Mastering Panning in After Effects: A Step-by-Step Guide
Introduction: Add Professional Touches to Your Videos with Panning
Have you ever wanted to add a smooth and professional touch to your videos? The art of panning in After Effects can help you achieve just that. Panning is a technique commonly used in filmmaking to create dynamic movements by shifting the camera’s position horizontally or vertically. It adds a sense of depth and captivates viewers’ attention.
In this guide, we’ll walk you through the steps to create a panning effect in After Effects, helping you to elevate your video projects.
Step-by-Step Guide to Panning in After Effects
Step 1: Import Your Video File
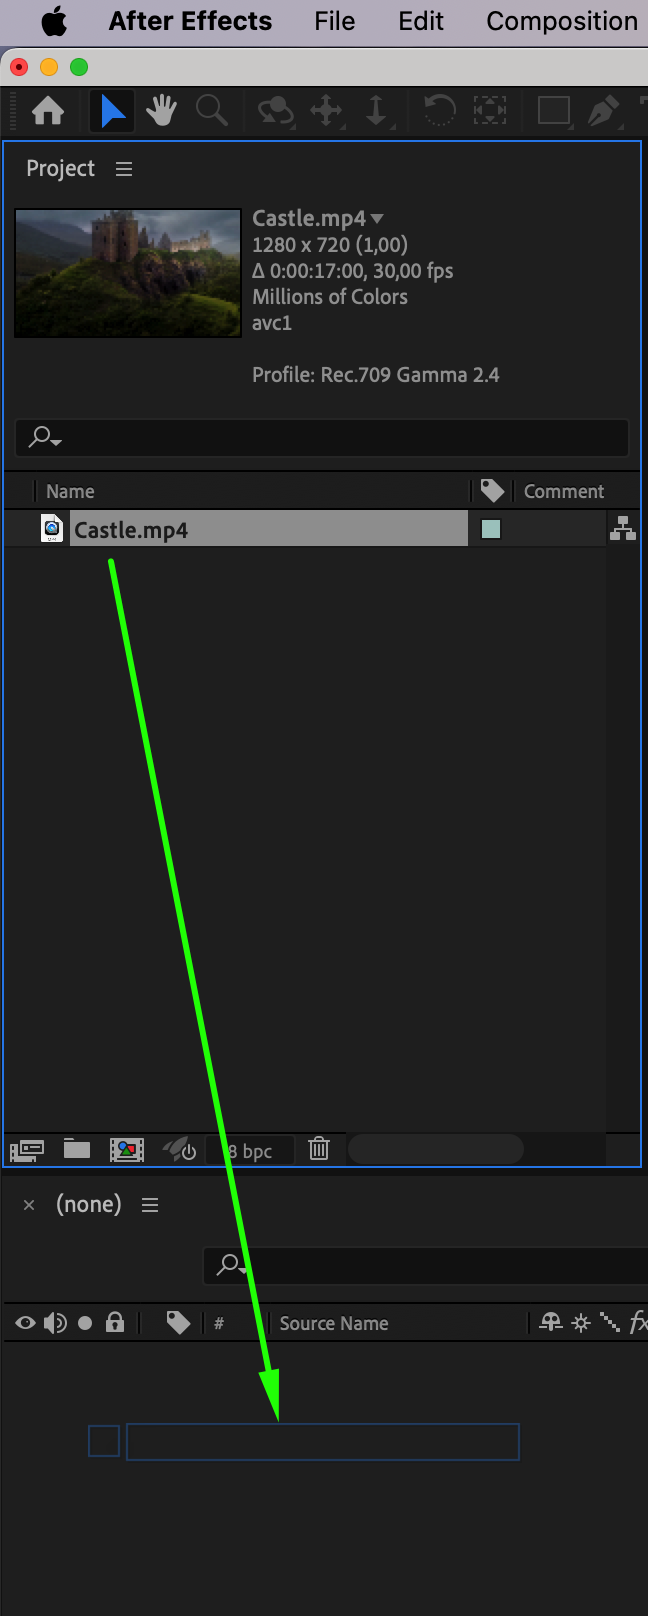
First, open After Effects and import your video file. To do this, click on “File” -> “Import” -> “File”, select your video, and click “Import”. Then drag the video from the “Project” panel to the “Timeline” panel to start working with it.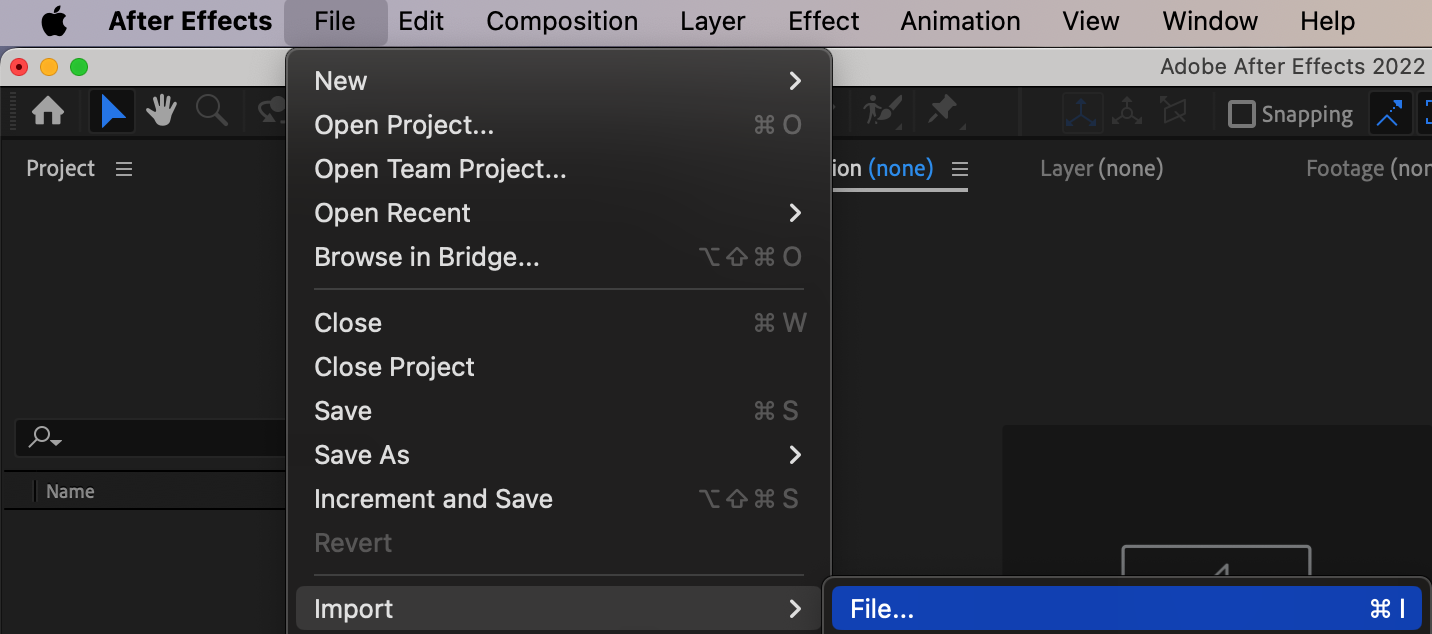
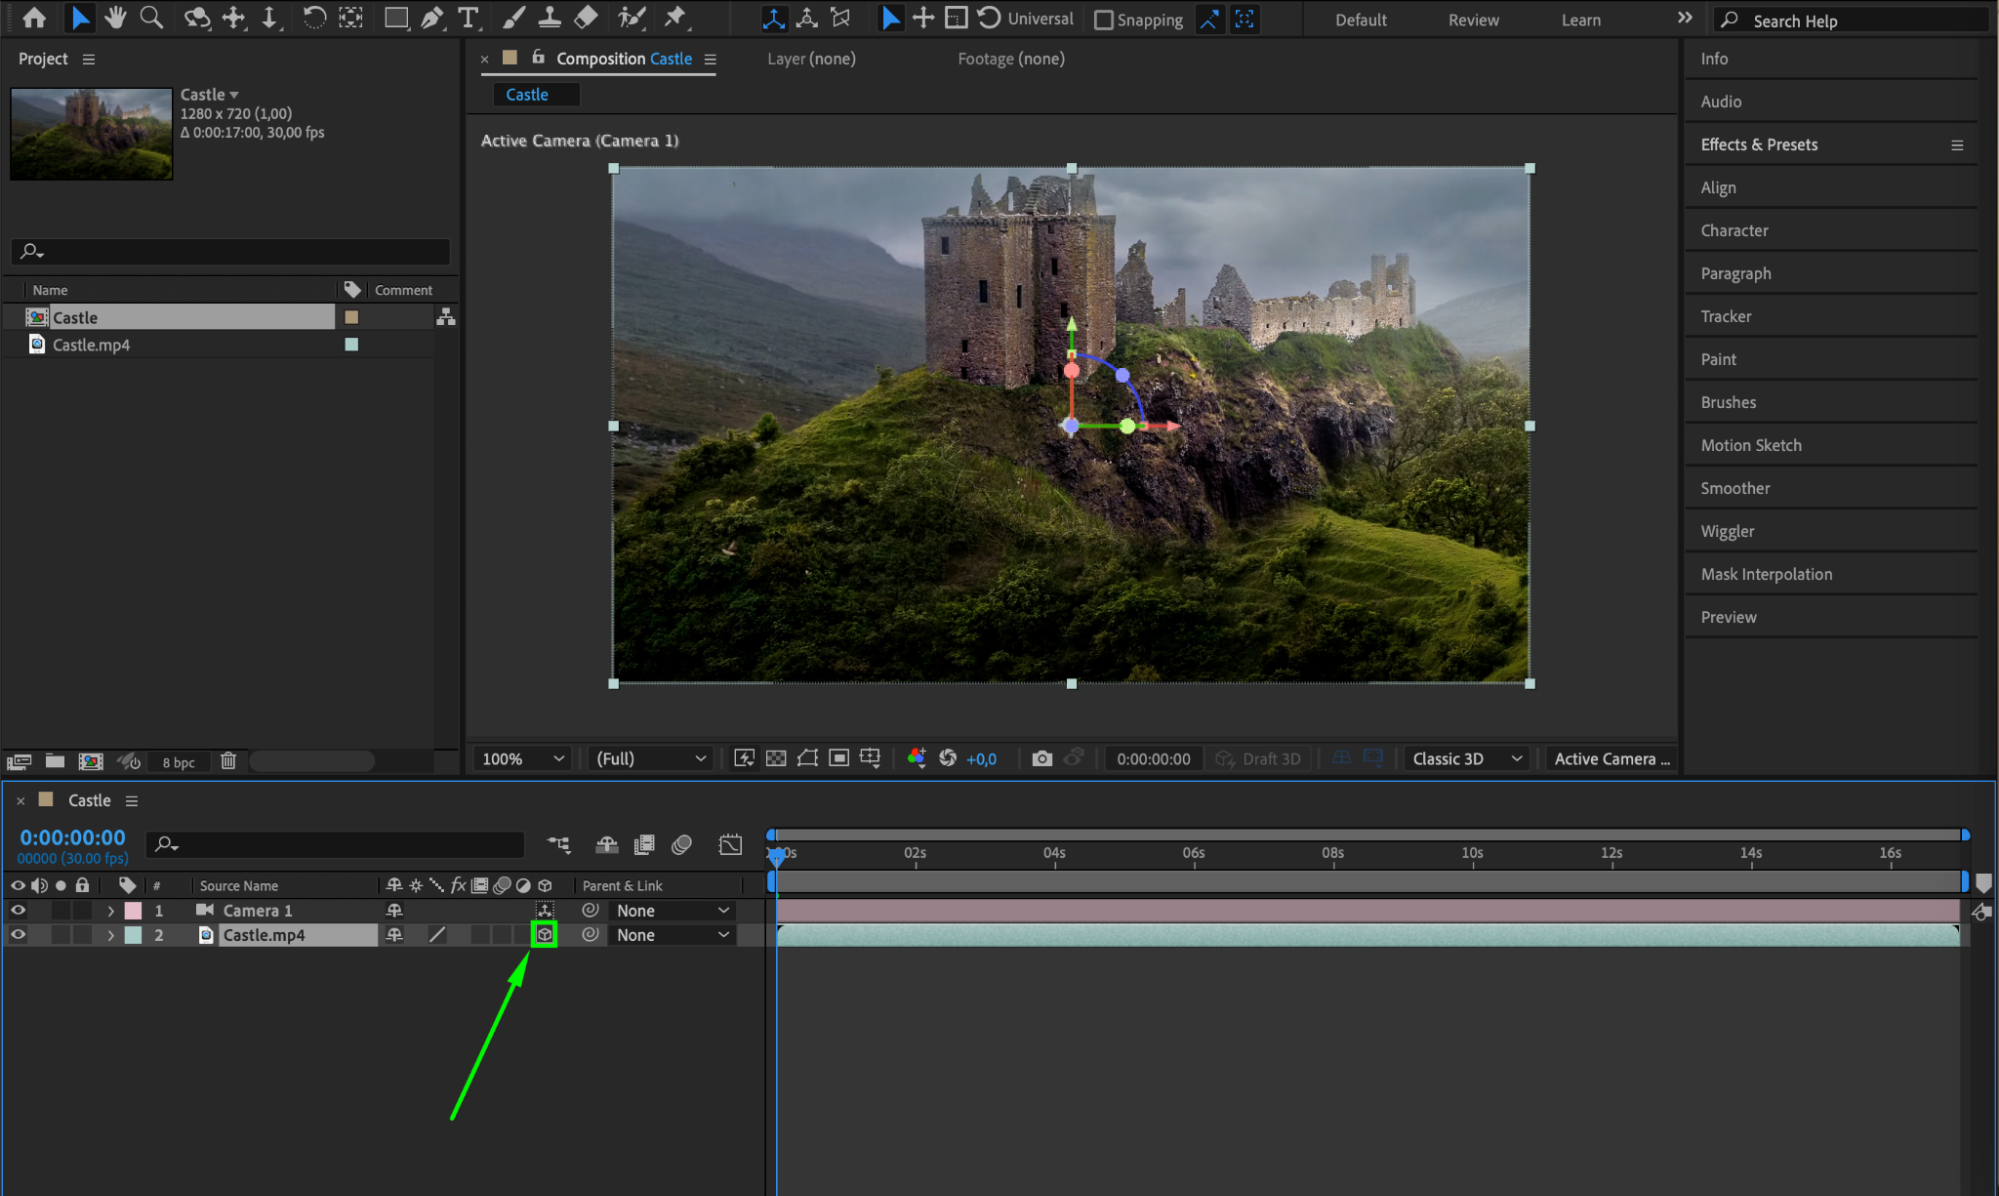
 Step 2: Create a Camera Layer
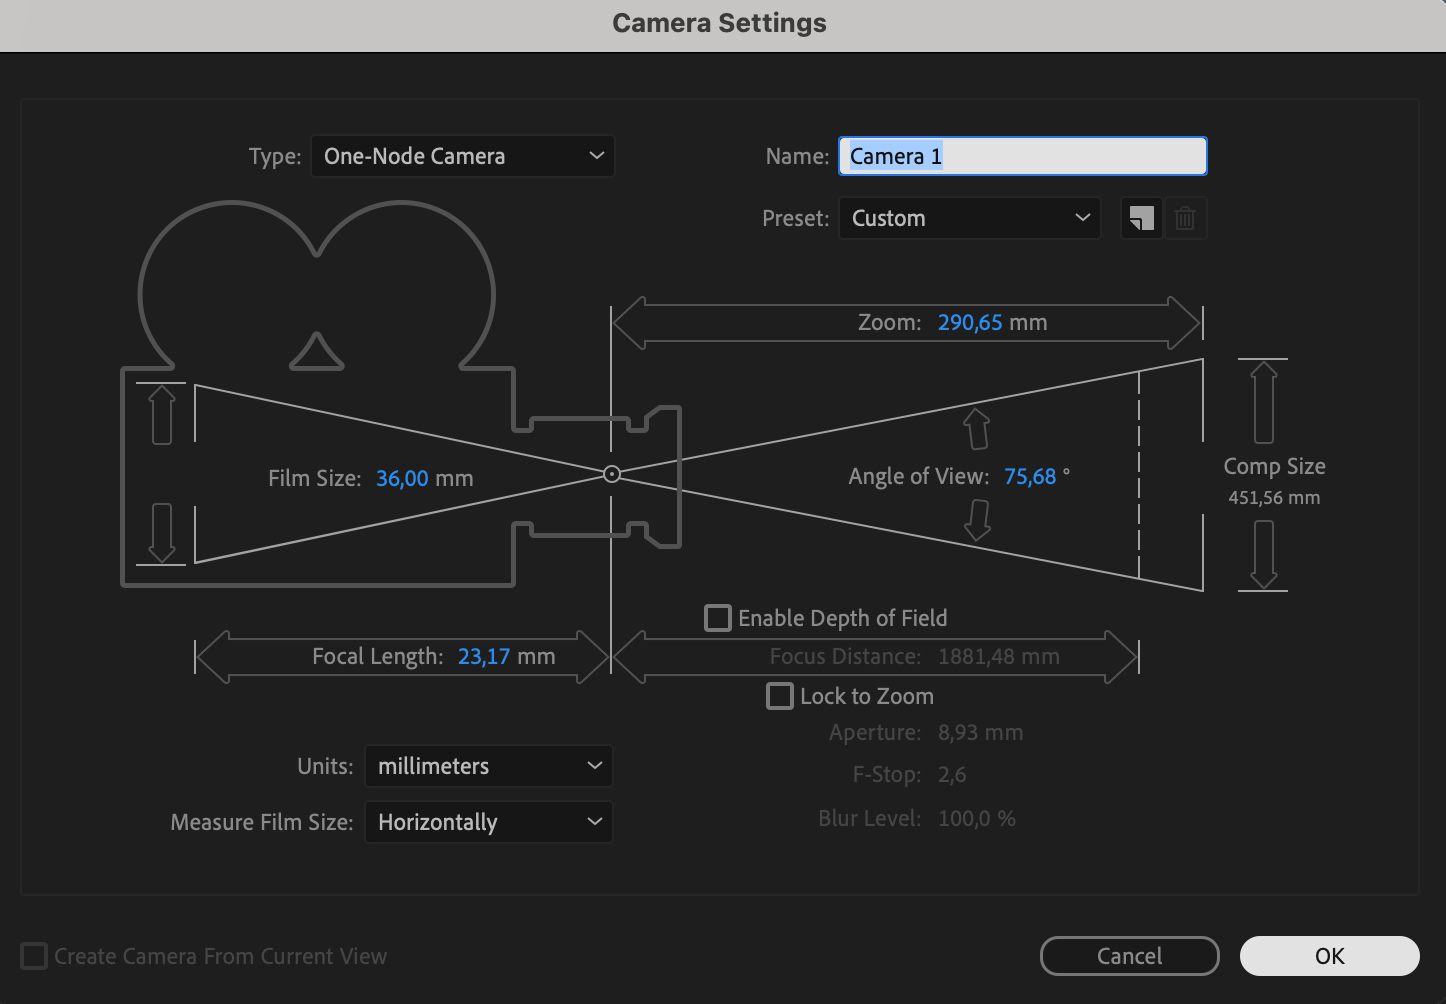
To control the scenes and create a panning effect, you’ll need to create a camera layer. Go to “Layer” -> “New” -> “Camera” to create a new camera layer.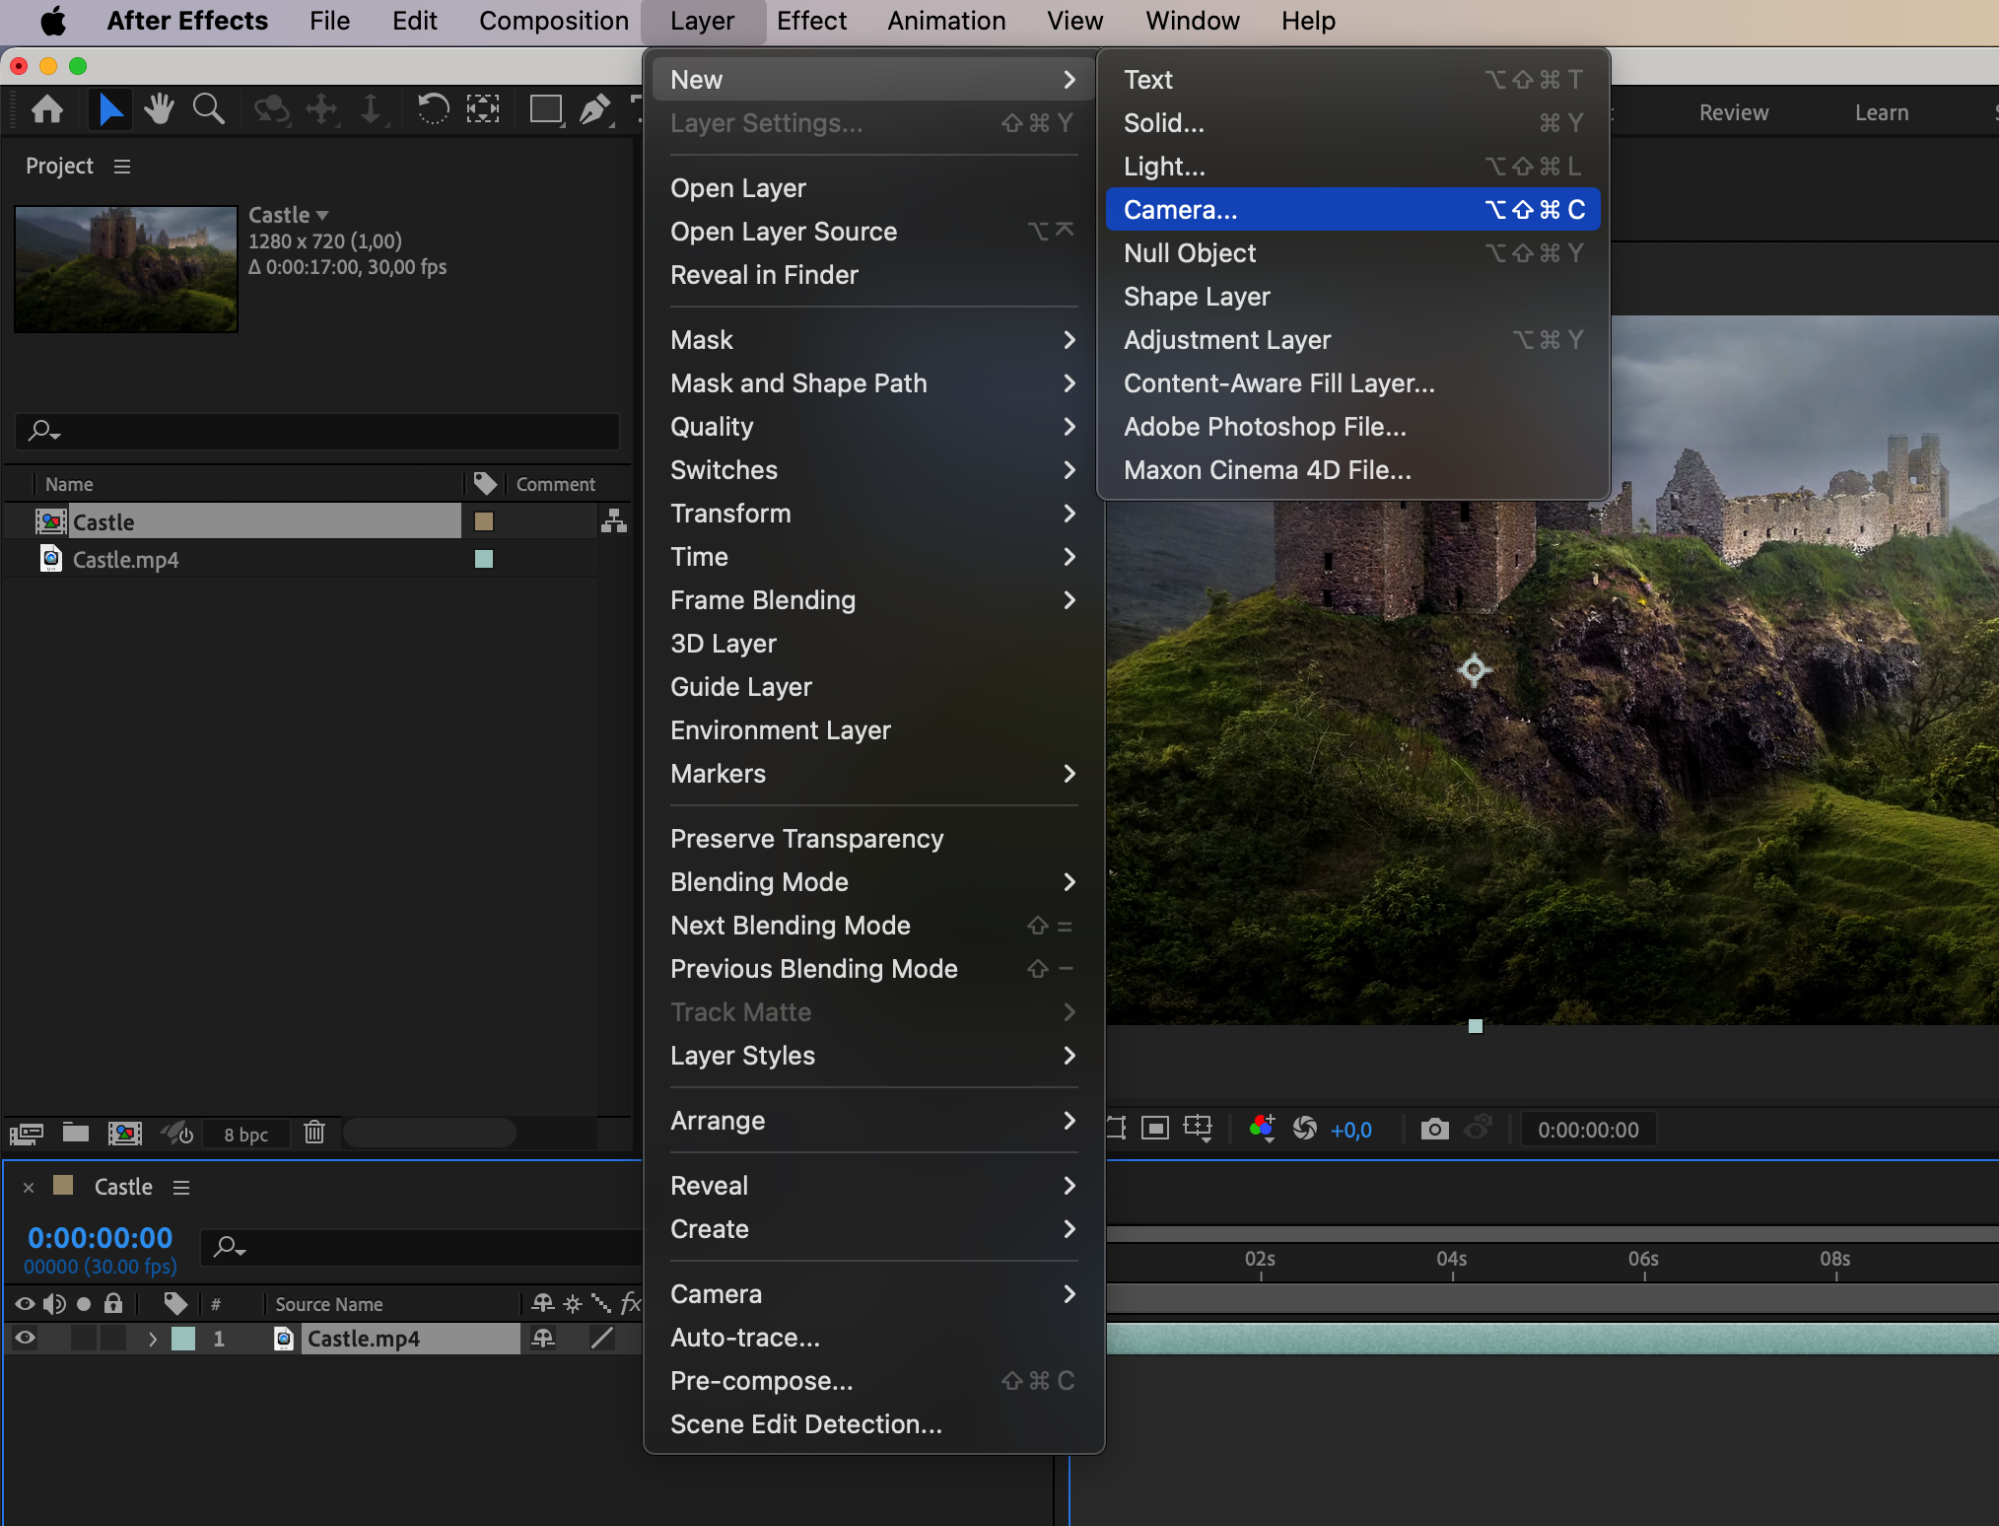
 Step 3: Enable 3D Layer
Next, enable the 3D option for your video layer to utilize the camera tool effectively. Click the cube icon next to your video layer in the “Timeline” panel to enable the 3D layer.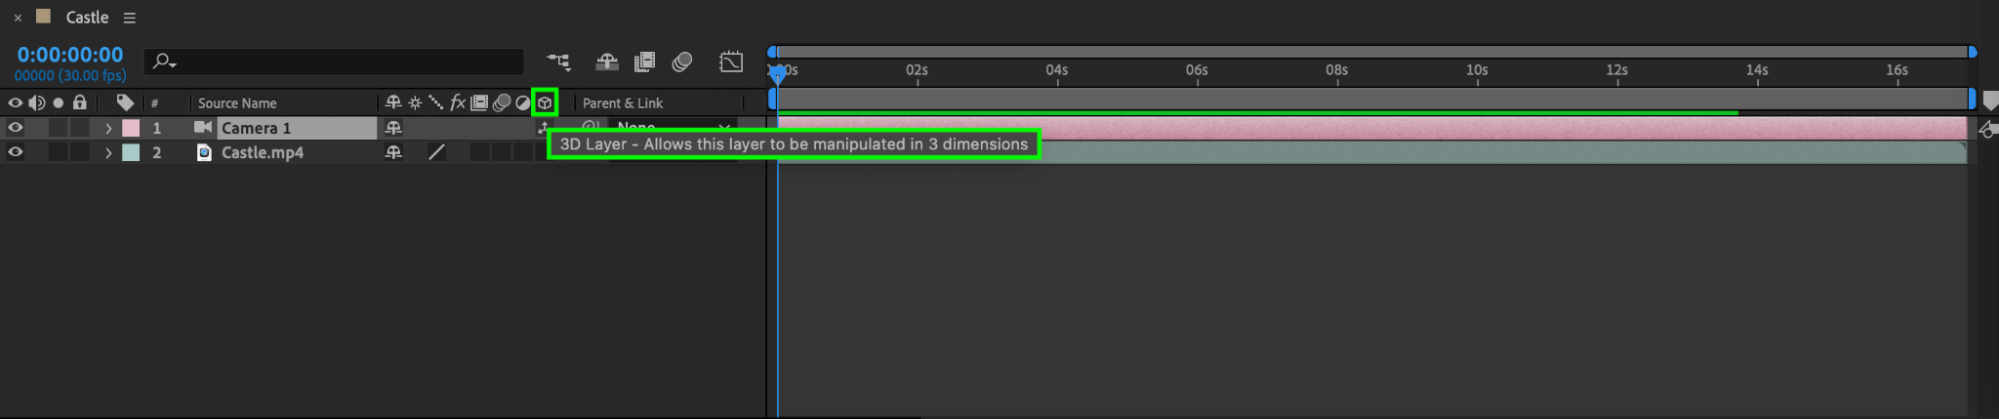
 Step 4: Adjust Camera Properties
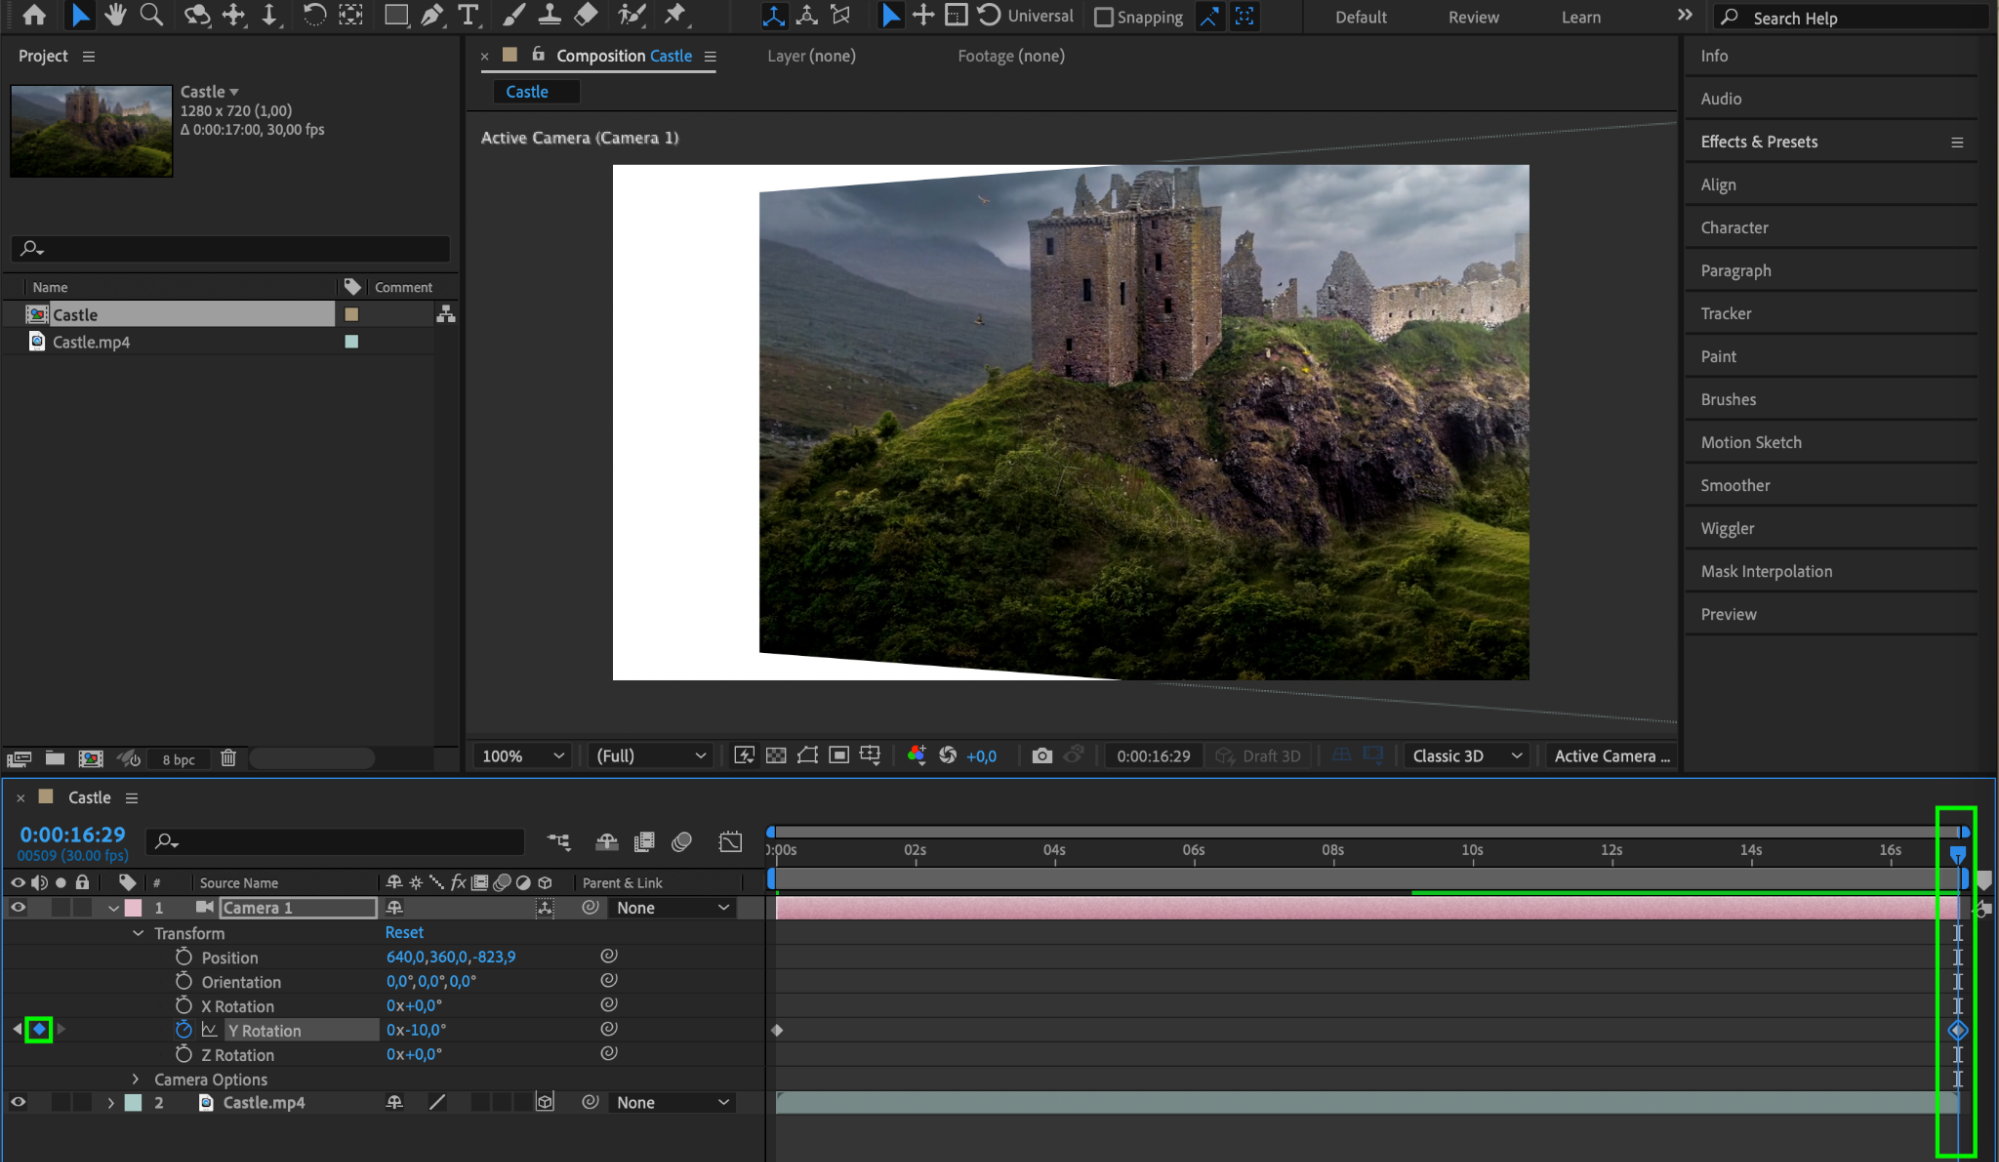
Expand the camera layer properties and find the parameters for X, Y, and Z rotation. In the “Timeline” panel, click on the arrow next to your camera layer to reveal its properties. Look for “Transform” and then “X Rotation”, “Y Rotation”, and “Z Rotation”.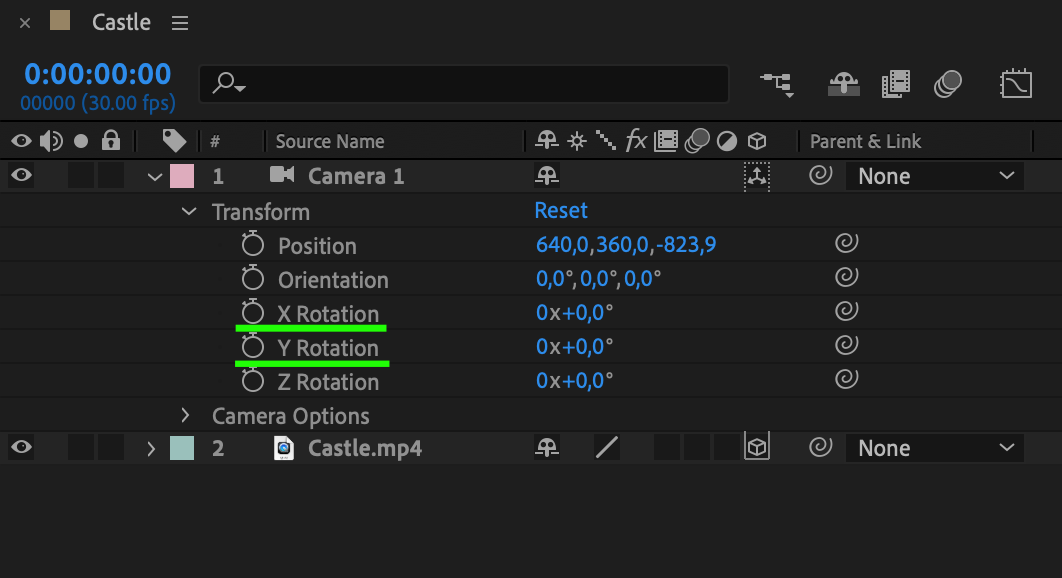 Step 5: Create Keyframes for Panning
To create the panning effect, you’ll need to animate the Y rotation property. At the start of your video layer, set a keyframe for “Y Rotation”. Move to the end of the layer and set another keyframe with a different Y rotation value to simulate smooth camera movement.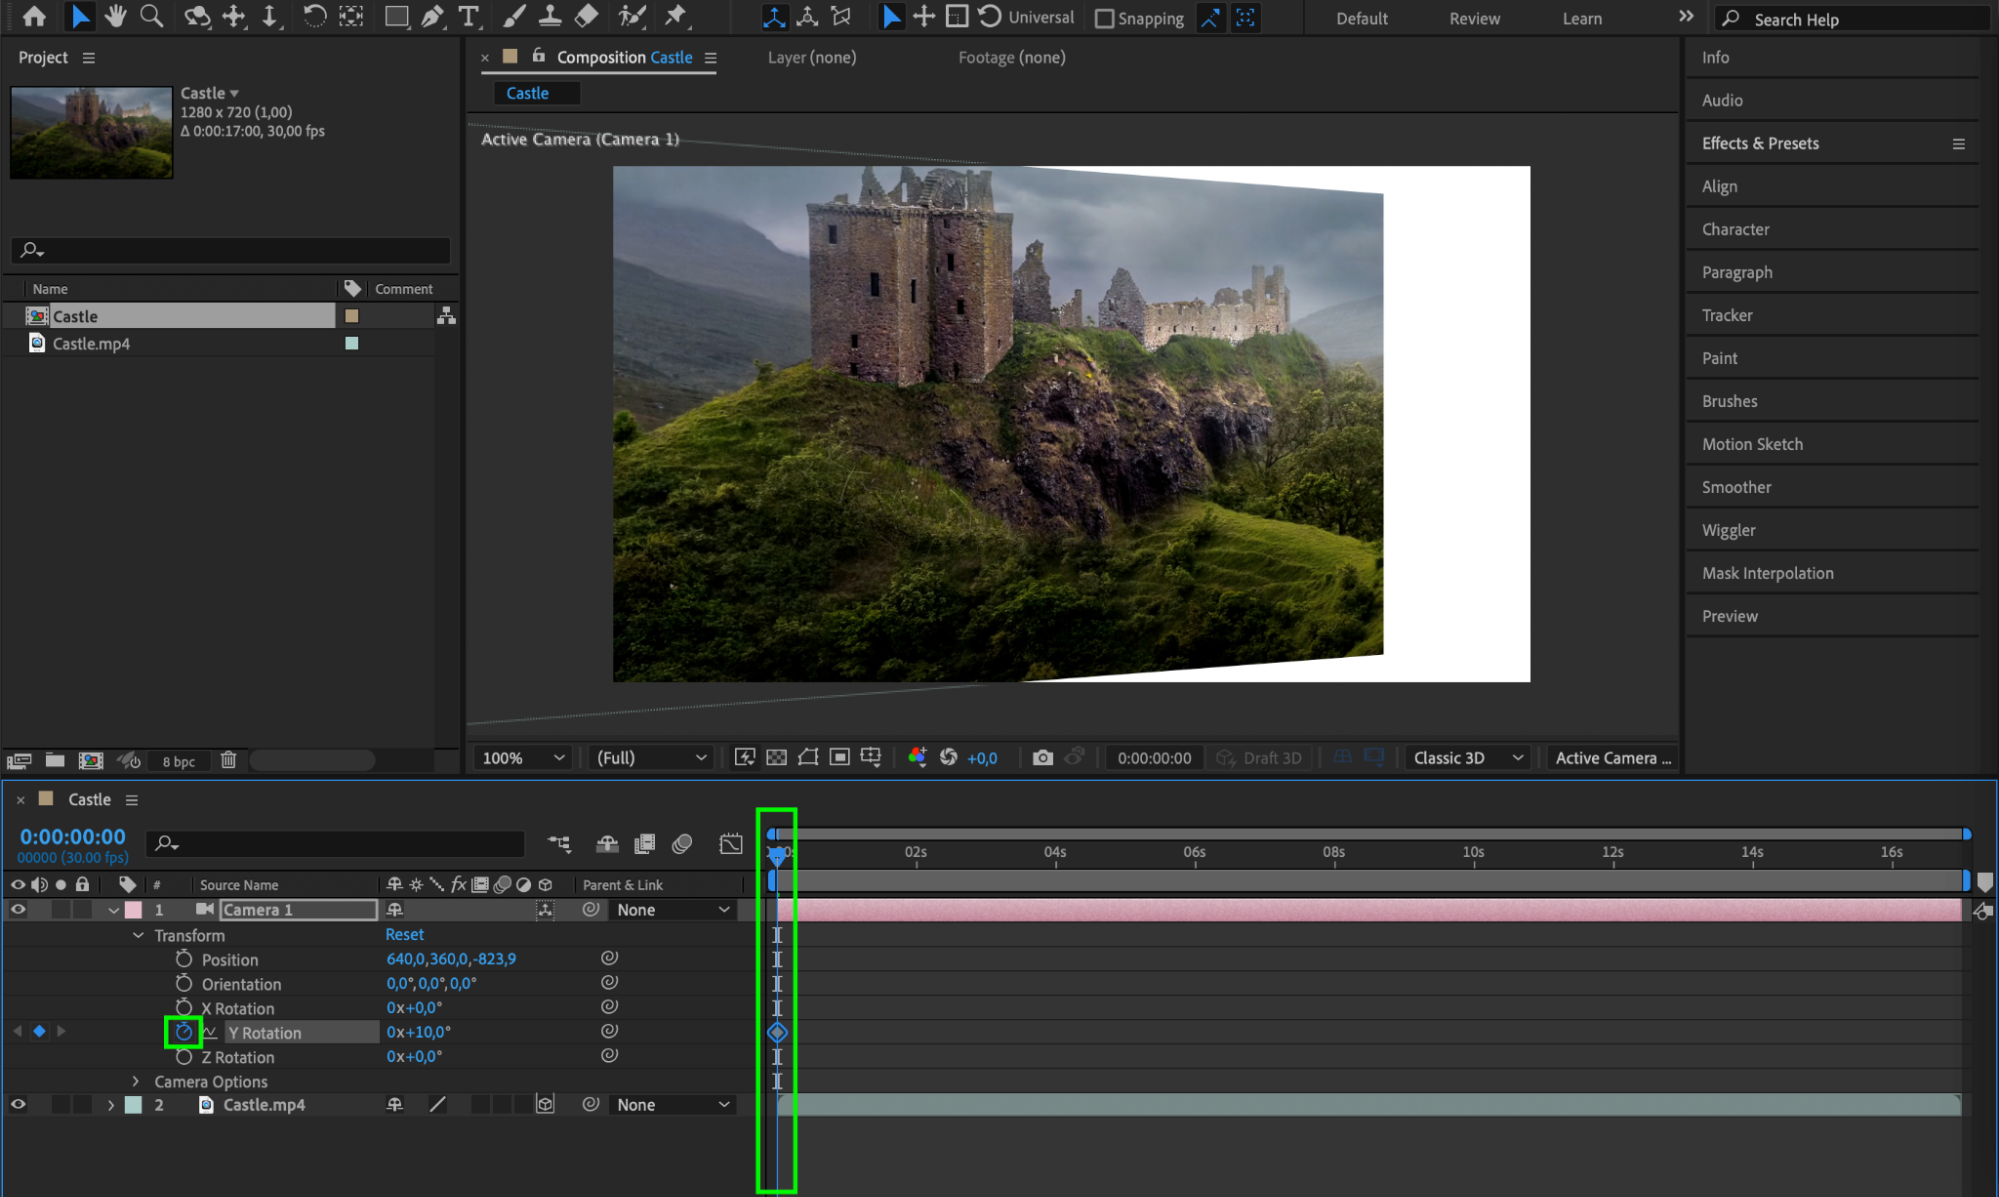
 Step 6: Adjust Position and Scale Properties
To ensure your video layer maintains a realistic look and the frame edges are not visible during panning, adjust the Position and Scale properties. Click the arrow next to your video layer to reveal its properties. Under “Transform”, adjust the “Position” and “Scale” values to keep the subject in frame and avoid any cut-off edges.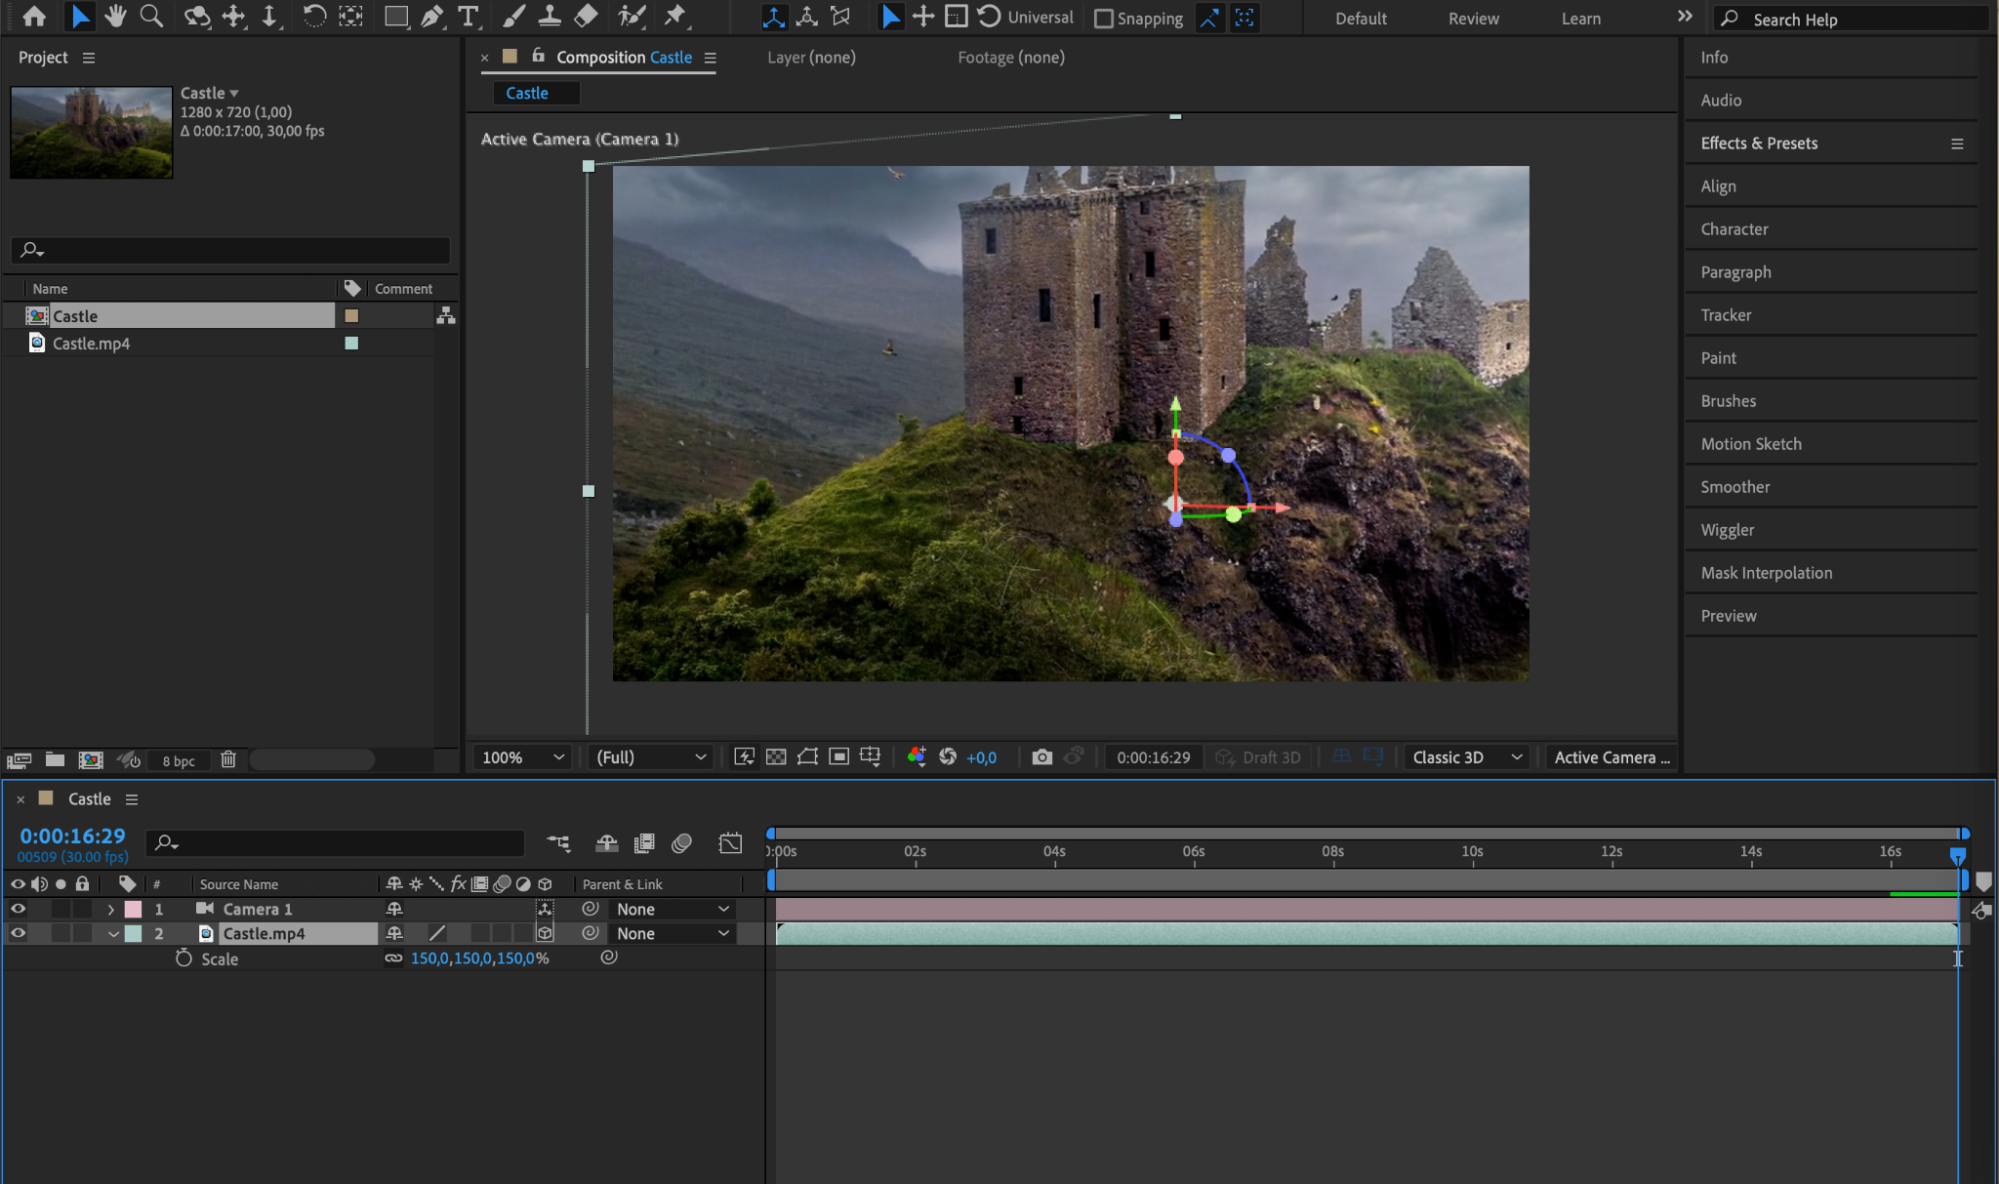 Step 7: Preview Your Work
Finally, preview your composition to see the panning effect in action. Press the spacebar to play your composition and enjoy the smooth panning effect you’ve created.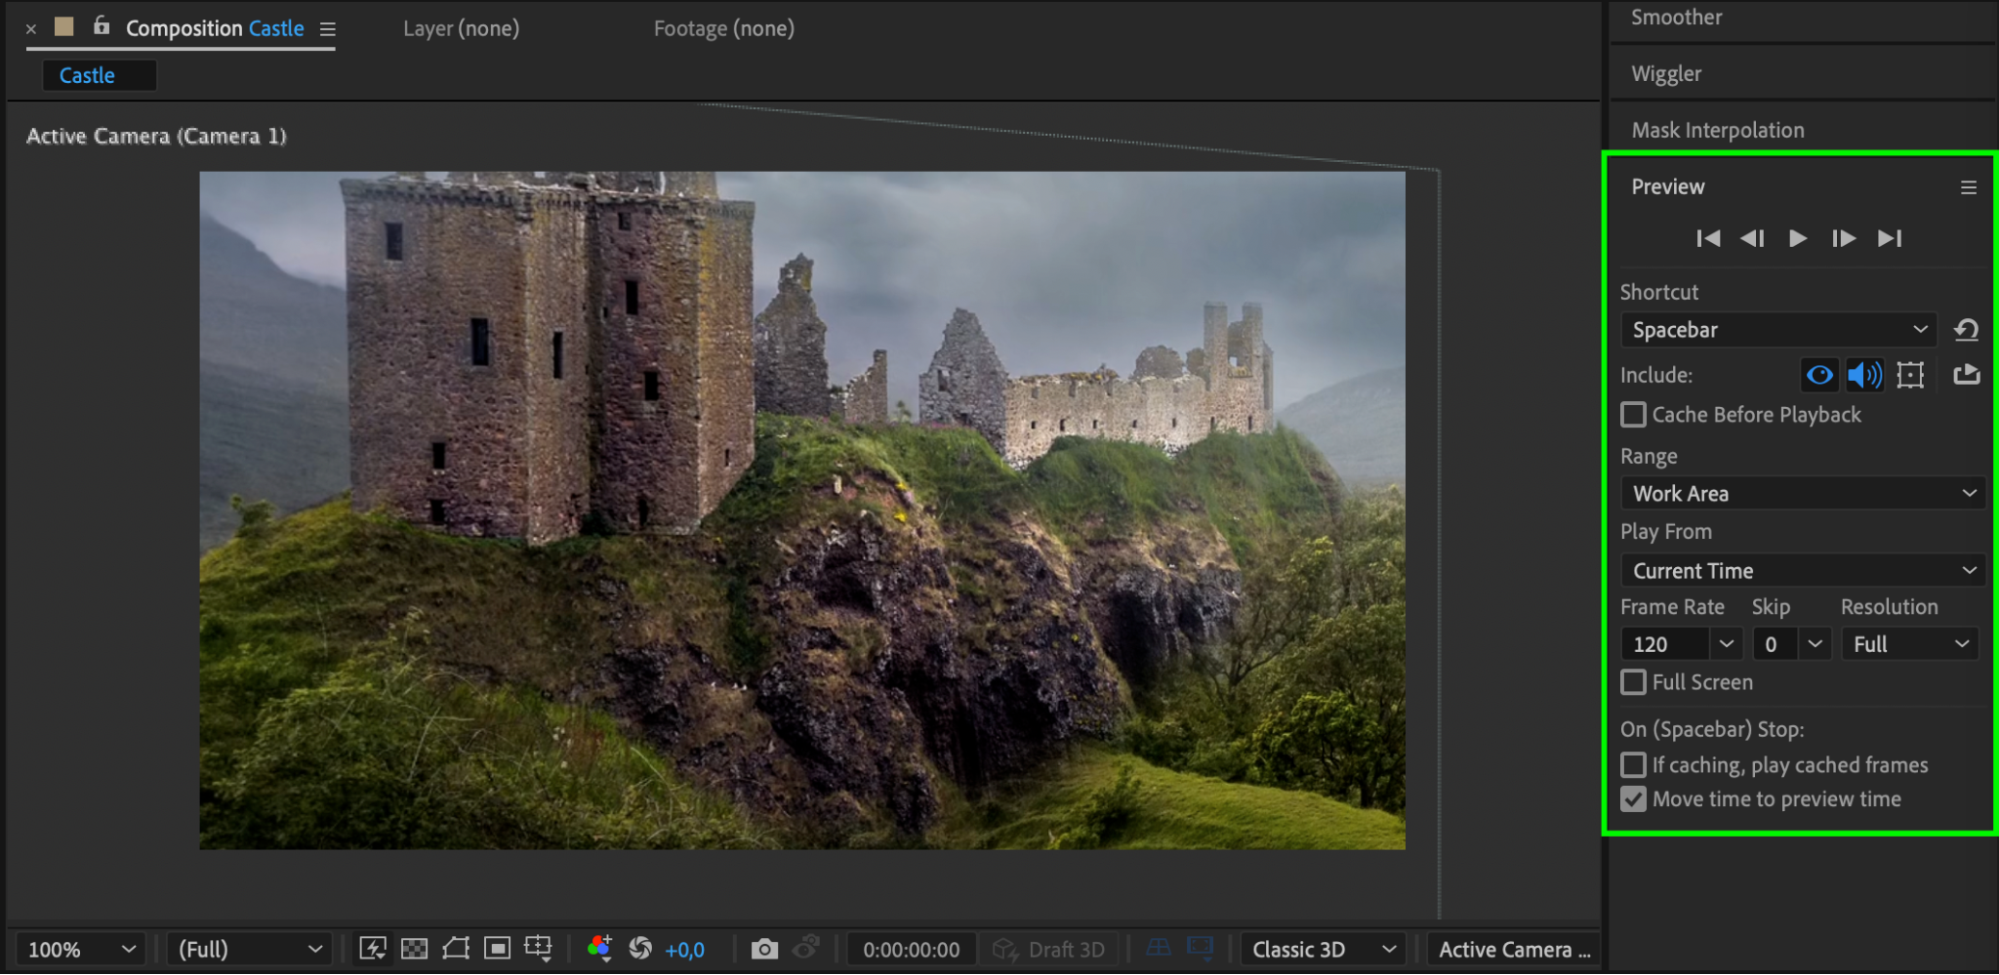 Conclusion
Creating a panning effect in After Effects is a powerful way to add depth and professionalism to your videos. By following these simple steps, you can achieve dynamic camera movements that will captivate your audience. Experiment with different rotation values and keyframe positions to find the perfect look for your project. With practice, you’ll be able to master this technique and enhance your video editing skills. Happy editing!
Our Bestsellers

