Perfecting Layer Precomposing in After Effects
Unleashing Creative Potential: A Guide to Layer Precomposing in After Effects
Have you ever wondered how to precompose layers in After Effects? Well, you’re in luck! Precomposing is a powerful feature that can greatly improve your animation workflow and help you create stunning visual effects. In this step-by-step guide, we will walk you through the process of precomposing layers in After Effects, regardless of whether you’re a beginner or an experienced user.
Get 10% off when you subscribe to our newsletter

So, what exactly is precomposing? Simply put, precomposing allows you to group multiple layers together, creating a new composition within your main composition. But it’s not just about organization – precomposing offers a range of benefits that can transform your video design projects.
For starters, precomposing enables you to isolate specific elements and treat them as a single unit. This makes it easier to edit, apply effects, or animate them independently, helping you maintain control over your project. Additionally, precomposing helps reduce clutter in your timeline, making it more manageable and improving your overall efficiency.
But that’s not all – precomposing also allows you to create nested compositions. By nesting several precomps within a main composition, you can build intricate hierarchies of elements. This gives you greater control and precision when working on individual sections of your animation, enabling you to create complex motion graphics and visual effects with ease.
Now, let’s walk through the step-by-step process of precomposing layers in After Effects:
Get 10% off when you subscribe to our newsletter
Step 1: Select the layers you want to precompose. Hold down the Shift or Ctrl/Cmd key while clicking on each layer to select multiple layers. Step 2: Right-click on any of the selected layers and choose “Pre-compose” from the context menu. You can also go to the “Layer” menu and select “Pre-compose.”
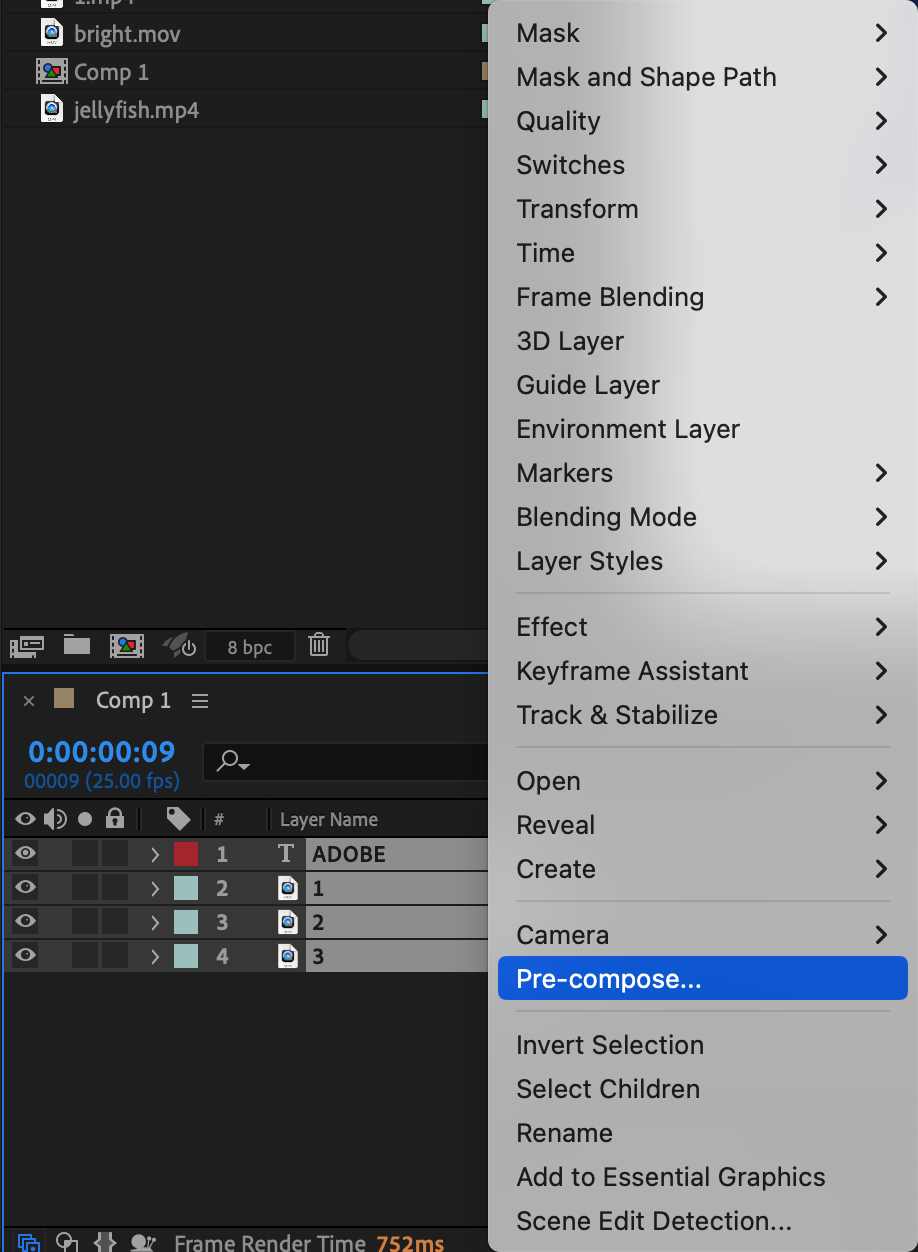 Step 3: In the Pre-compose dialog box, you have the option to move all attributes into the new composition or leave them in the original composition. If you want to retain the effects, keyframes, and adjustments applied to the selected layers, make sure to enable the “Leave all attributes” option. Click “OK” to proceed.
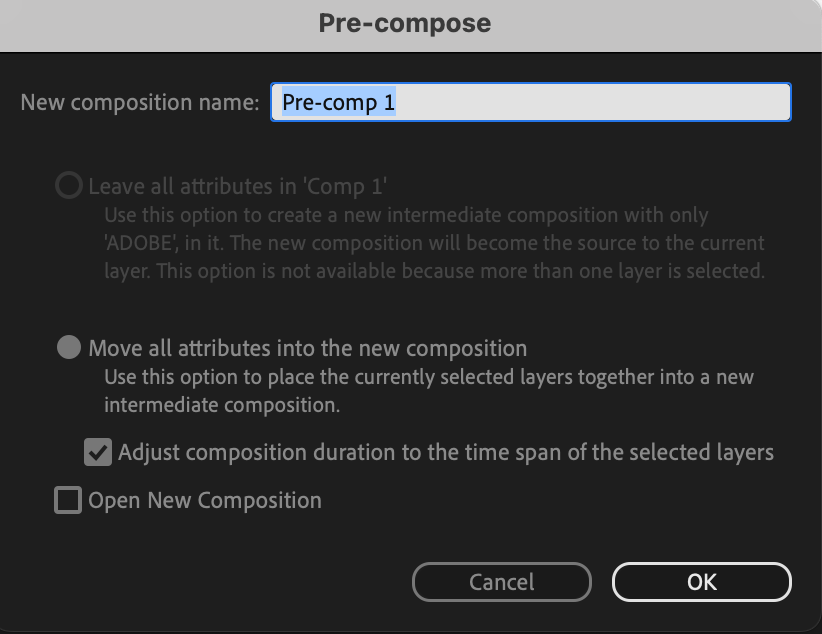 Step 4: After precomposing, you will notice that the selected layers are now consolidated into a single precomposition layer in your timeline. Double-click on the precomposition layer to open it and access its contents independently.
 Step 5: To make changes to the precomposition, double-click on its layer in the timeline. This will open the precomposition in a new composition tab, where you can edit, add effects, or animate its contents.
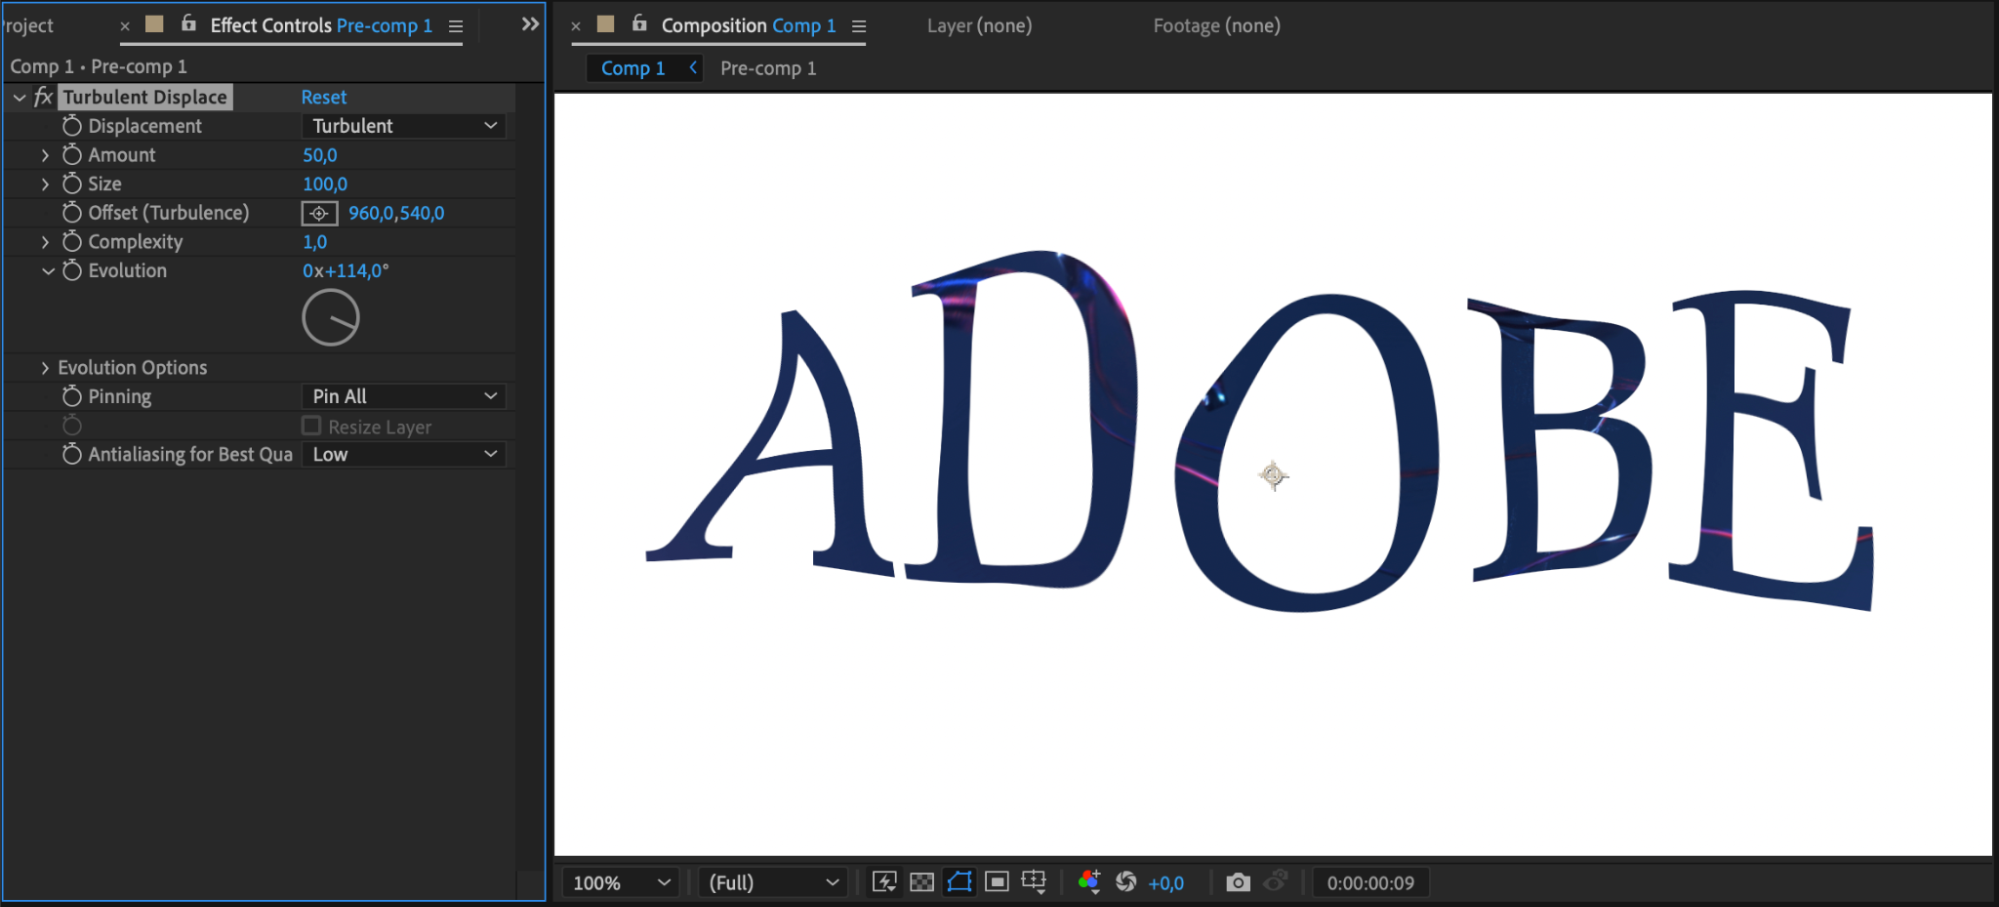
 Step 6: If you need to modify the precomposition within the main composition, select the precomposition layer in the timeline and make the desired changes in the composition panel. This enables you to refine your animation while immediately observing the outcome within the context of your entire composition, and apply effects to the entire composition simultaneously.
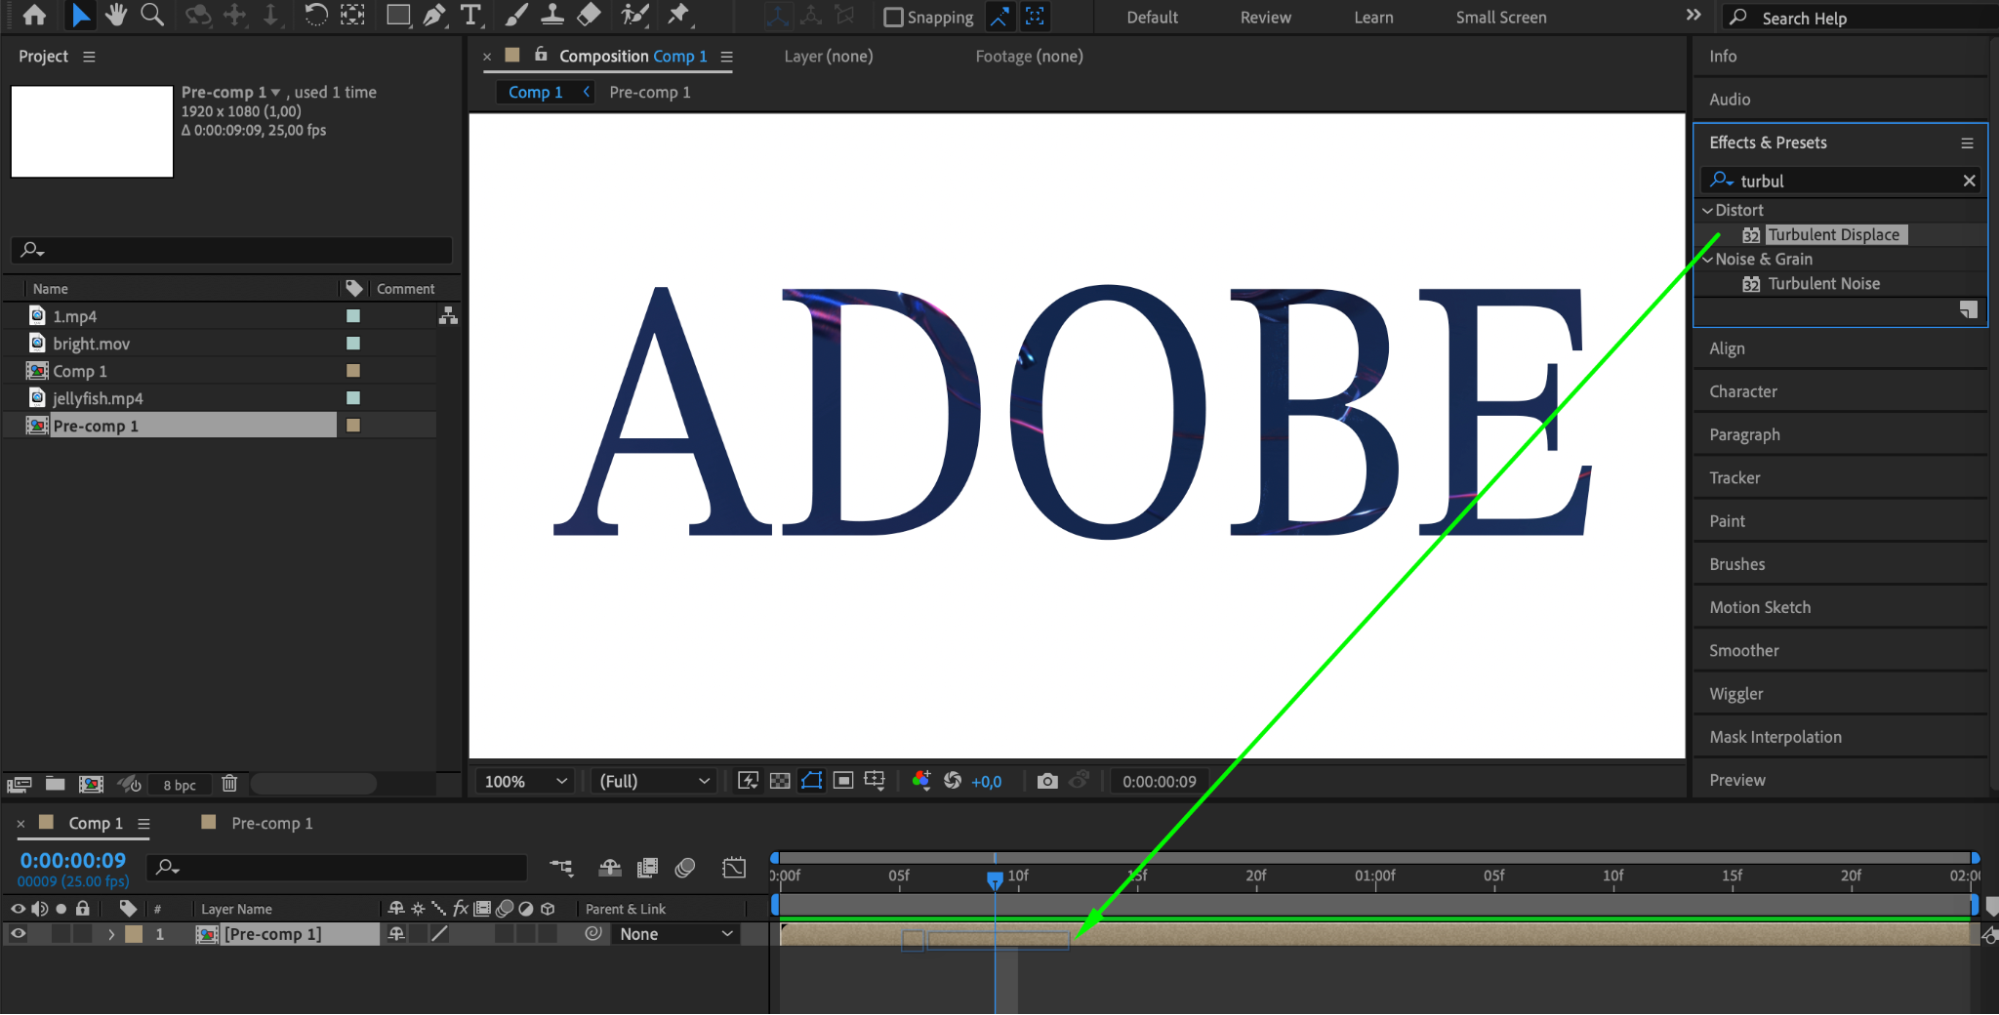
 Conclusion
Get 10% off when you subscribe to our newsletter
By following these steps, you can effectively precompose layers in After Effects and unlock a world of creative possibilities. Mastering this technique is essential for achieving a more organized workflow, greater control over your animations, and ultimately, creating stunning visual masterpieces.
So why wait? Start incorporating precomposing into your After Effects projects and witness the incredible impact it has on your efficiency and creativity. Get ready to take your animations to the next level!
Our Bestsellers

