How to Preview After Effects Projects with Perfectly Synced Audio
Importance of Audio in After Effects Previews
Have you ever created a video in Adobe After Effects and found yourself frustrated when the audio didn’t quite match up? It’s a common problem that can make your video feel disjointed and unprofessional. But don’t worry, there’s a simple solution! In this blog post, we’ll walk you through a step-by-step guide on how to preview After Effects with audio, so you can ensure a seamless and synchronized experience for your viewers.
Get 10% off when you subscribe to our newsletter

Step-by-Step Guide to Previewing After Effects with Audio
Step 1: Import Your Audio Files
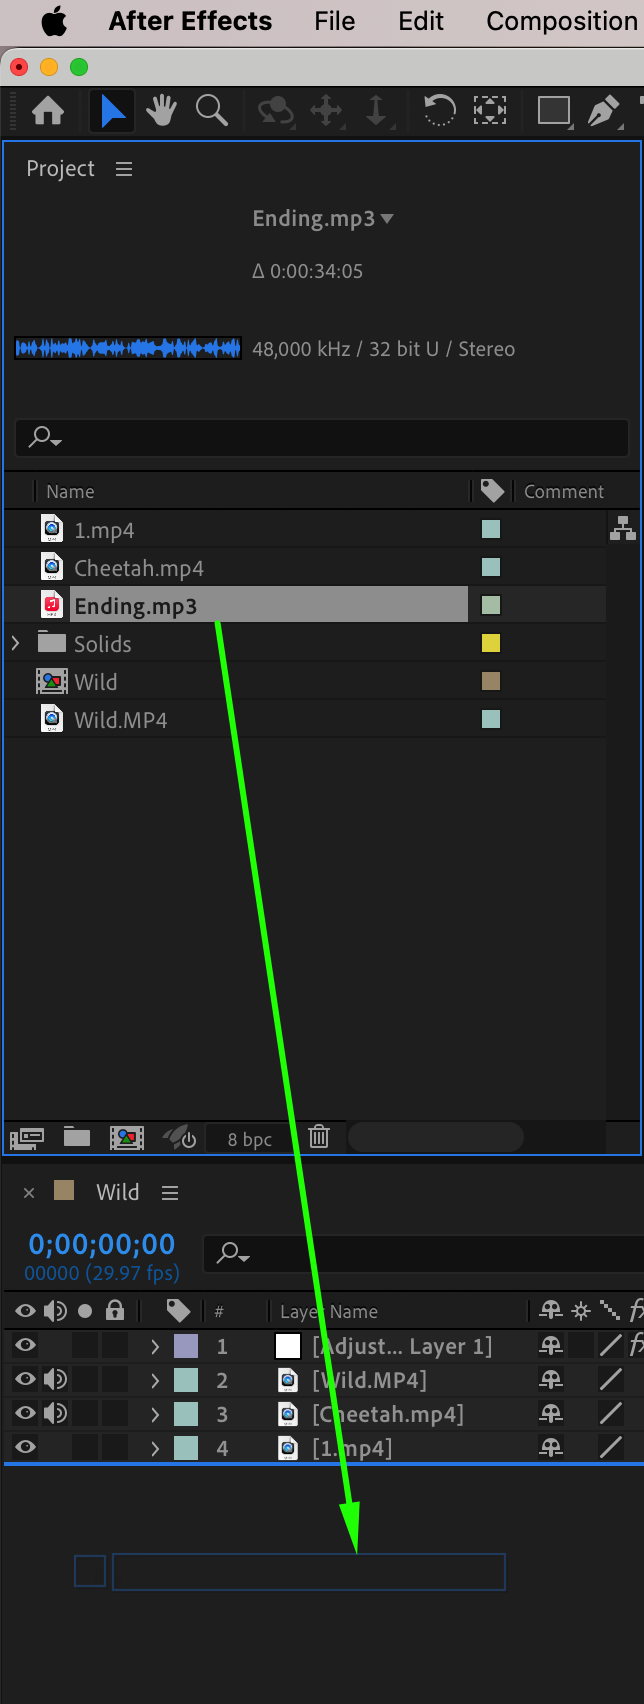
Start by importing your audio files into your After Effects project. You can do this by going to File > Import > File and selecting your audio files from your computer. After Effects supports various audio file formats like WAV, MP3, and AIFF, so choose the format that works best for you. Once imported, drag the audio file from the Project panel to the Timeline panel.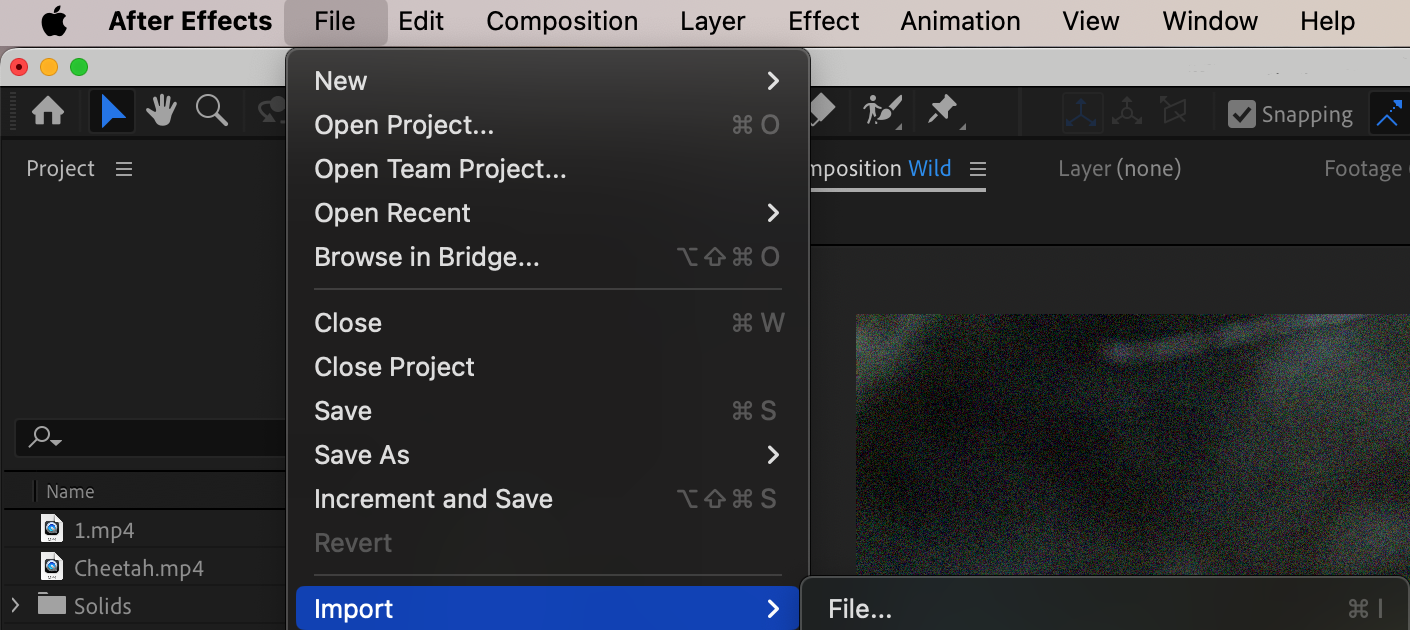
 Step 2: Sync Your Audio with Visuals
Get 10% off when you subscribe to our newsletter
Once your audio files are imported, it’s time to synchronize them with your visual elements. Arrange your composition timeline accordingly and place your audio layers where you want them. To preview the composition and adjust the timing of the audio, press the spacebar or click the Play button in the Preview panel. This will help you see how well your audio matches your visuals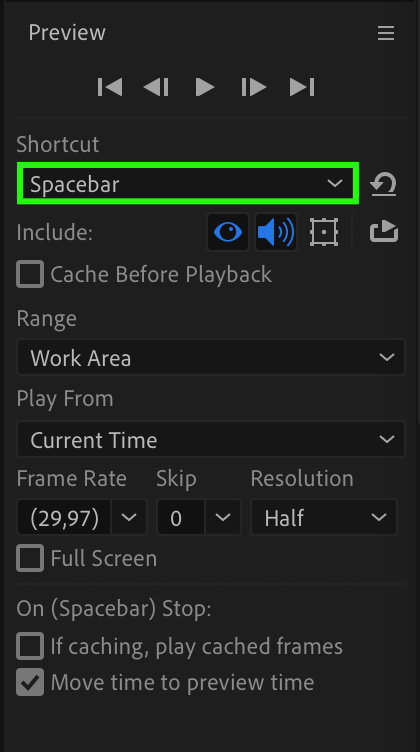 Step 3: Fine-Tune the Audio Settings
After previewing your composition, you may find that the audio levels or effects need adjustments. To fine-tune the audio settings, select your audio layer in the Timeline panel and open the Audio section. Here, you will find the waveform and audio levels. Create keyframes for audio levels, adjusting the parameter from -70 (no sound) to 12 (maximum volume). Use the waveform as a visual guide for your audio layer.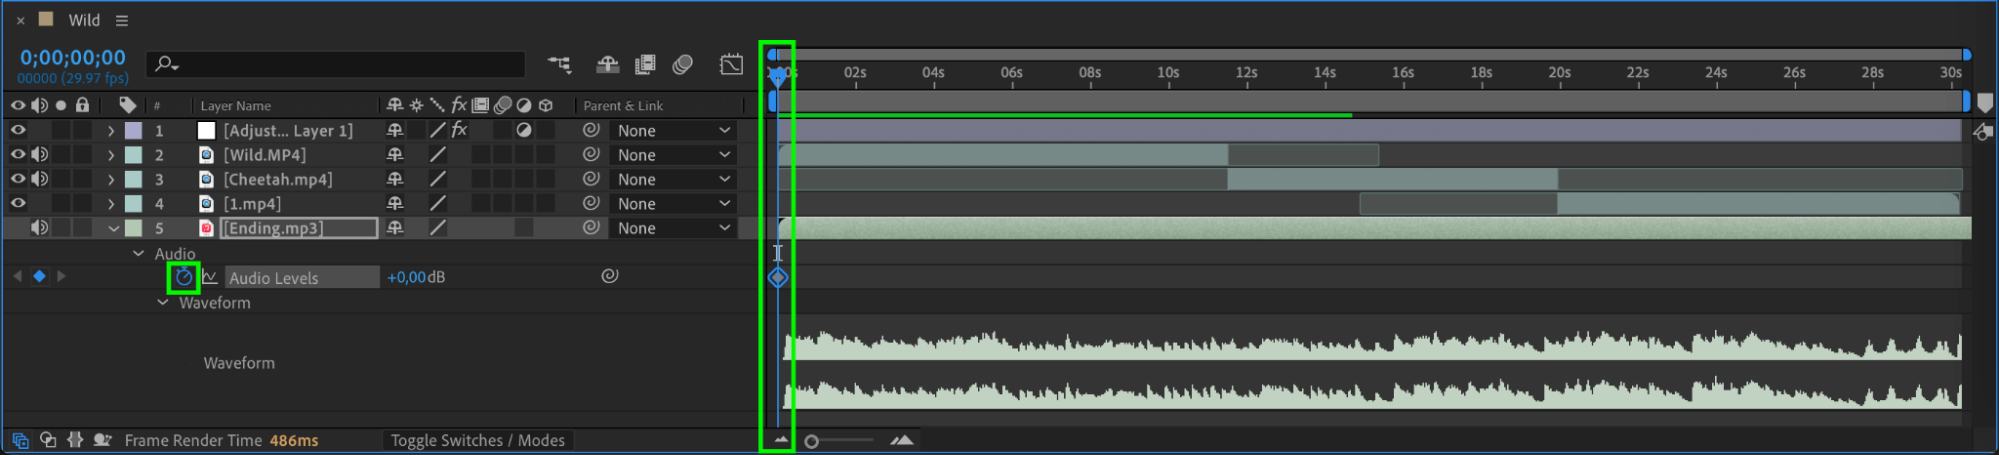
 Step 4: Apply Audio Effects
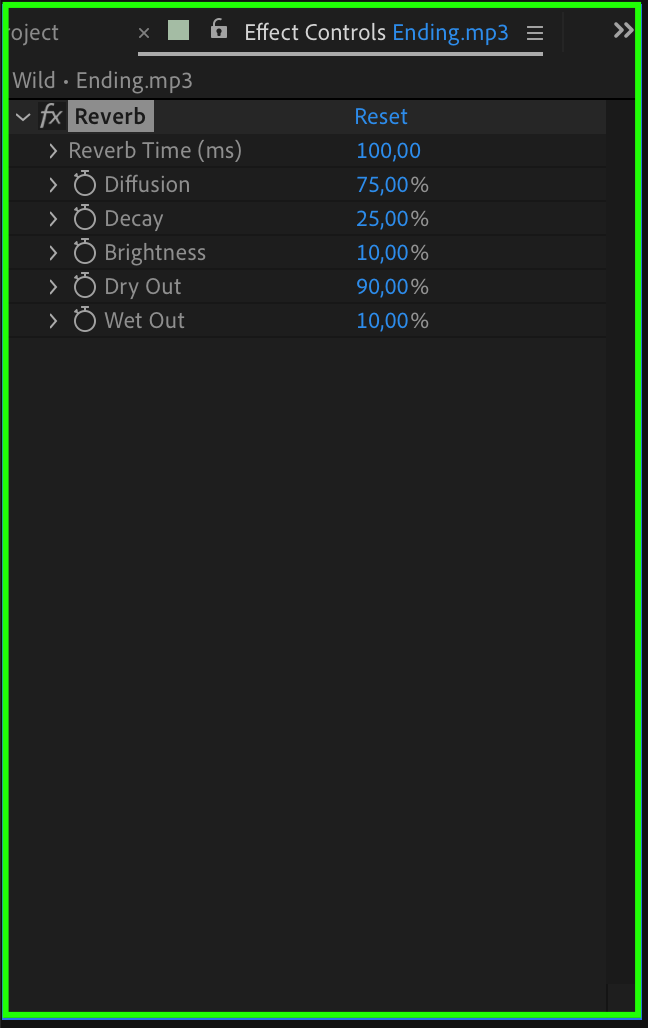
You can also enhance your audio by applying various effects from the Effects & Presets panel. Simply drag the desired effect onto your audio layer and adjust the settings in the Effect Controls panel. This allows you to add reverb, EQ, or other audio enhancements to match the tone and mood of your video.

Step 5: Preview with Audio in Full Screen
Instead of exporting your composition and viewing it in an external media player, you can preview your After Effects project with audio in full screen. Select the Preview panel and ensure the audio icon is enabled. Then, click on the “Full Screen” button. Now, when you press the spacebar or the play button, your composition will play with synchronized audio in full screen within the After Effects interface. This lets you make necessary adjustments and quickly preview the final result.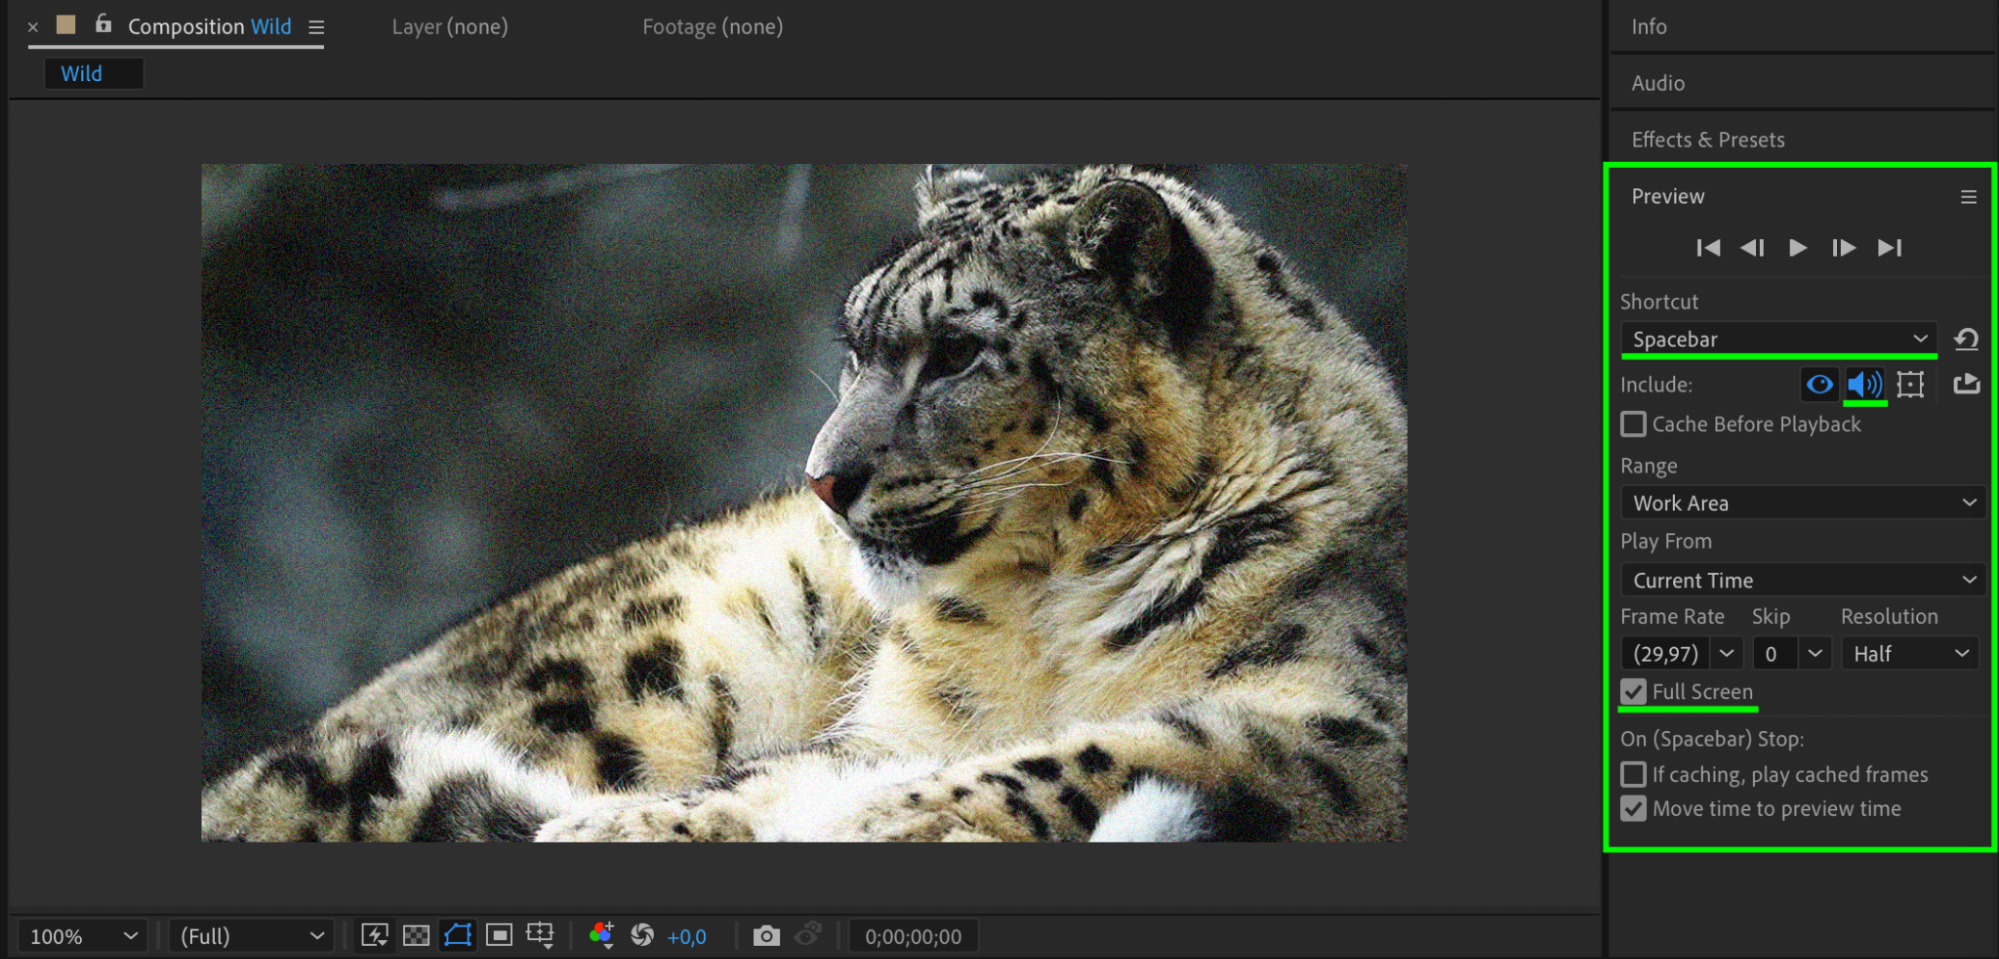 Pro Tip: Make sure the “Cache Before Playback” button is unchecked to hear your audio during preview. Otherwise, After Effects might mute the audio during caching.
 Step 6: Export and Share Your Composition
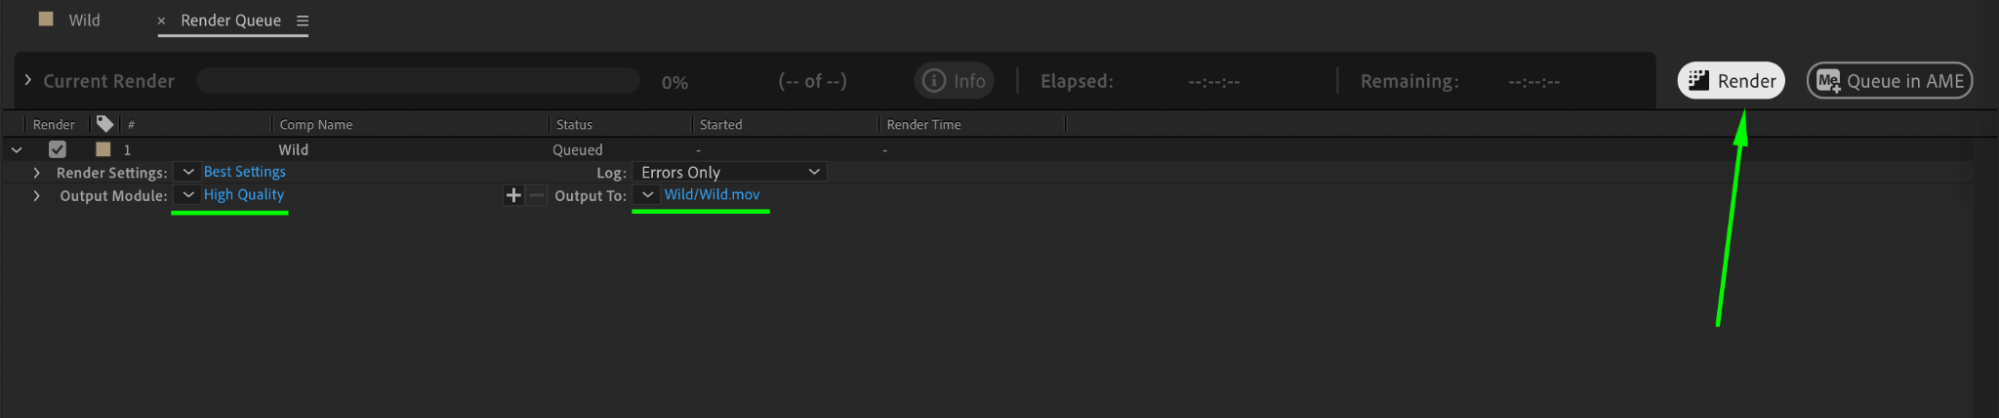
Once you’re satisfied with the preview and have completed your video composition, it’s time to export and share your work. After Effects provides various export options, allowing you to save your composition in different formats like MP4 or MOV. Go to Composition > Add to Render Queue, then configure your settings and choose the appropriate output format for optimal playback.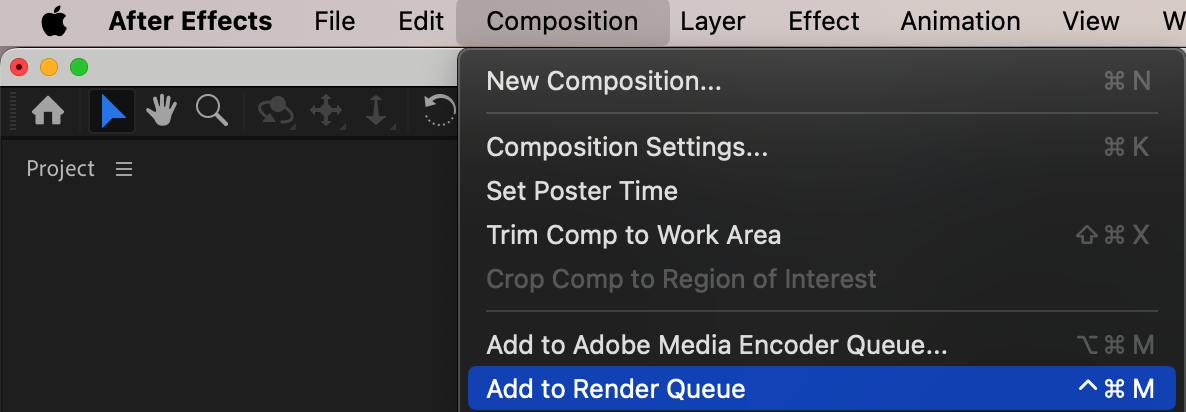
 Conclusion
By following these steps, you can easily preview your After Effects projects with audio, ensuring a seamless and professional end result. So go ahead, unleash your creativity, and create captivating videos that perfectly blend visual and audio elements. Happy designing!
Our Bestsellers


