How to Effectively Remove Background Noise in After Effects
Introduction to Removing Background Noise in After Effects
Background noise can greatly diminish the quality of your videos, making them appear less professional. Fortunately, After Effects provides tools to reduce or eliminate unwanted noise. In this guide, we’ll walk you through the steps to clean up your audio and improve the overall quality of your video productions.
Get 10% off when you subscribe to our newsletter

Step 1: Import Your Video Footage
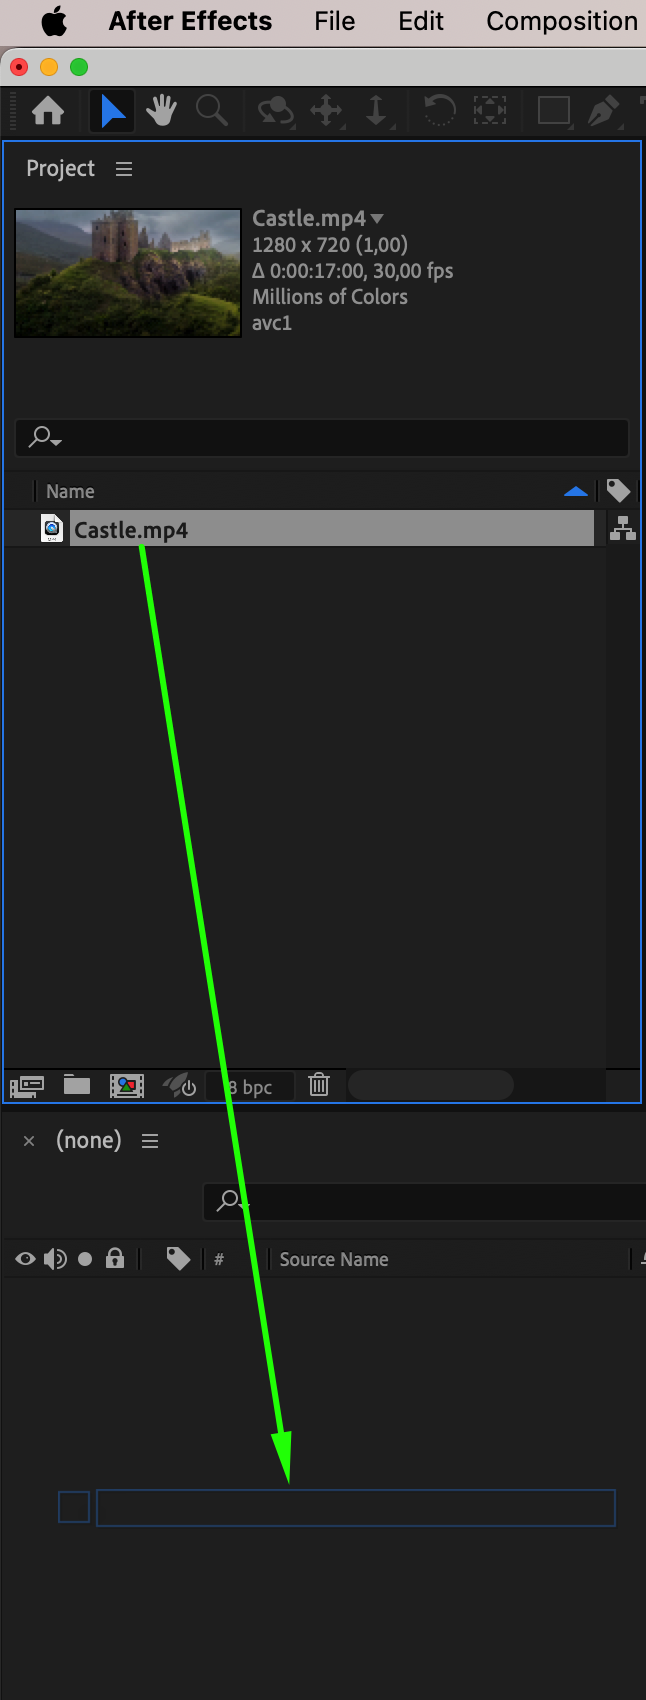
Begin by importing the video footage that you want to clean up. Go to the “File” > “Import” menu and select the video file. Once imported, drag the video from the Project panel onto the Timeline. This step gets your footage ready for noise reduction.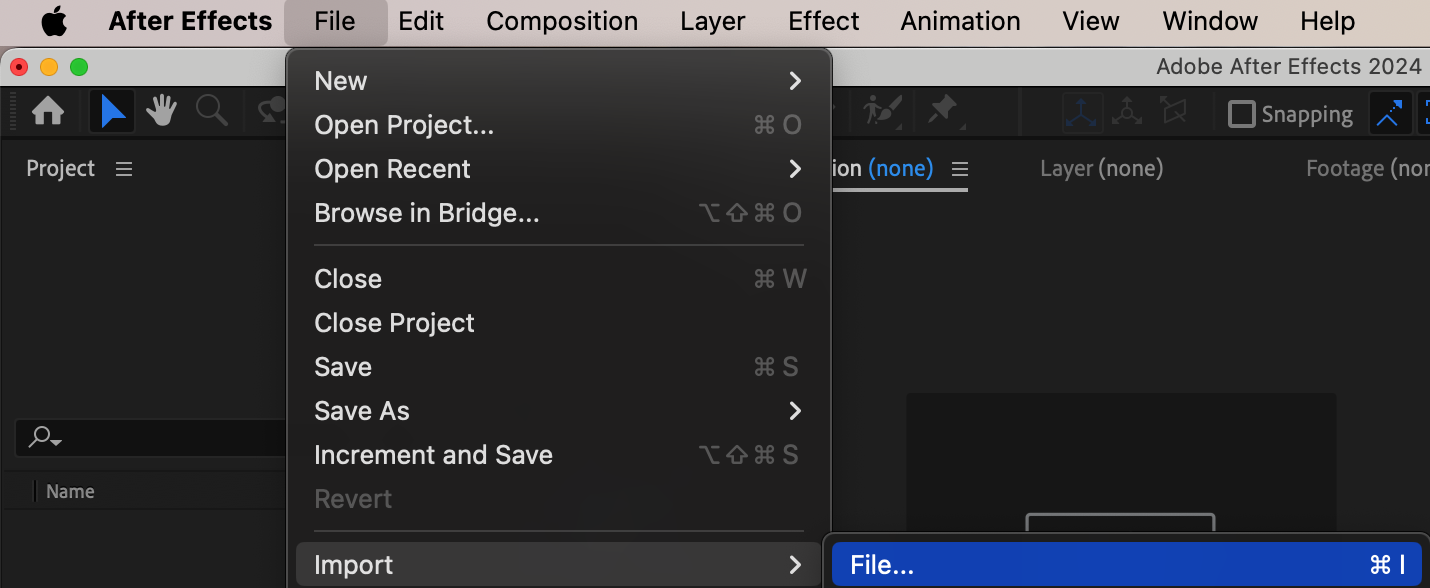
 Step 2: Apply the “Remove Grain” Effect
Next, apply the Remove Grain effect from the Effects & Presets panel. Simply search for “Remove Grain,” then drag and drop it onto your video layer in the Timeline. This effect will help you address unwanted visual noise, and it can also contribute to enhancing the clarity of your audio.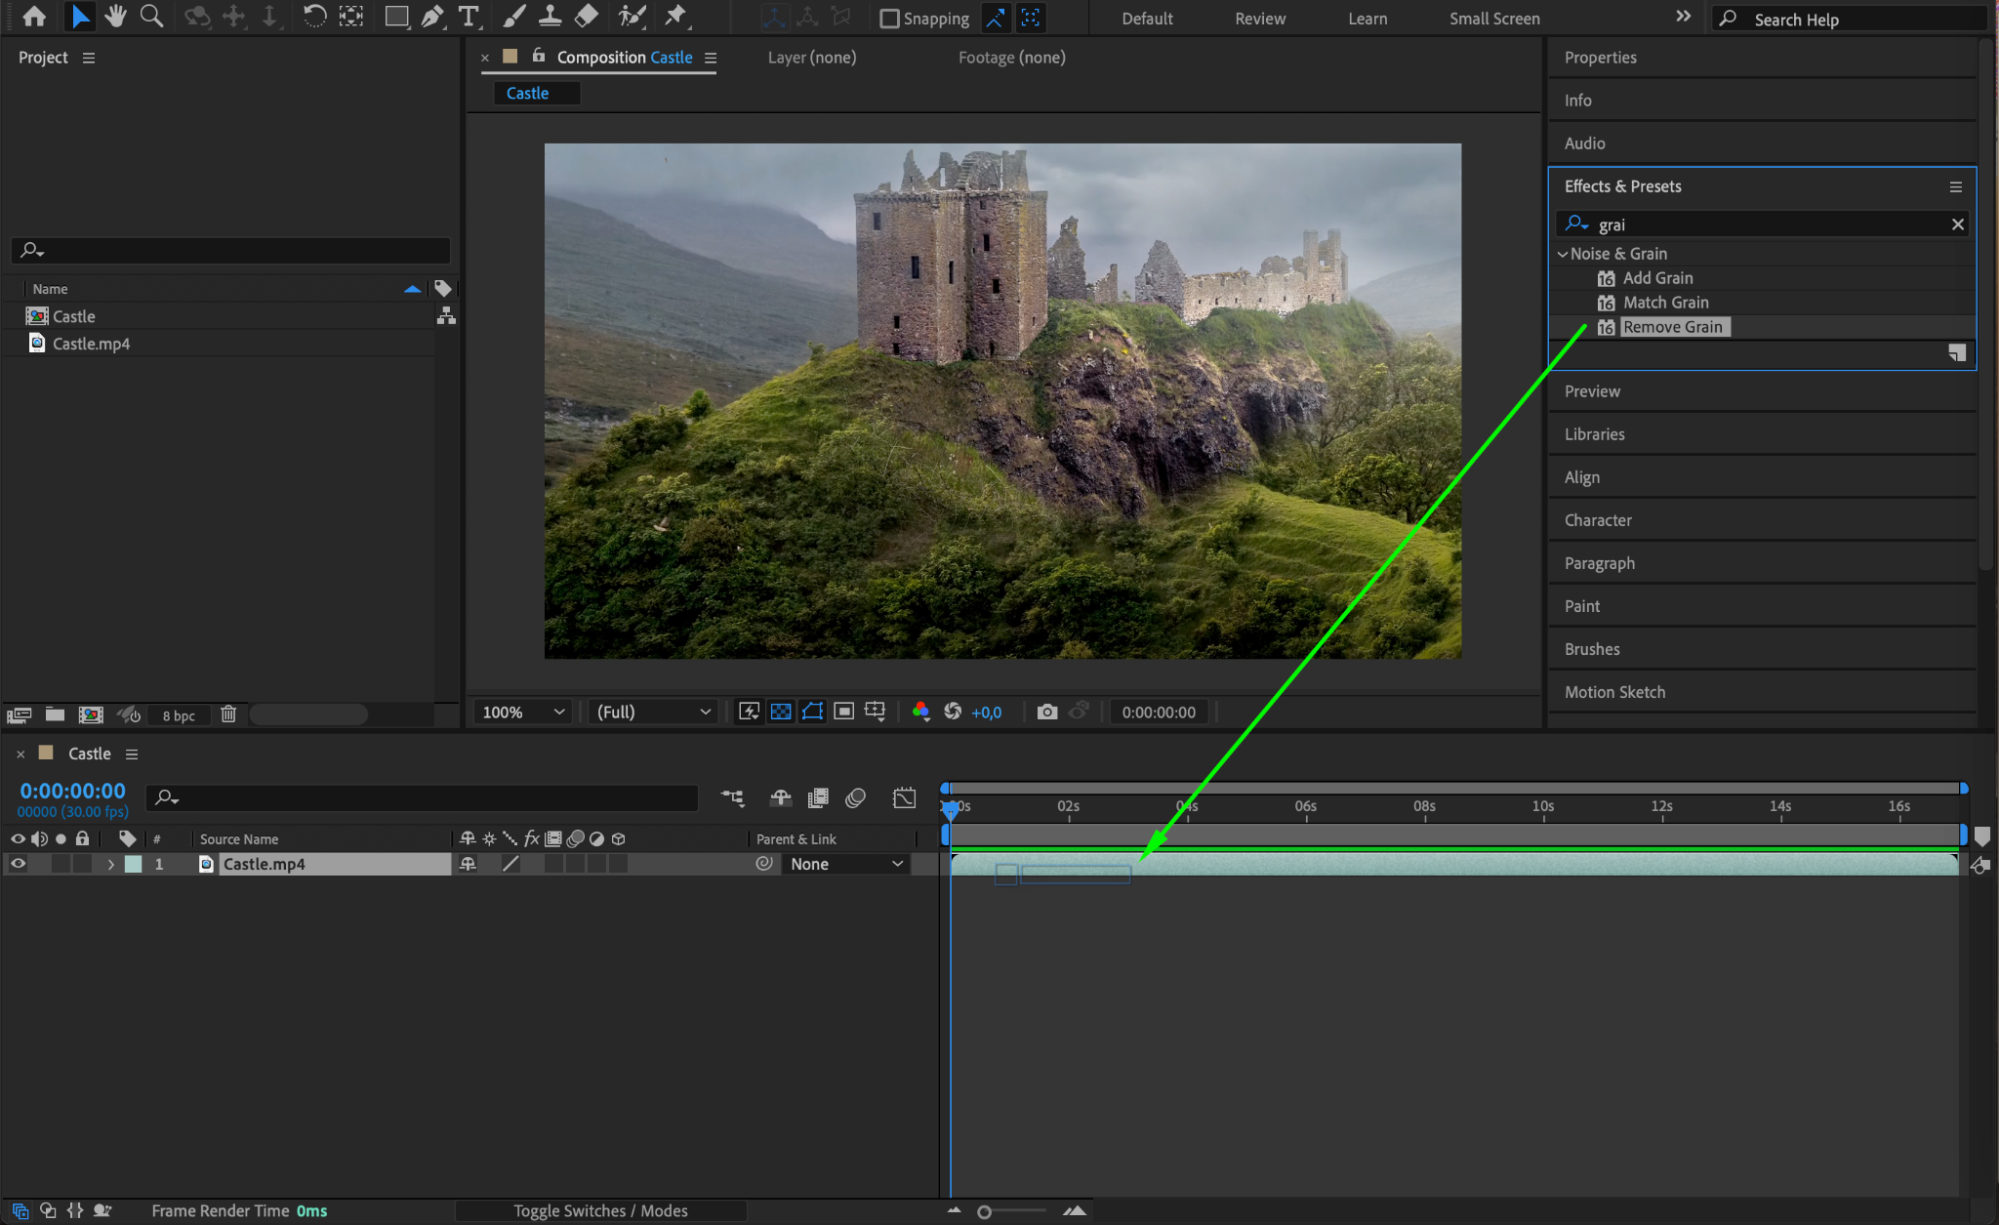 Step 3: Adjust Initial Effect Settings
With the Remove Grain effect applied, head over to the Effect Controls panel. Start by changing the Viewing Mode to Noise Samples – this helps you visualize the noise that’s being targeted. Set Noise Reduction to 10, Passes to 5, and change the Mode to Multichannel. Also, increase Chroma Suppression to 10 and enable it by checking the corresponding box. These settings will act as your base for removing background noise effectively.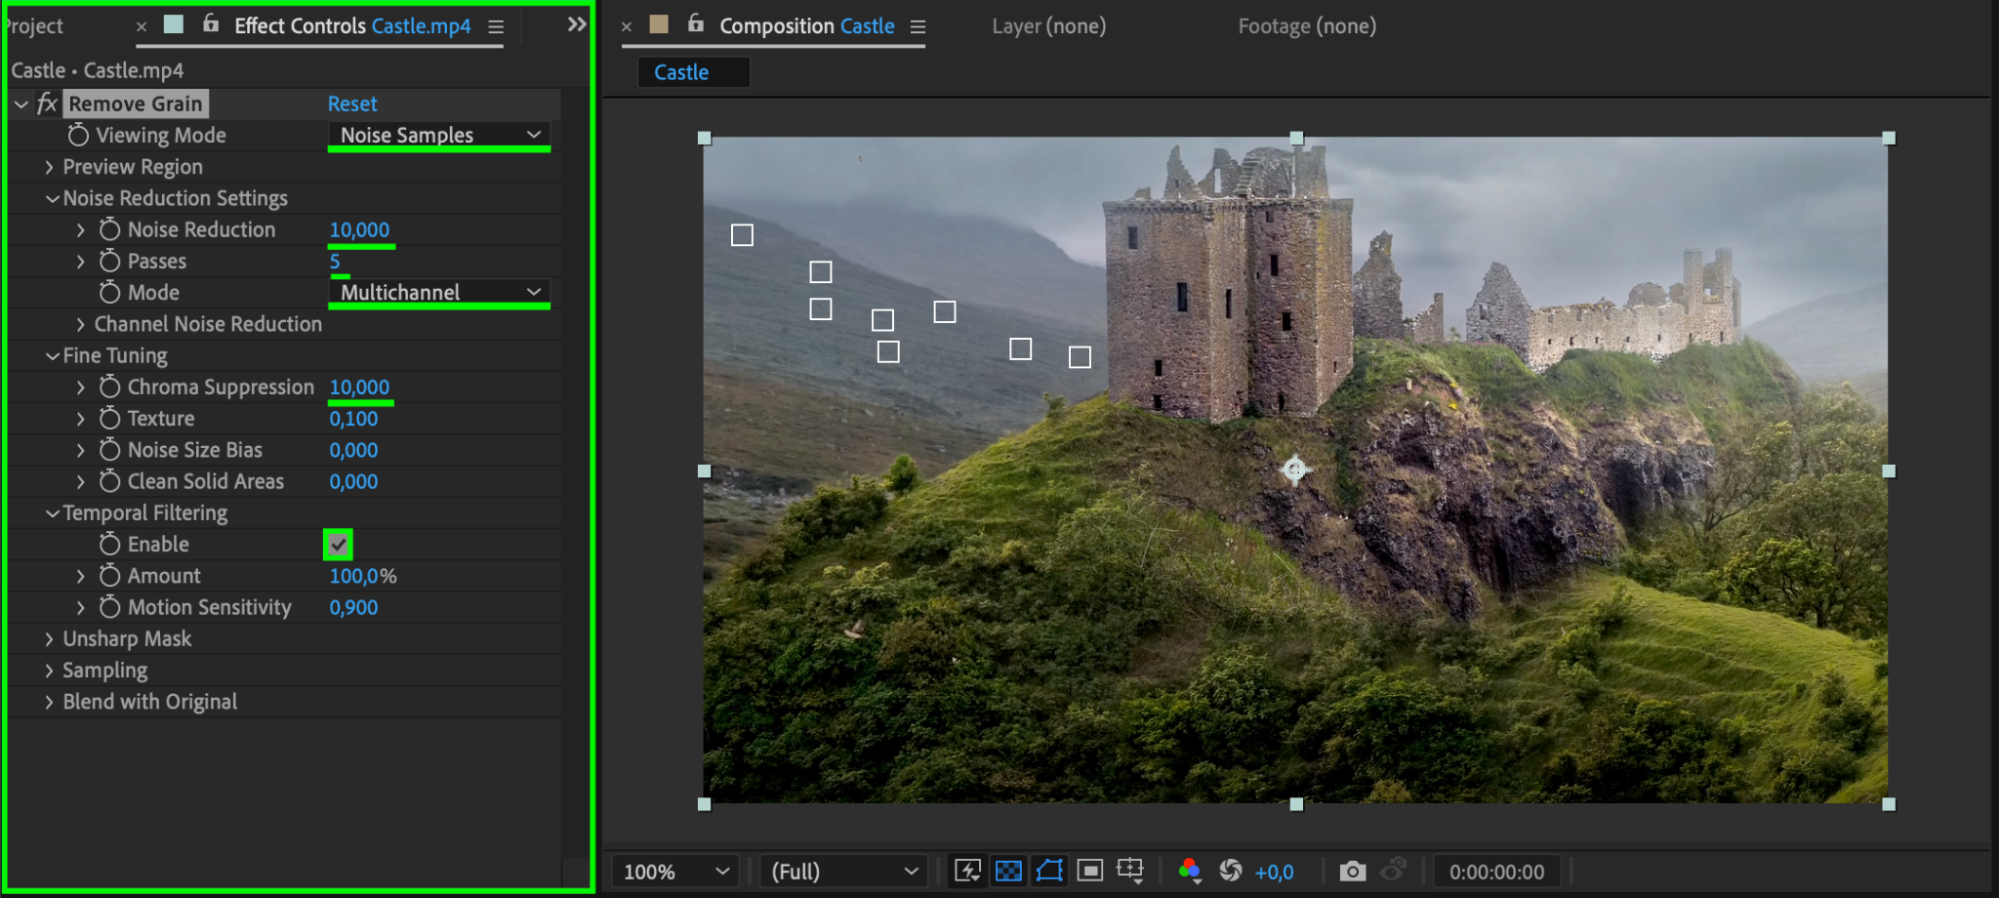 Step 4: Fine-Tune the Noise Reduction
Now that the base settings are applied, switch the Viewing Mode from Noise Samples to Final Output to see the results in real time. From here, you can further adjust the Noise Reduction and Chroma Suppression sliders until you’re satisfied with the balance between removing noise and retaining audio clarity. Fine-tuning these settings ensures that you get the best possible outcome without over-processing your footage.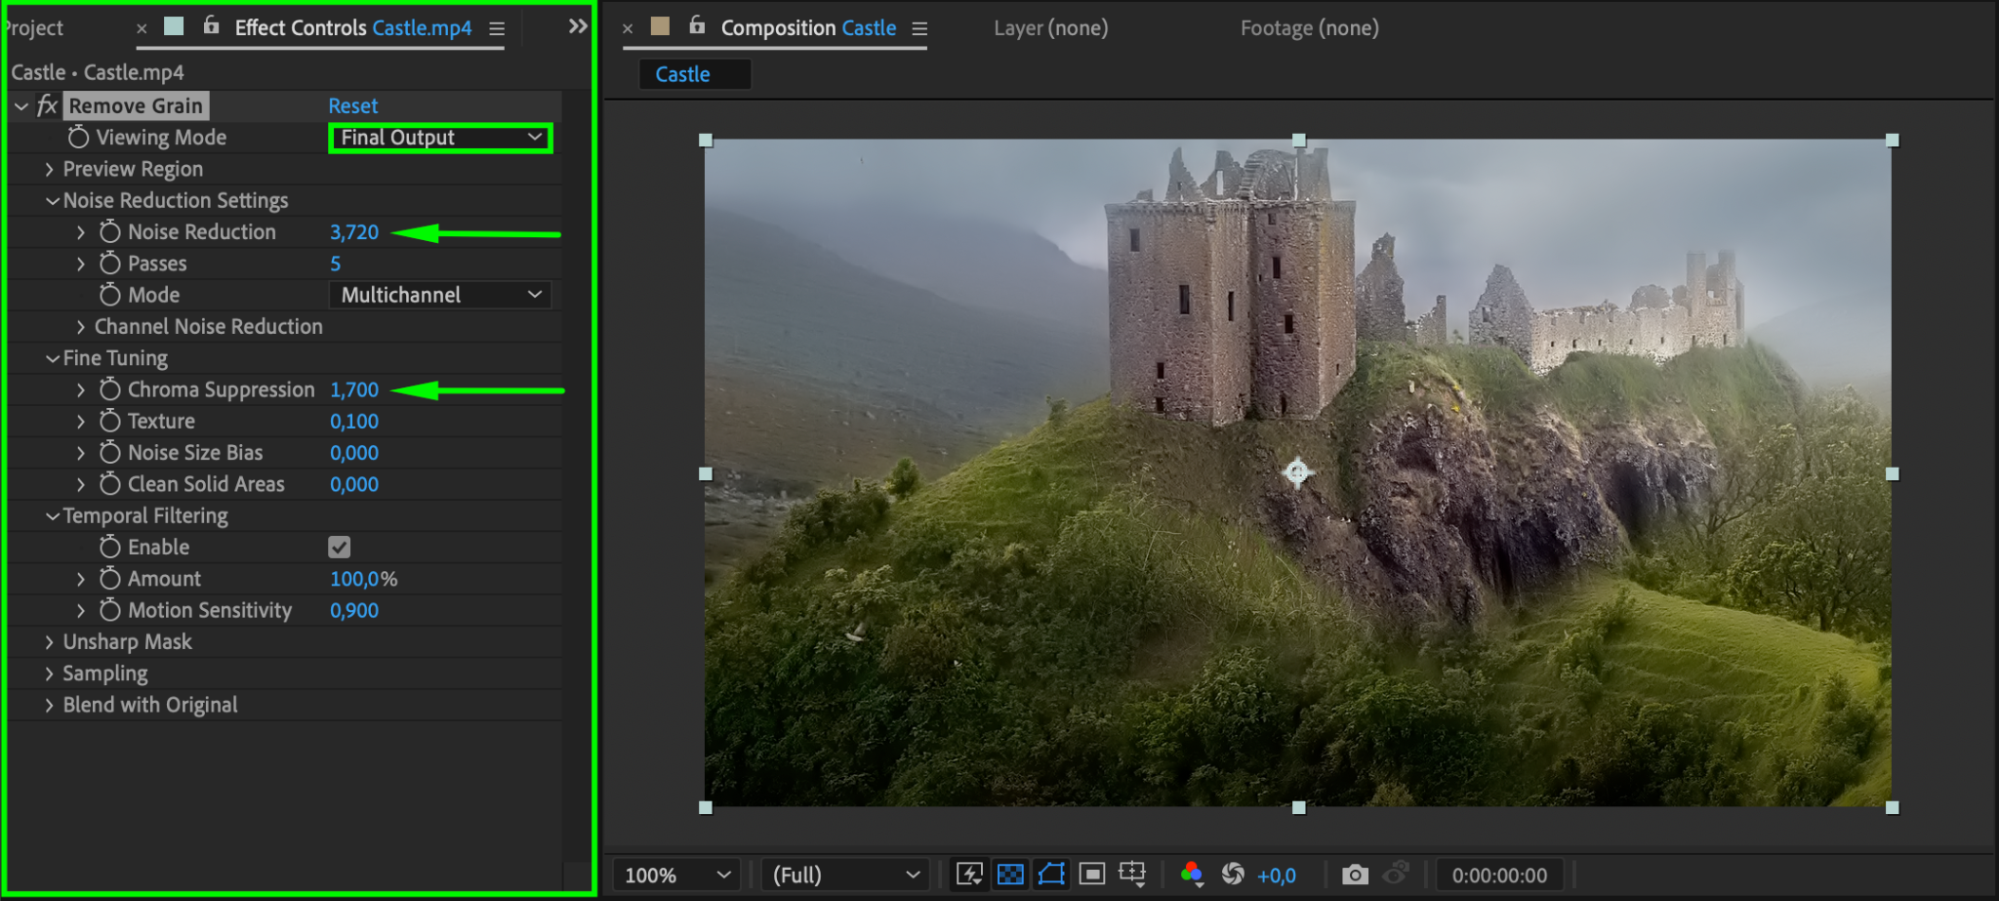 Step 5: Preview the Changes
Before rendering, it’s important to preview the changes. Hit Spacebar to play back the video and ensure that the noise has been adequately reduced. Listen closely to the audio for any remaining distortions and check the visual quality to confirm that the adjustments have improved the overall look and sound.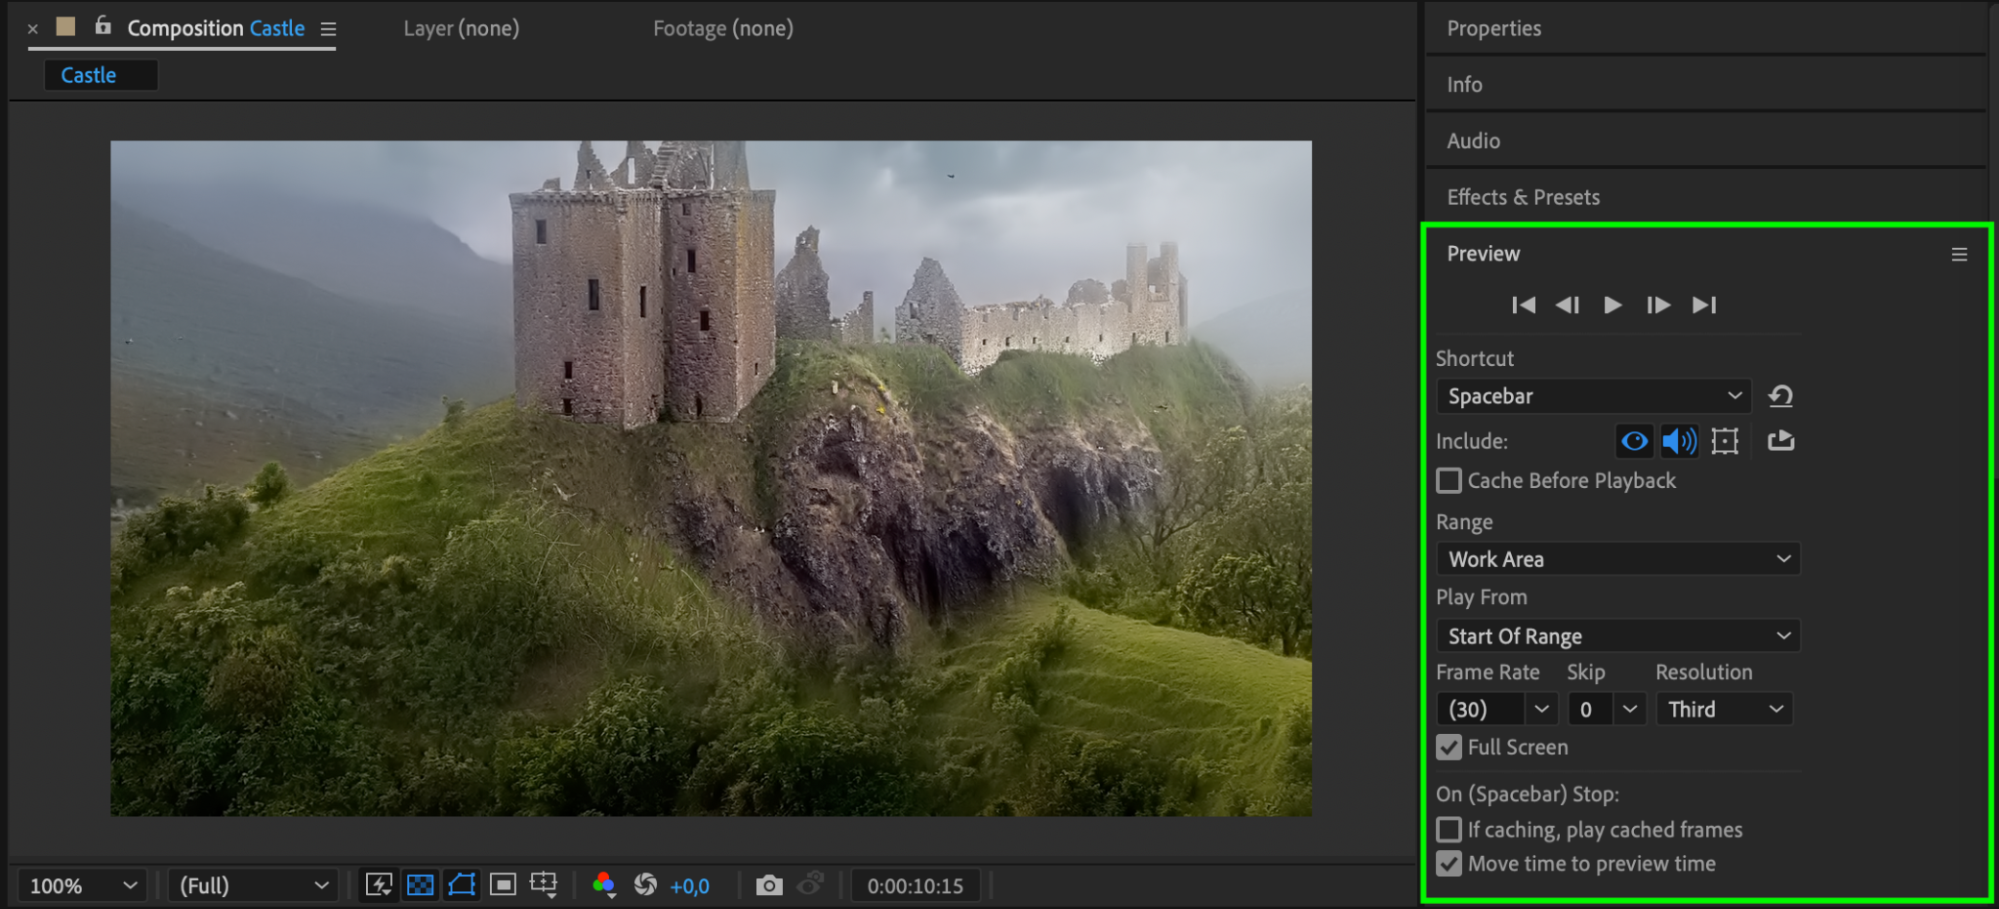 Step 6: Render and Export Your Project
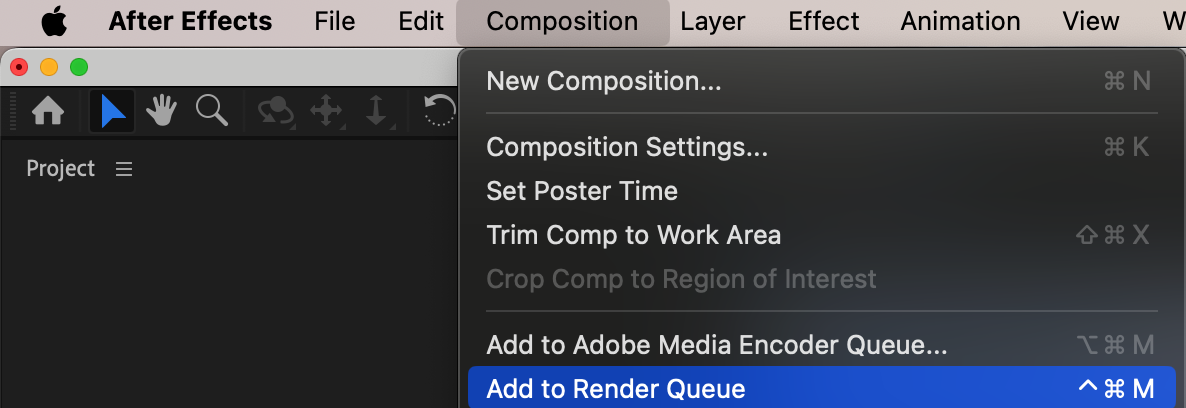
Once you’re satisfied with the results, it’s time to render the project. Go to Composition > Add to Render Queue to prepare the final output. Adjust the rendering settings to your preferences, and then click Render to export the cleaned-up version of your video. This step finalizes the process, allowing you to save the improved video with reduced background noise.

Conclusion
Removing background noise in After Effects is a simple yet effective way to improve the audio and visual quality of your videos. By following these steps and adjusting the Remove Grain effect, you can produce professional-grade content with cleaner audio and enhanced visuals. Take your video production to the next level by eliminating distractions and focusing on delivering a polished final product.


