How to Remove Unwanted Objects in After Effects
Introduction: Techniques for Removing Objects in After Effects
Removing unwanted objects from a video is a common task in video editing. Whether you need to erase a distracting element or clean up your footage, Adobe After Effects provides powerful tools like masking and Content-Aware Fill to make this process seamless. In this guide, we’ll take you through the steps to effectively remove an object from your video, ensuring your final product looks clean and professional.
Get 10% off when you subscribe to our newsletter

Step 1: Import Your Footage
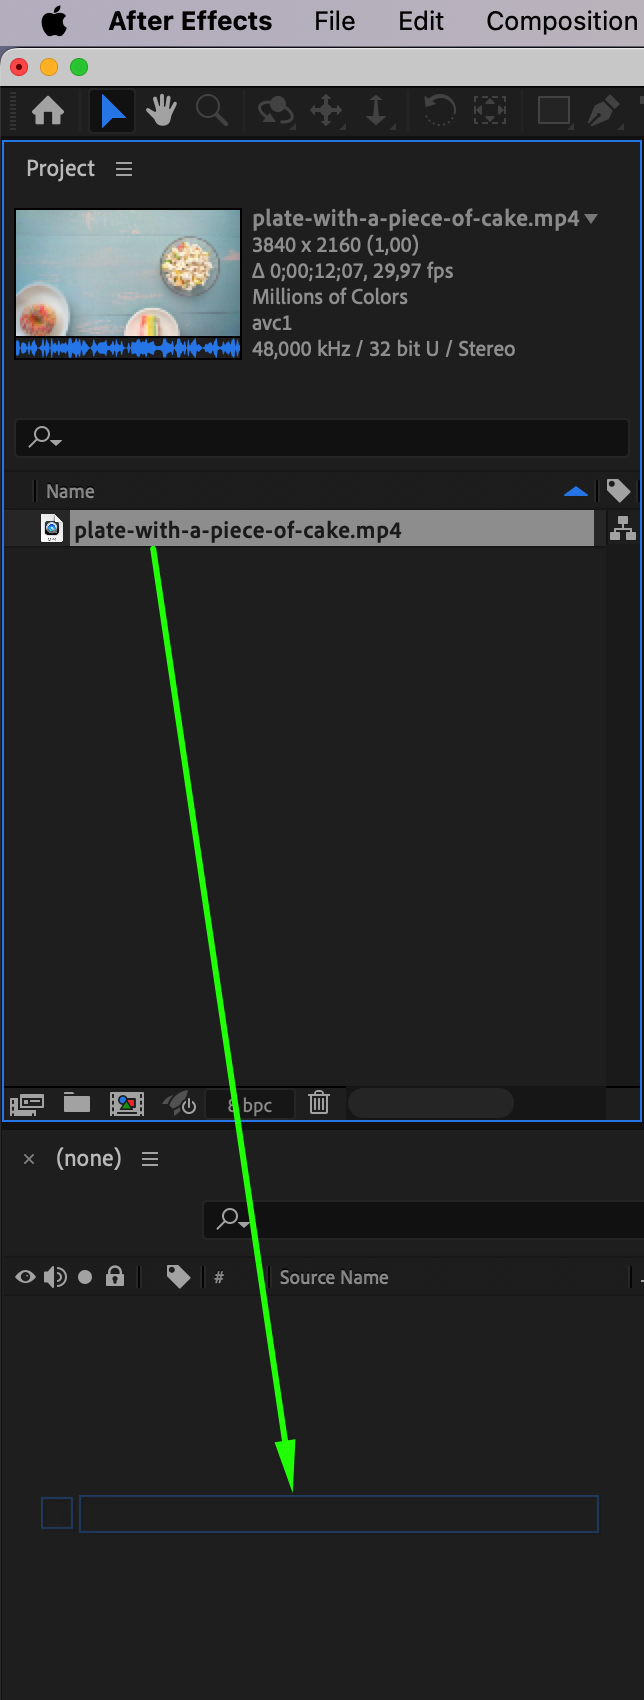
Start by importing the video file that contains the object you want to remove. Go to File > Import > File and select your footage. Once imported, drag it onto the Timeline to begin working. It’s important to preview your footage and identify the object or area that needs to be removed.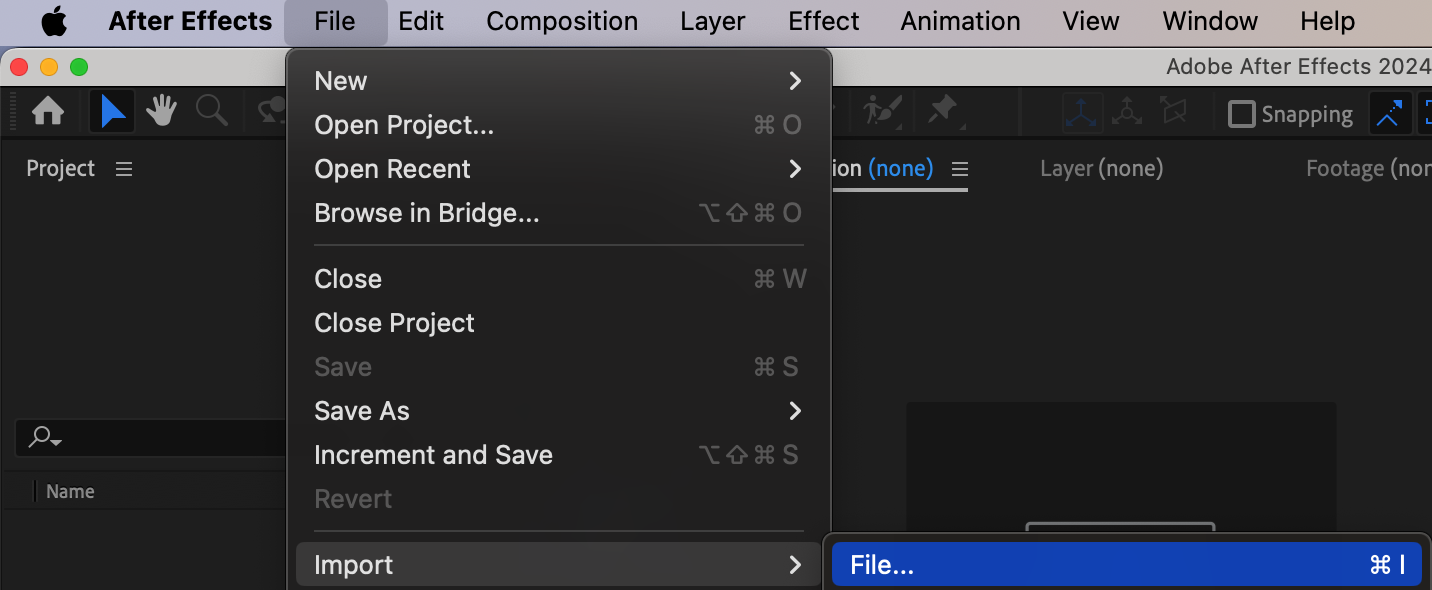
 Step 2: Create a Mask Around the Object
To remove an object from your footage, the first method is to use a mask. Start by selecting the Pen Tool (G) or the Shape Tool (Q) from the toolbar. Carefully draw a mask around the object you wish to erase. Ensure that the mask closely follows the contours of the object to prevent interference with other parts of the footage. Once the mask is created, go to the Mask Properties under the layer containing the mask. Then, change the Mask Mode to Subtract to remove the selected area.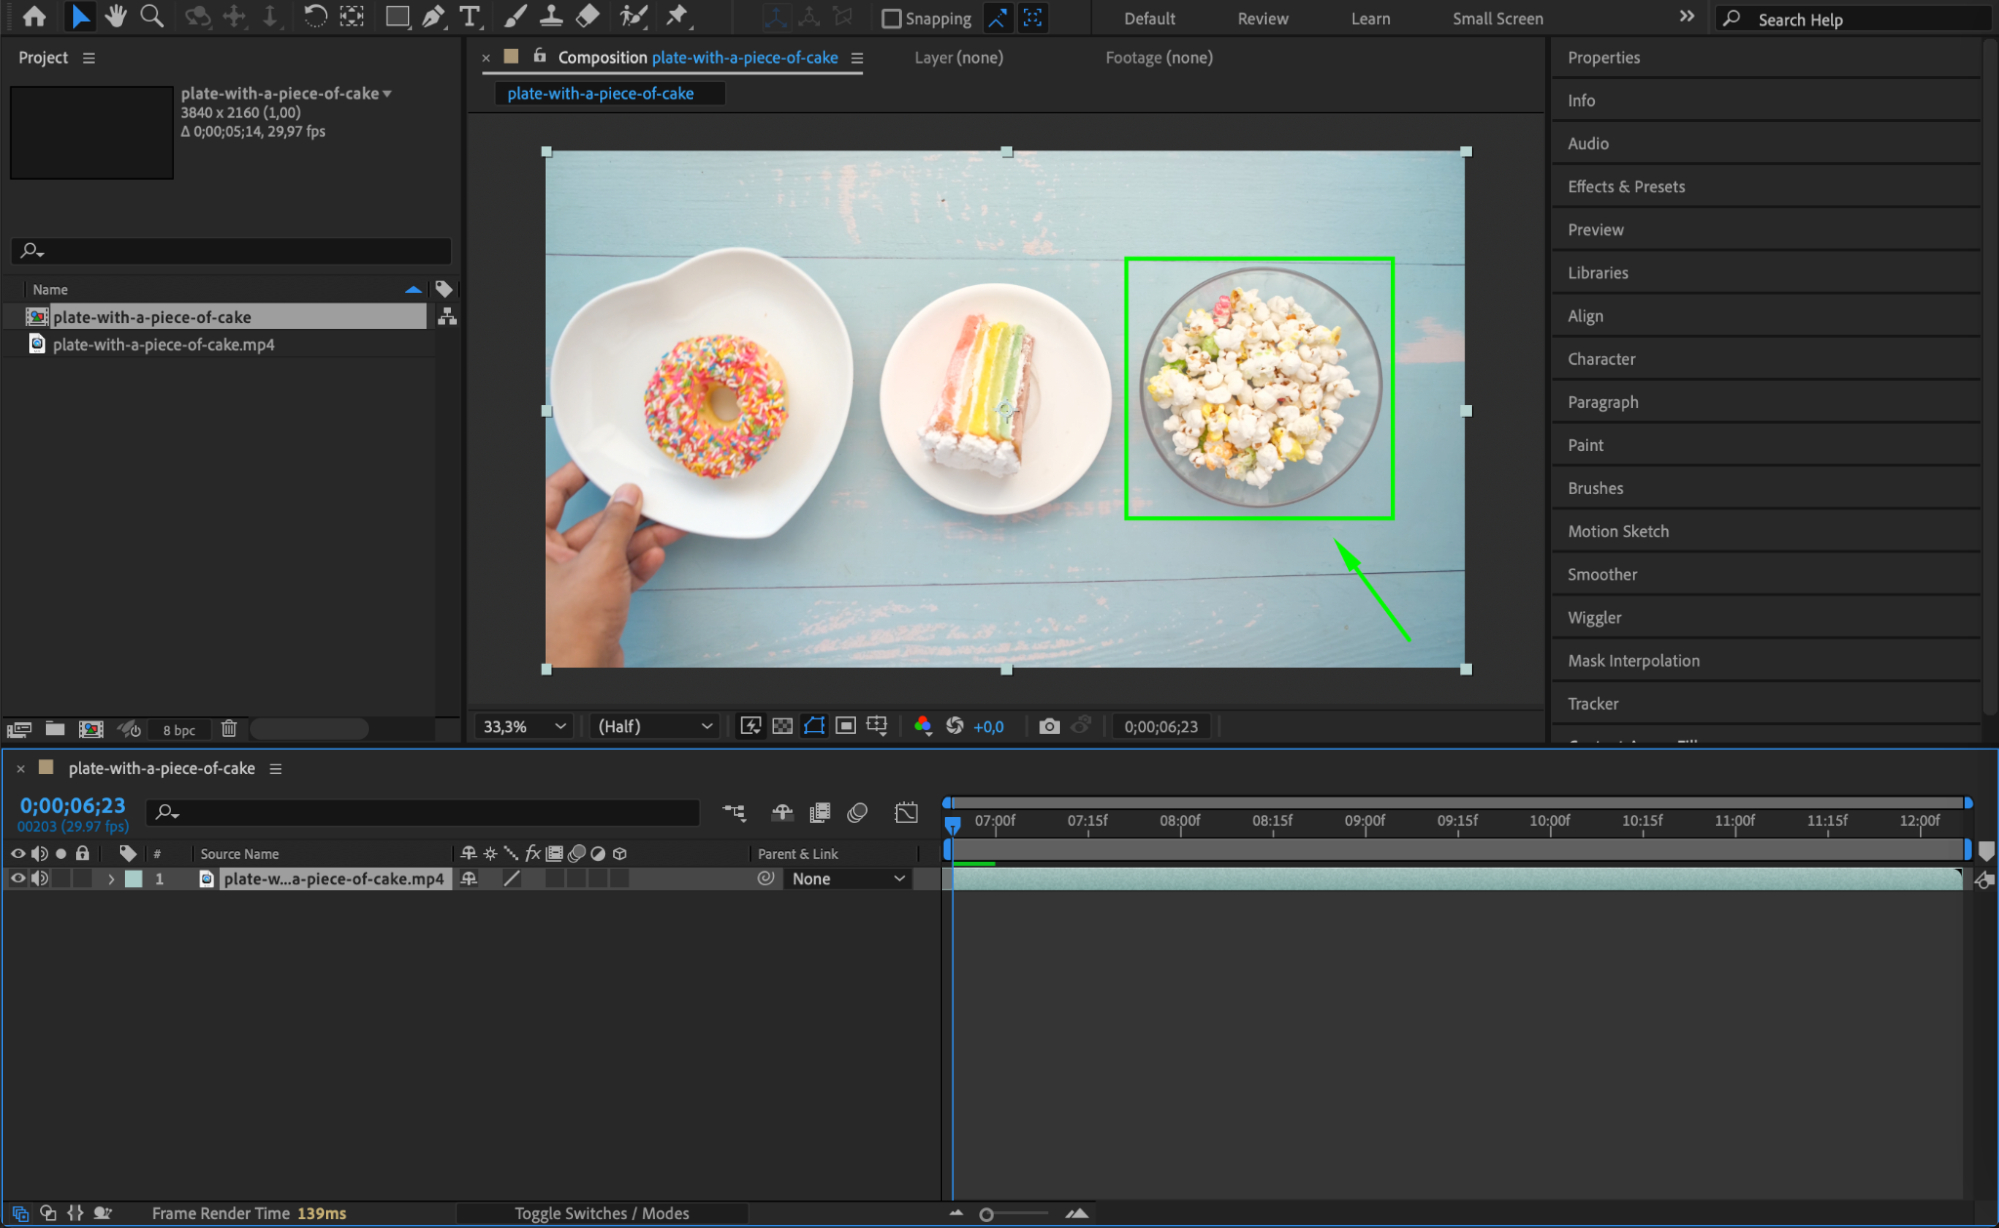
 Step 3: Use Content-Aware Fill
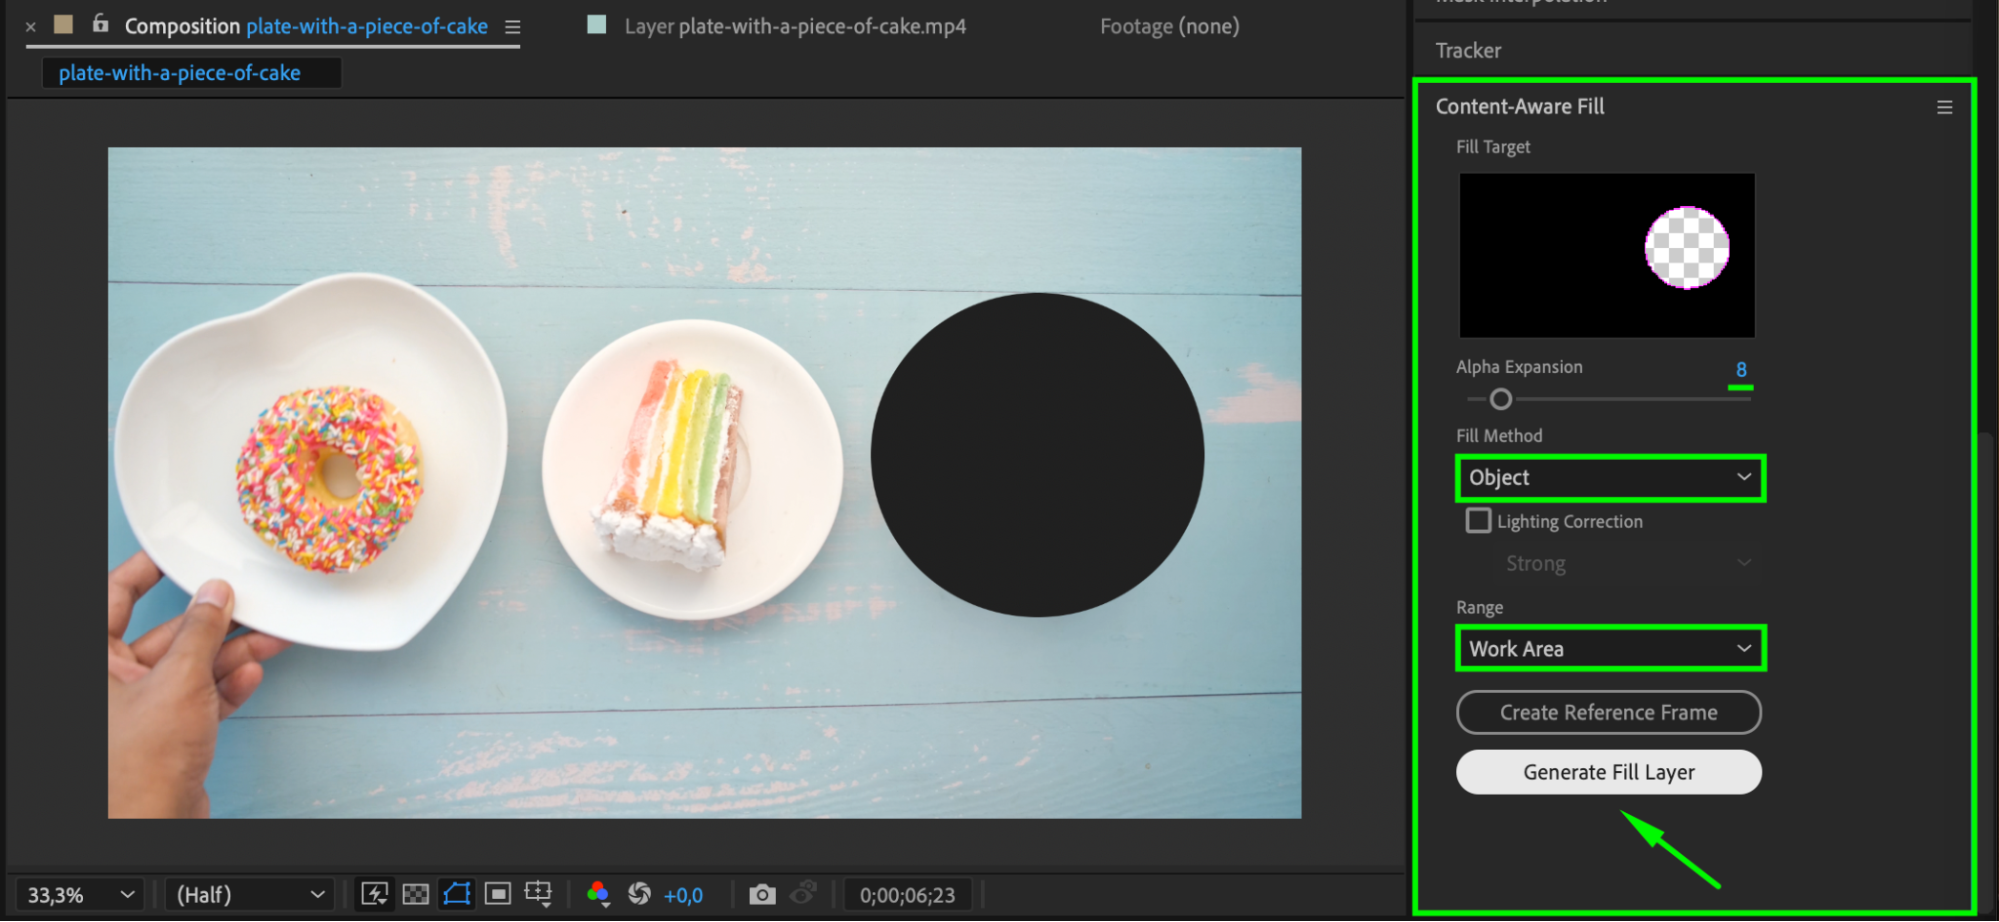
Once the mask is in place, it’s time to use the Content-Aware Fill feature. This tool allows After Effects to automatically fill in the area left behind after you remove the object. With your footage layer selected and the mask applied, go to Window > Content-Aware Fill. In the Content-Aware Fill panel, choose the Fill Method that best fits your scene, such as “Object”. Click Generate Fill Layer, and After Effects will analyze the footage and generate a new layer with the object removed.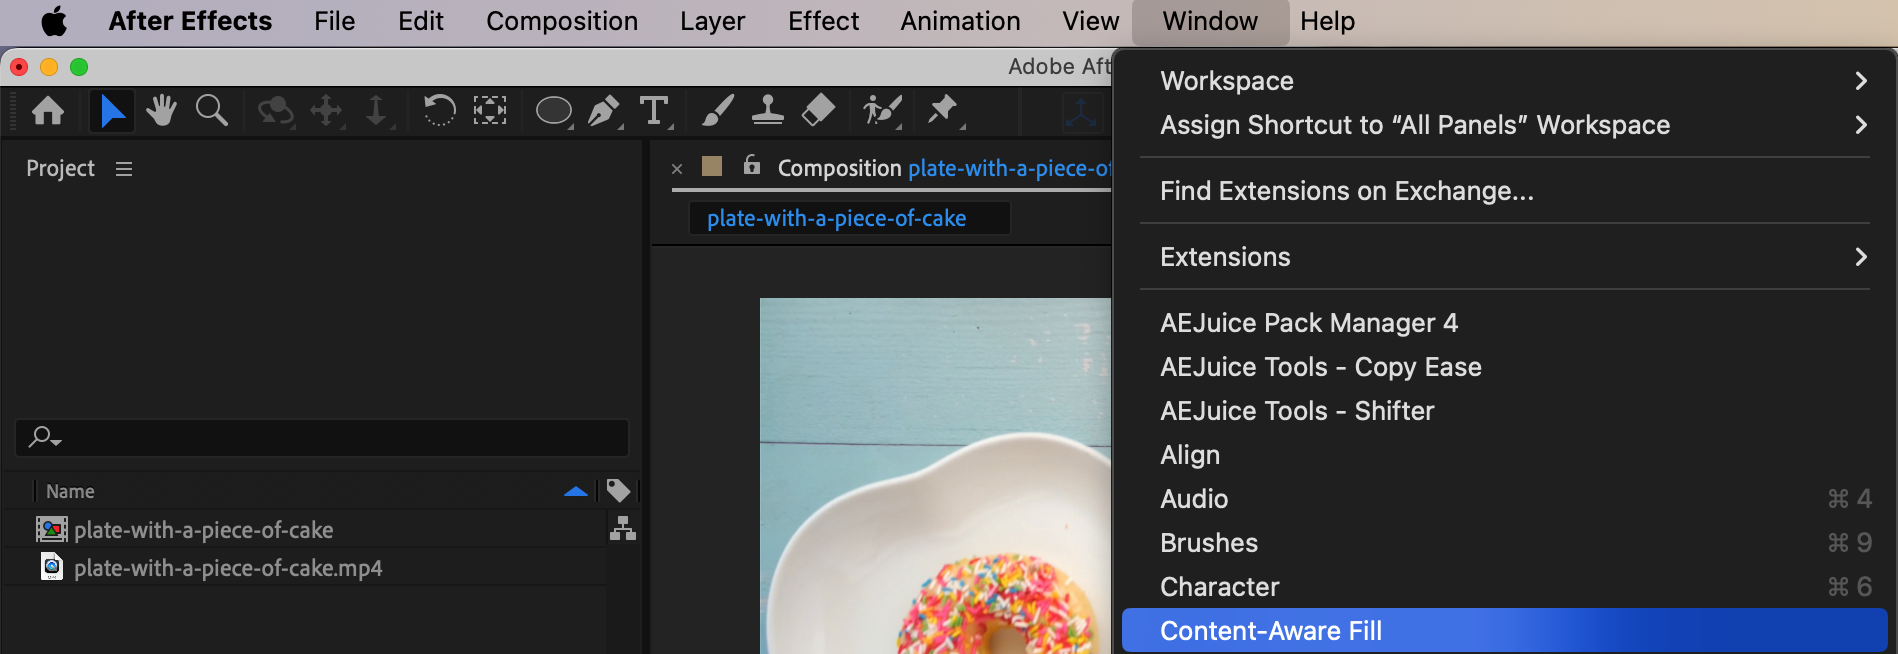
 Step 4: Preview and Refine the Removal
After the fill is generated, preview the video to see how well the object removal worked. If you notice any imperfections, such as visible seams or unnatural textures, you may need to tweak the mask or use additional adjustments. Reposition or refine the mask edges, adjust the feathering, or even reapply Content-Aware Fill for better results.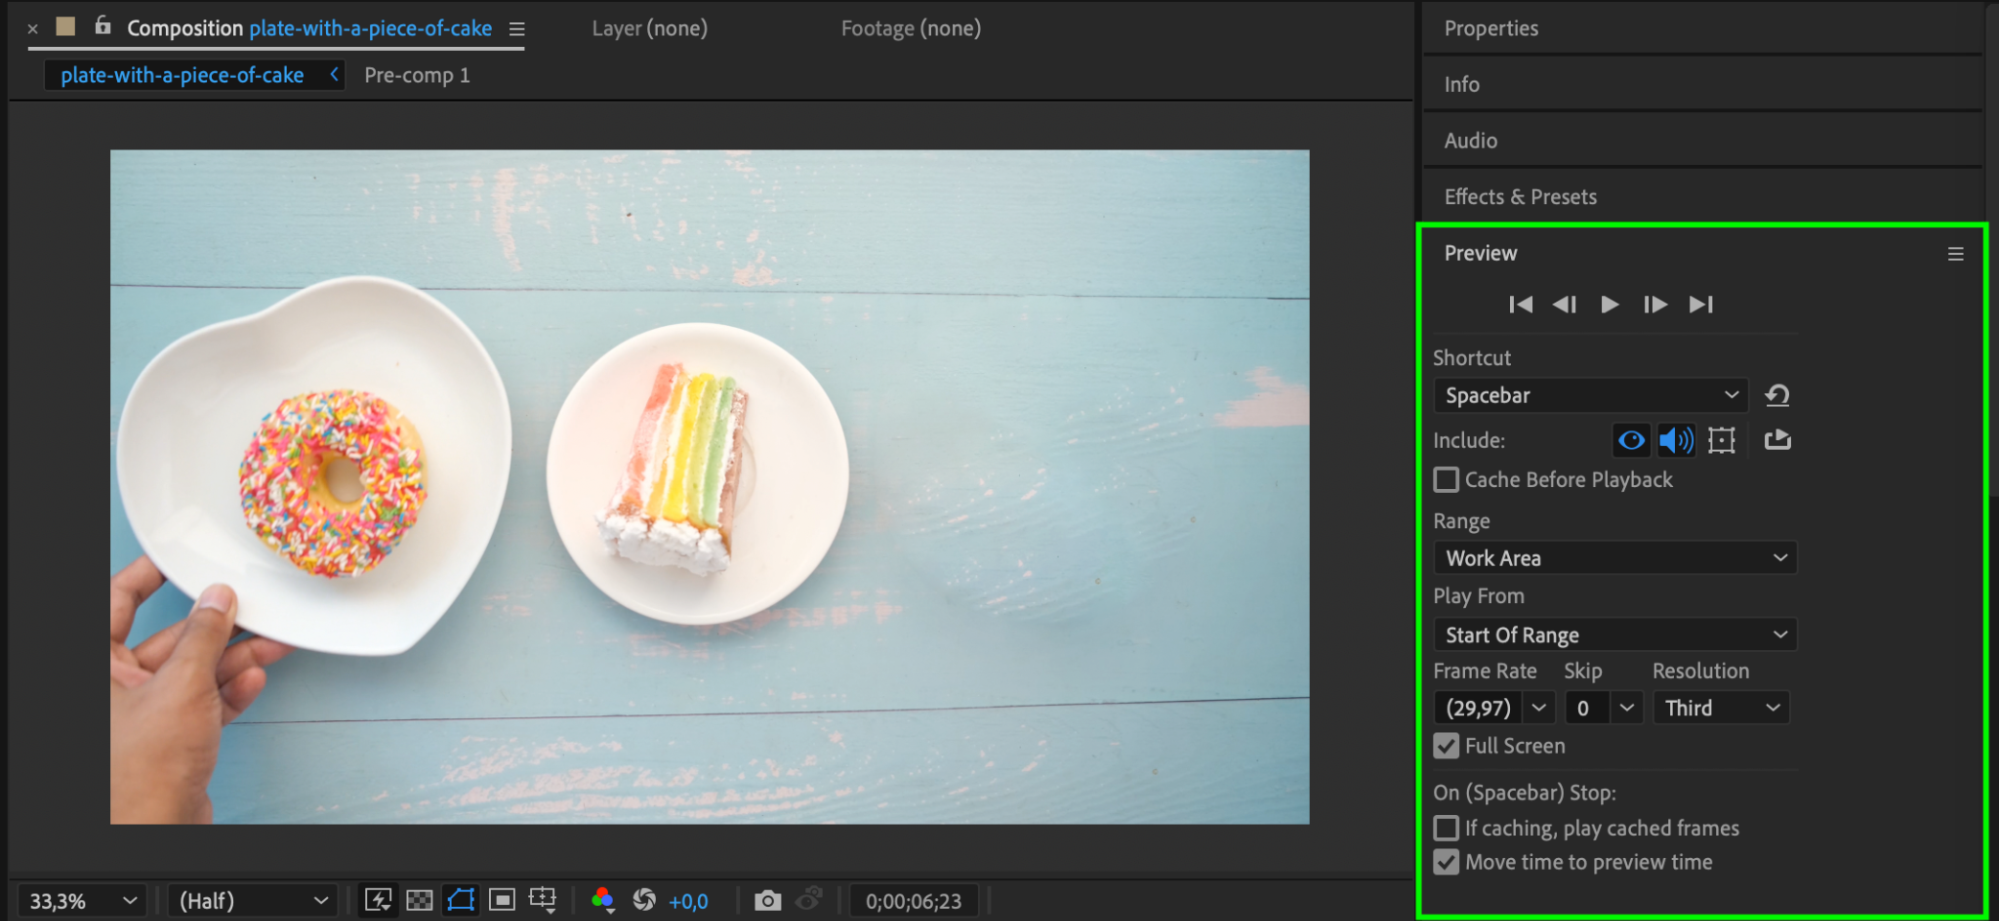 Step 5: Render Your Final Video
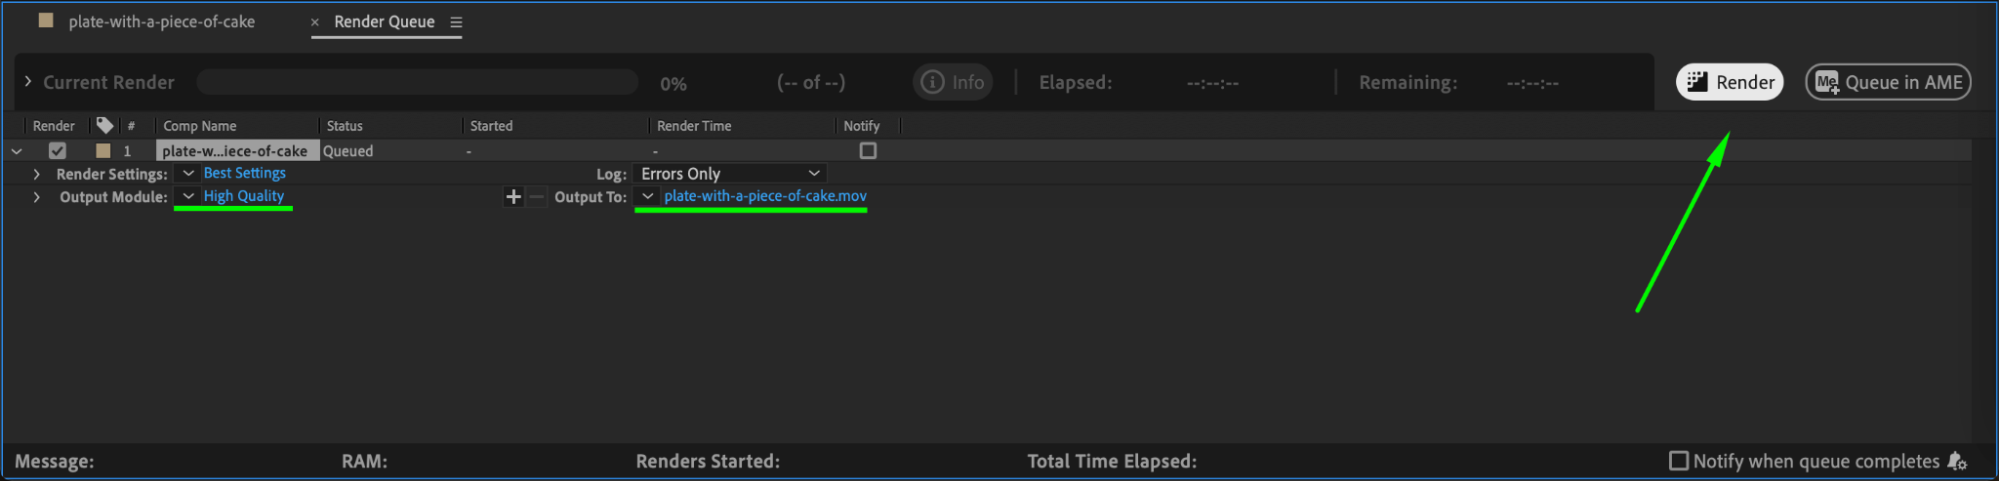
Once you are satisfied with the object removal, render your video. Go to Composition > Add to Render Queue. In the Render Queue panel, select your desired settings and click Render. Your video will now be exported without the unwanted object.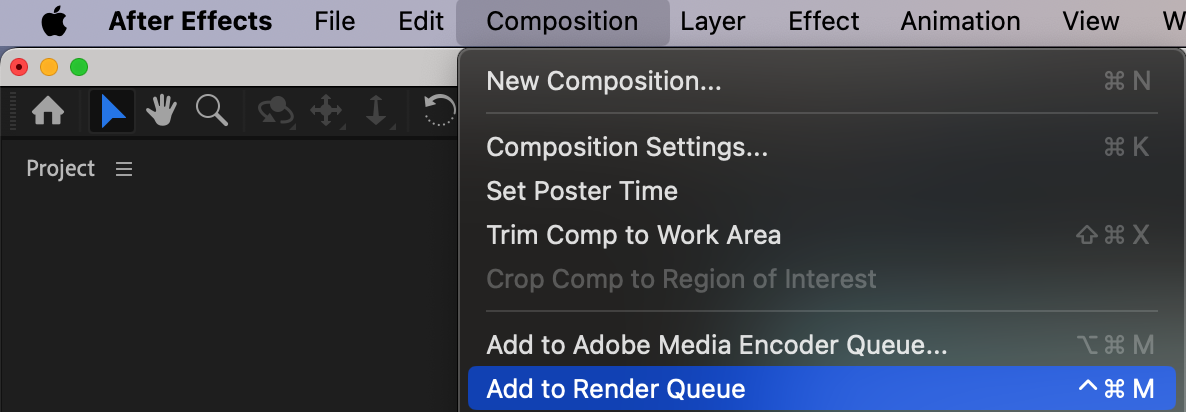
 Conclusion
Removing objects in After Effects can greatly enhance the quality of your video projects. By using techniques like masking and Content-Aware Fill, you can easily erase unwanted elements, resulting in clean and professional footage. Whether you’re working on short films, commercials, or personal projects, these tools are invaluable for achieving polished results.
Our Bestsellers


