Introduction – Dive into the World of Alpha Channel Rendering in After Effects
Are you ready to take your video editing skills to the next level? If you’ve been wondering how to give your videos that professional touch, rendering with an alpha channel in After Effects is the key. With this powerful feature, you can create stunning visual effects, seamlessly blend your compositions with different backgrounds, and even overlay your clips onto other footage.
Whether you’re a videographer, motion graphics designer, or simply an enthusiast looking to elevate your video editing game, this comprehensive guide will walk you through the essential steps to master the art of rendering with an alpha channel in After Effects. From understanding the basics to gaining advanced techniques, by the end of this article, you’ll have the knowledge and confidence to create captivating videos with transparent backgrounds.
So, brush up on your After Effects skills, unleash your creativity, and get ready to transform your projects from ordinary to extraordinary. Let’s dive in and explore the world of rendering with alpha channels in After Effects!
Essential Advice for Rendering with Alpha Channel in After Effects
Rendering with an alpha channel in After Effects opens up a whole new world of possibilities for your videos. Whether you want to remove a background, create transparent overlays, or composite your footage onto different backgrounds, mastering the art of rendering with alpha channel is essential. To help you get started, here are some valuable tips and advice:
1. Choose the Right Composition Settings:
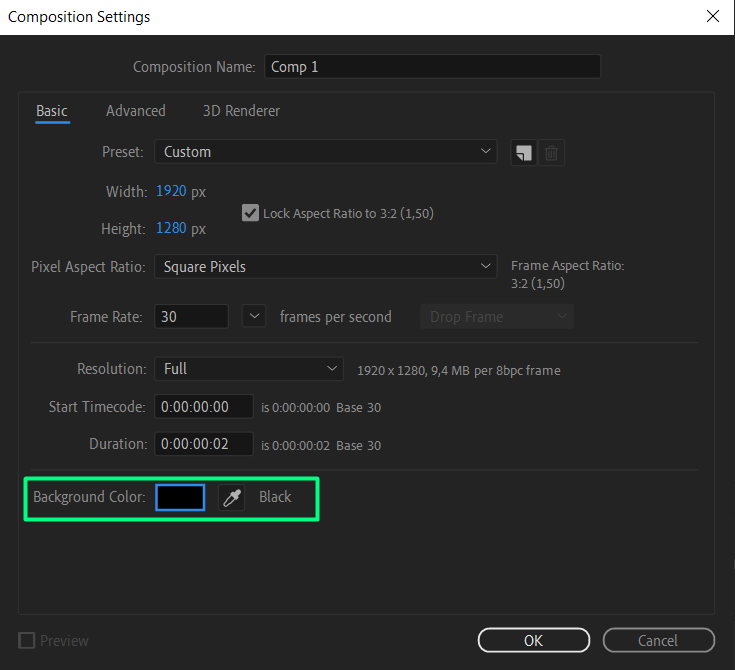
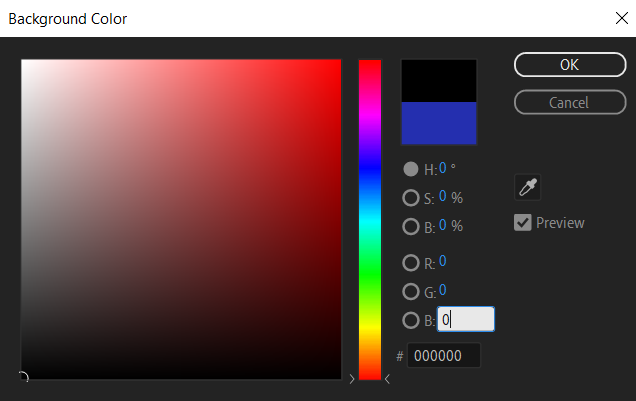
Before you begin your project, it’s crucial to set up your composition correctly. Go to Composition > New Composition or simply use the hotkey Ctrl/Cmd + N to create a new composition. In the Composition Settings dialog box, ensure the Background Color is set to a solid black (RGB value 0,0,0) to create transparency by default.

2. Enable Transparency Grid:
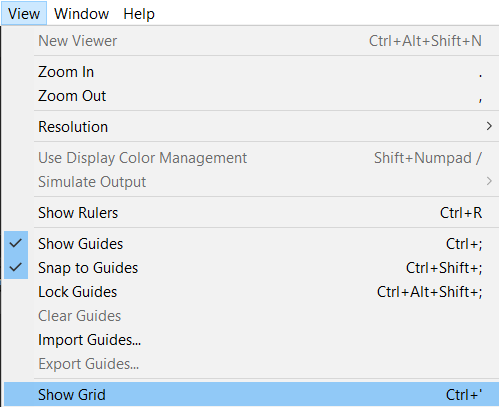
To easily visualize the transparency in your composition, enable the Transparency Grid. Press the hotkey Ctrl/Cmd + or go to the View menu and select Show Grid. This grid will help you identify any areas in your composition that are transparent.
3. Utilize the Alpha Add Mode:
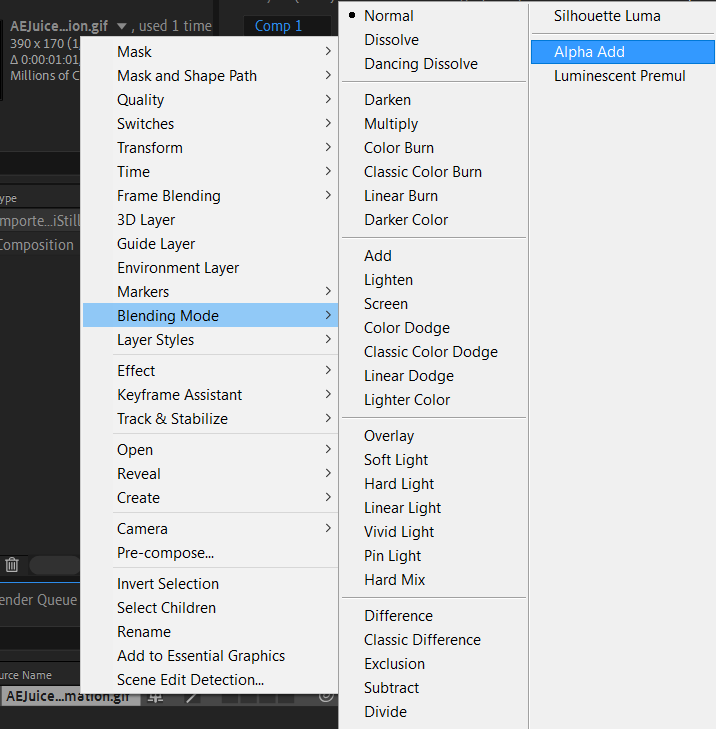
When compositing your footage onto a new background, it’s crucial to use the Alpha Add mode. This blending mode allows your transparent pixels to be superimposed over the background without affecting the non-transparent areas. Select the layer’s blending mode dropdown and choose Alpha Add to enable this mode.
4. Check Your Channel Settings:
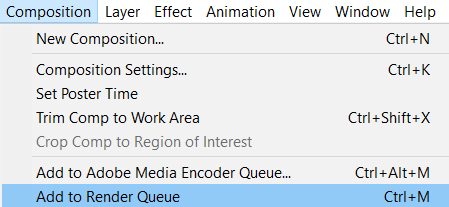
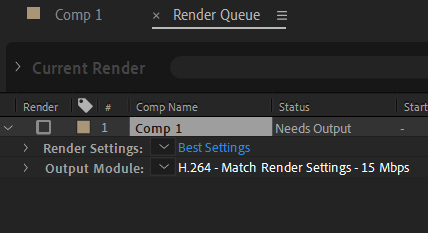
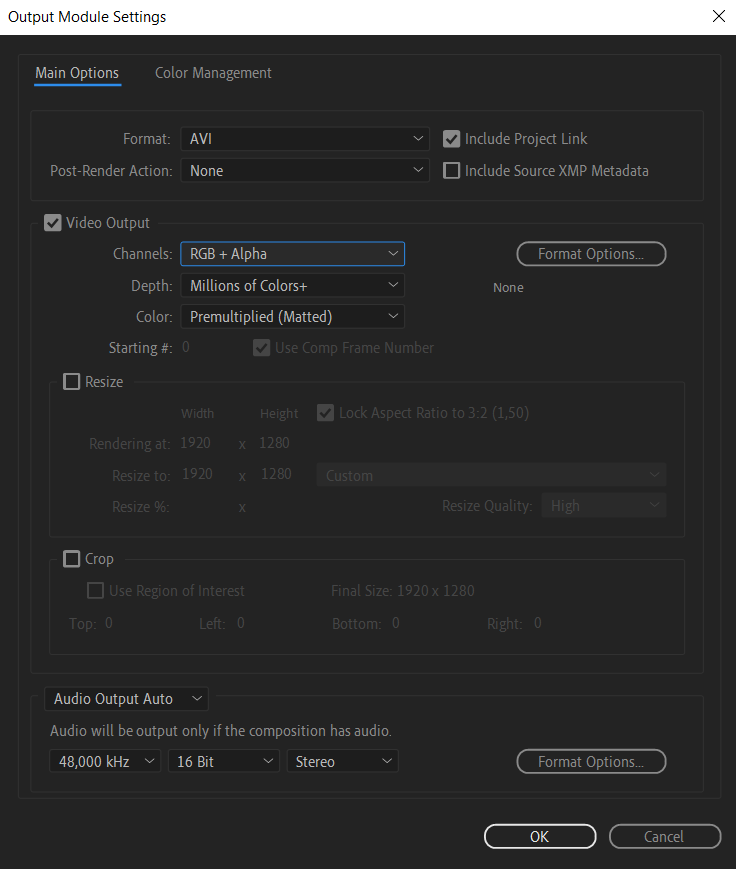
To ensure your alpha channel is properly set and ready for rendering, double-check your channel settings. Click on the Add to Render Queue menu or use Ctrl/Cmd + M, go to the Output Module, and make sure the RGB + Alpha option is selected. This will ensure that your alpha channel is included in the final render.
5. Export with the Best Codec for Alpha Channels:
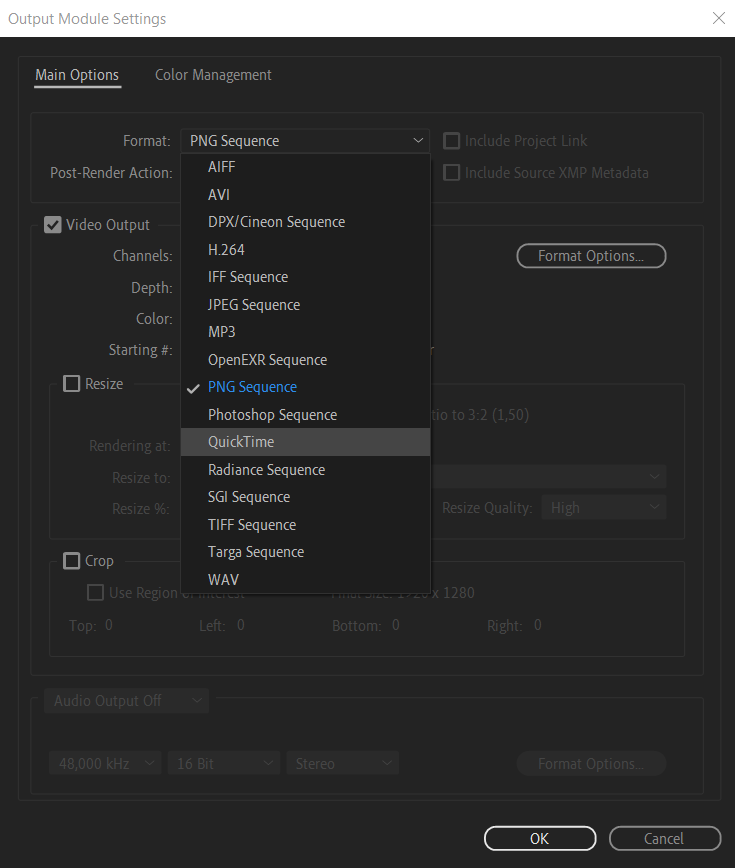
When it comes to exporting your composition with an alpha channel, choose the right codec to maintain transparency. The recommended codecs for preserving alpha channels include QuickTime or PNG sequence. Use the hotkey Ctrl/Cmd + M to bring up the export settings and select the appropriate codec based on your requirements.
6. Test and Preview:
Before finalizing your render, it’s essential to preview your composition to ensure everything looks as expected. Use the spacebar hotkey to play your composition to perform a RAM preview. This will help you identify any potential issues and make necessary adjustments before rendering.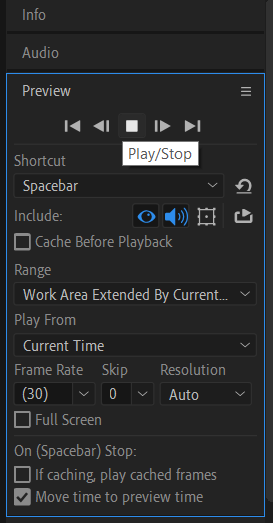
7. Use the Render Queue:
To render your final composition with the alpha channel, utilize the Render Queue in After Effects. Go to Composition > Add to Render Queue to add your composition to the queue. Configure your render settings, output path, and settings for alpha channel, then hit the Render button to start the render process.

With these essential tips and tricks, you are well on your way to mastering the art of rendering with an alpha channel in After Effects. Remember to experiment, practice, and explore the vast capabilities that this feature brings to your video editing projects. Happy rendering!
Conclusion
Congratulations! You have now become proficient in rendering with an alpha channel in After Effects. By following the tips and techniques outlined in this article, you can create visually captivating videos with transparent backgrounds, vibrant overlays, and seamless compositing.
Rendering with an alpha channel offers a multitude of creative possibilities, enabling you to express your ideas with precision and finesse. Whether you’re working on a professional project, a personal video, or experimenting with various visual effects, understanding how to render with an alpha channel is an invaluable skill.
Remember to experiment, push the boundaries of your creativity, and continue honing your After Effects skills. With practice and dedication, you can elevate your video editing game to new heights, delivering stunning visual experiences that captivate your audiences.
So, go ahead, start implementing these techniques, and unlock the full potential of After Effects. Embrace transparency, blend seamlessly, and create videos that stand out from the crowd. Happy rendering!

