Efficiently Rendering Your Work Area in After Effects
Introduction to Rendering in After Effects
After Effects is a powerful tool for video editing and motion graphics. But rendering your work can be time-consuming. In this guide, we’ll show you how to efficiently render the work area in After Effects to save time and optimize your video projects.
Rendering the Work Area in After Effects
Get 10% off when you subscribe to our newsletter

Rendering your work area is an important step in post-production. It allows you to preview your project and export it in the desired format. But rendering can be slow, especially for large projects. In this guide, we’ll walk you through the steps to render your work area efficiently, saving you time and improving your workflow.
Step 1: Set the Work Area:
Before rendering, define the work area in After Effects. The work area is the part of your project you want to render. You can use the Work Area Bar or keyboard shortcuts “B” and “N” to set the start and end points. Adjust the work area to include all necessary elements.
 Step 2: Set the Render Settings:
Get 10% off when you subscribe to our newsletter
Next, configure the render settings. Click “Composition” and select “Add to Render Queue” or use the shortcut “Ctrl/Cmd + M”. This opens the Render Queue panel. Customize settings like output module, format, resolution, and frame rate based on your project’s requirements.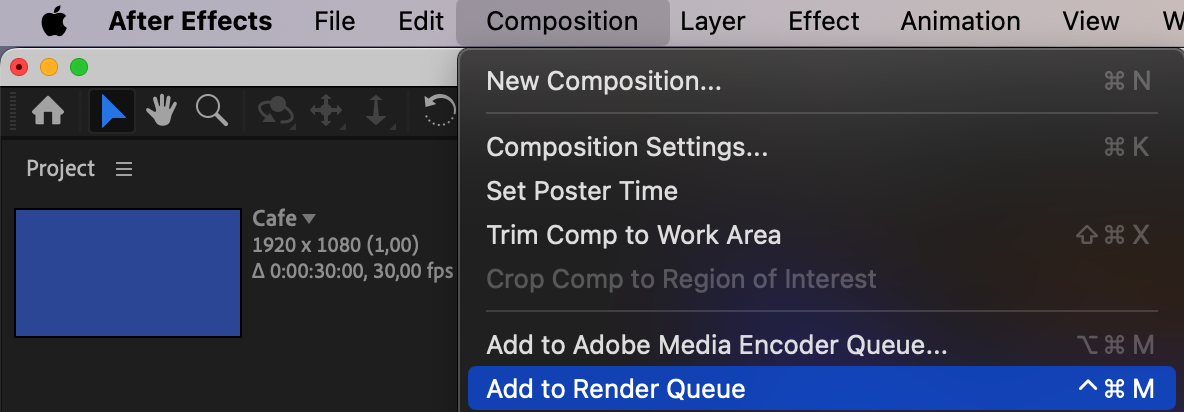 Step 3: Configure Output Modules:
Output Modules determine the format and codec of your rendered file. Click “Output Module” in the Render Queue panel to select the desired format and codec. Use widely compatible formats like MP4 or MOV and efficient codecs like H.264 or Apple ProRes 422 for optimal playback.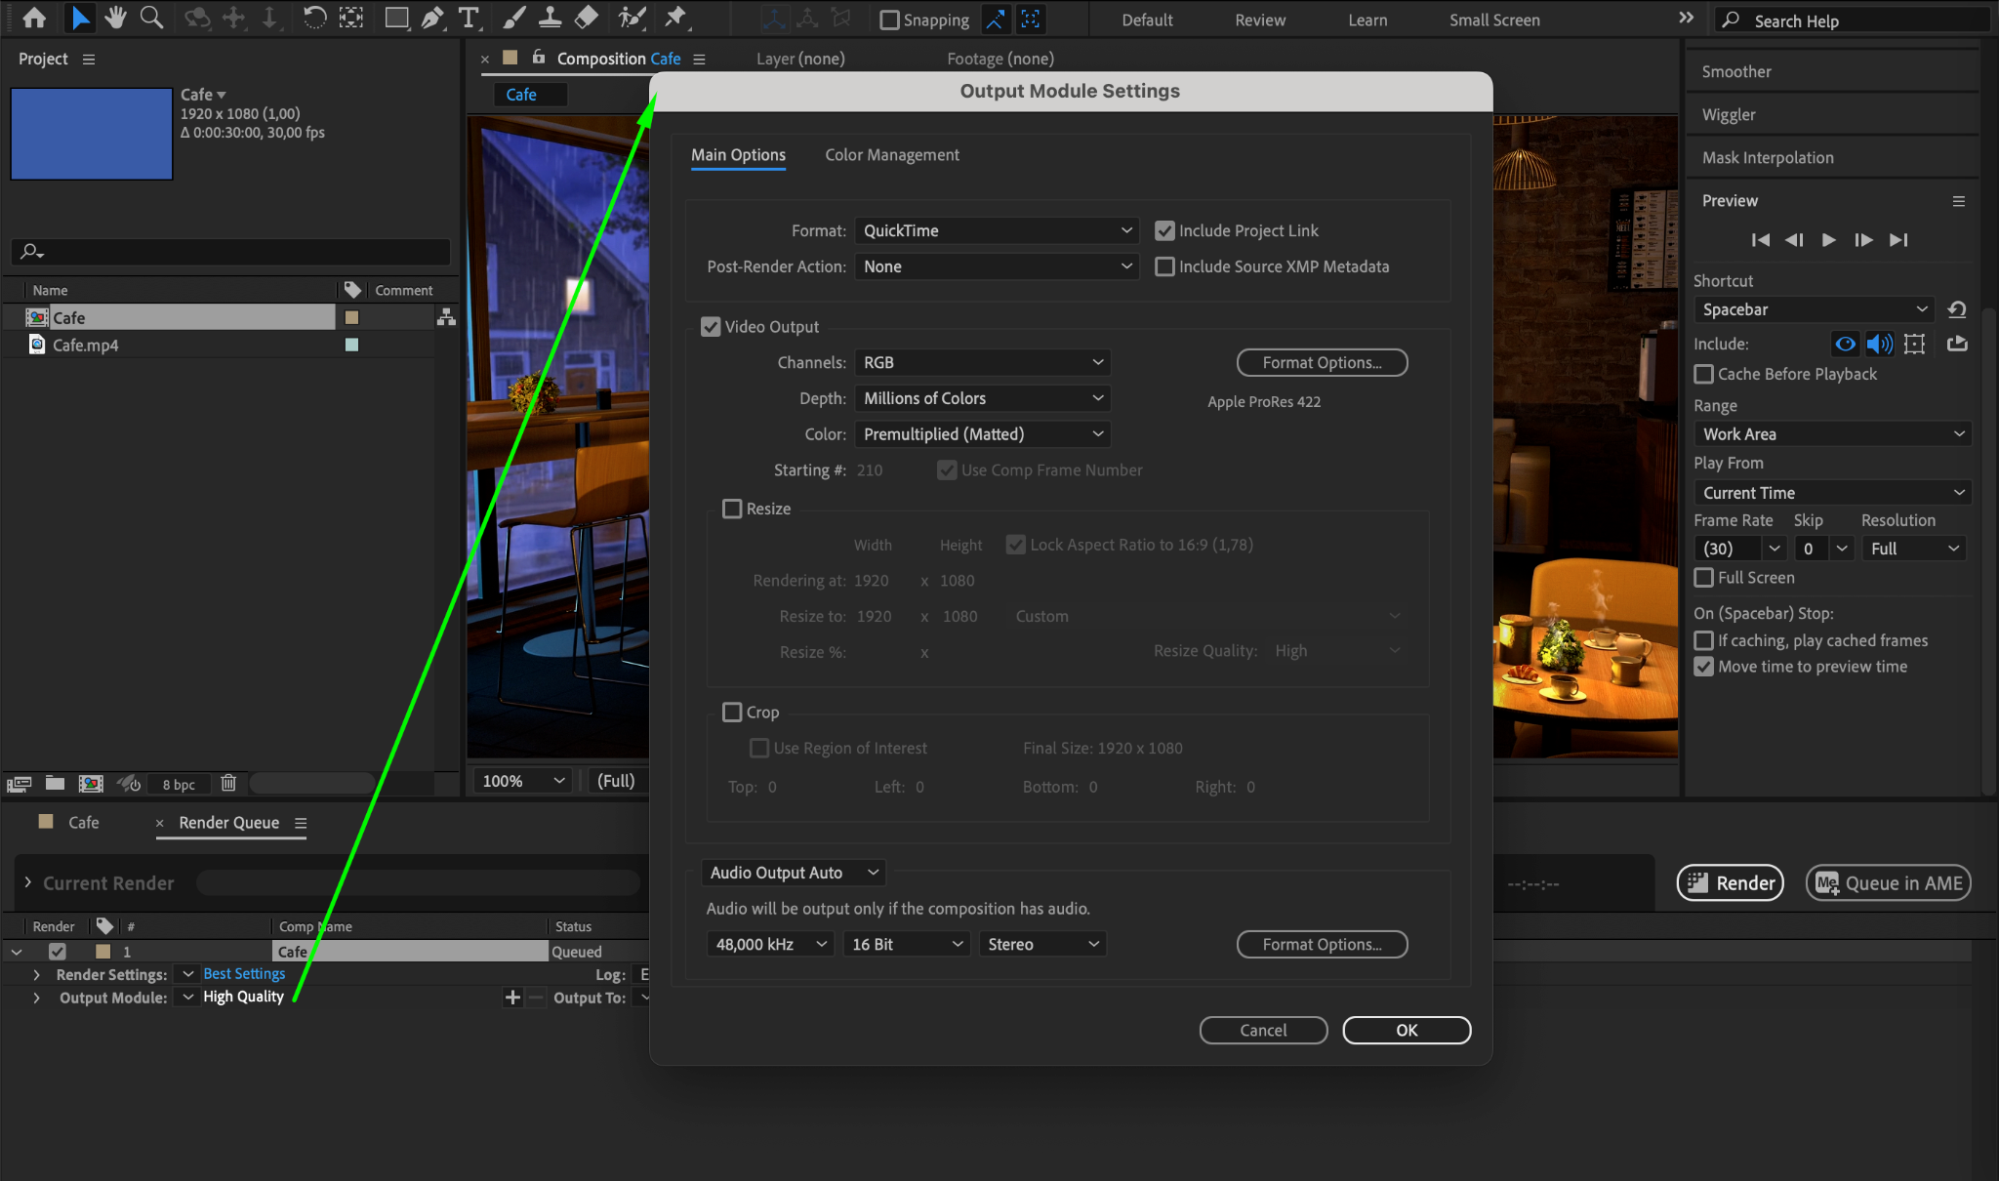 Step 4: Select Output Location:
Choose where to save the rendered file by clicking “Output To” in the Render Queue panel. Select a folder or specify a custom path on a reliable hard drive to avoid data loss or corruption. Step 5: Start Rendering:
Once all settings are configured, click “Render” in the Render Queue panel to start rendering. Monitor progress in the Status column. Depending on project complexity and settings, rendering may take time. Let the process run uninterrupted for best results.
Get 10% off when you subscribe to our newsletter
Conclusion
Efficiently rendering your work area in After Effects is crucial for high-quality videos. Follow the steps outlined to optimize your workflow, save time, and achieve great results. Set the work area, configure render settings, adjust output modules, select the output location, and start rendering. Mastering rendering will help you create stunning videos that captivate your audience.
Our Bestsellers


