Exporting After Effects Project to MP4
Introduction
Saving your After Effects project as an MP4 file is really quite simple. Let me walk you through the process step by step:
Step 1: Make sure your composition is ready
Before you export your After Effects project as an MP4, make sure that your composition is all set. Check that all your layers, effects, and animations are in place and adjusted to your liking. Take a moment to preview your composition and make any final tweaks before moving on to the export process.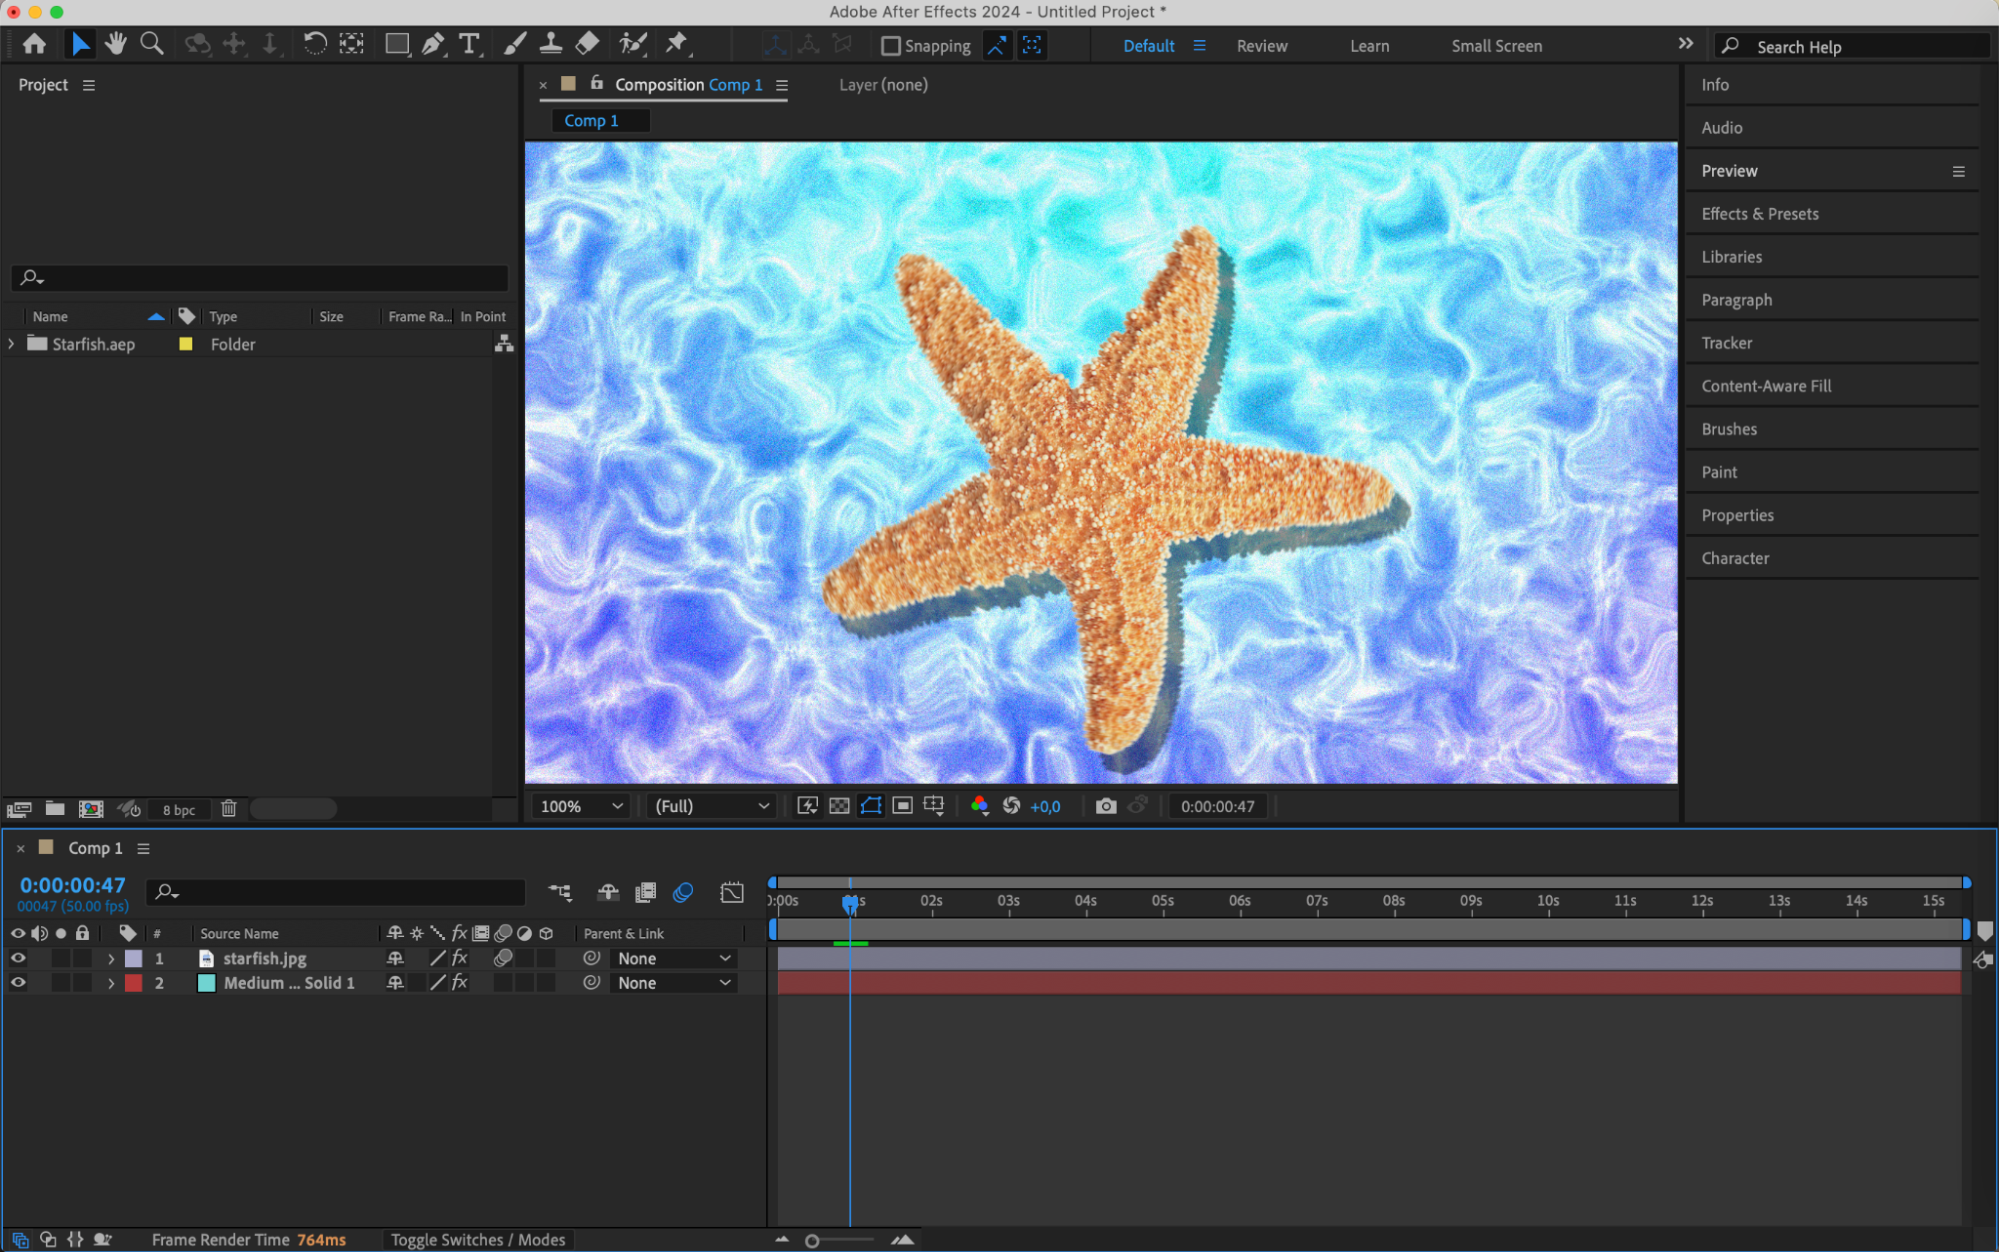 Step 2: Access the Output Module settings
To save your After Effects project as an MP4, you’ll need to access the Output Module settings. To do this, go to the Composition menu and select Add to Render Queue. This will open up the Render Queue panel, where you can customize various rendering settings.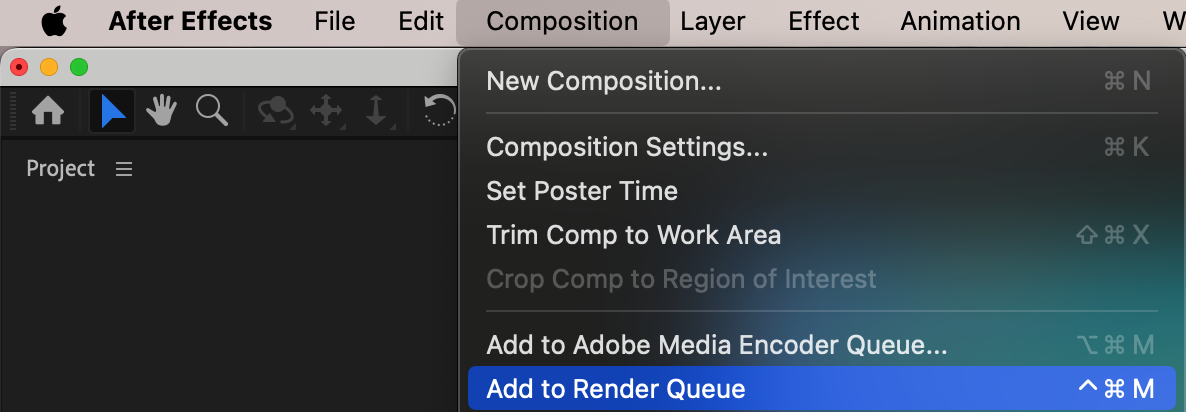 Step 3: Customize the output settings
In the Render Queue panel, you’ll find the Output Module section. Here, you’ll see a list of available output formats. Click on the linked text next to Output Module to access the settings.
Step 4: Choose the MP4 format
Within the Output Module settings, you’ll find a wide range of formats to choose from. Scroll through the list and select “H.264” as the format. This format offers good compression while maintaining high-quality video output. Plus, it’s widely supported on different devices and platforms.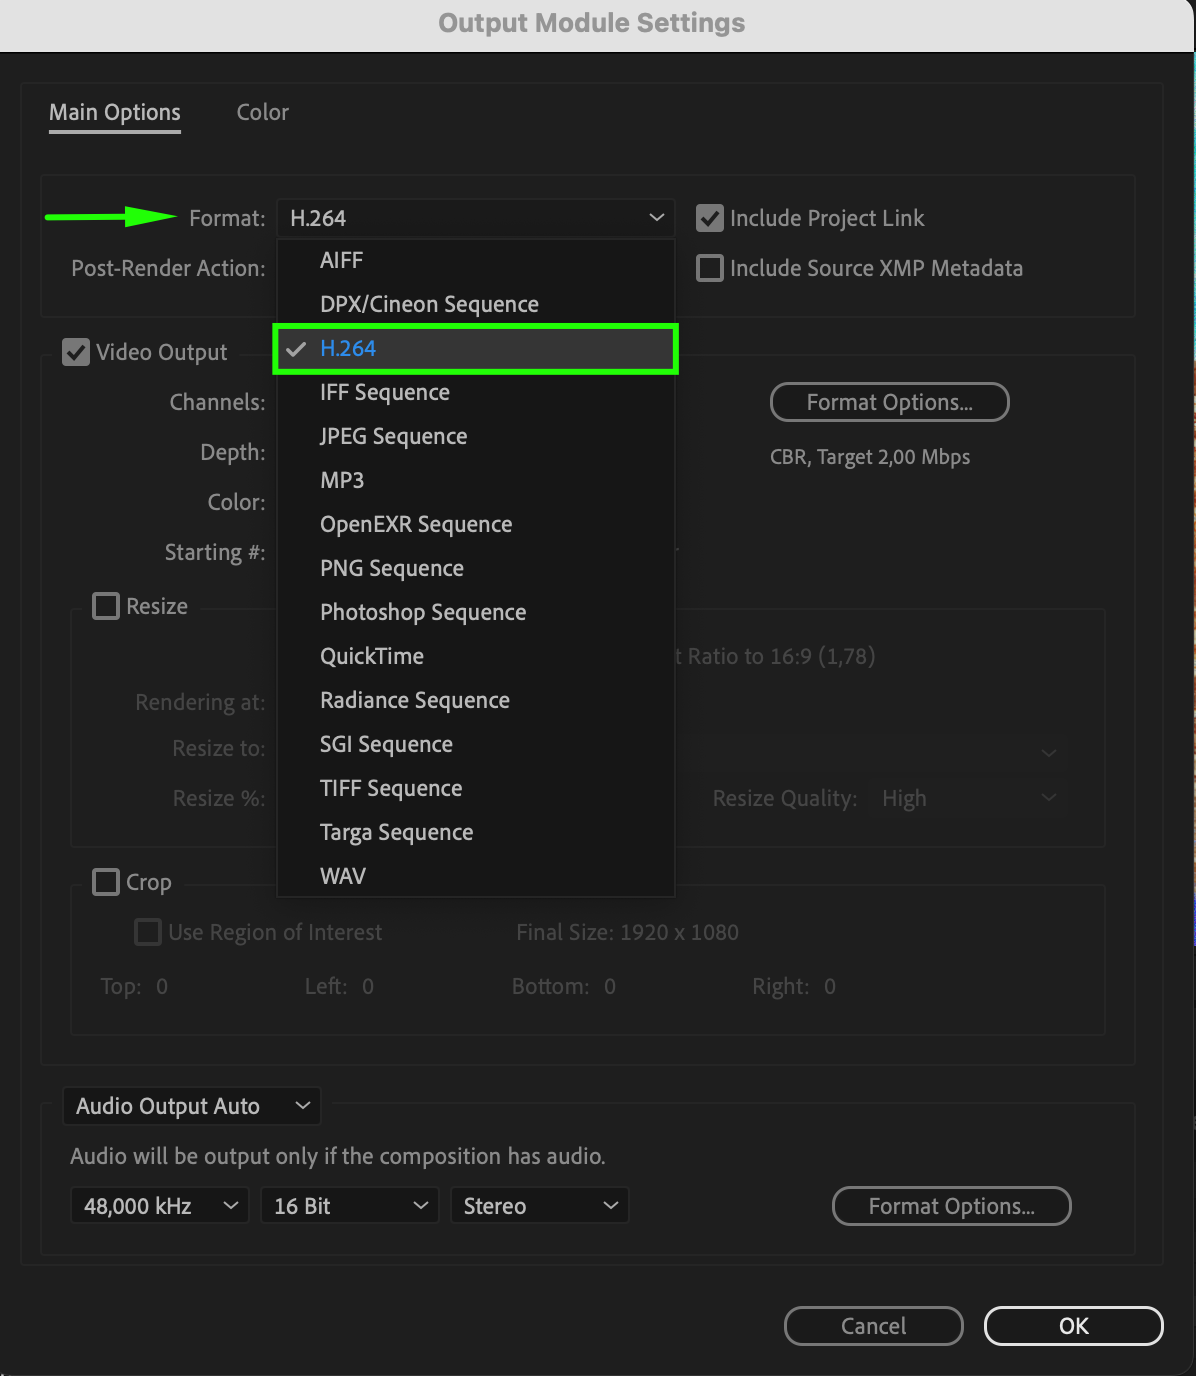 Step 5: Fine-tune the settings
Get 10% off when you subscribe to our newsletter

Once you’ve selected the MP4 format, you can further customize the output settings. Click on the Format Options button to access additional settings such as video codec, bitrate, frame rate, and resolution. Adjust these settings according to your preferences and requirements. Keep in mind that higher quality settings will result in larger file sizes, so find a balance that suits your needs.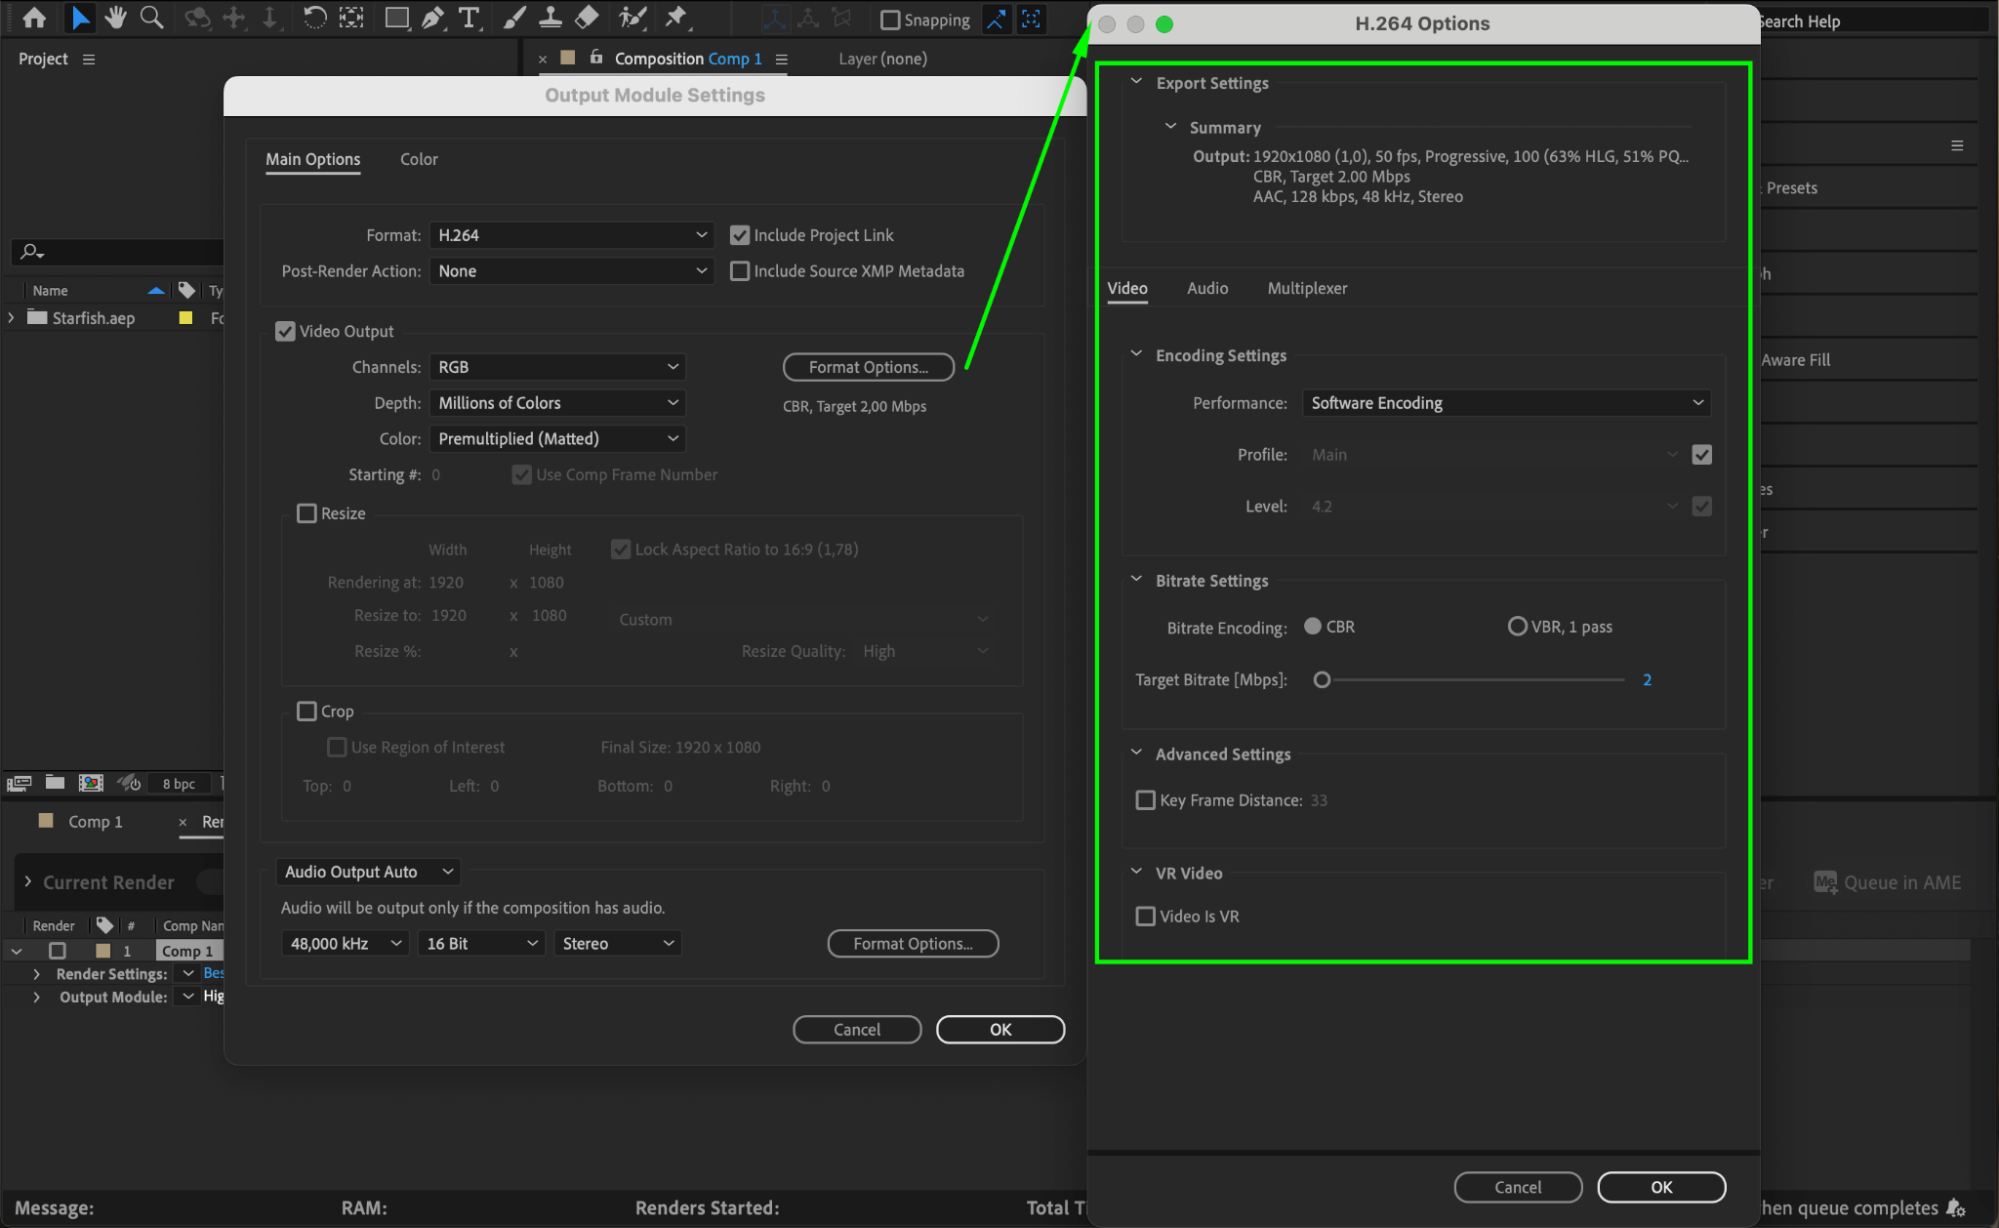 Step 6: Choose the output destination
By default, After Effects will save your rendered file in the same location as your project. However, you can choose a different output destination by clicking on the Output To text. Select a folder and give your file a name. It’s important to choose a location that is easily accessible and preferably on a fast or external drive.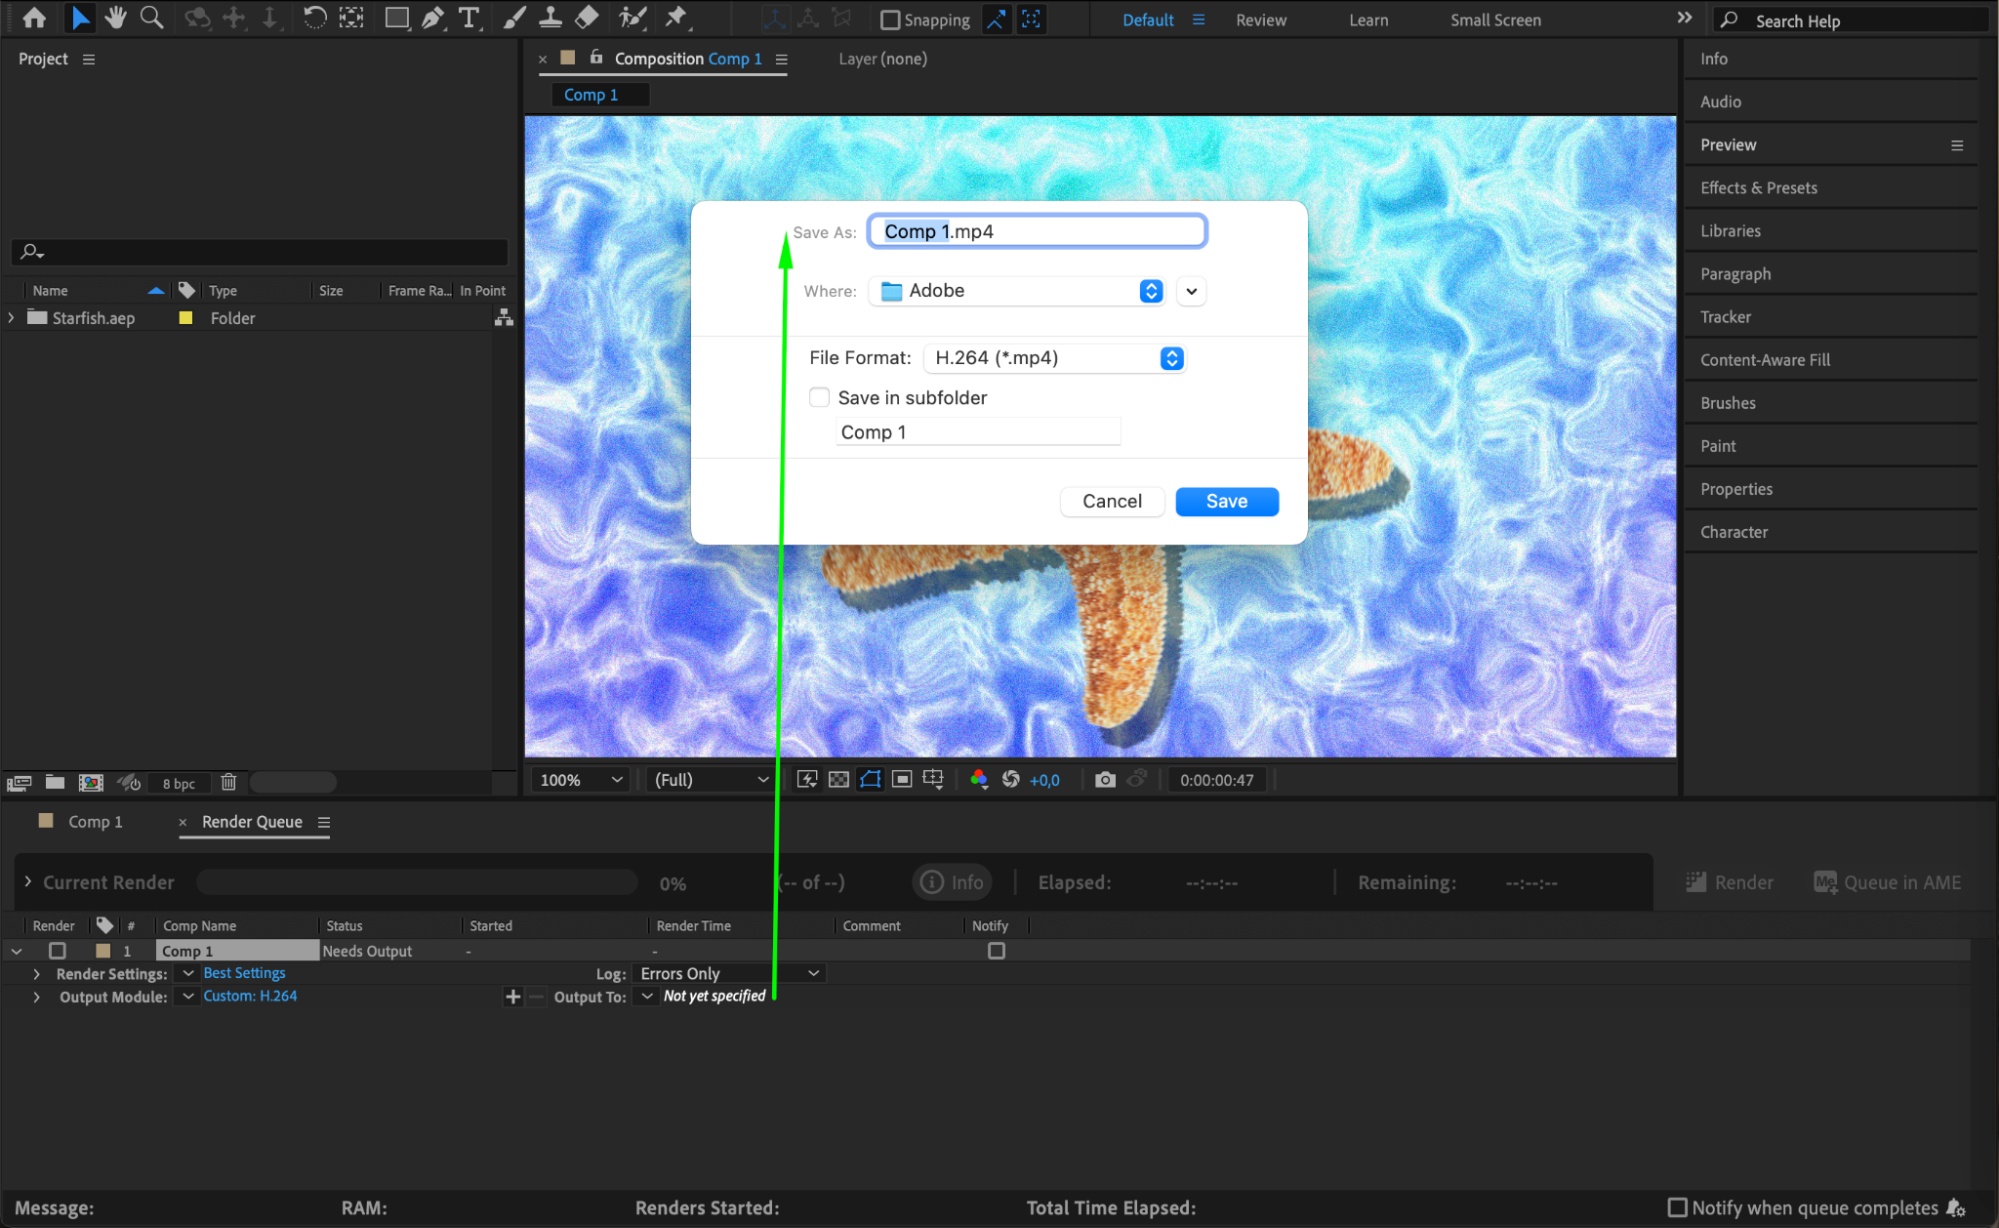 Step 7: Start the rendering process
Once you’ve completed all the previous steps, you’re ready to render your After Effects project as an MP4. Double-check that all your settings are correct, and then click on the Render button in the Render Queue panel. After Effects will start processing your composition and saving it as an MP4 file. Step 8: Keep an eye on the progress
While After Effects renders your composition, you can monitor the progress in the Render Queue panel. You’ll see a status bar and an estimated remaining time. Depending on the complexity of your project and the settings you’ve chosen, this process can take some time.
Step 9: Verify the final export
Once the rendering process is complete, you can find your exported MP4 file in the output destination you specified earlier. Double-check the file to make sure everything looks as intended and that there are no issues or errors.
Conclusion
In conclusion, saving your After Effects project as an MP4 file is a straightforward process. By following these steps, you can customize your output settings and export your projects in the popular and widely supported MP4 format. Just remember to consider the size and quality requirements for your intended use, and don’t forget to double-check the final exported file. With these tips in mind, you’ll be able to save and share your After Effects projects as MP4 files with ease.


