Mastering Object Spinning in After Effects
Introduction
Welcome to this step-by-step guide on how to spin an object in After Effects! Adding spinning animations to objects can bring dynamic and eye-catching elements to your videos. Whether you’re creating a rotating logo, spinning a product showcase, or adding spinning text effects, After Effects provides the tools you need to achieve stunning results.
Get 10% off when you subscribe to our newsletter

Step 1: Import and Position Your Object
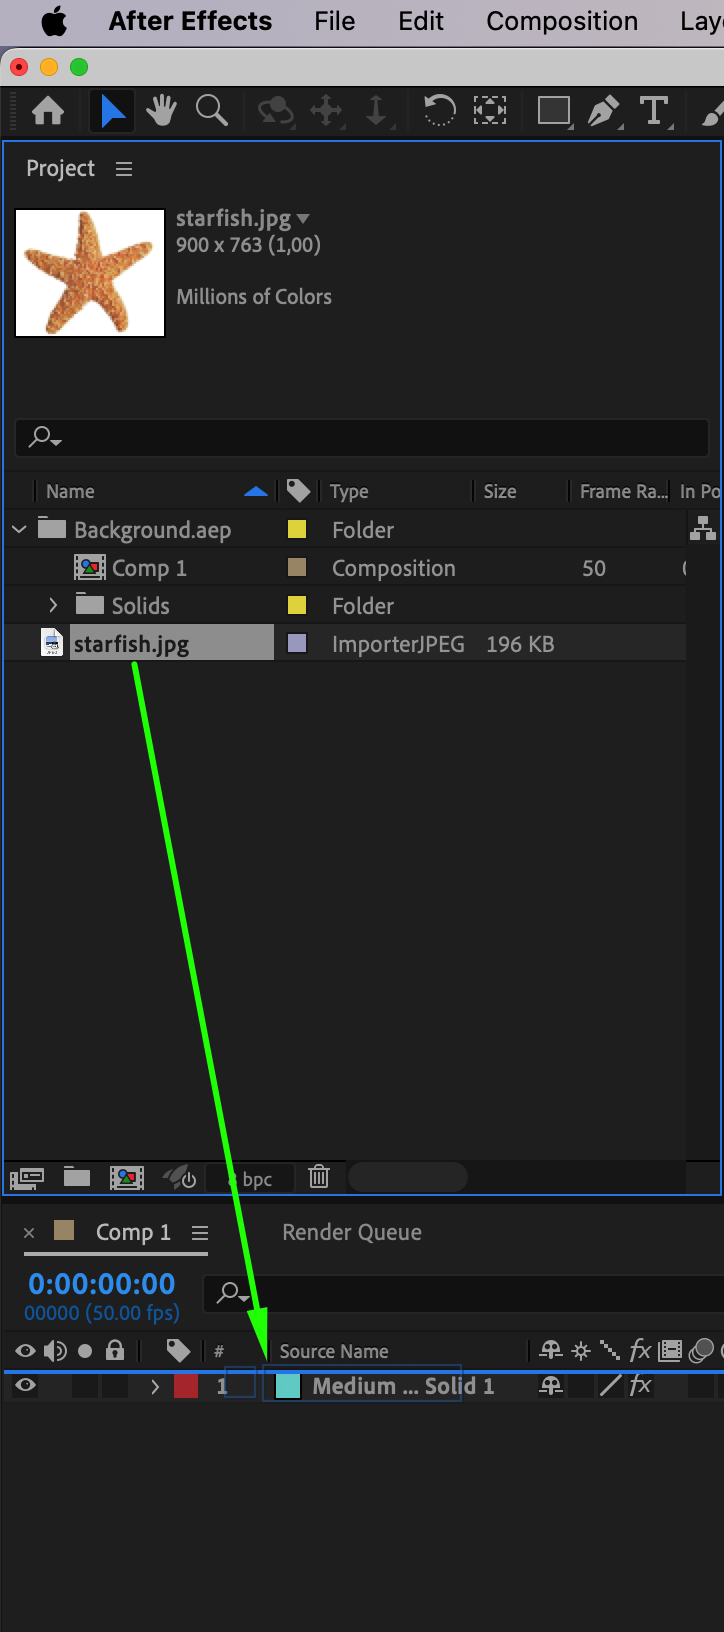
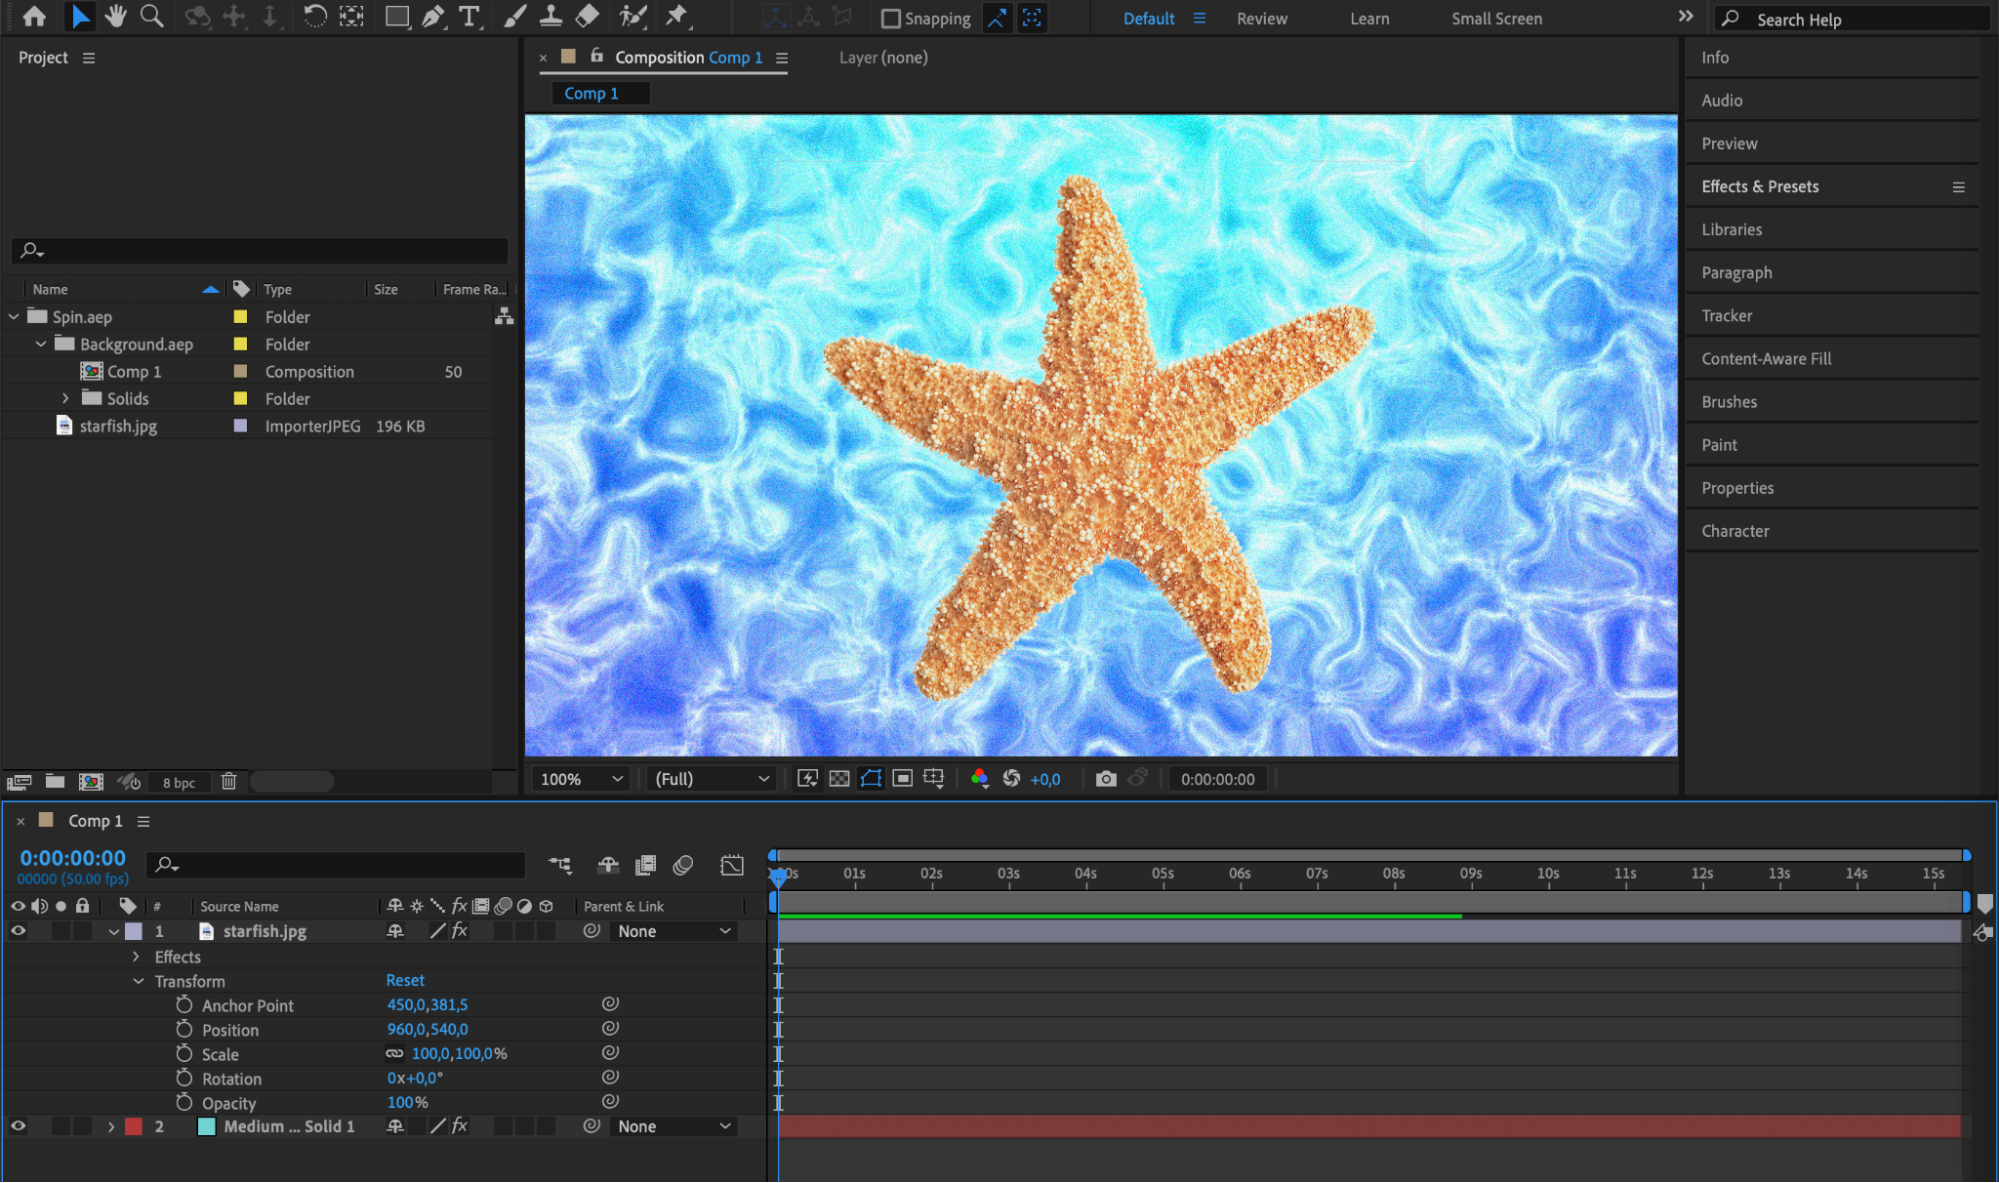
First, import your object into After Effects and position it within your composition. Ensure it’s placed where you want the spinning animation to occur. Expand the layer properties and use the position and scale parameters to adjust the object’s appearance.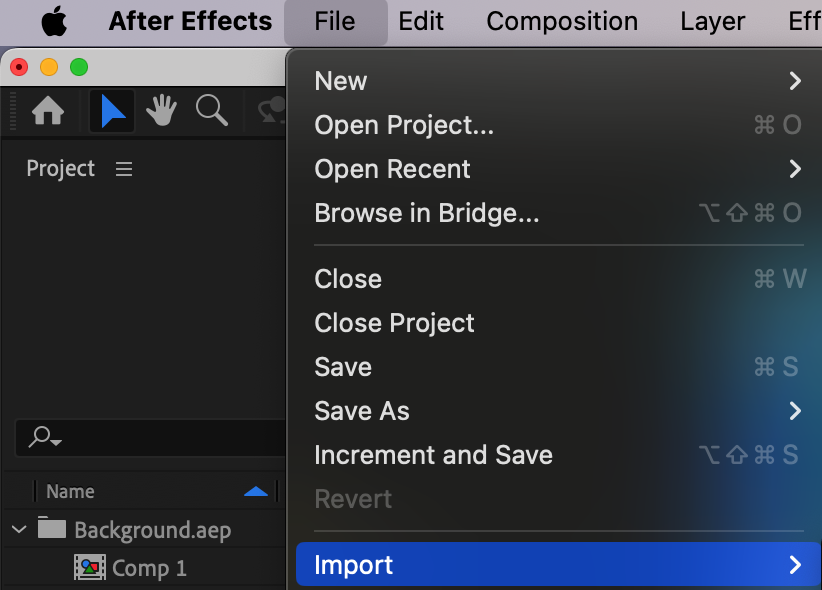
 Step 2: Setting Up Keyframes for Rotation
To start the spinning animation, set your first keyframe for the rotation property of the object. This keyframe will mark the beginning of the rotation. Select the layer, press “R” to reveal the rotation property, and click the stopwatch icon to create the first keyframe.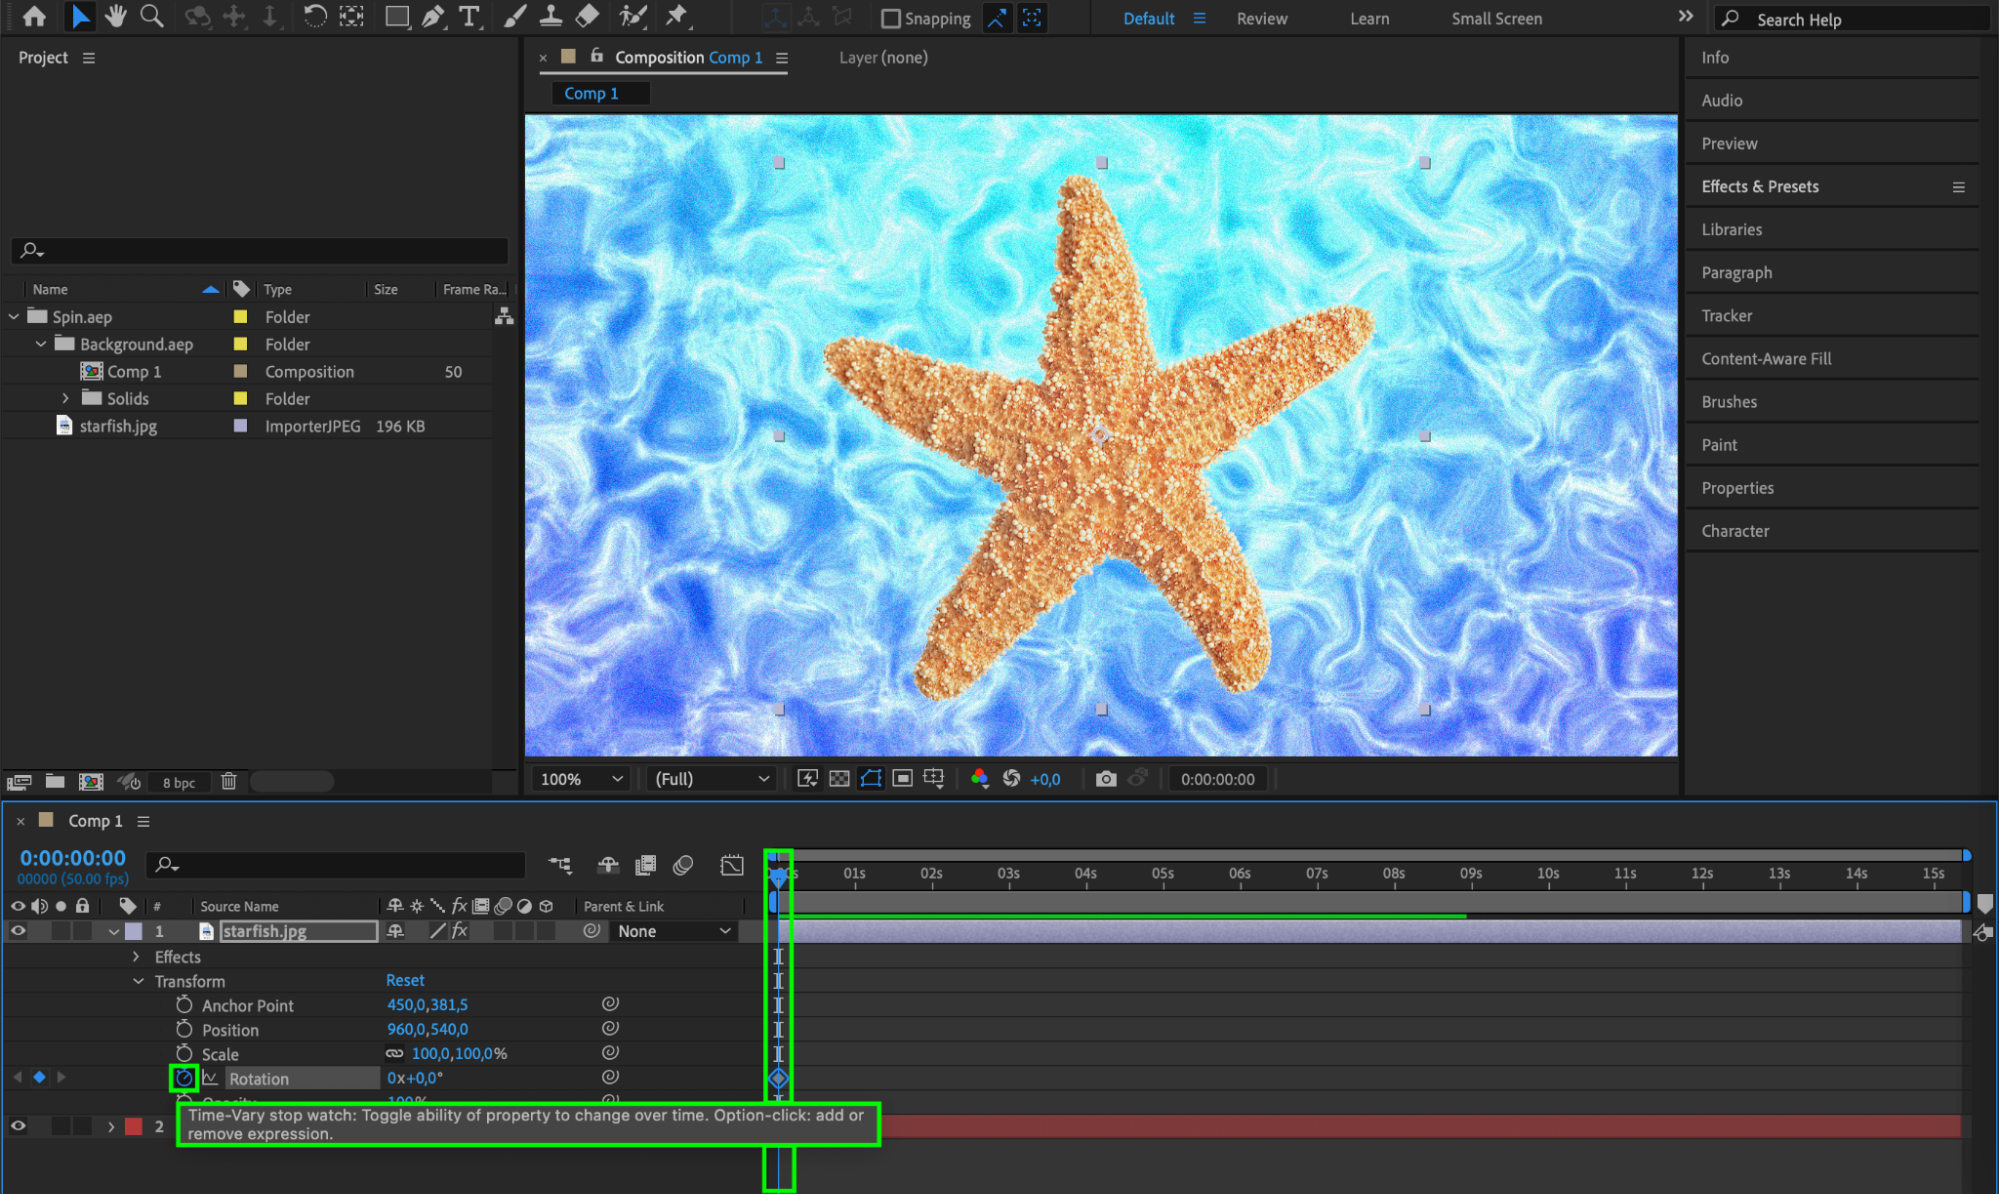 Step 3: Creating the Spin Animation
Increase the rotation value over time by setting another keyframe at a later point in the timeline. Adjust the rotation speed and direction as desired. Move the playhead to a new position on the timeline and change the rotation value to set the second keyframe.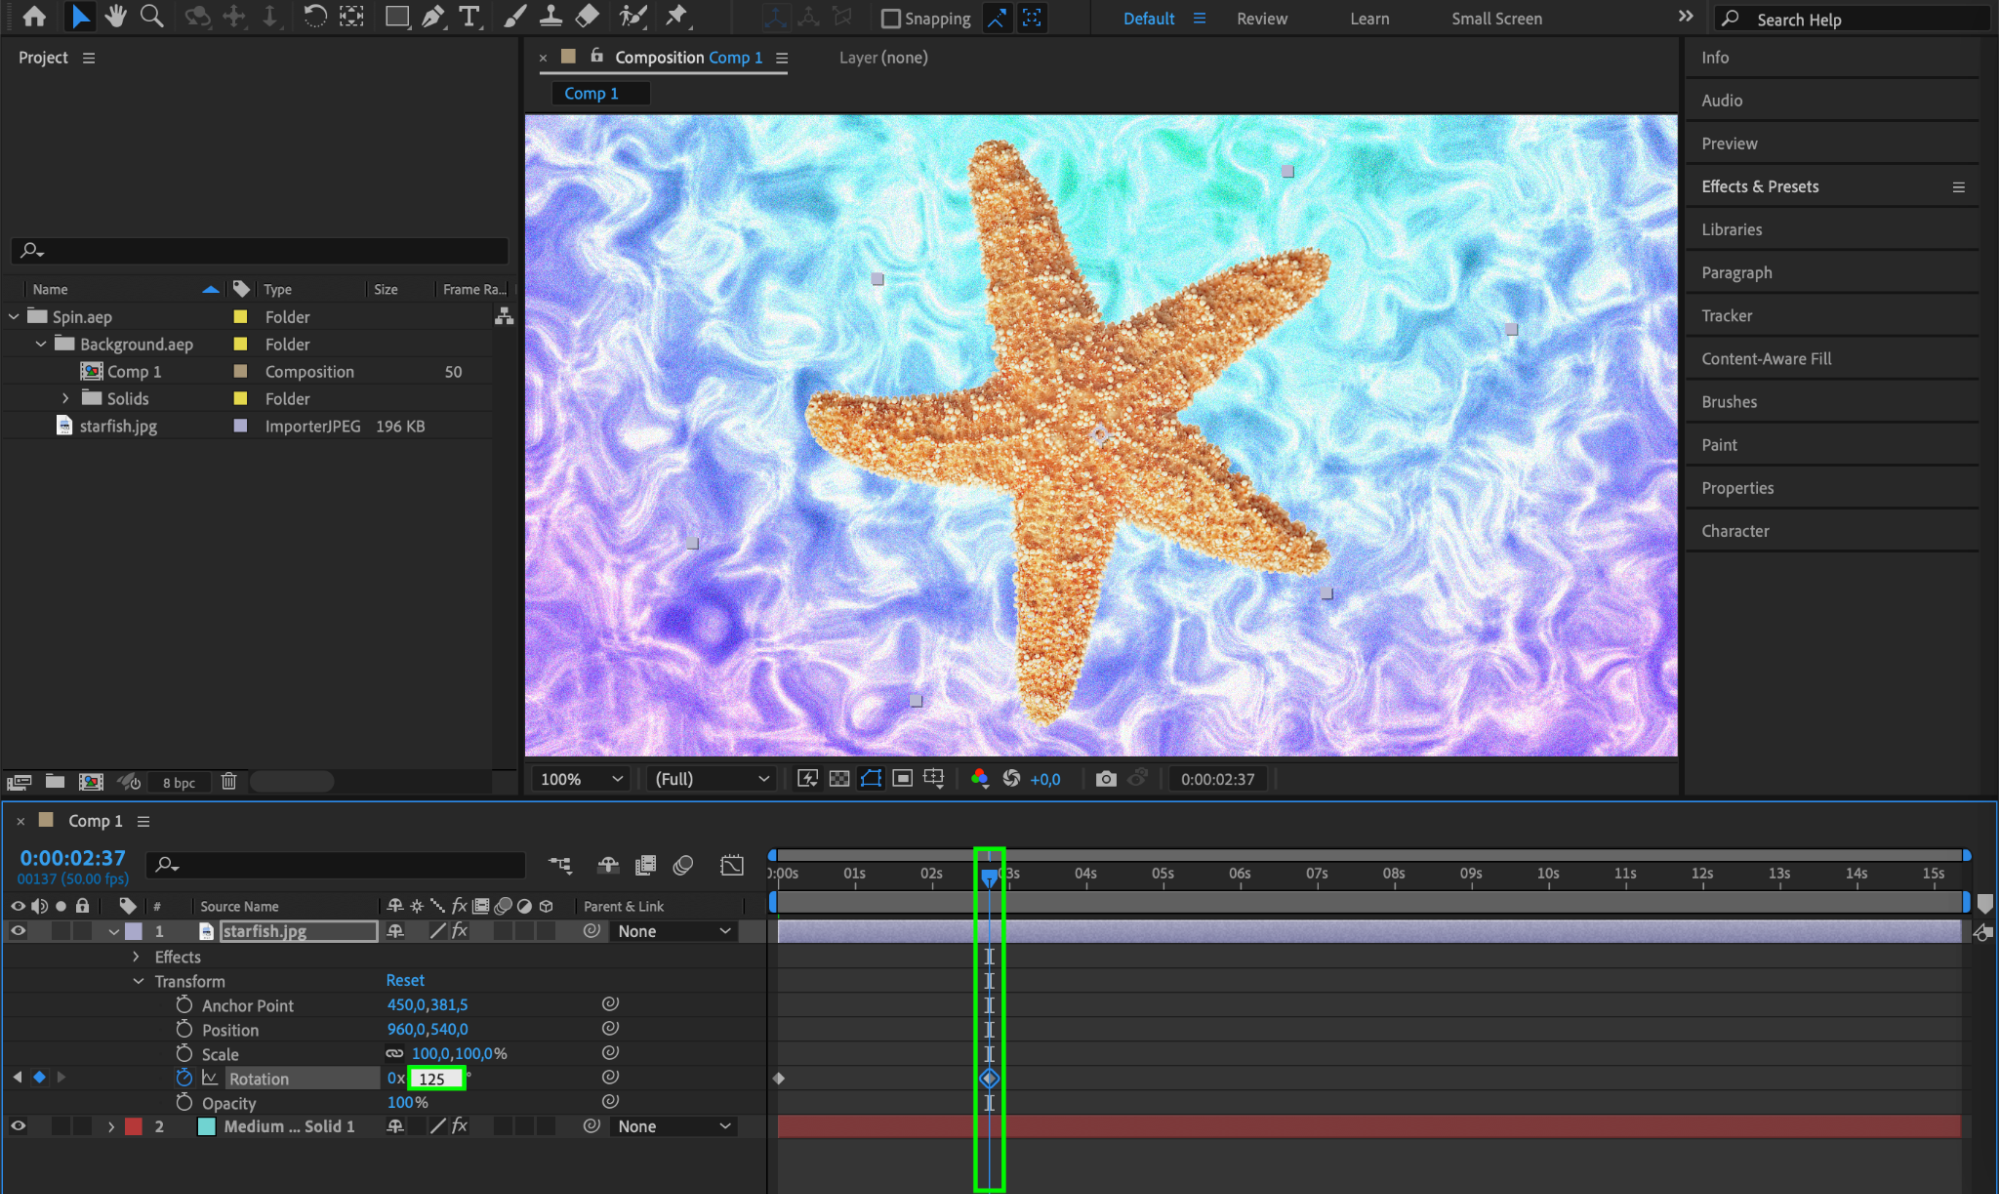 Step 4: Smoothing Transitions with Ease
Get 10% off when you subscribe to our newsletter

Apply easing to your keyframes to create smooth transitions between rotations. This helps to make the animation more natural and visually appealing. Use the Graph Editor and curves to fine-tune the motion.


 Step 5: Enhancing Realism with Motion Blur
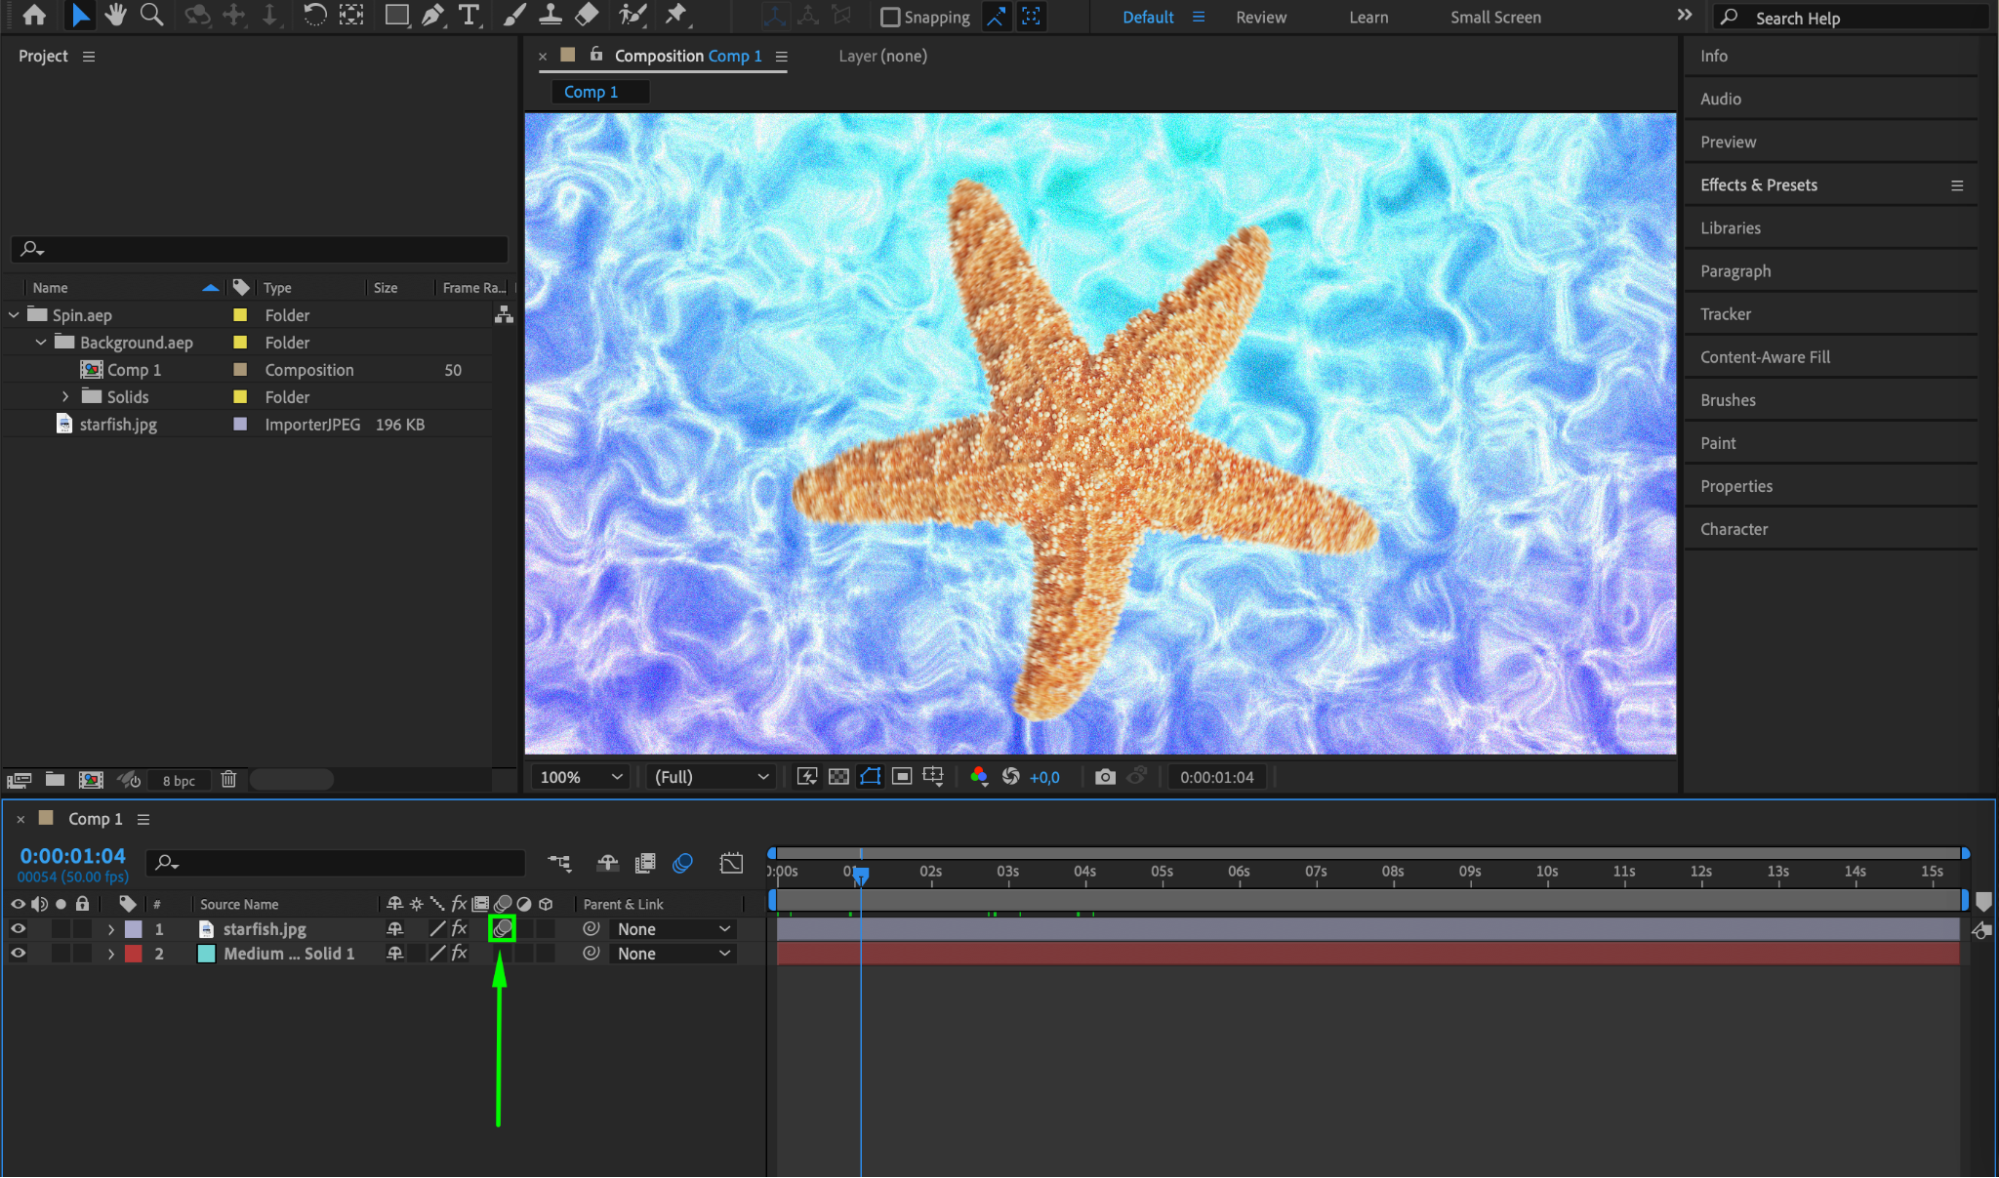
Add motion blur to the object to enhance realism during fast rotations. Enable motion blur in the timeline panel and make the effect available for the specific layer by clicking the motion blur switch for that layer.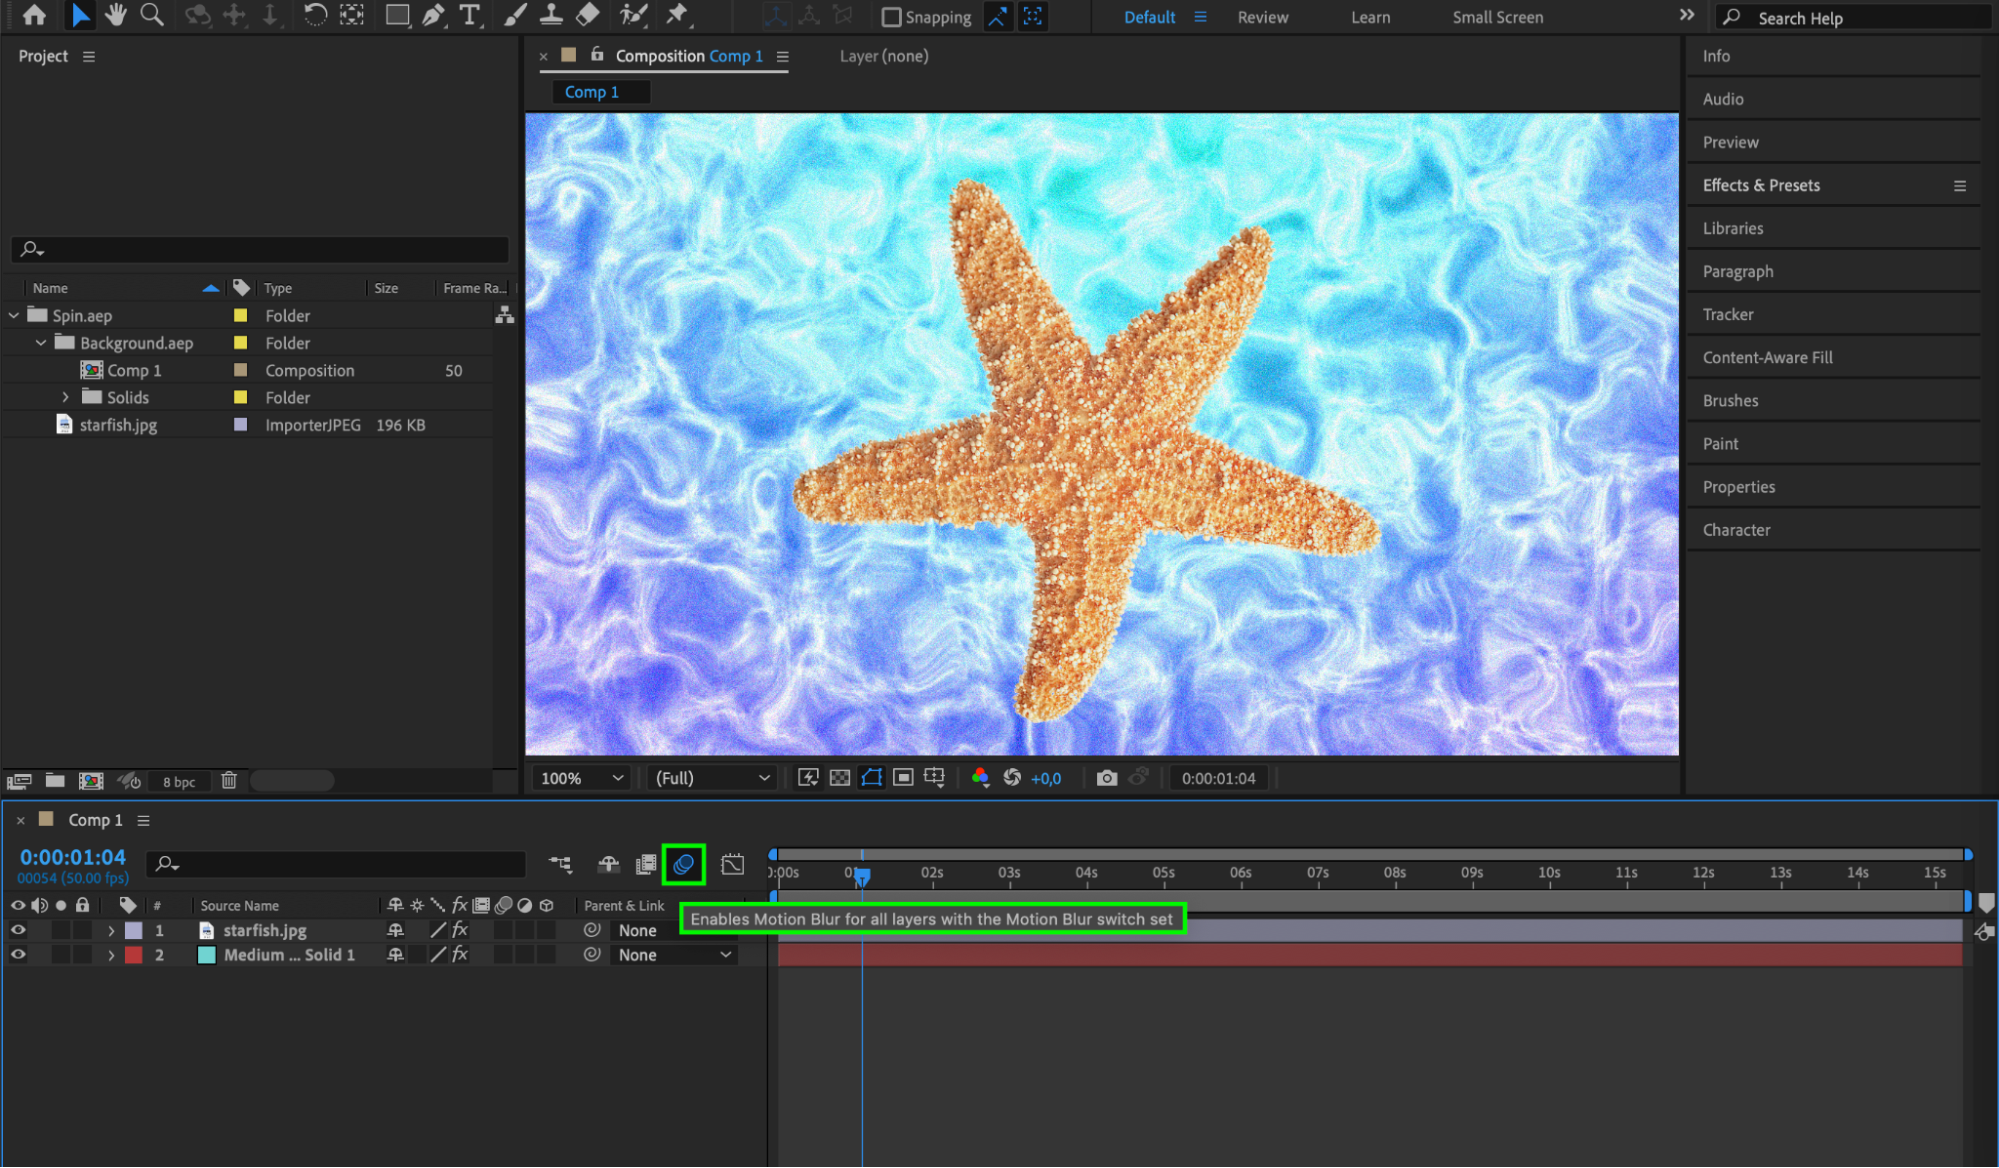
 Step 6: Using Expressions for Advanced Control
Get 10% off when you subscribe to our newsletter

Explore using expressions to automate and control aspects of your spinning animation, such as rotation speed variations or oscillations. You can also experiment with other parameters in the Transform panel to make the animation even more captivating. 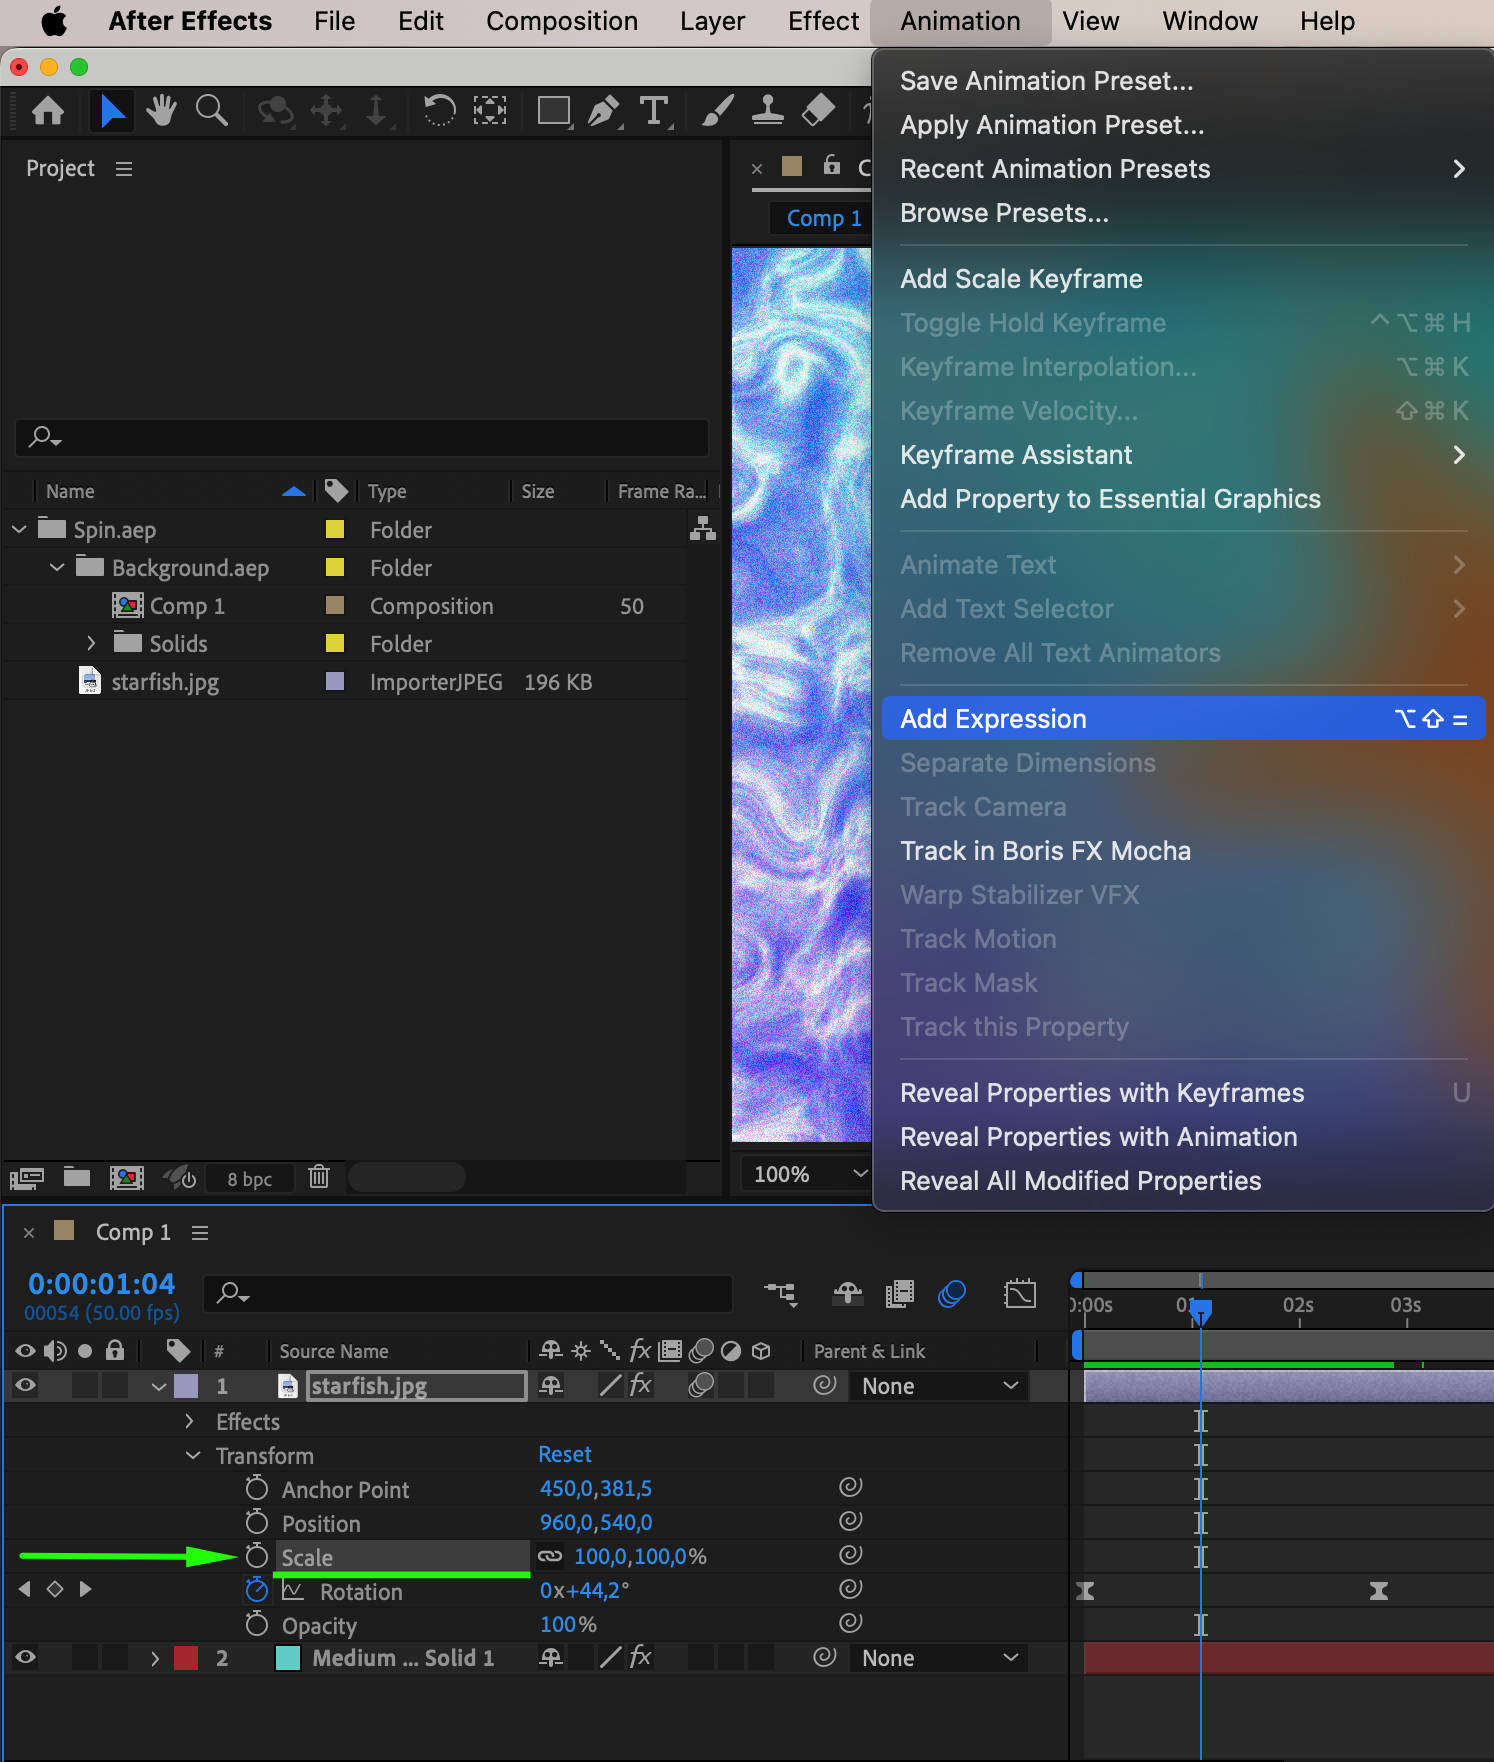
 Step 7: Adding Final Touches
Add any additional effects, such as lighting changes or shadows, to further enhance the visual impact of your spinning object. Adjust the lighting settings or add a shadow layer to create a more realistic and polished look.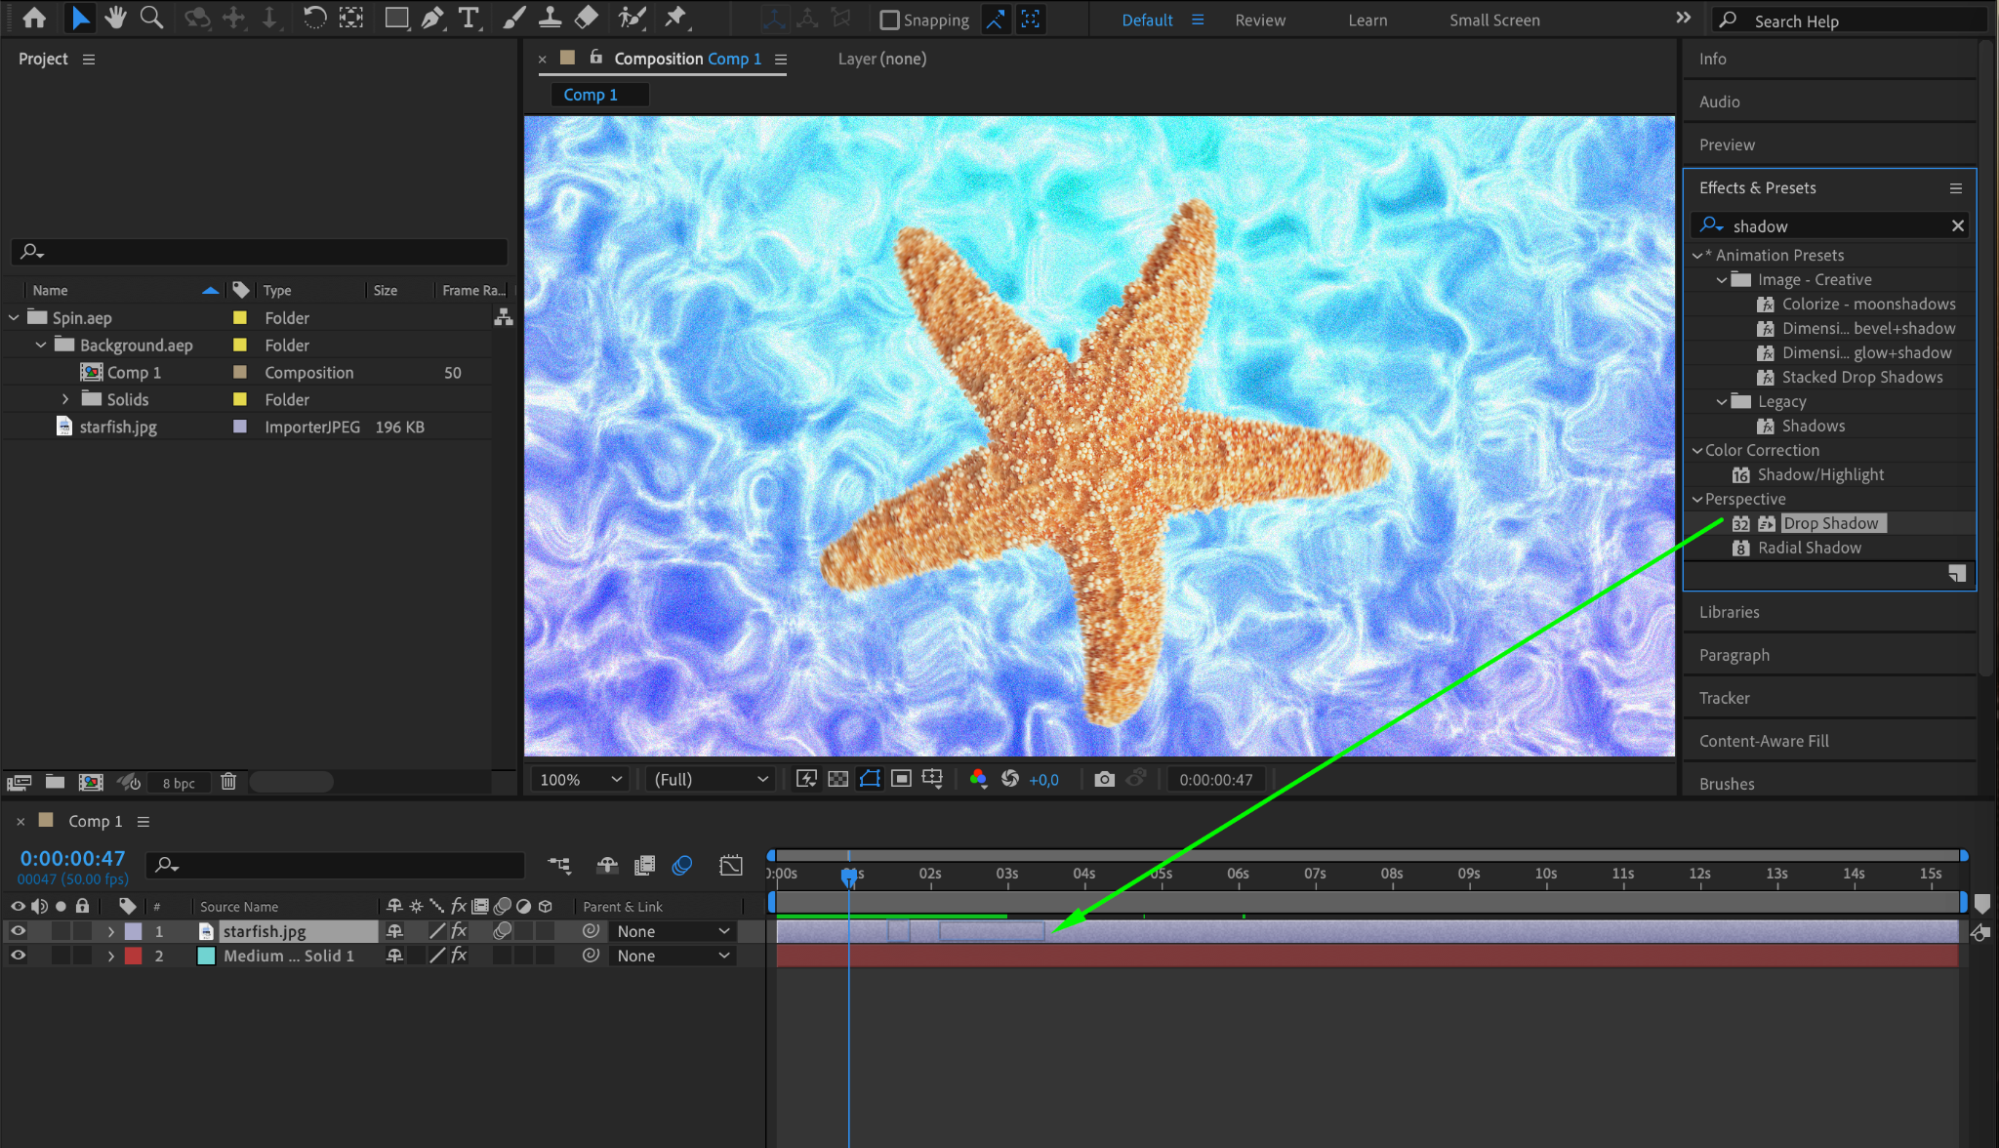
 Step 8: Refining Your Animation
Get 10% off when you subscribe to our newsletter

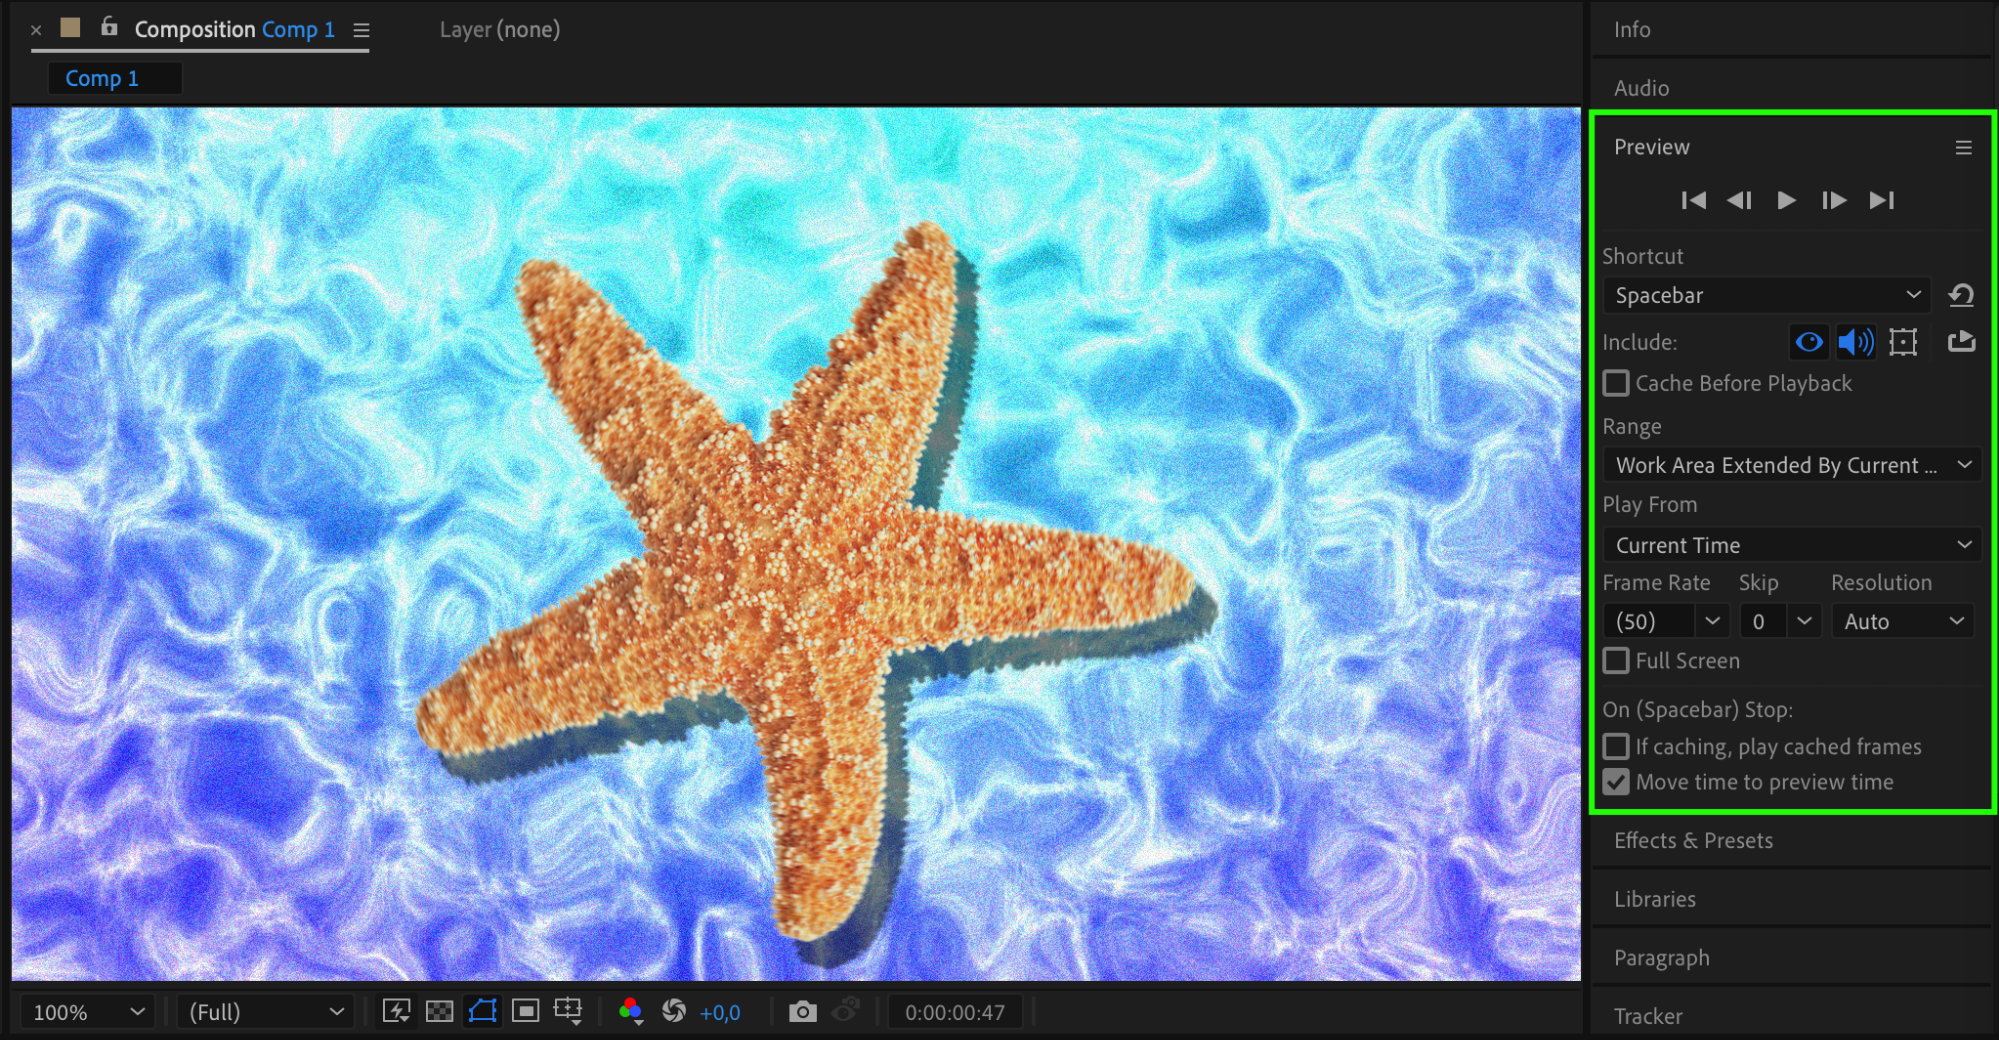
Fine-tune the timing, speed, and overall look of your spinning animation. Preview your work frequently to make adjustments as needed.
Conclusion
Congratulations! You’ve learned how to create impressive spinning animations in After Effects. By following these steps, you can now apply spinning effects to any object in your compositions. Experiment with different settings and techniques to customize your animations and make them stand out.


