How to Animate and Adjust Masks in After Effects
Introduction
Masks are essential tools in Adobe After Effects that let you control which parts of a layer are visible. You can use masks to create custom transitions, highlight areas, or shape visual effects. In this tutorial, you’ll learn how to transform a mask by adjusting its shape, position, and animation using simple tools and keyframes.
Step 1: Open Your Project
Launch After Effects and open the project where you want to work with masks. Import your media files if needed and drag them onto the timeline. Select the layer you want to mask.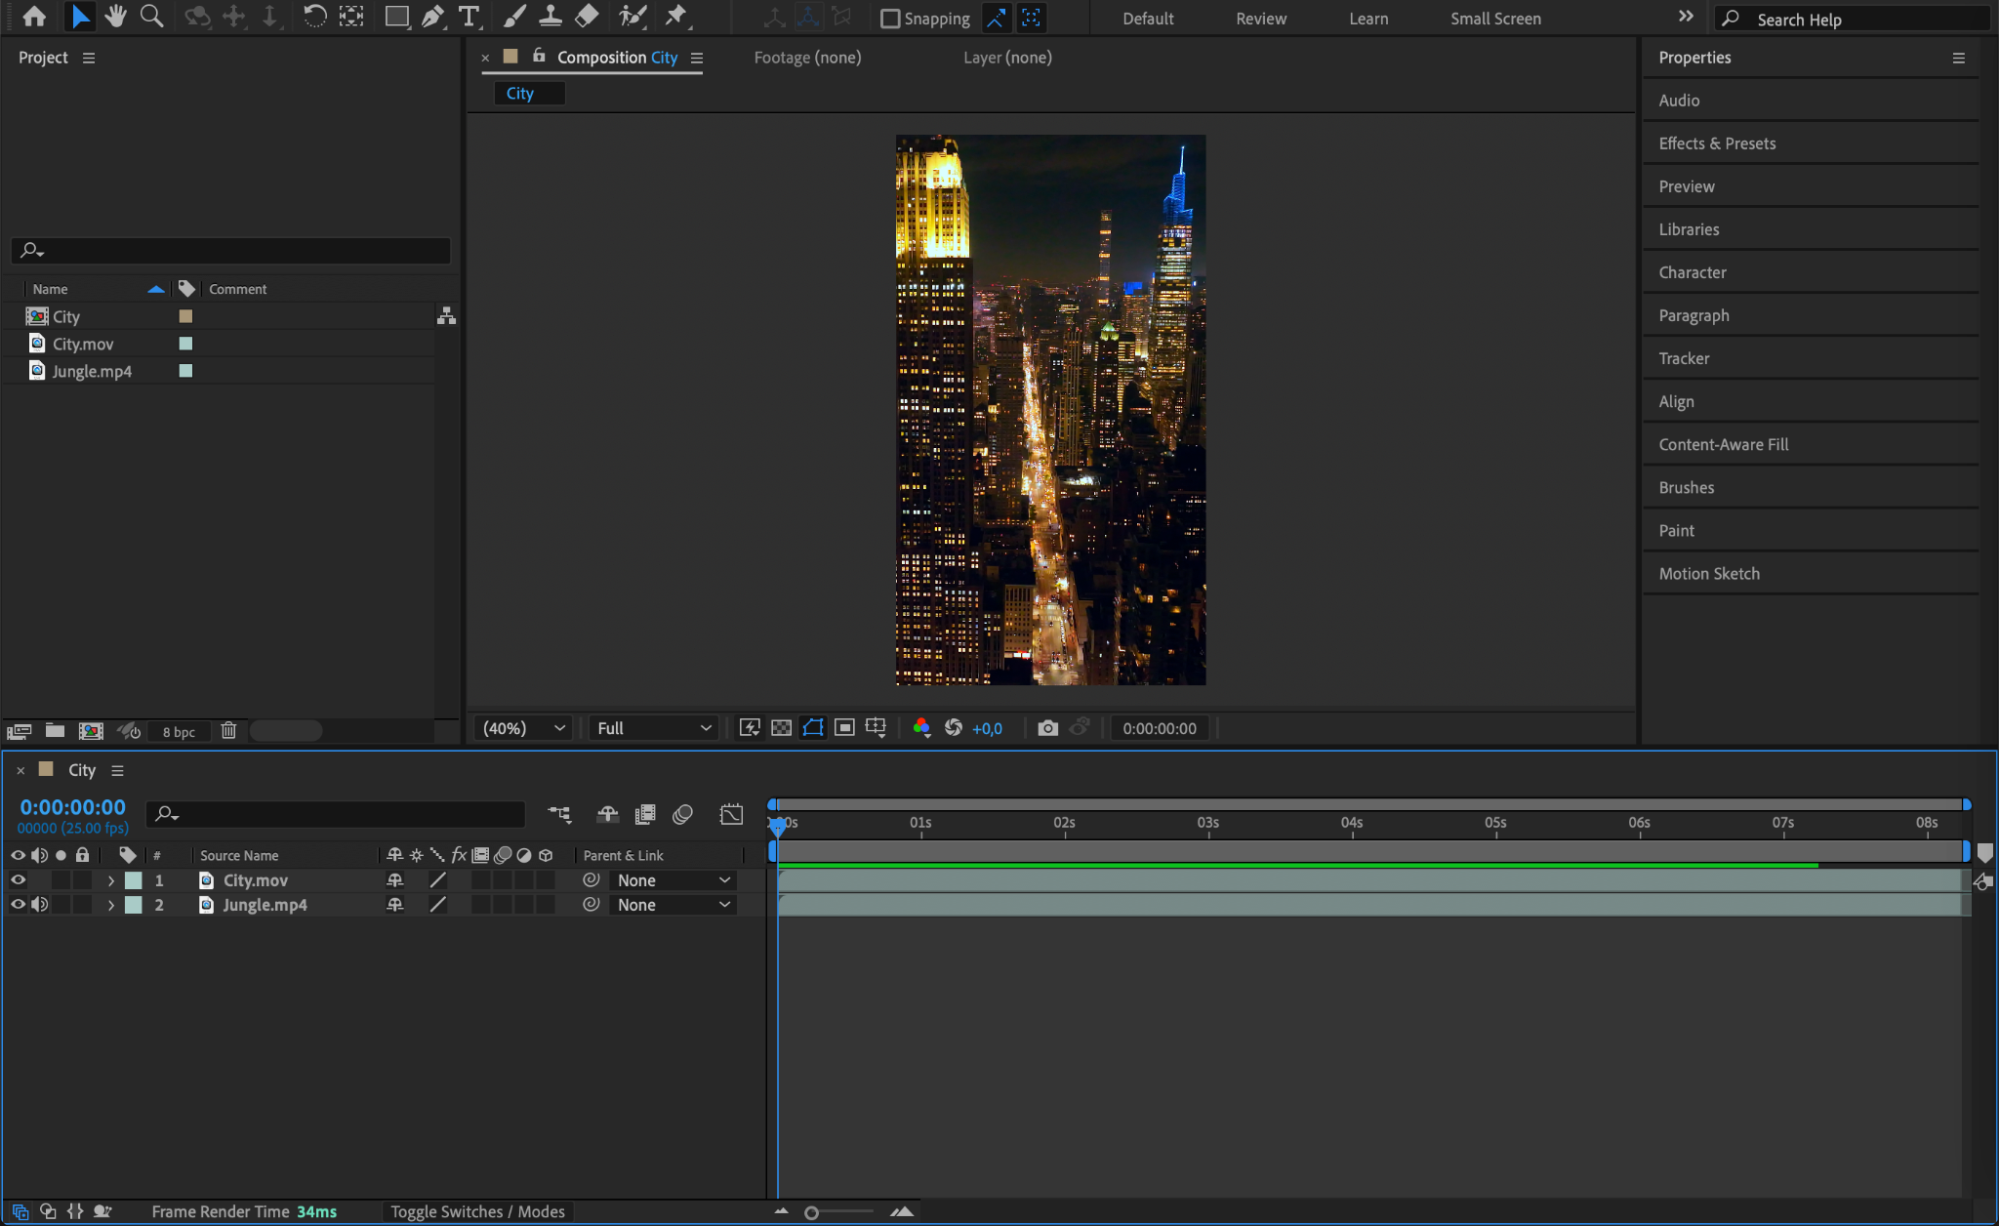 Step 2: Add a Mask to a Layer
Click on the layer to activate it. Then choose the Rectangle Tool (Q), Ellipse Tool (Q), or Pen Tool (G) from the top toolbar. Draw a mask directly over the layer. In the Timeline panel, the mask will appear under the layer’s properties. Set the mask mode to Add (to reveal content) or Subtract (to hide content).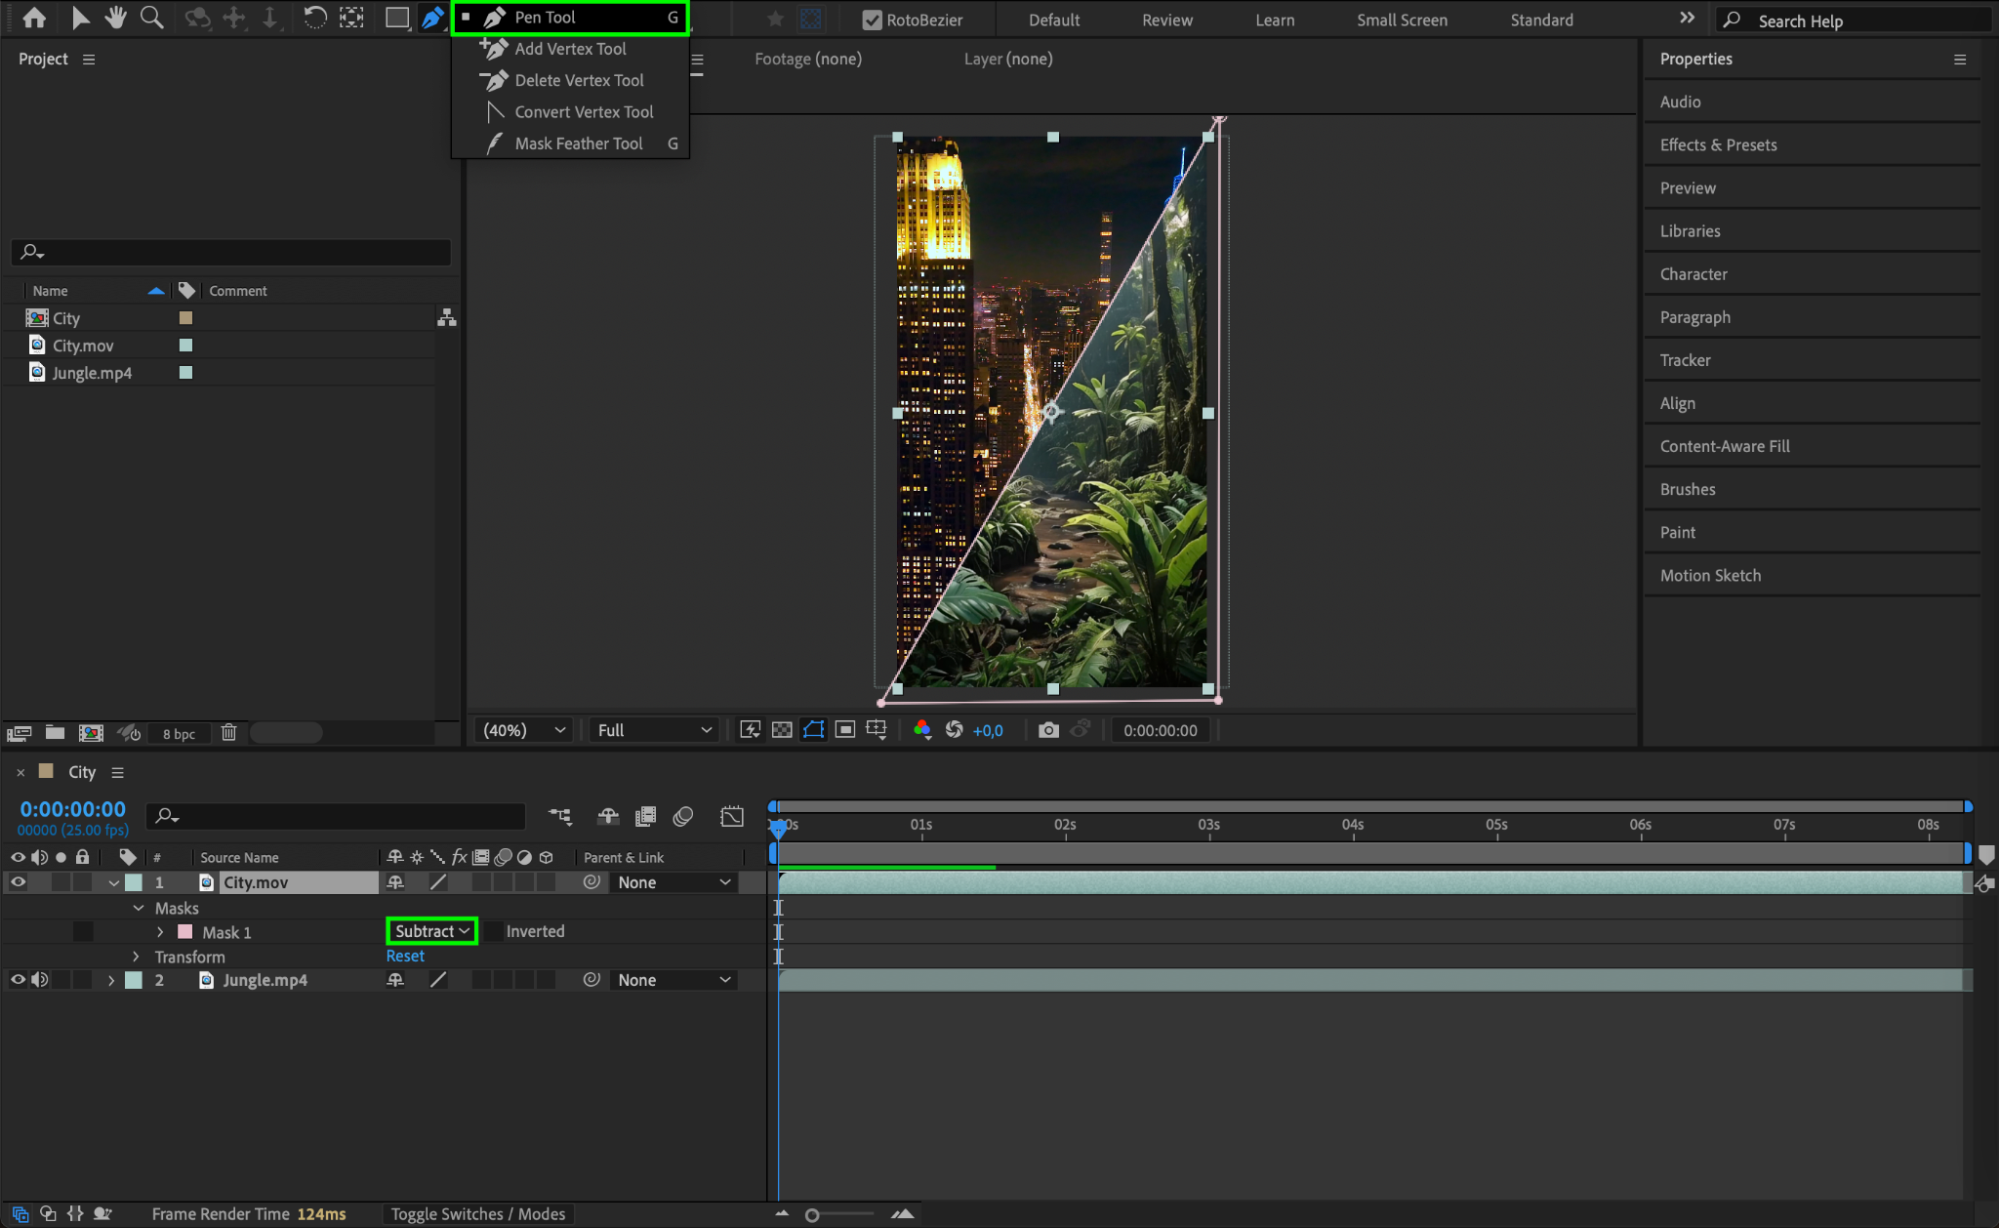
Get 10% off when you subscribe to our newsletter

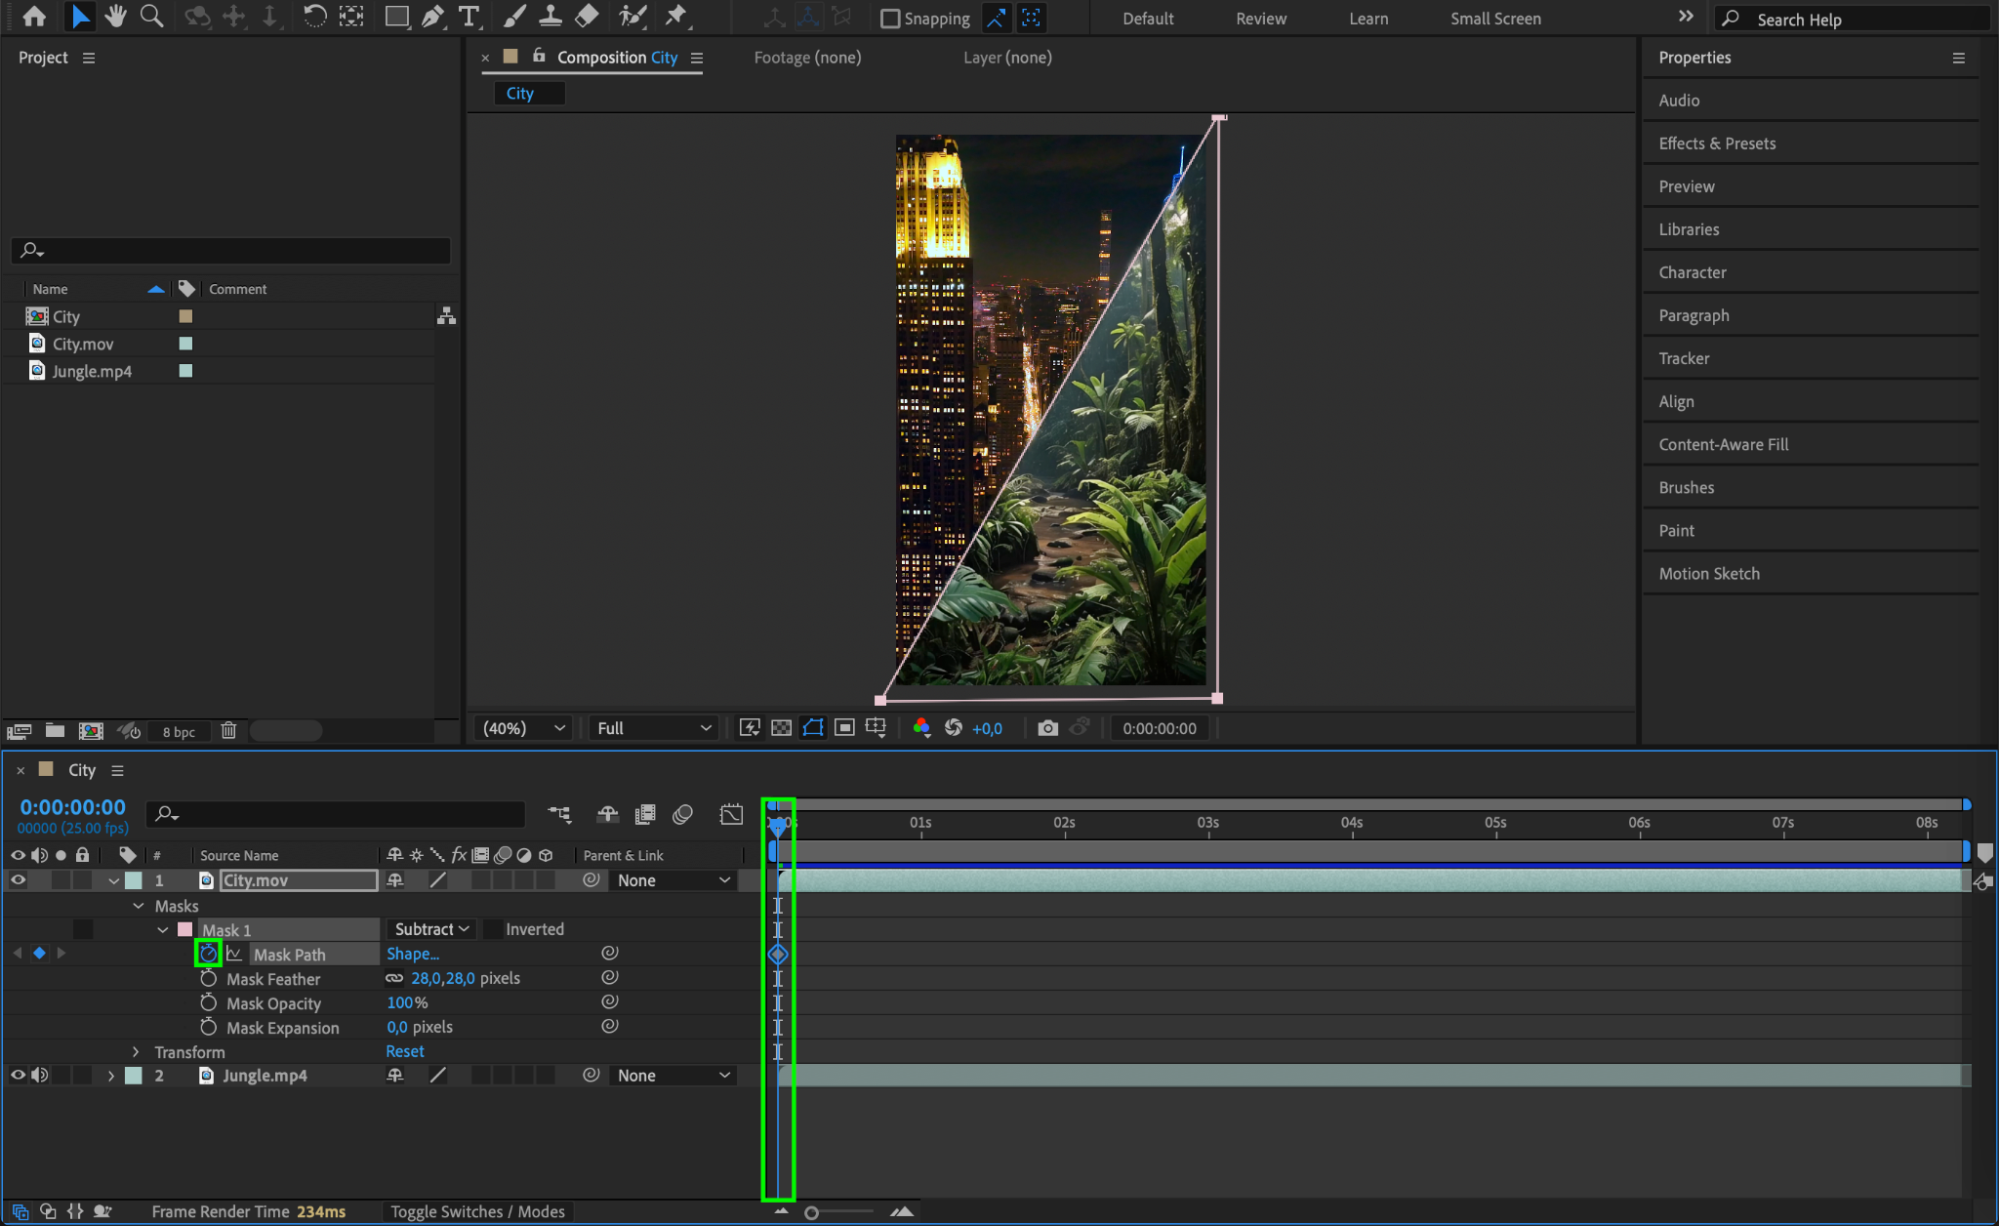
Step 3: Access Mask Path Propertie
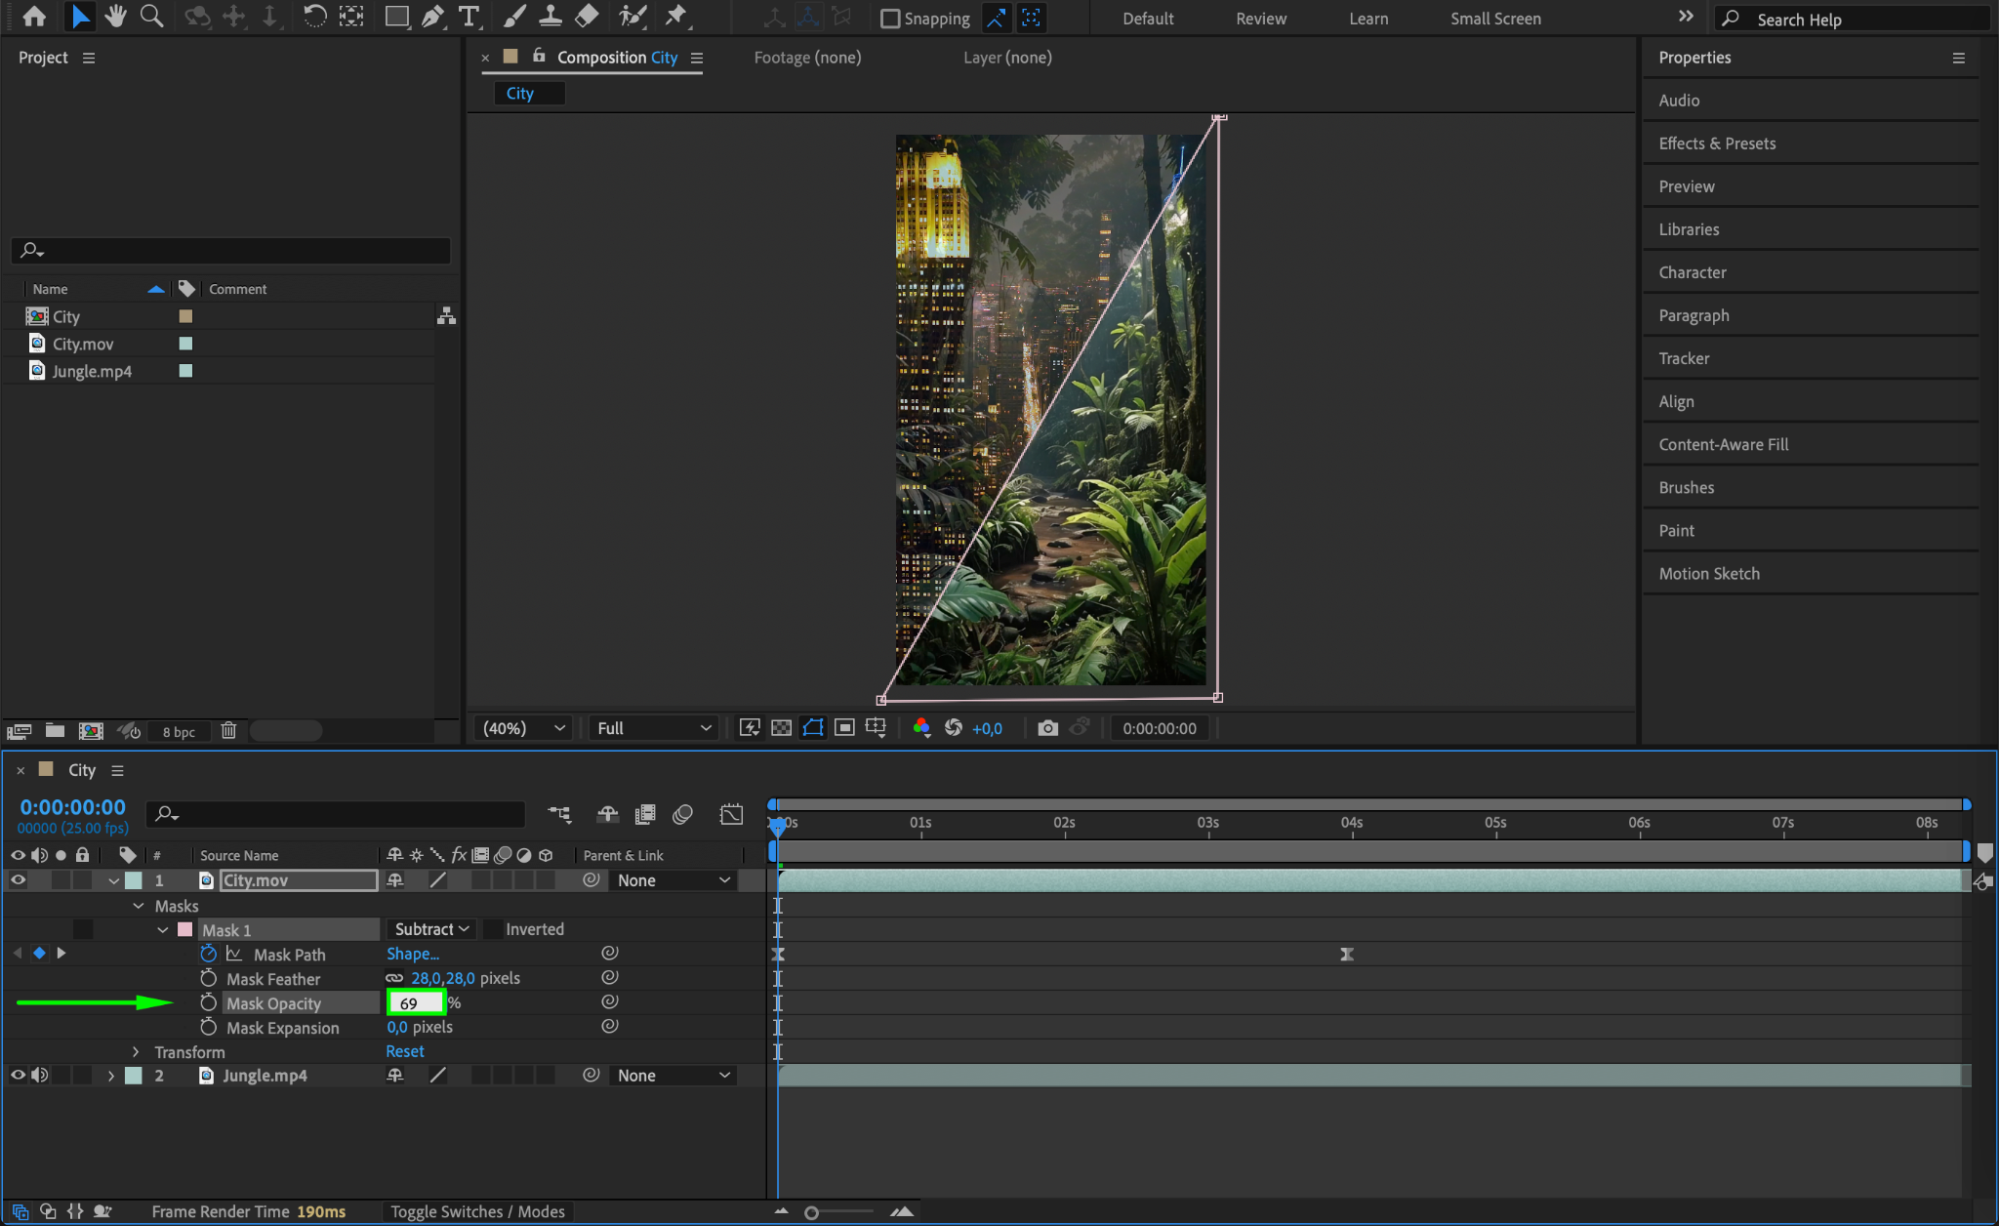
Twirl down the layer by clicking the arrow, then expand the Masks section. Go to Mask 1 > Mask Path to access the mask’s shape. You’ll also see Feather, Opacity, and Expansion controls. These options allow you to modify how the mask looks and behaves.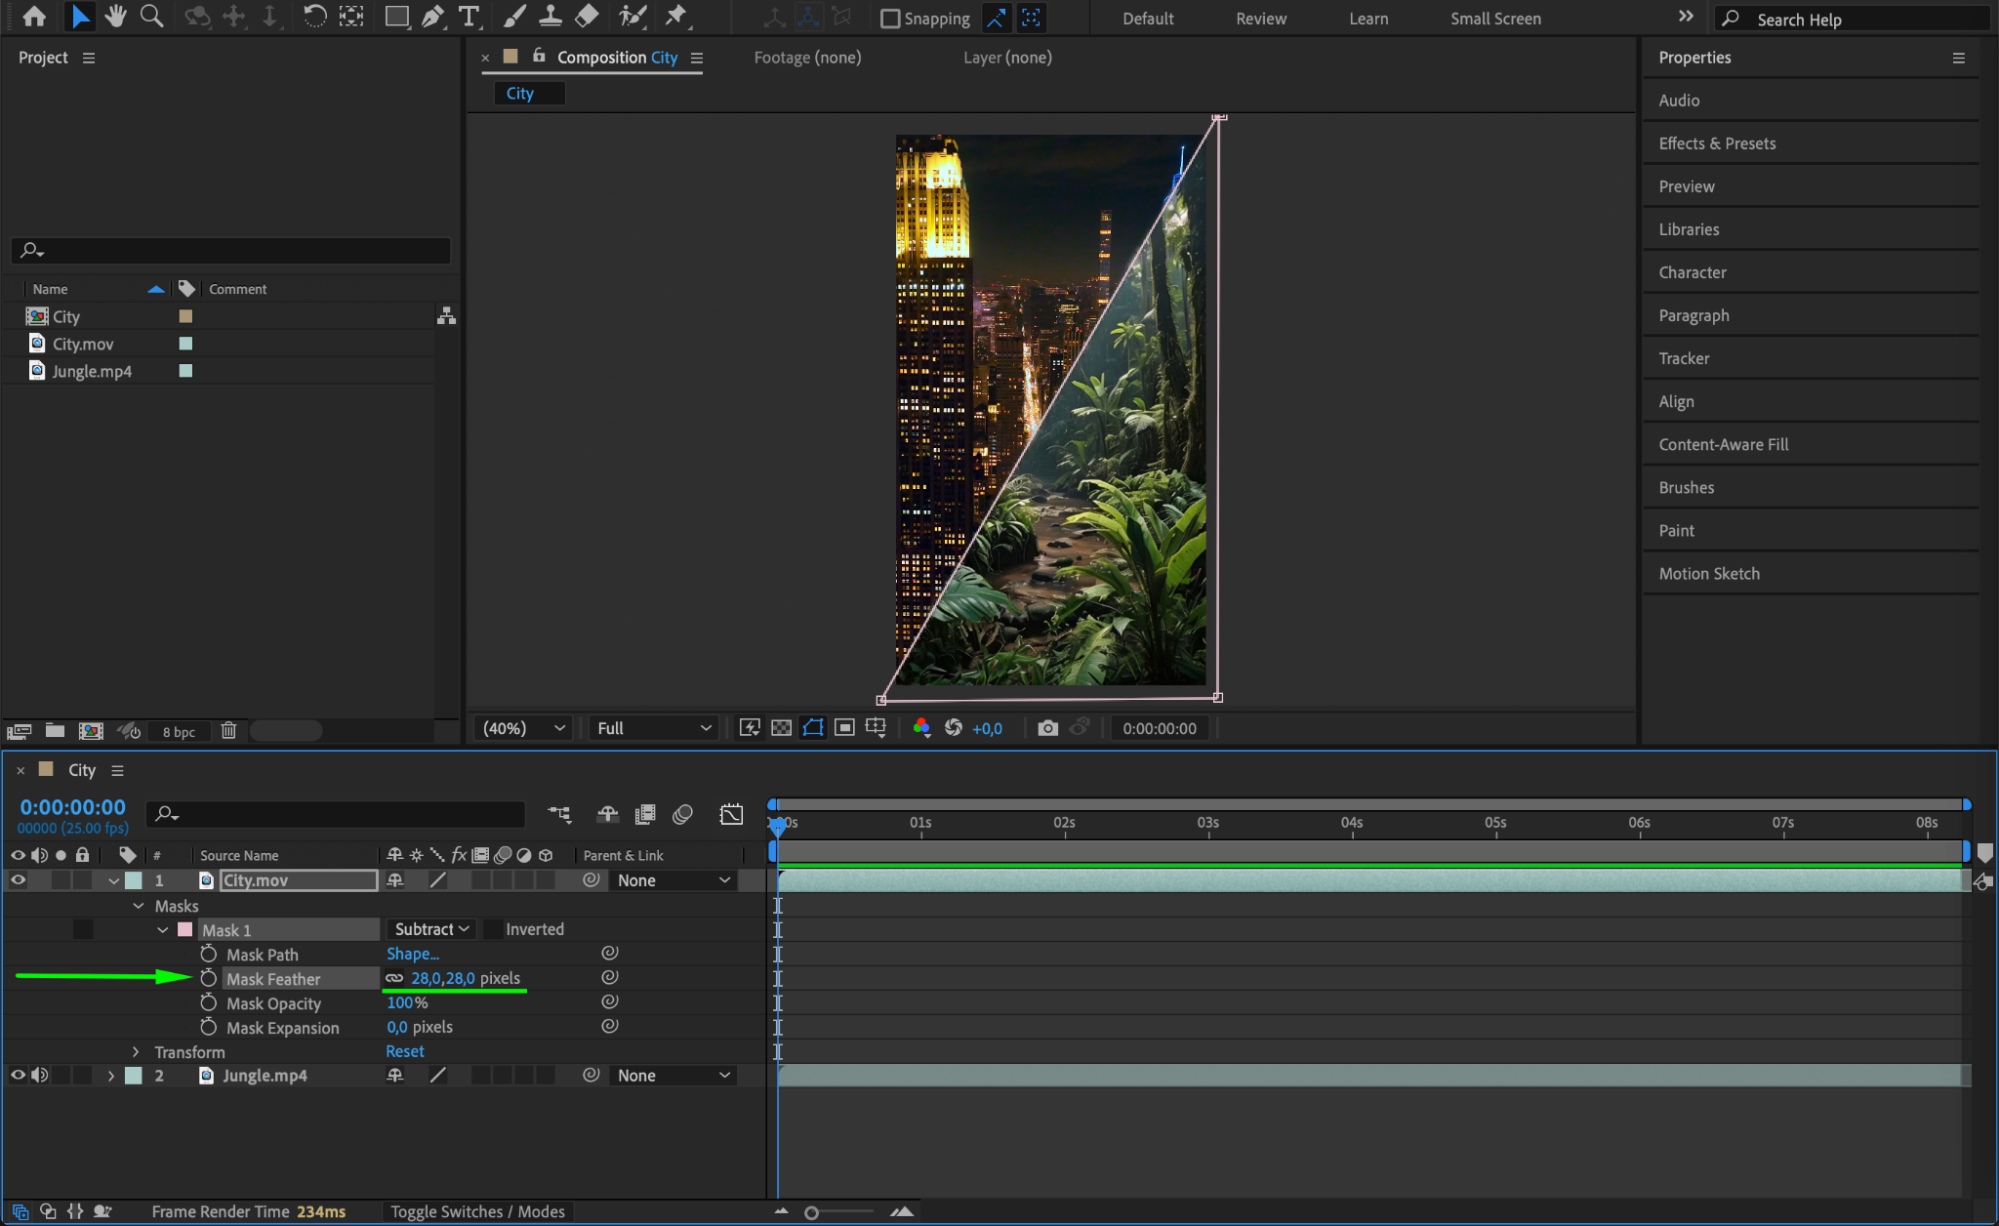 Step 4: Move or Resize the Mask
To move the entire mask, select the Selection Tool (V) and drag the shape to a new position. If you want to resize or reshape the mask, click on individual points (vertices) and adjust them. Hold Shift to move multiple points or scale uniformly.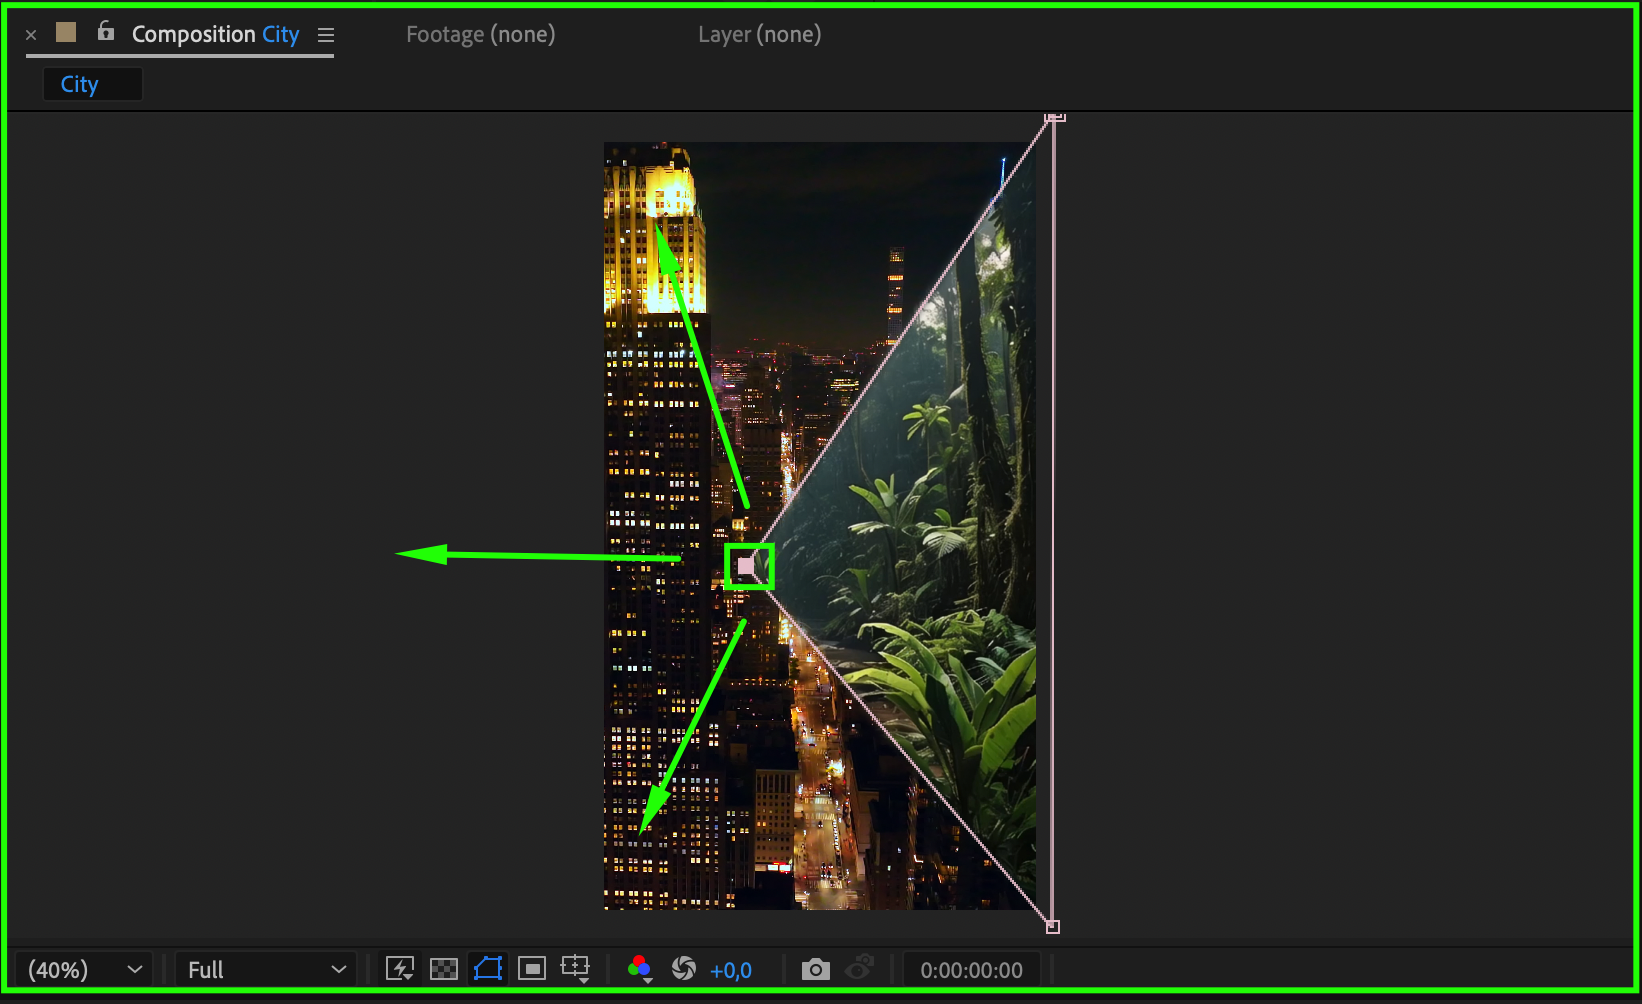 Step 5: Animate the Mask Path
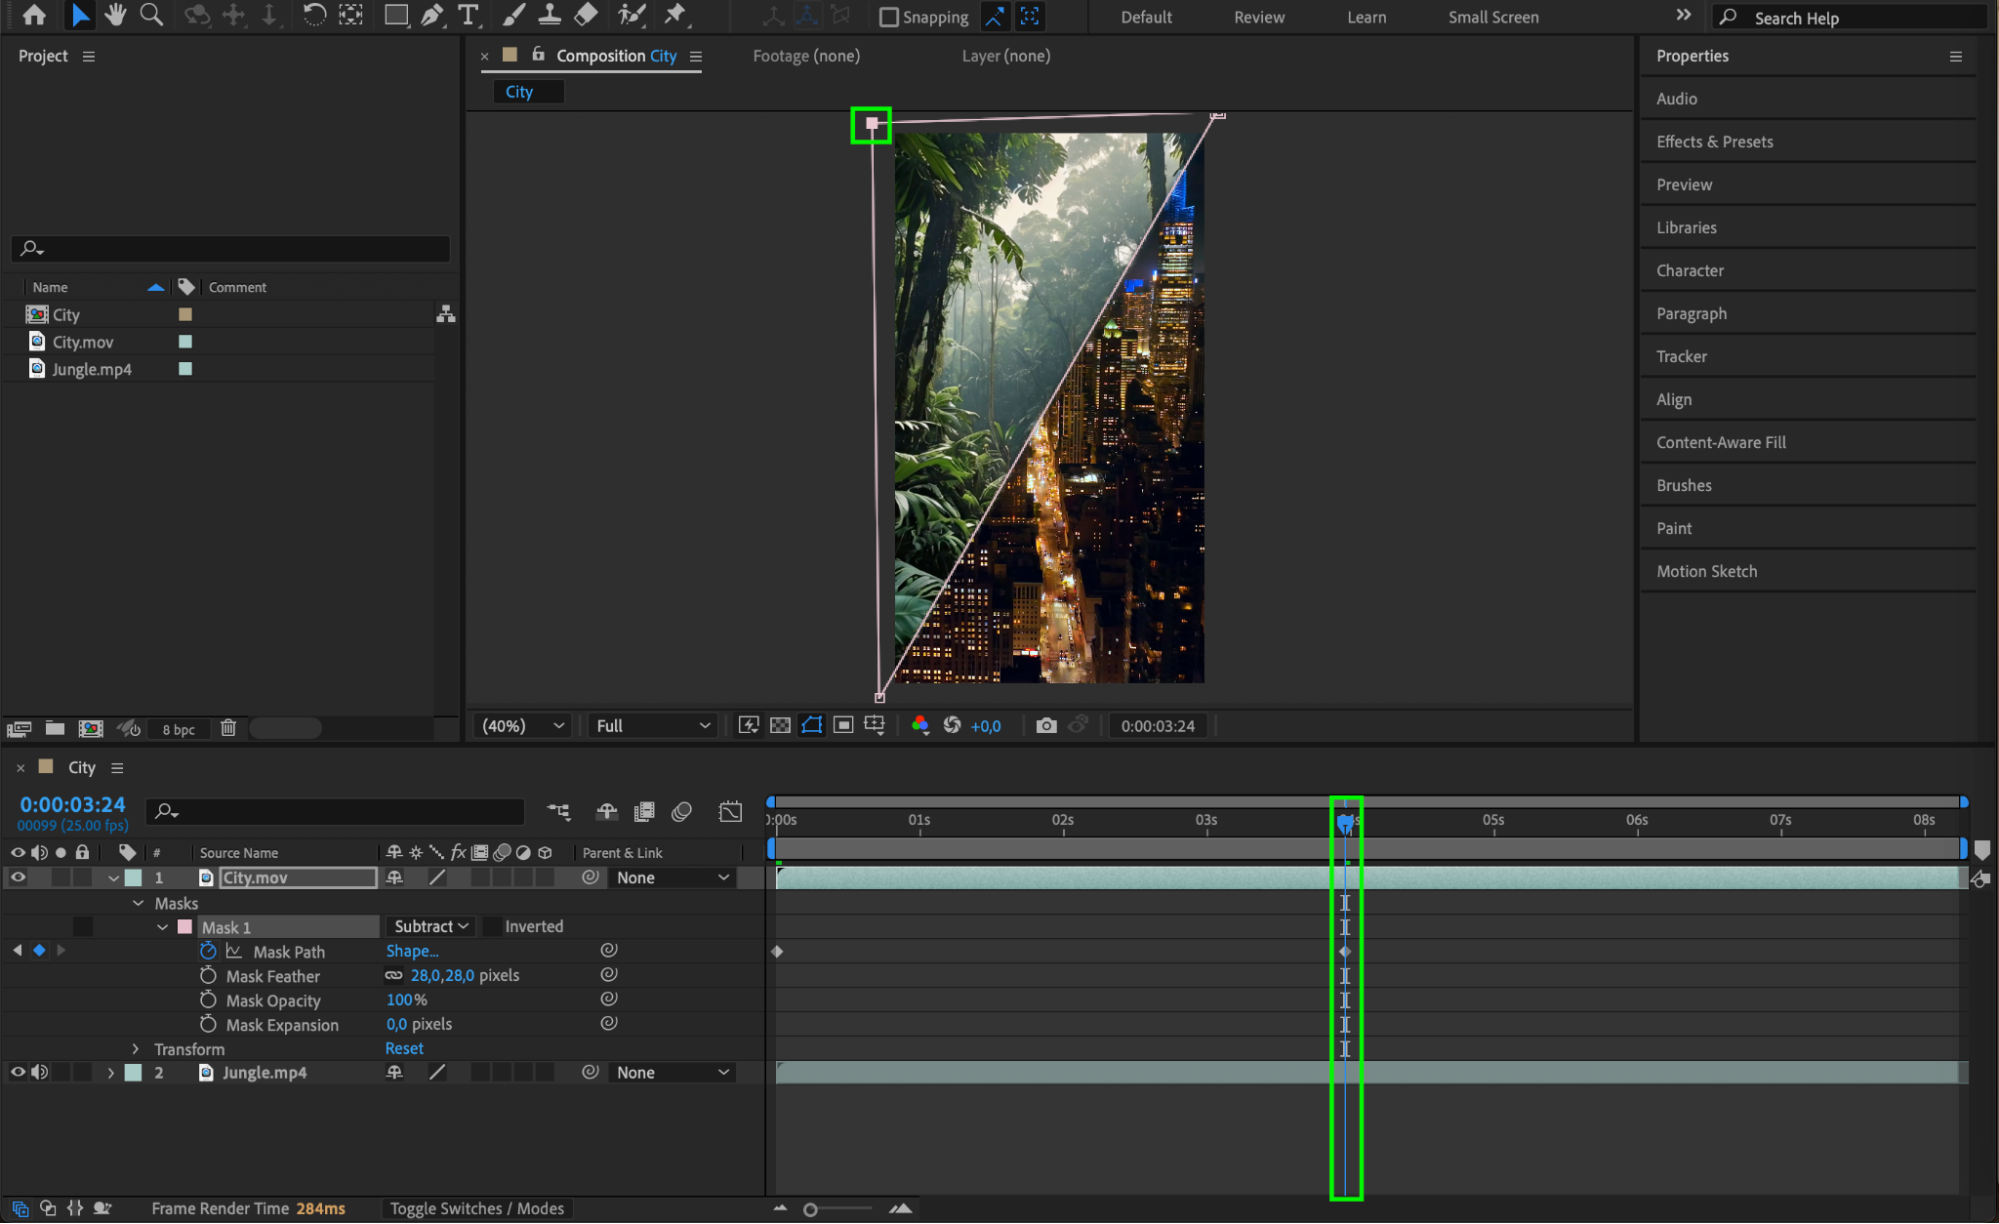
Click the stopwatch next to Mask Path to create your first keyframe. Move the CTI (Current Time Indicator) to another moment in time. Now move or reshape the mask. After Effects will automatically create an animation between the two keyframes, transforming the mask smoothly.
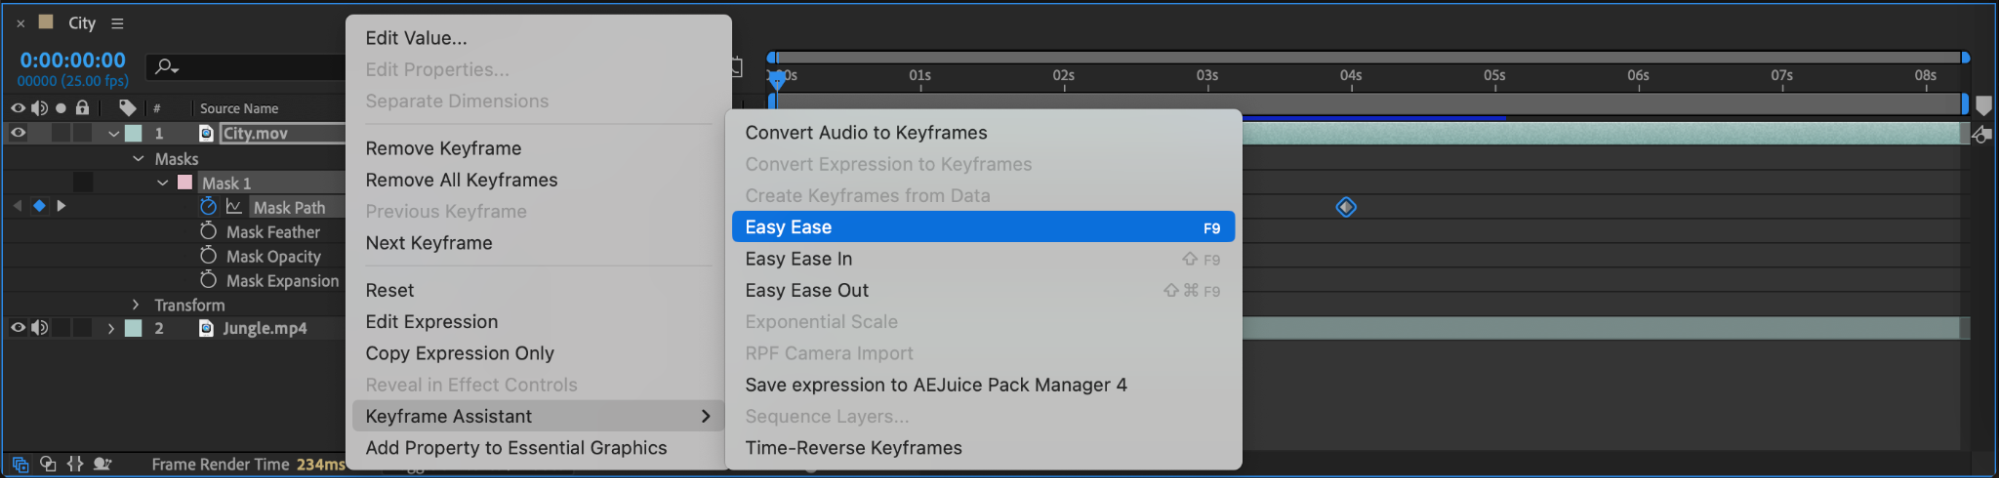
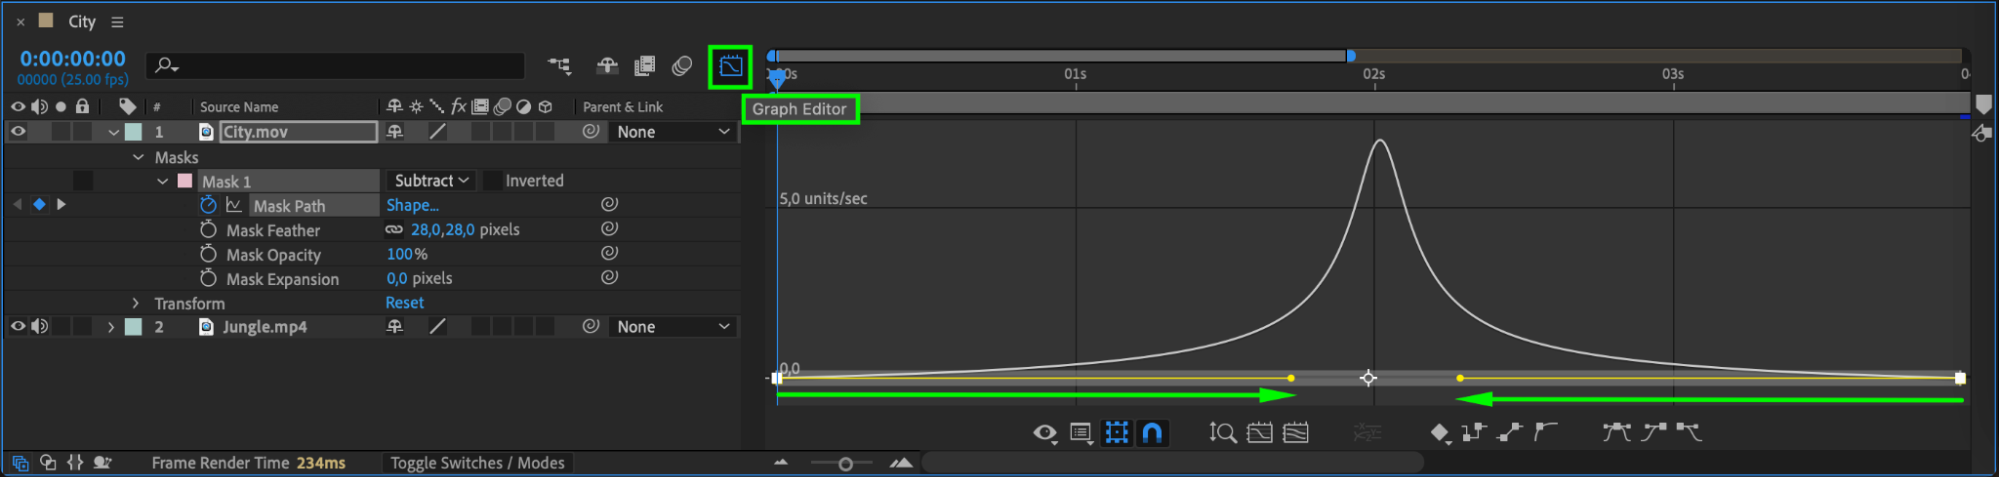
Step 6: Use Easy Ease and Graph Editor (Optional)
For a more natural motion, right-click on your keyframes and choose Keyframe Assistant > Easy Ease. Open the Graph Editor to adjust the speed curve of the animation. This can make your mask transitions feel more organic and professional.
 Step 7: Refine the Mask
Adjust Mask Feather to blur the edges of the mask. Use Mask Opacity to fade the mask in or out, and Mask Expansion to make it grow or shrink without altering its original shape. These settings help blend the mask smoothly with the background.
 Conclusion
Transforming masks in After Effects gives you detailed control over your animations and effects. Whether you’re revealing text, creating transitions, or shaping light, learning to move, scale, and animate a mask is a key part of professional motion design.
Our Bestsellers


