Factors and Tips for Efficient Rendering in After Effects
Introduction: Understanding Rendering Times in After Effects
Rendering in After Effects converts your project into a final video file, processing layers, effects, and animations into a playable format. Depending on the project’s complexity, rendering can take anywhere from a few seconds to several hours. This guide explores the factors that influence rendering times and provides tips to optimize the process.
Step 1: Understand What Rendering Involves
Rendering involves processing all layers, effects, and keyframes in your composition to generate a video file. If your project contains high-resolution footage, complex effects, or 3D elements, the rendering time will increase. Knowing what rendering requires helps you anticipate time and adjust your workflow for efficiency.
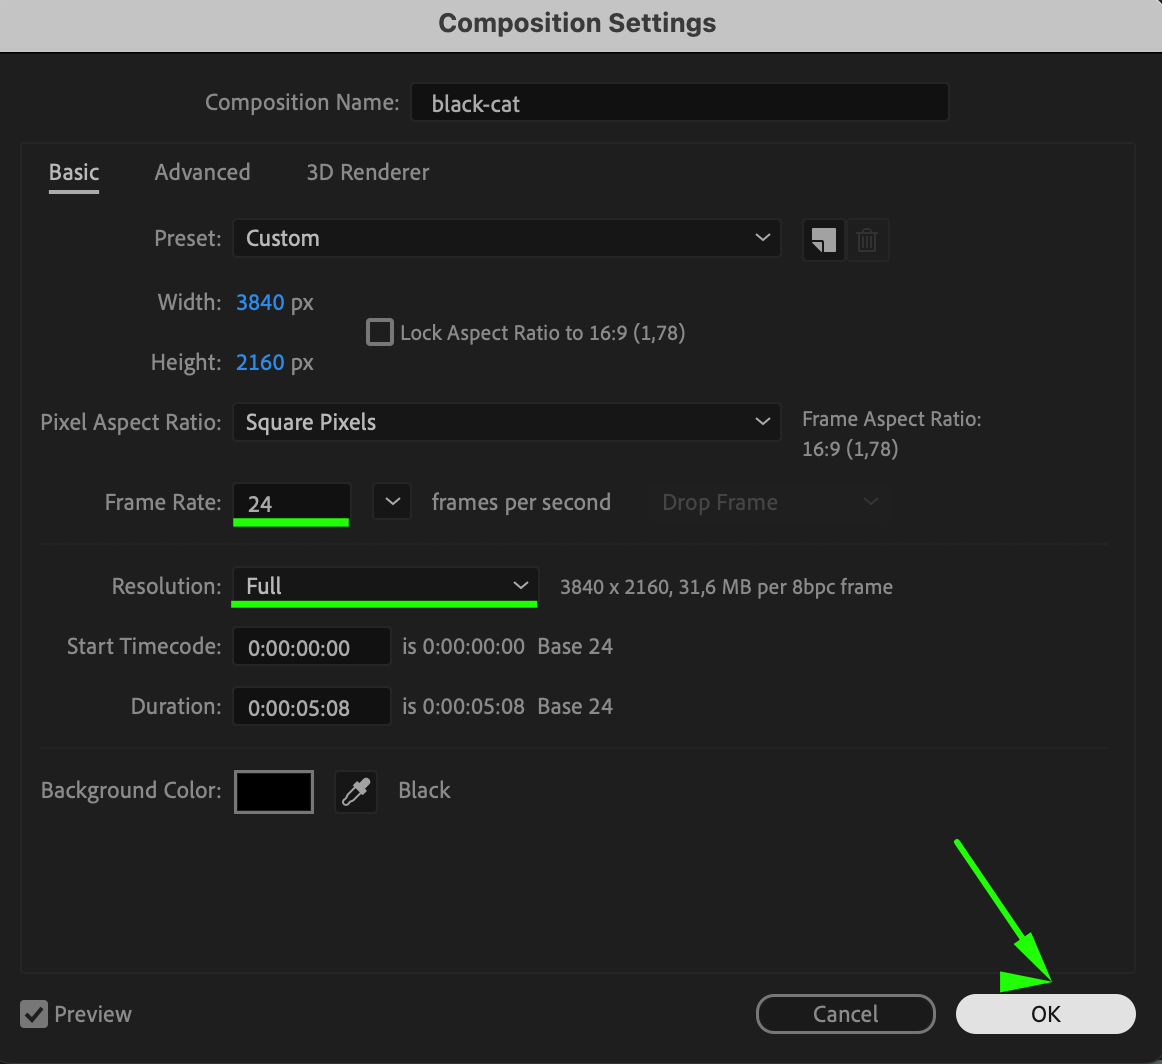
Step 2: Adjust Composition Settings
Get 10% off when you subscribe to our newsletter

The resolution and frame rate of your composition significantly impact rendering times. For example, a 4K resolution project at 60 fps will take much longer to render than a 1080p project at 30 fps. To speed up rendering without sacrificing quality, consider lowering the resolution or frame rate to meet the project’s needs.
 Step 3: Optimize Layers and Effects
Rendering time can balloon when dealing with numerous layers or resource-intensive effects. Simplify your composition by:
Pre-composing groups of layers to reduce complexity.
Minimizing the use of effects like motion blur, depth of field, or heavy 3D rendering.
Disabling effects temporarily for test renders.
Streamlining your project makes After Effects process it more efficiently.
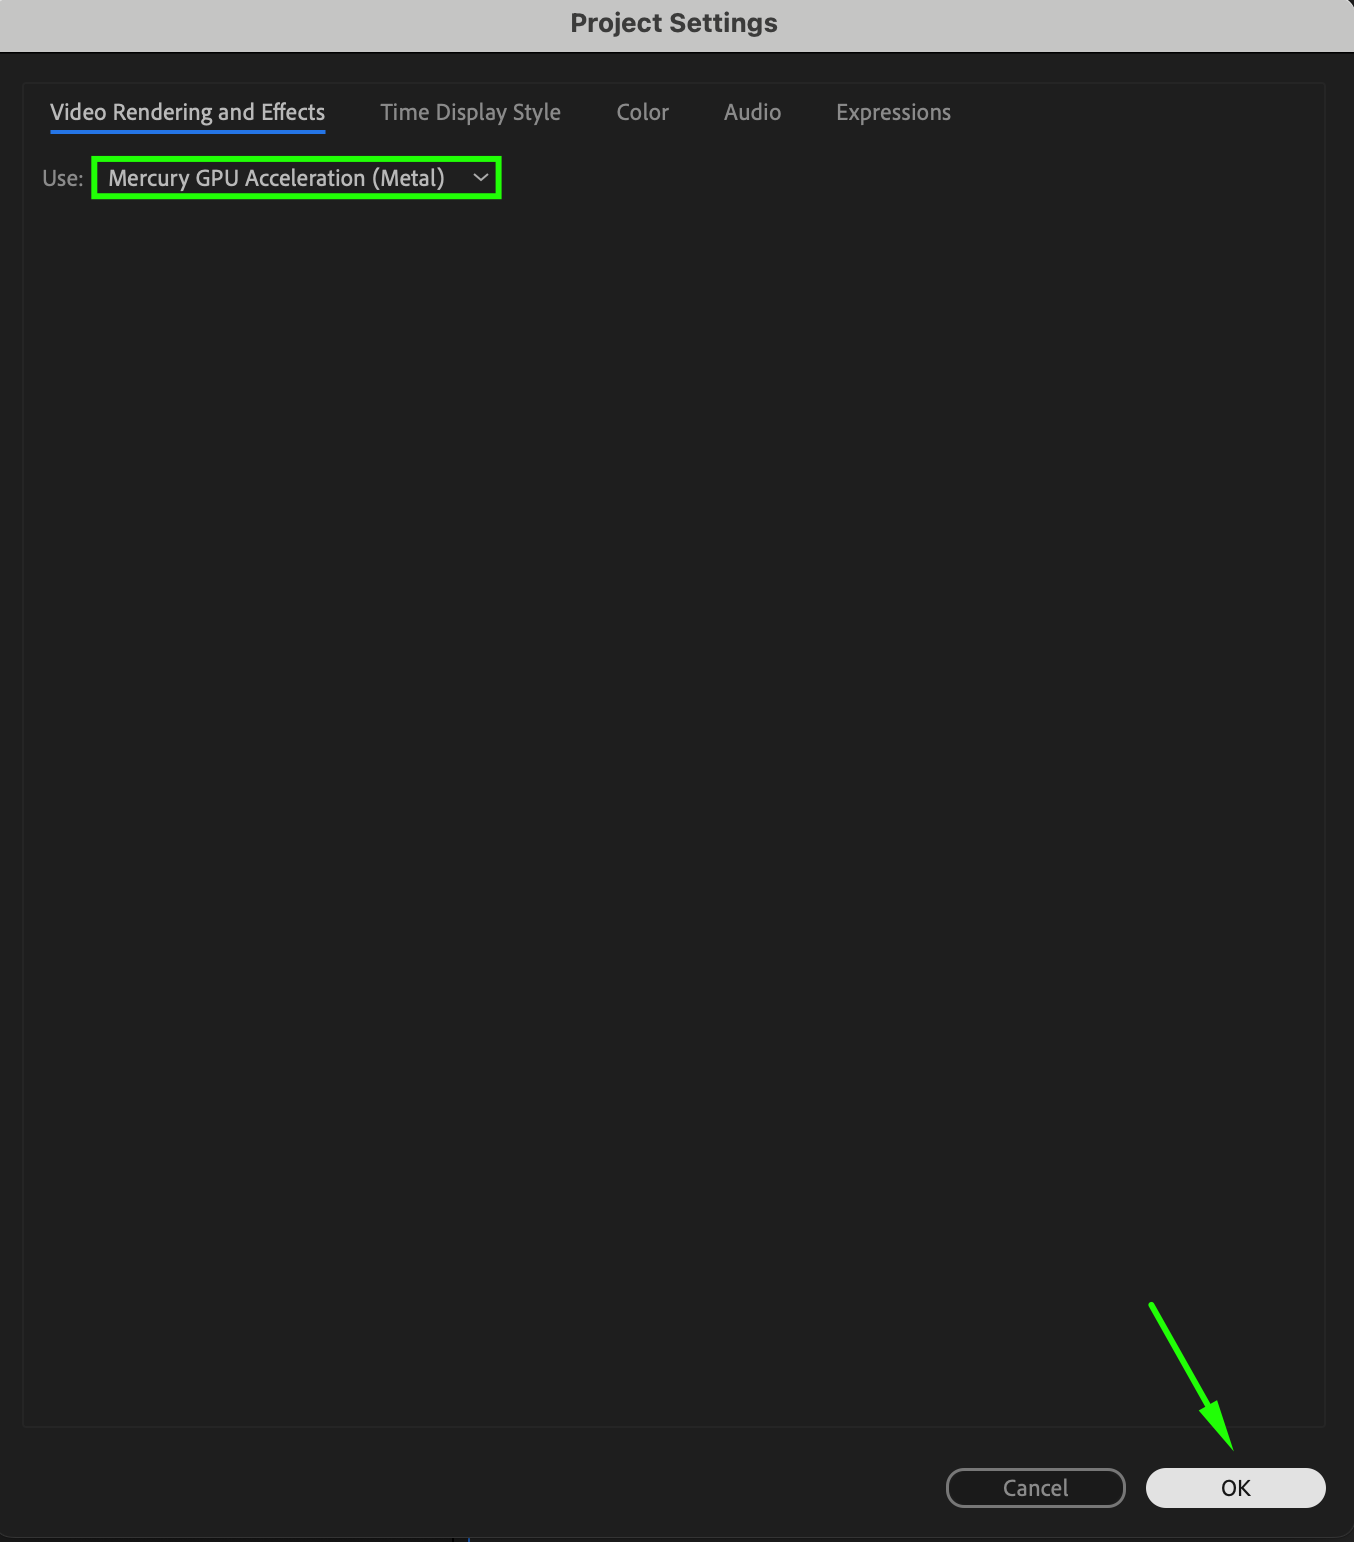
 Step 4: Enable Mercury GPU Acceleration
In the File > Project Settings menu, choose Mercury GPU Acceleration to offload some rendering tasks to your graphics card. This significantly improves rendering times for projects with GPU-optimized effects. If your hardware supports it, enabling GPU acceleration is a must for faster performance.
 Step 5: Cache Your Composition for Playback
Get 10% off when you subscribe to our newsletter
Preview your composition and allow After Effects to cache it before rendering. Caching stores temporary playback data, which can speed up rendering by reducing the workload during final output. Ensure that your preview runs smoothly to confirm your settings before rendering.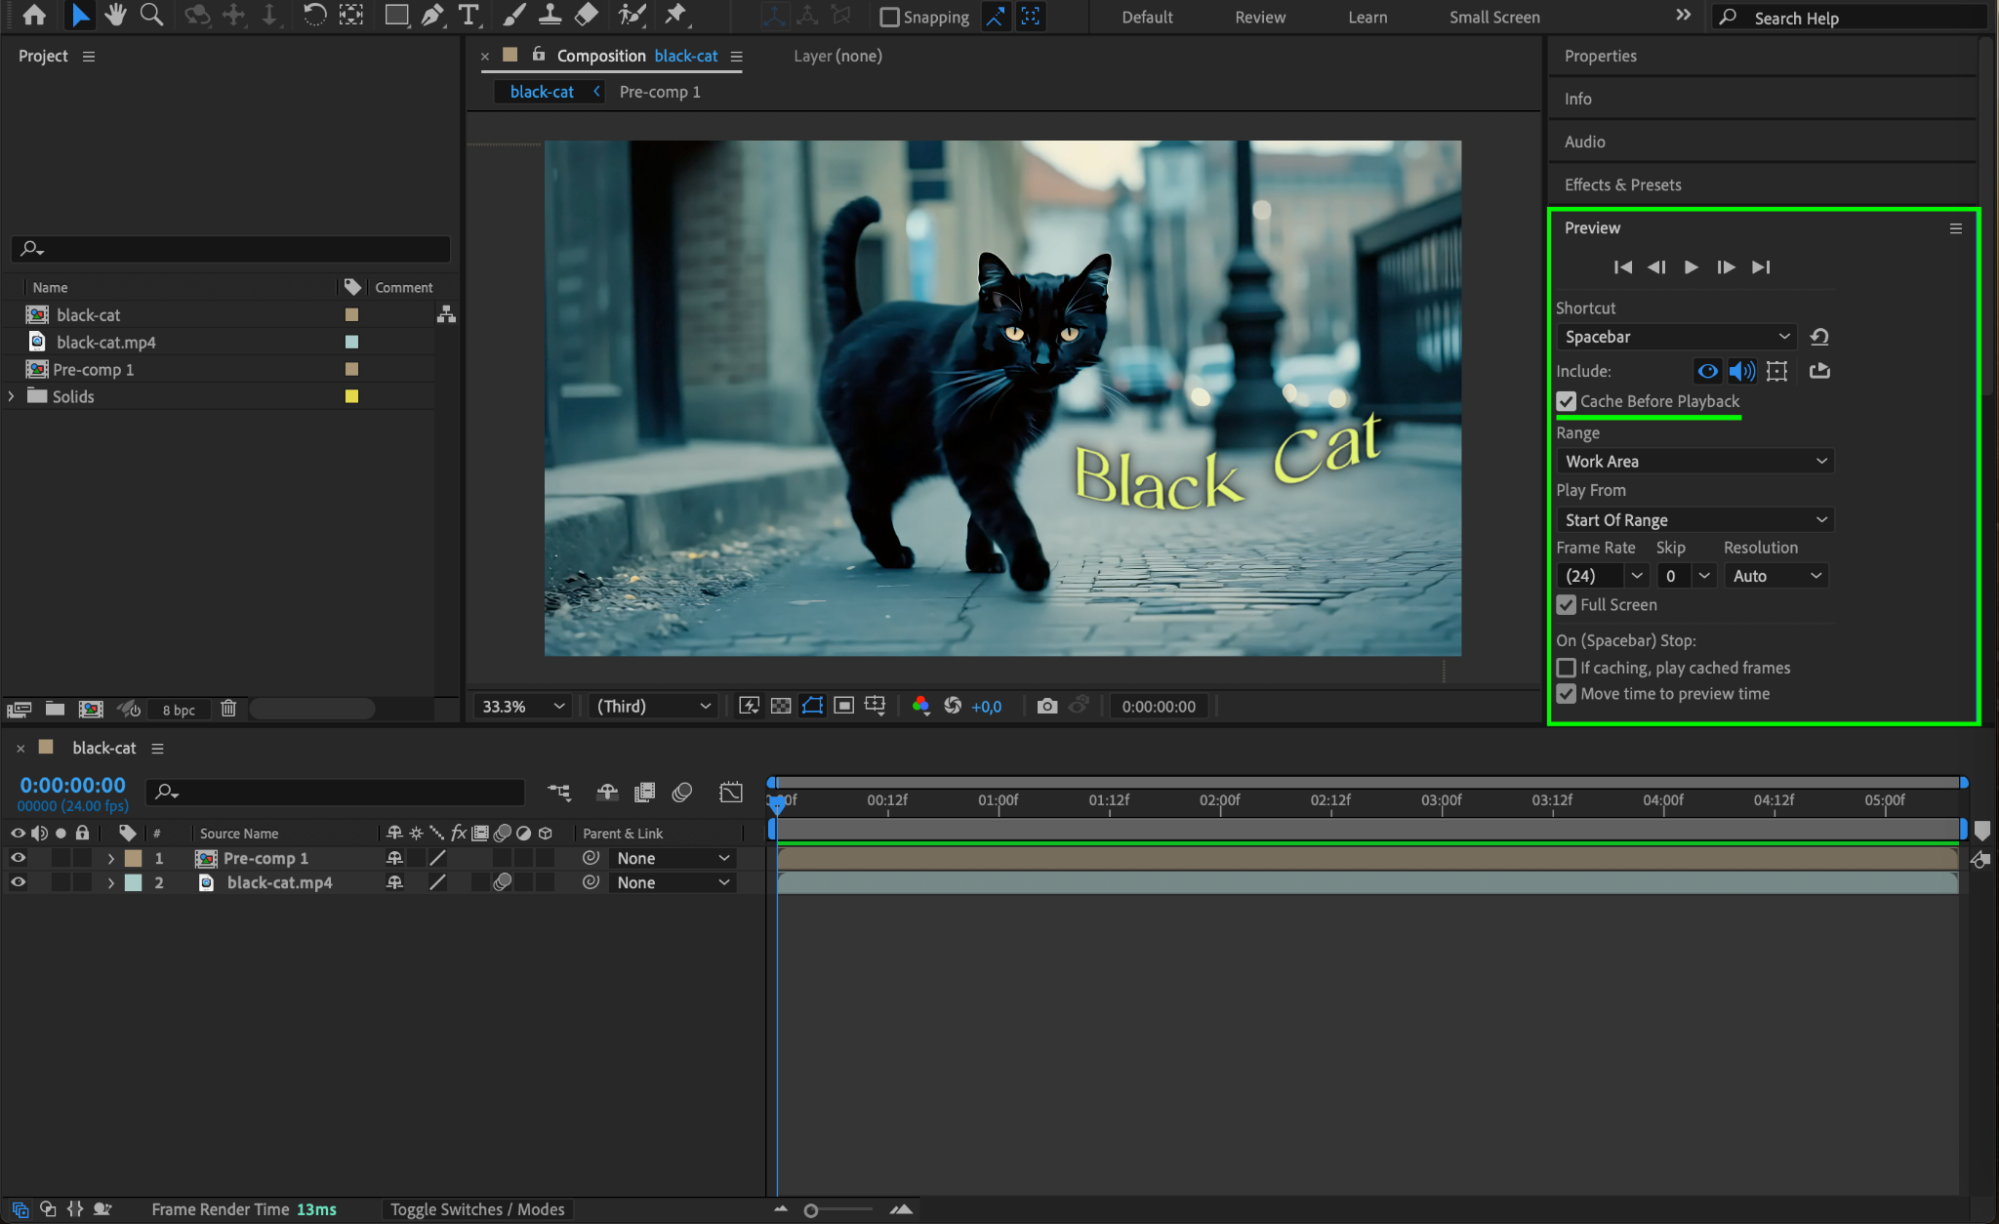 Step 6: Choose Your Rendering Method
Decide whether to render using After Effects’ native Render Queue or Adobe Media Encoder (AME):
Render Queue: Suitable for simple renders and gives you control over detailed export settings.
Adobe Media Encoder: Ideal for creating multiple file formats or compressing large files. Add your composition to AME via Composition > Add to Adobe Media Encoder Queue.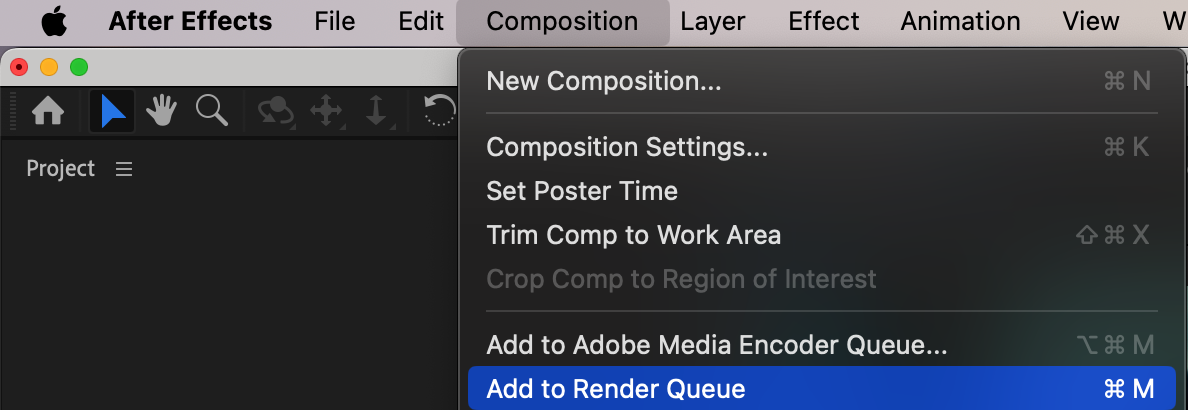 Step 7: Configure Output Module Settings
Get 10% off when you subscribe to our newsletter
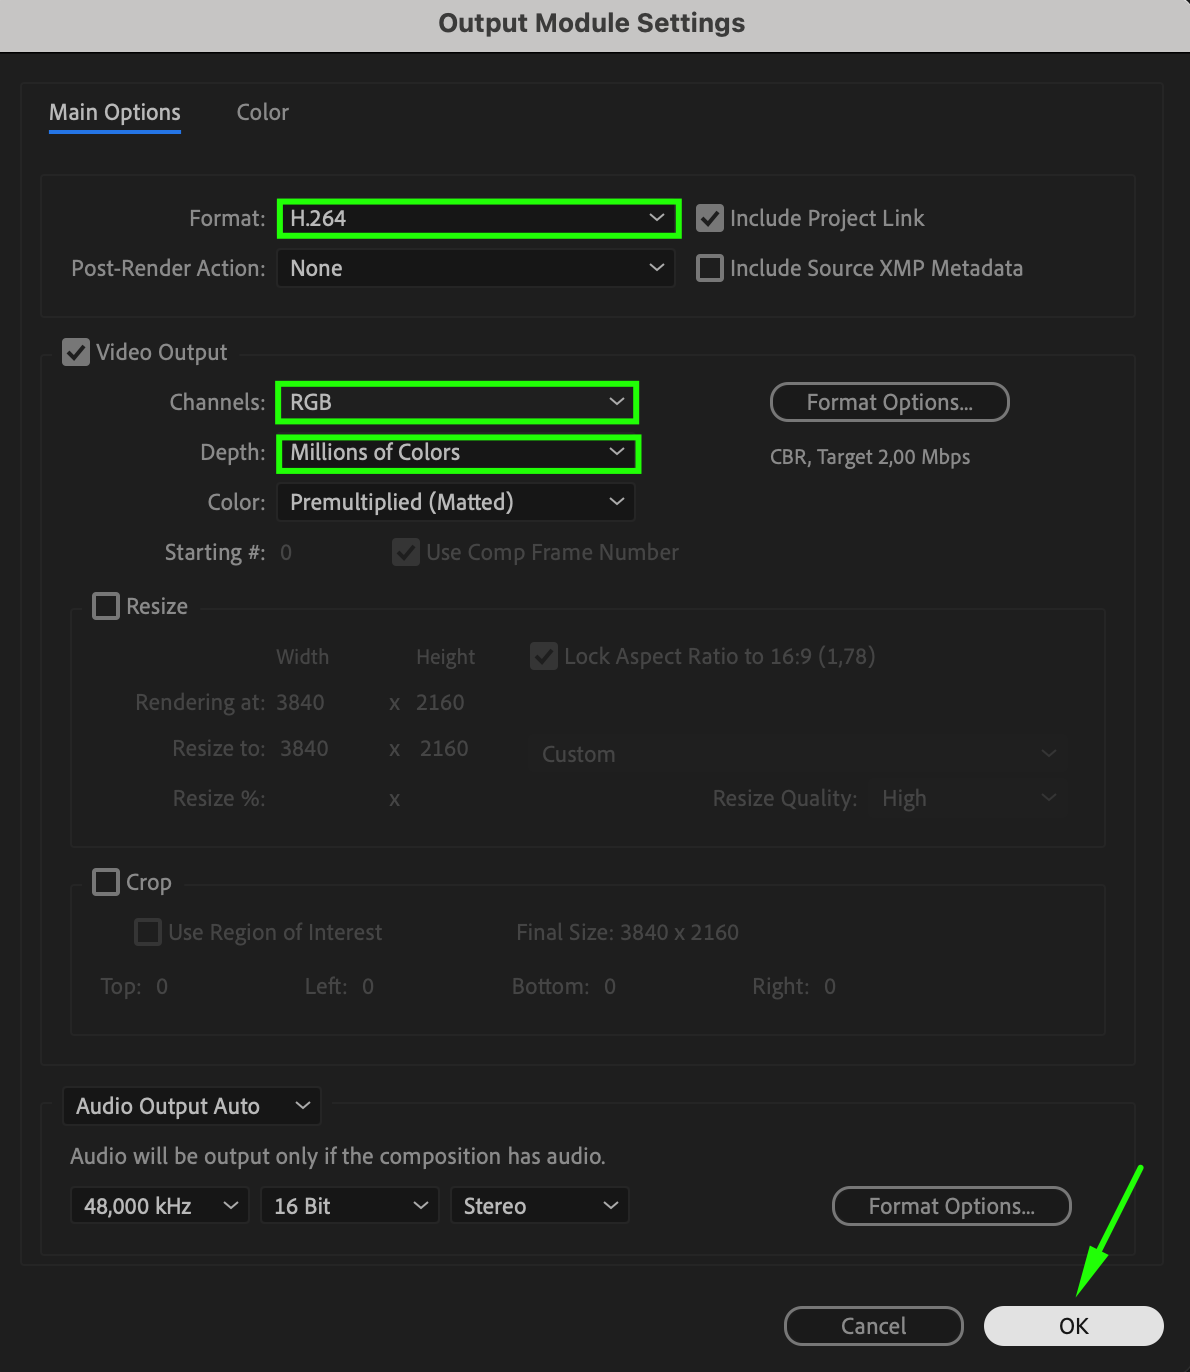
In the Render Queue, click the white text next to Output Module (e.g., “High Quality”) to customize your render settings. Choose the appropriate format (e.g., H.264) and ensure the depth, channels, and codec align with your project’s requirements.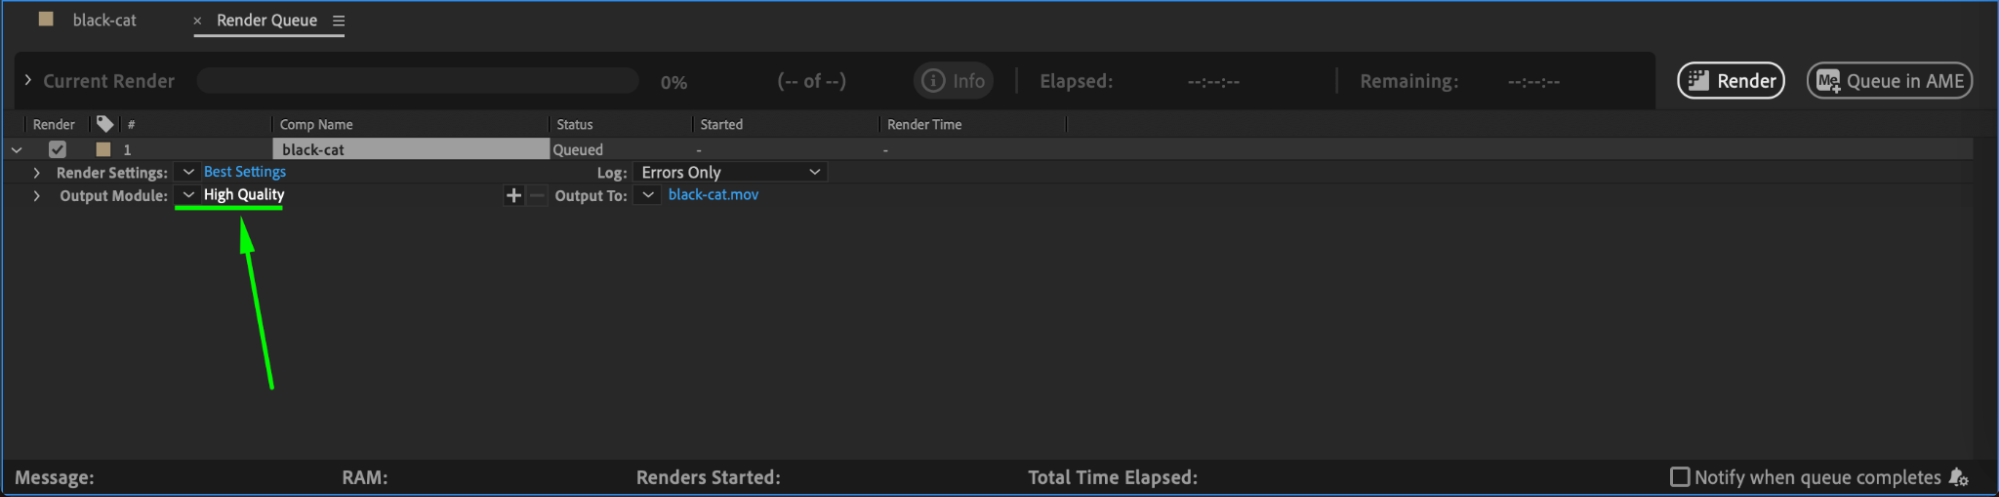
 Step 8: Specify Output File Location
Click the text next to Output To to select the location and filename for your final render. Choose an easily accessible folder to avoid confusion and organize your project files.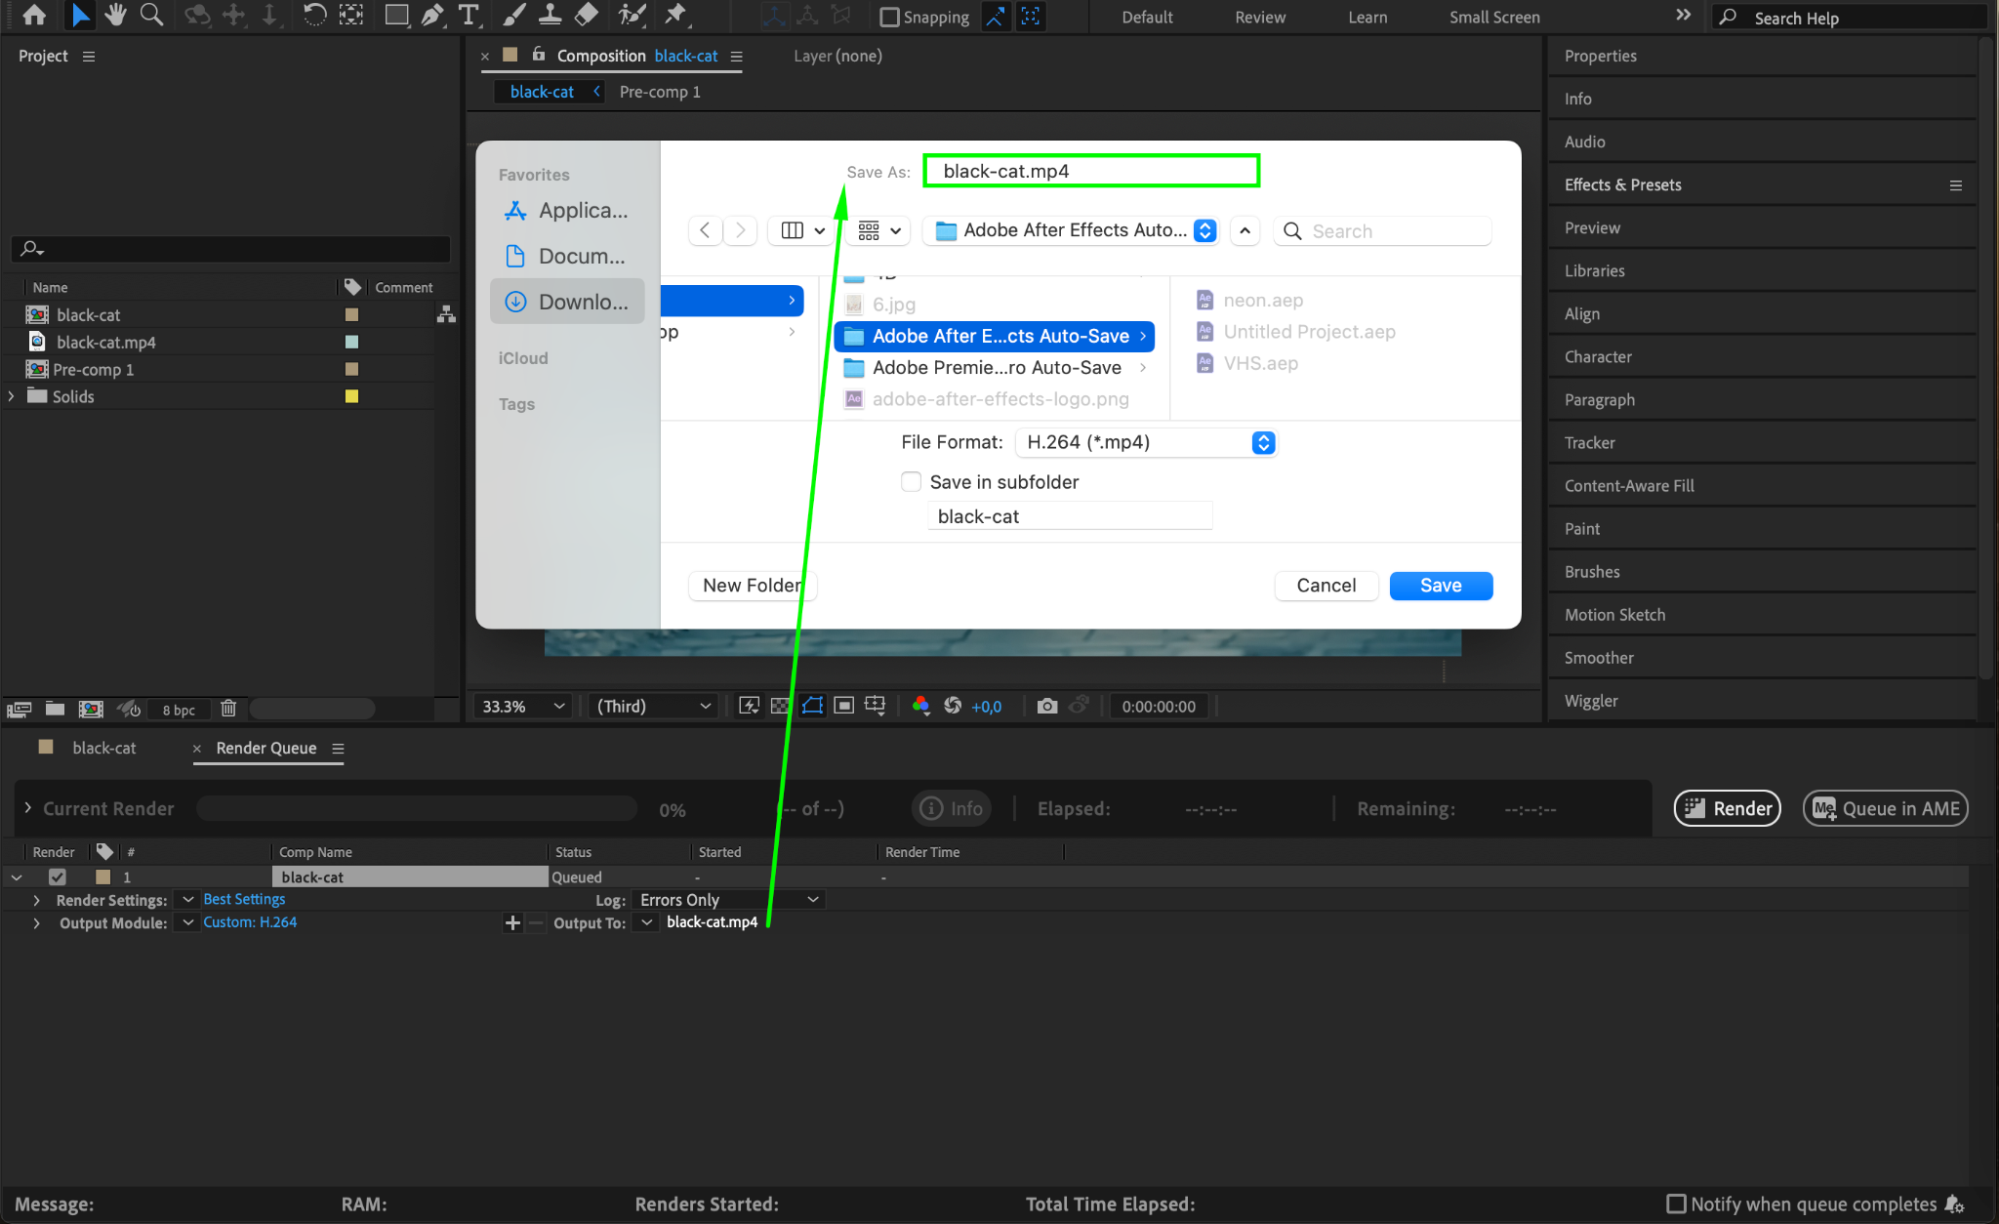 Step 9: Render and Monitor Progress
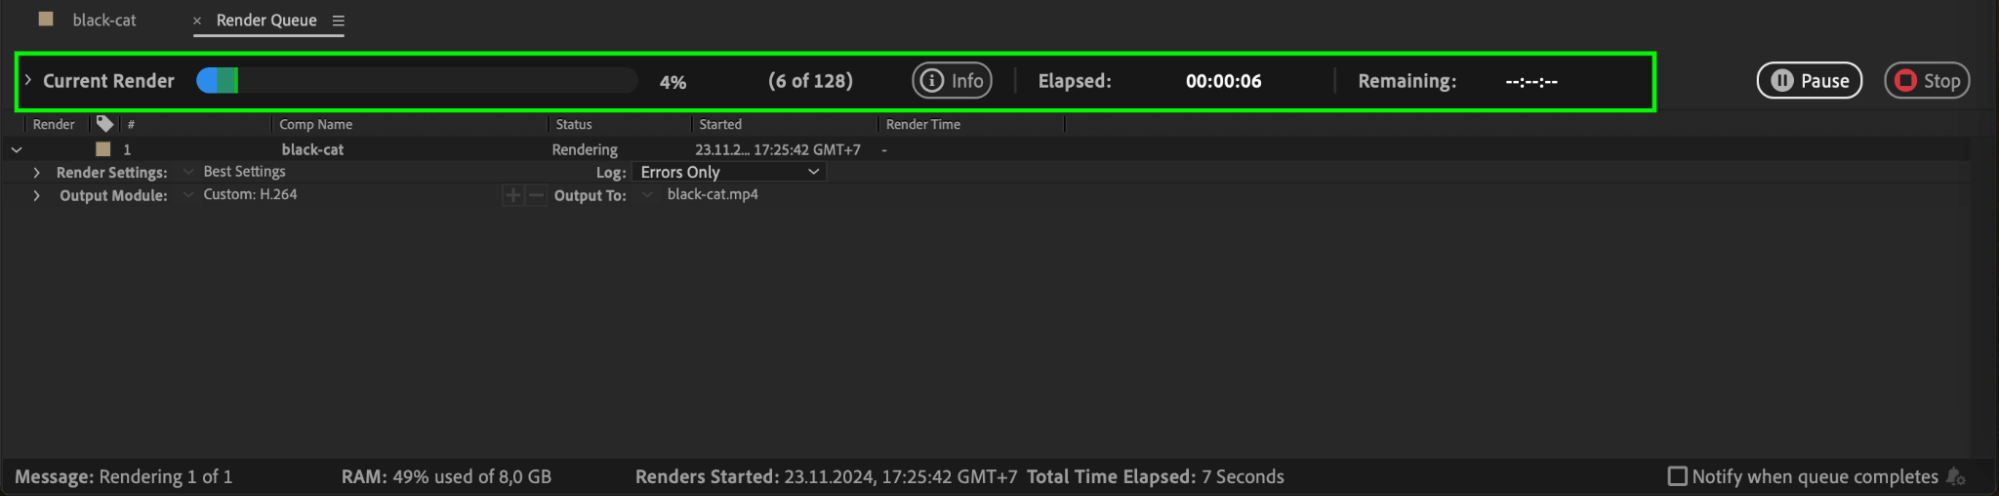
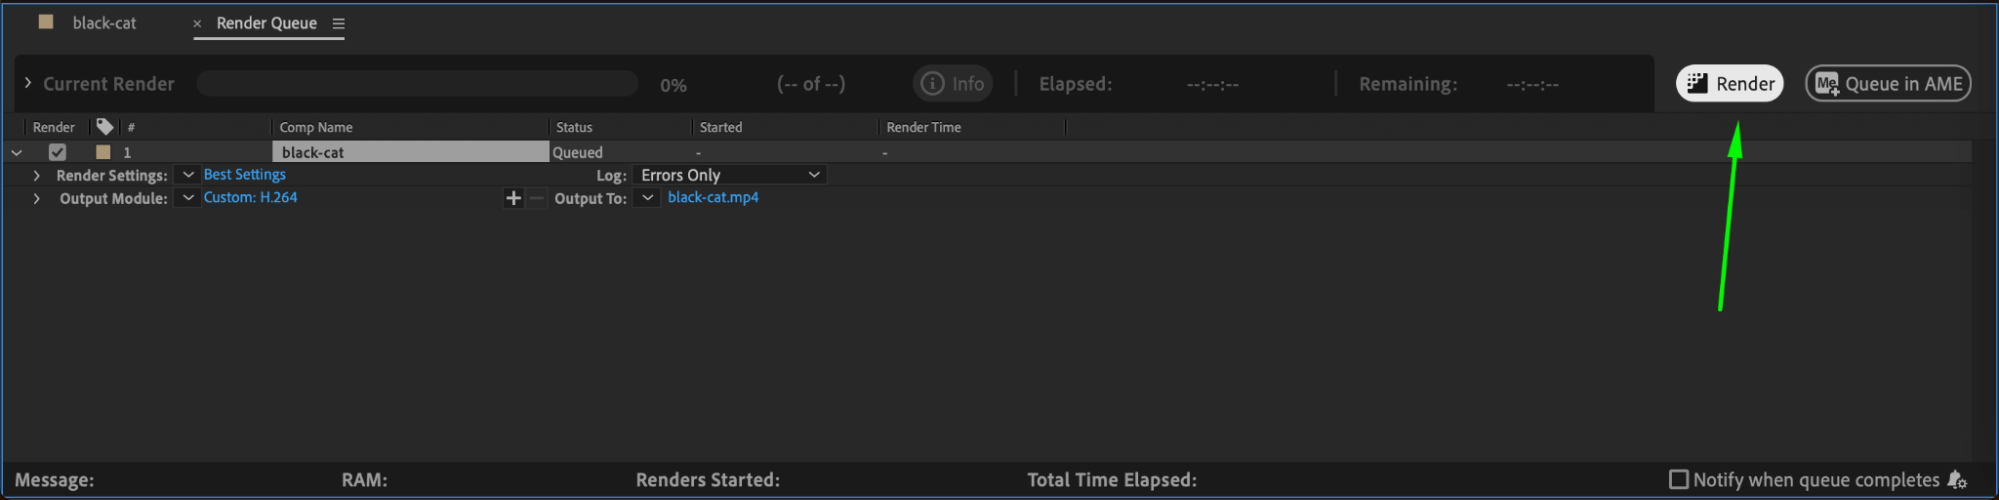
Press the Render button in the Render Queue or start the render in AME. Monitor the progress bar to ensure the process runs smoothly. Depending on your system and project complexity, rendering may take minutes or hours. Once completed, review the output for any issues.
Get 10% off when you subscribe to our newsletter
 Conclusion
The time it takes to render in After Effects depends on many factors, such as composition settings, project complexity, and hardware capabilities. By optimizing your workflow, adjusting settings, and using tools like GPU acceleration, you can significantly reduce rendering times while maintaining quality. Consistent practice and experimentation with settings will help you master efficient rendering workflows over time.
Our Bestsellers


