A Complete Guide to 3D Text Tracking in After Effects
Introduction – Why 3D Track Text in After Effects?
3D text tracking allows you to blend animated text with your footage, making it appear as if it’s naturally part of the scene. This technique is perfect for creating professional motion graphics, visual effects, and immersive storytelling. In this guide, you’ll learn how to 3D track text in After Effects step by step.
Step 1: Import Your Video Footage
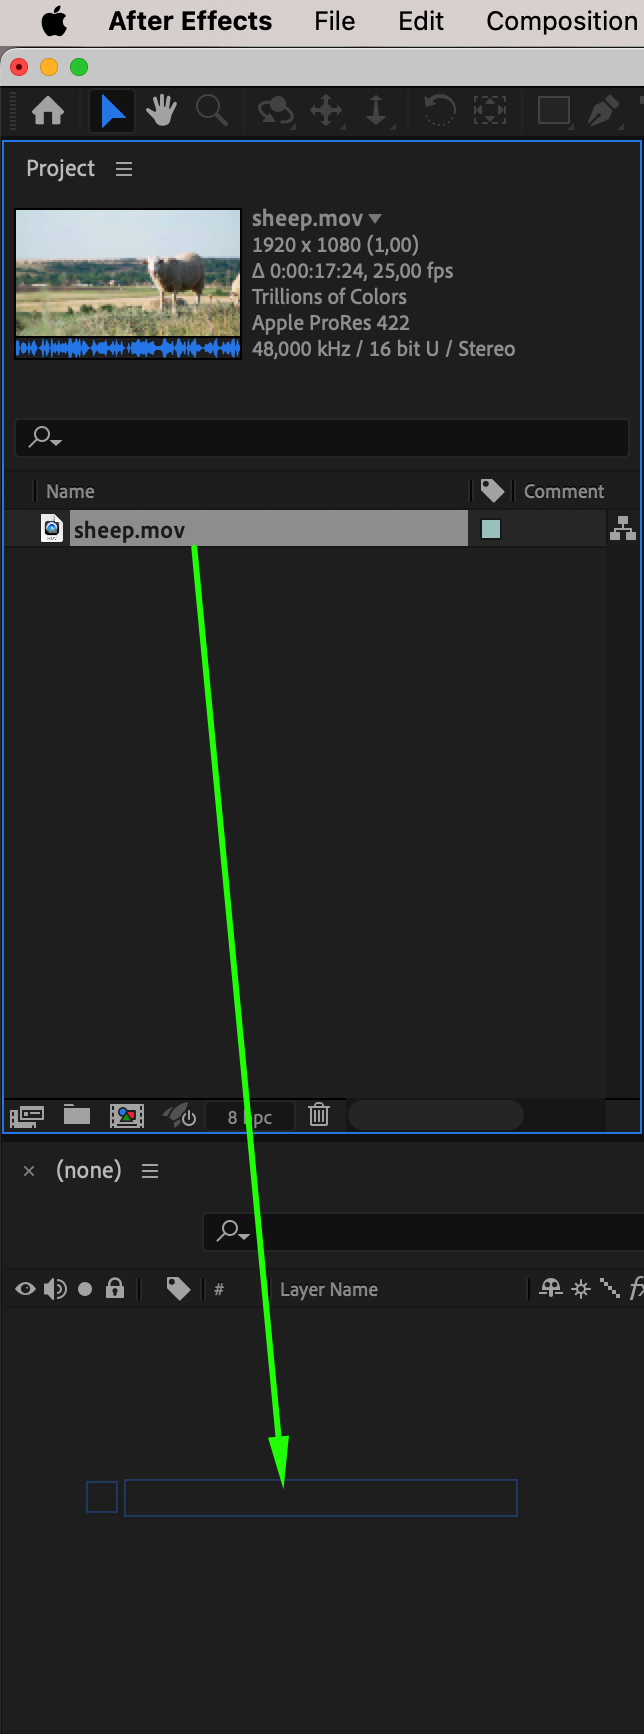
Begin by importing your video file into After Effects. Drag the footage to the Timeline Panel to create a new composition. Ensure the video has enough movement to make 3D tracking effective and engaging.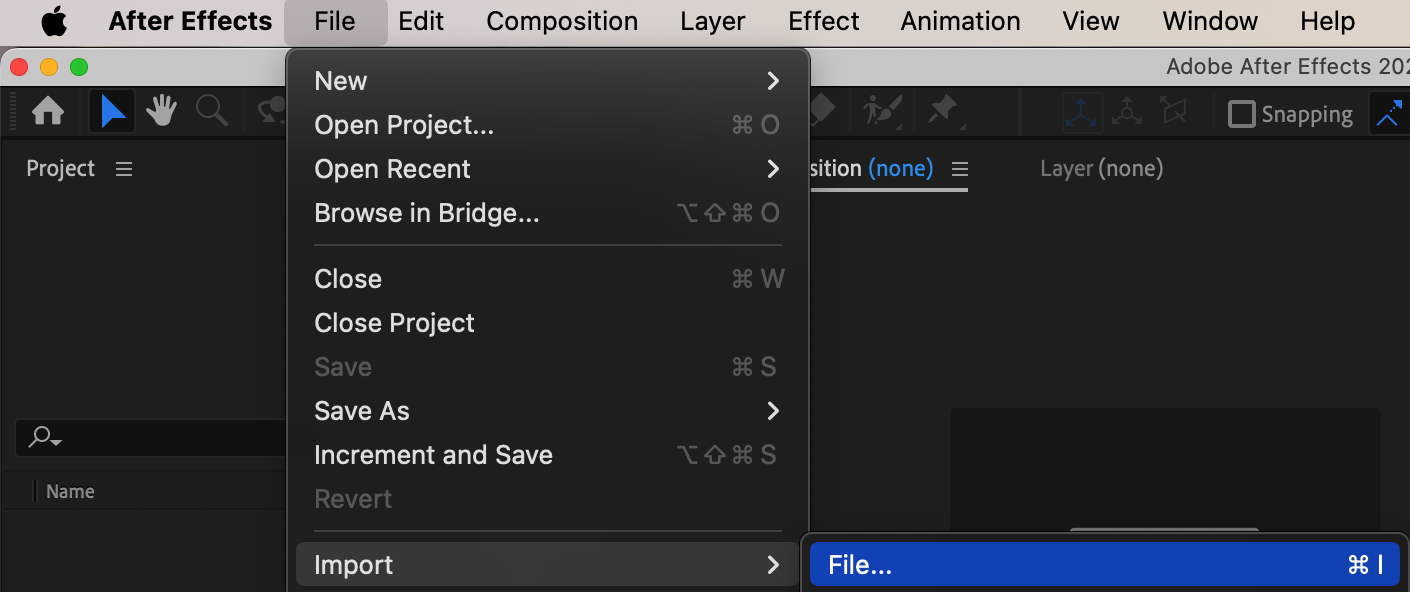
 Step 2: Apply the 3D Camera Tracker Effect
Get 10% off when you subscribe to our newsletter

In the Effects & Presets panel, search for the 3D Camera Tracker effect. Drag it onto your video layer. After Effects will start analyzing the footage, which may take a few moments depending on its length and complexity.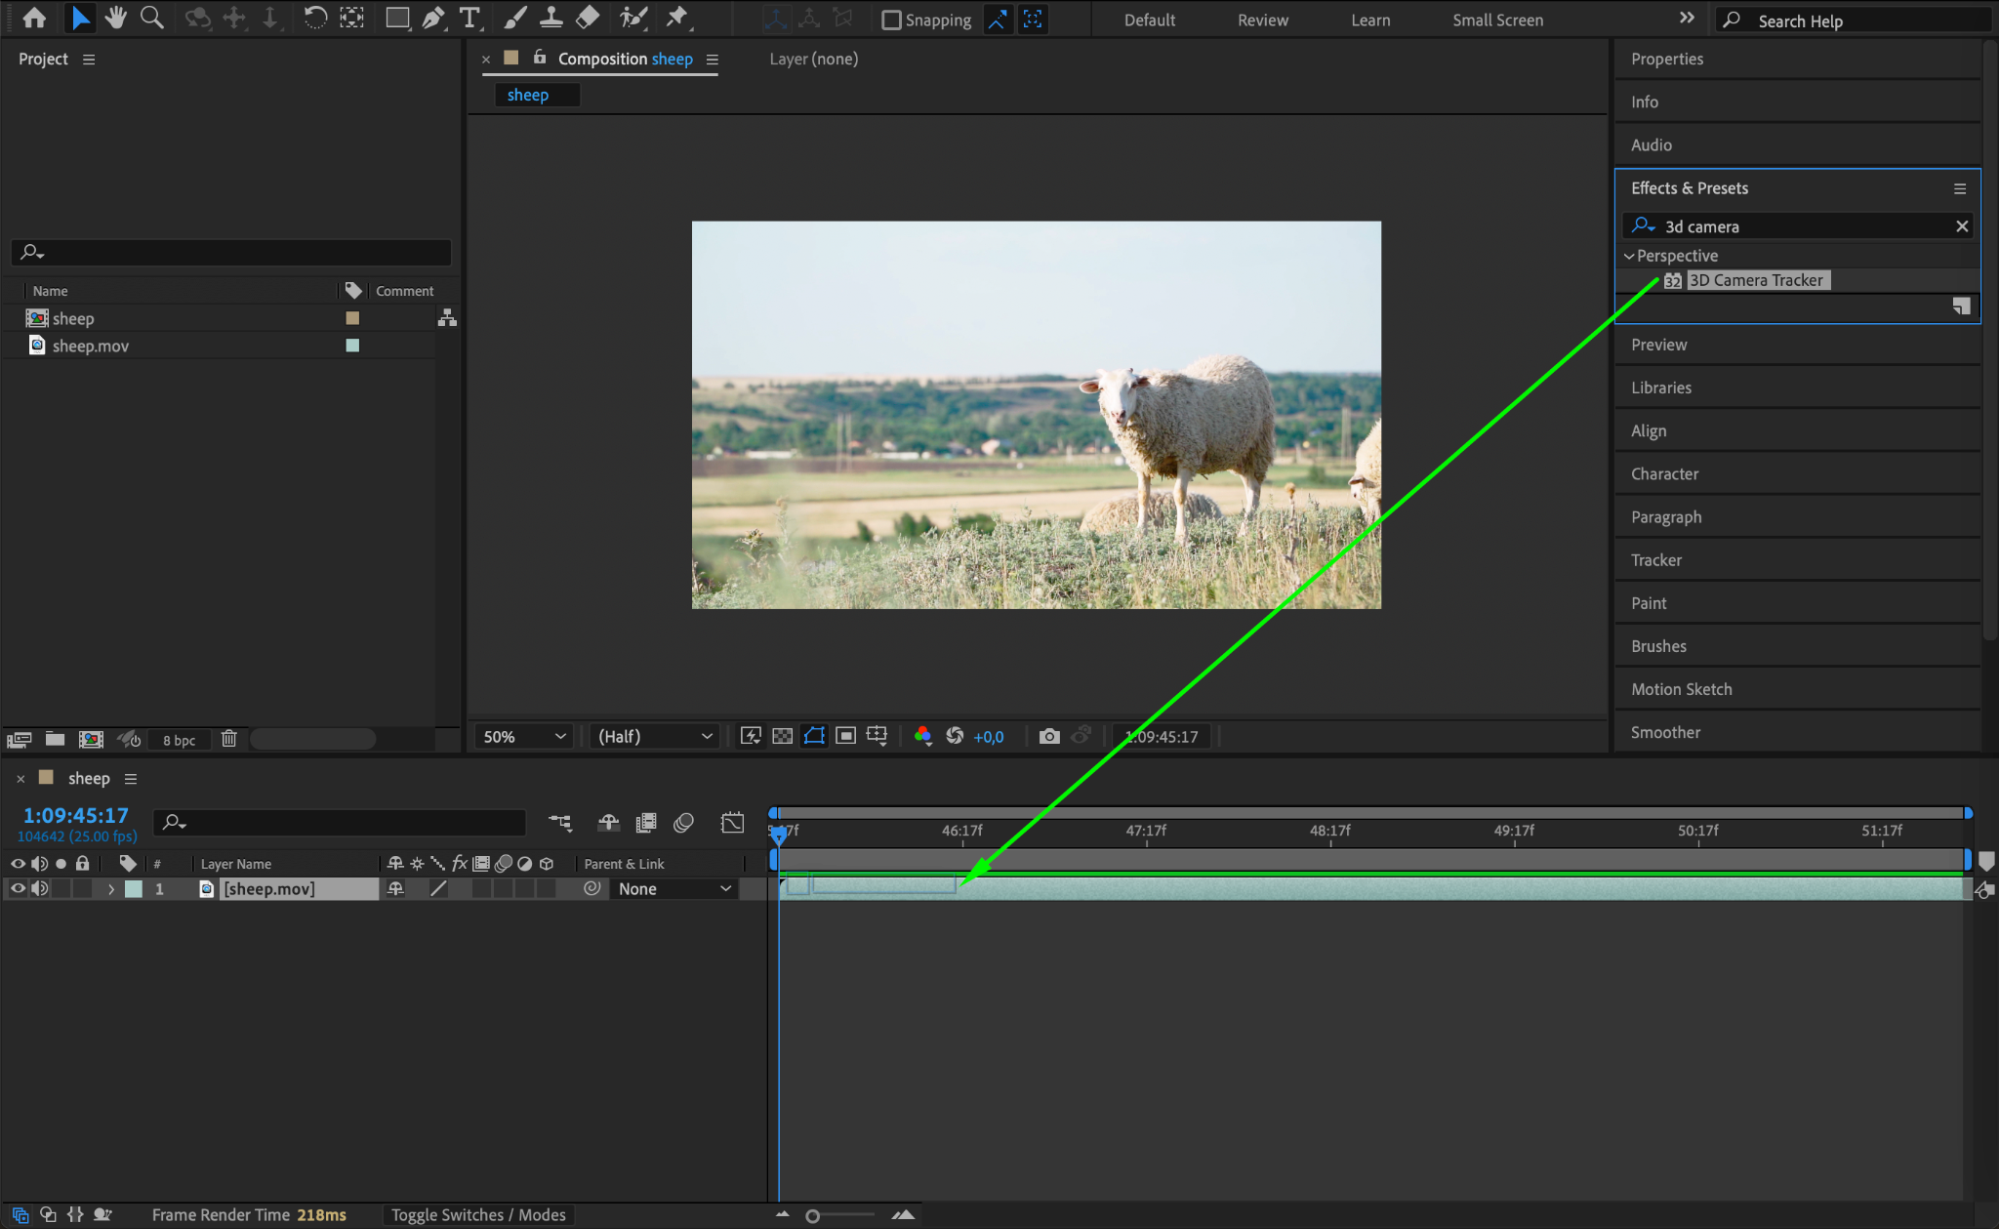 Step 3: Select a Tracking Area
Once the analysis is complete, you’ll see multiple tracking points overlaid on your footage. Identify the area where you want the text to appear. Right-click on a cluster of points in that area and select Create Text and Camera from the submenu. This will generate a text layer and a camera linked to the tracked movement.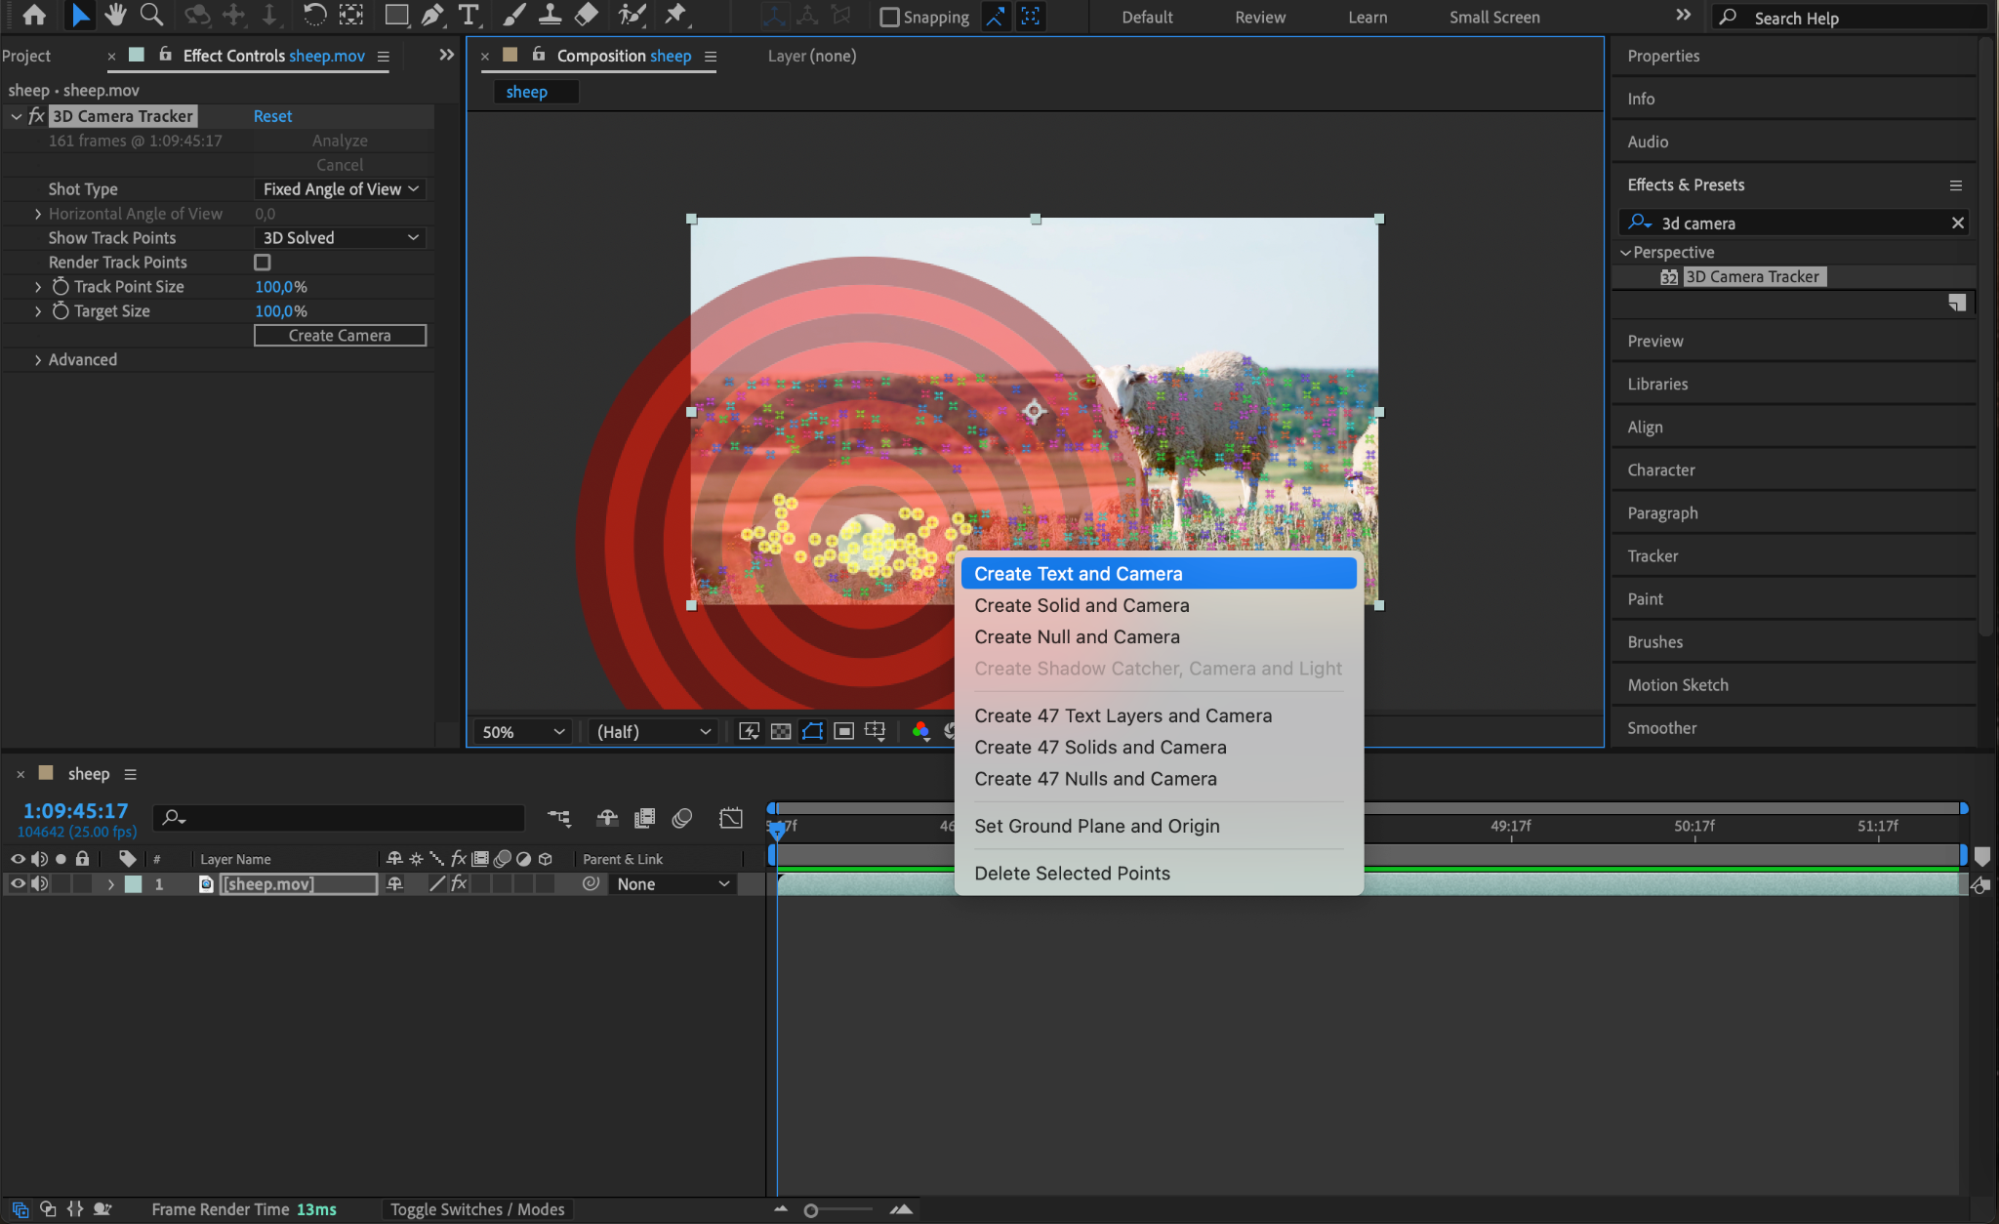 Step 4: Edit the Text Layer
Double-click the new text layer to modify its content. Adjust its position, size, and orientation in the Composition Panel to align it seamlessly with the environment of your footage.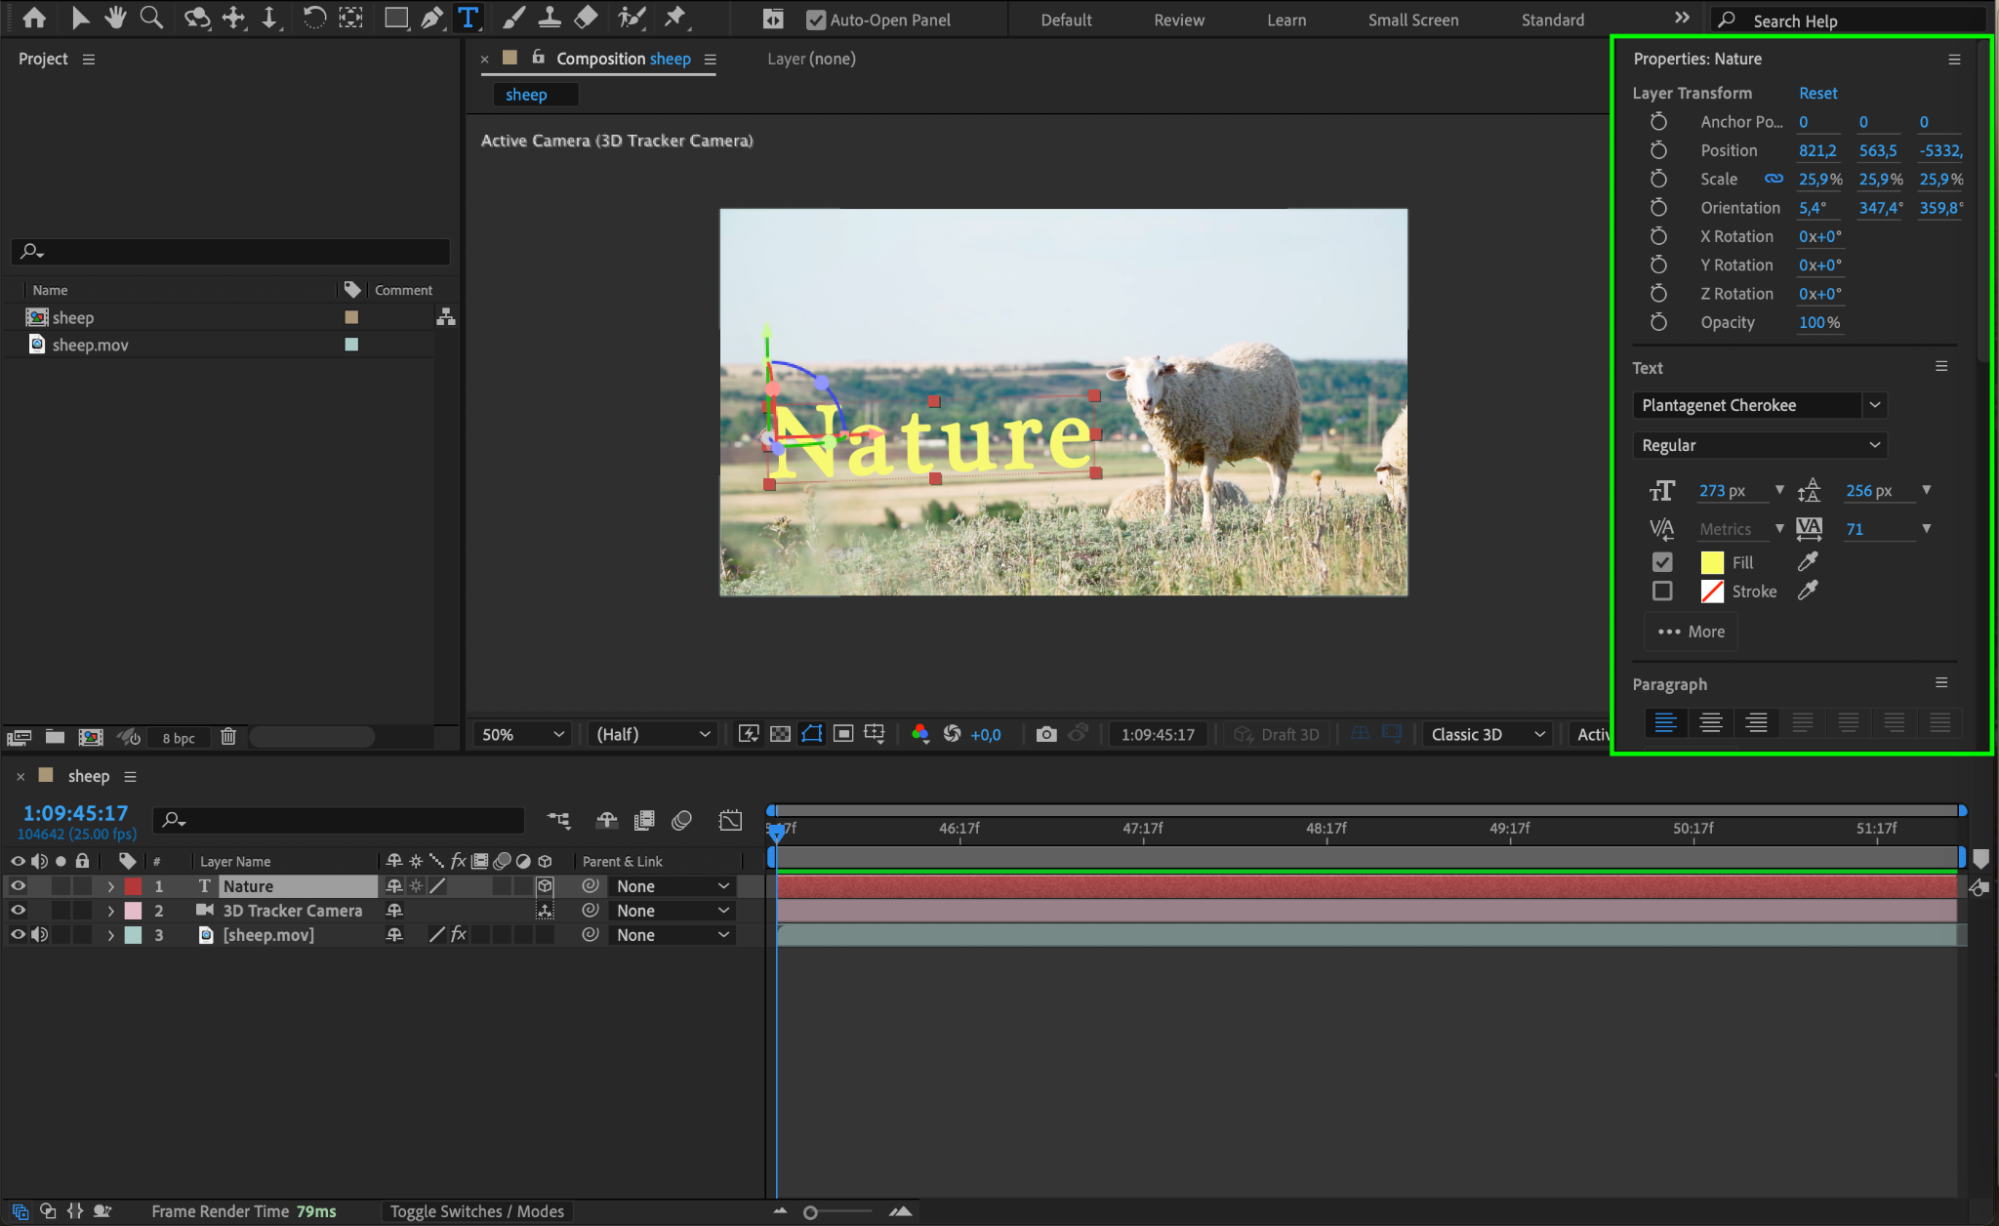 Step 5: Add Lighting for Realism
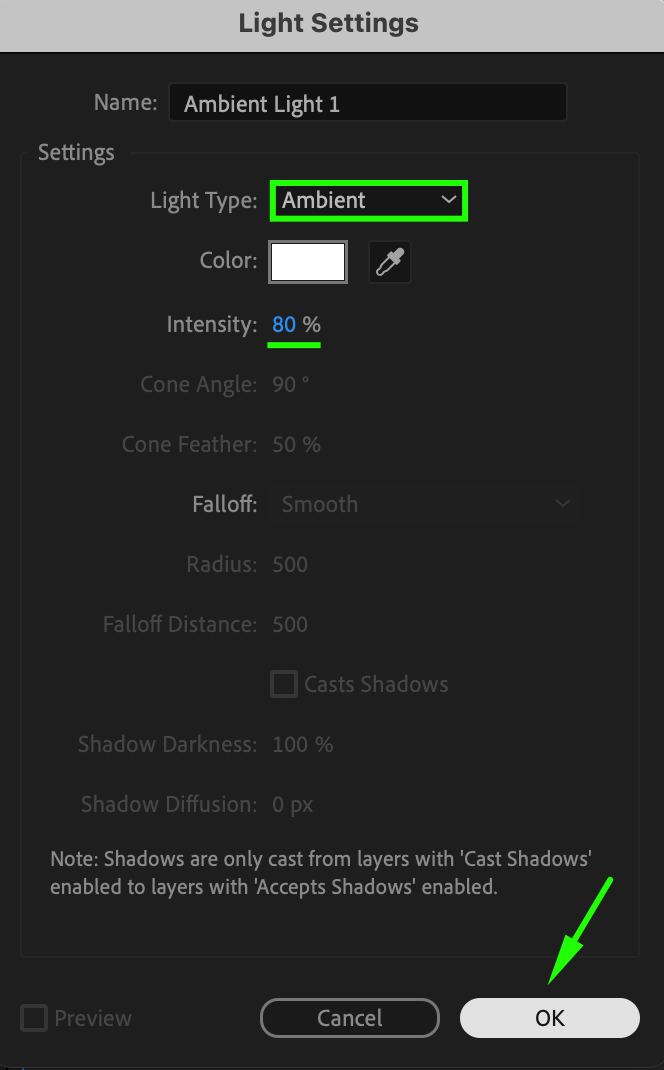
Go to Layer > New > Light and create two light sources:
An Ambient Light with an intensity of 80% to softly illuminate the scene.
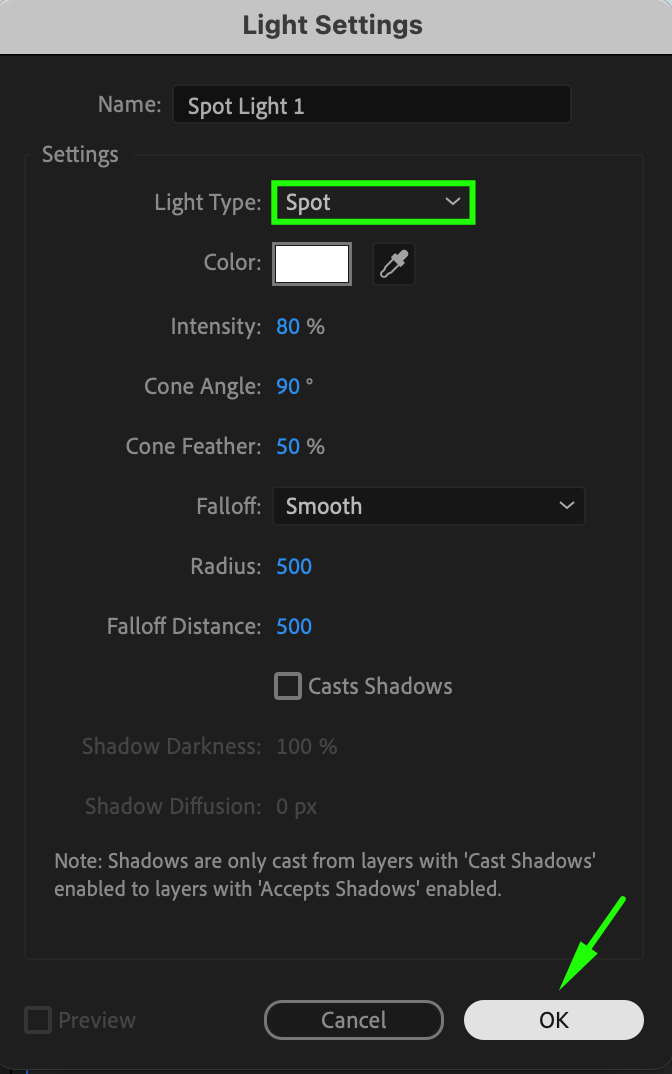
A Spot Light to add directional lighting and shadows, making the text feel integrated into the environment.
Position the lights carefully to match the natural lighting of your footage.
 Step 6: Change the Renderer to Cinema 4D
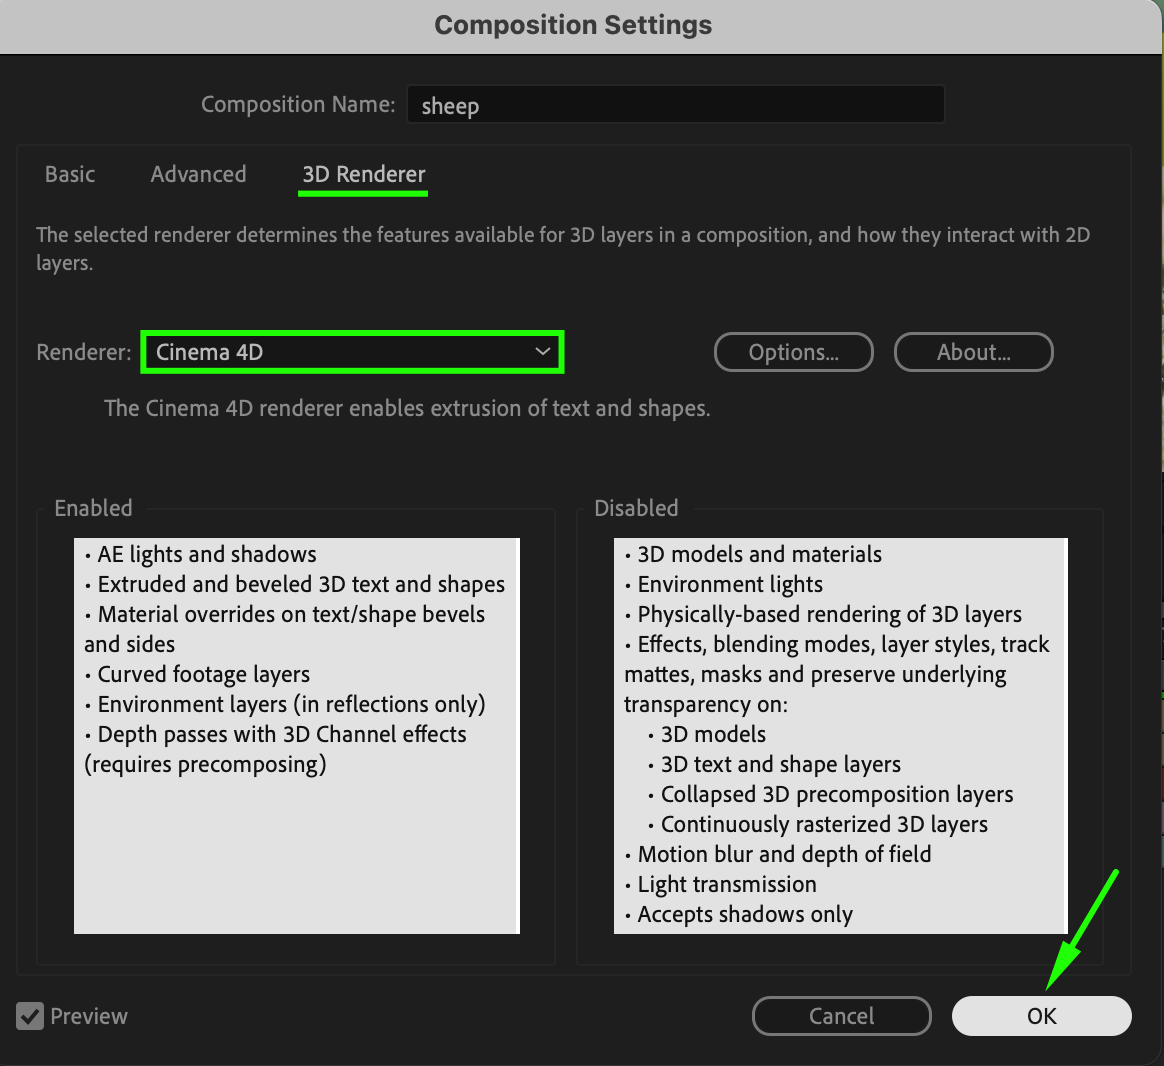
Navigate to Composition > Composition Settings and select the 3D Renderer tab. Choose Cinema 4D as your render engine. This unlocks advanced 3D features for your text layer.
 Step 7: Adjust the Geometry Options of the Text Layer
Expand the properties of the text layer and go to the Geometry Options section. Modify the following settings:
Bevel Style: Convex
Extrusion Depth: 109
Reflection Intensity: 30
Reflection Rolloff: 29
These adjustments give the text depth, reflective properties, and a polished 3D appearance.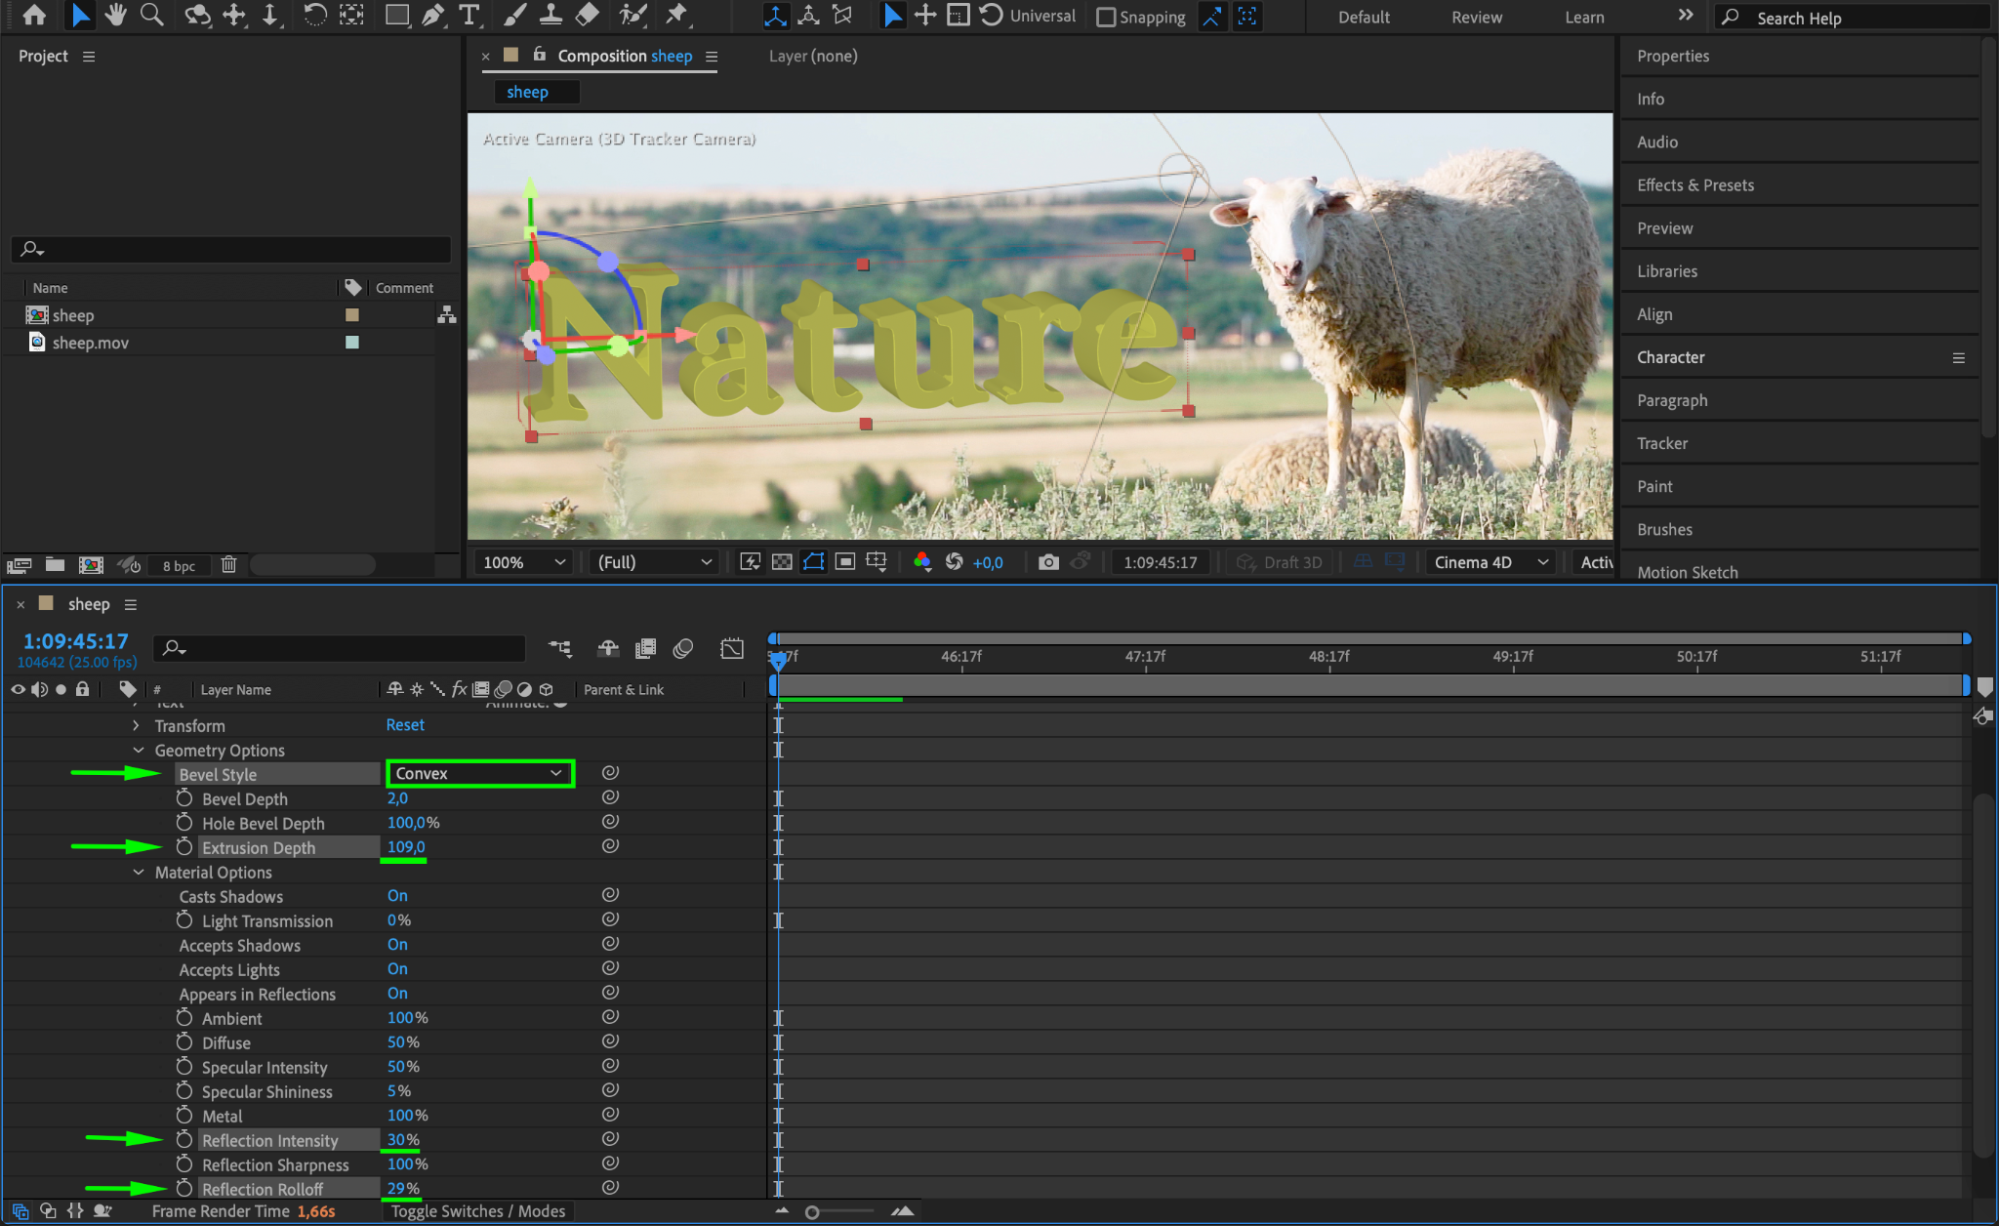 Step 8: Preview Your Animation
Press the Spacebar to preview your composition. Observe how the text follows the movement of the camera and integrates into the scene. Make any necessary adjustments to lighting or text properties for optimal results.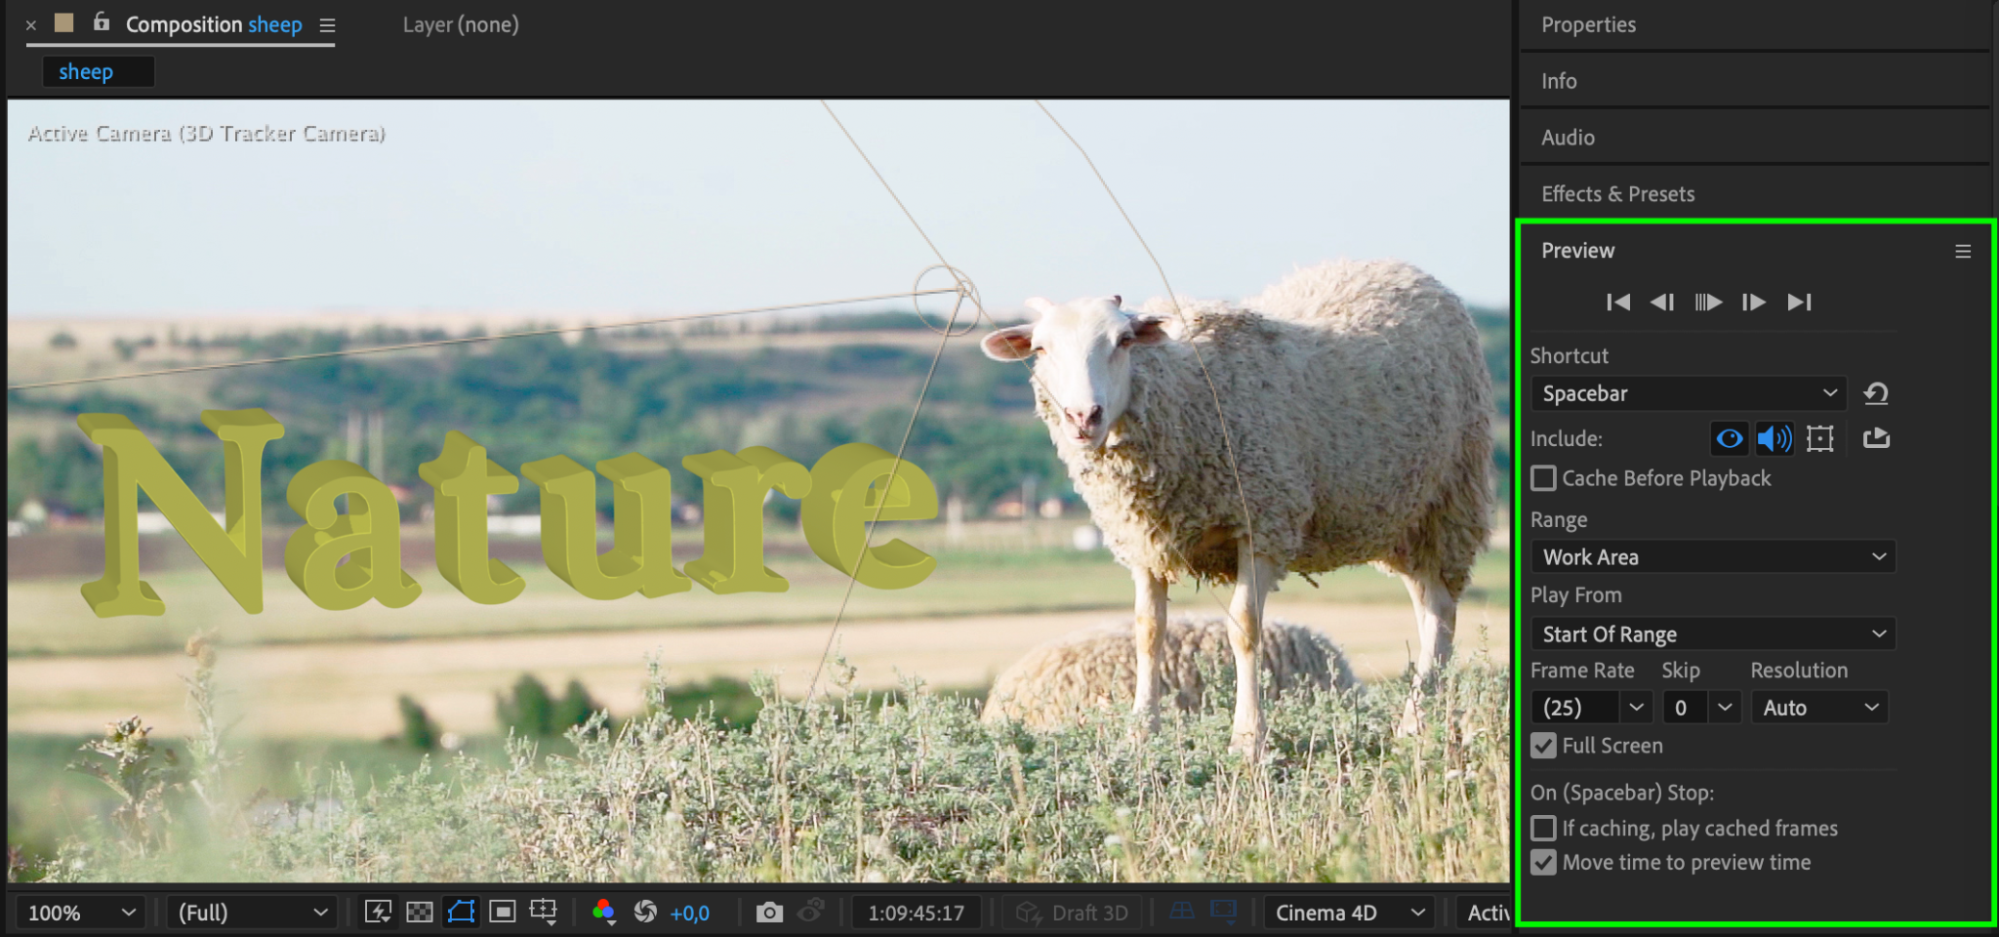 Step 9: Render Your Project
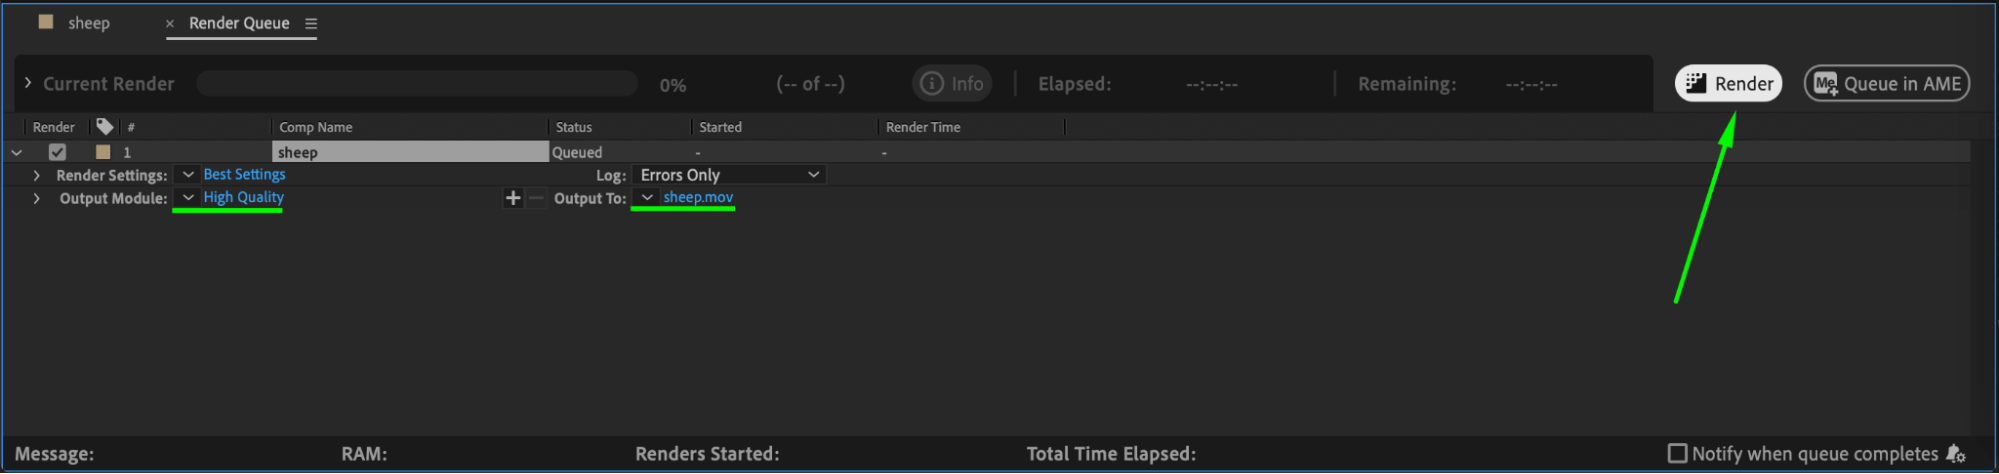
When you’re satisfied with the animation, render your project. Go to Composition > Add to Render Queue, select your preferred settings, and click Render to finalize your 3D tracked text animation.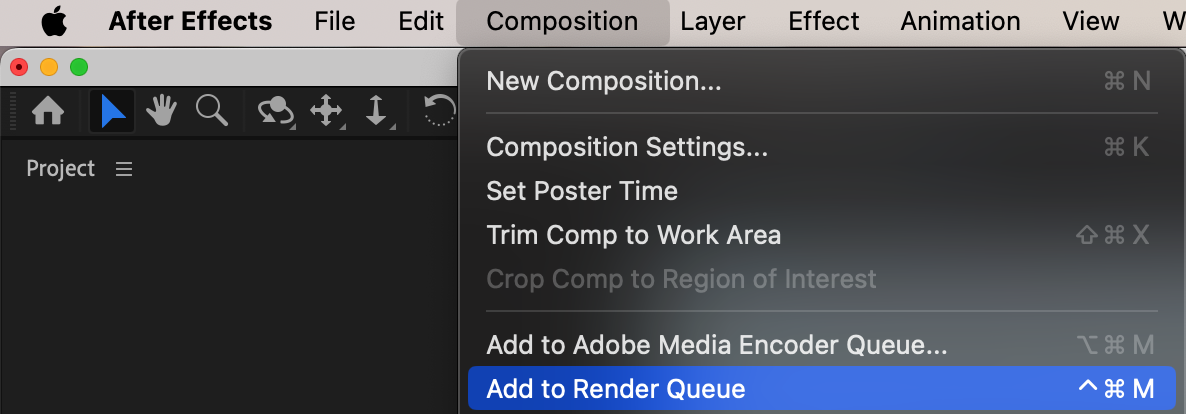
Get 10% off when you subscribe to our newsletter
Conclusion
3D text tracking in After Effects is a powerful way to enhance your video projects, adding depth and interactivity. By following these steps, you can seamlessly integrate text into your footage, creating stunning motion graphics and visual effects. Experiment with lighting, geometry, and placement to achieve the best results.
Our Bestsellers


