A Complete Guide to Adding 3D Text in After Effects
Introduction – Why Add 3D Text in After Effects?
3D text can elevate your motion graphics projects, providing depth, perspective, and professionalism. By using After Effects’ built-in Cinema 4D renderer, you can create dynamic 3D text effects that enhance video presentations, advertisements, and cinematic titles. This guide will show you how to create and render 3D text step by step.
Step 1: Create a New Composition with Cinema 4D Rendering
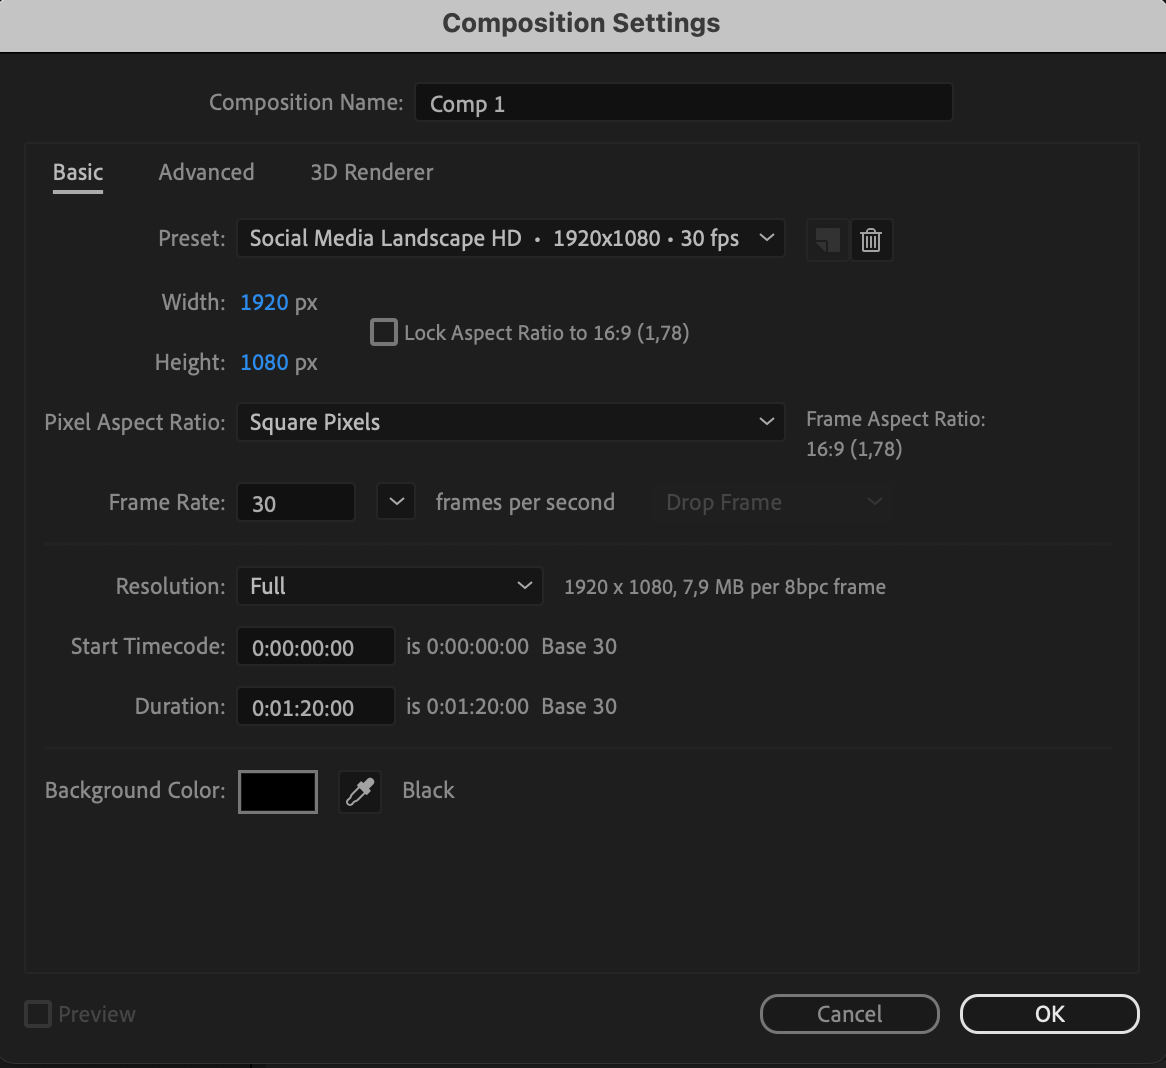
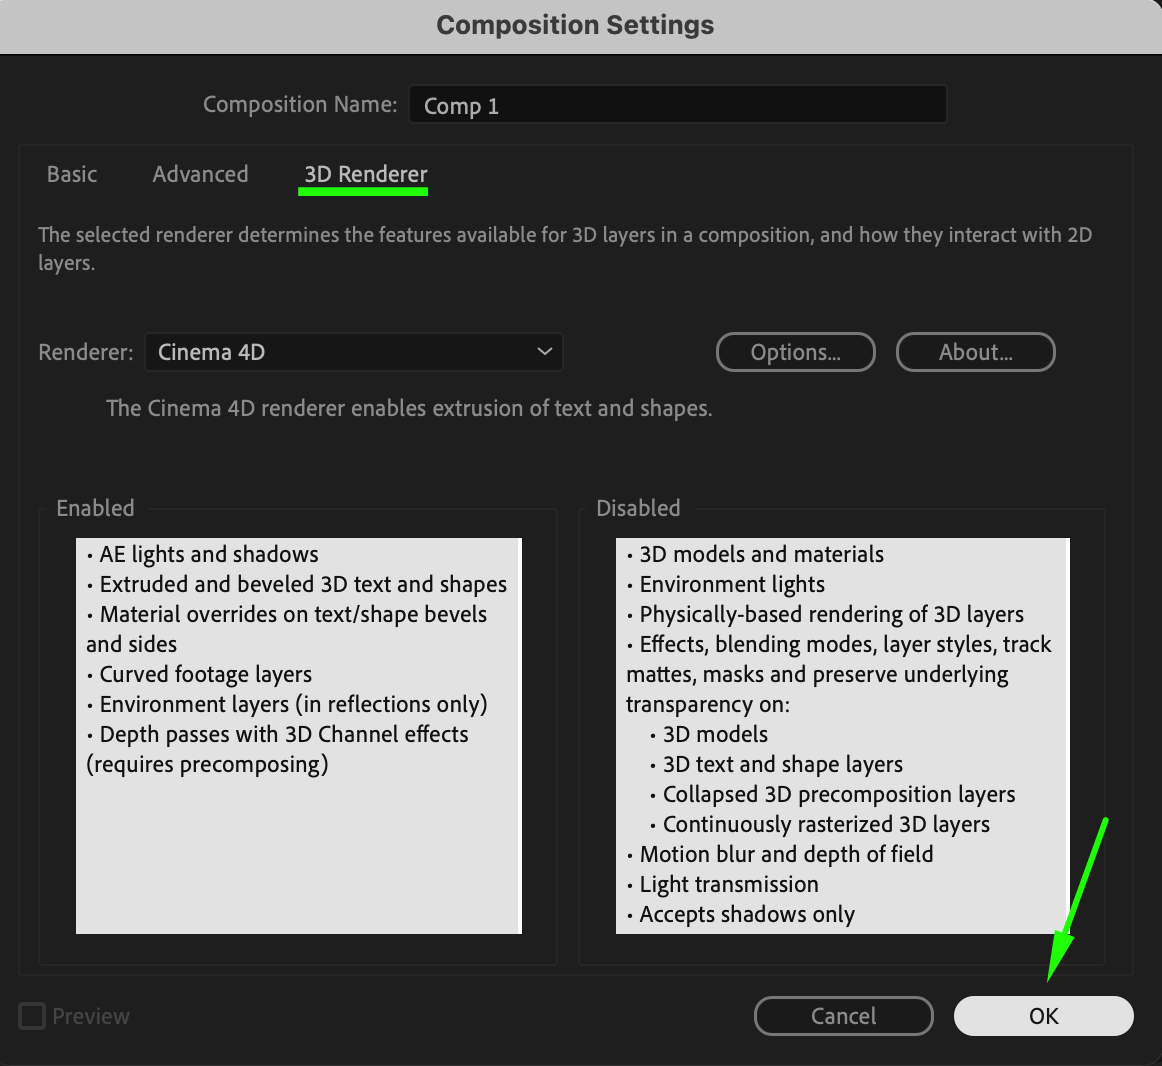
Start by creating a new composition. Go to Composition > New Composition, then set your desired resolution, frame rate, and duration. Under the 3D Renderer tab, choose Cinema 4D as your render engine. This enables 3D capabilities, including advanced text extrusion and lighting.
 Step 2: Add Text to the Composition
Use the Type Tool (T) to create your text layer. Customize the font, size, and color to match your project’s style. Position the text in the center of the composition for better focus.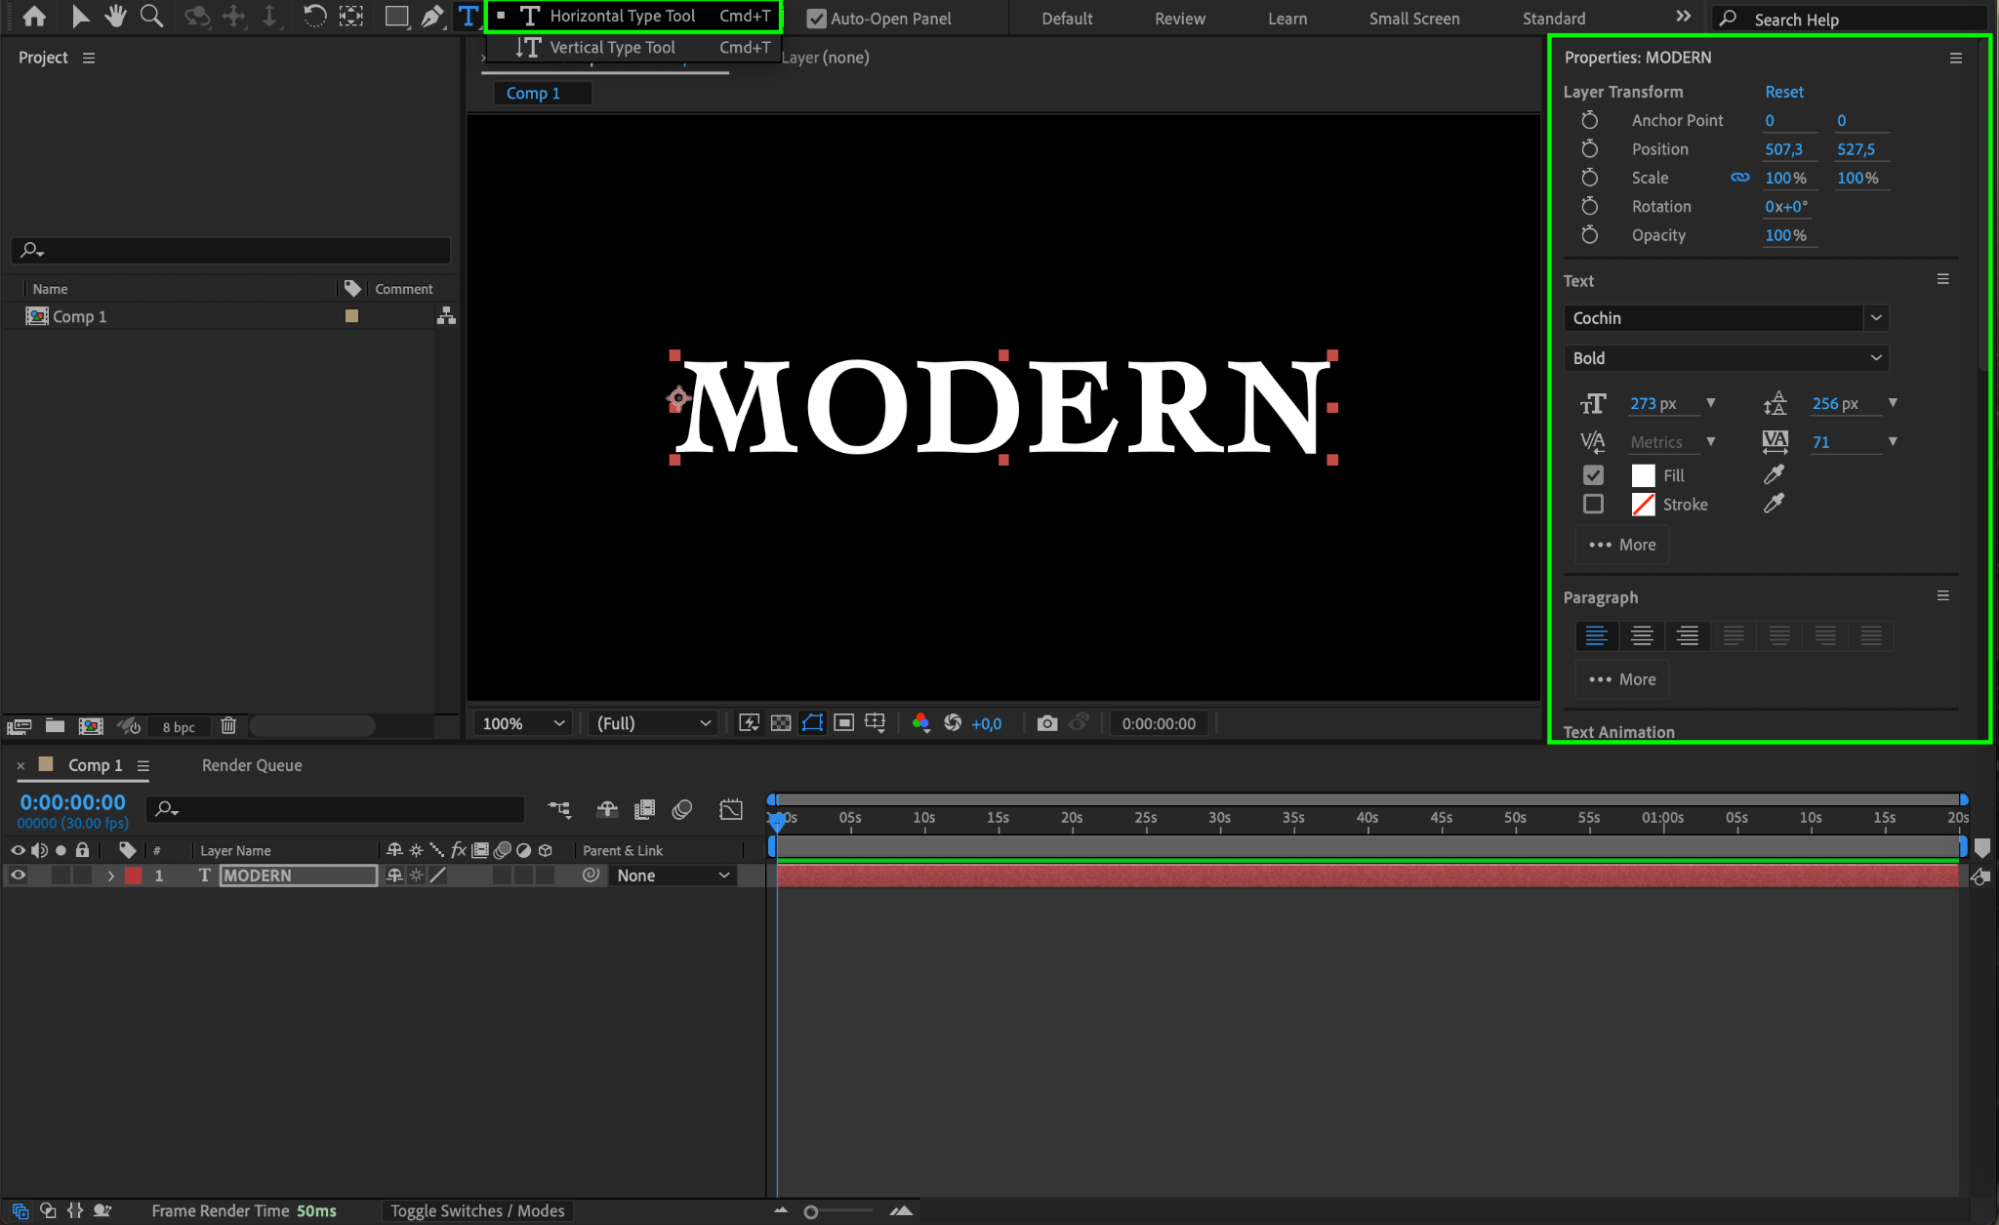 Step 3: Convert Text into a 3D Layer and Adjust Geometry Options
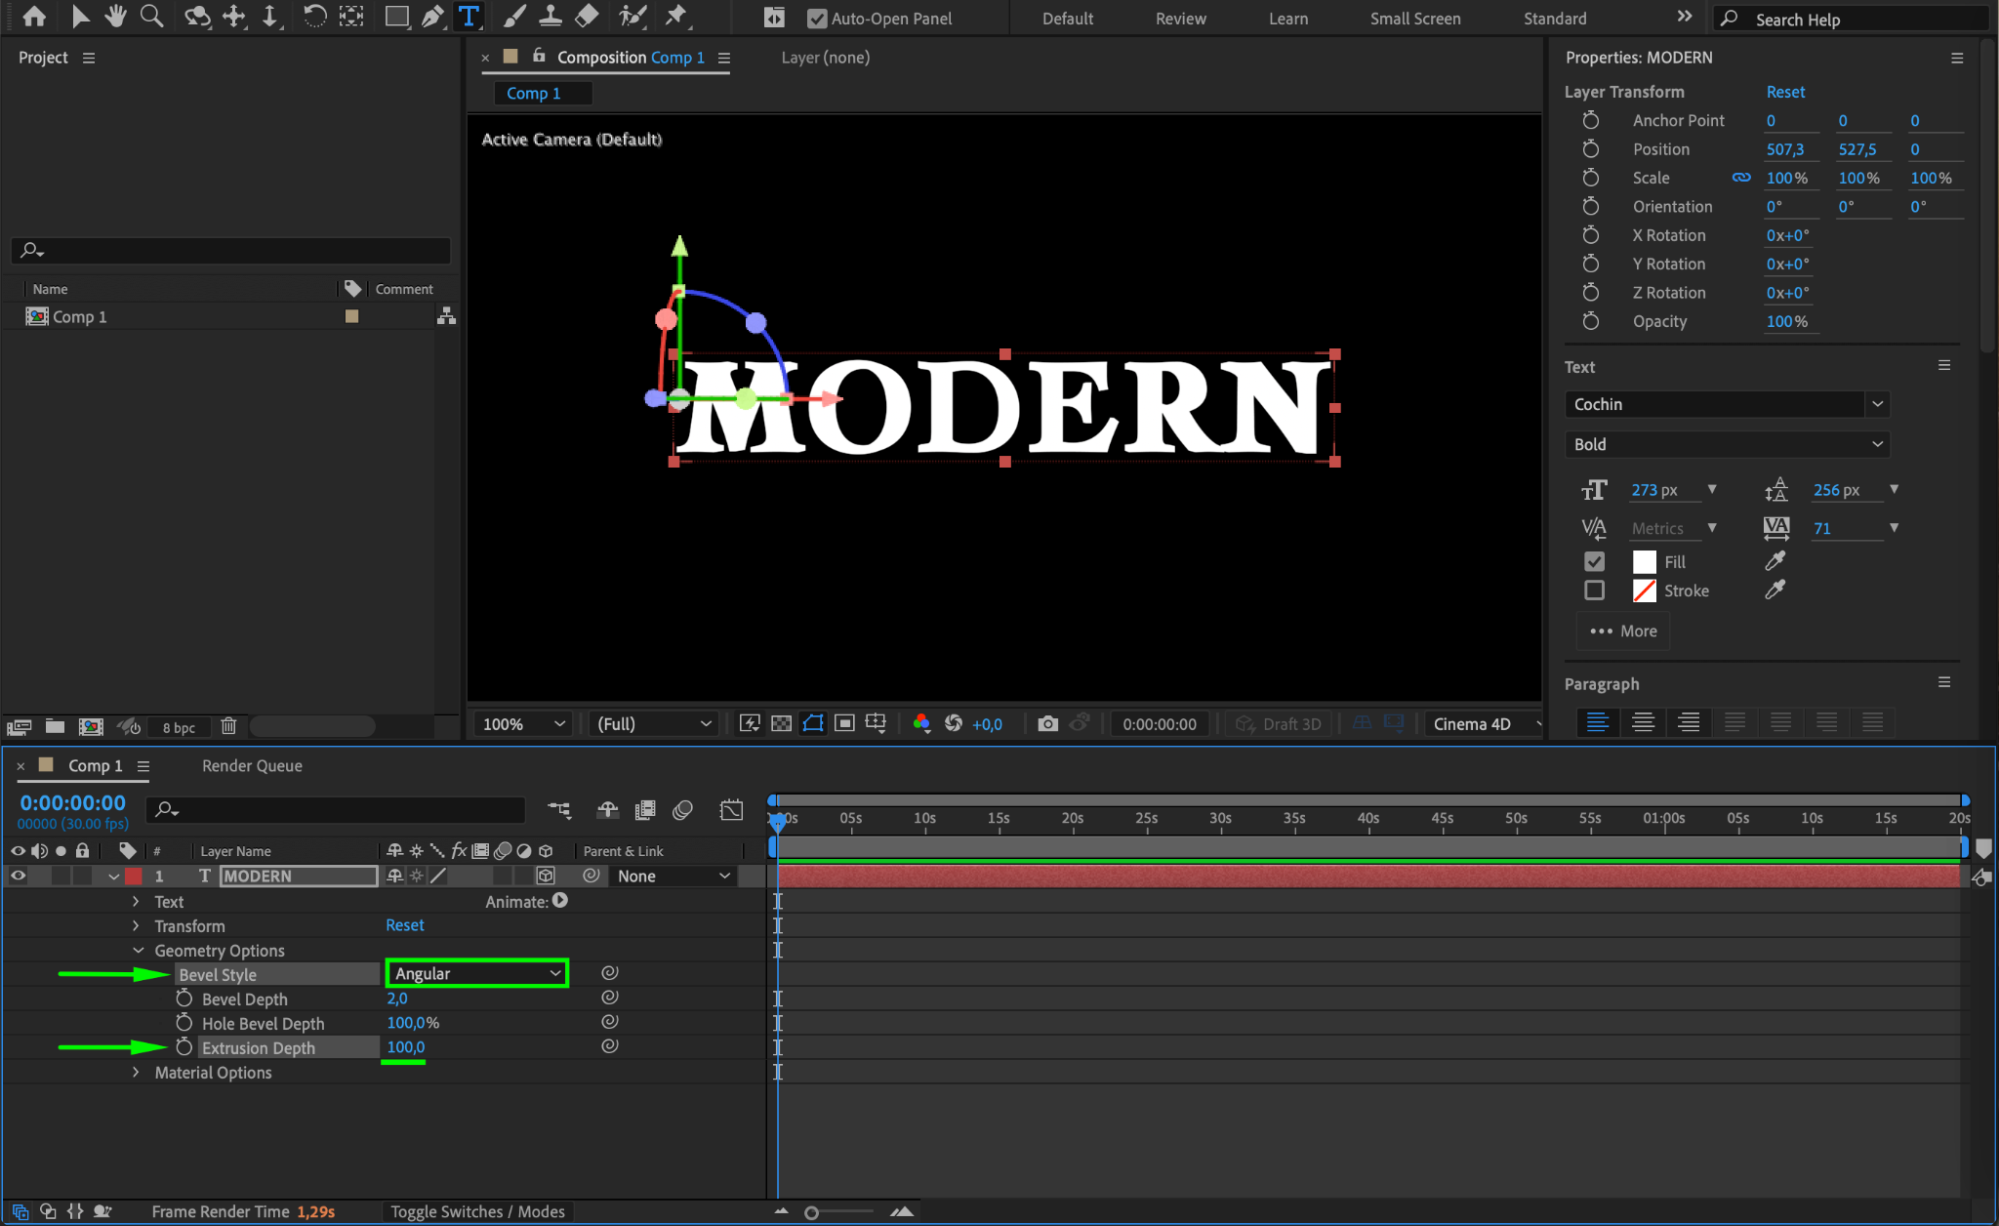
Select the text layer and make it a 3D layer by clicking the cube icon in the Timeline panel. Open the Geometry Options section in the layer’s properties. Set Bevel Style to Angular and Extrusion Depth to 100. These settings give the text its 3D appearance and depth.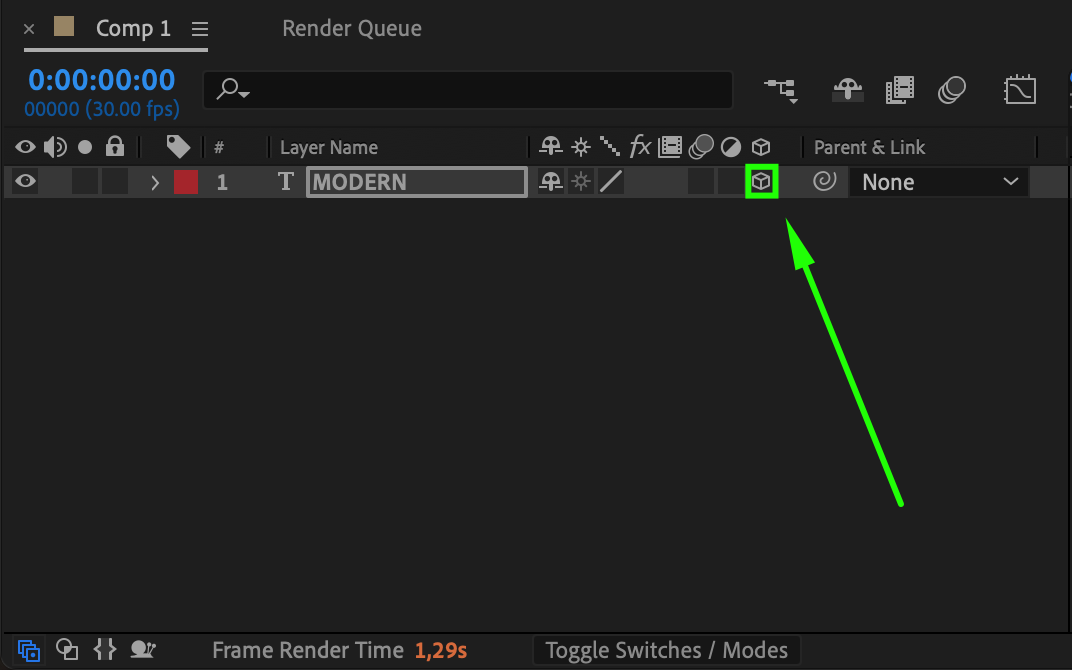
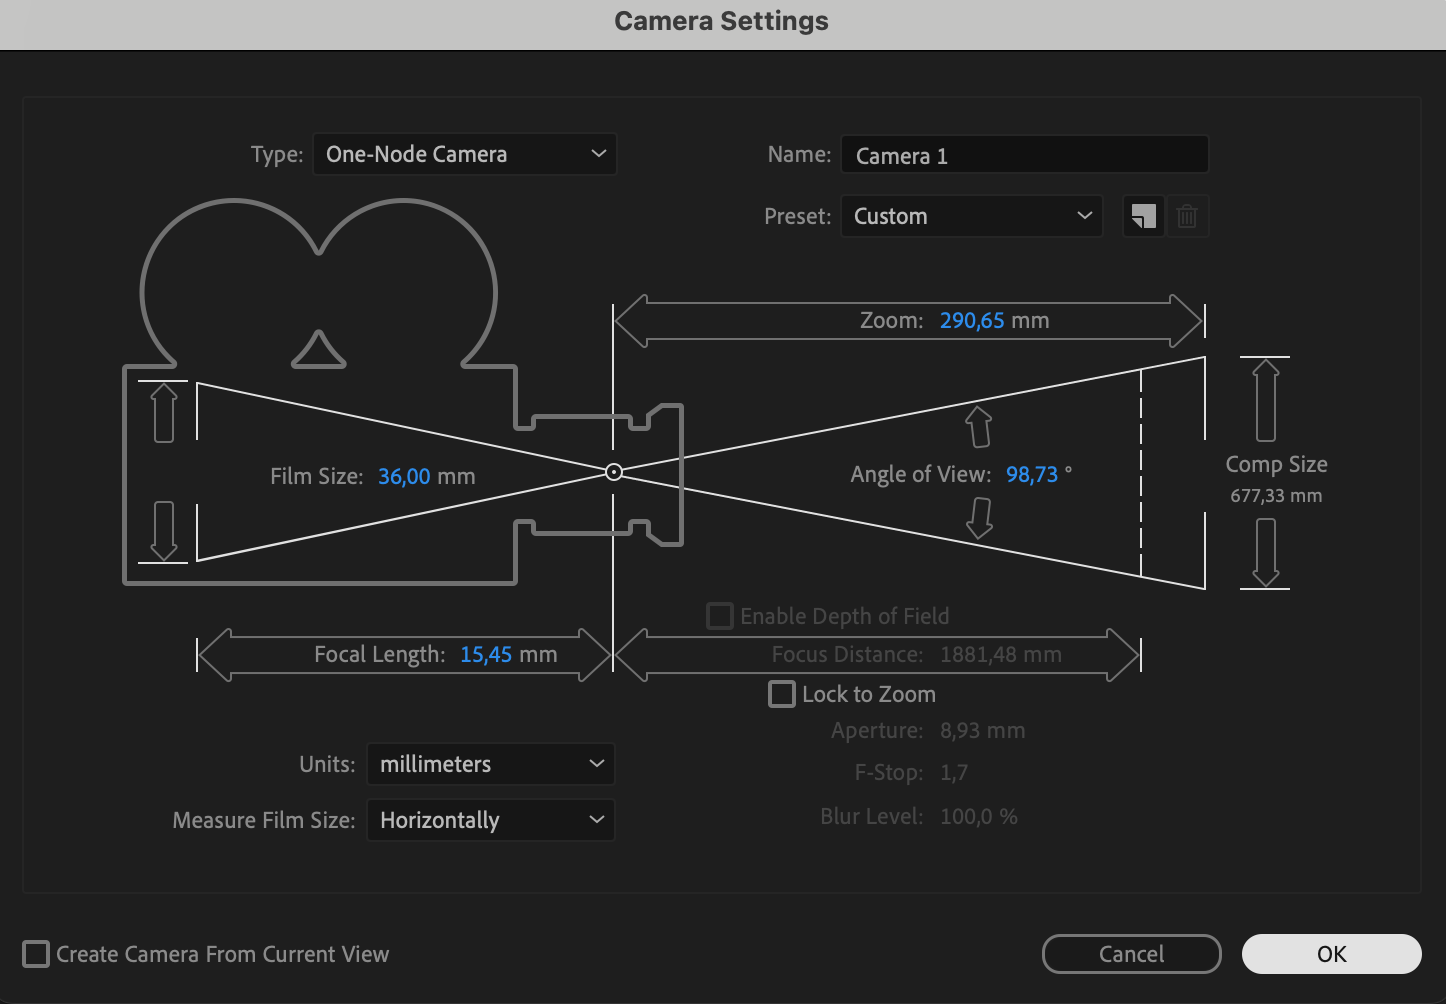
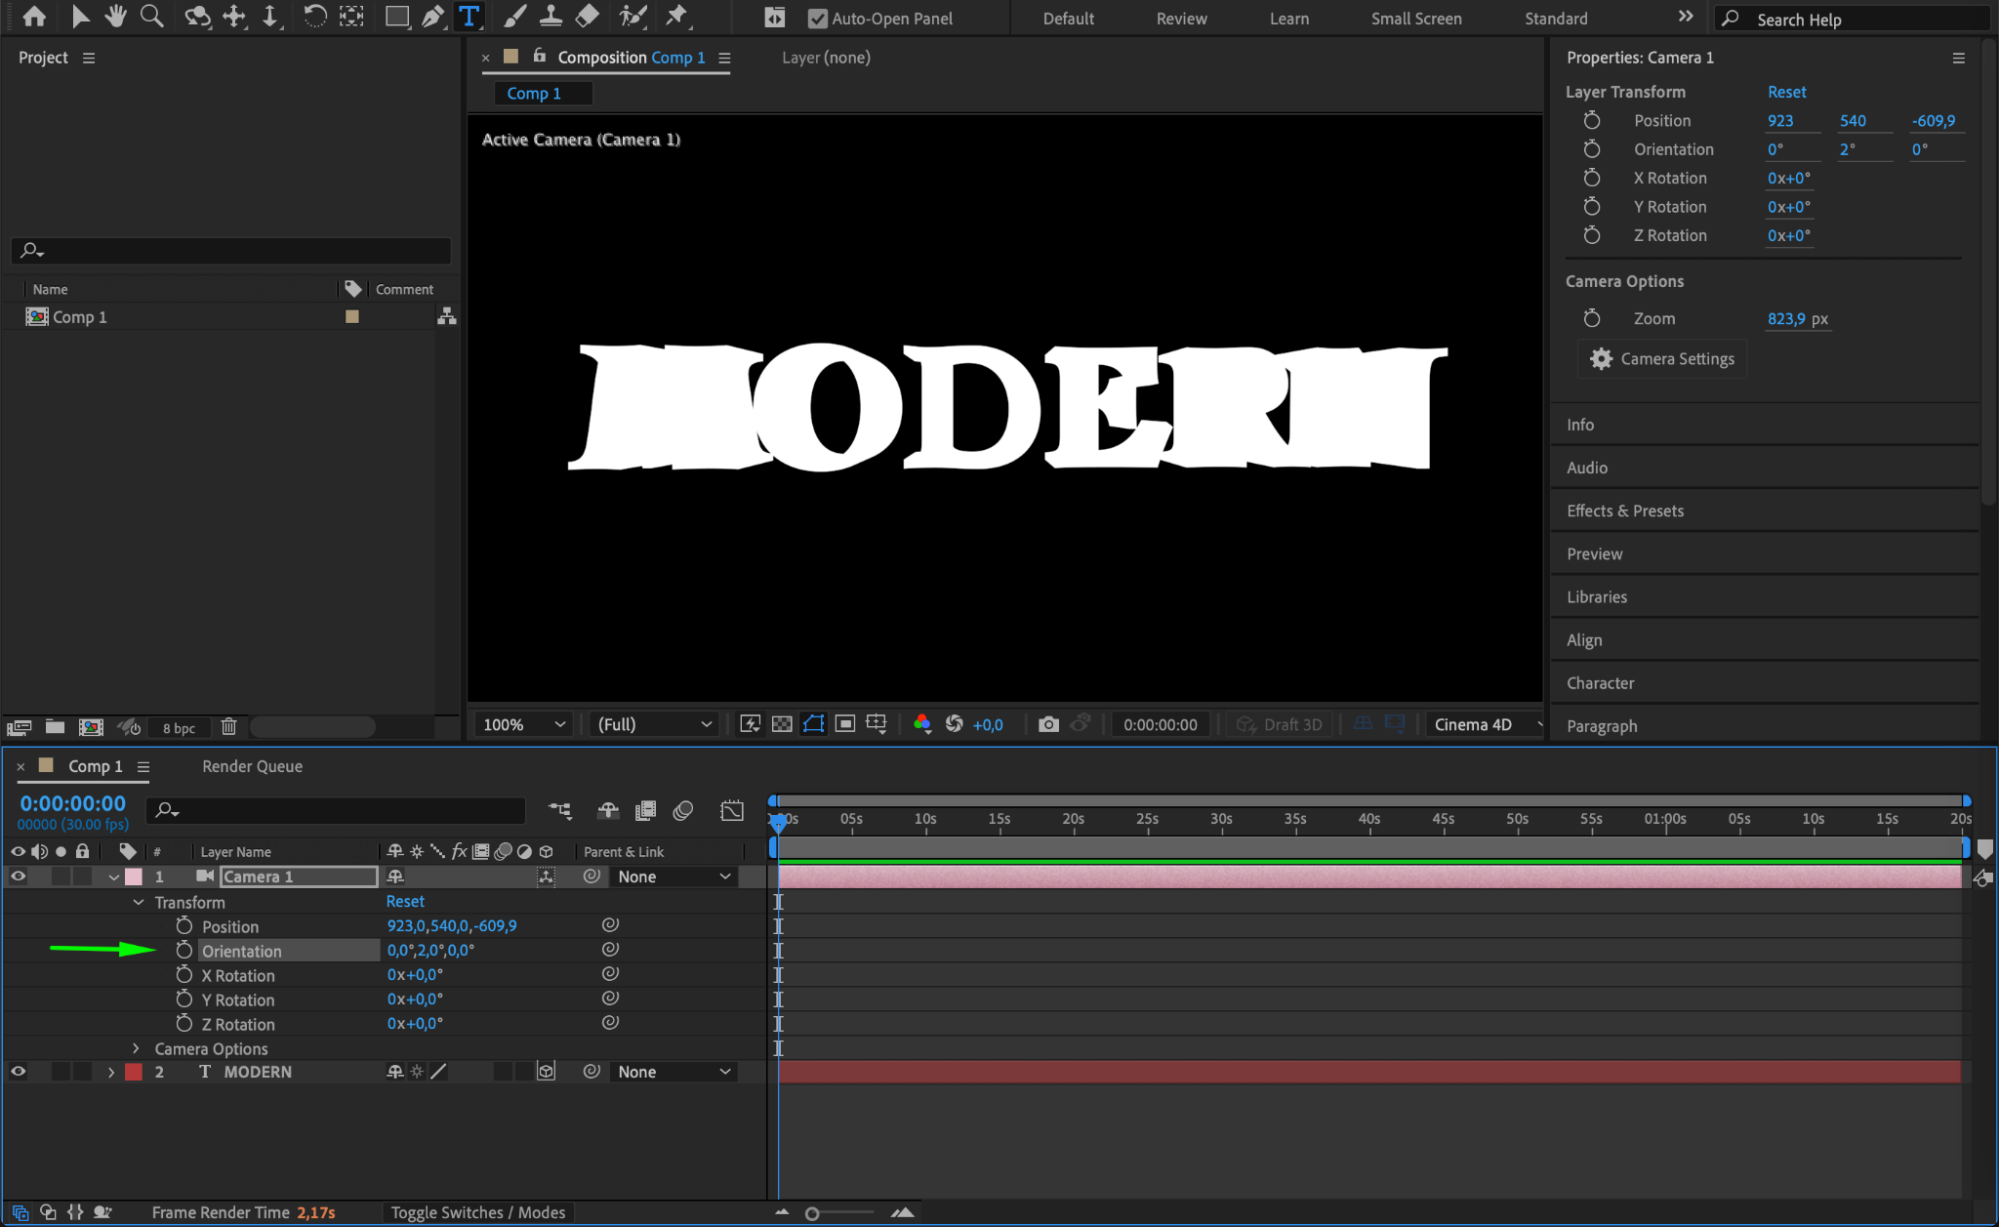
 Step 4: Add a Camera Layer for Perspective Control
Go to Layer > New > Camera. Use the Camera Tools (C) to adjust the orientation and perspective of your 3D text.

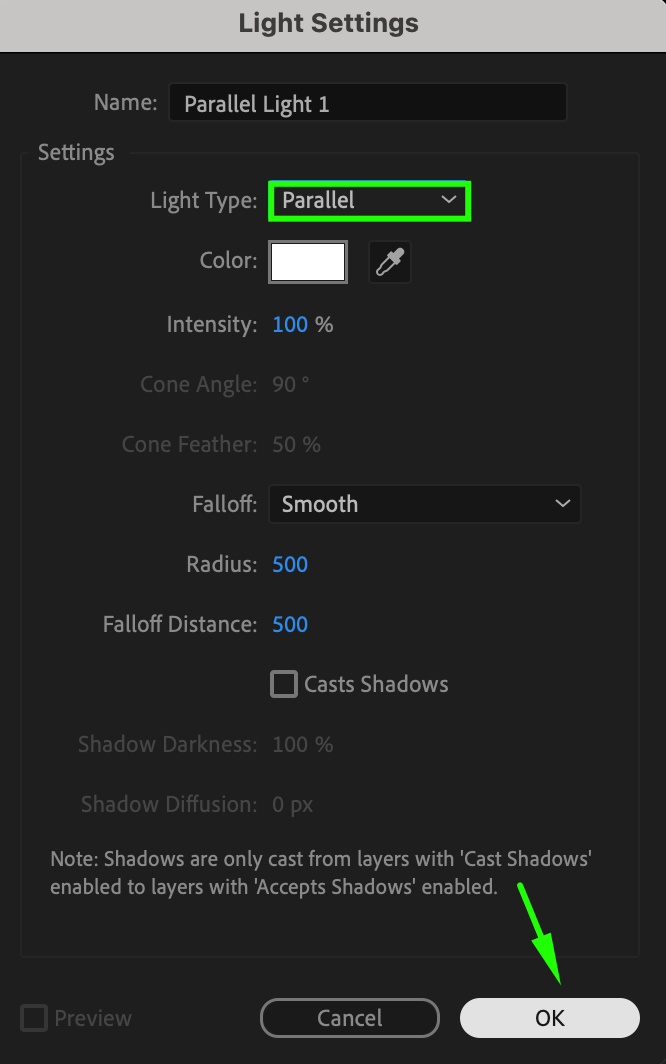
 Step 5: Add Parallel Light and Adjust Lighting Direction
Get 10% off when you subscribe to our newsletter

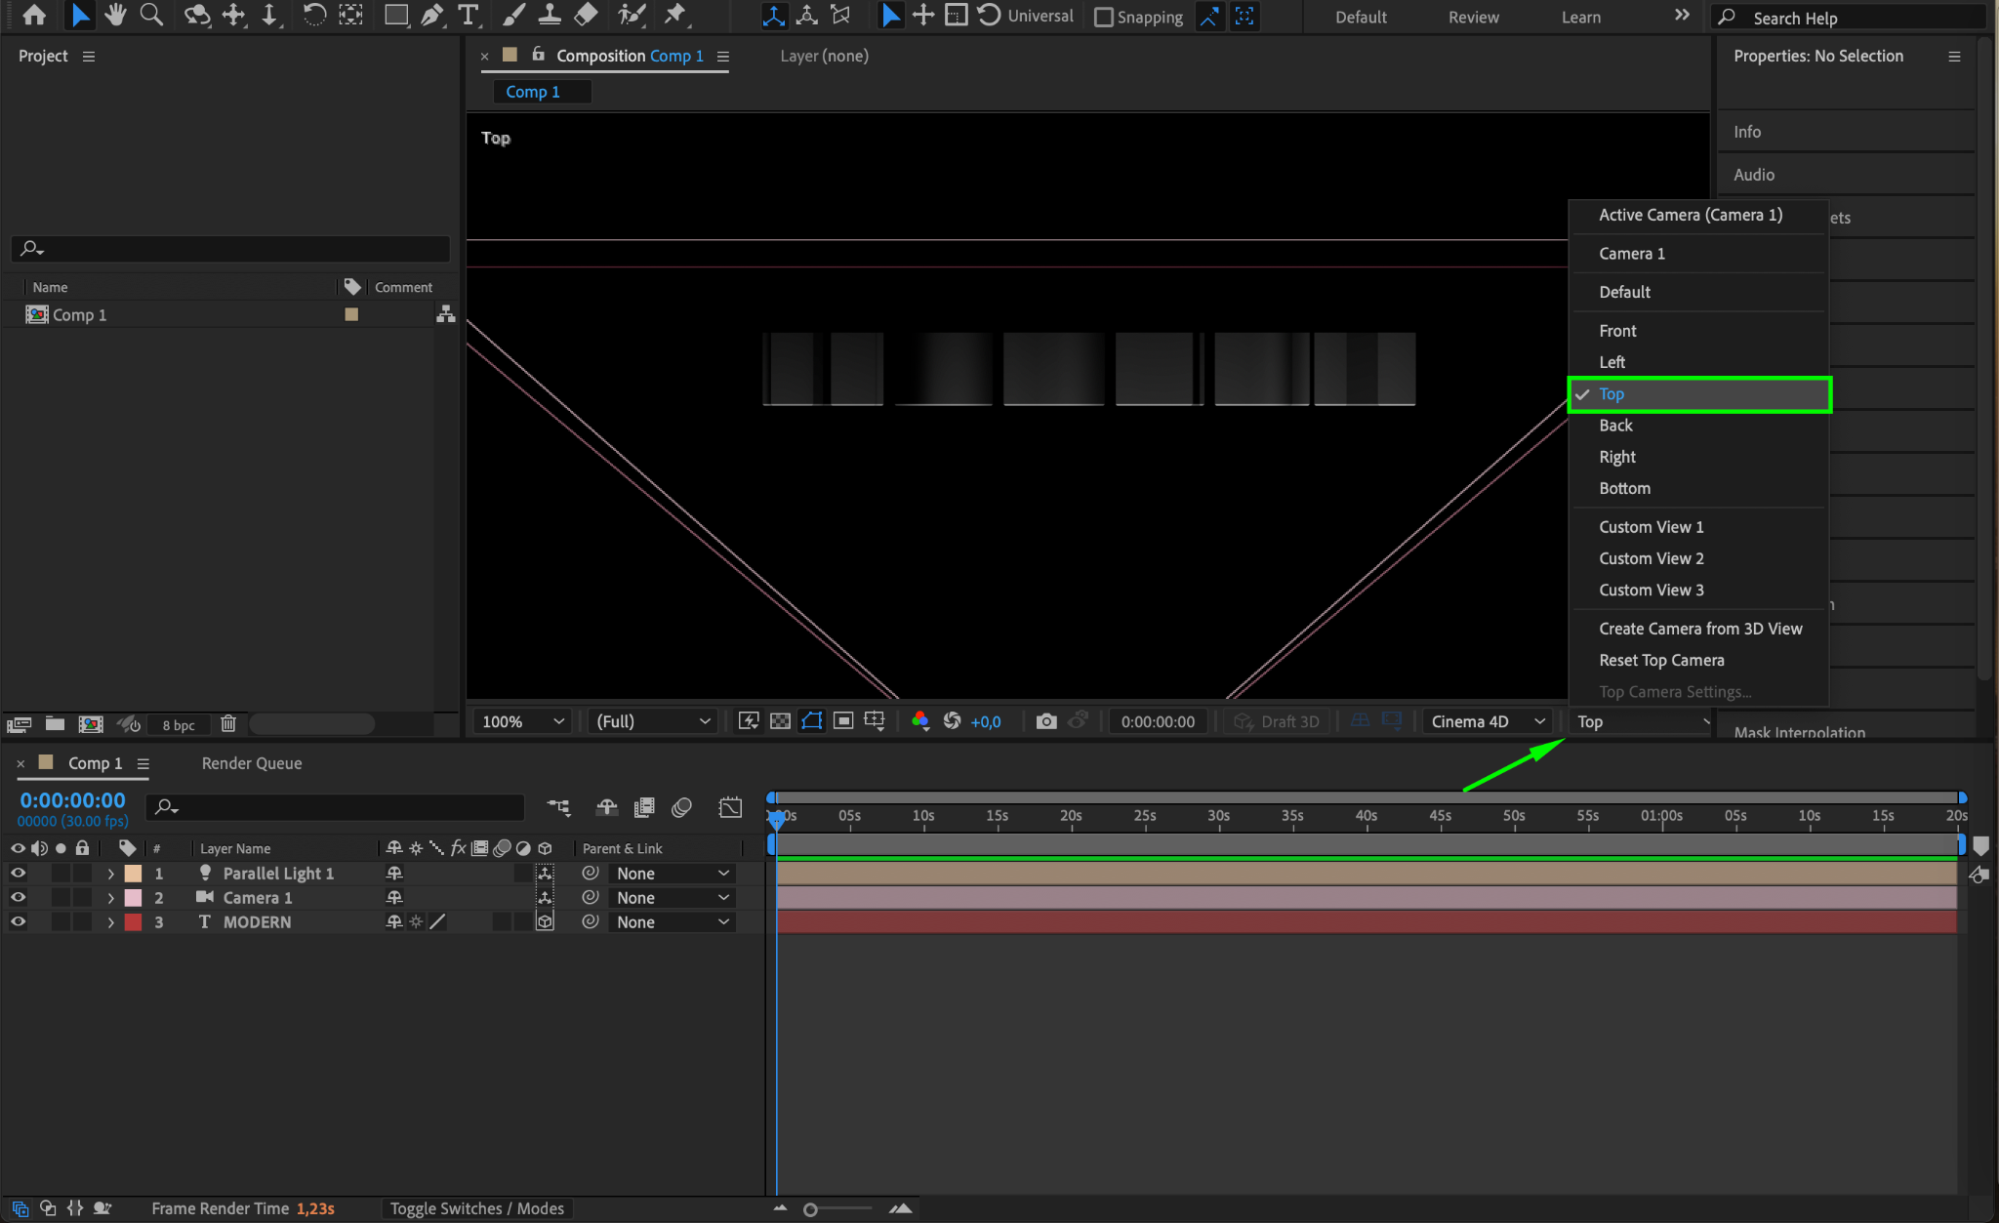
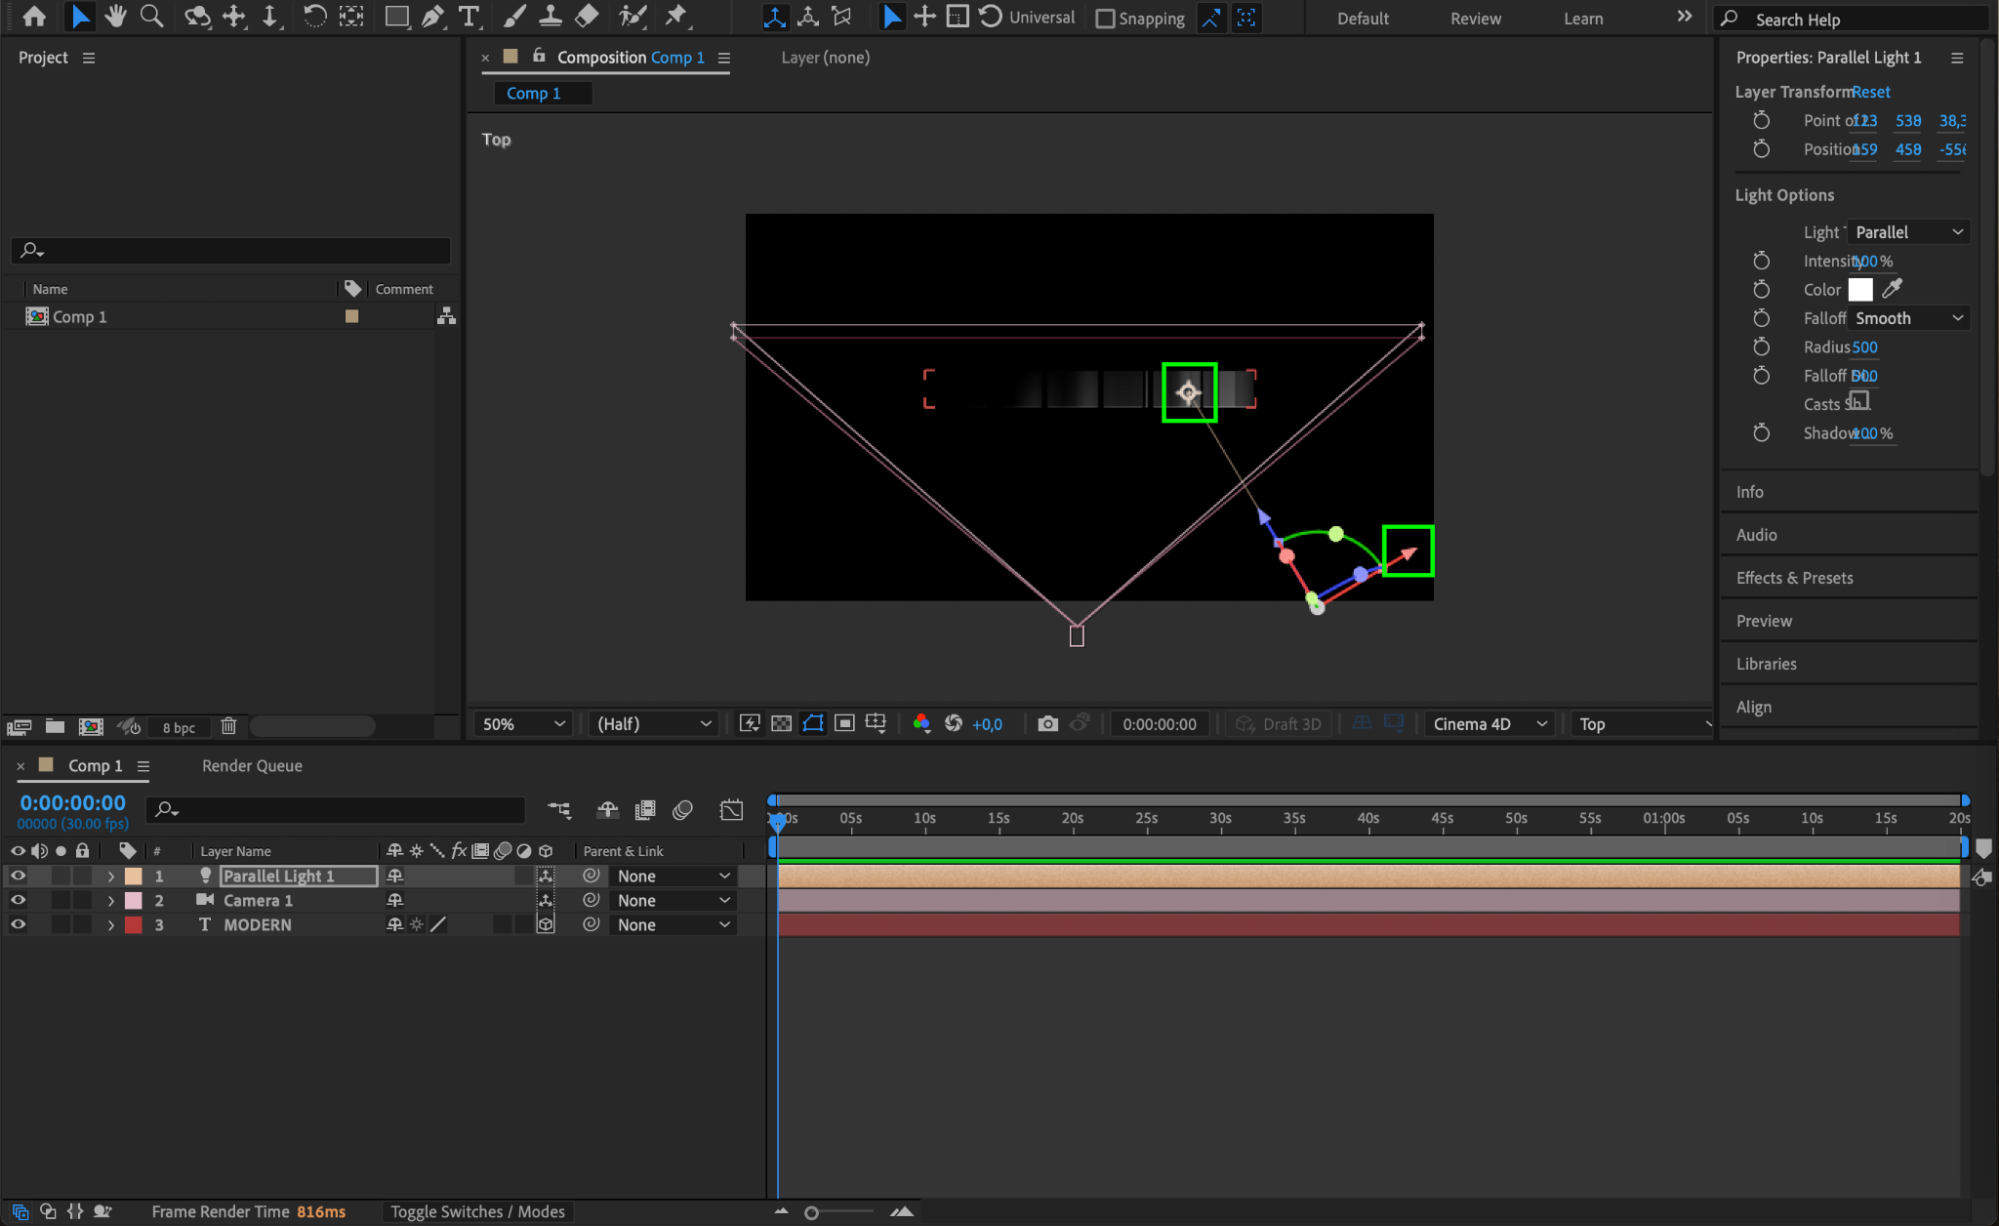
Create a light source by selecting Layer > New > Light and choosing Parallel Light. In the Composition panel, switch to the Top View and position the light to illuminate one side of the text. Adjust the light’s intensity and angle for dramatic shadows and highlights.

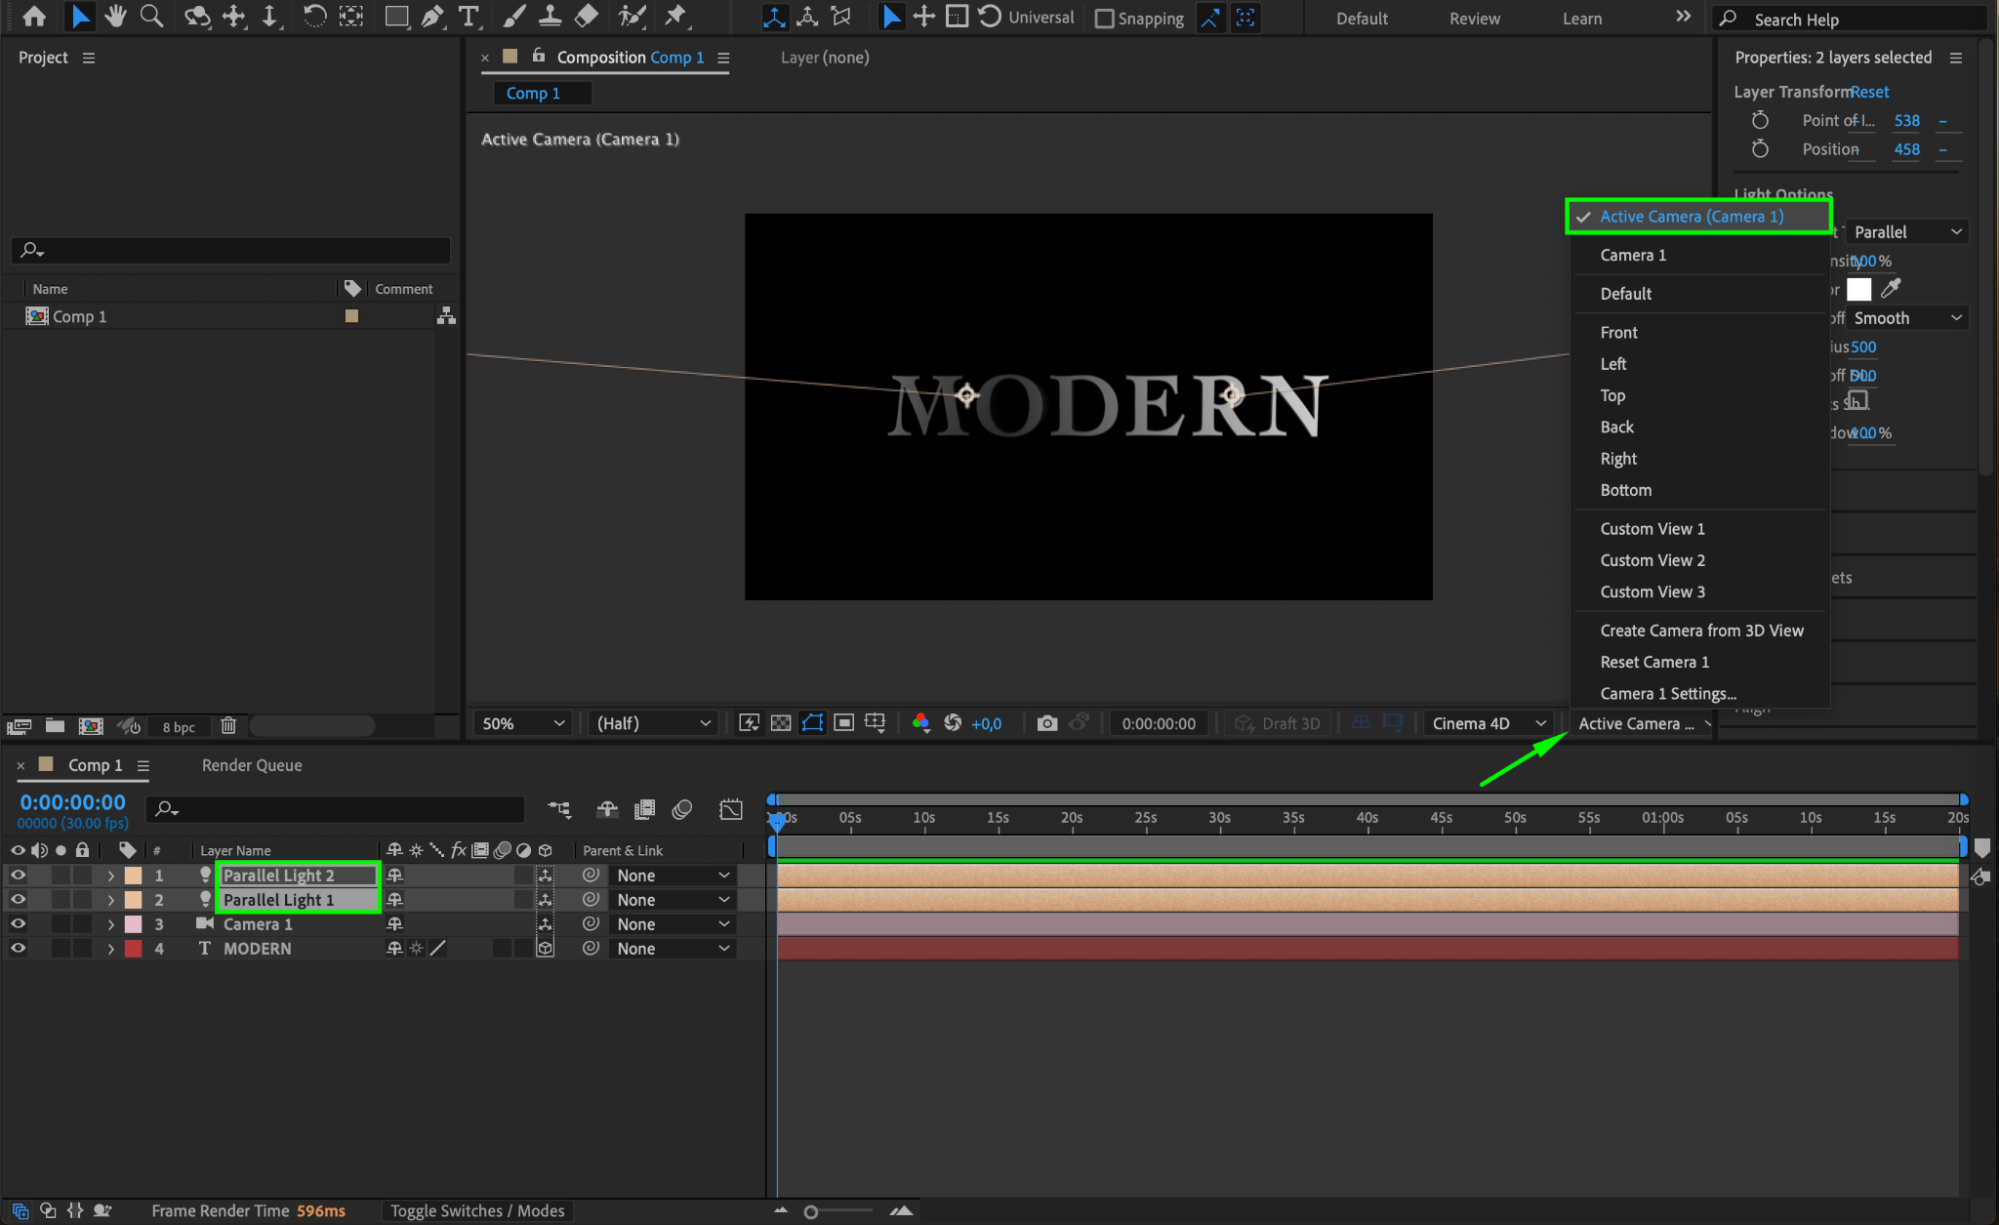
 Step 6: Duplicate Light Source for Balanced Illumination
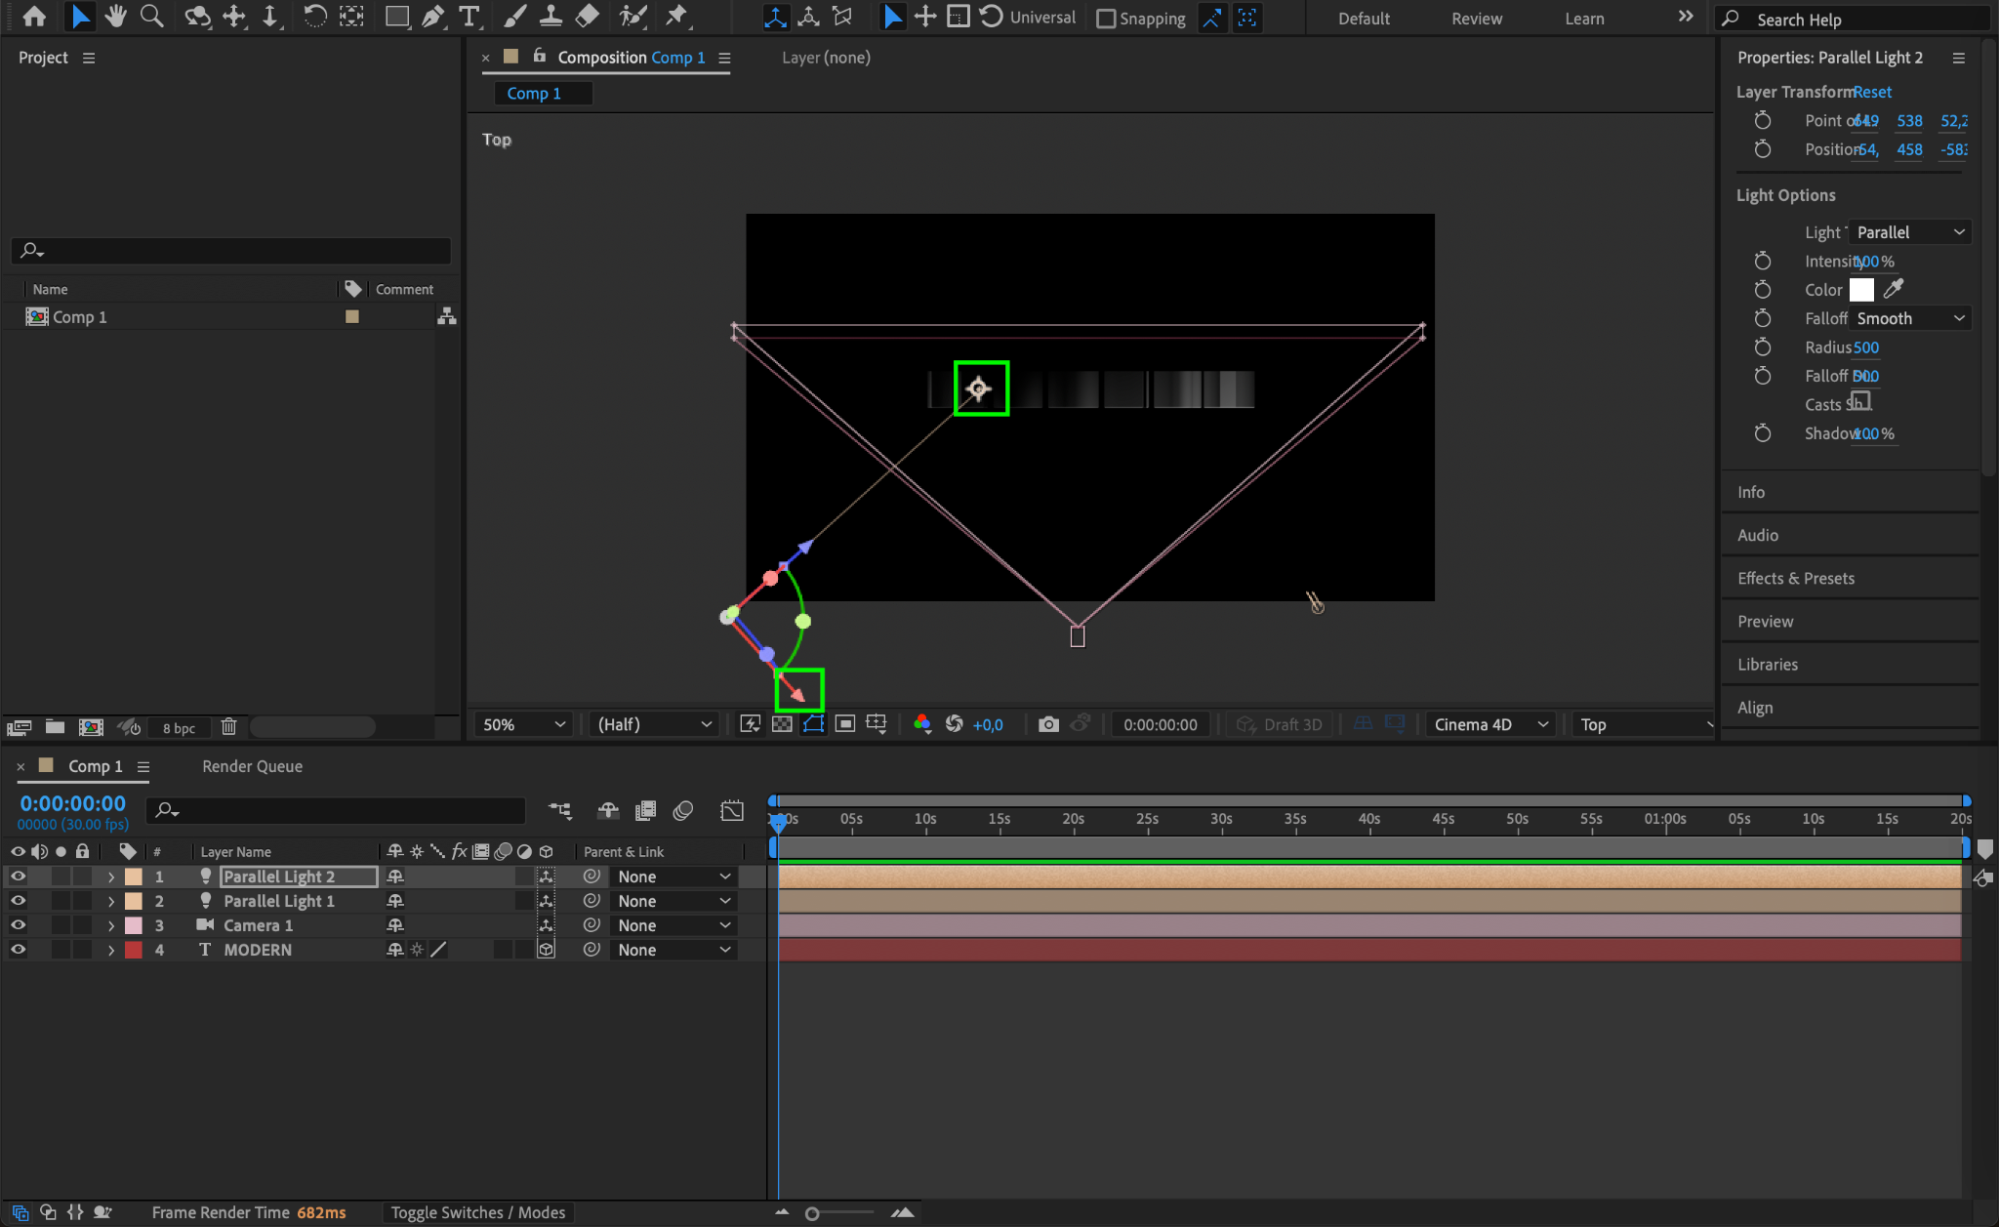
Duplicate the light layer (Ctrl/Cmd + D) and reposition it to illuminate the opposite side of the text. This creates a balanced and polished lighting effect. Switch back to Active Camera view to preview the results.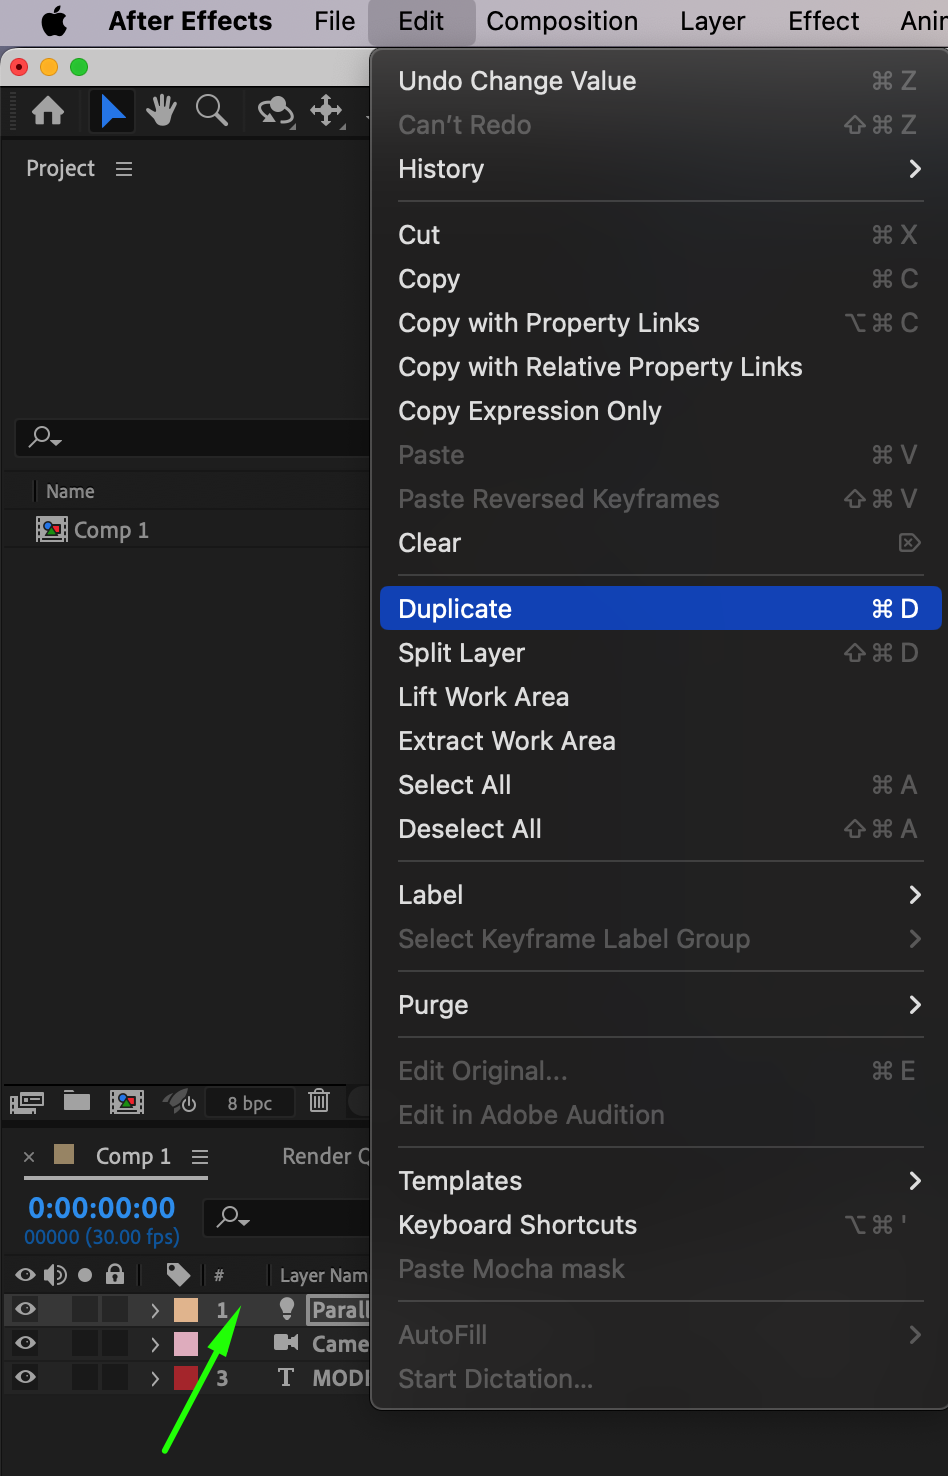
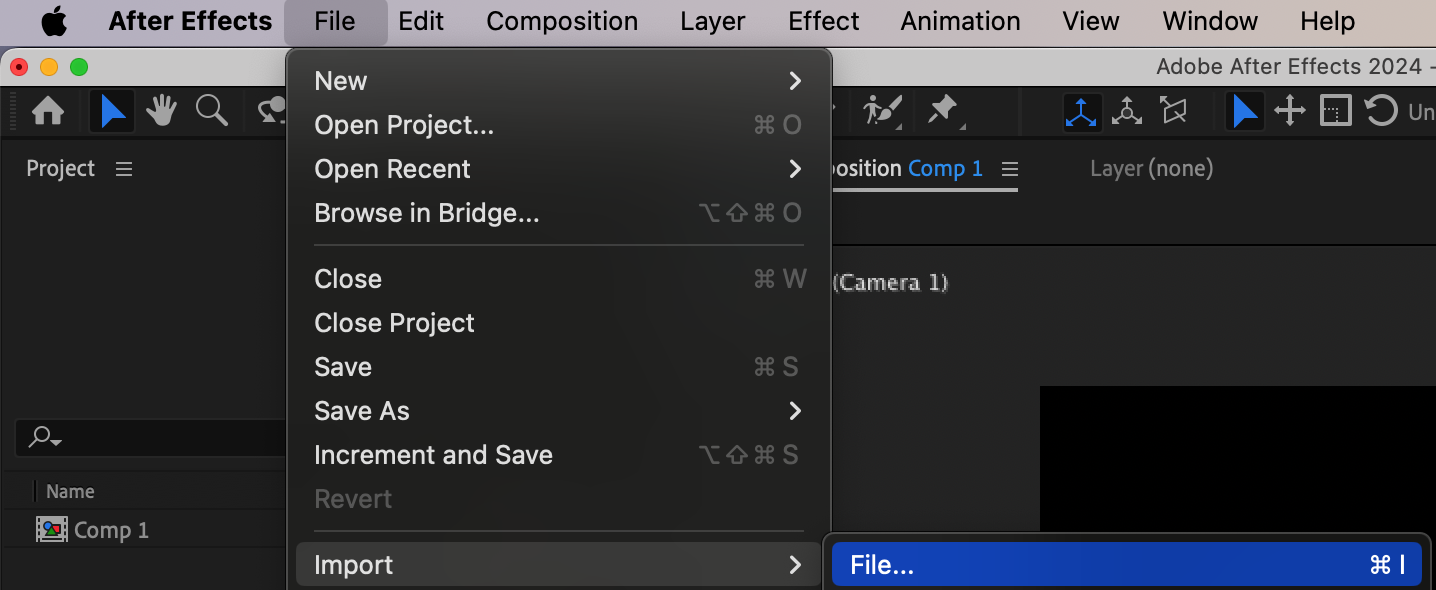
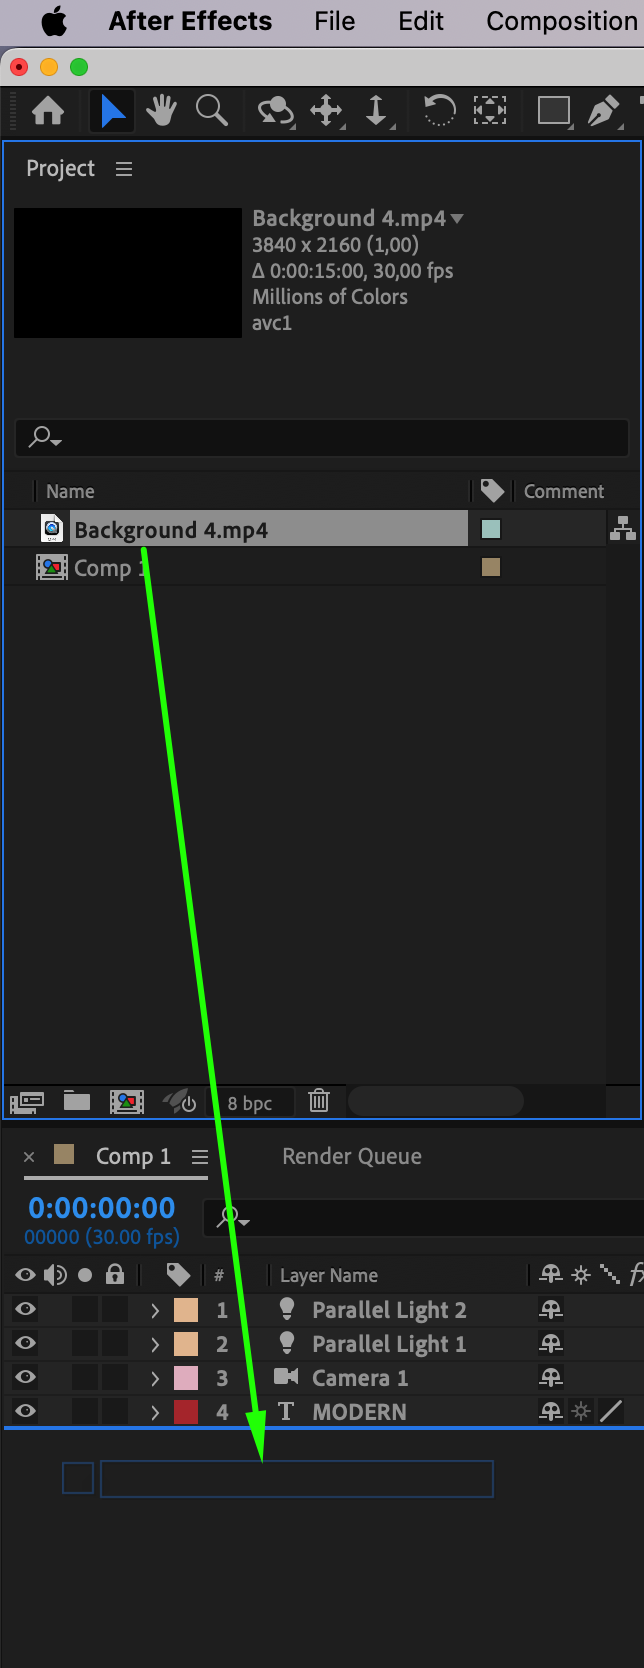
 Step 7: Add a Video Background
Import a video file or image to serve as the background. Drag it into your timeline and place it below the text layer. Ensure the background complements the 3D text and enhances its visual appeal.
 Step 8: Set Environment Layer and Adjust Material Options
Get 10% off when you subscribe to our newsletter
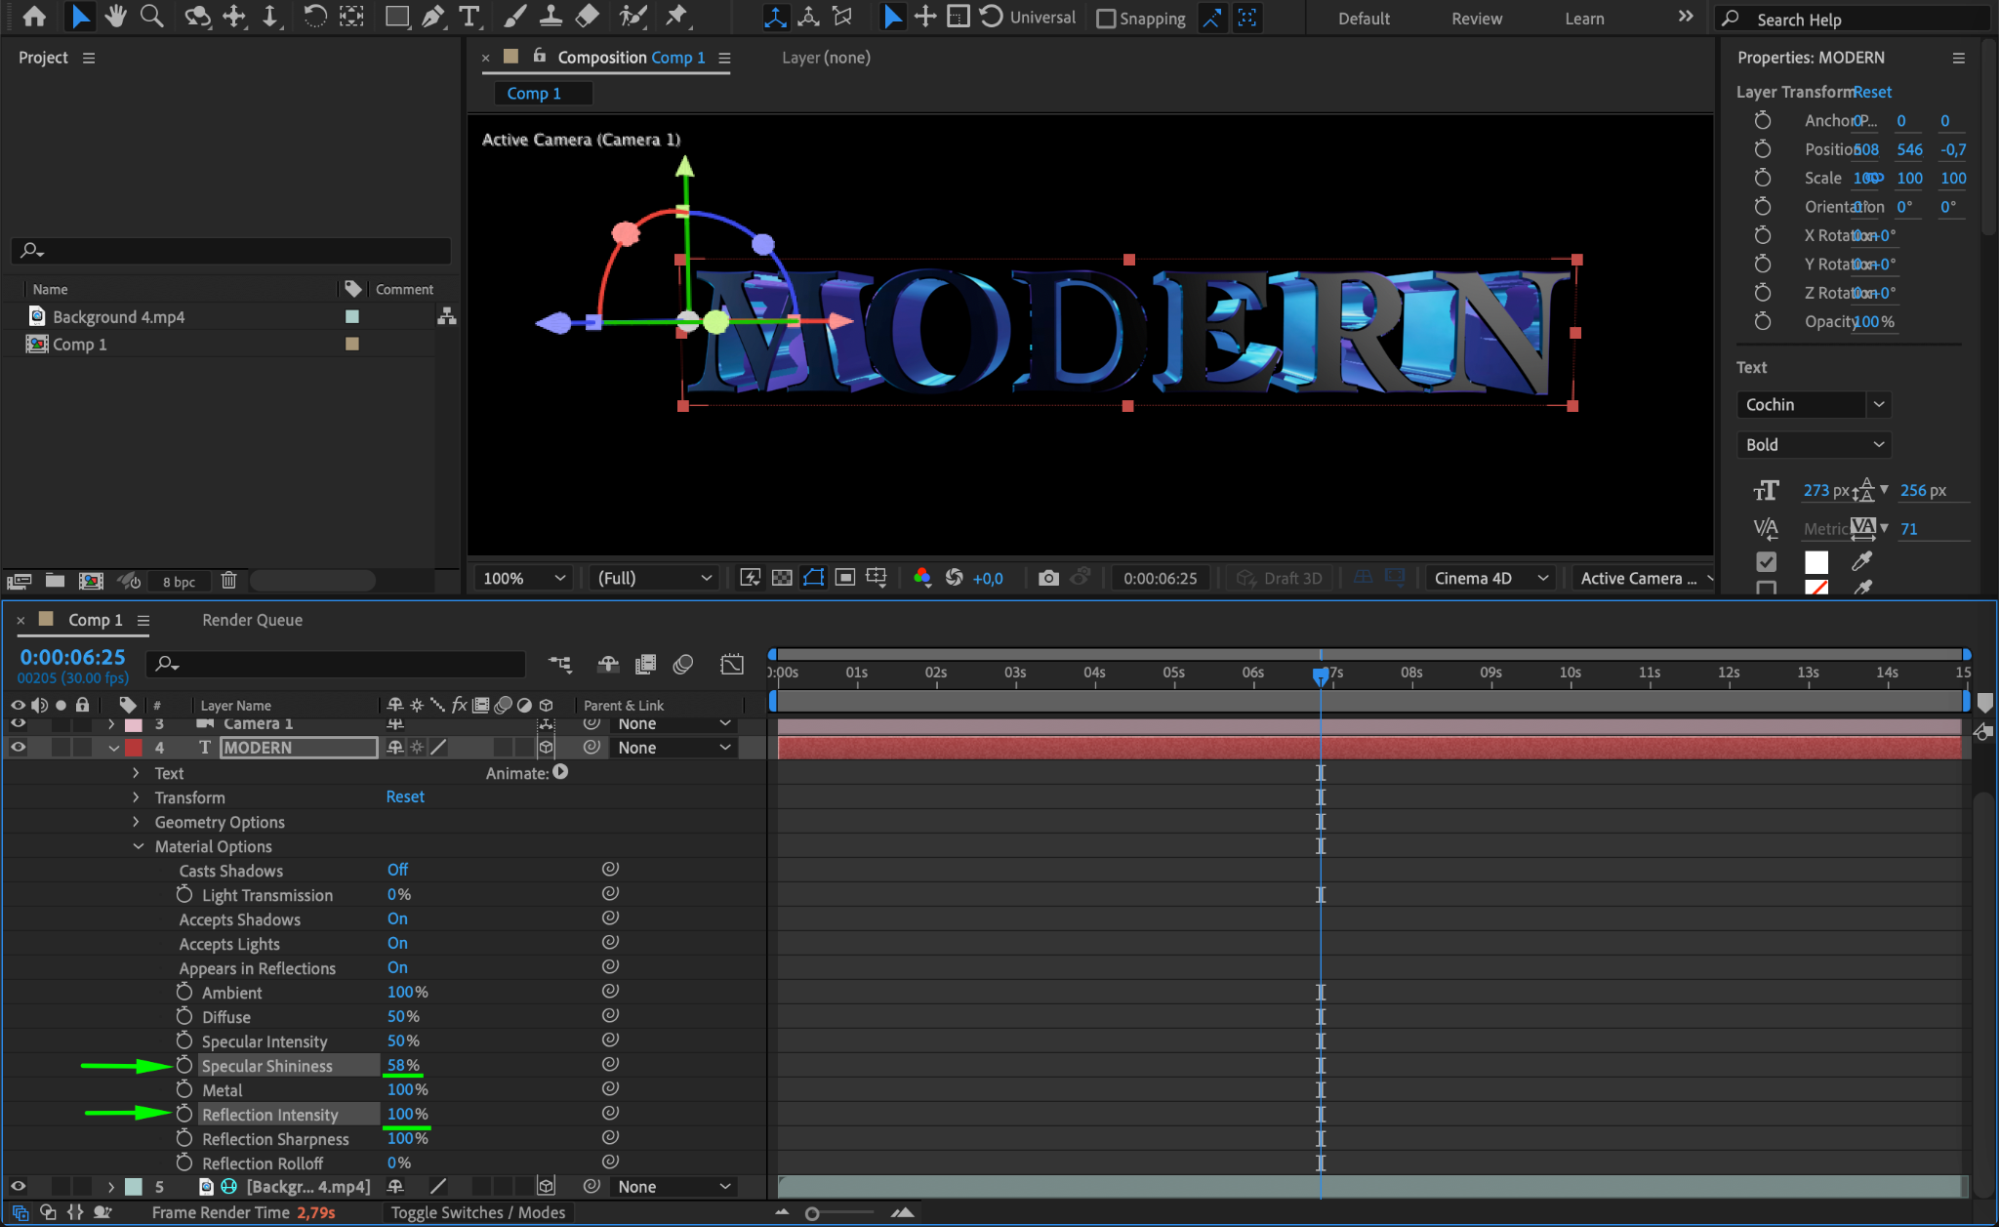
Right-click the background layer and select Environment Layer. For the text layer, expand the Material Options section. Set Specular Shininess to 50 and Reflection Intensity to 100. These adjustments give the text a realistic, reflective appearance.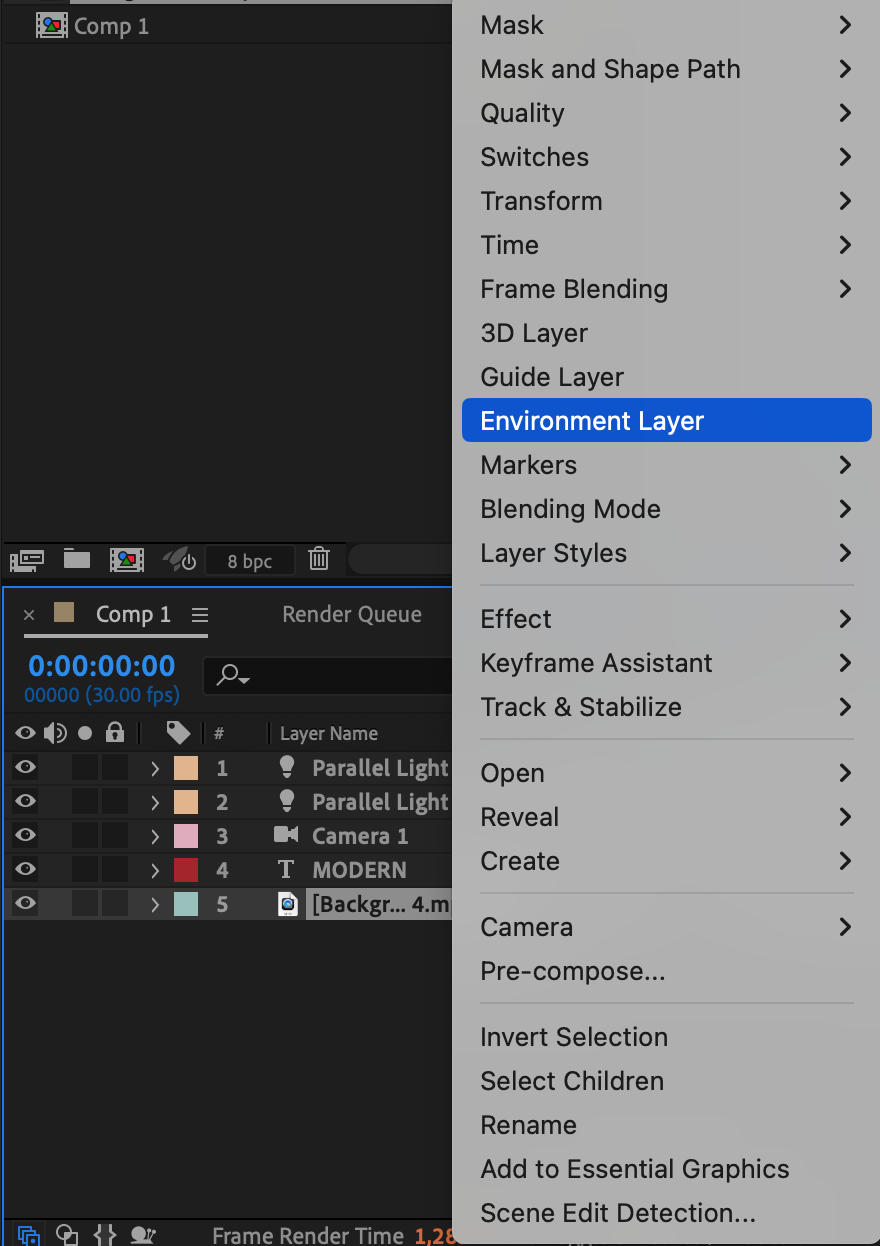
 Step 9: Preview Your Animation
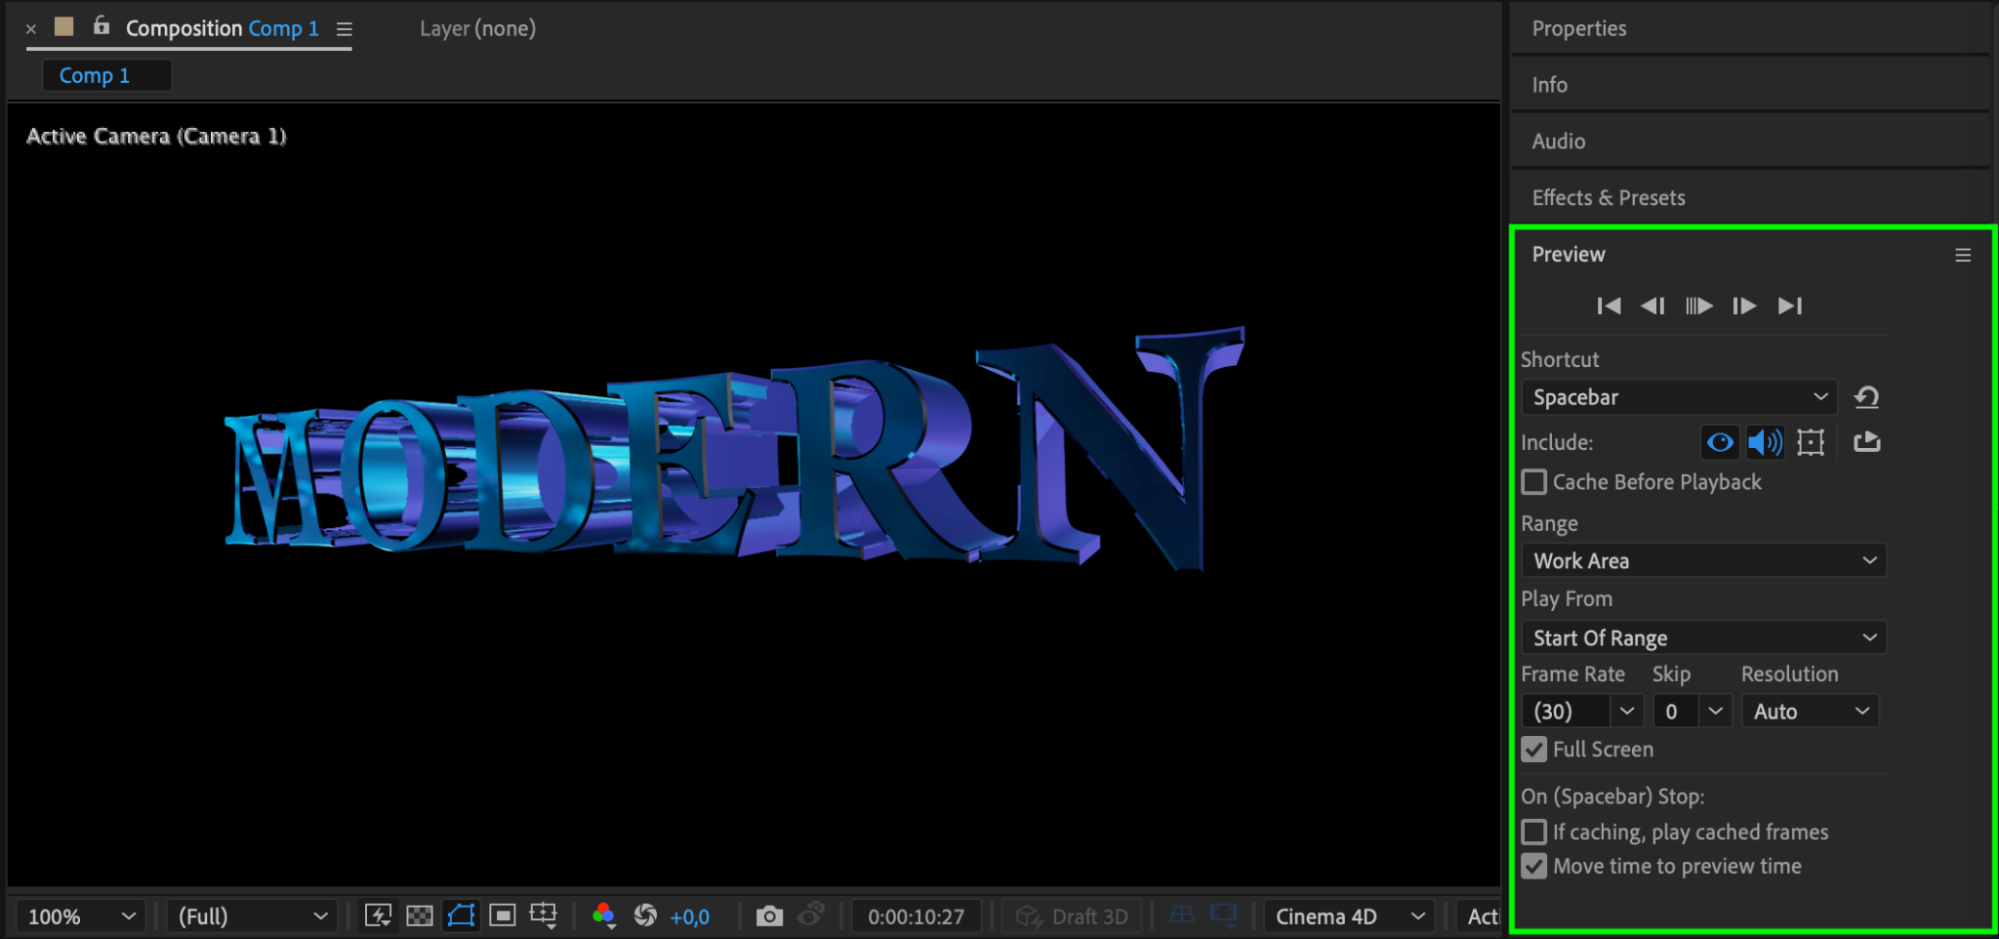
Press the Spacebar to review your animation. Make any necessary adjustments to lighting, text properties, or camera angles for optimal results.
 Step 10: Render the Composition
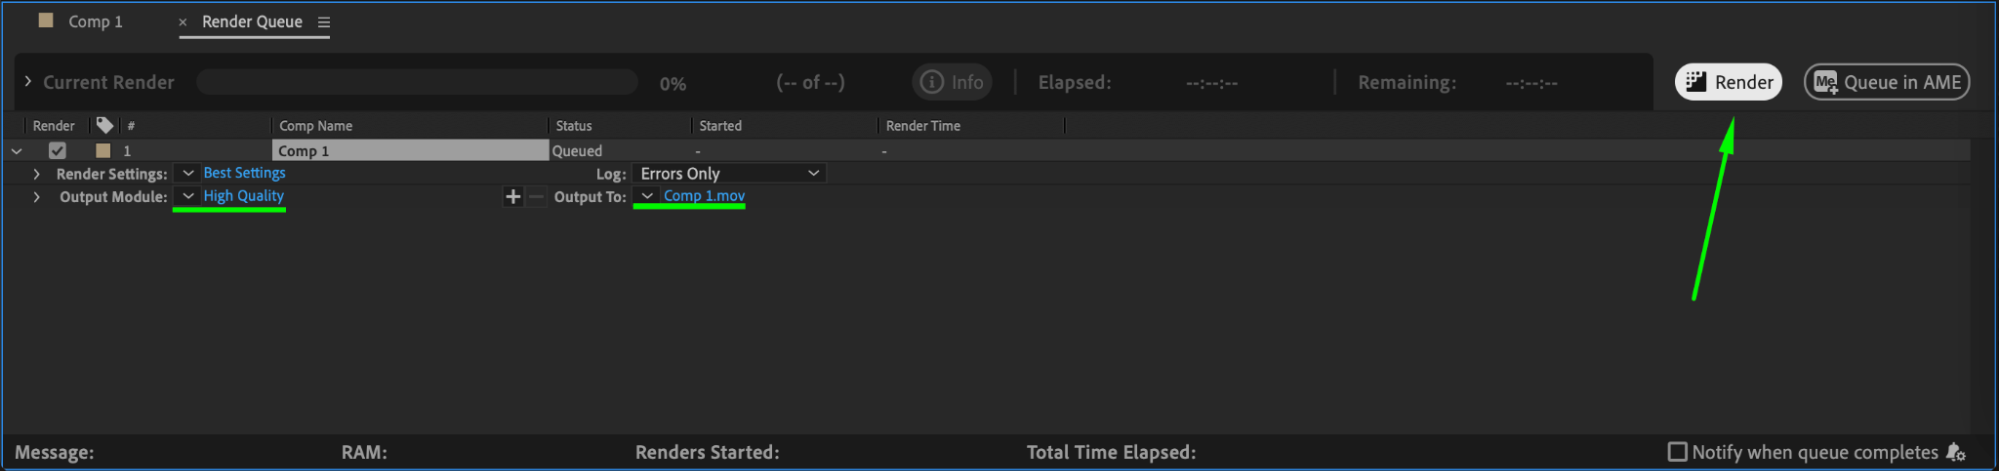
Once satisfied, render your project by going to Composition > Add to Render Queue. Choose the desired output format and location, then click Render to finalize your 3D text animation.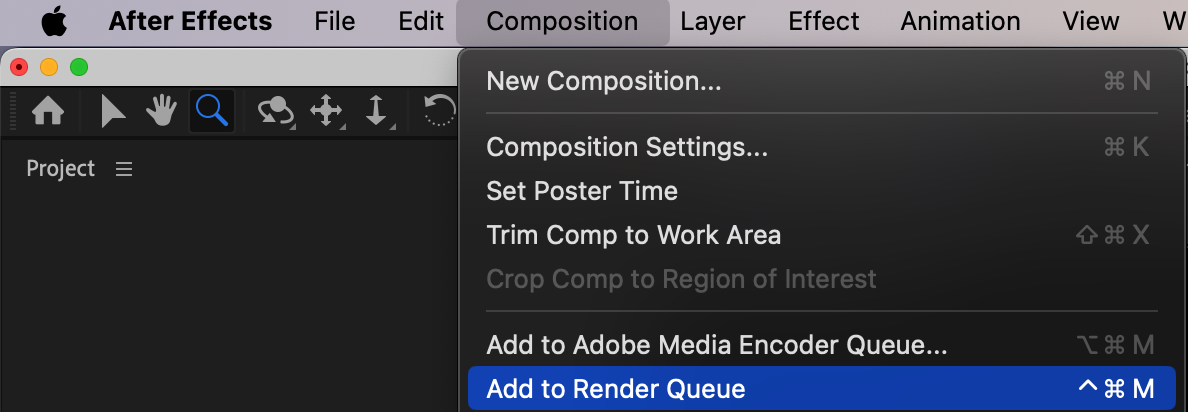
 Conclusion
Get 10% off when you subscribe to our newsletter
Creating 3D text in After Effects using Cinema 4D rendering is a powerful way to add depth and sophistication to your videos. By mastering lighting, geometry options, and environment settings, you can produce professional-grade animations that captivate your audience. With practice, these techniques will become an invaluable part of your motion graphics toolkit.
Our Bestsellers


