Title: “How to Add a Text Transition in After Effects”
Creating a Smooth Text Transition in After Effects
Introduction
Adding a transition effect to text in After Effects can make your animations look more polished and professional. This tutorial will guide you through creating a smooth text reveal effect using a shape layer as a cursor. We will use scaling, positioning, and masking techniques to achieve a dynamic appearance.
Get 10% off when you subscribe to our newsletter

Step 1: Create a New Composition
Open After Effects and create a new composition. Set the resolution, frame rate, and duration according to your project needs.
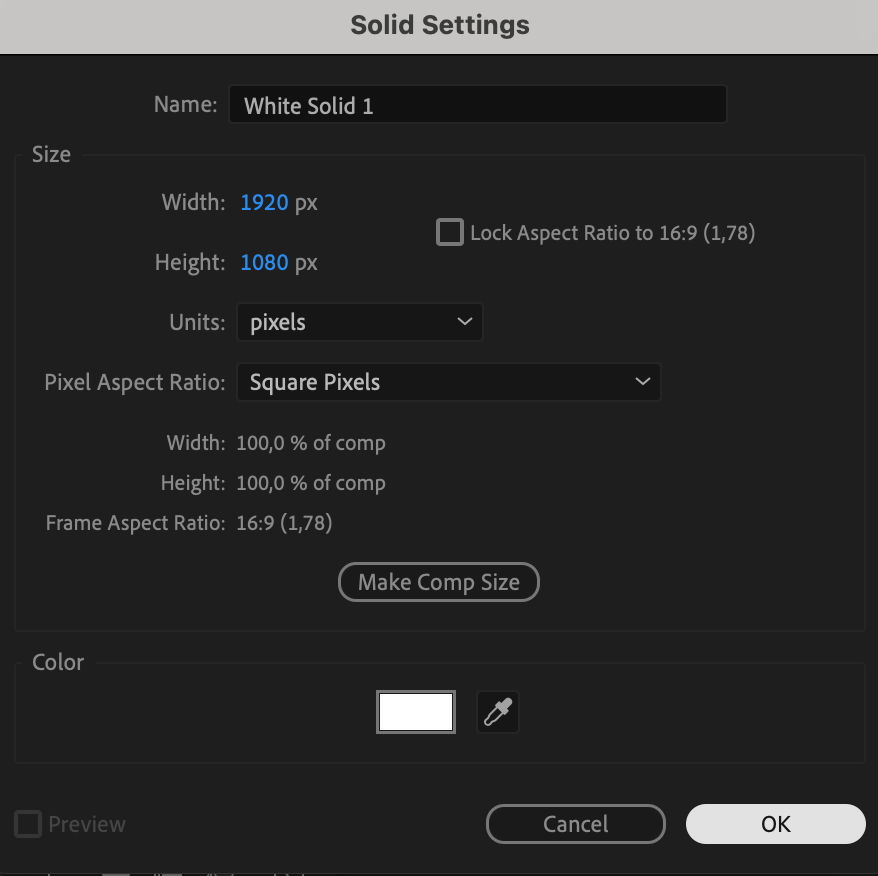
 Step 2: Add a White Solid Layer
Go to Layer > New > Solid and choose a white color. This solid will act as the “cursor” that reveals the text.
 Step 3: Adjust the Scale and Position of the Solid
In the Transform settings of the solid layer, unlink the scale properties by clicking the chain icon. Set the values to (0.5, 9) to create a thin vertical bar. Adjust the position so that the solid is placed at the starting point of your text.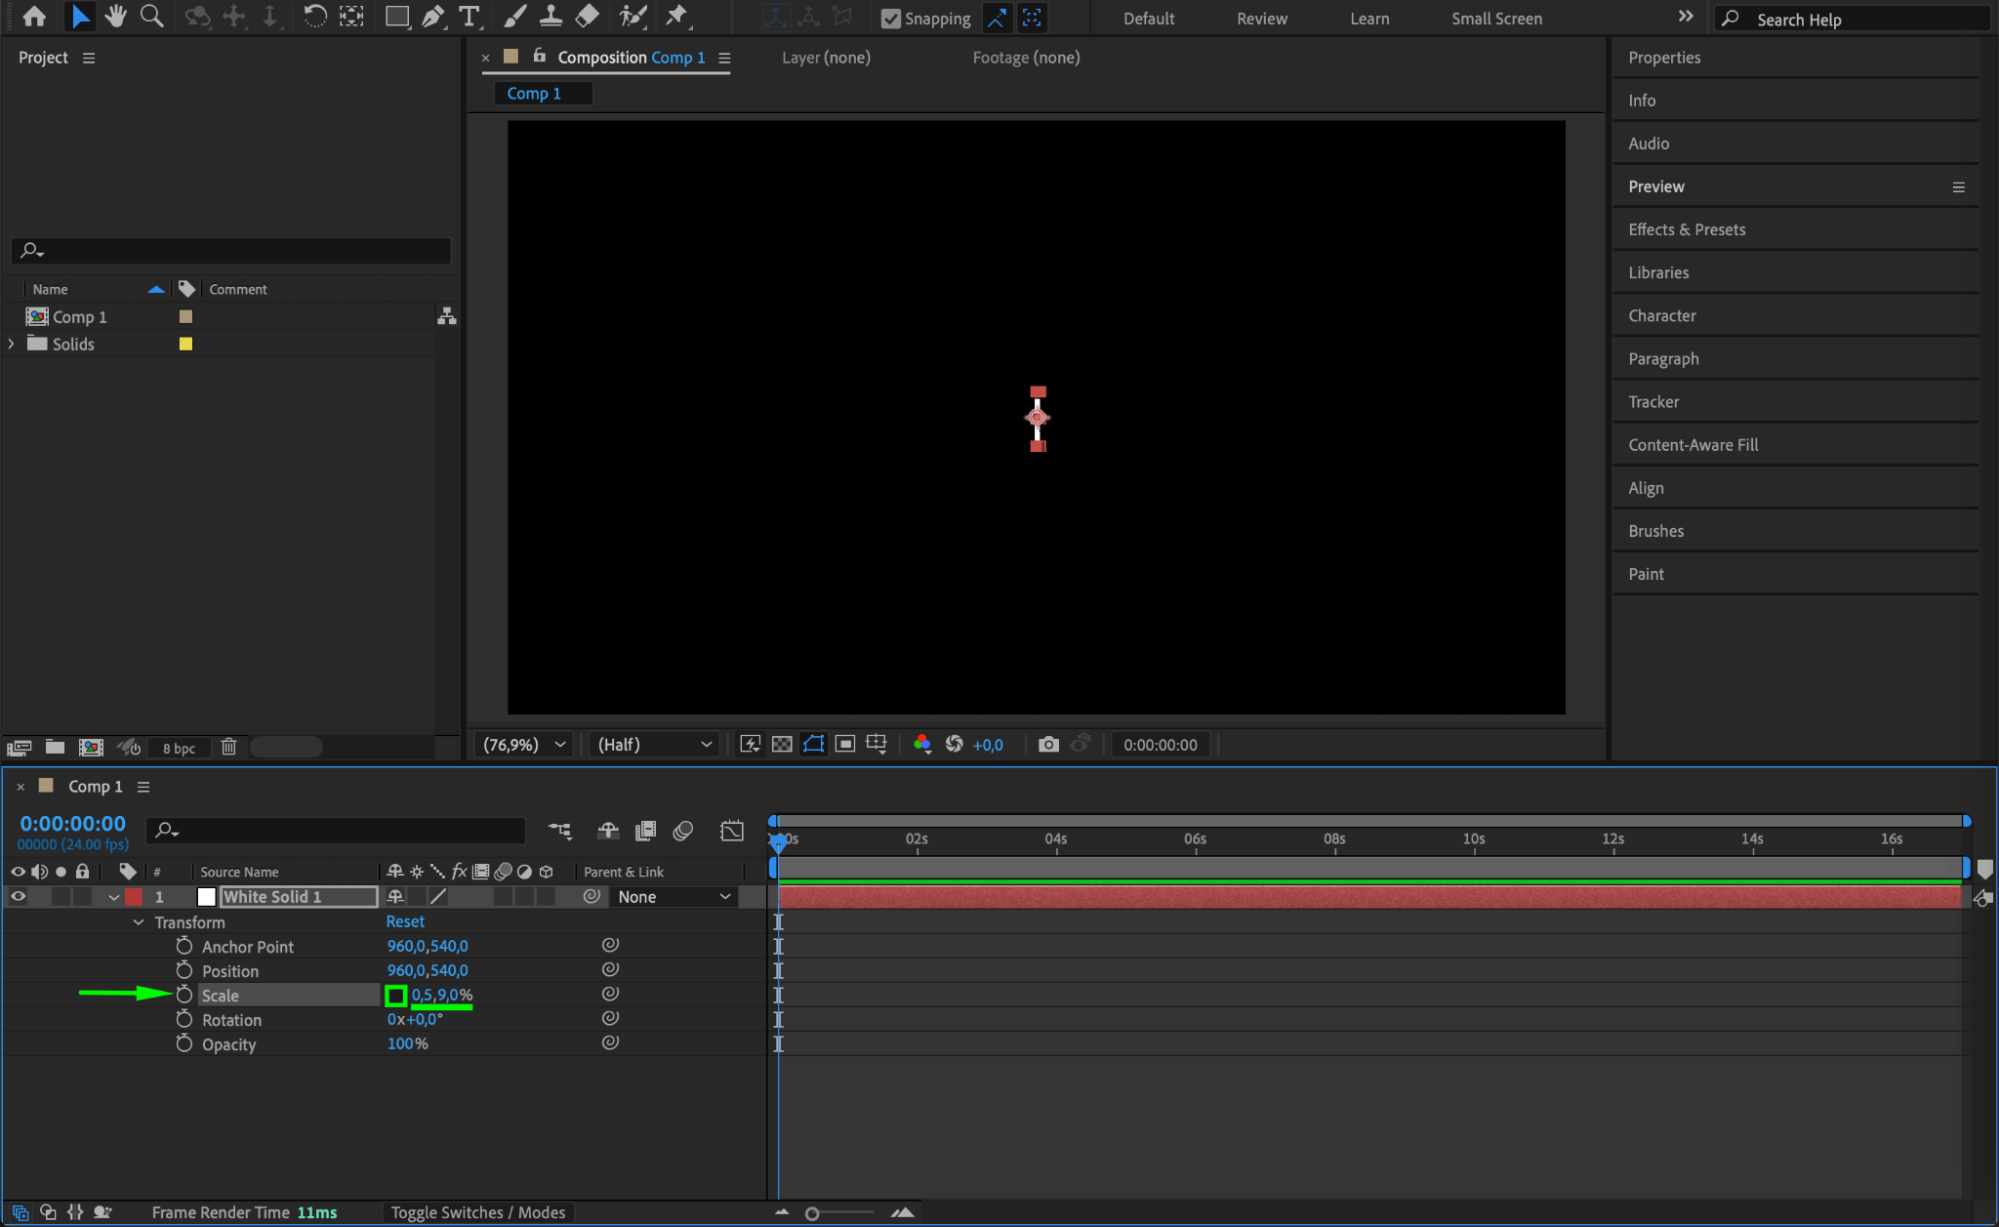
 Step 4: Add and Position Your Text
Select the Type Tool (Ctrl/Cmd + T) and create your desired text. Position it so that it aligns with the starting position of the solid layer.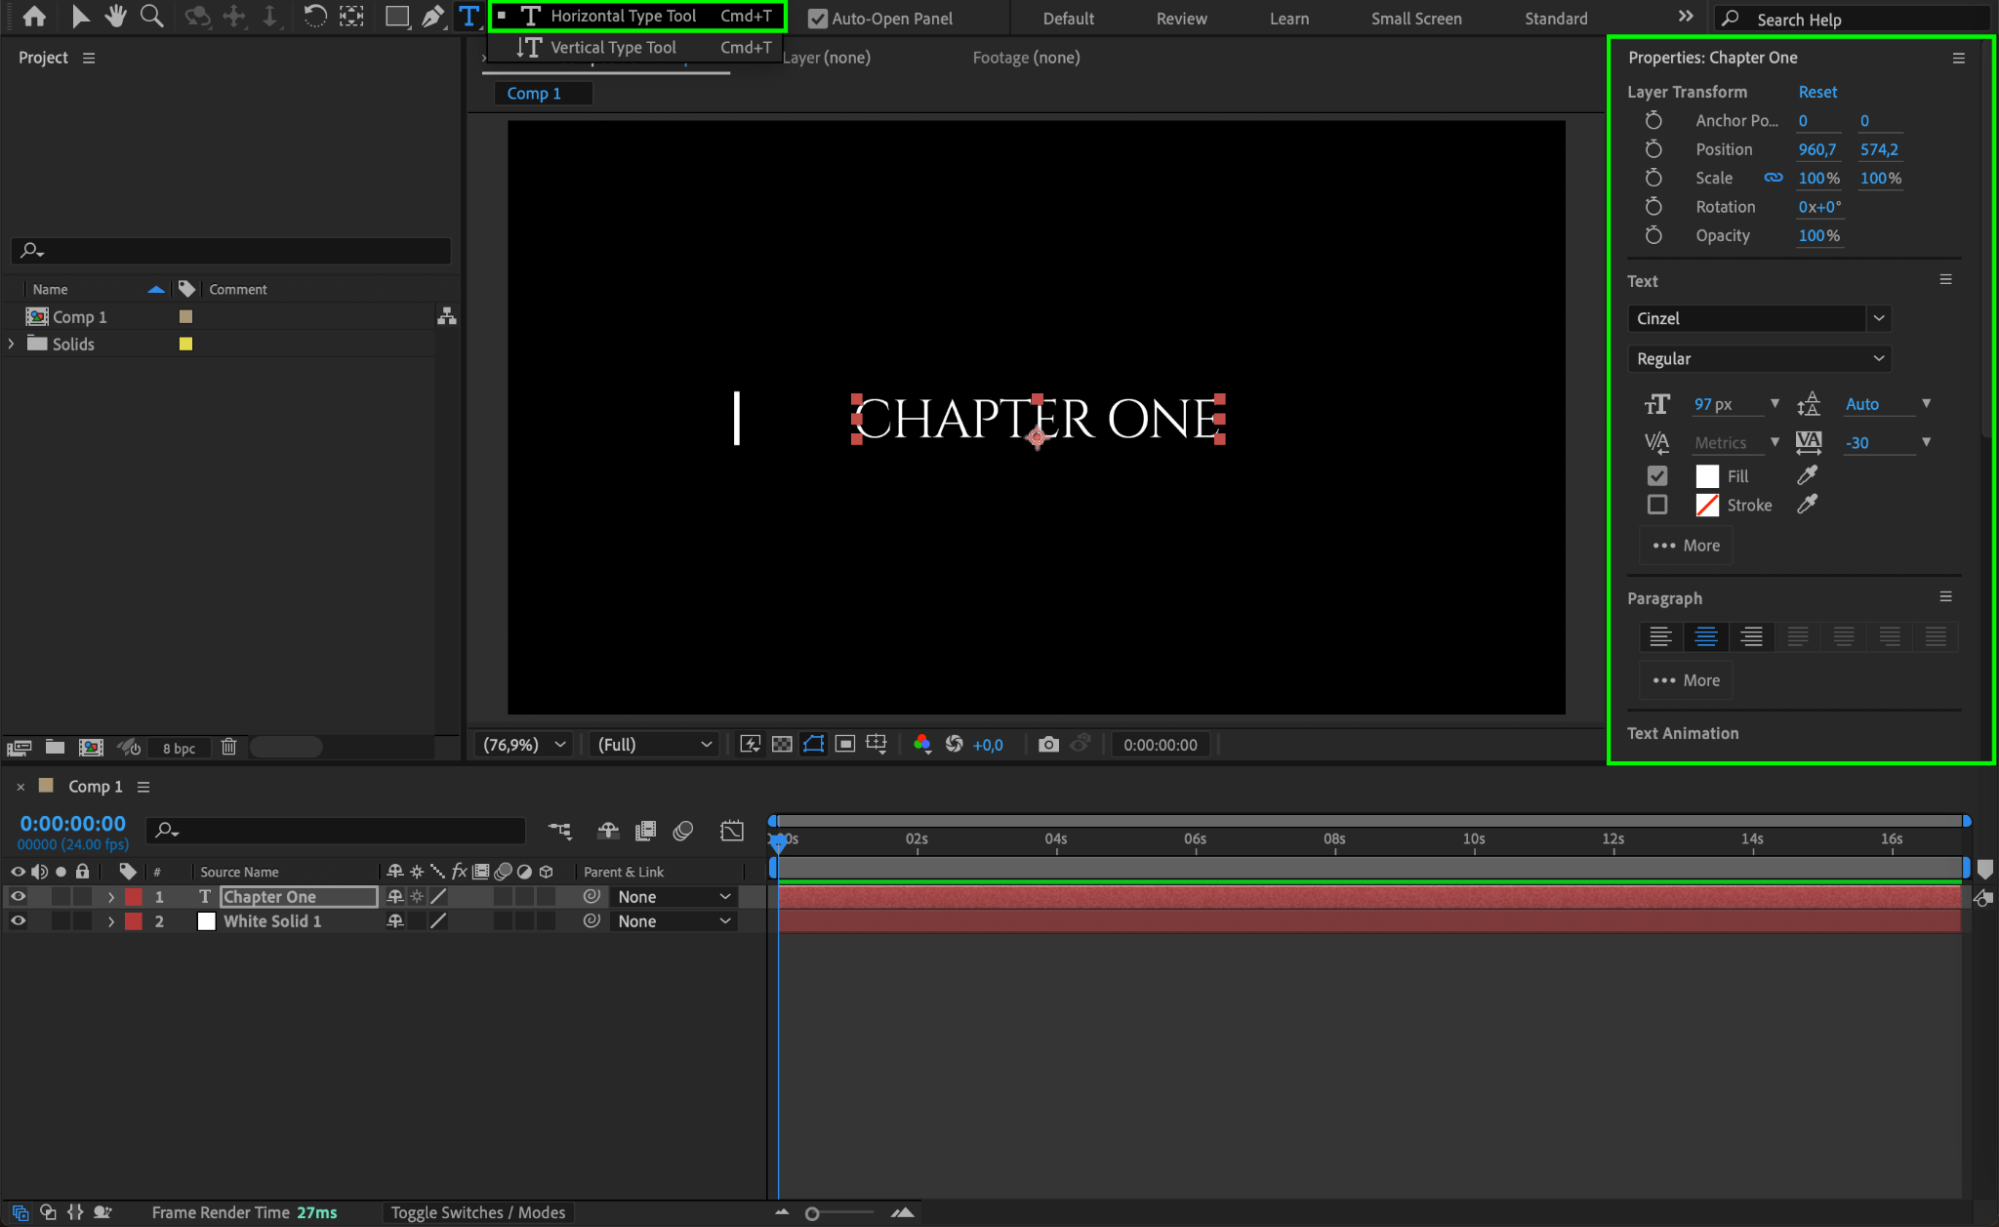 Step 5: Animate the Scale of the Solid
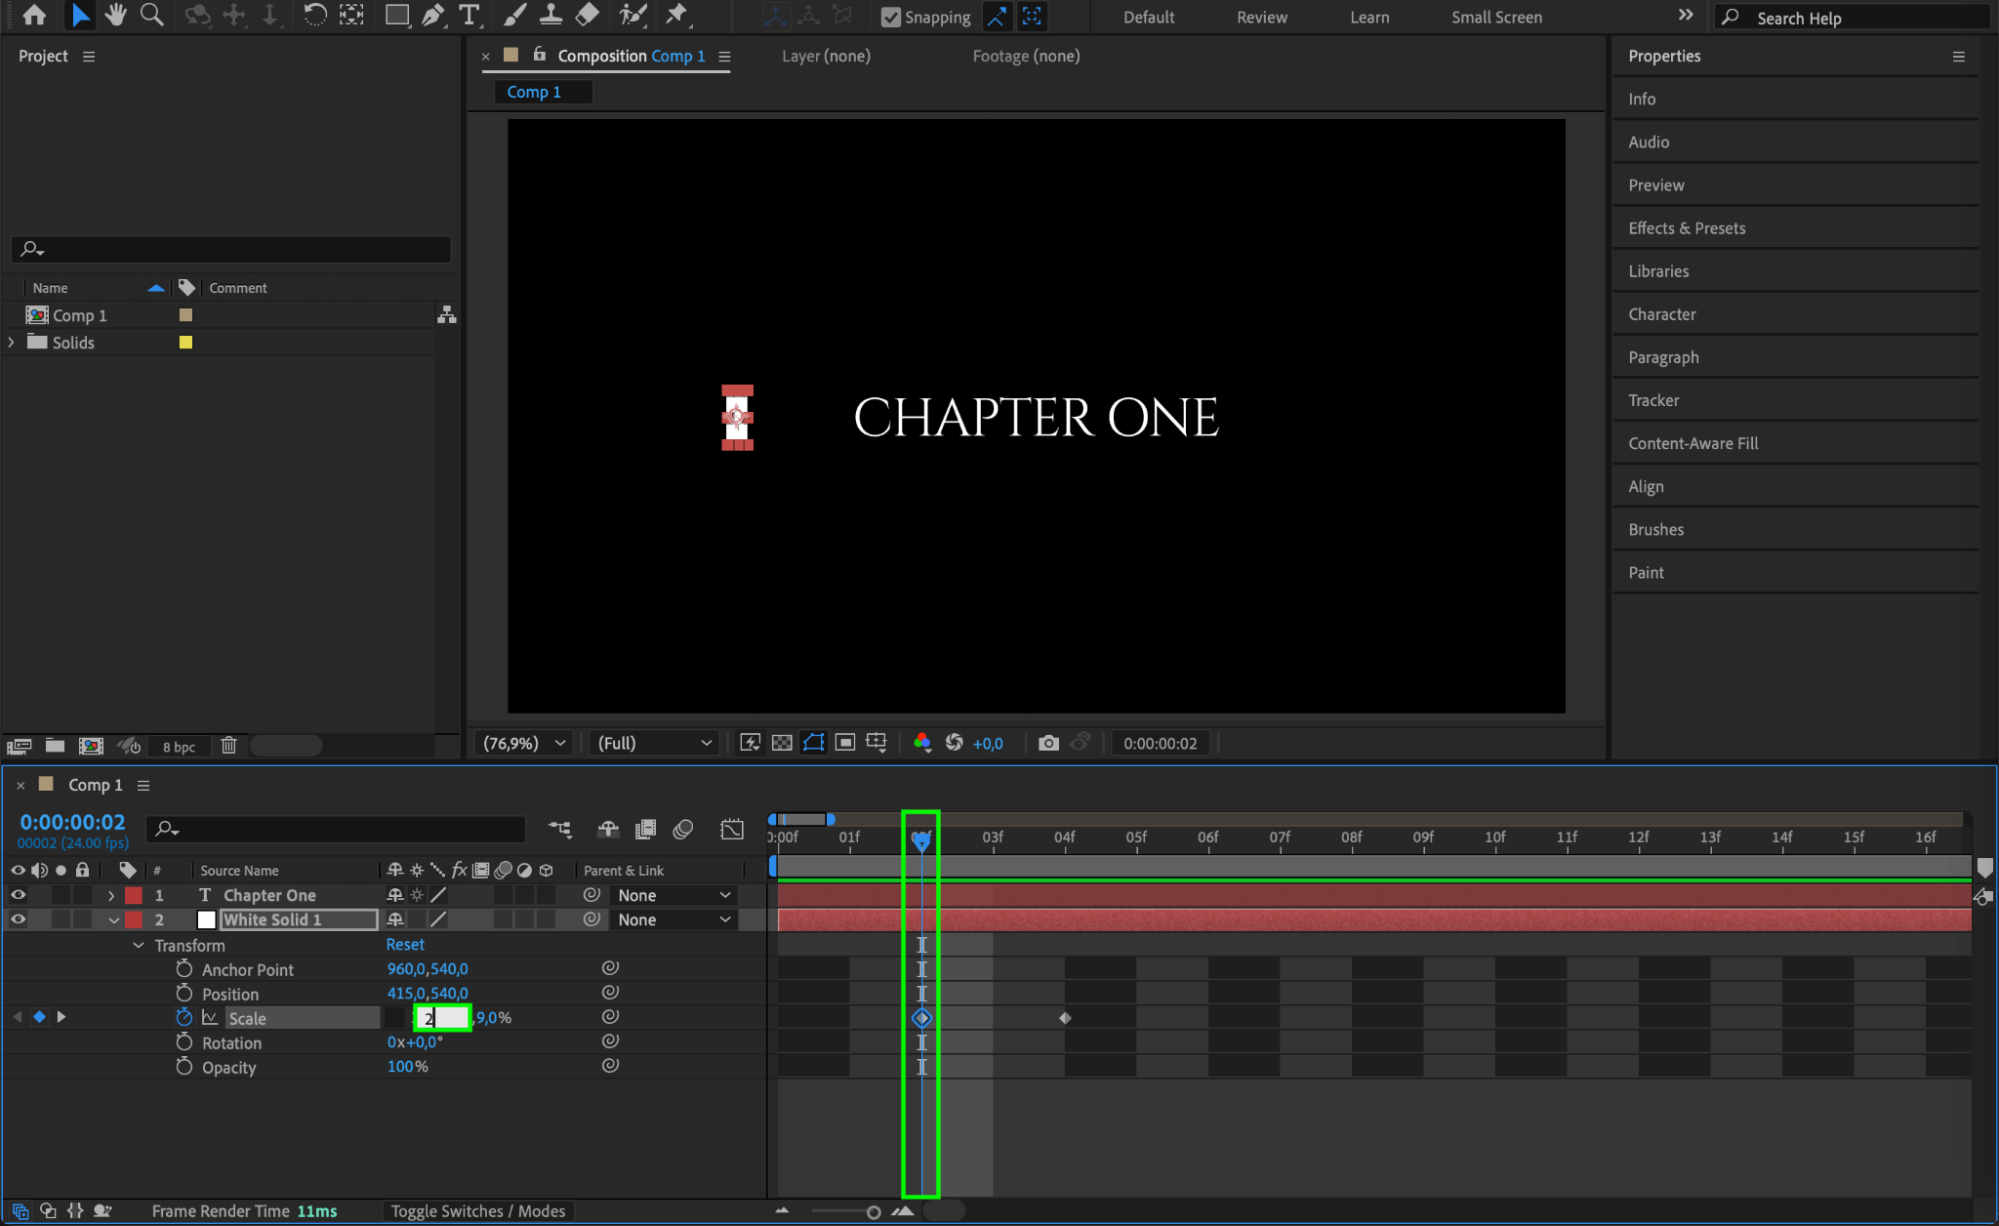
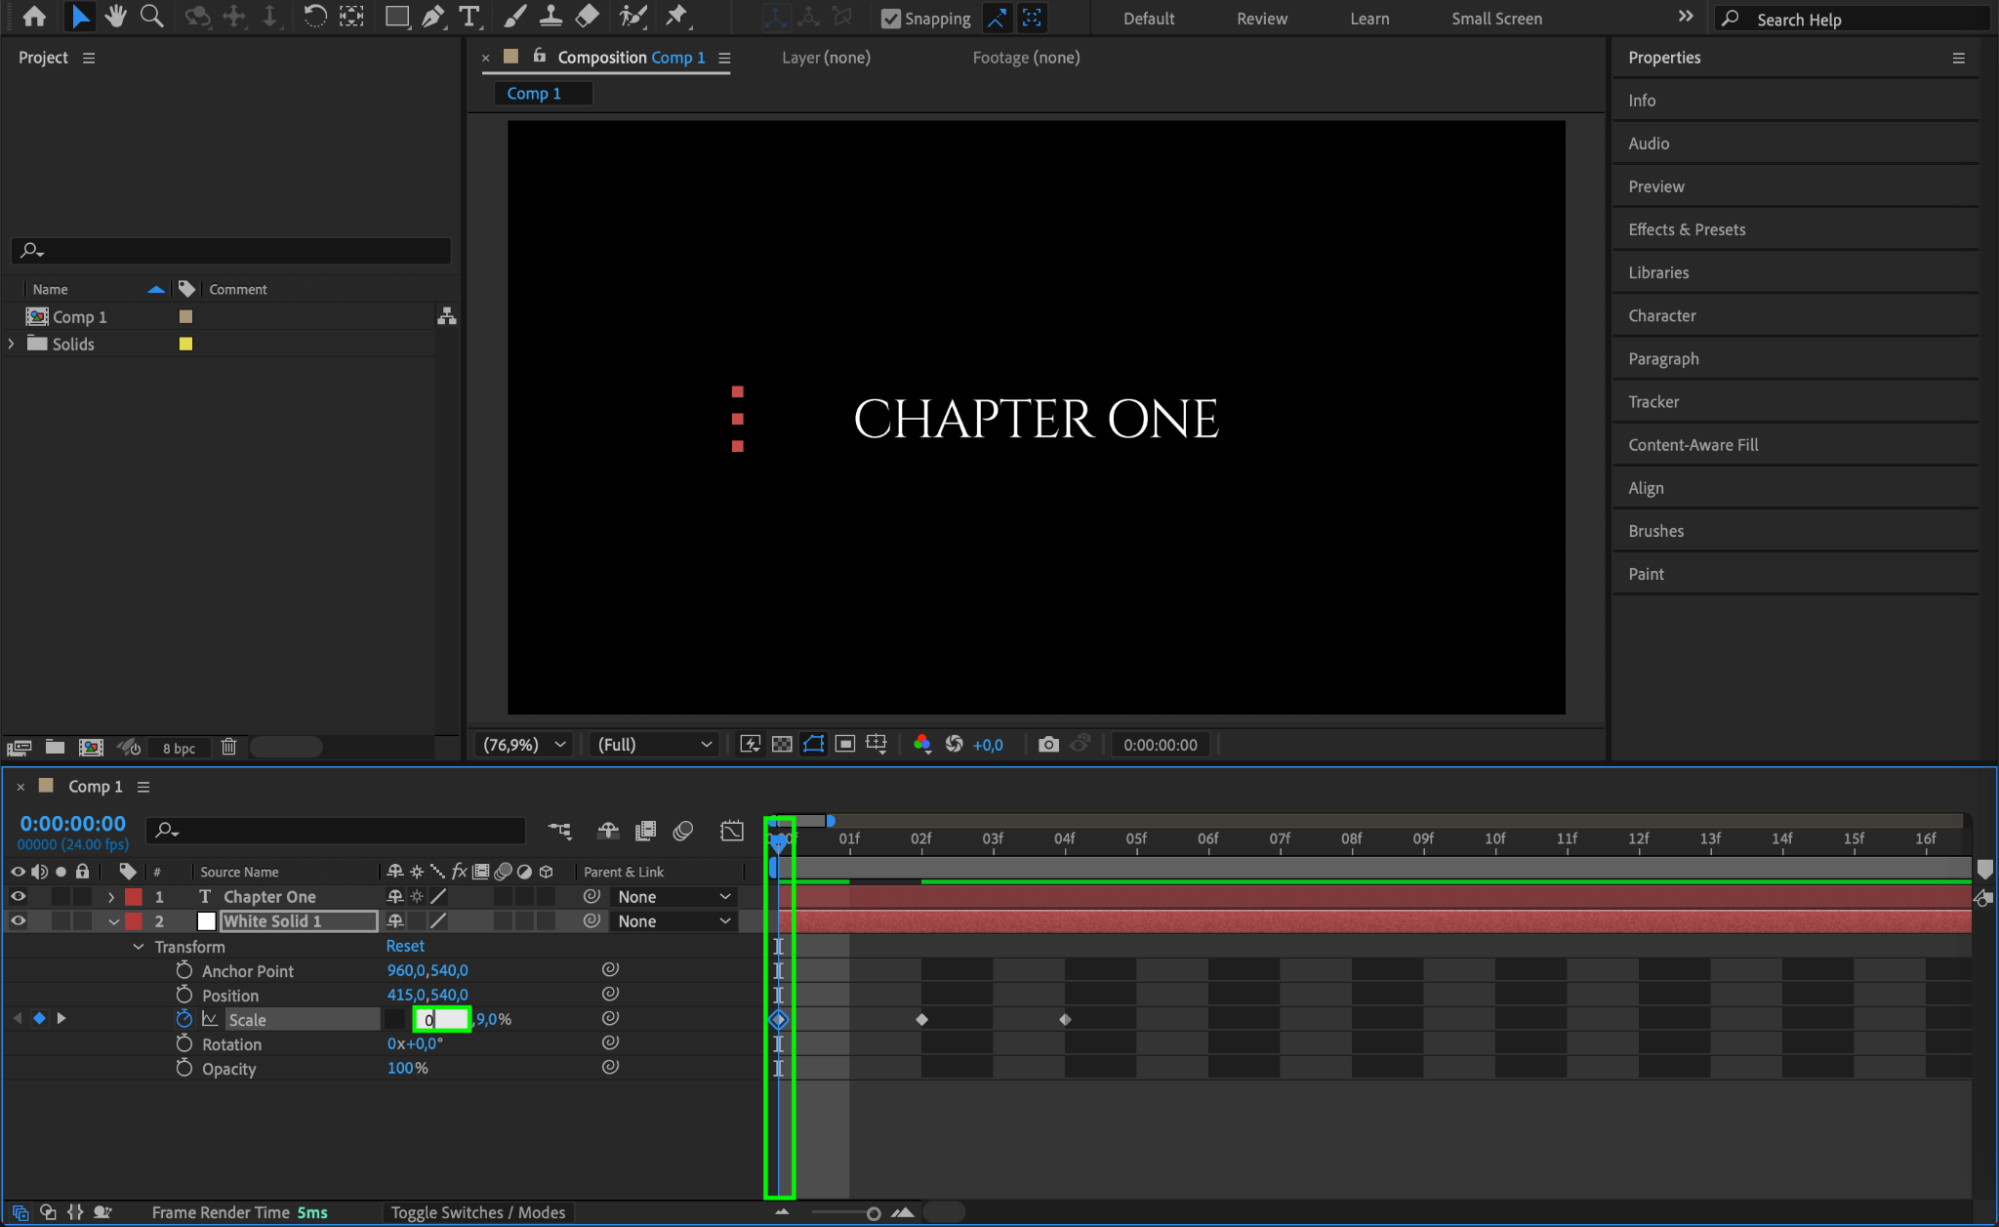
Move the Current Time Indicator (CTI) 4 frames forward and click the stopwatch icon next to Scale to create a keyframe.
Move 2 frames back and set the scale to (2, 9).
Then, move to the start of the timeline and set the scale to (0, 9) to create the appearance of the cursor growing in size.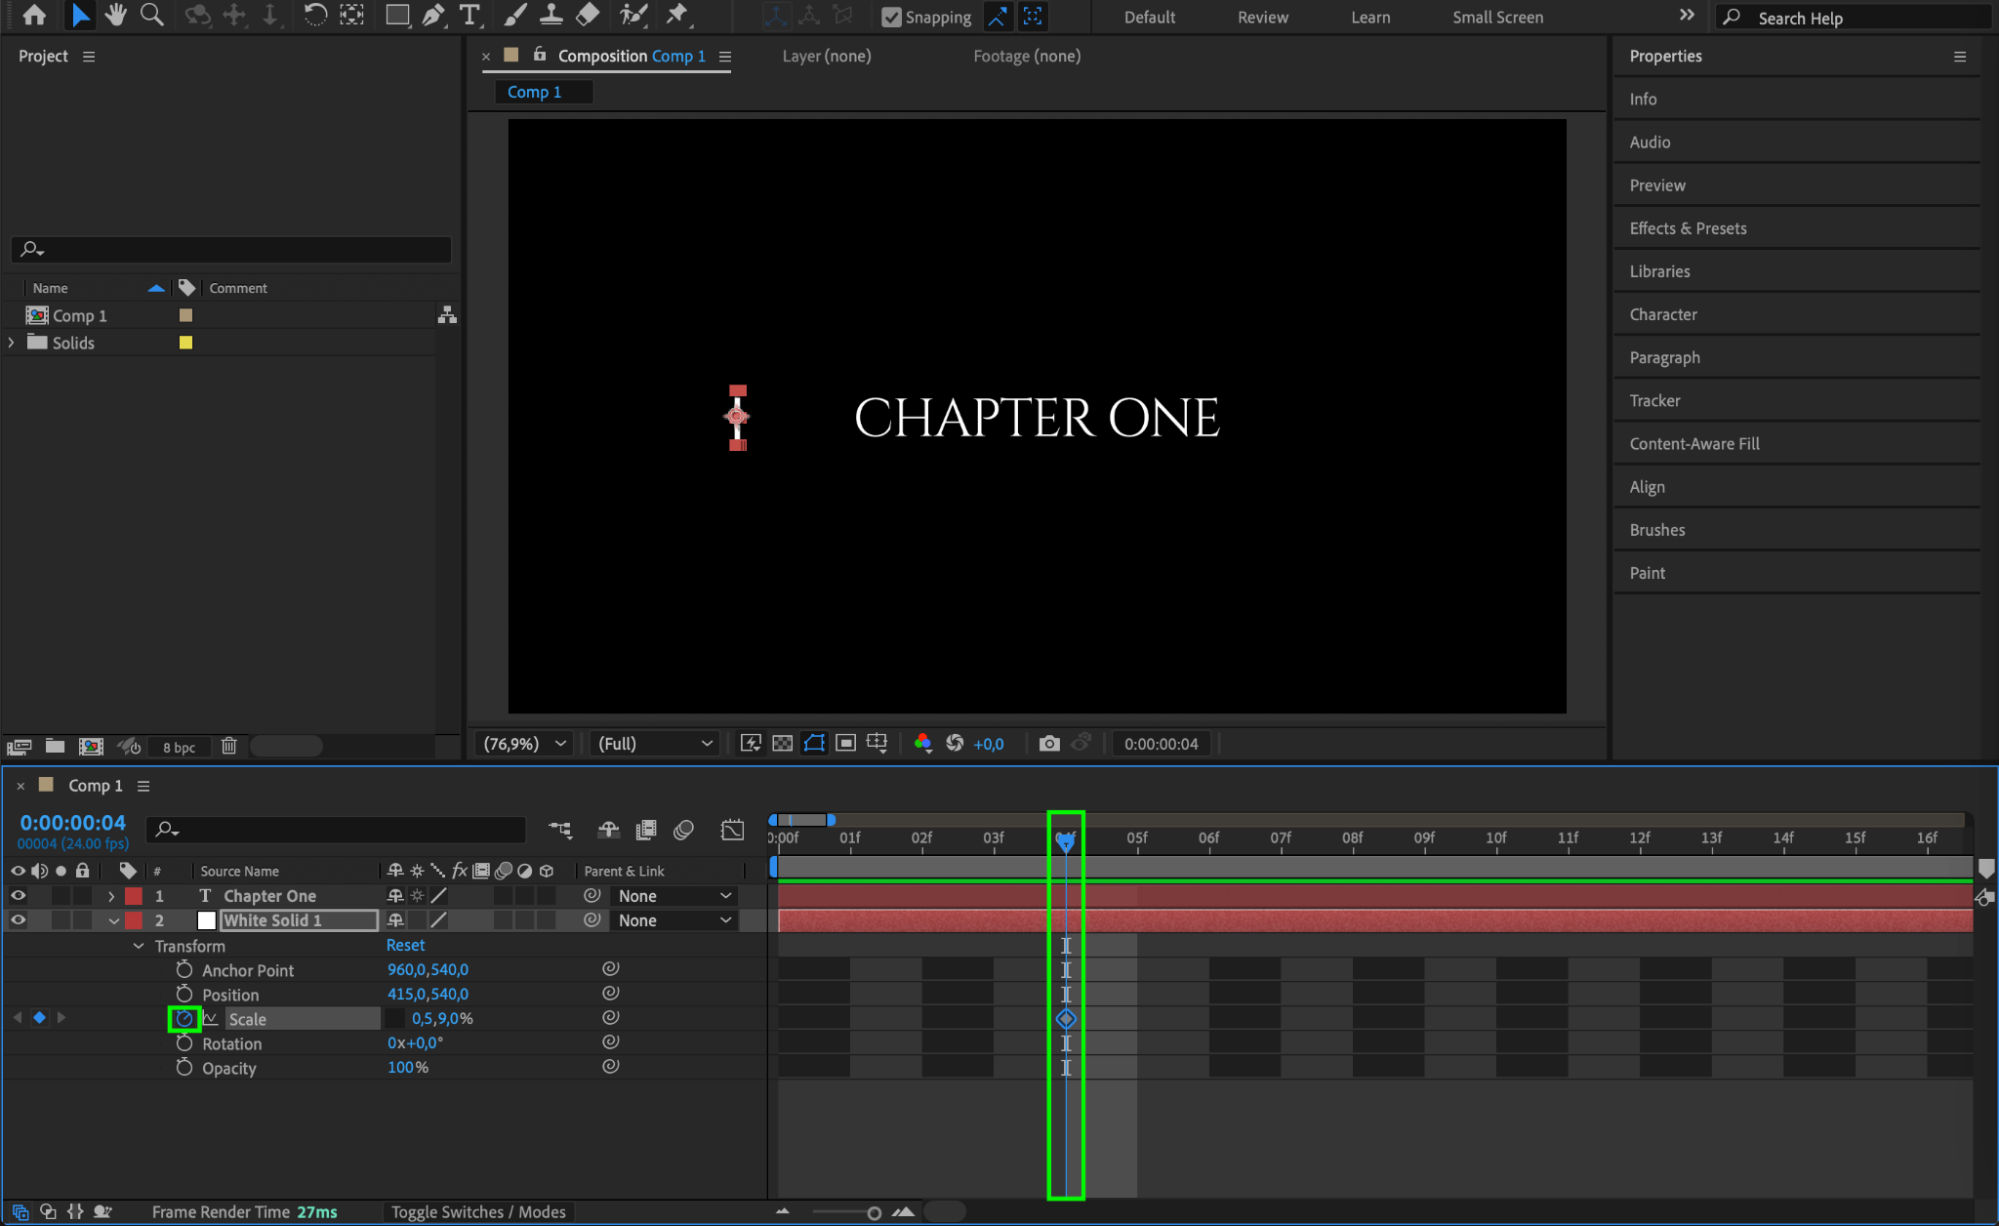
 Step 6: Animate the Position of the Solid
Move the CTI a few frames forward and click the stopwatch icon next to Position to create a keyframe.
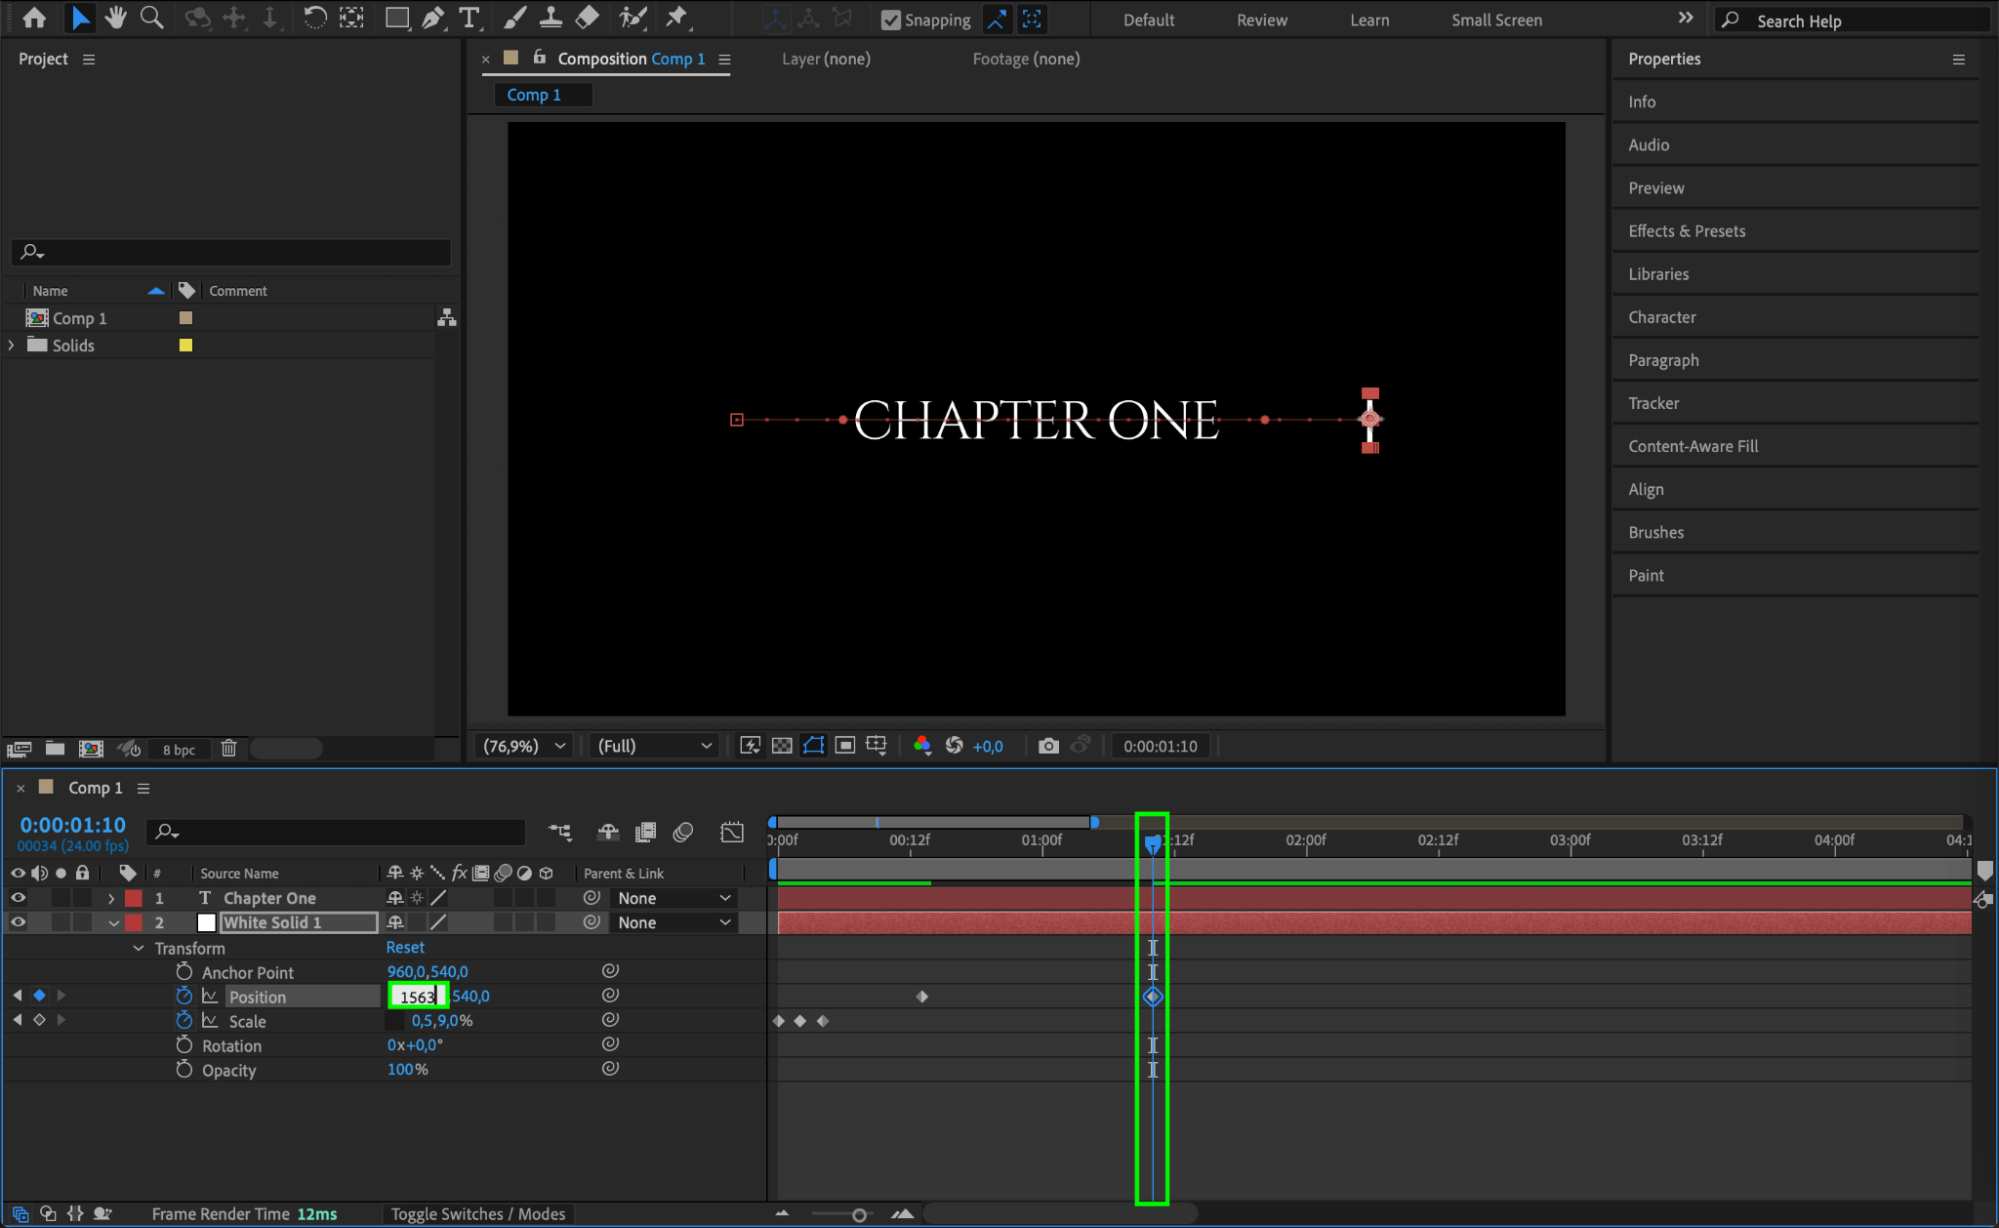
Move the CTI further ahead and adjust the position so that the solid moves to the right, “typing” the text.
Then, move one frame forward and shift the solid slightly back to create a natural easing effect.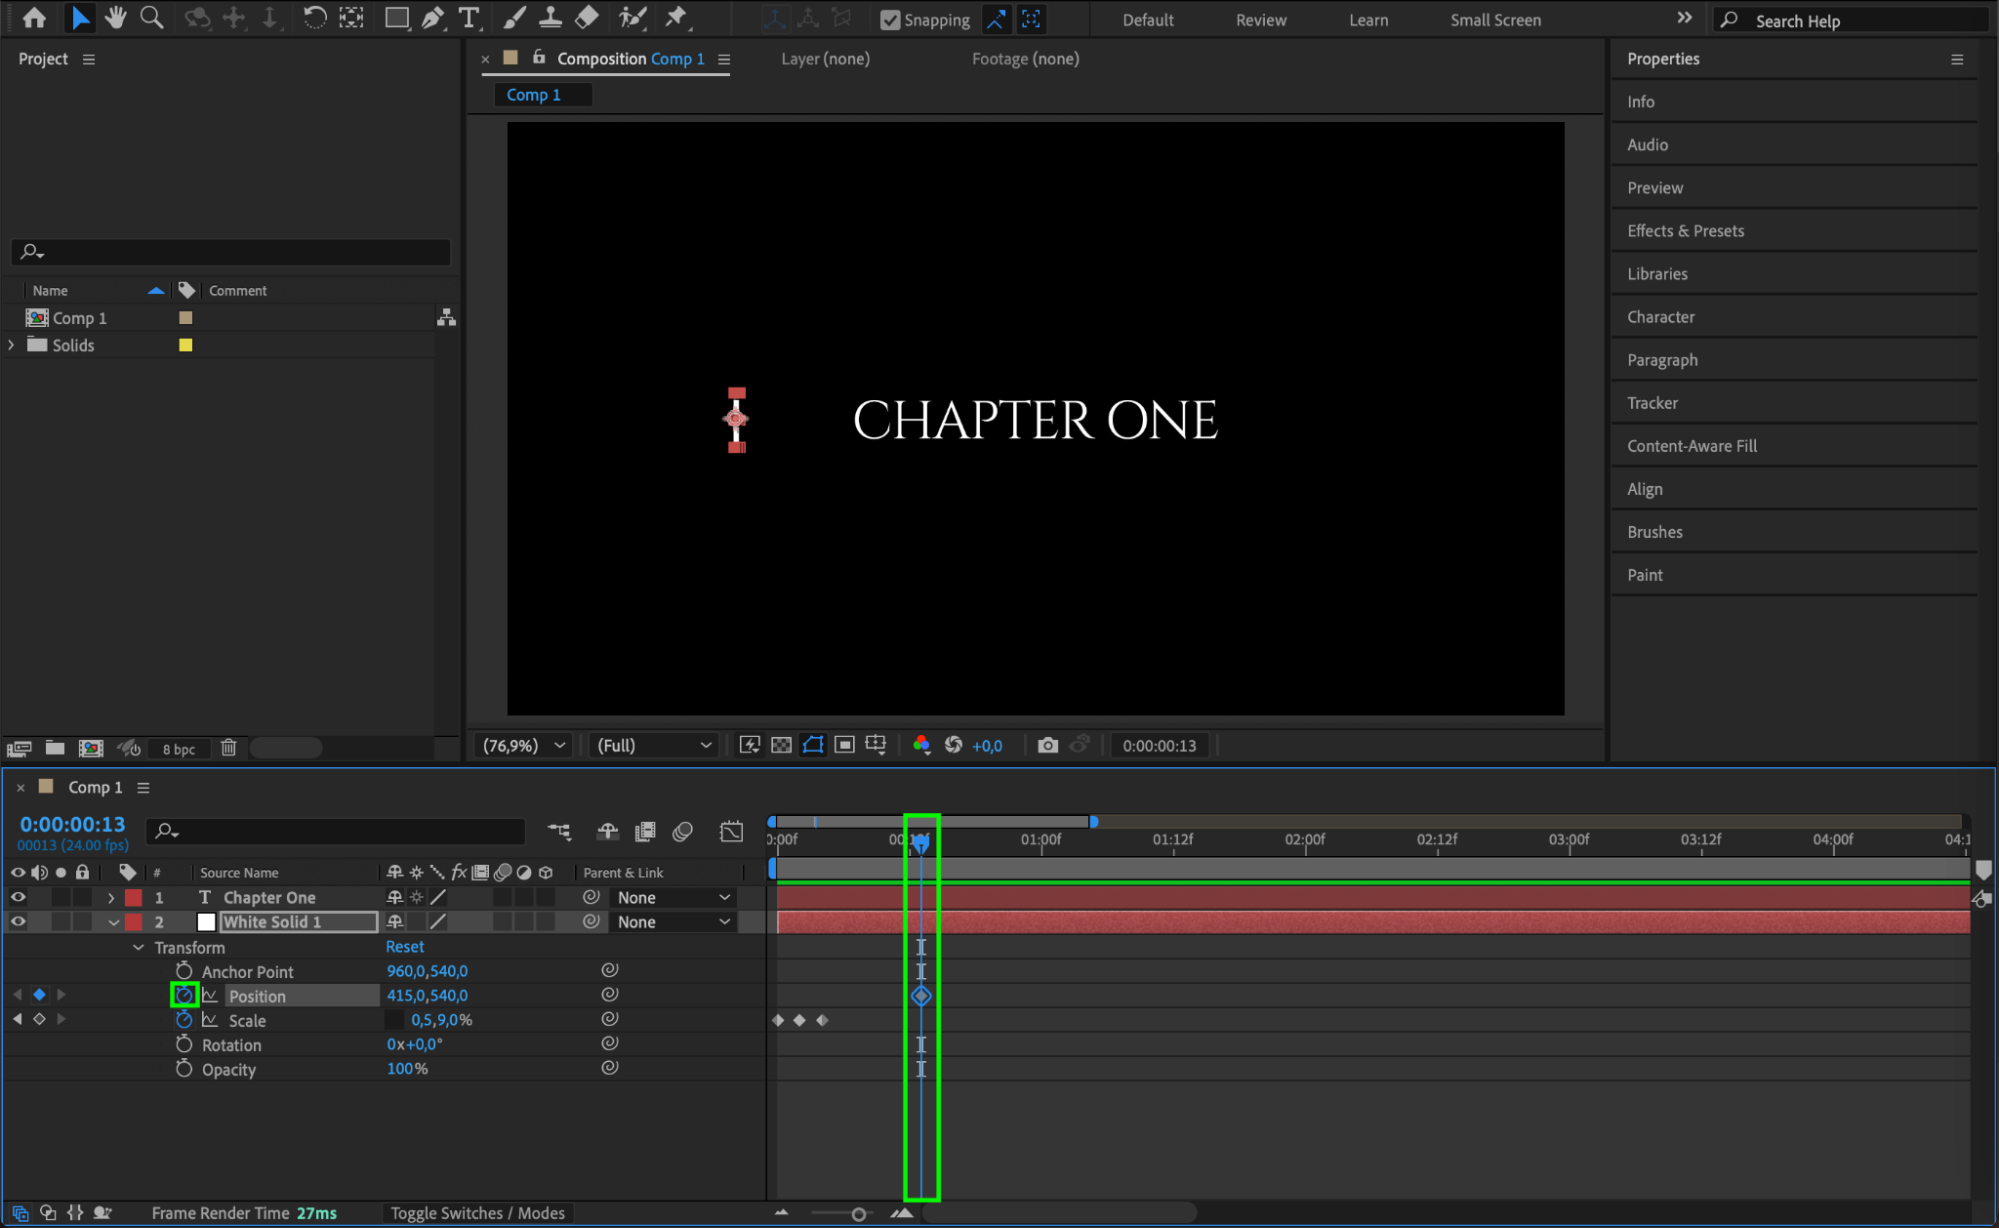
 Step 7: Apply Easy Ease to Keyframes
Select all the keyframes, right-click, go to Keyframe Assistant > Easy Ease. This will create smoother transitions between the keyframes.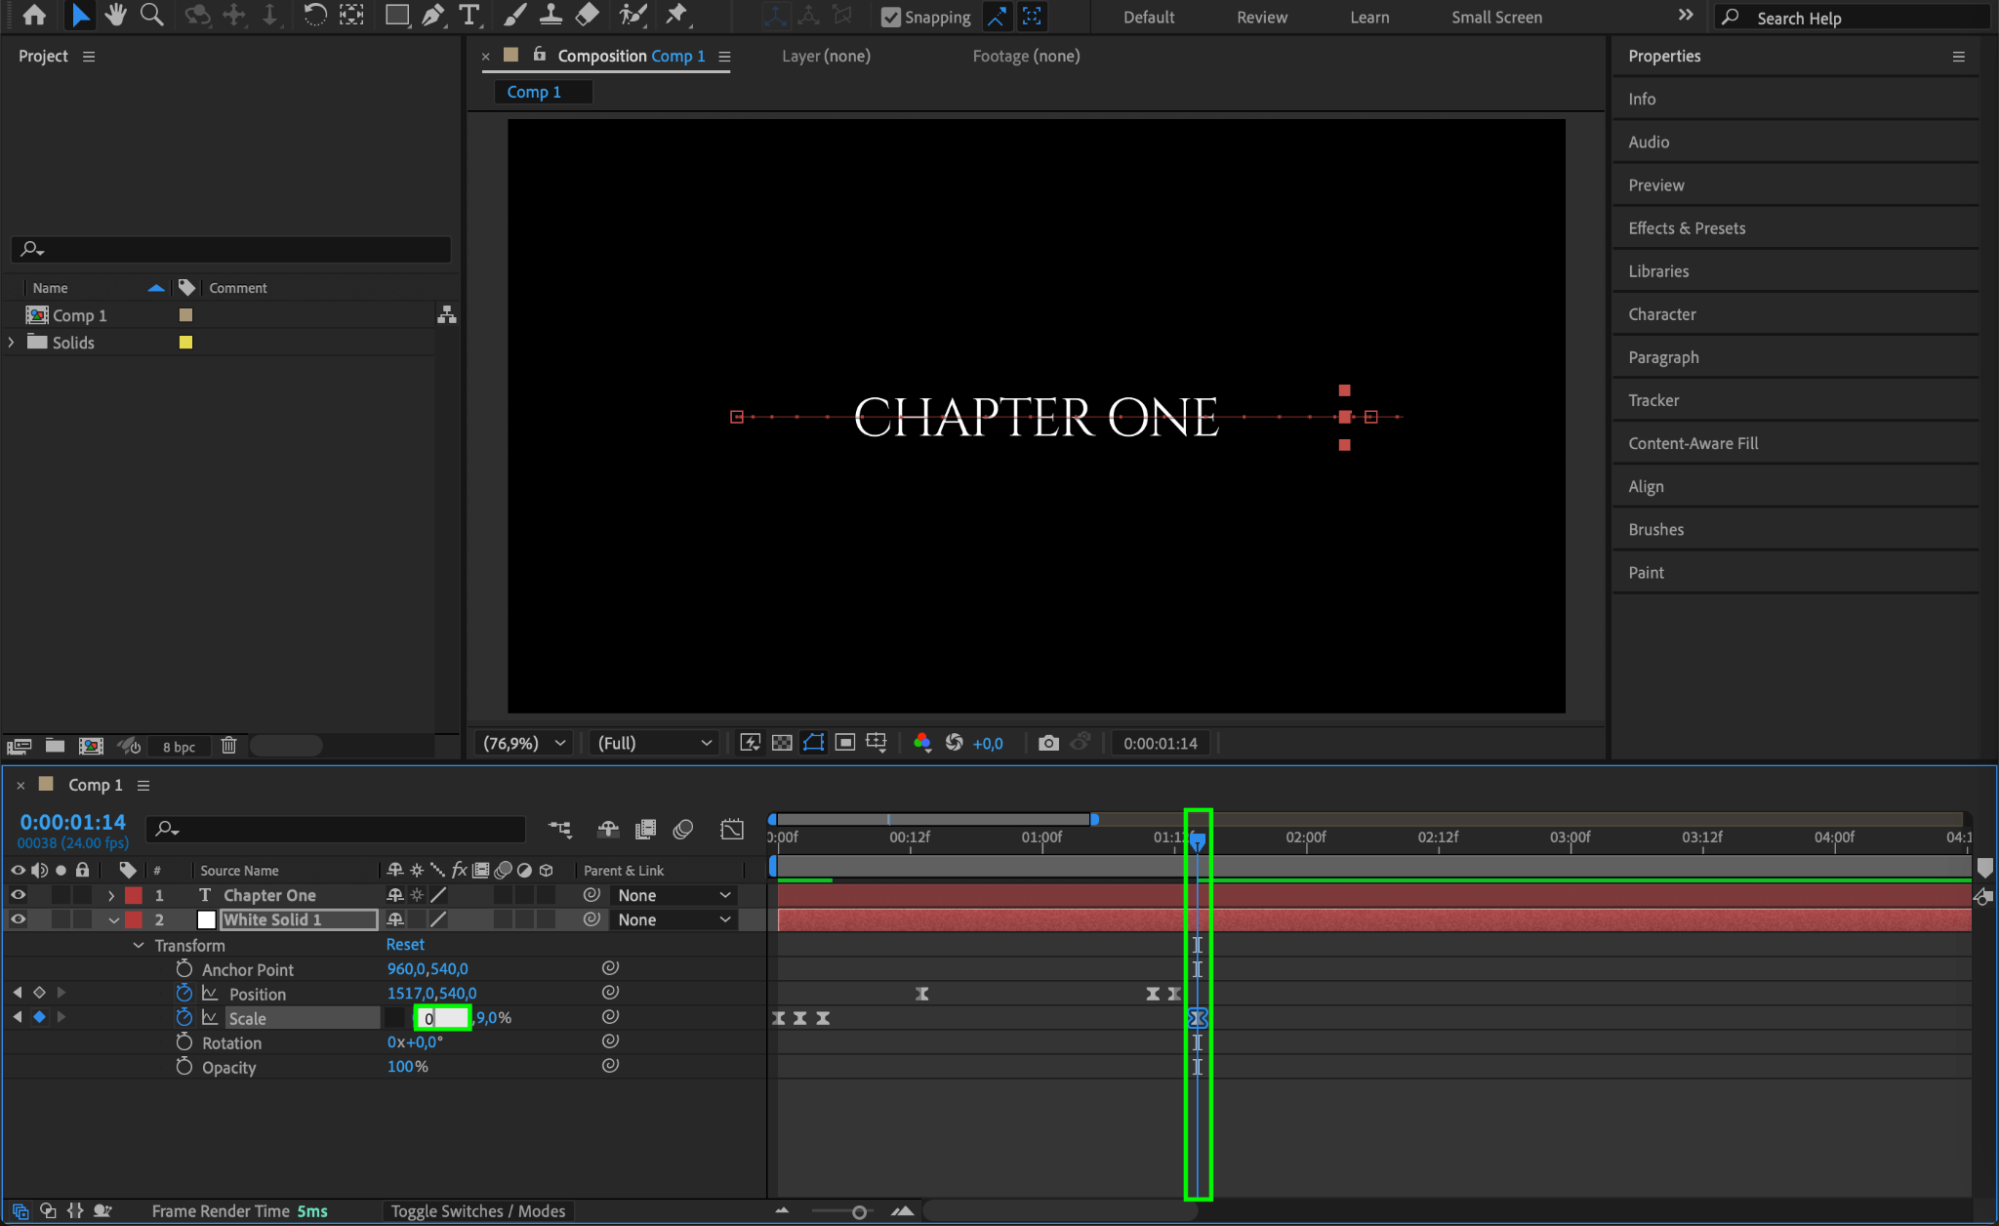 Step 8: Add a Mask to the Text
Select the Rectangle Tool (Q) and draw a mask around the text to hide it initially. This will allow the text to be revealed only when the solid passes over it.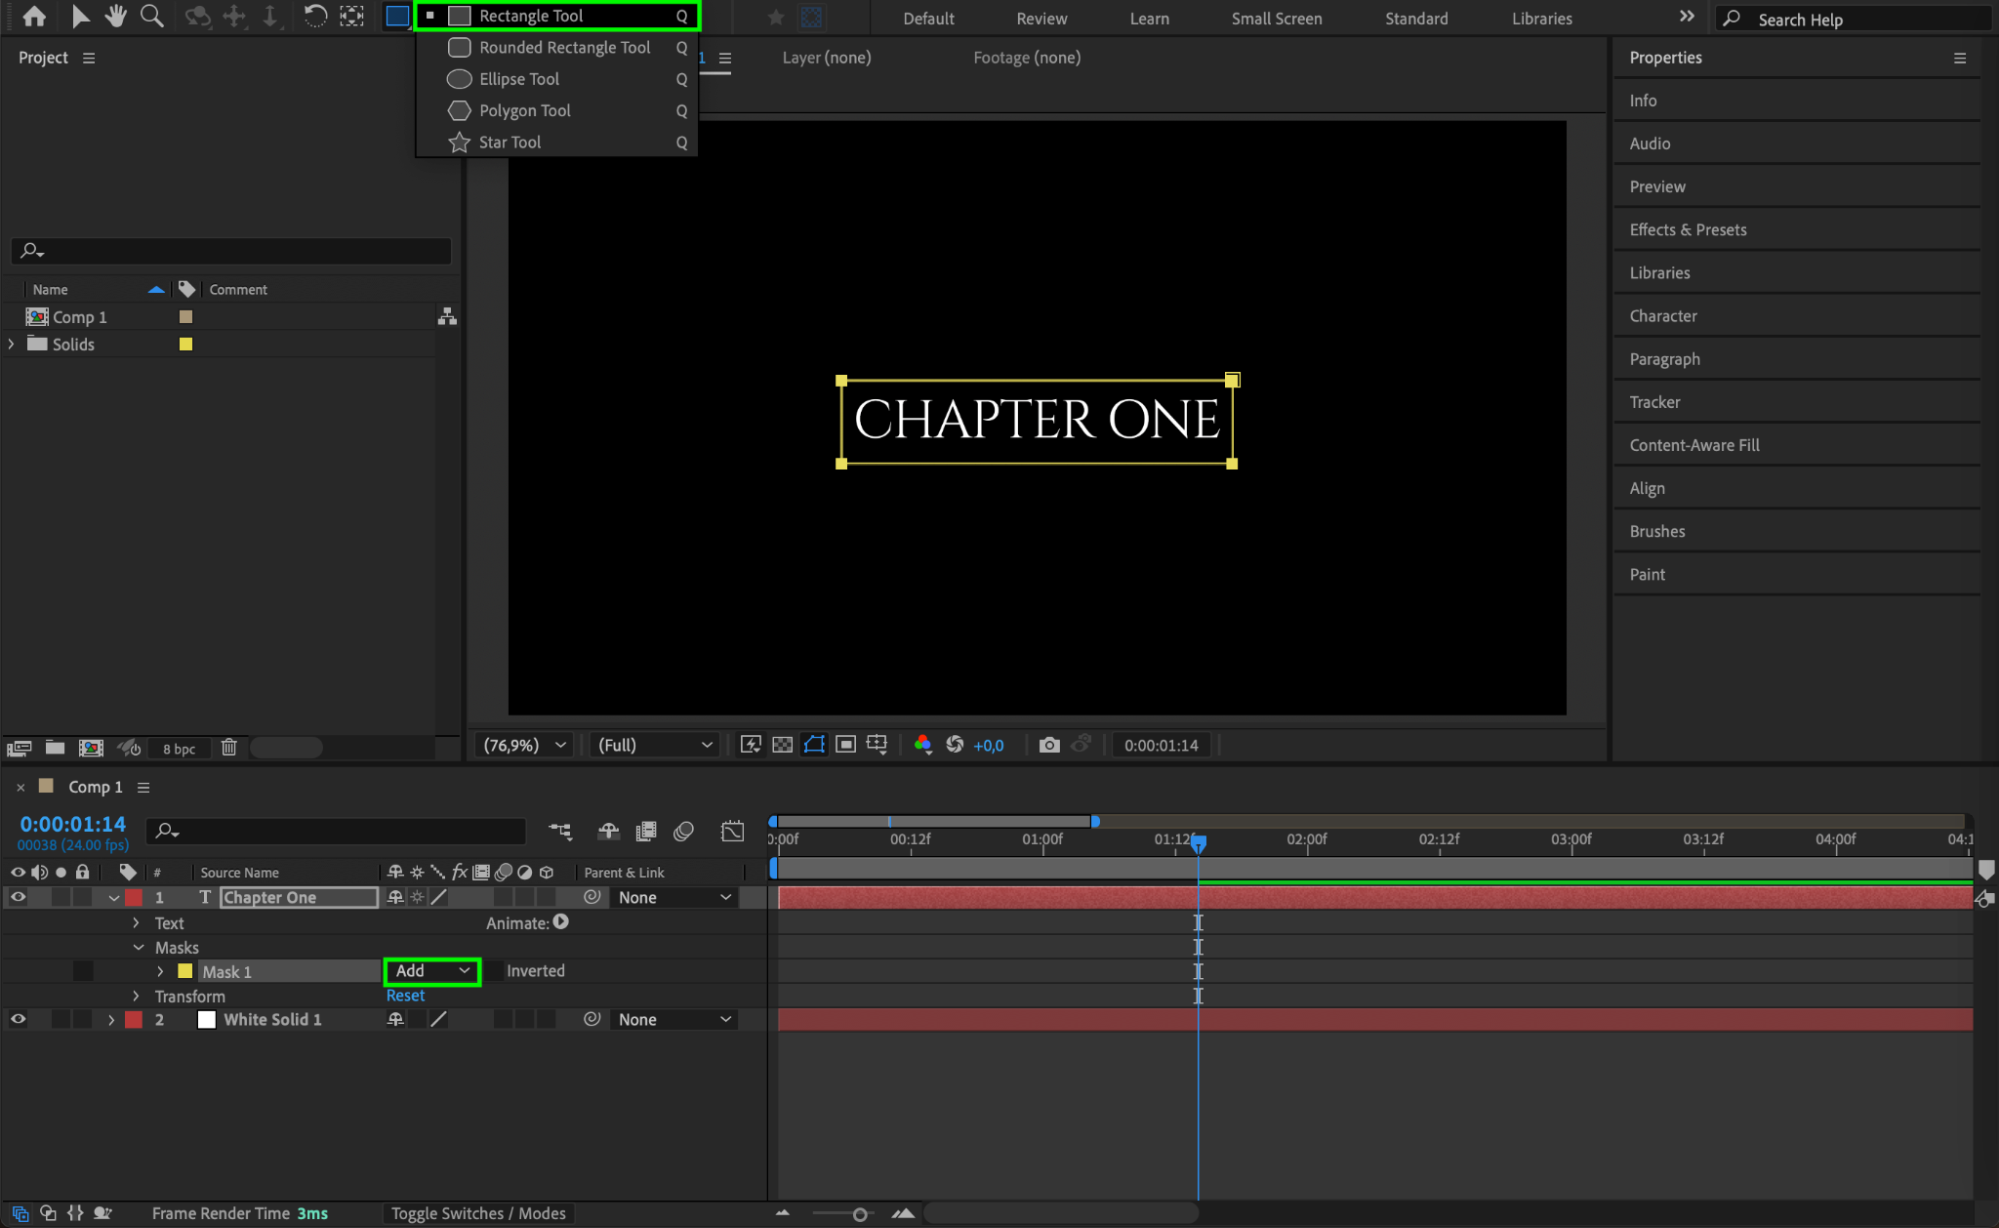 Step 9: Animate the Mask Path
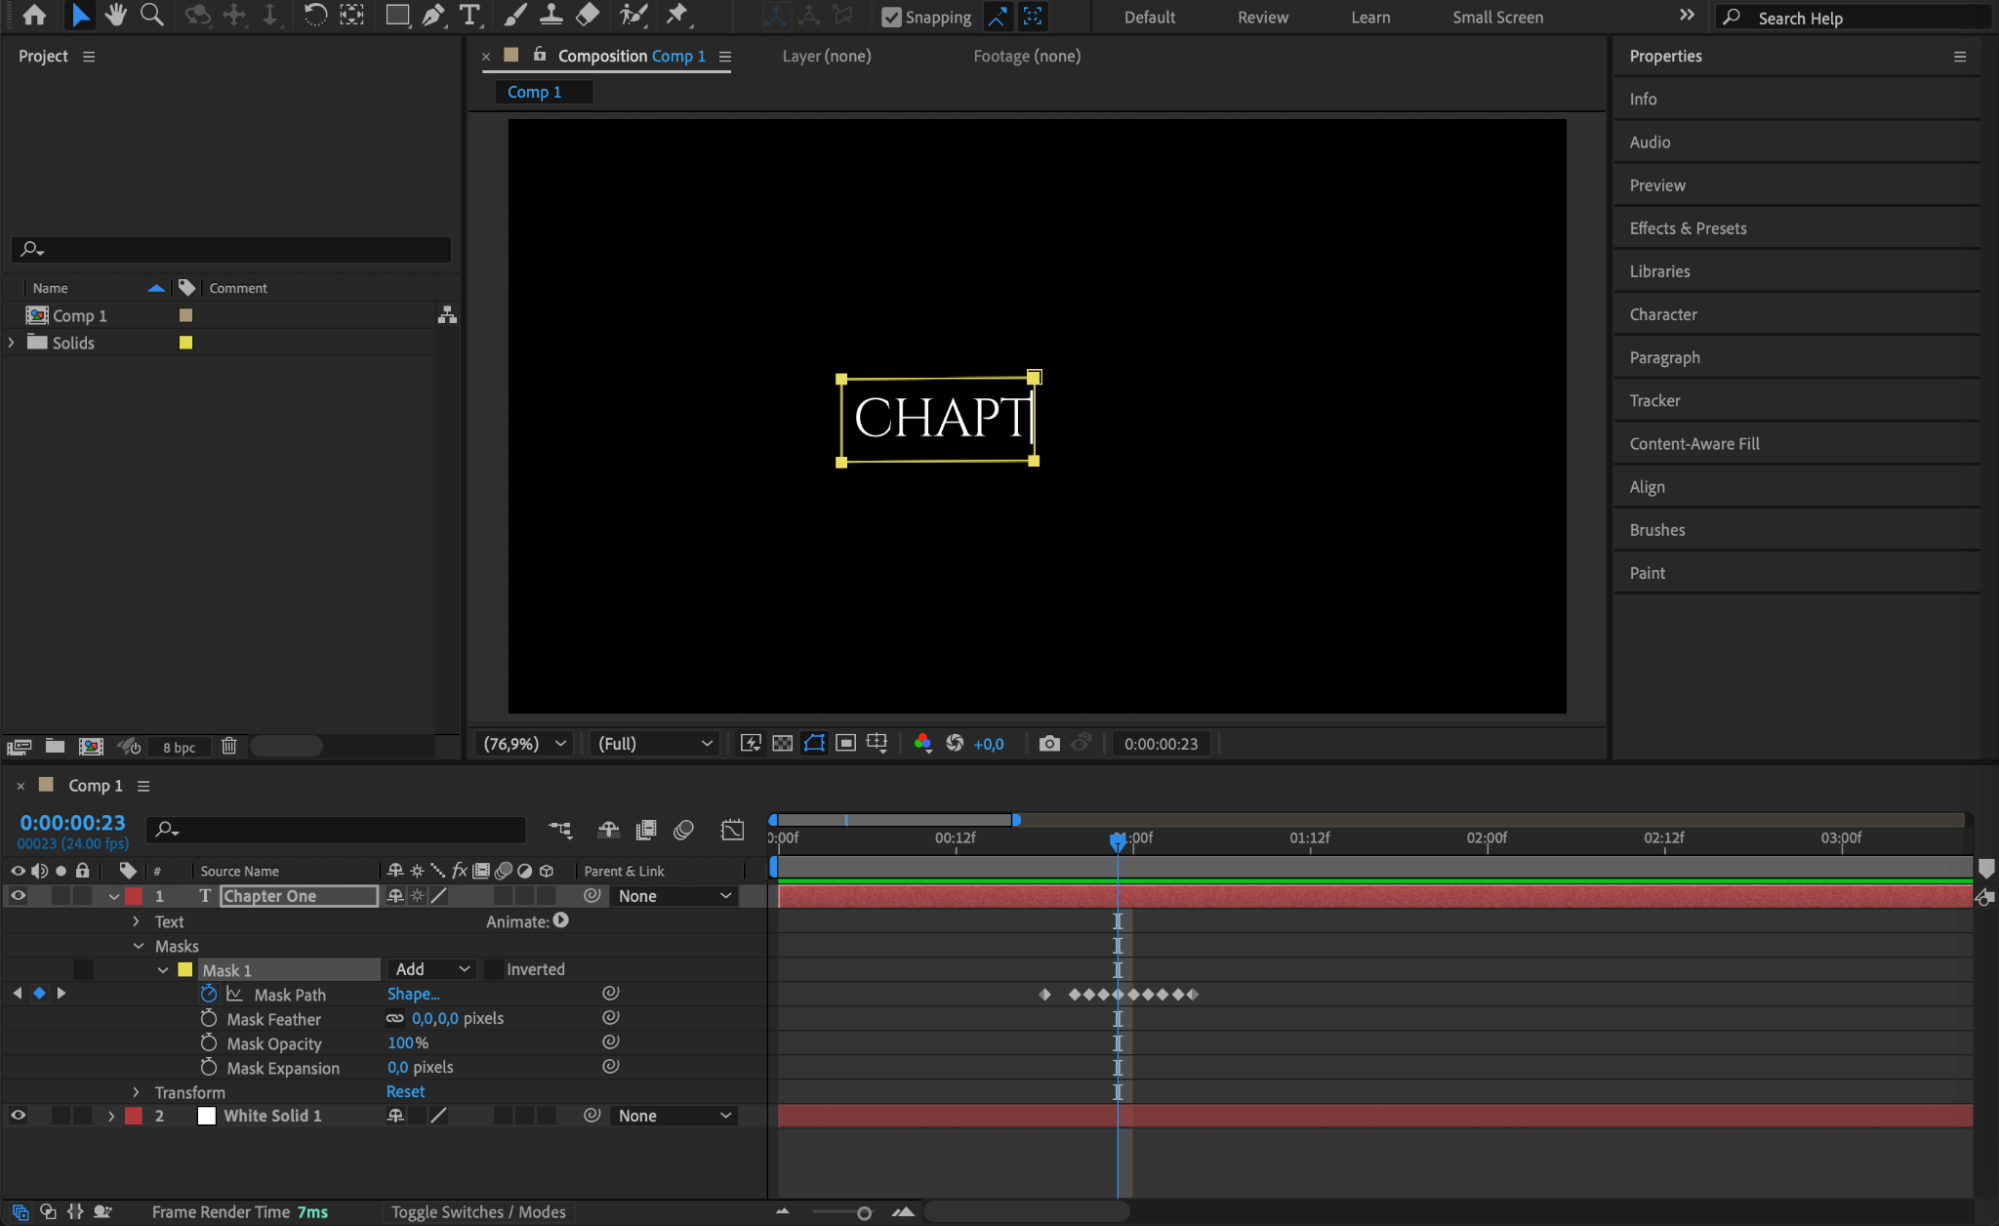
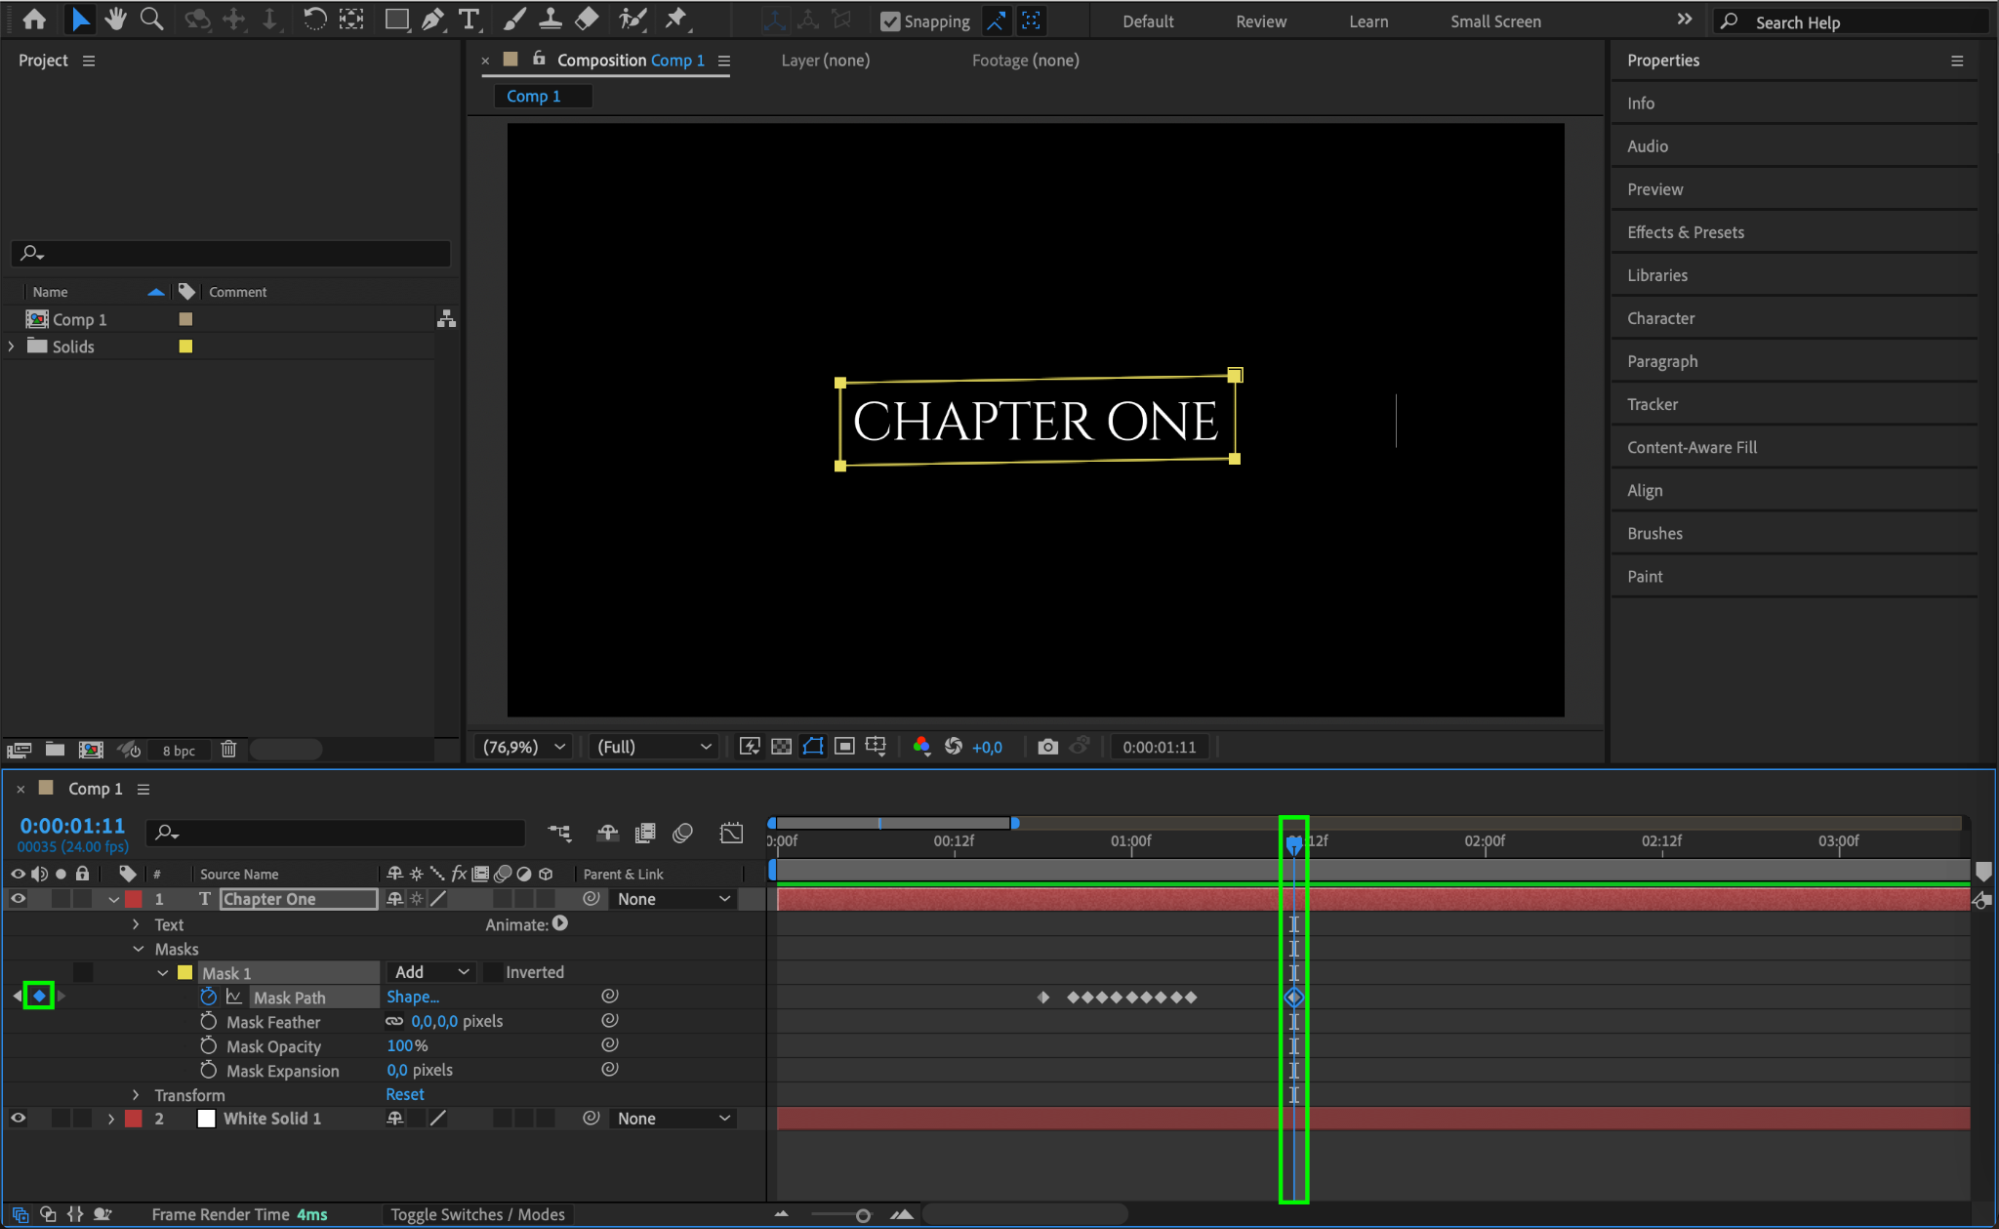
Click the stopwatch next to Mask Path and adjust the mask frame by frame to ensure the text appears smoothly as the solid moves.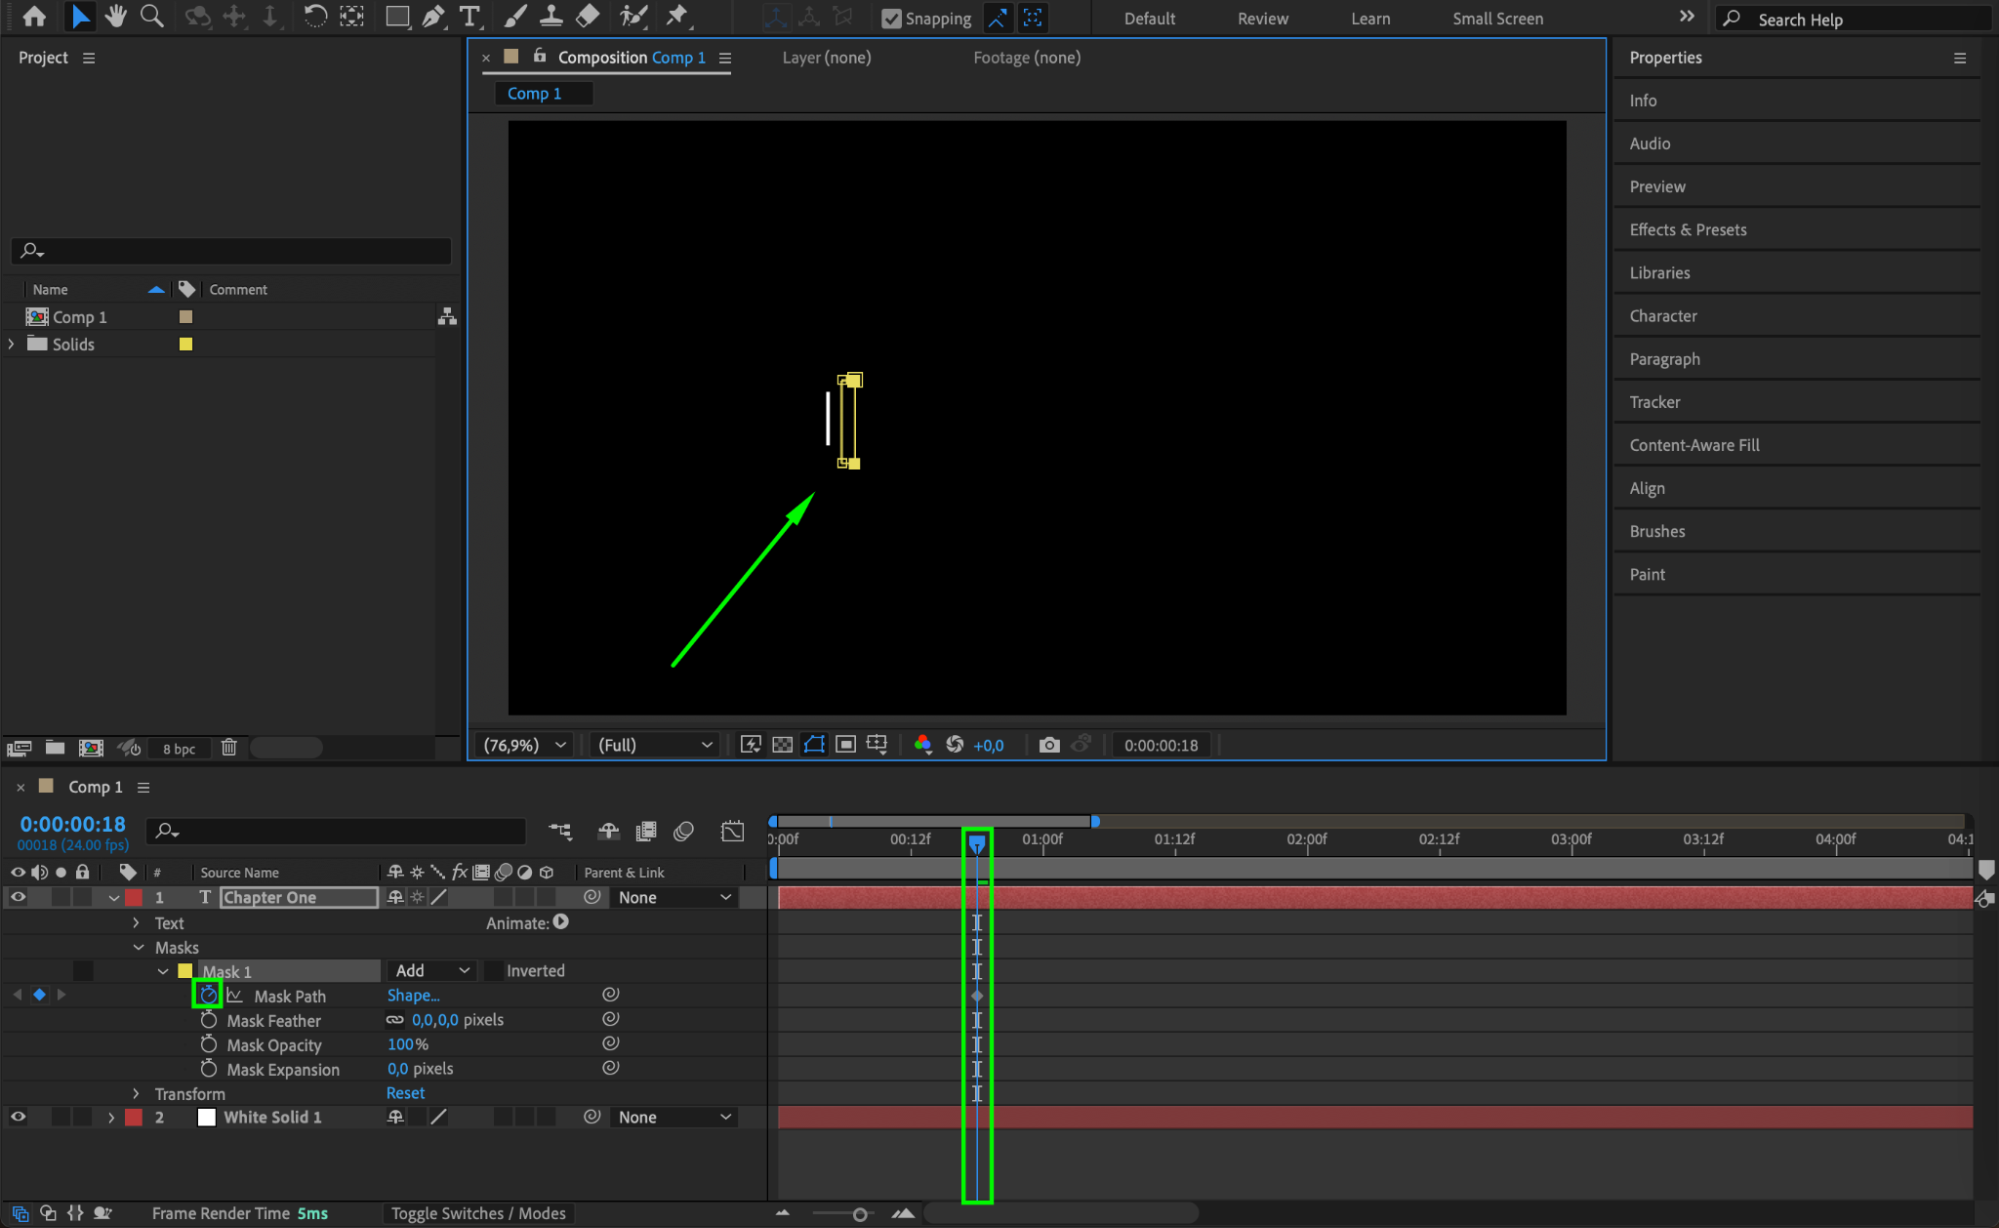
 Step 10: Animate the Disappearance of the Text
At the end of the animation, after the text is fully revealed, simulate a collapsing effect by adjusting the Mask Path. Bring the top-right corner of the mask down to meet the bottom-right, and the top-left to the bottom-left, making the text shrink and disappear. Trim the layer by pressing “Alt/Option + ]”.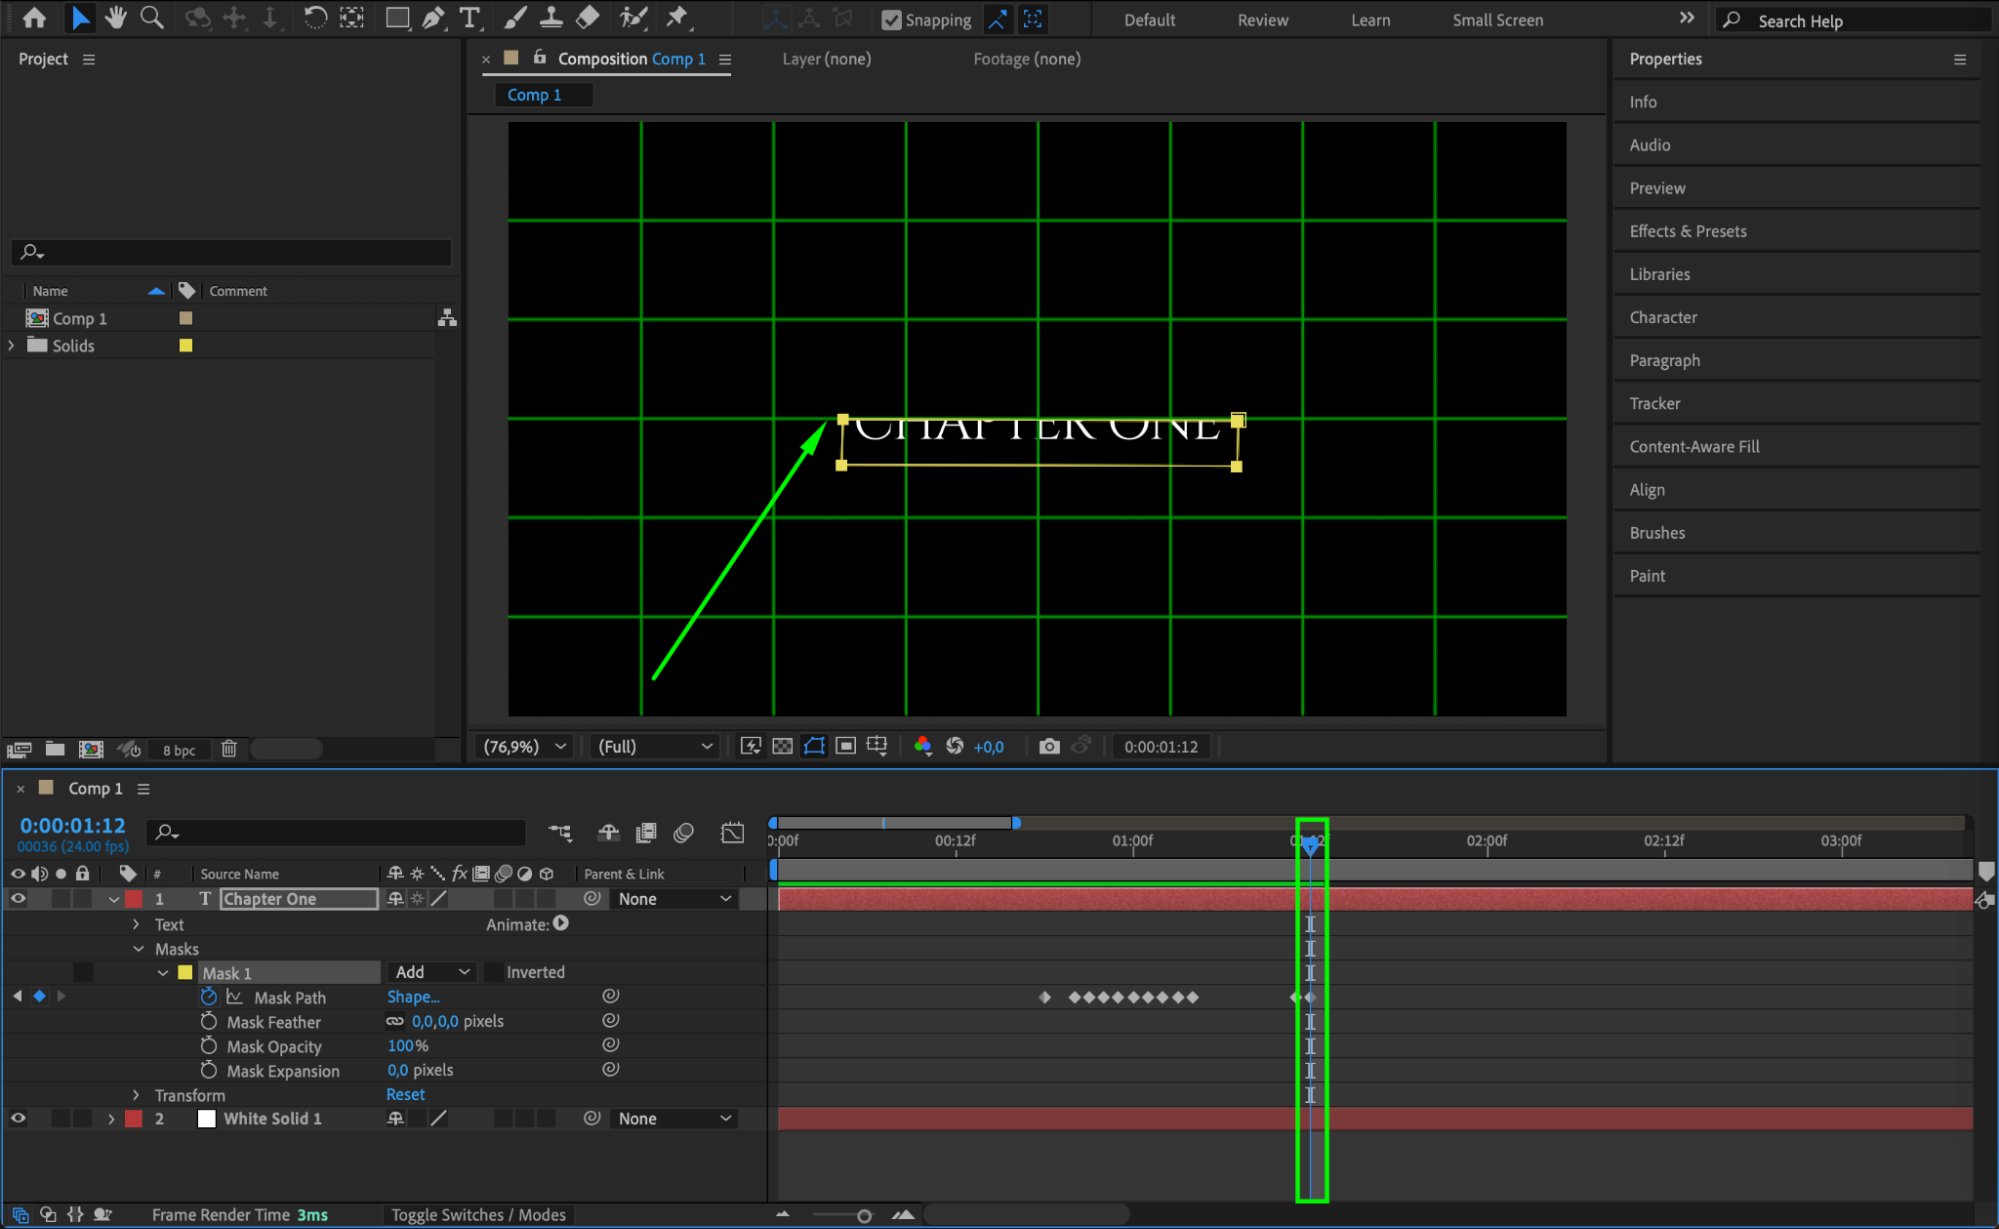
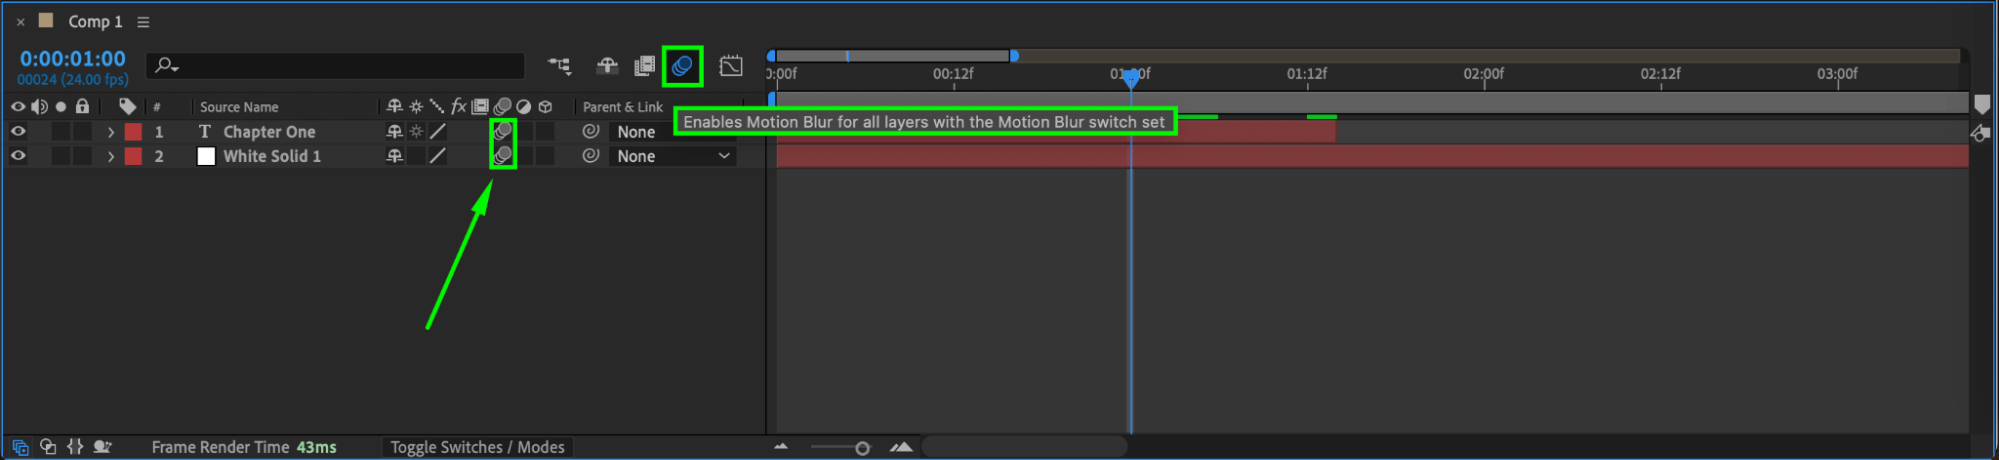
 Step 11: Enable Motion Blur
In the Timeline Panel, enable Motion Blur for both the text and the solid layer to create a more natural movement.
 Step 12: Preview and Render
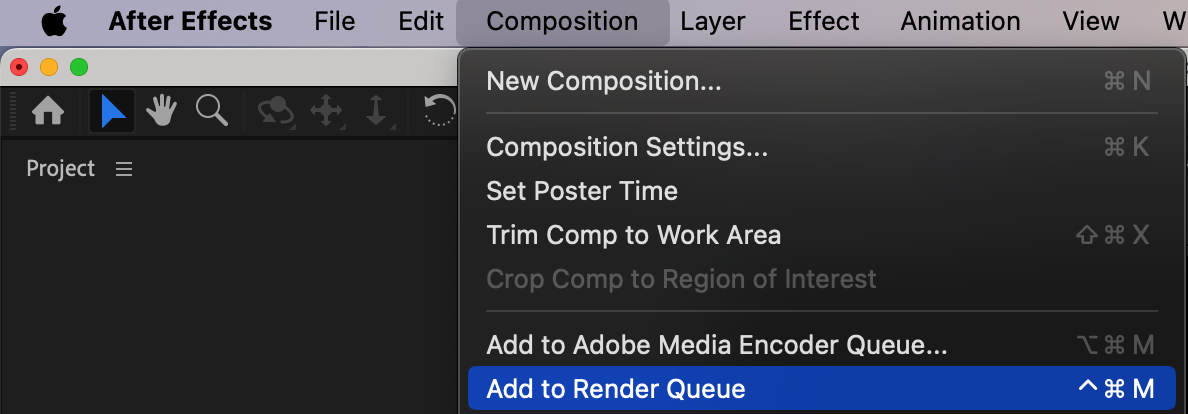
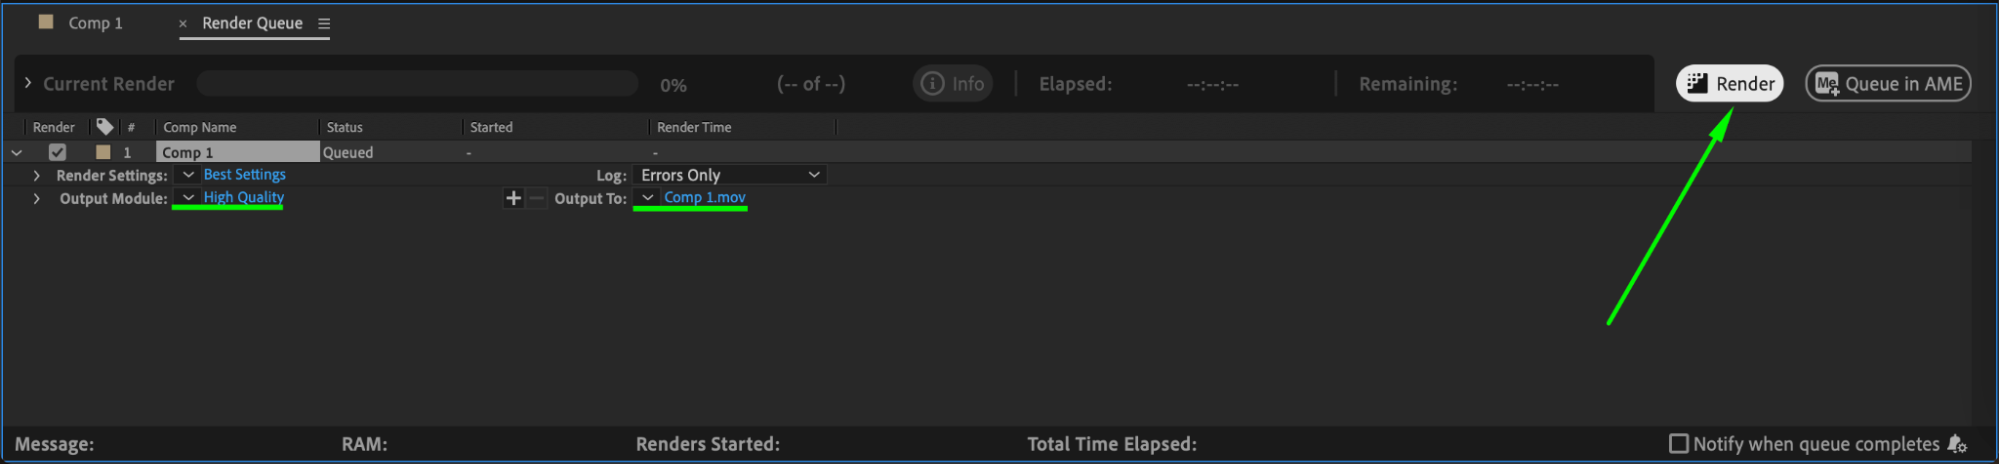
Press Spacebar to preview the animation. If satisfied, go to Composition > Add to Render Queue, adjust the settings, and export your final animation.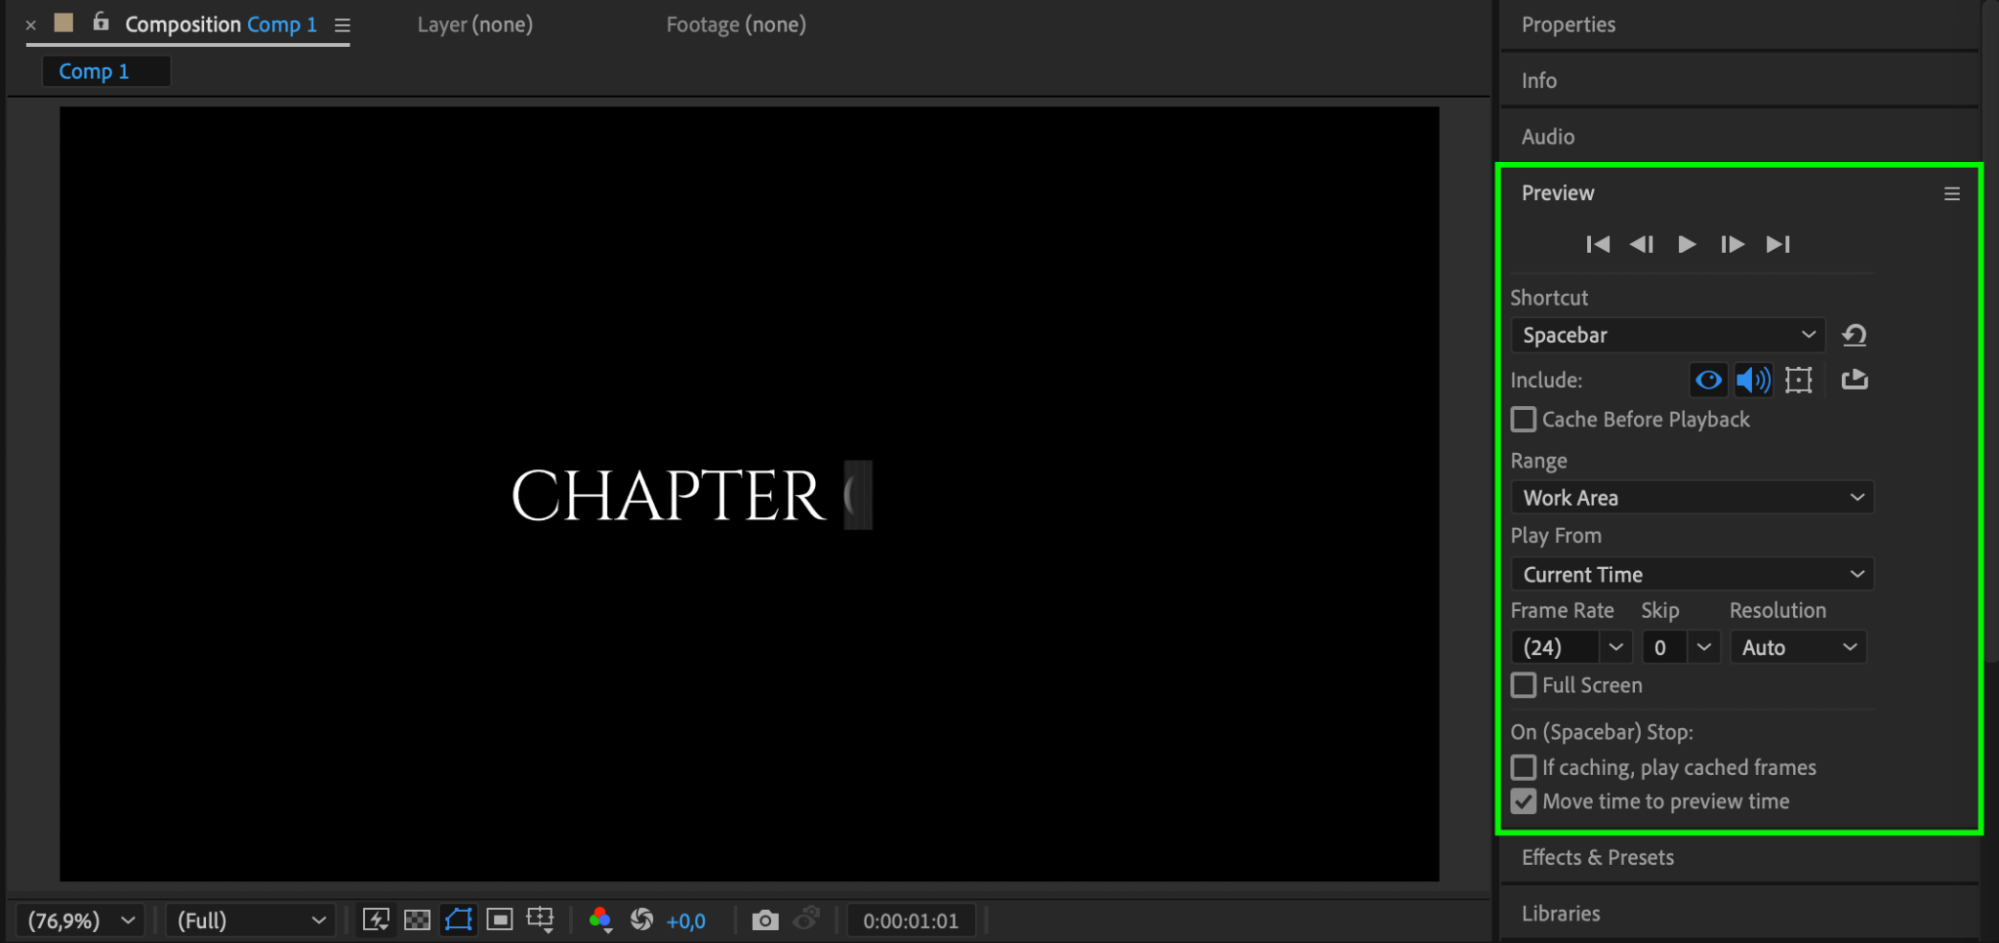
Conclusion
By using keyframes, masking, and motion blur, you can create a smooth and professional text transition effect in After Effects. This method adds a dynamic feel to your animations and can be customized to suit different styles. Experiment with different speeds and easing settings to refine your transitions further.
Our Bestsellers


