A Step-by-Step Guide to Adding Lights in After Effects
Introduction: Enhancing Your Composition with Lights
Adding lights in After Effects transforms flat 3D compositions into dynamic, visually engaging scenes. Lights can be used to focus attention on specific elements, create realistic atmospheres, or add dramatic flair to your project. This guide will walk you through the process of adding and customizing lights in After Effects.
Get 10% off when you subscribe to our newsletter

Step 1: Import Your Footage or Assets
Begin by importing the assets you want to use in your project. Go to File > Import > File, and select the images, videos, or graphic elements needed for your composition. This ensures that your project is ready to be enhanced with lighting effects.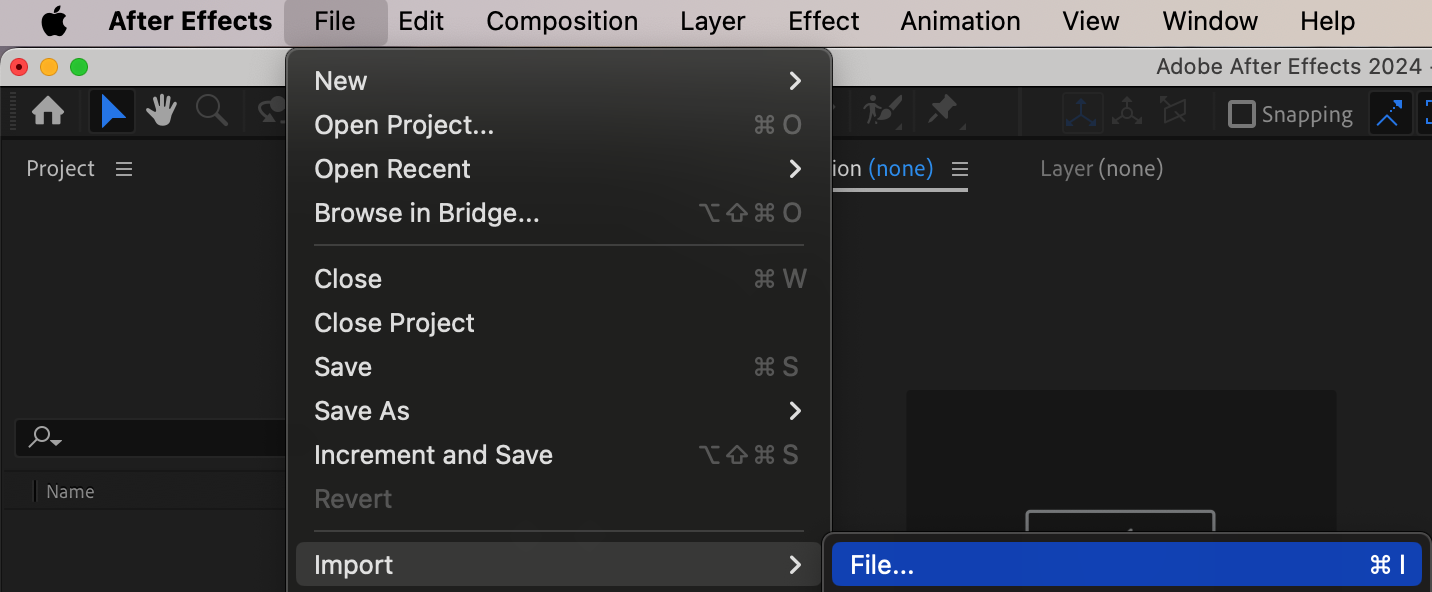 Step 2: Add Assets to the Timeline
Drag your imported files from the Project Panel to the Timeline Panel. Arrange them as needed to build the base of your composition. Make sure layers are correctly ordered and positioned to set the stage for applying lights effectively.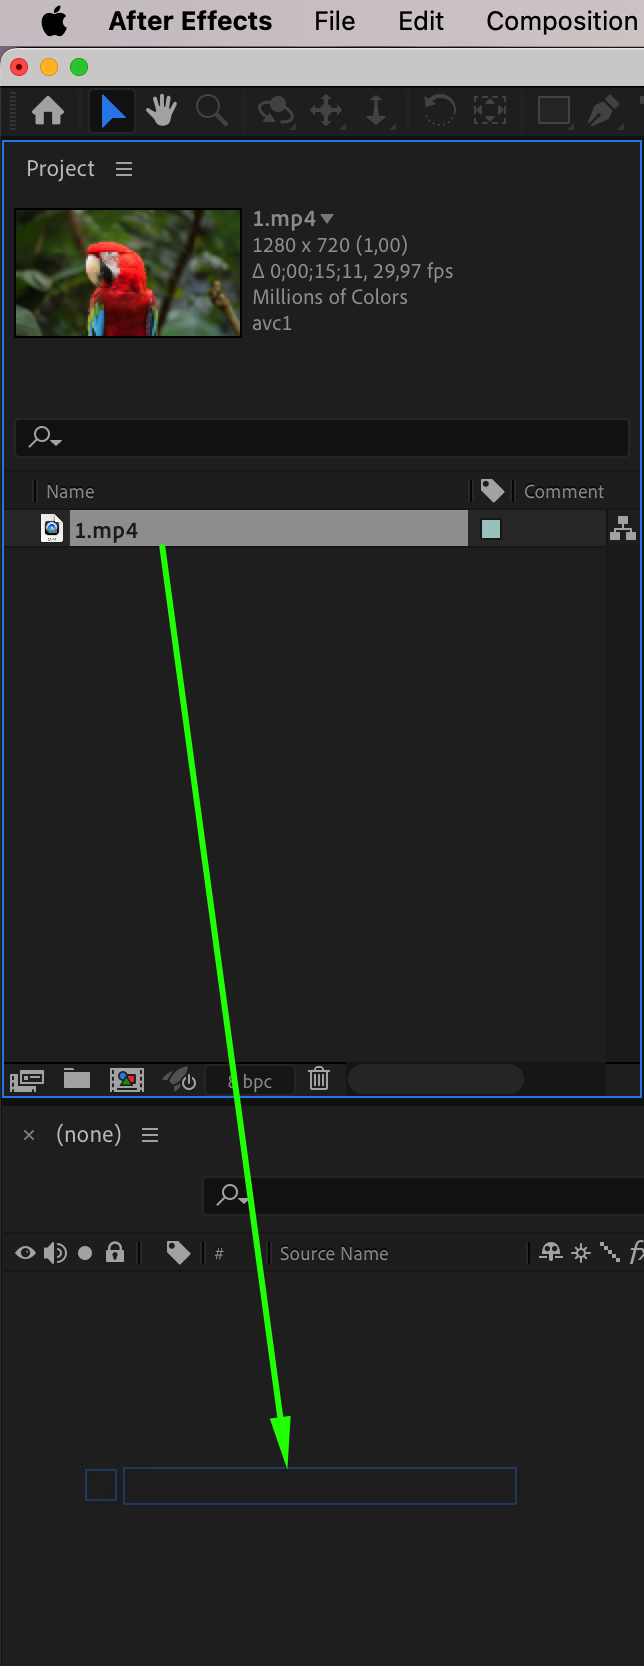 Step 3: Add a New Light Layer
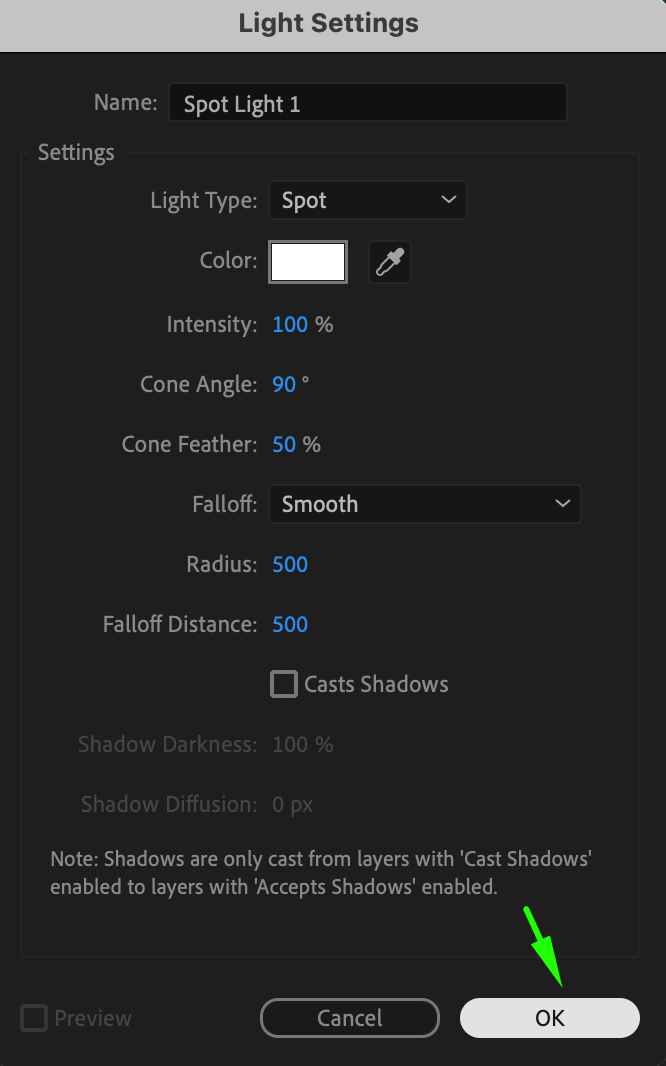
To introduce a light source, navigate to Layer > New > Light. A dialog box will prompt you to choose a Light Type – options include Spot, Point, Ambient, or Parallel. Select the type that best fits your scene and adjust initial settings like color and intensity. After clicking OK, a light layer will be added to your timeline.
 Step 4: Enable 3D for Layers
For lights to impact your layers, they must be set to 3D mode. Click the small cube icon in the Switches Panel next to each layer you want illuminated. If you can’t see the cube icon, toggle between Switches and Modes at the bottom of the timeline. This step ensures that the light interacts properly with your composition.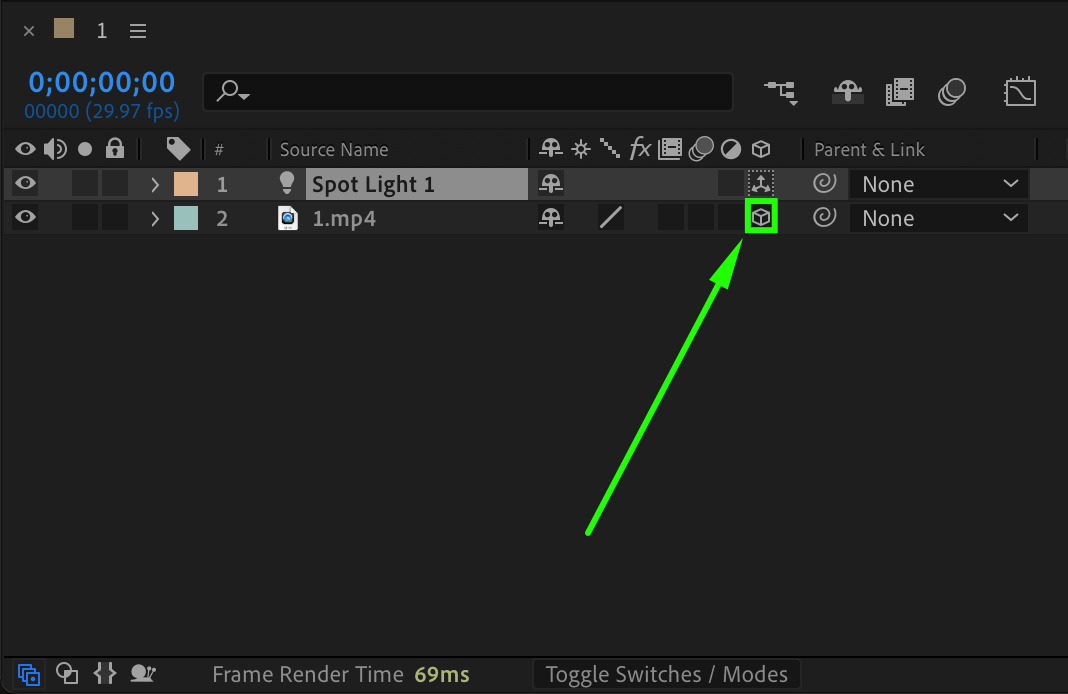 Step 5: Customize Light Properties
Select the light layer in the timeline and expand its properties to access Light Options. From here, you can adjust settings such as Color, Intensity, Cone Angle, and Cone Feather. These parameters allow you to control the brightness, focus, and softness of your light. Experiment with these settings to match the tone and style of your composition.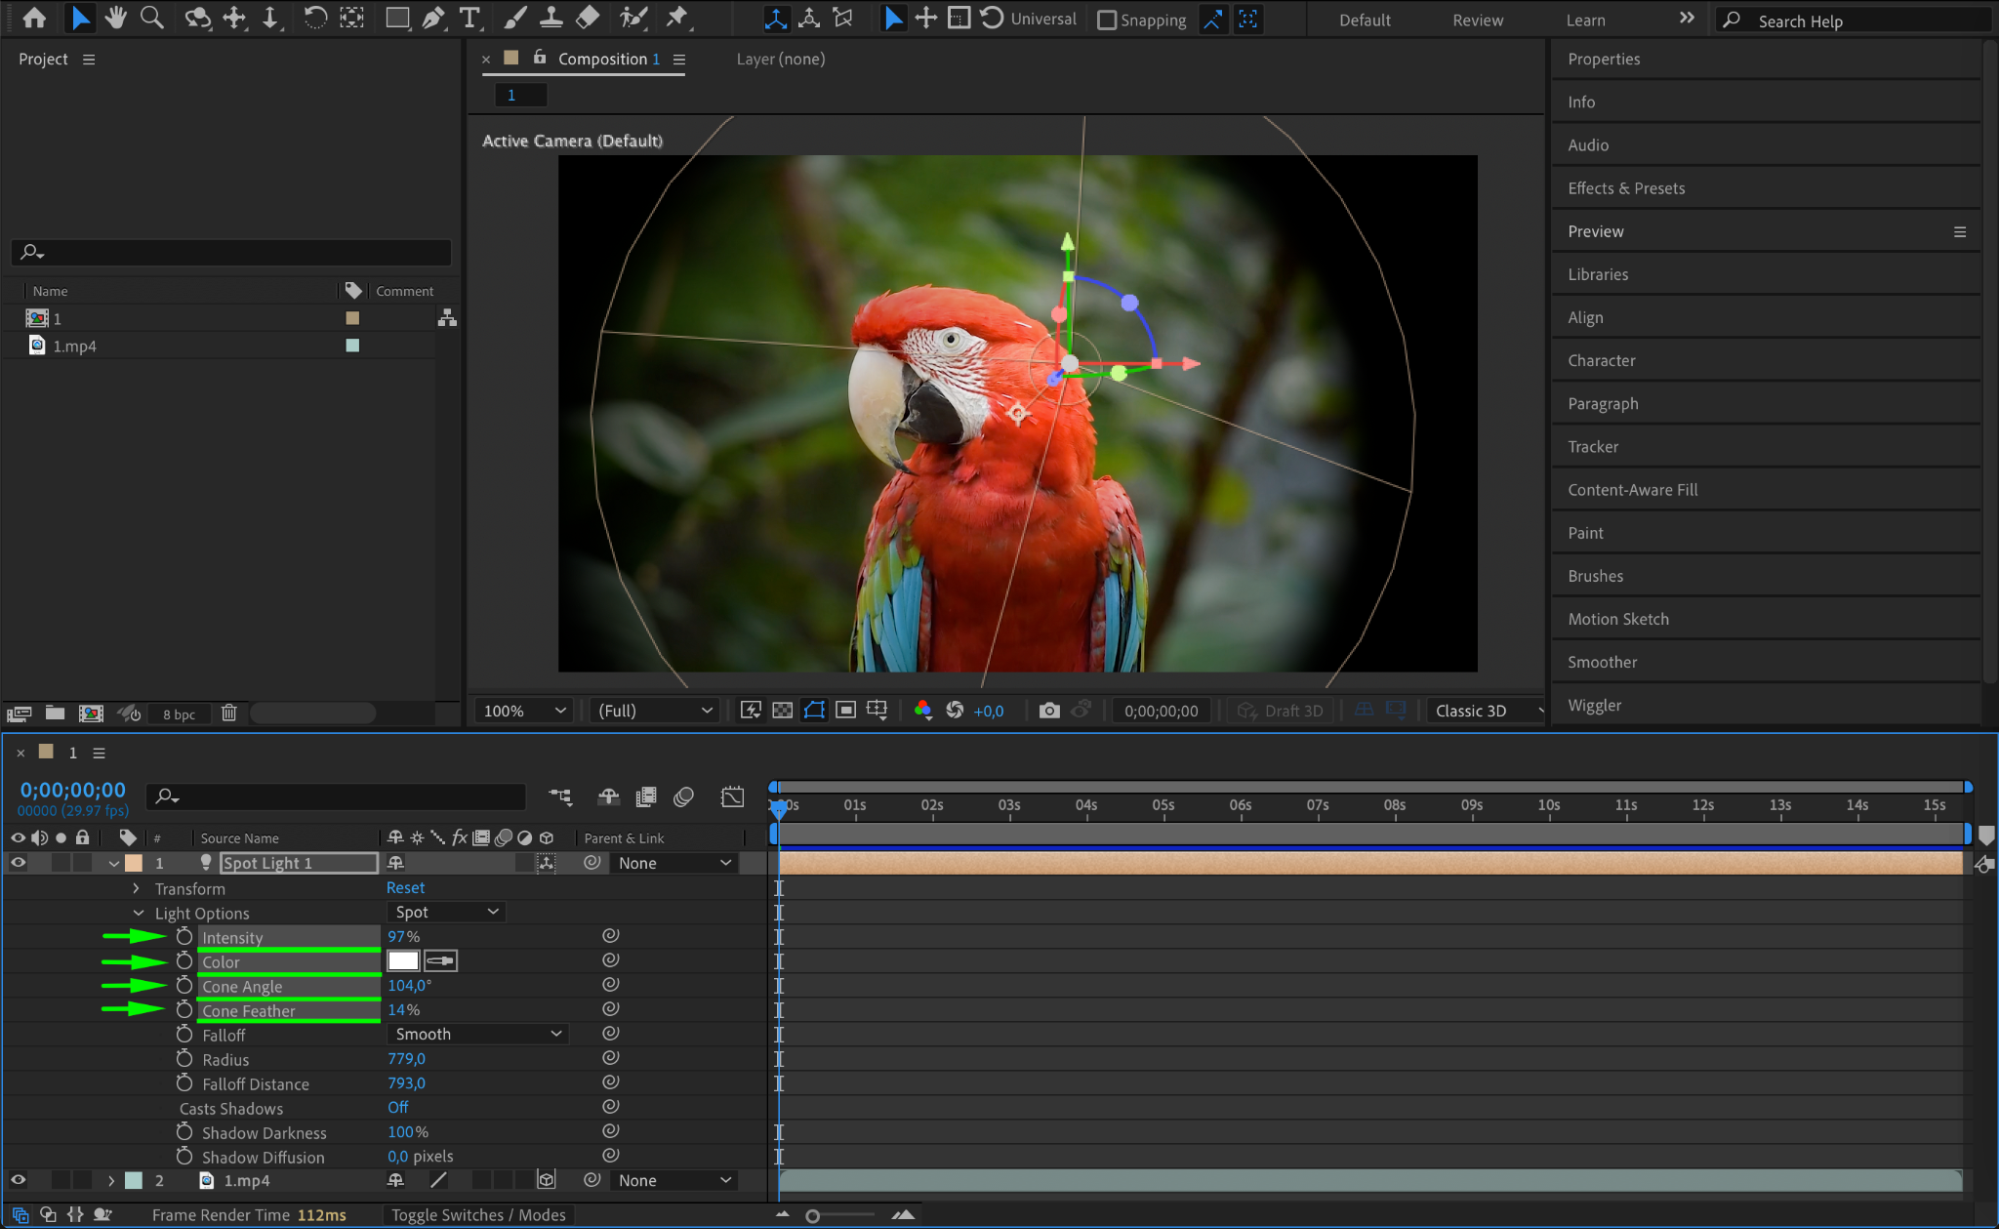 Step 6: Animate Light Properties
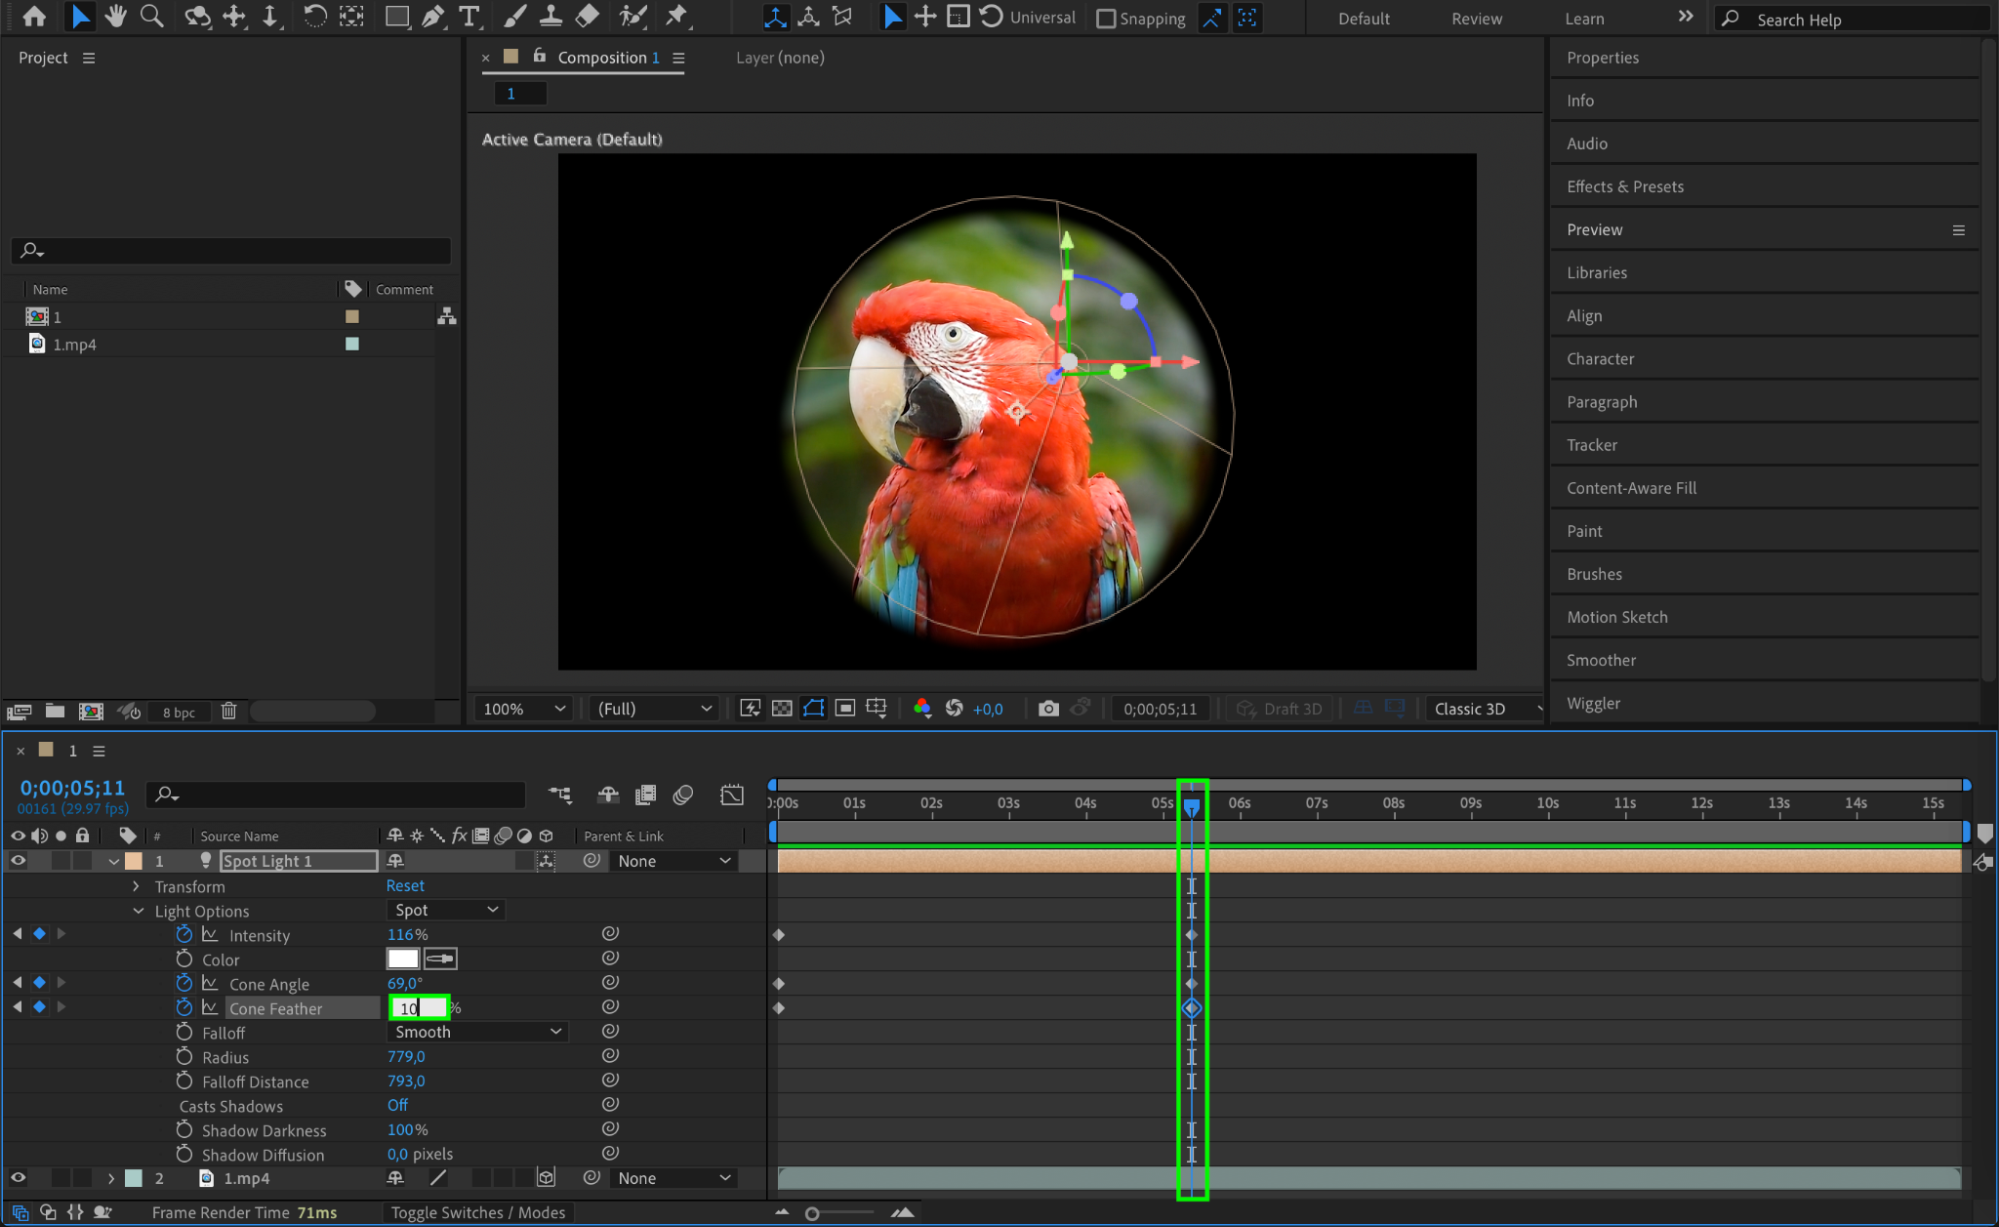
Animating light properties adds dynamic movement and drama to your scene. For instance, you can animate the Intensity and Cone Angle of a Spot Light. Position the CTI (Current Time Indicator) at the starting point, click the stopwatch next to the property, and then move the CTI to a later point while adjusting the value. After Effects will interpolate the animation between keyframes.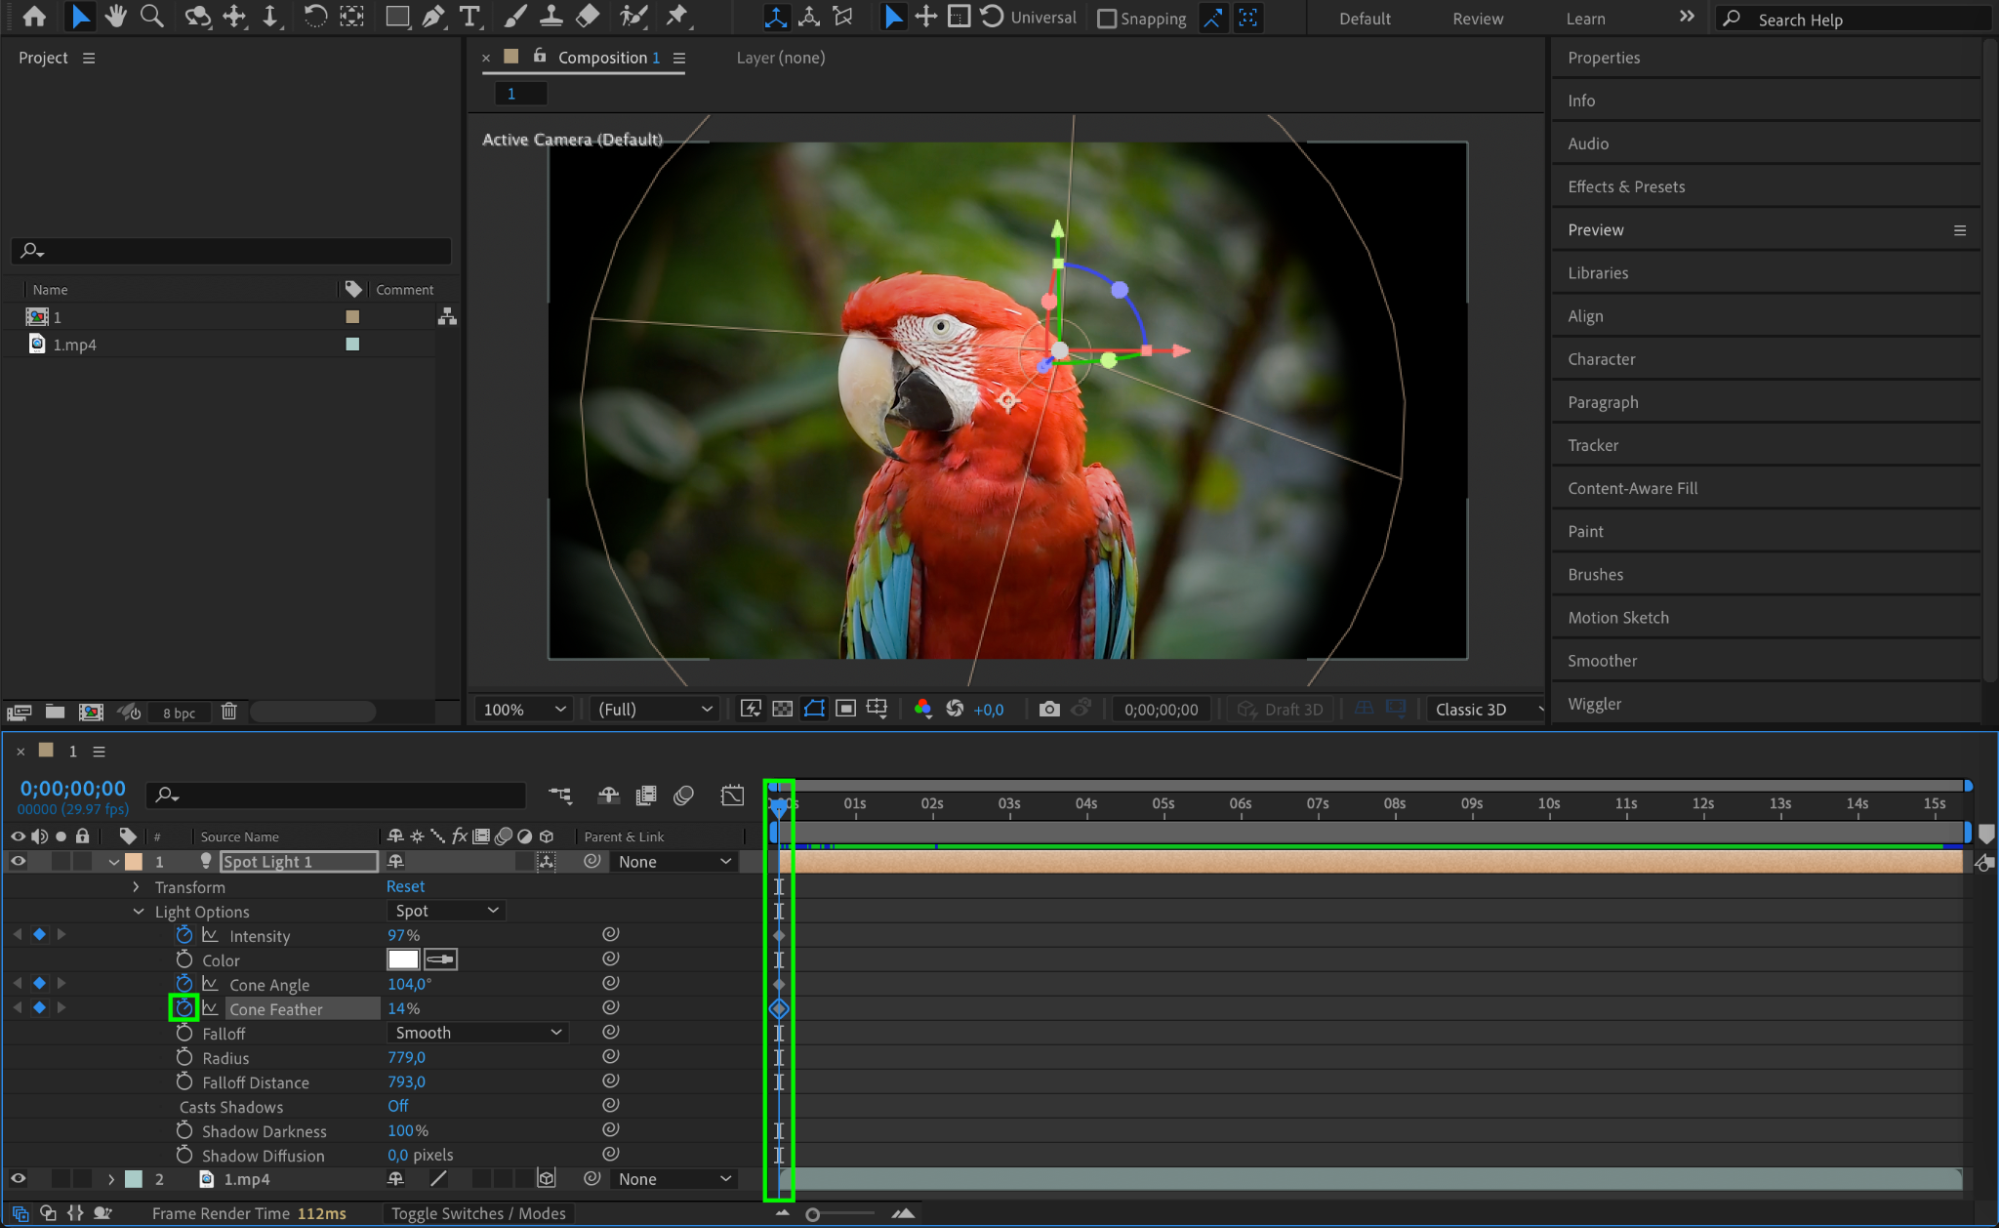
 Step 7: Preview Your Work
Preview your composition by pressing the Spacebar. This will allow you to see how the light interacts with your scene. Use this step to make fine adjustments to the light’s position, intensity, or animation until you achieve the desired effect.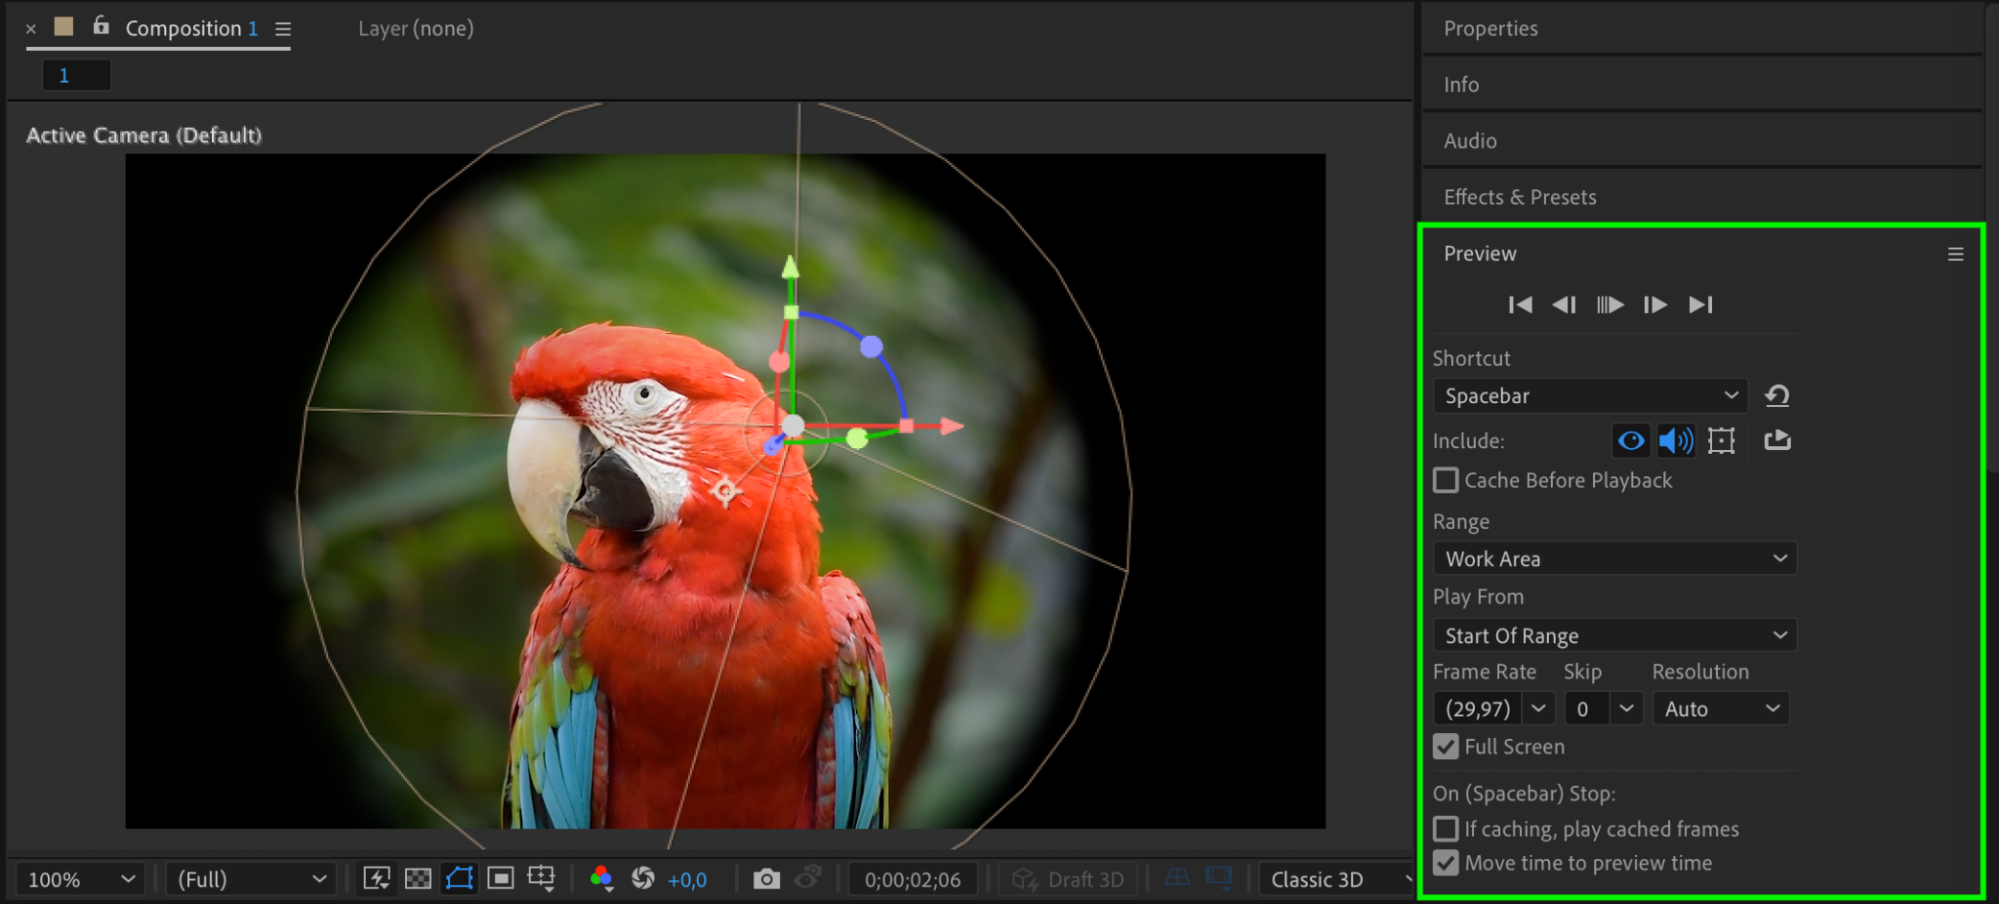 Step 8: Render Your Composition
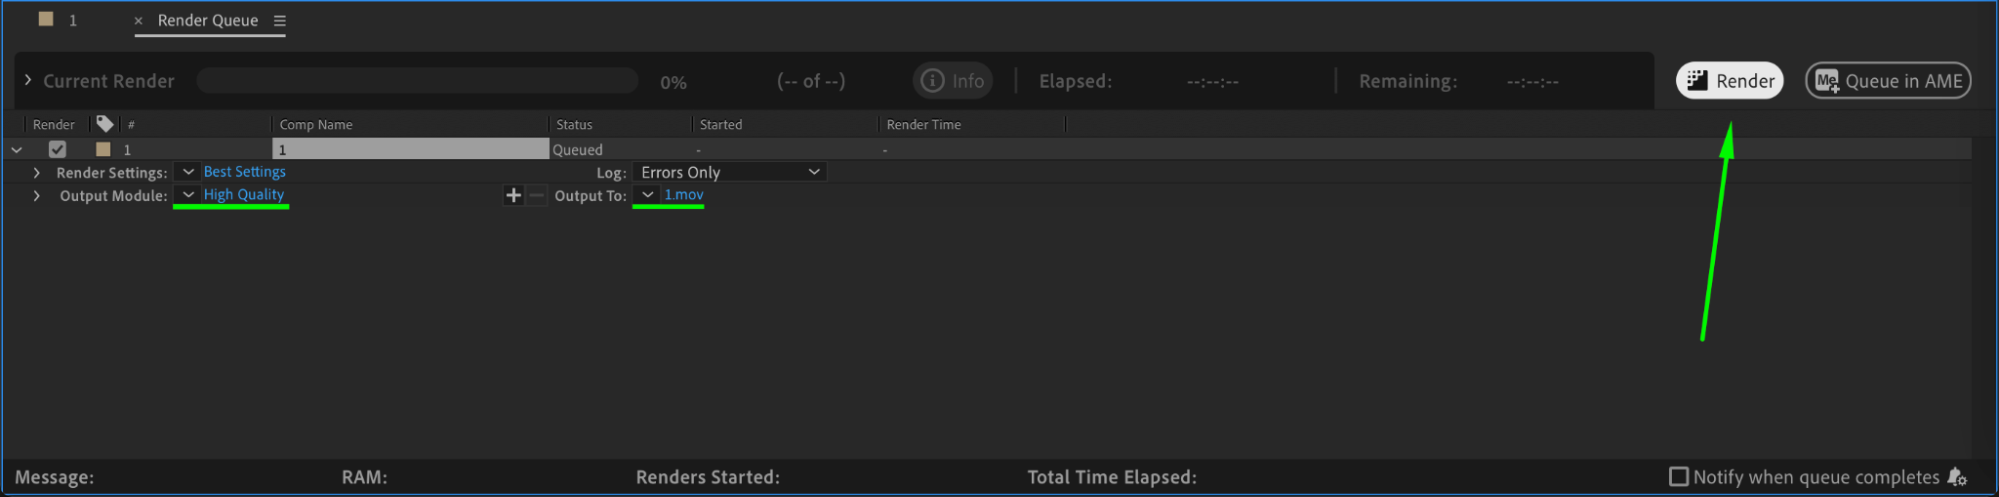
When your project is complete, export it by going to Composition > Add to Render Queue or using Add to Adobe Media Encoder for advanced output options. Choose the desired format, set the output location, and click Render. This final step ensures your work is saved as a finished video.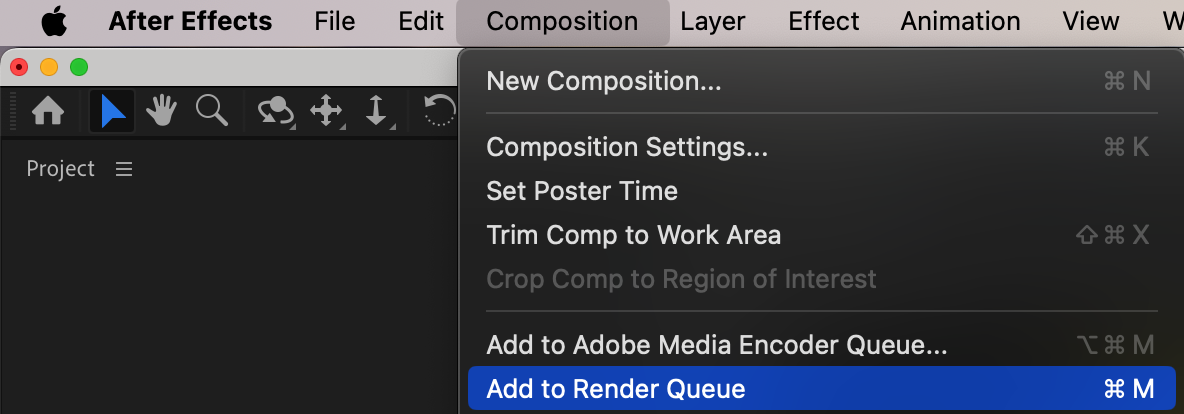
Conclusion
By understanding how to add and customize lights, you can elevate your After Effects projects to a professional level. Lights are an essential tool for creating depth, drama, and realism in 3D compositions. Experiment with different types of lights and settings to unlock their full creative potential in your projects.
Our Bestsellers


