A Complete Guide to Adding Multiple Keyframes in After Effects
Introduction: What Are Keyframes in After Effects?
Keyframes are the foundation of animation in After Effects, allowing you to change values over time and bring your projects to life. In this guide, you’ll learn how to add and manage multiple keyframes for smooth transitions and complex animations.
Step 1: Open Your Composition
Get 10% off when you subscribe to our newsletter

Ensure your project is ready to animate. Open the composition you want to work on, and navigate to the layer you want to animate. Keyframes can be applied to various properties, such as position, scale, opacity, and rotation.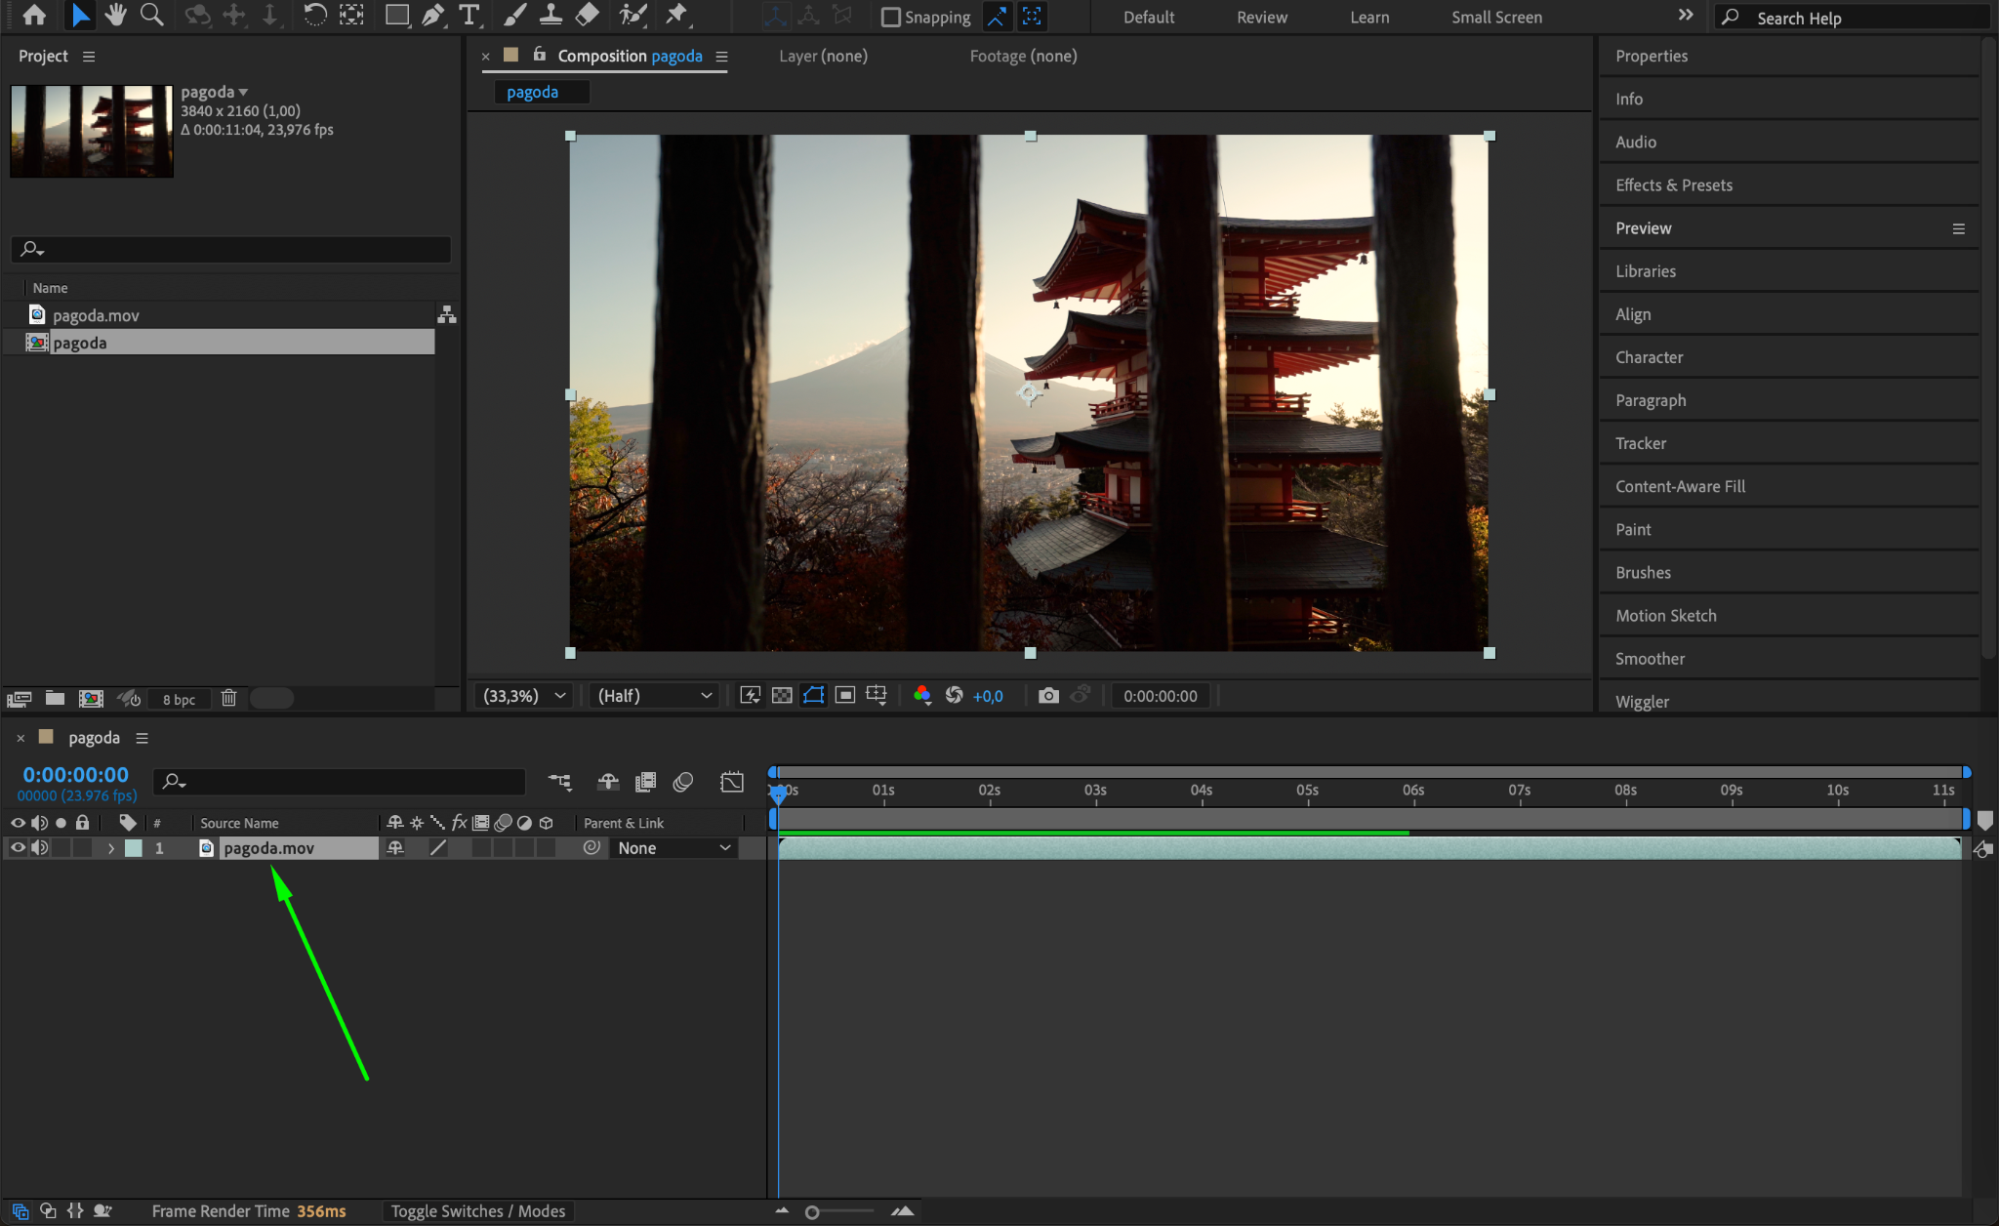 Step 2: Select a Property to Animate
Choose the property you want to animate by expanding the layer in the timeline. For example, click the arrow next to a layer and choose properties like “Position,” “Scale,” or “Opacity.”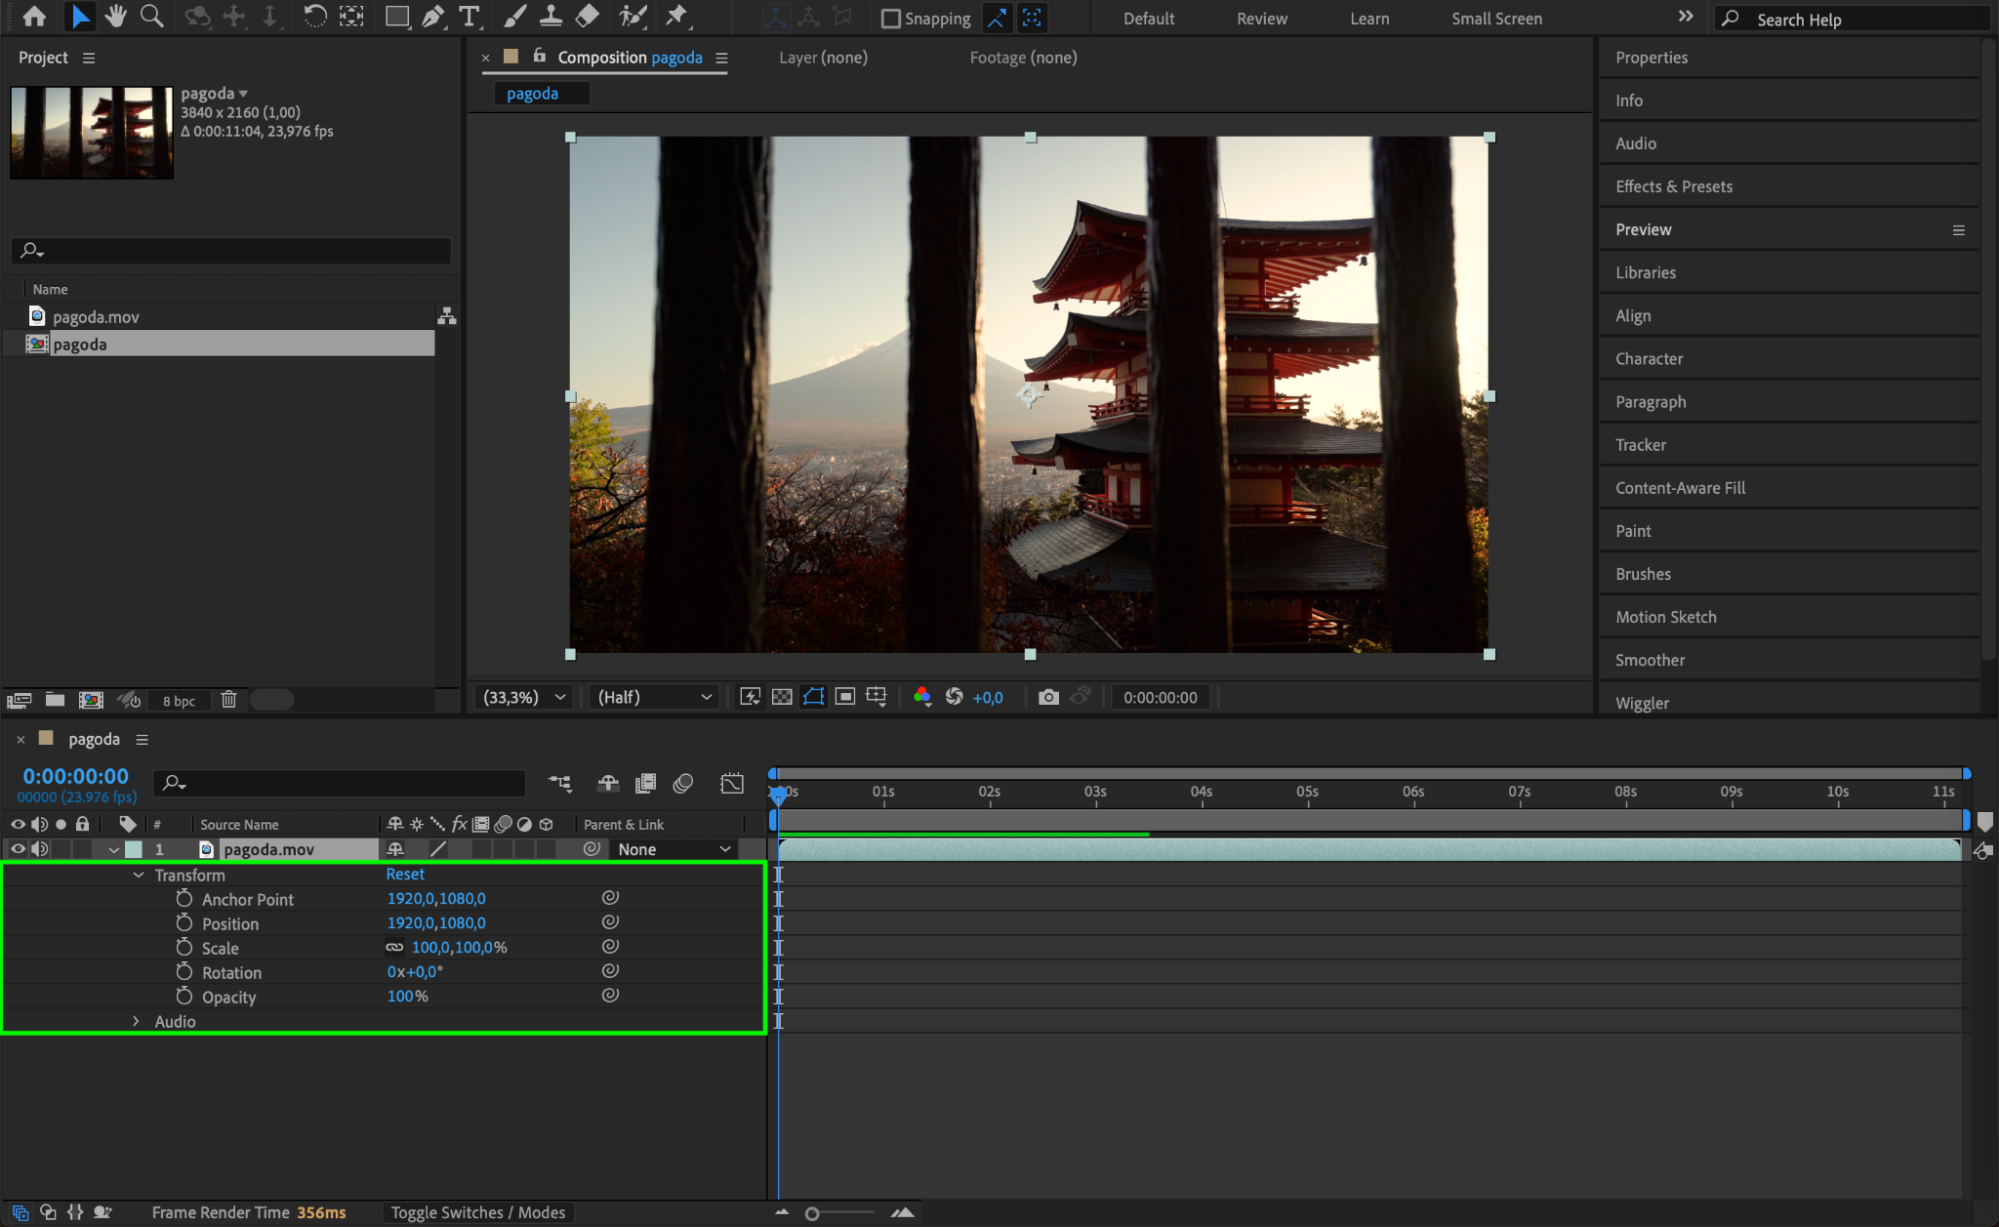 Step 3: Add Your First Keyframe
Move the Current Time Indicator (CTI) to the desired starting point on the timeline. Click the stopwatch icon next to the selected property to add your first keyframe. This action enables animation for that property. Step 4: Adjust the Property Valu
Move the CTI to a different point in time and adjust the property value. For instance, if animating position, drag the layer to a new position in the composition. A second keyframe will automatically be created. Step 5: Add More Keyframes for Complex Animations
Repeat Step 4 as needed, moving the CTI and adjusting property values at different points in time. This creates a sequence of keyframes that define the animation. Use as many keyframes as necessary for smooth transitions or intricate motion. Step 6: Preview the Animation
Press the spacebar to preview your animation. If the motion doesn’t look smooth, refine the placement or value of the keyframes in the timeline.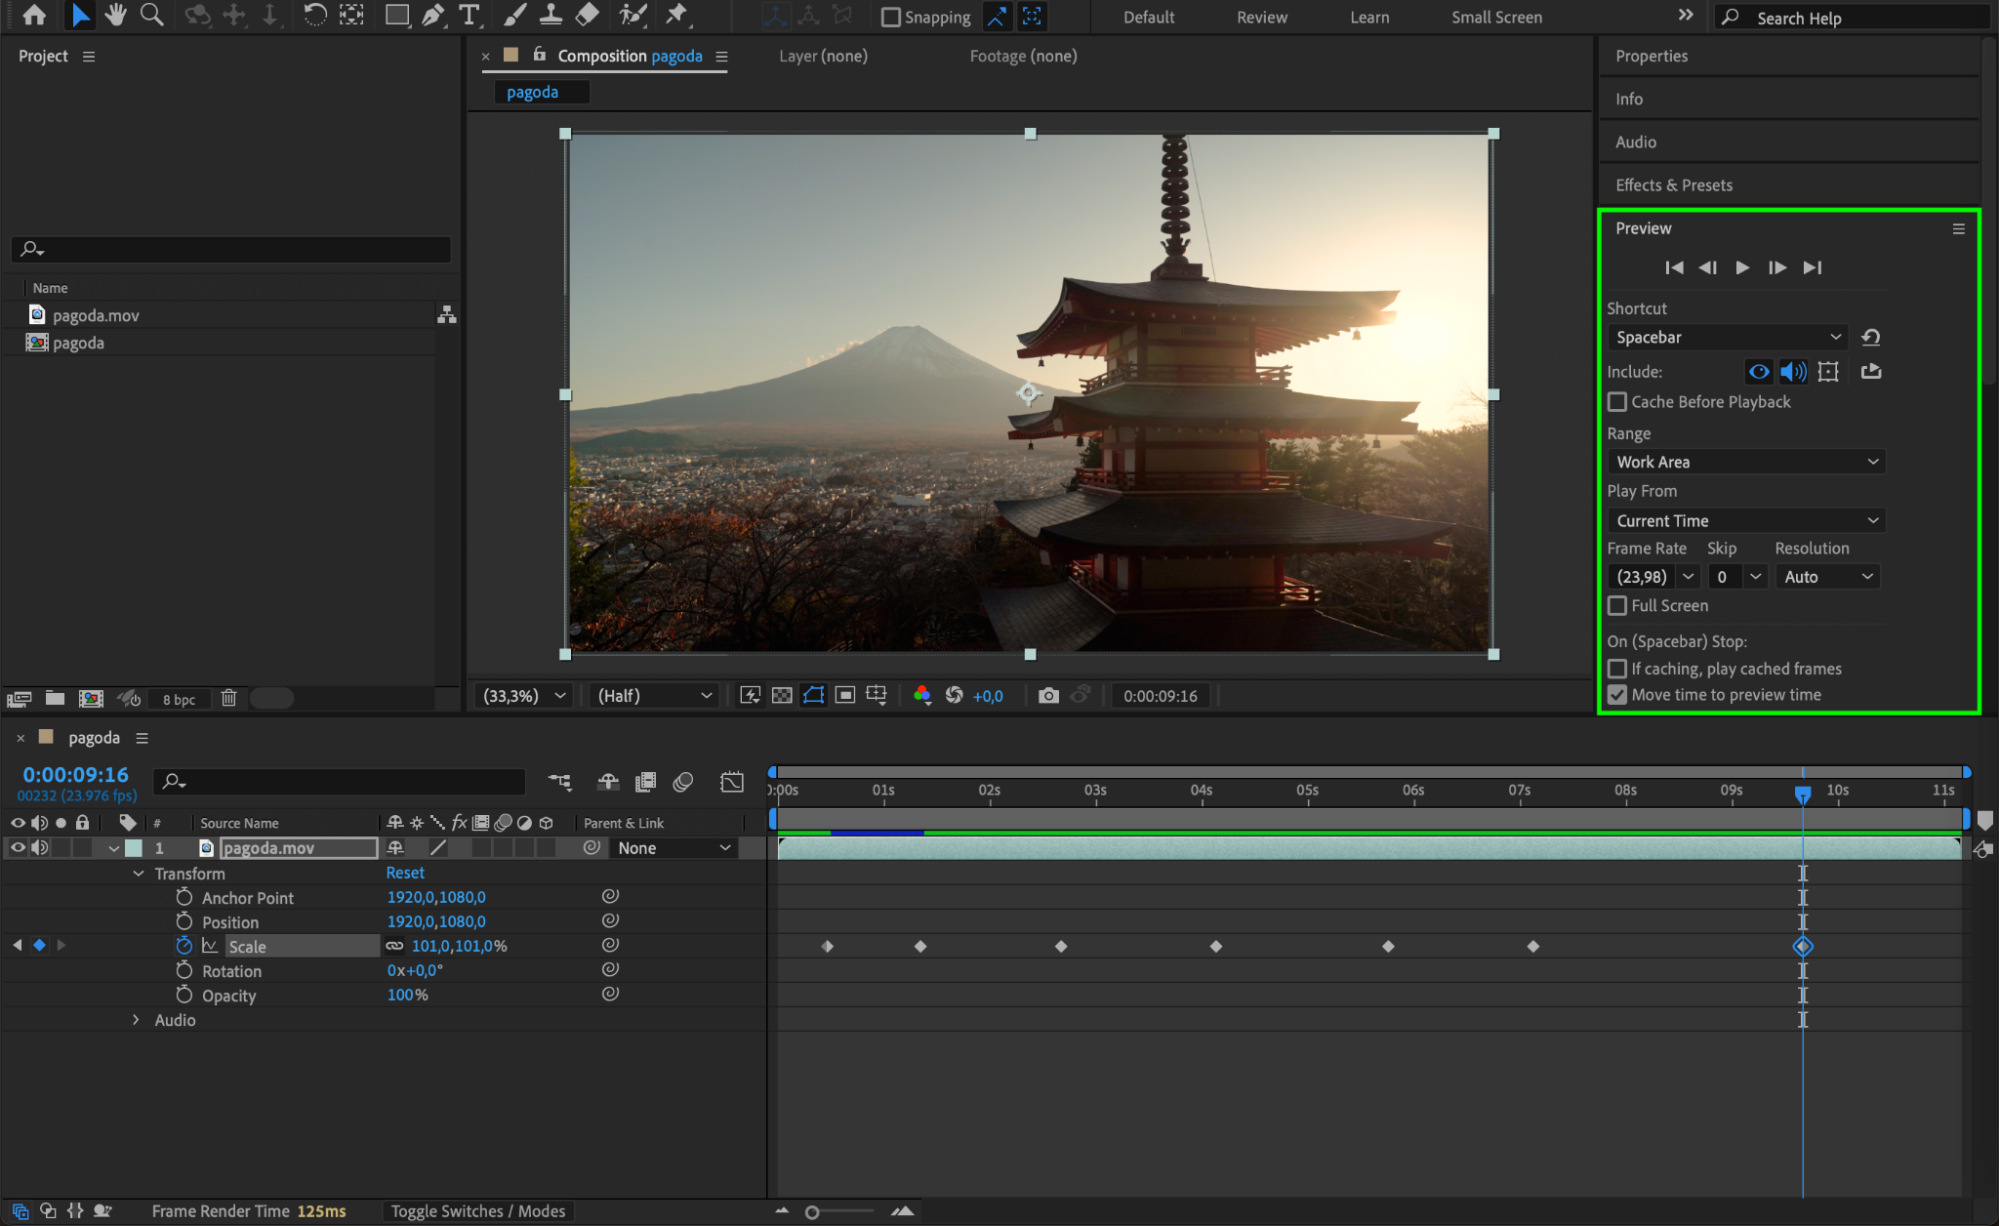 Step 7: Fine-Tune Keyframes with Easy Ease
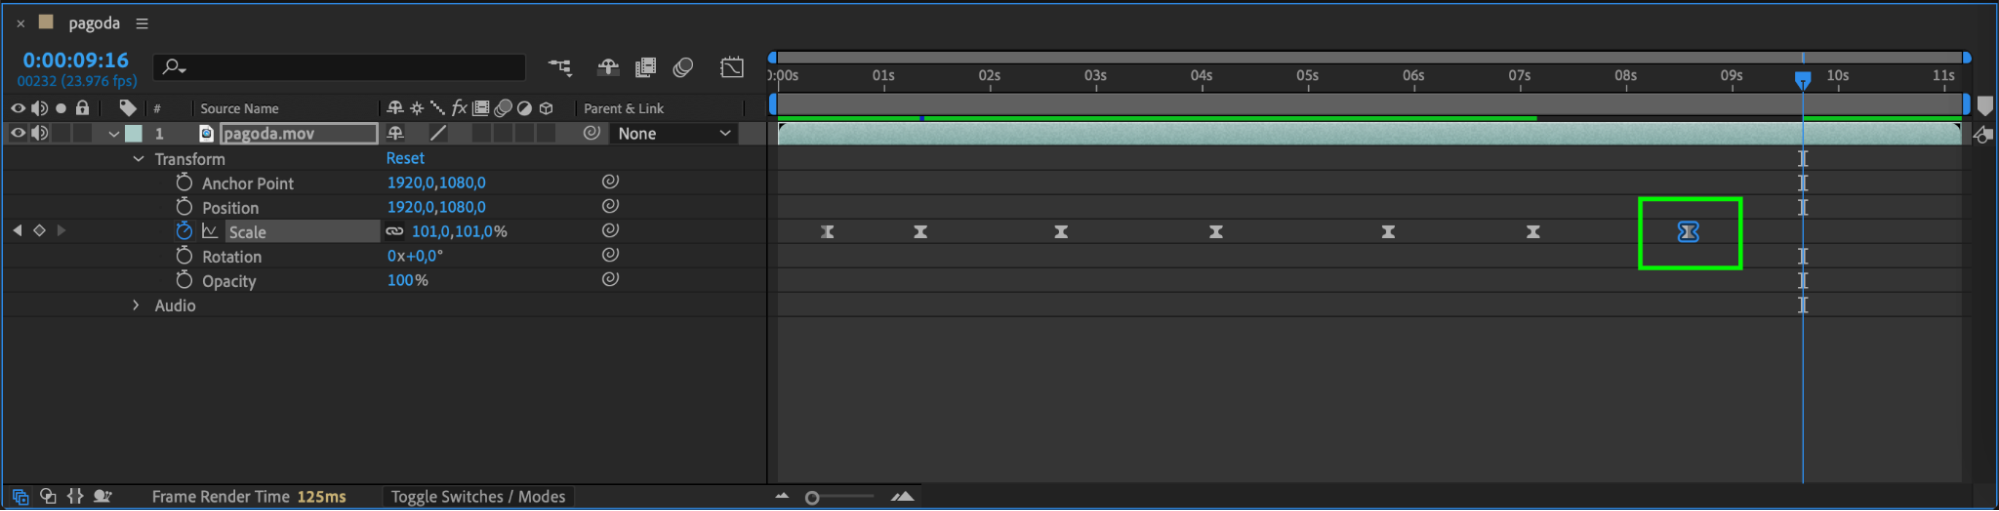
Select multiple keyframes by dragging a selection box around them. Right-click and choose Keyframe Assistant > Easy Ease to create smoother transitions between keyframes. Alternatively, use the shortcuts F9 or Shift+F9 for Easy Ease-In or Easy Ease-Out.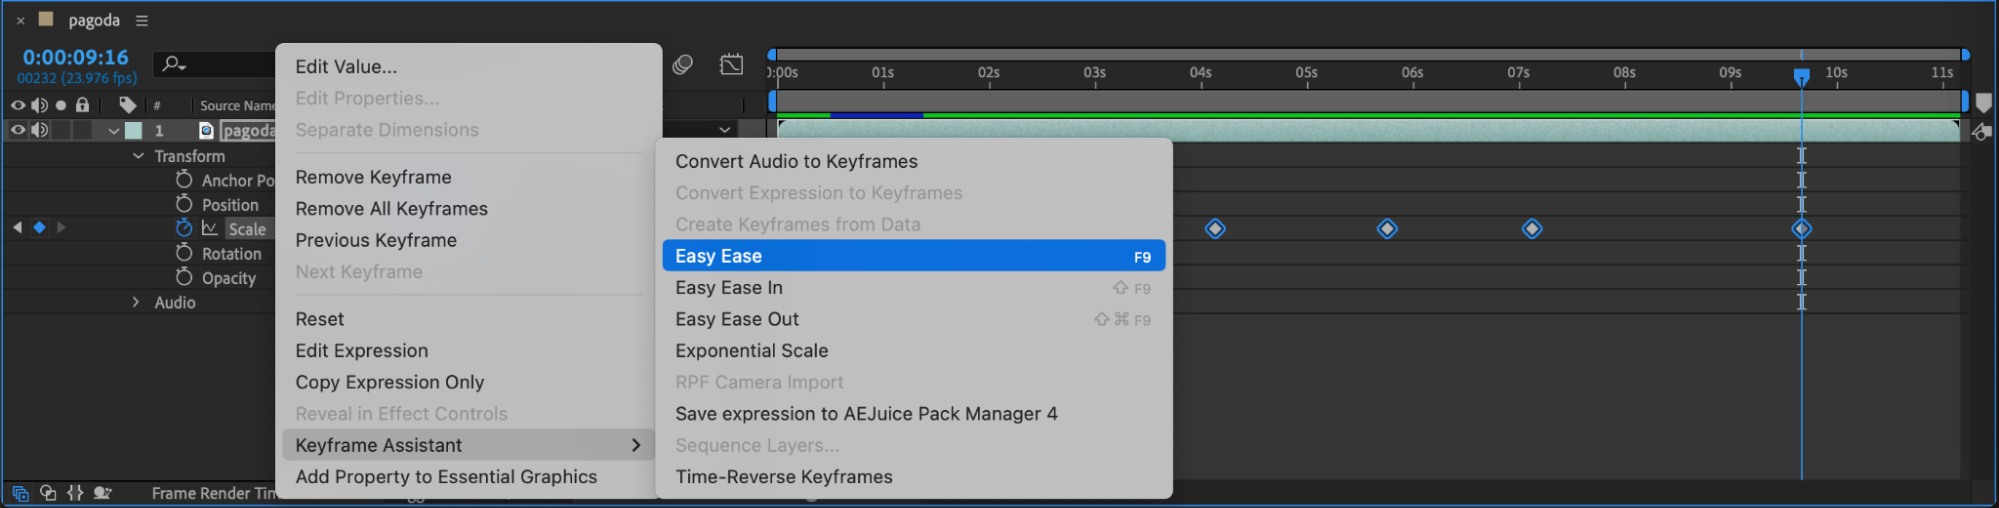 Step 8: Adjust Keyframe Timing
To adjust timing, drag individual keyframes left or right on the timeline. This action controls the speed and duration of the animation. Spread them out for slower motion or bring them closer for faster transitions.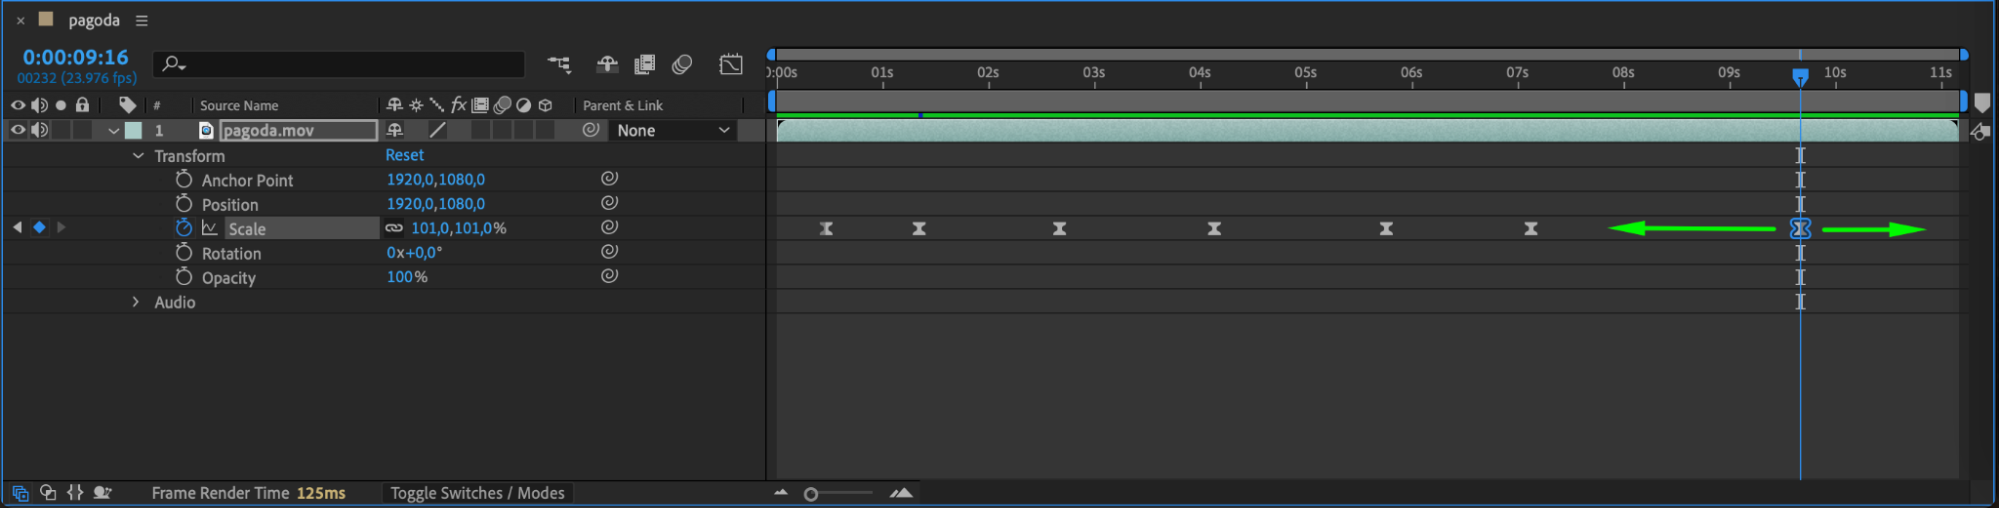
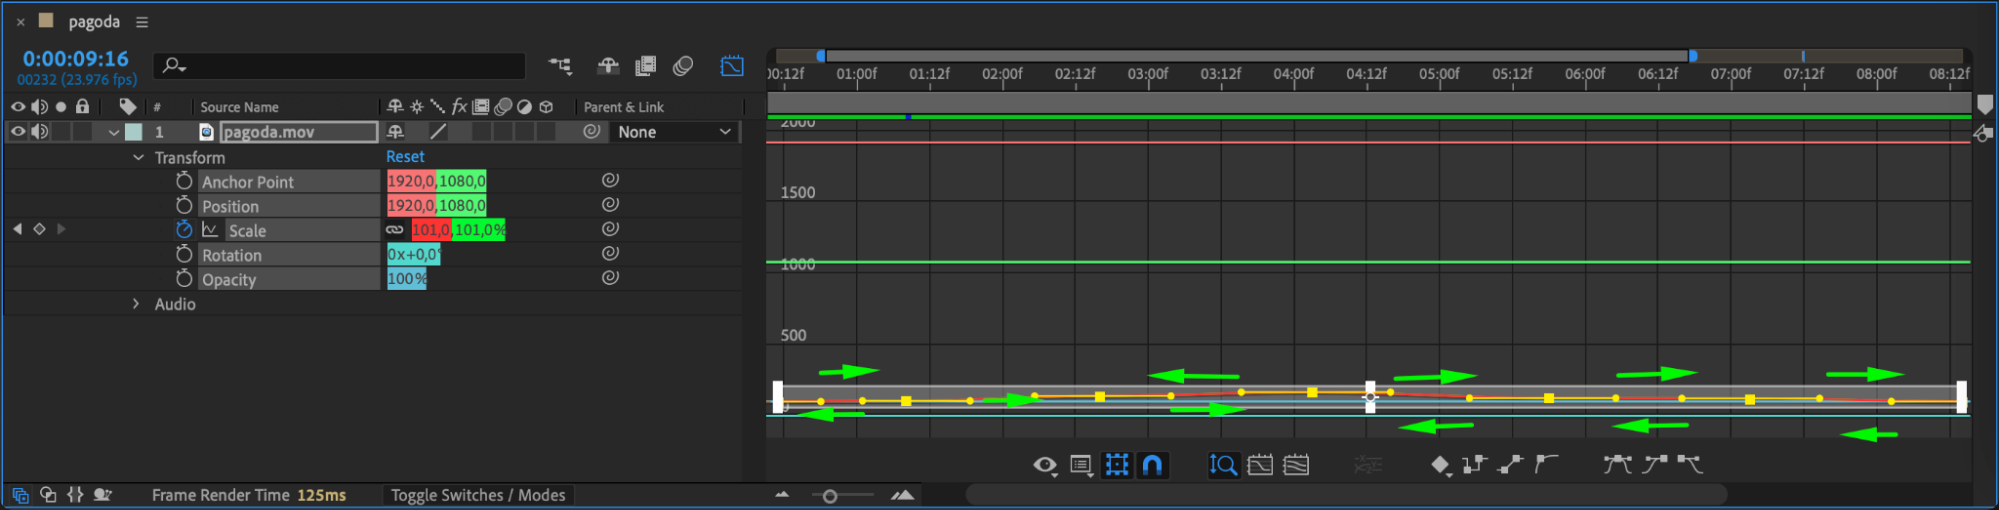
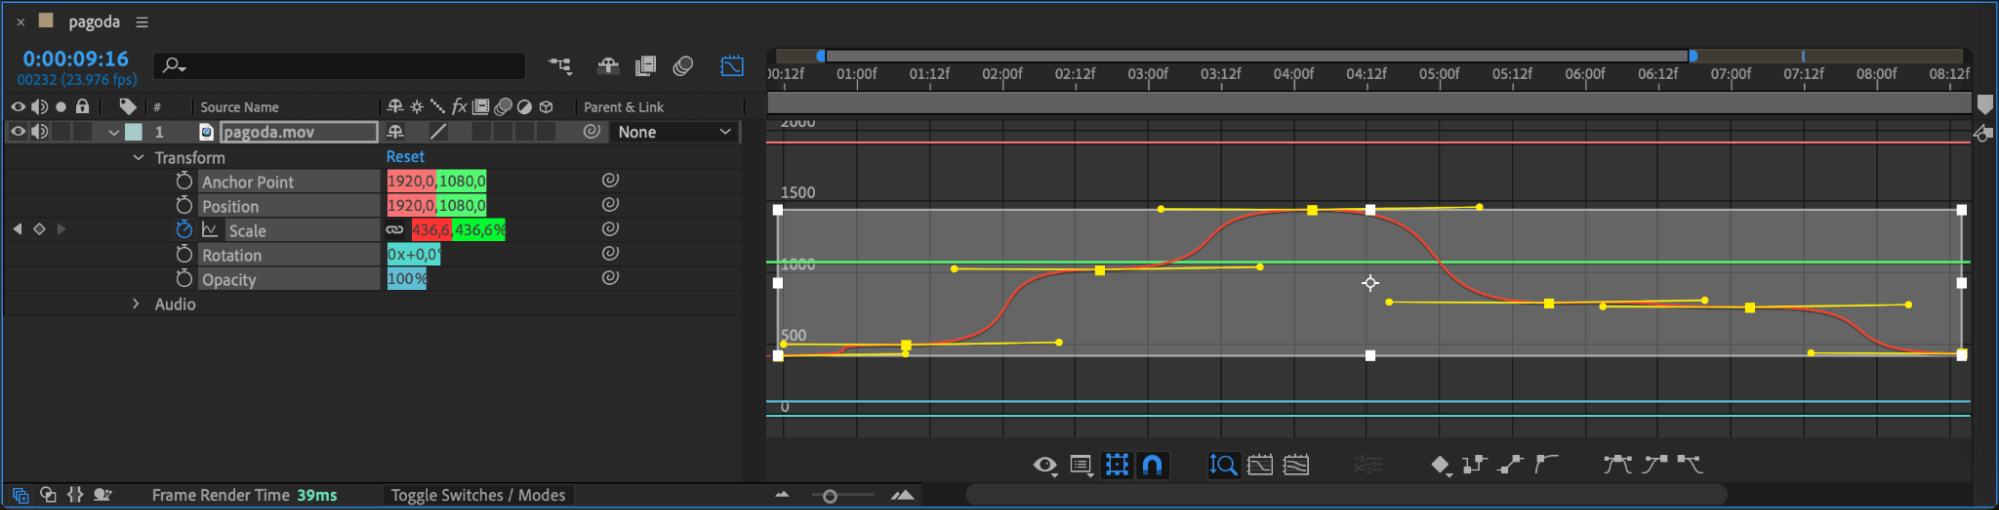
 Step 9: Use the Graph Editor for Precision
Open the Graph Editor to refine the motion curves of your animation. Select your keyframes and tweak the handles to create more natural and dynamic movements.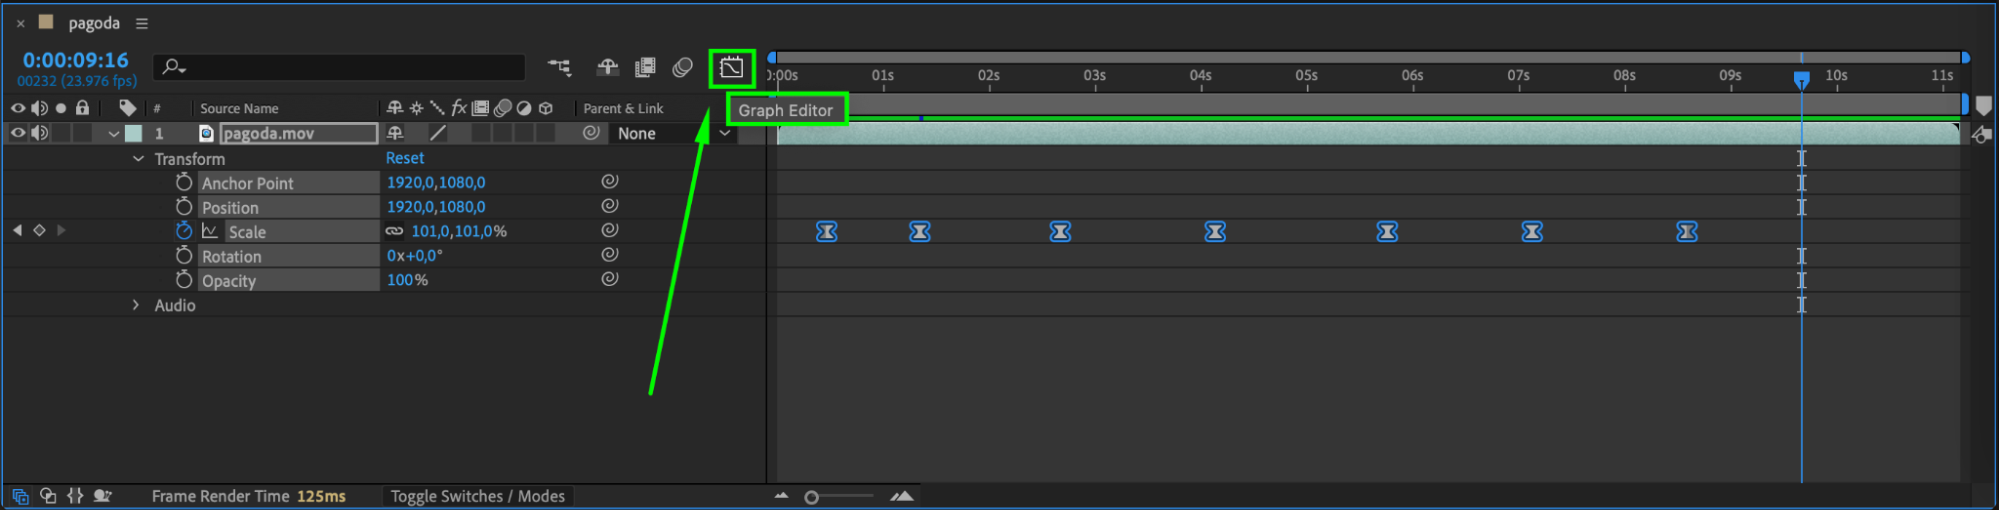
 Step 10: Finalize and Render
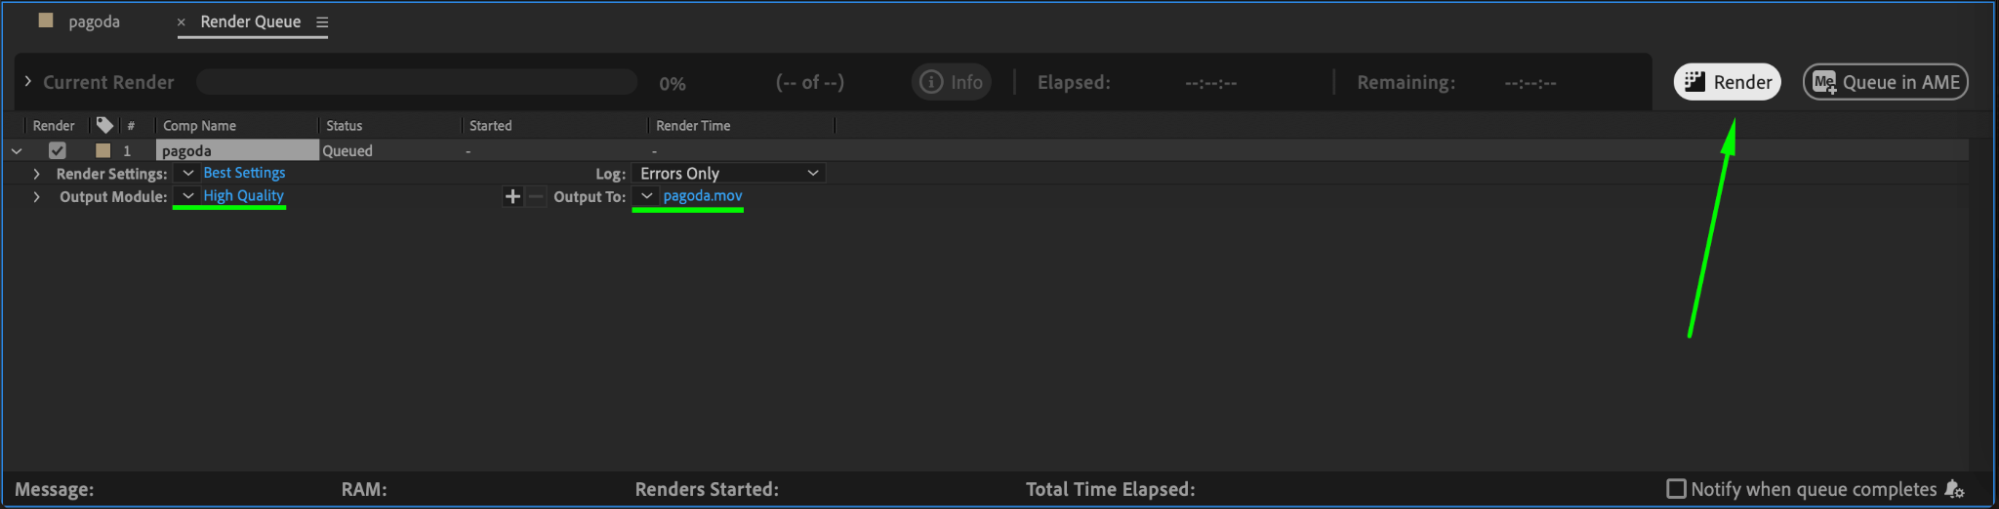
Once you’re satisfied with your animation, preview it one last time. Make any necessary adjustments and then render your project via Composition > Add to Render Queue.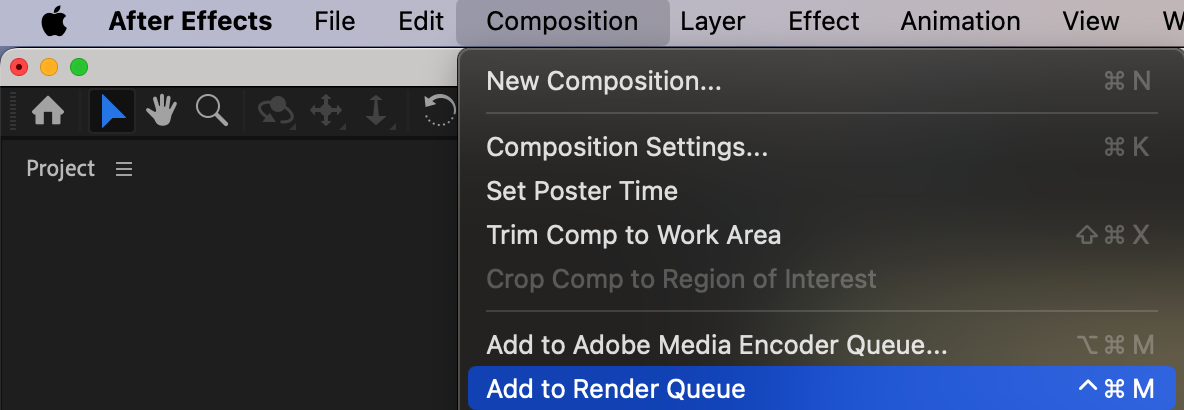
 Conclusion
Keyframes are the backbone of animation in After Effects, enabling you to create stunning visuals and dynamic motion. By mastering how to add, adjust, and refine multiple keyframes, you’ll elevate your animation skills and bring your creative ideas to life.
Our Bestsellers


