If you want to add audio or a sound element to your Adobe After Effects project, follow these steps:
Open the project and the composition that you want to incorporate audio into.
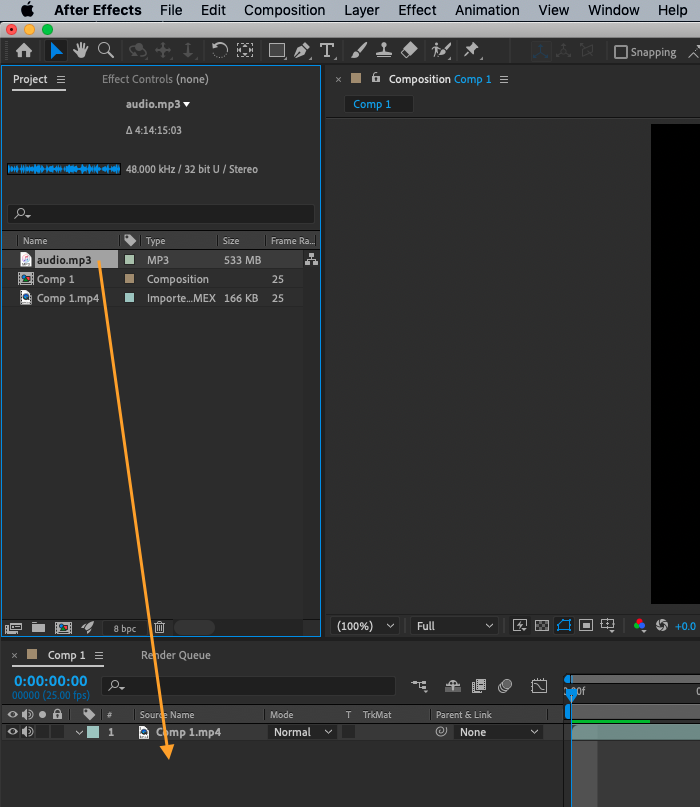
Import and drag audio into the composition. This will add the file as a new audio layer.
Get 10% off when you subscribe to our newsletter

To preview the audio, press the spacebar on your keyboard. Press it again to stop the preview.
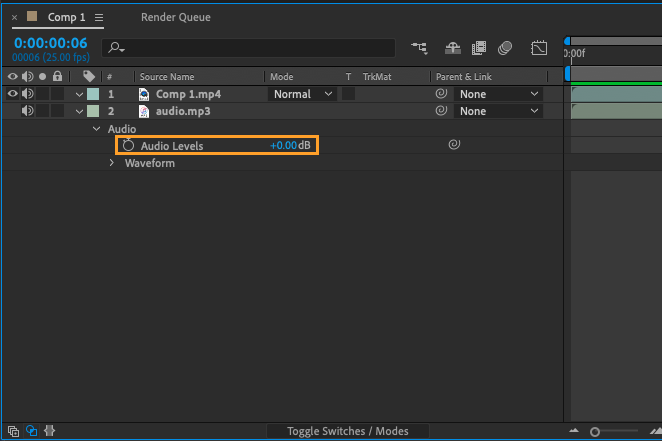
To adjust the volume of the audio layer, go to the Layer panel and find the “Audio Levels” property. Use the volume slider to increase or decrease the volume.
Get 10% off when you subscribe to our newsletter

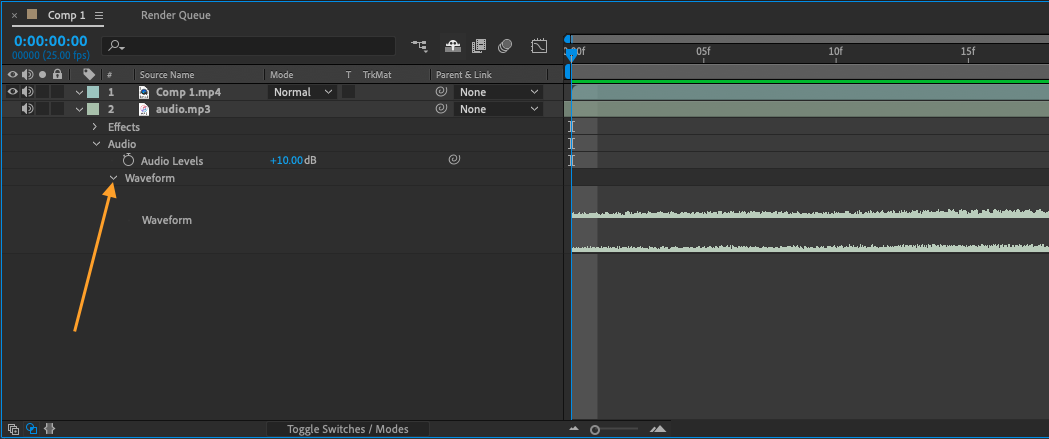
If you want to make edits to the audio, you can use the “Audio Waveform” property in the Layer panel to view the waveform and make changes.
The Audio Waveform property allows you to view and edit the audio in your project more precisely. The waveform display shows the amplitude of the audio over time, and you can use it to select specific portions of the audio and delete or adjust them.
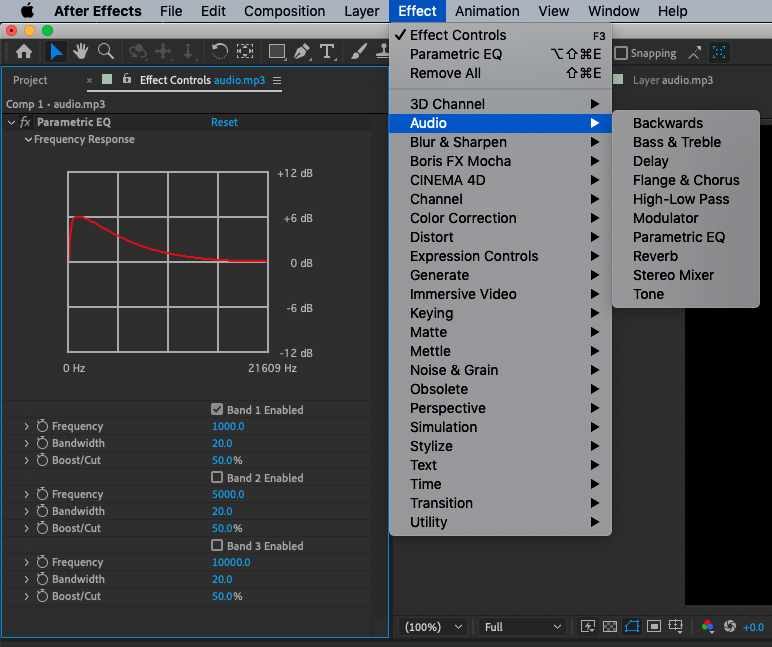
You can also use the “Effect Controls” panel to apply audio effects like EQ or reverb.
Go to Effects > Audio > choose effects.
Also, you can try the Time Stretch function in Adobe After Effects that allows you to adjust the speed of an audio layer without altering its pitch. This can be useful if you want to change the duration of the audio to match the length of a video clip, for example.
Get 10% off when you subscribe to our newsletter

To use the Time Stretch function:
Select the audio layer in the timeline.
Go to the Layer > Time > Time Stretch and enter a new duration for the audio in the dialog box that appears.
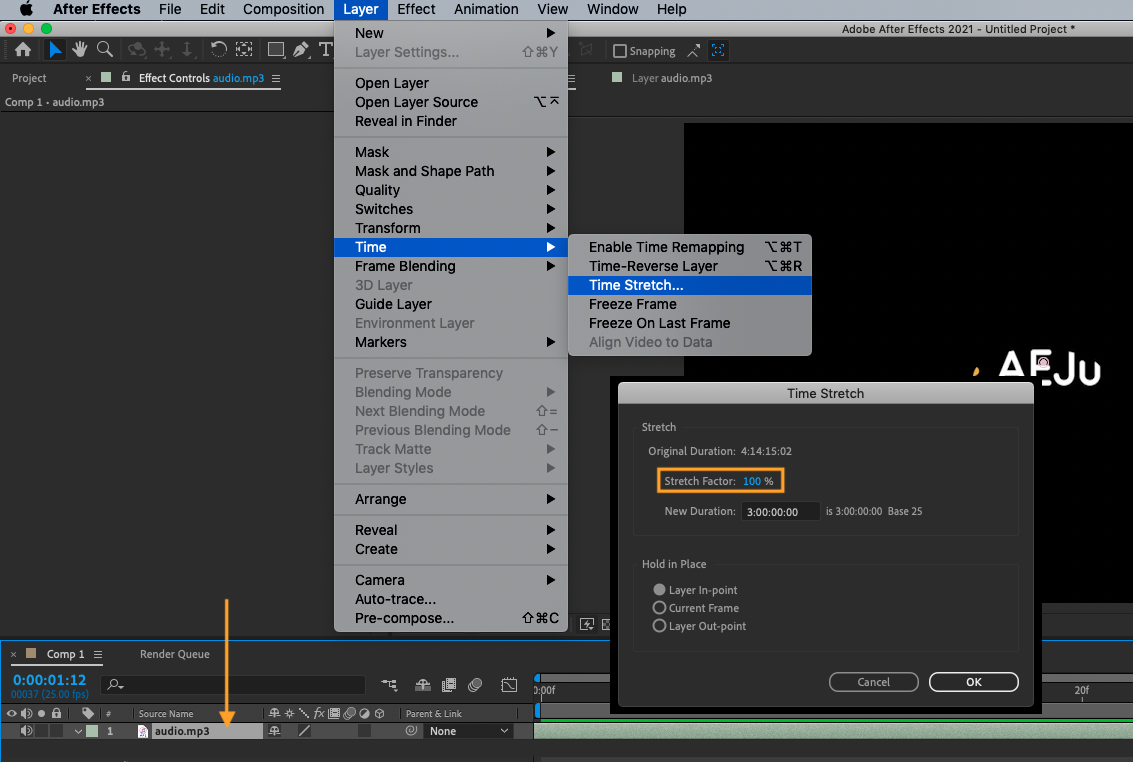
Keep in mind that using the Time Stretch function may result in some loss of quality, so you may want to use it sparingly and avoid stretching the audio too much.
Conclusion
Don’t forget to save your project when you’re finished!
Saving your project regularly is important to ensure that your progress is not lost in the event of a computer malfunction or other unexpected issue.
To save your project in Adobe After Effects, go to File menu > Save, or use the keyboard shortcut Ctrl+S (on a Win) or Command+S (on a Mac).
It’s a good idea to save your project often, especially when you’re making significant changes or working on a long-term project.


