Adding Cinematic Motion Blur to Text in After Effects
Creating a Professional Cinematic Text Animation
Adding cinematic motion blur to your text can enhance its dynamic feel, making it more polished and professional. Follow these steps to create this effect using After Effects.
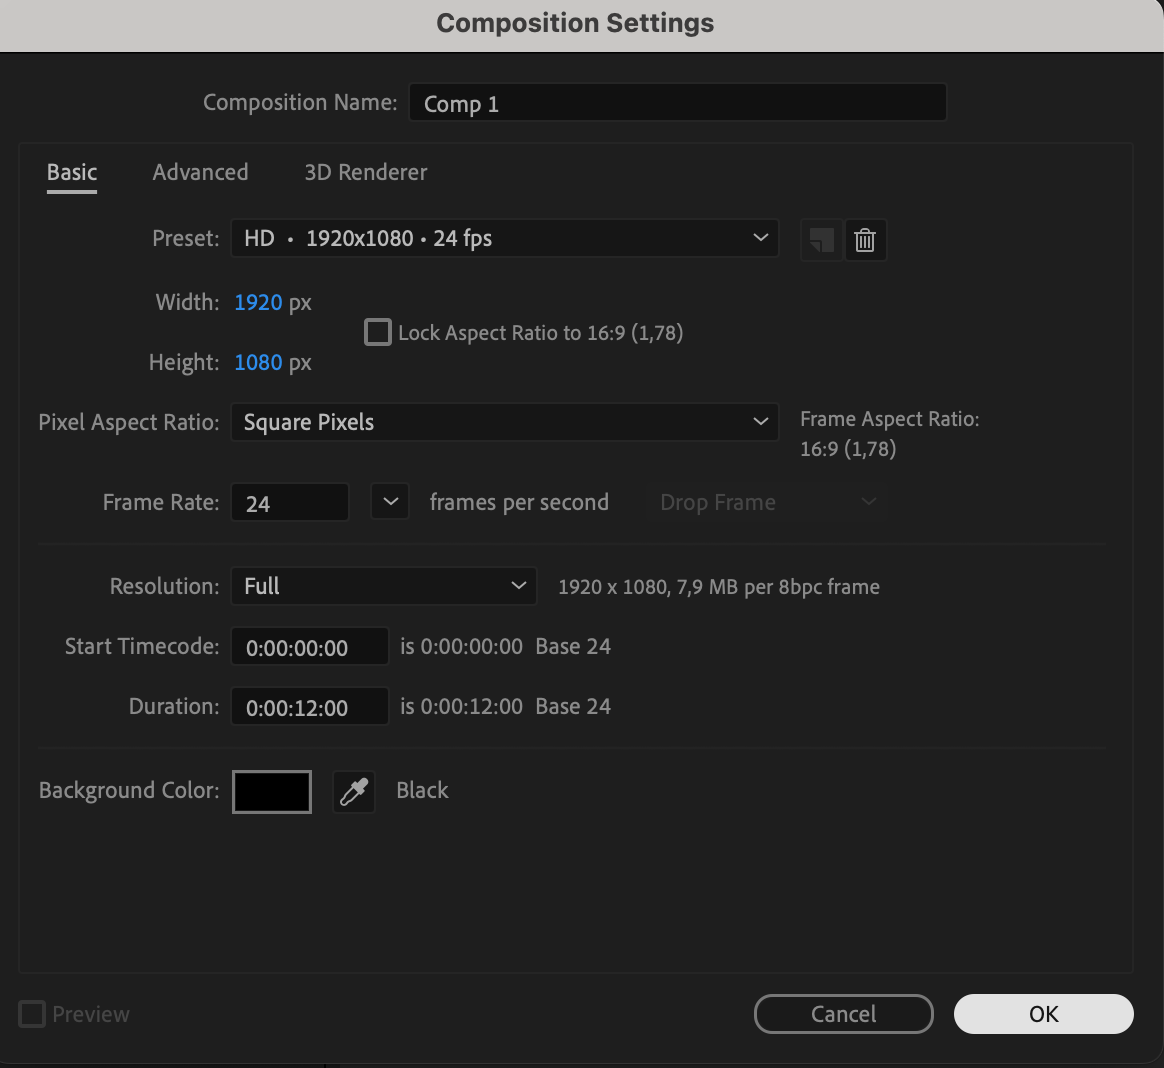
Step 1: Create a New Composition
Start by opening After Effects and navigating to Composition > New Composition. Set your resolution (e.g., 1920×1080), frame rate, and duration. This will be the base for your animation.
 Step 2: Add Text to Your Composition
Get 10% off when you subscribe to our newsletter

Select the Type Tool (Ctrl/Cmd + T) and type your desired text onto the composition. Customize its appearance in the Properties Panel, adjusting font, size, and color as needed.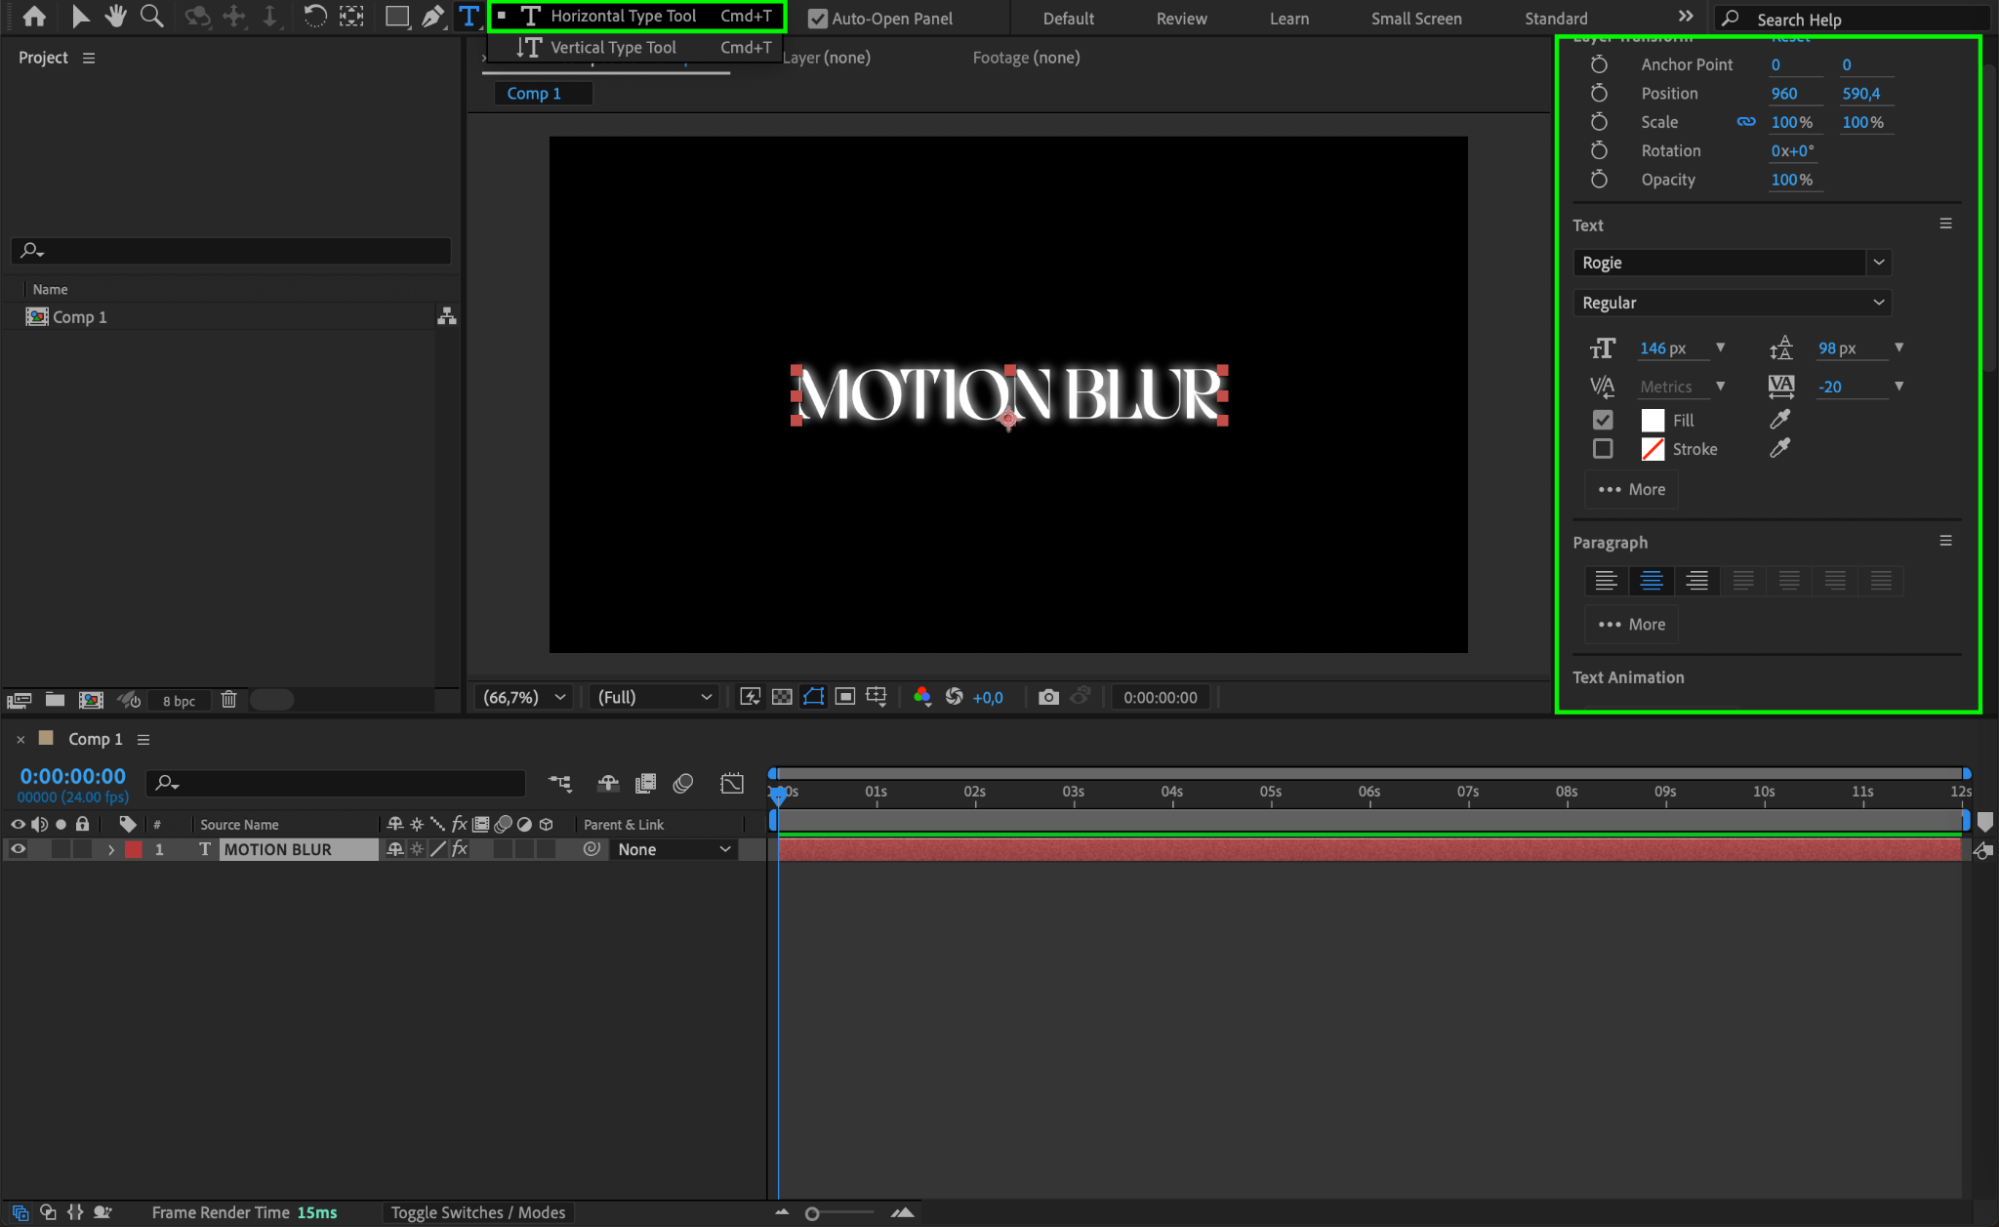 Step 3: Add Blur, Scale, and Opacity Animations
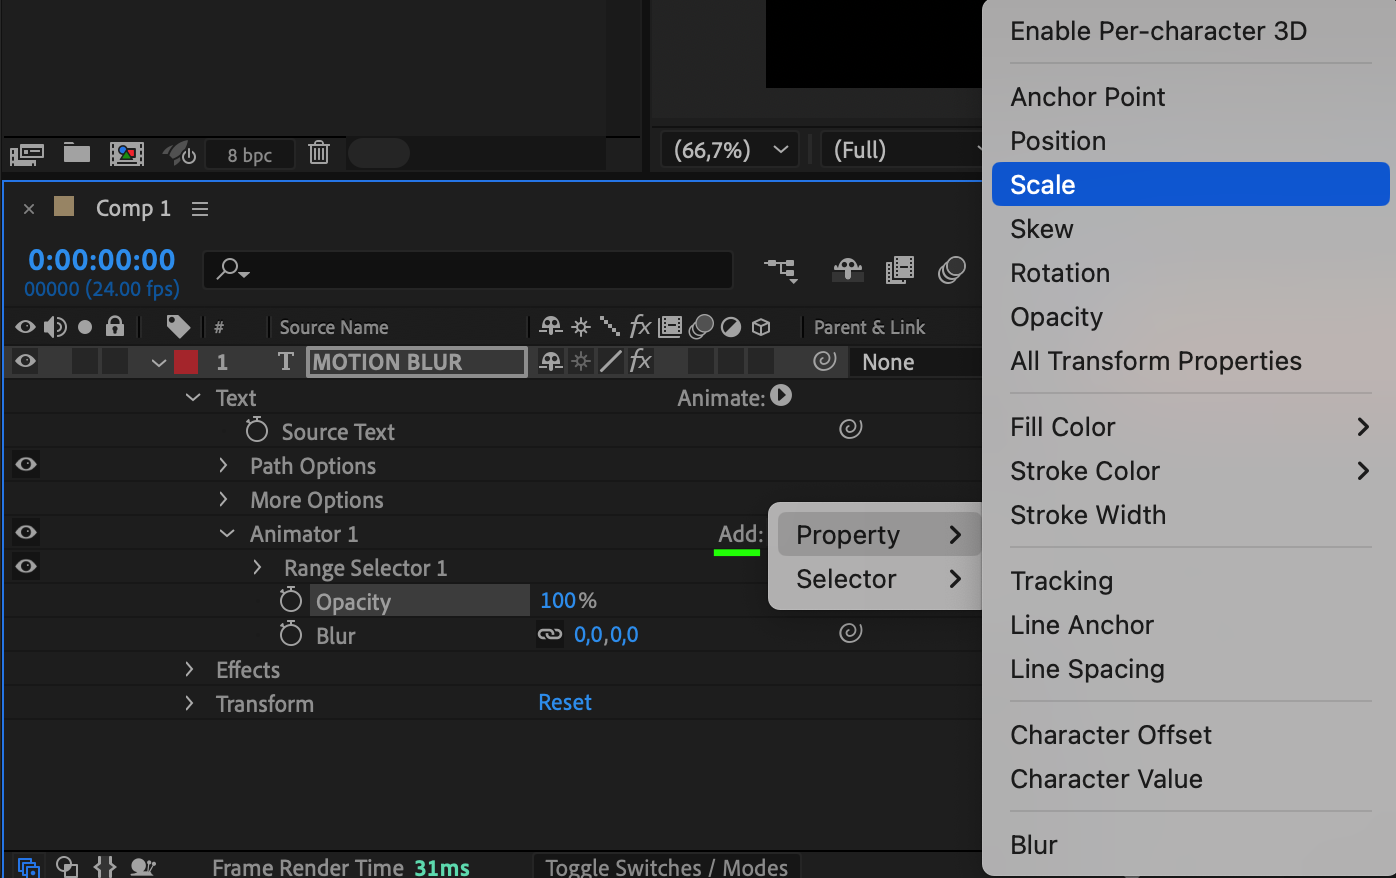
Select your text layer. Click the Animate button beside the text layer properties, and choose Blur from the dropdown menu. This creates an Animator 1 layer.
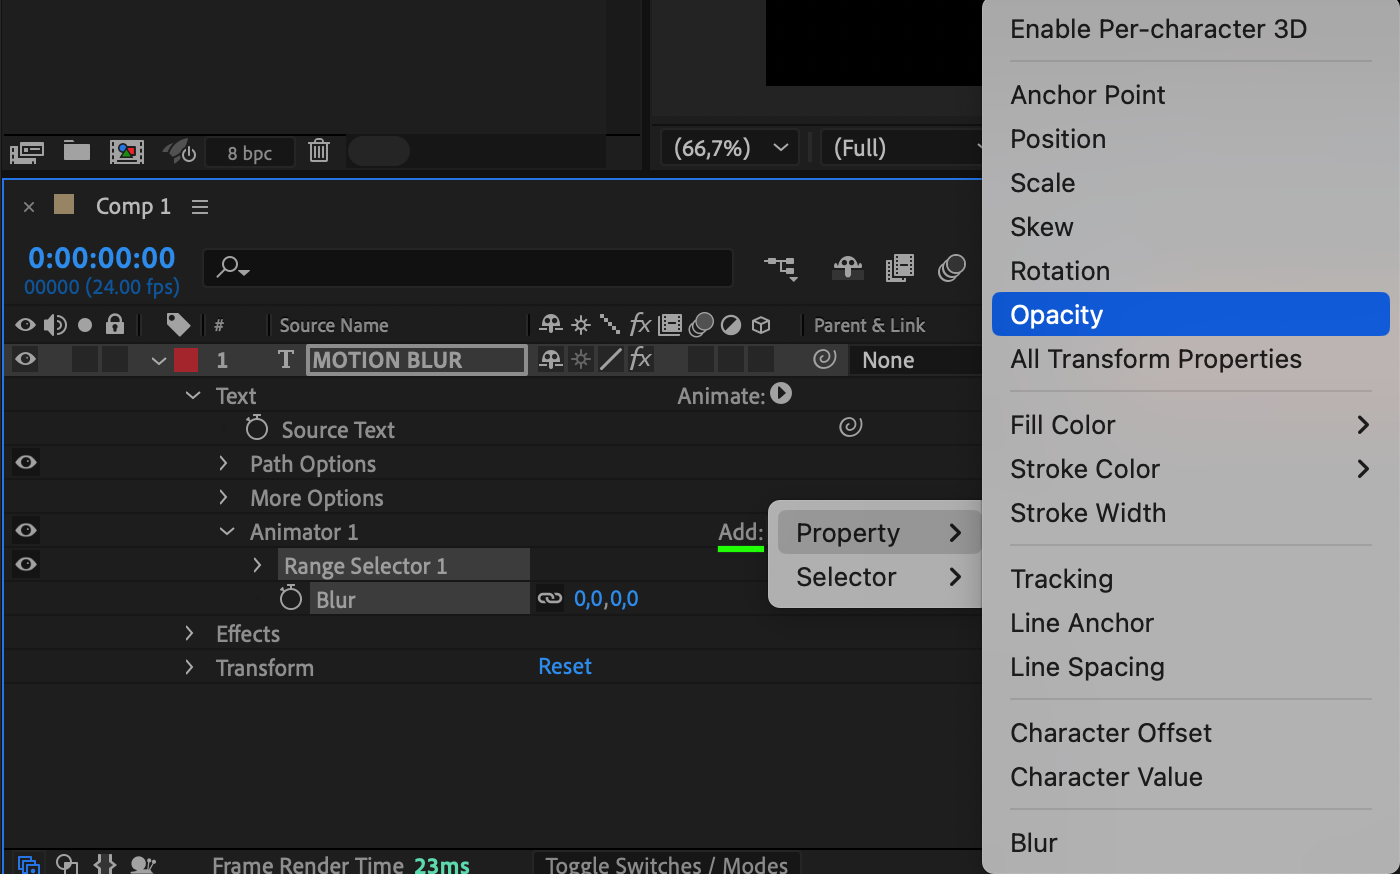
Under Animator 1, press the Add button and choose Property > Scale, and then press Add > Property > Opacity. These properties will allow you to control the cinematic motion blur effect.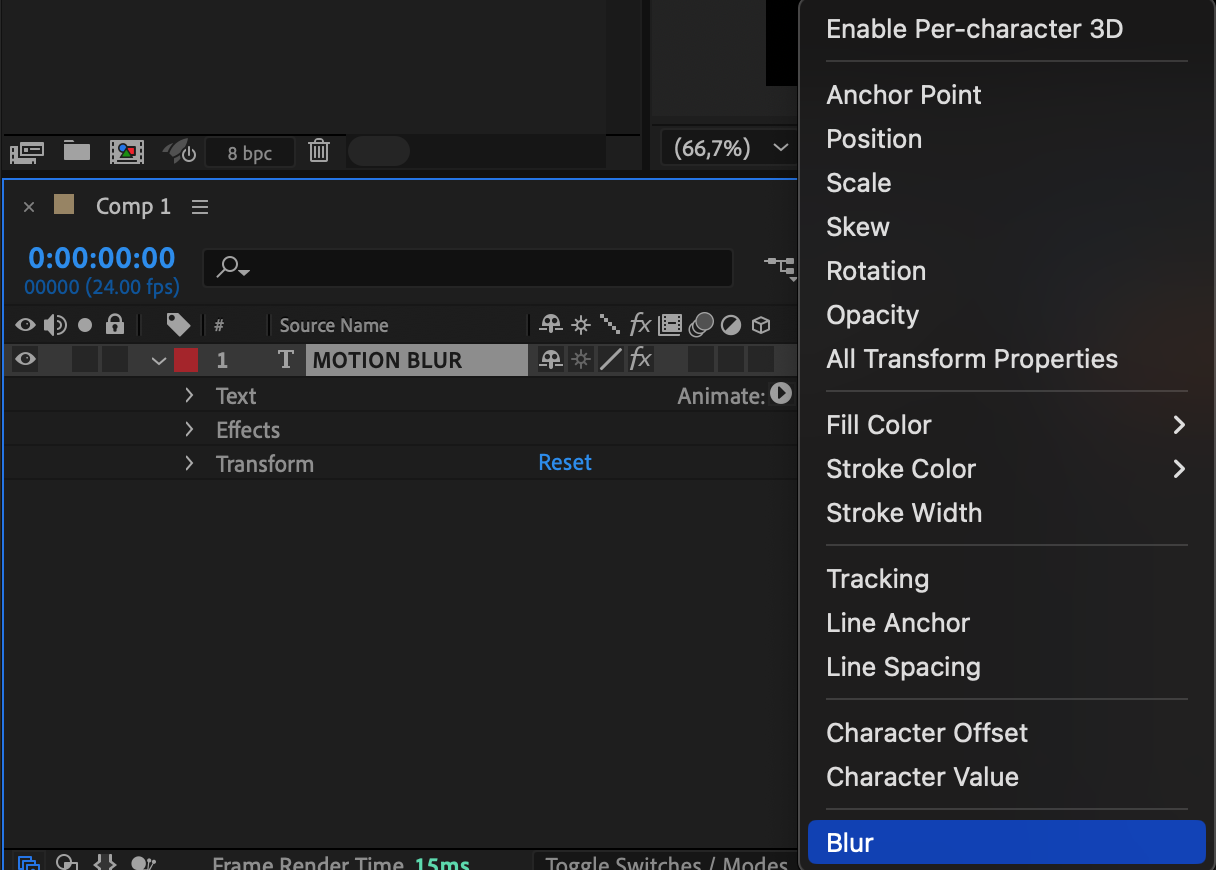
 Step 4: Set the Animation Properties
Within Animator 1, set the following values:
Scale: 150
Opacity: 0
Blur: 100
These values will create a smooth cinematic fade-in effect with motion blur.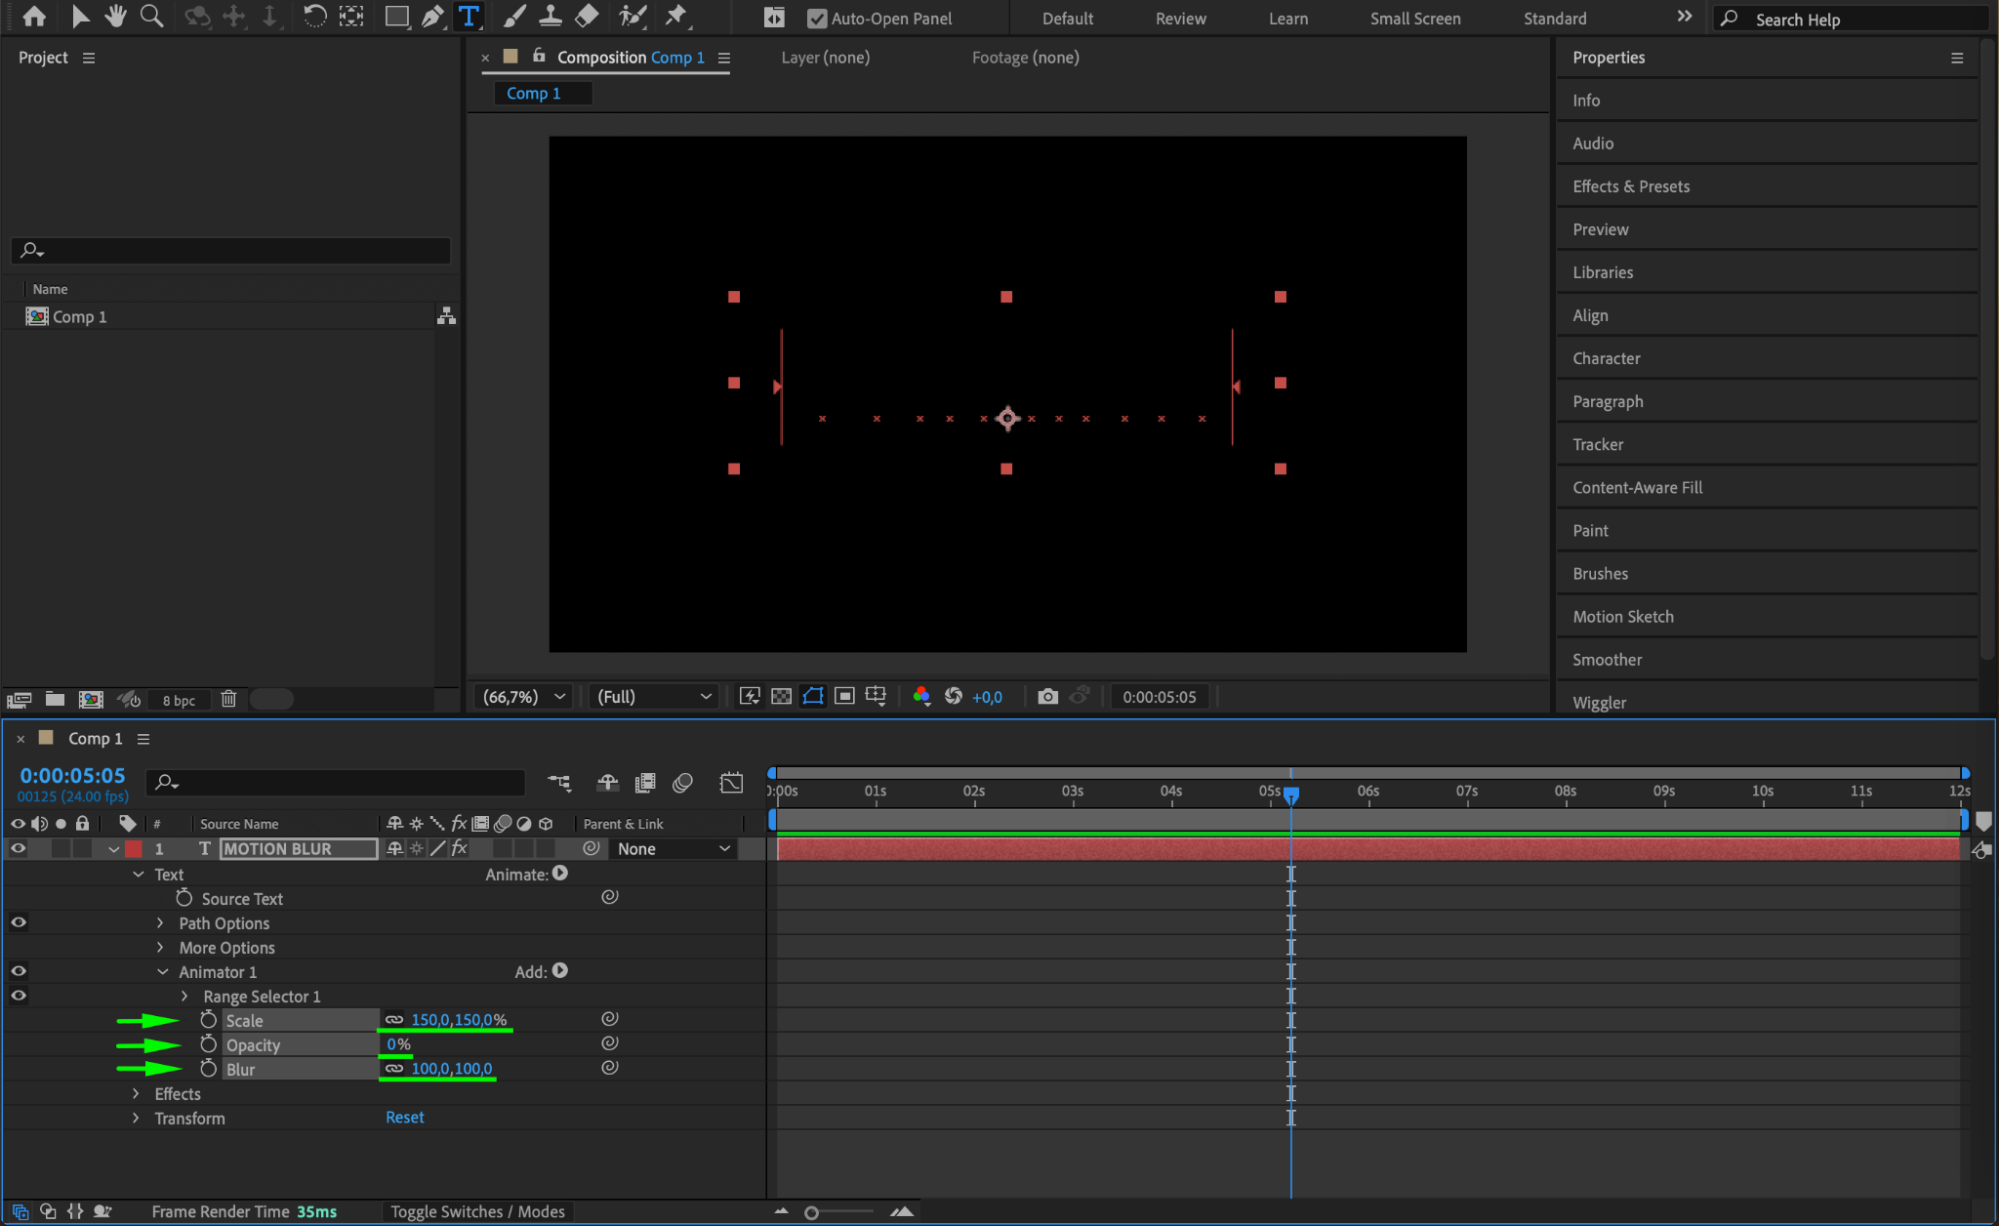 Step 5: Animate the Offset Property
Go to Animator 1 > Range Selector 1, and adjust the Offset property:
At the start of the composition, set Offset to -100.
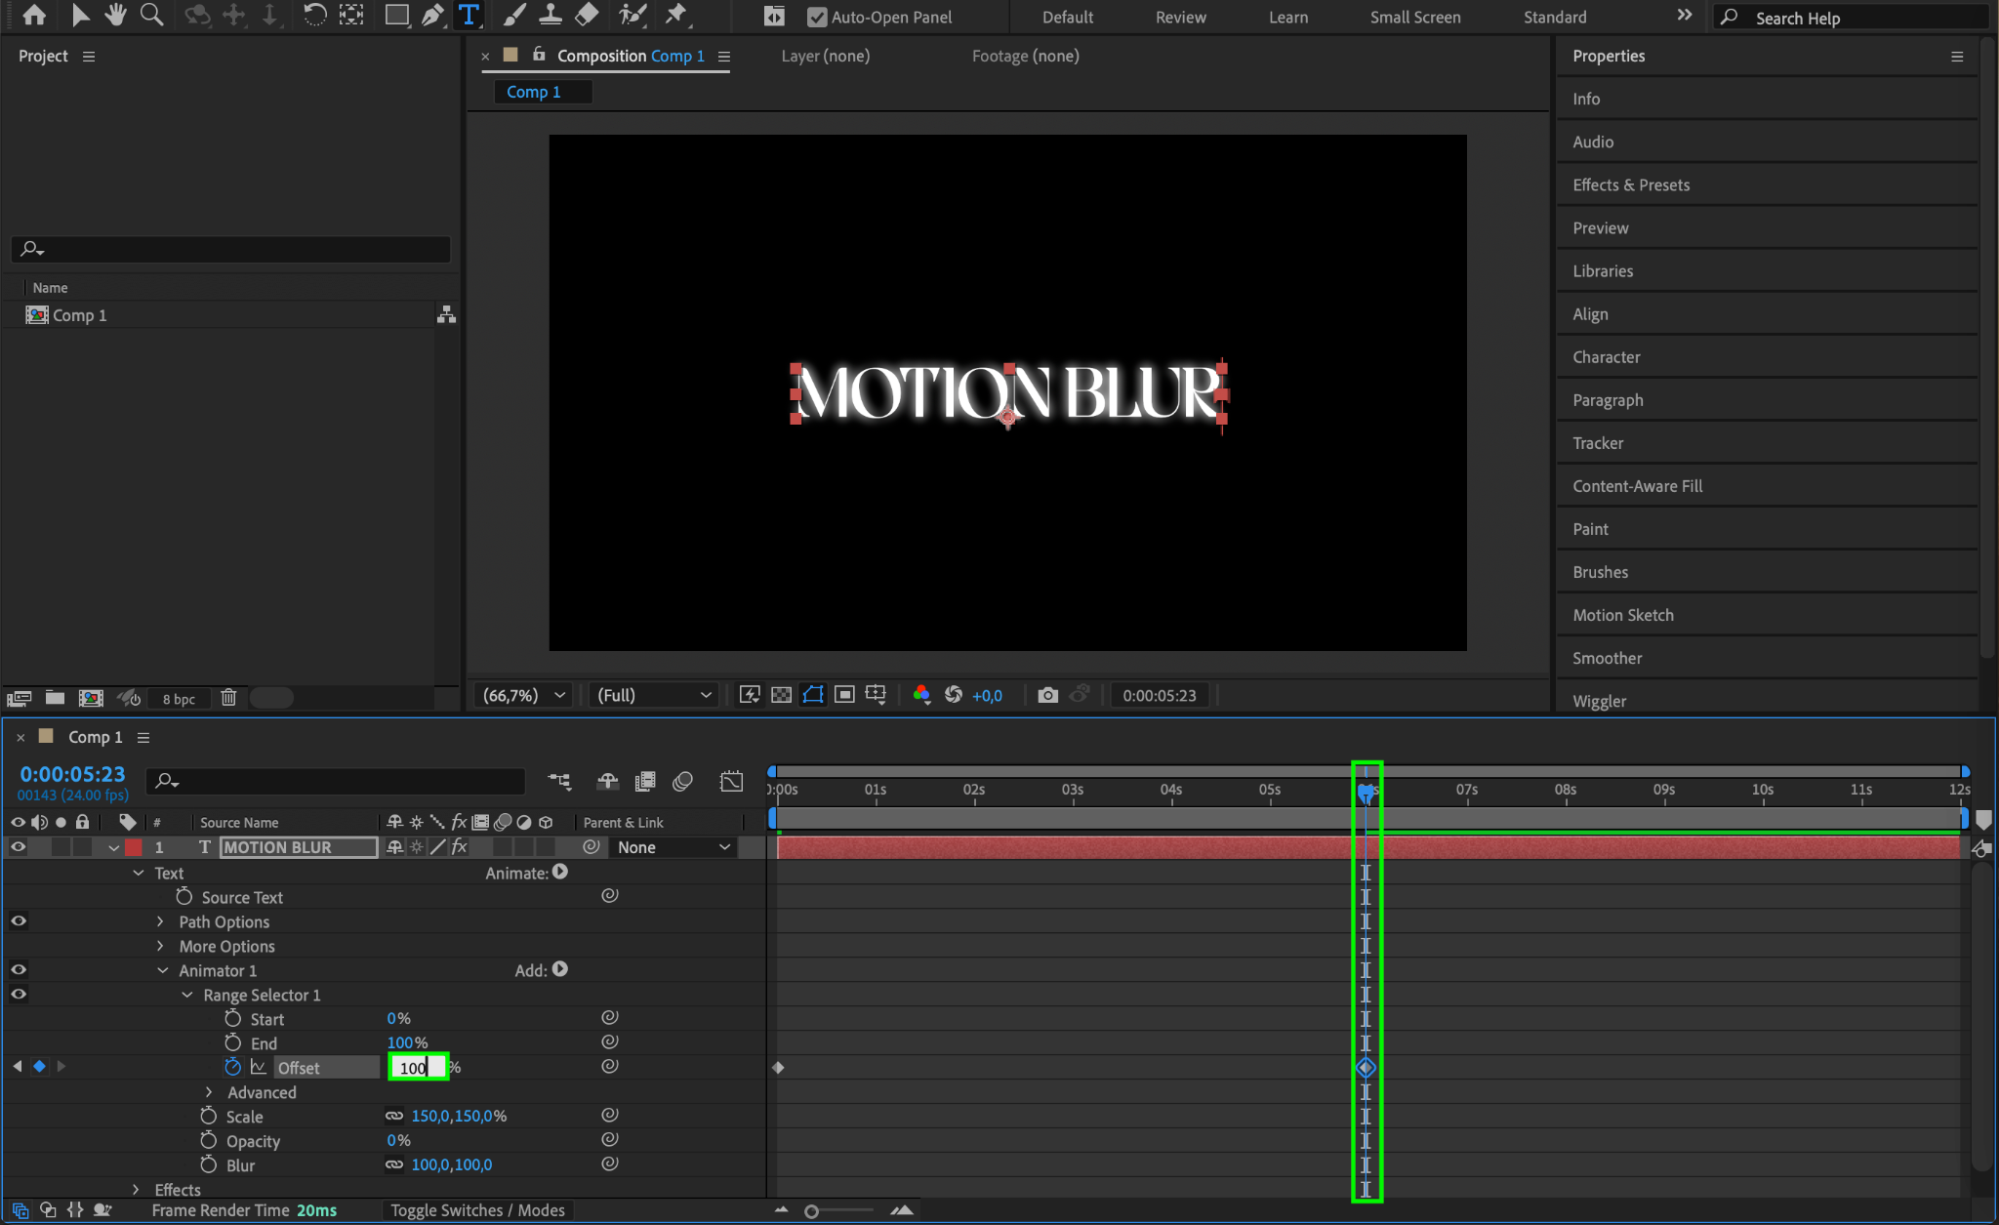
Move the Current Time Indicator (CTI) to the middle of the composition and set Offset to 100.
This creates a gradual animation effect over time.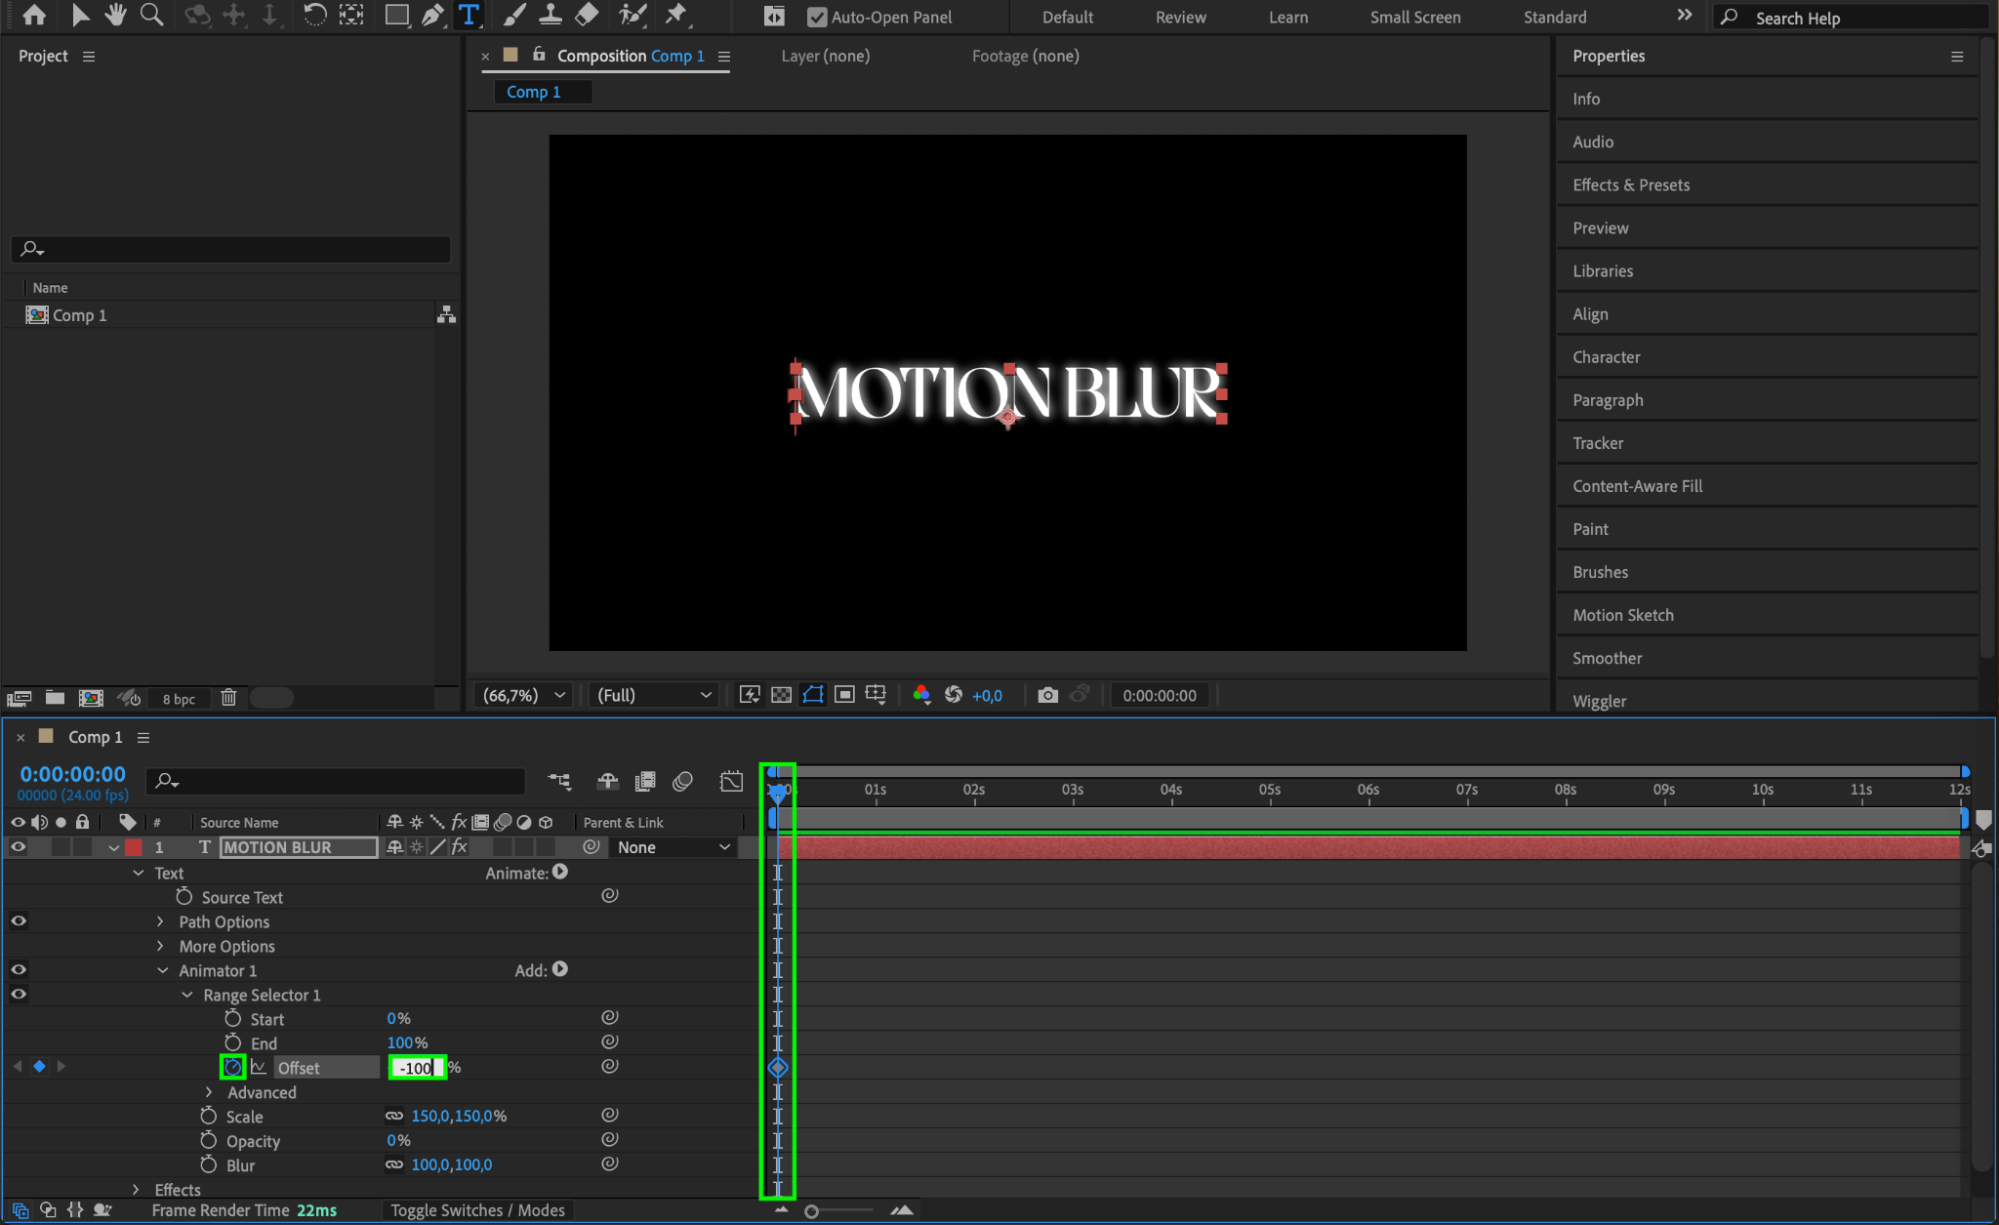
 Step 6: Adjust Advanced Properties
Under Range Selector 1, expand the Advanced options. Modify the following settings:
Shape: Ramp Up
Ease Low: 50
Randomize Order: On
These changes add variation and smoothness to the animation, making it appear more cinematic and less linear.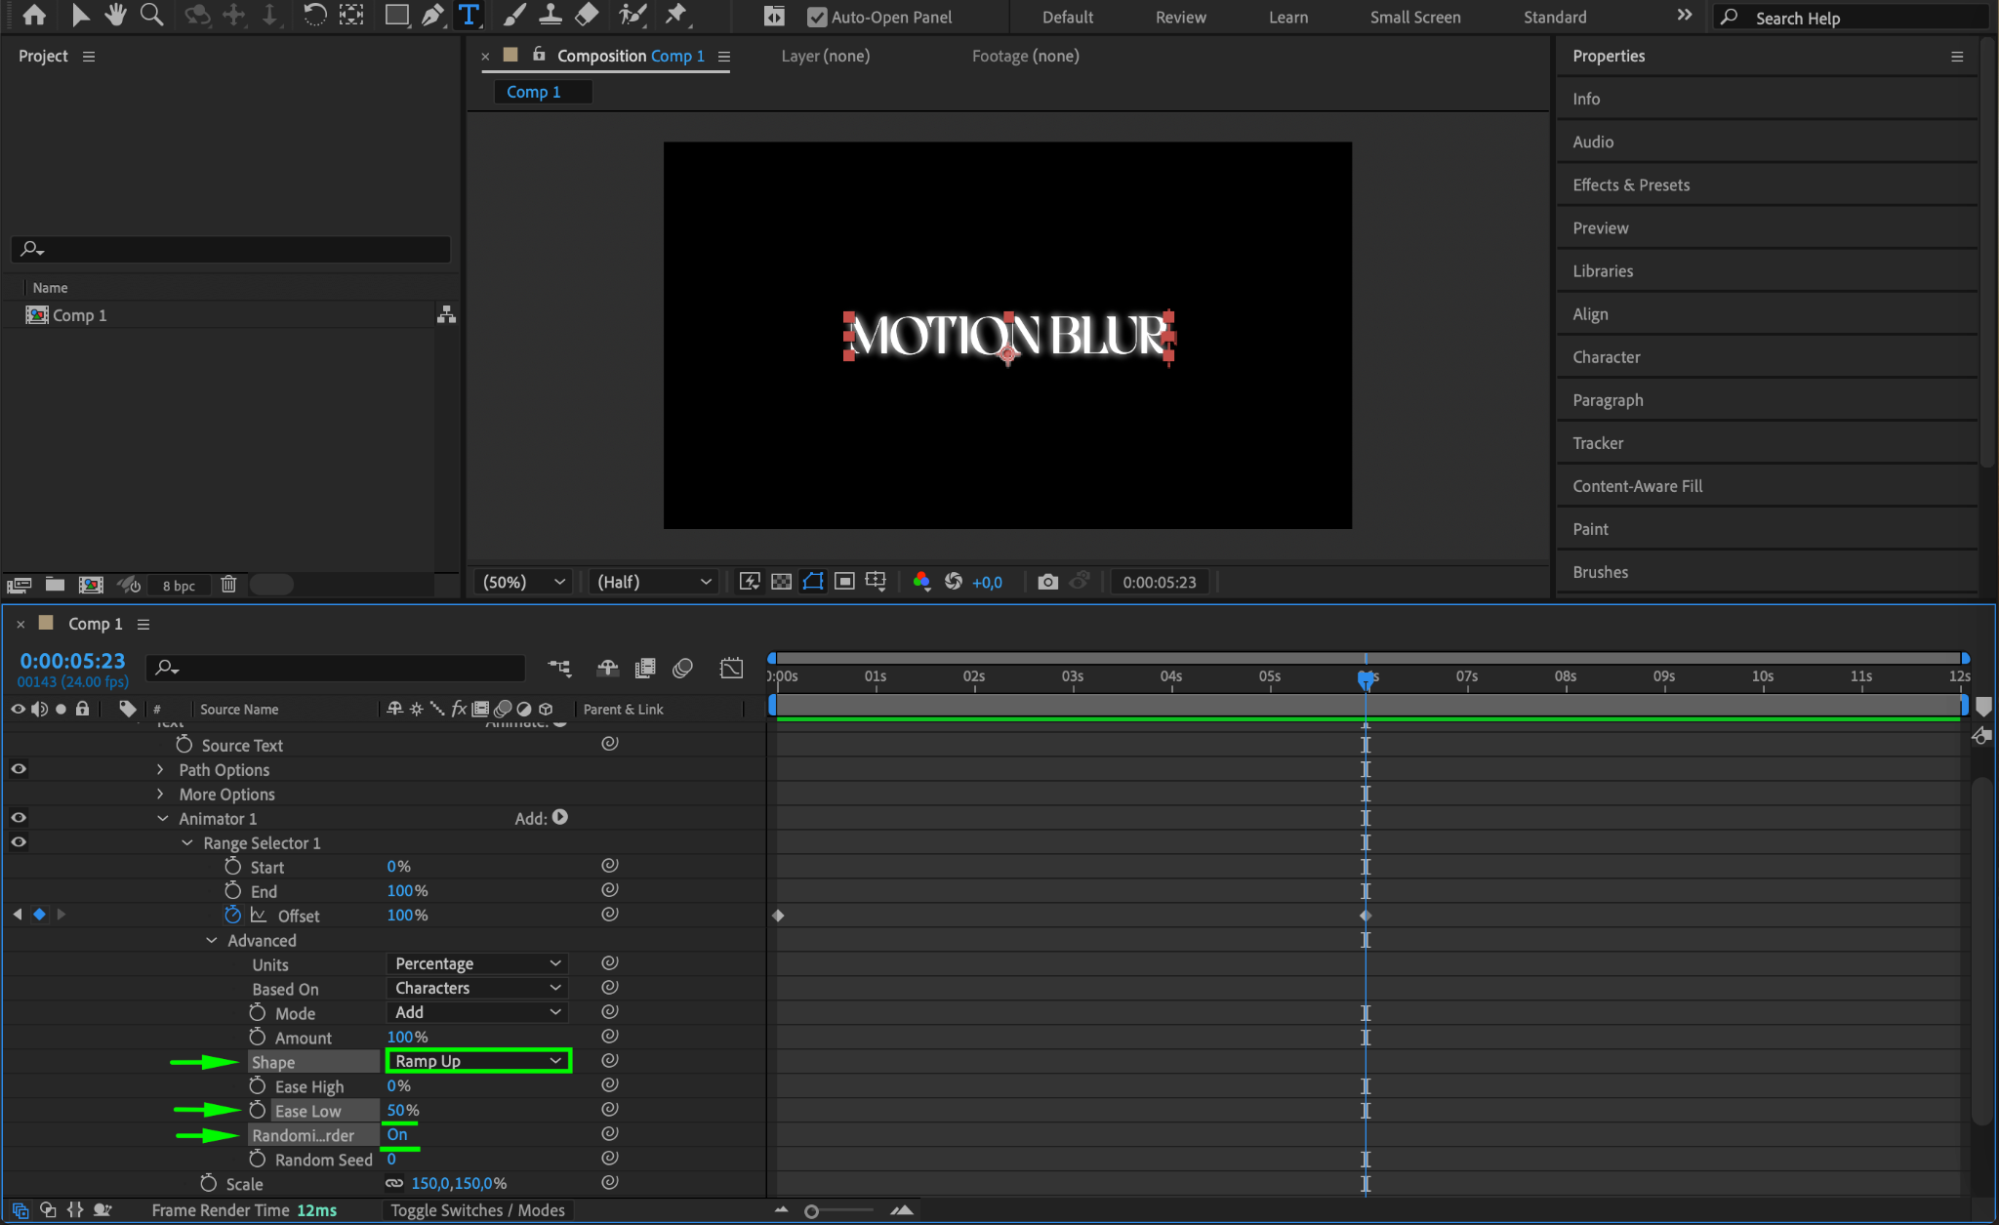 Step 7: Preview the Animation
Press Spacebar to preview the animation. Observe the smooth motion blur effect as the text appears and fades in a cinematic style. Adjust the keyframes or property values if needed.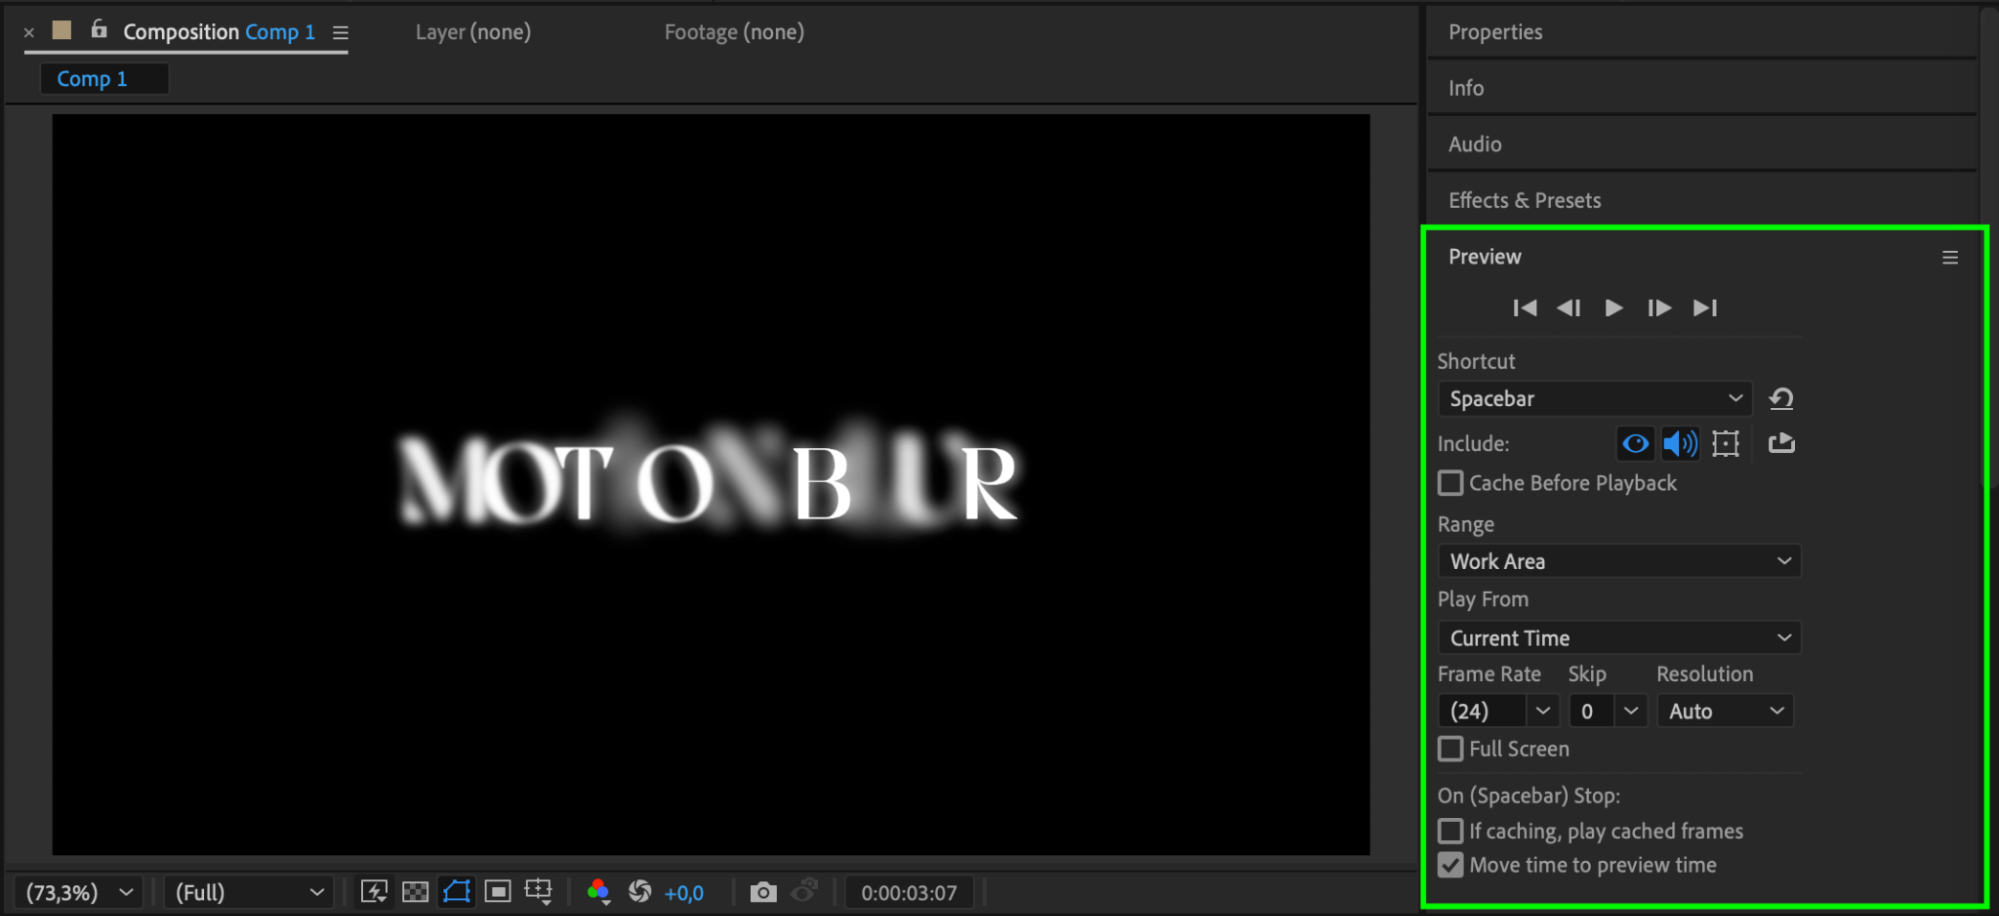 Step 8: Render the Final Composition
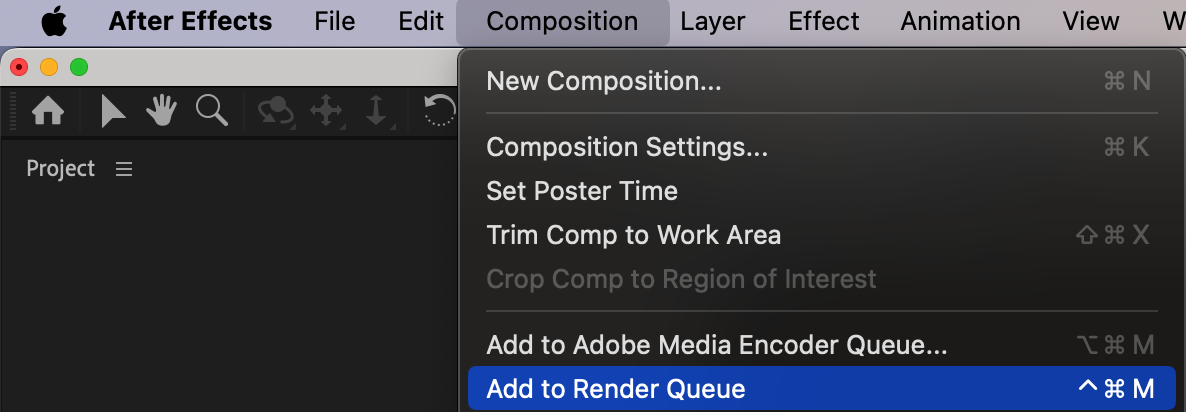
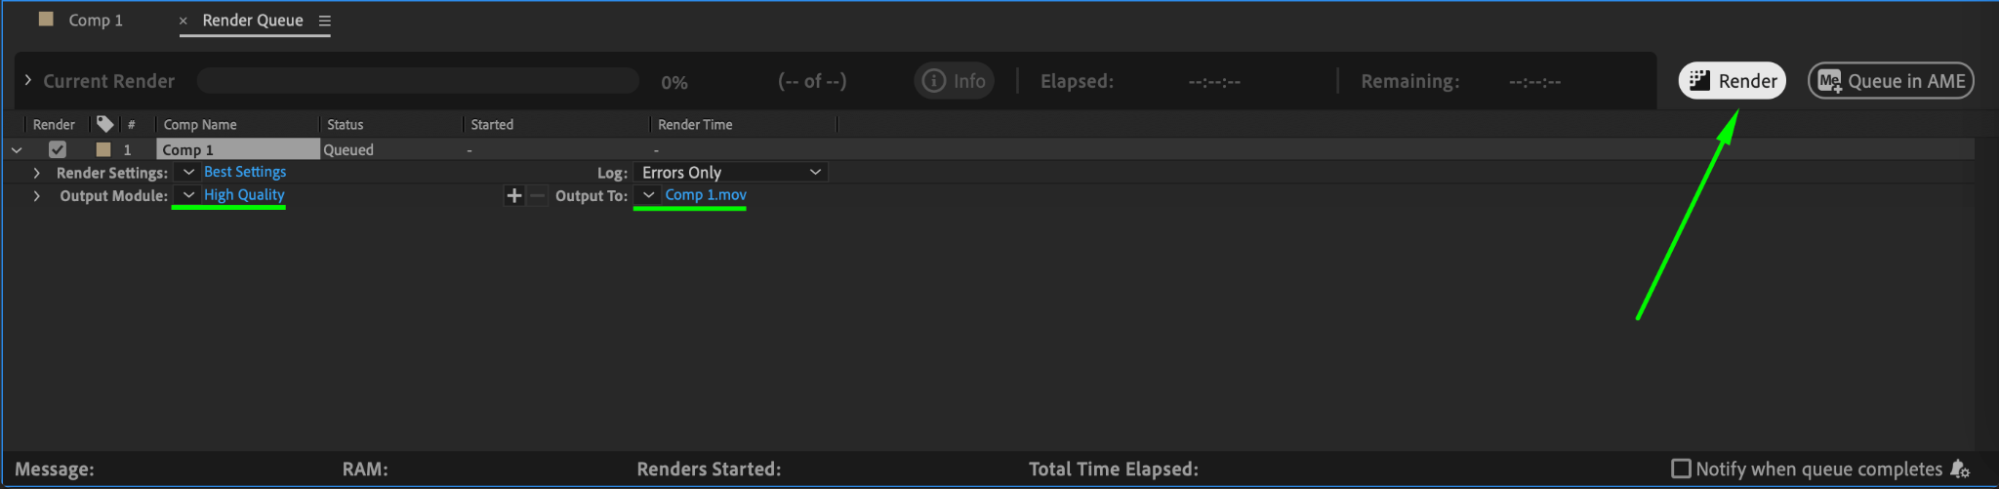
Once satisfied with the animation, navigate to Composition > Add to Render Queue, choose your output settings, and click Render to export your project.
 Conclusion
Adding cinematic motion blur to text in After Effects is a powerful way to elevate your motion graphics. By following these steps, you’ll create professional, dynamic animations perfect for any project.
Our Bestsellers


