How to Enhance Your Videos with Filters in After Effects
Introduction: Elevating Your Videos with Professional Filters
Adding filters to your videos in Adobe After Effects is a great way to enhance your footage and give it a professional look. In this step-by-step guide, we will walk you through the process of adding filters to your videos.
1. Import Your Video Footage:
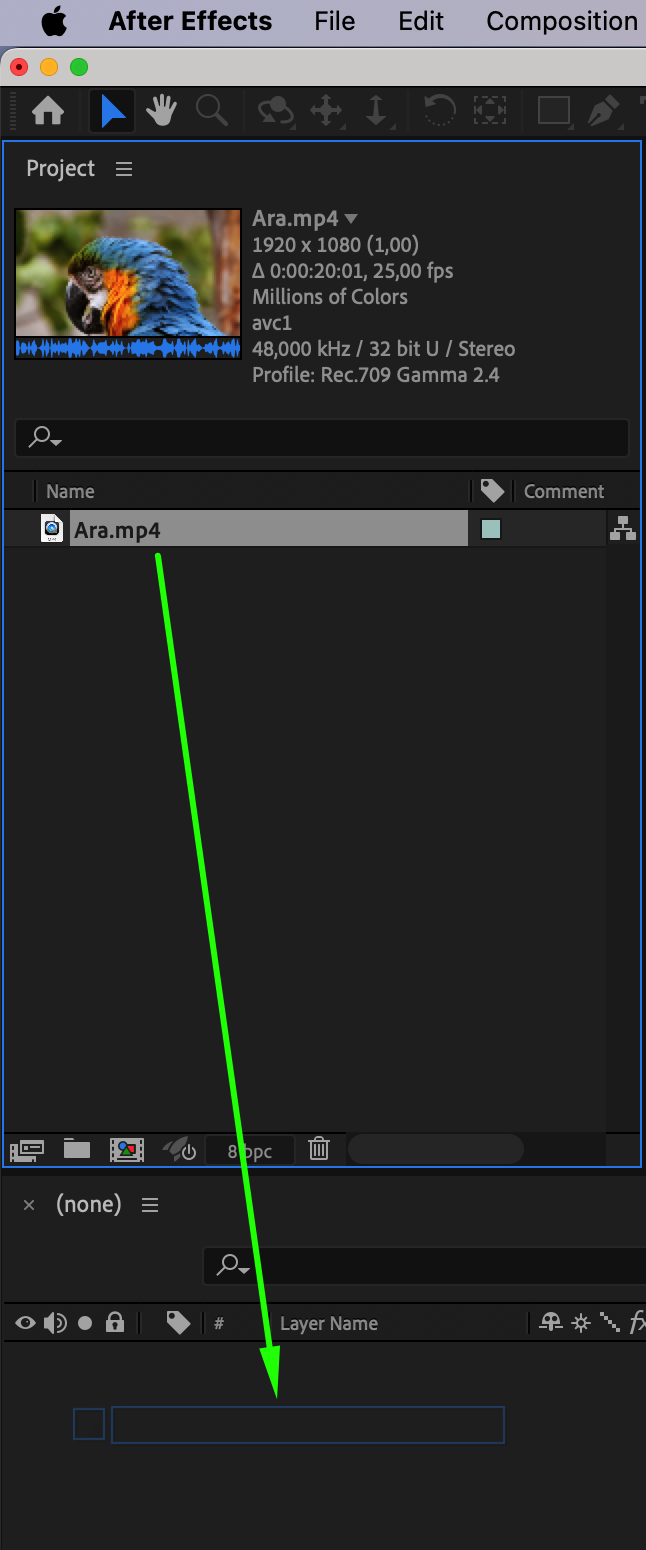
To begin, import your video footage into After Effects. Navigate to the “File” menu and select “Import” > “File”. Once imported, drag the video file onto the timeline panel. This action will automatically create a new composition matching the settings of your video.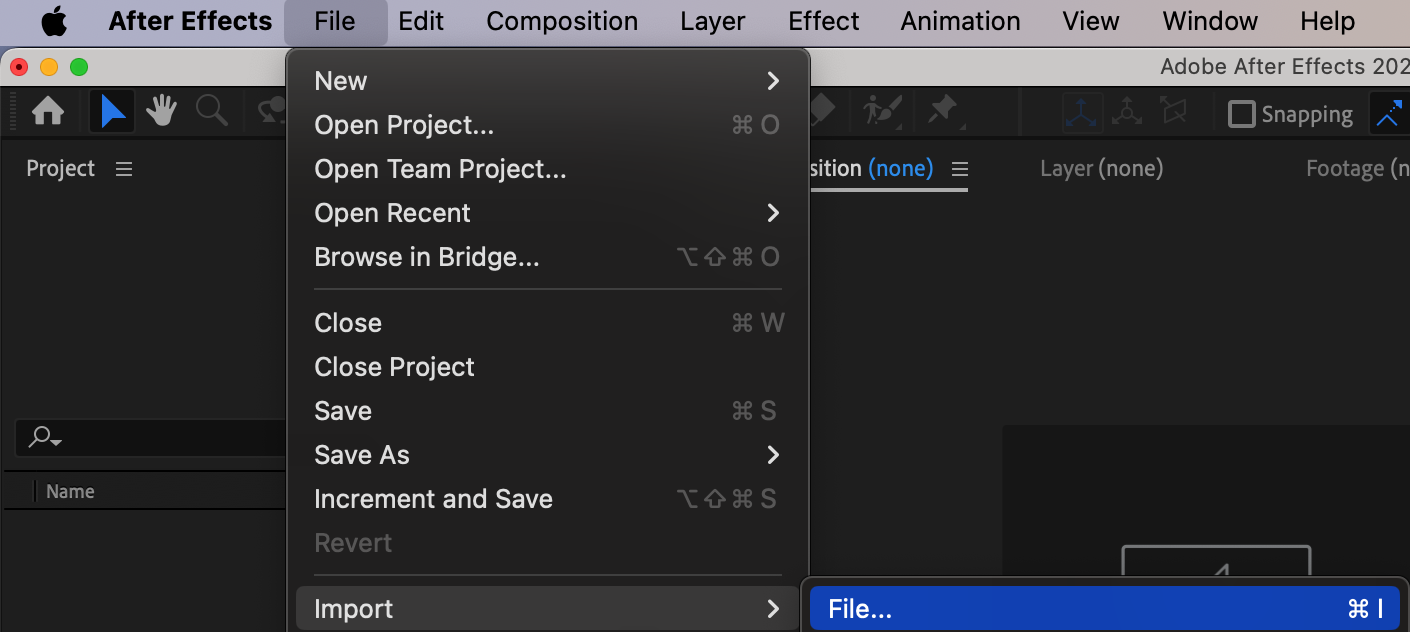
 2.Apply the Filter:
Get 10% off when you subscribe to our newsletter

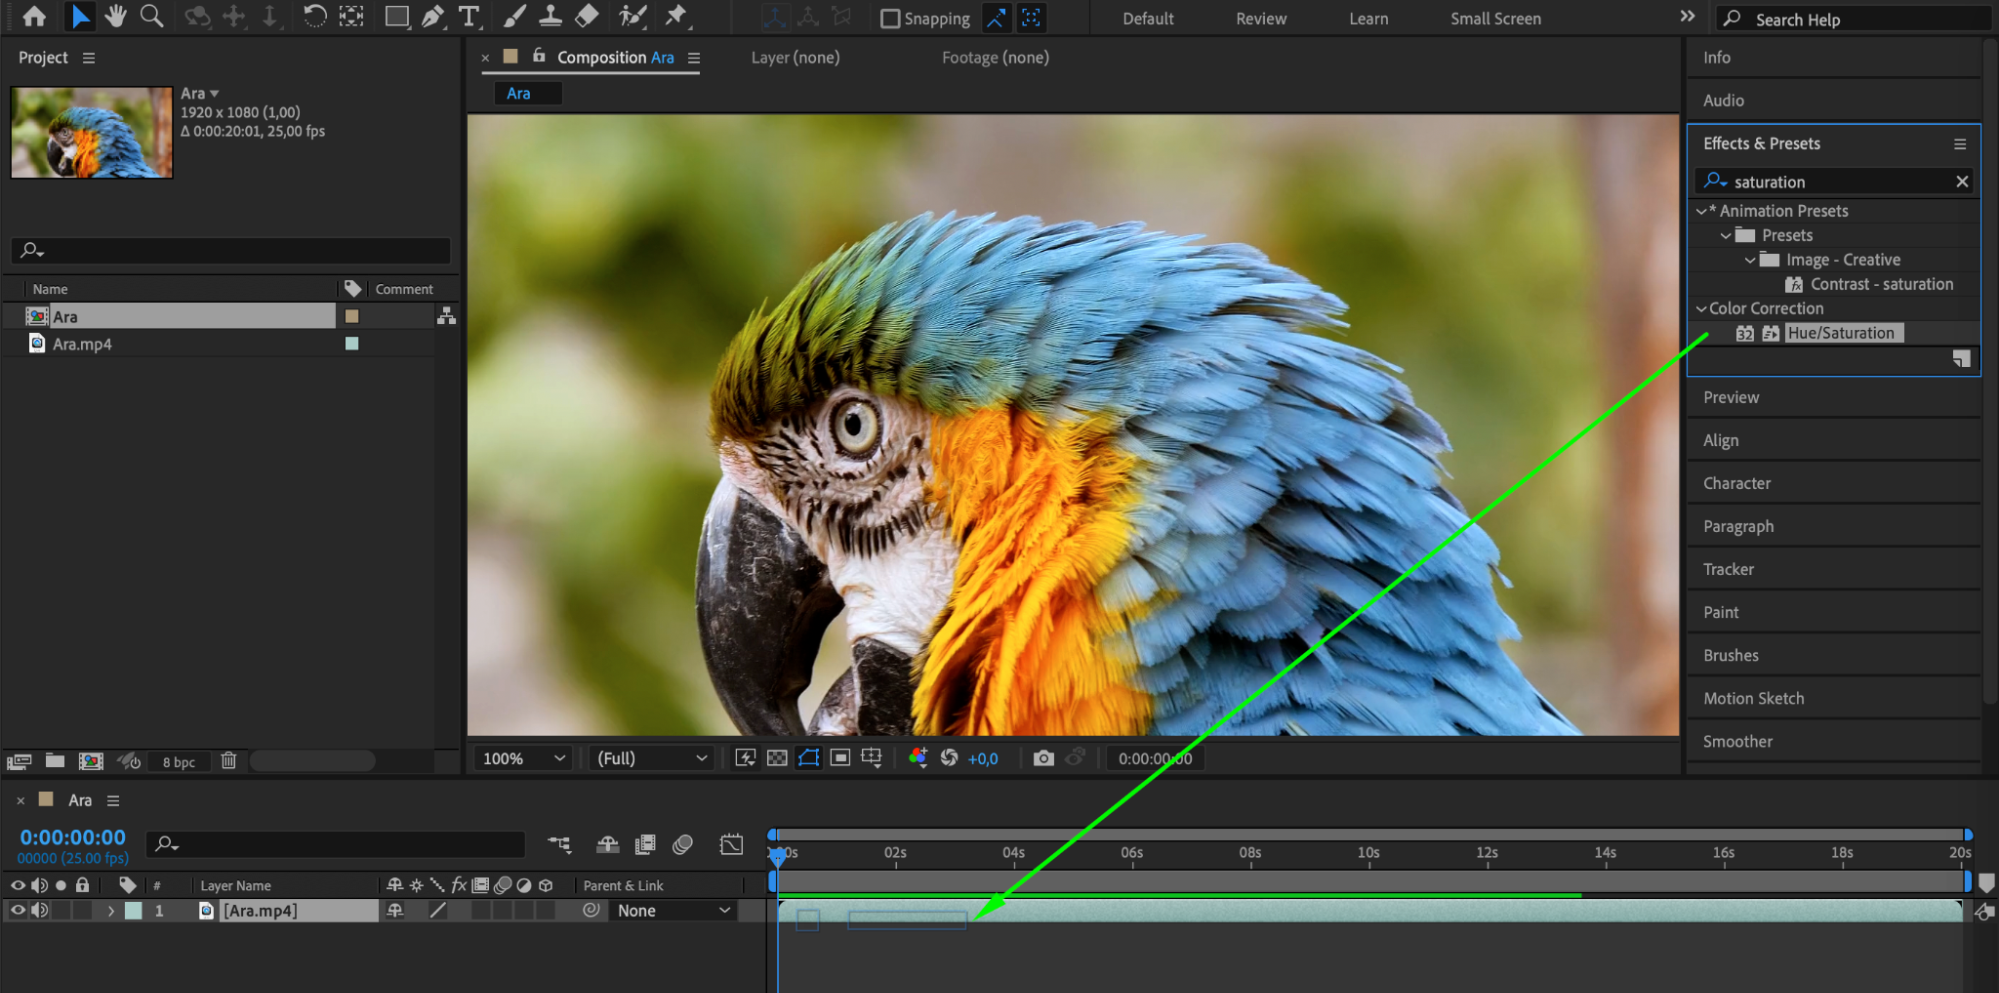
Select your video footage in the composition timeline. Open the “Effects & Presets” panel on the right side of the interface. Browse through the available filters and effects, then drag and drop the desired filter onto your video footage in the timeline.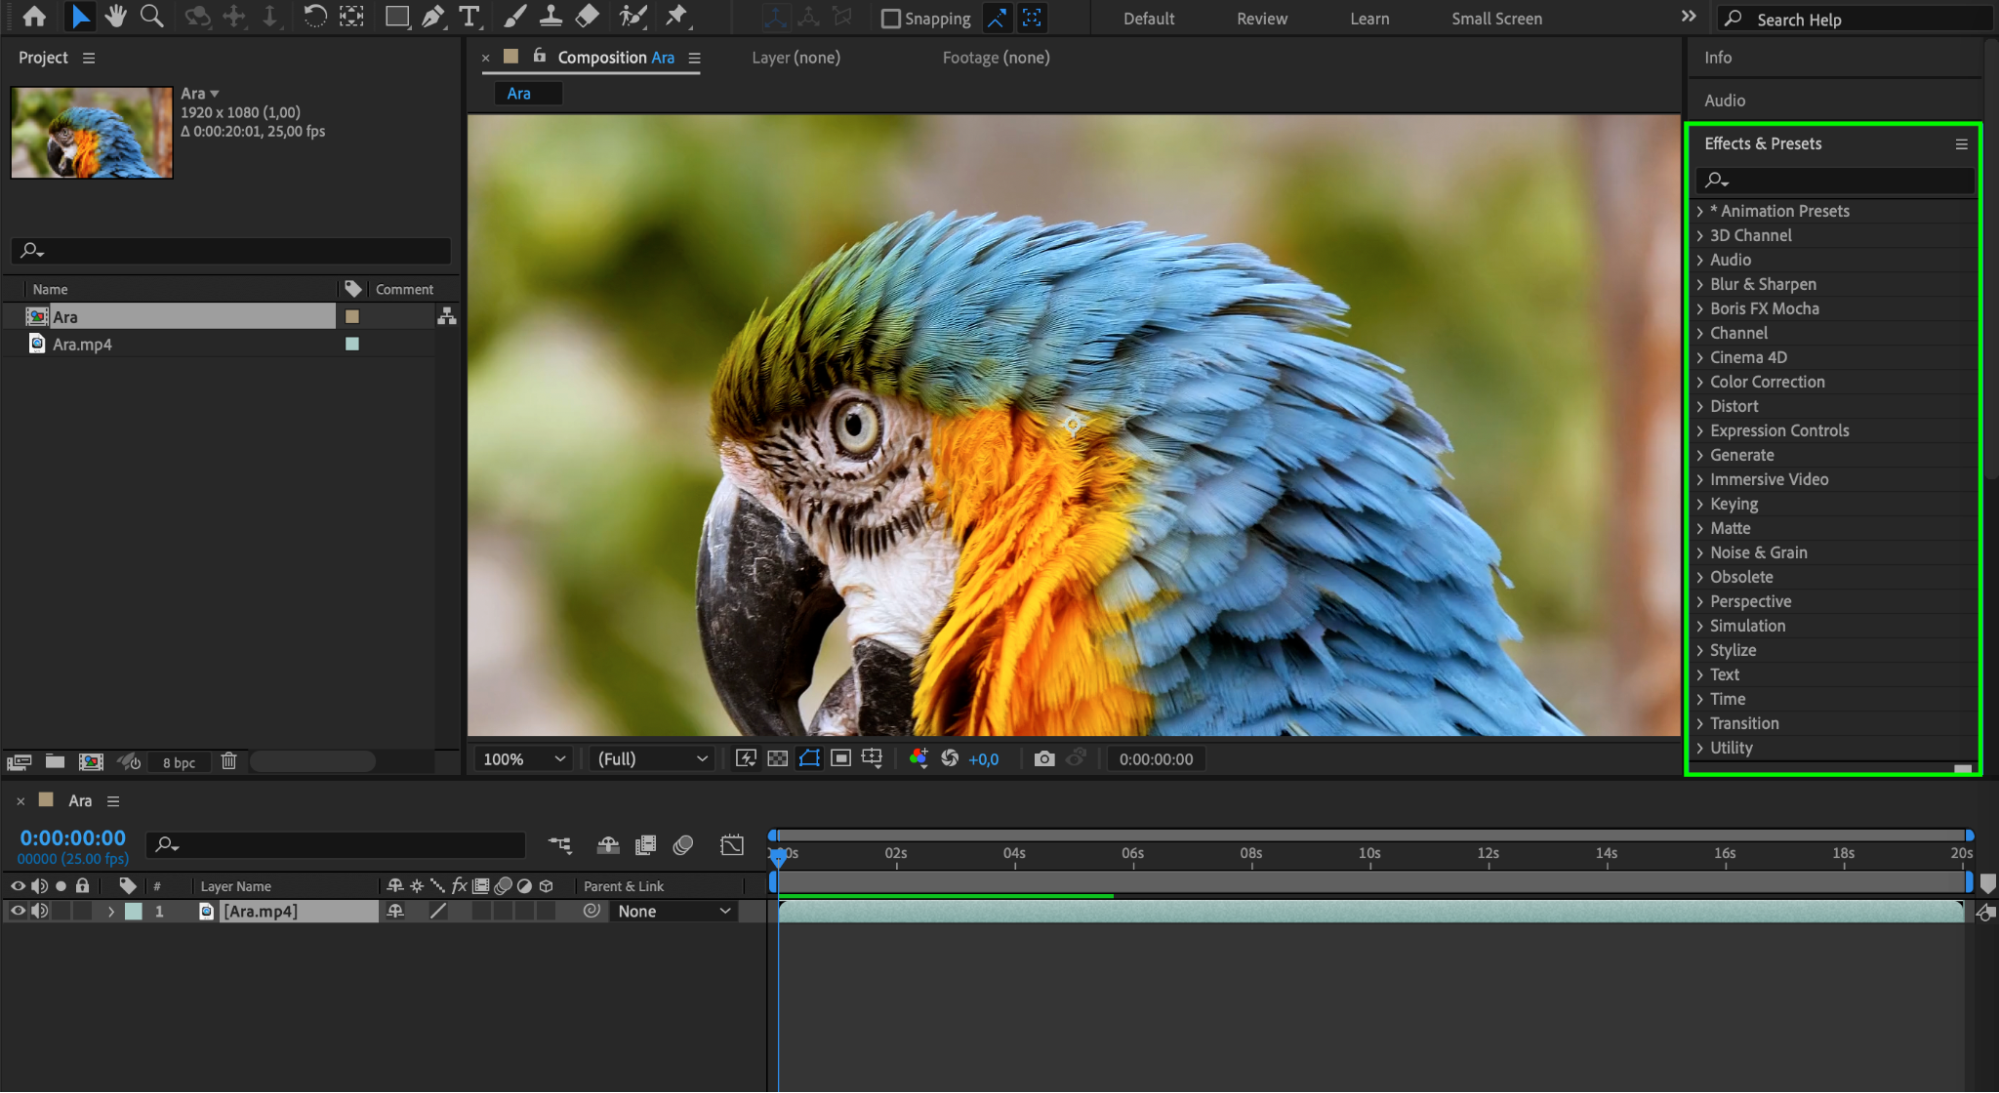
 3.Customize Filter Settings:
Get 10% off when you subscribe to our newsletter

After applying the filter, customize its settings to achieve the desired effect. Select the video footage layer in the timeline, and adjust the filter settings in the “Effects Controls” panel on the left side of the interface.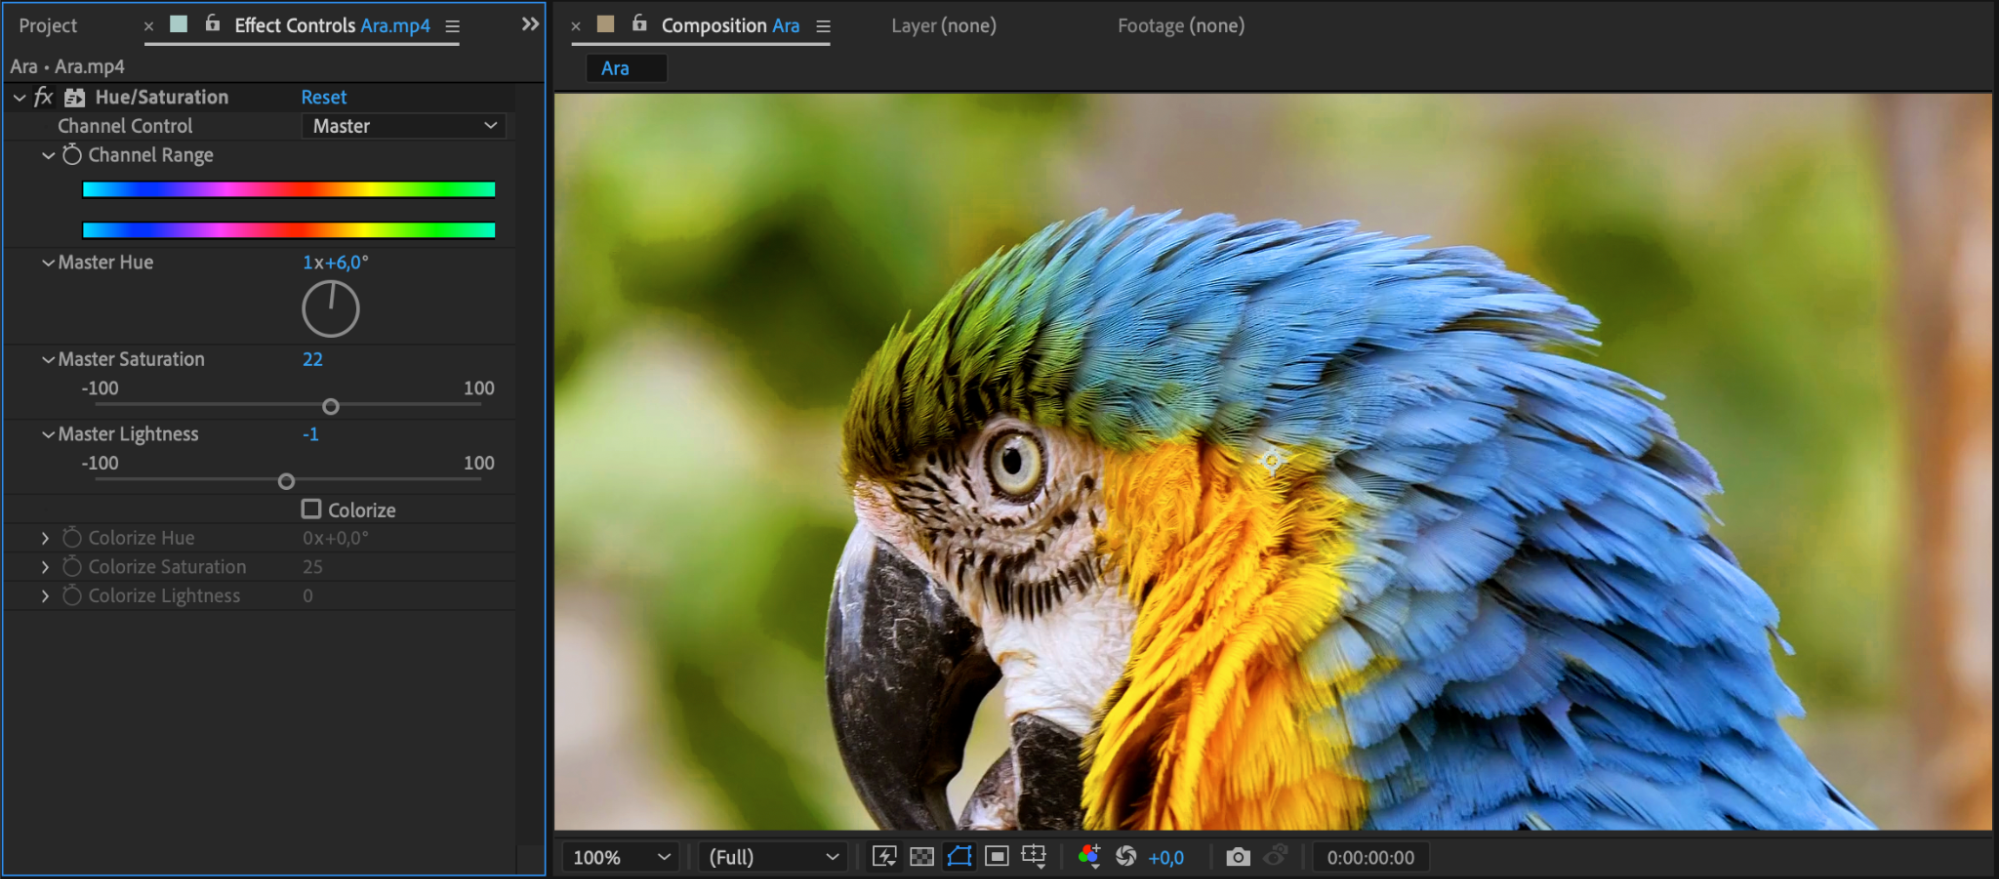 4.Preview Your Video:
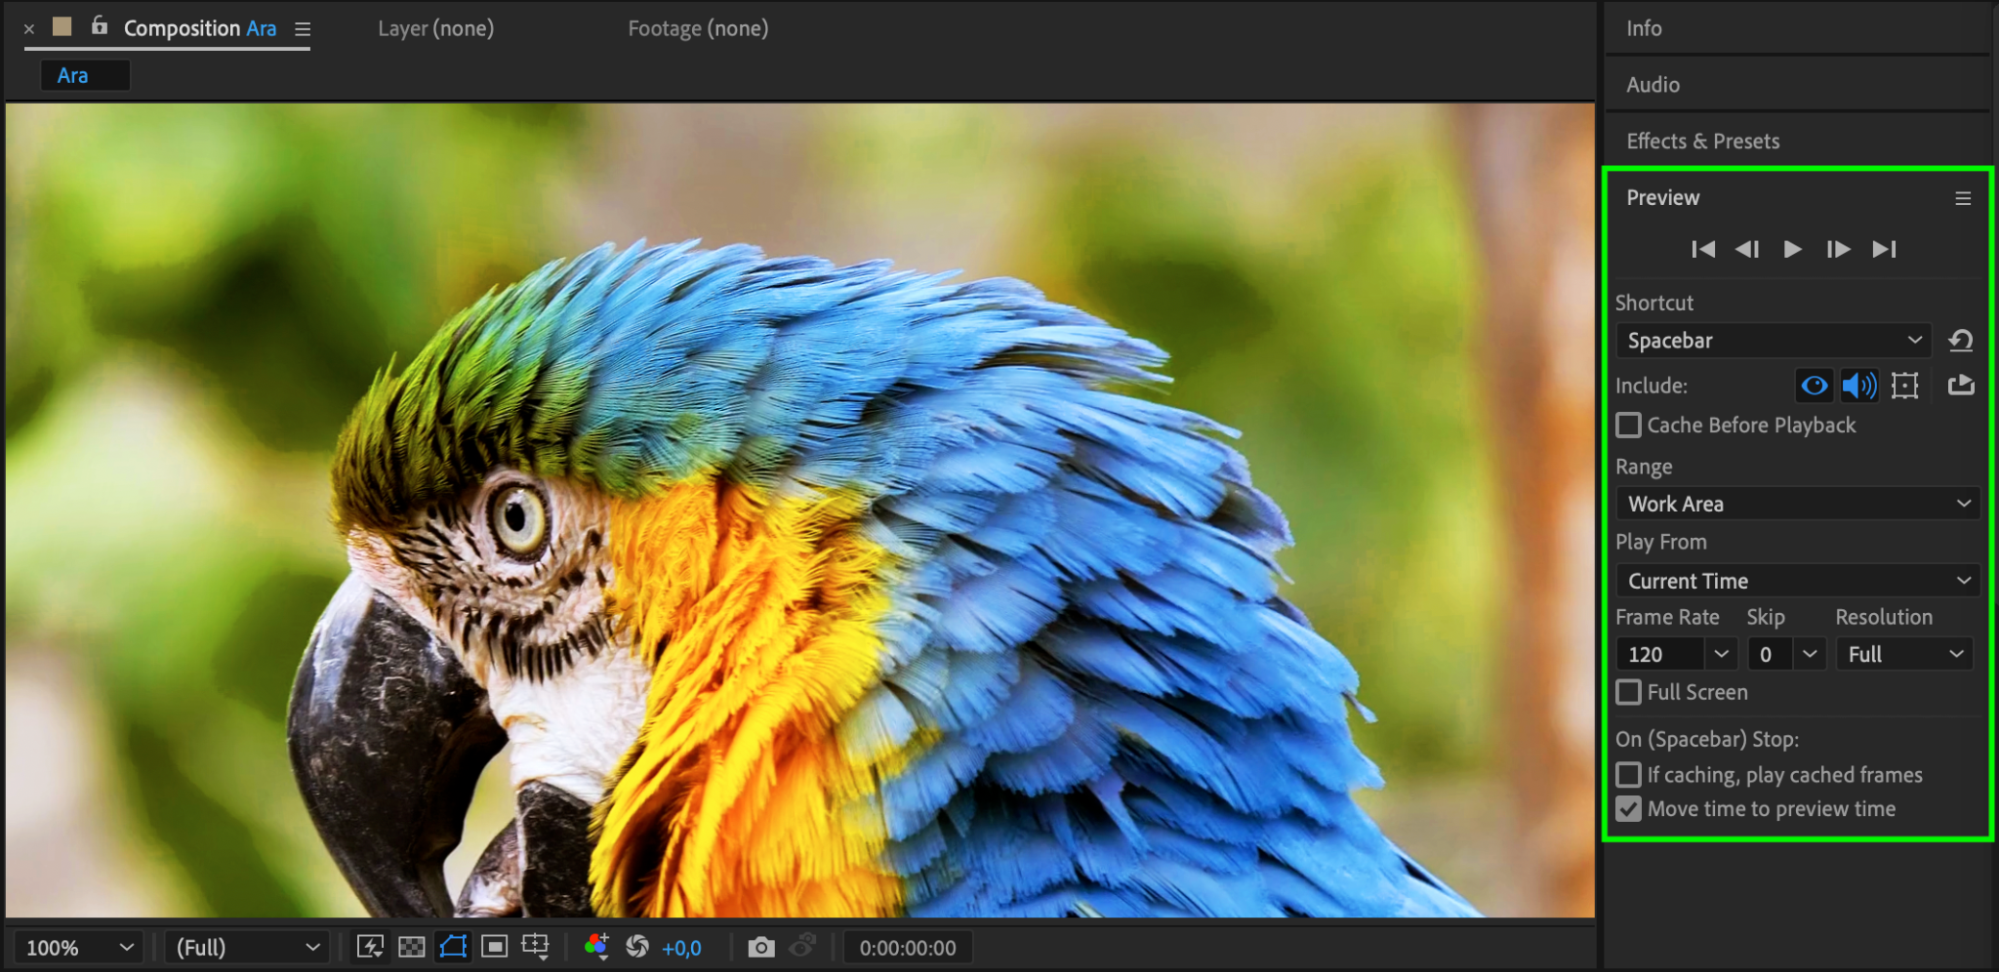
Play the composition to see the changes in real-time. Press the “Spacebar” key to preview your video with the applied filter effect.
 5. Render Your Video:
Once you’re satisfied with the filter effect, it’s time to render your video. Go to the “Composition” menu and select “Add to Render Queue”. Configure the output settings such as file format and resolution, then choose a destination folder. Click the “Render” button to start rendering your video.Conclusion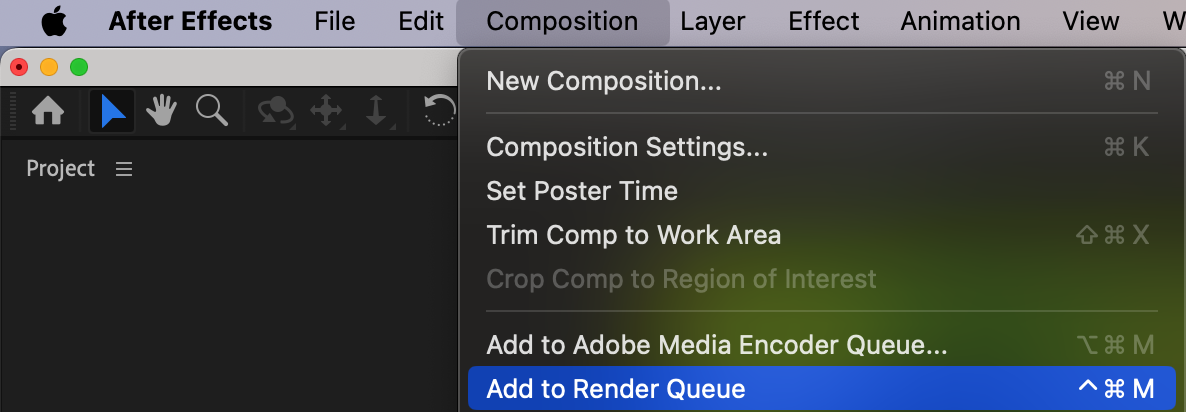
 By following these simple steps, you can easily add filters to your videos in After Effects. Experiment with different filters and settings to achieve the desired look and make your videos stand out. Remember to have fun and unleash your creativity!
Get 10% off when you subscribe to our newsletter

If you have any questions or need further assistance, feel free to leave a comment below. Happy editing!

