Are you ready to elevate your After Effects projects with the perfect soundtrack? Adding music can enhance the mood, set the pace, and add that extra layer of professionalism to your videos. Whether you’re a beginner or an experienced video designer, this step-by-step guide will walk you through the process of adding music to your After Effects projects.
Let’s get started!
Step 1: Importing Your Audio Files
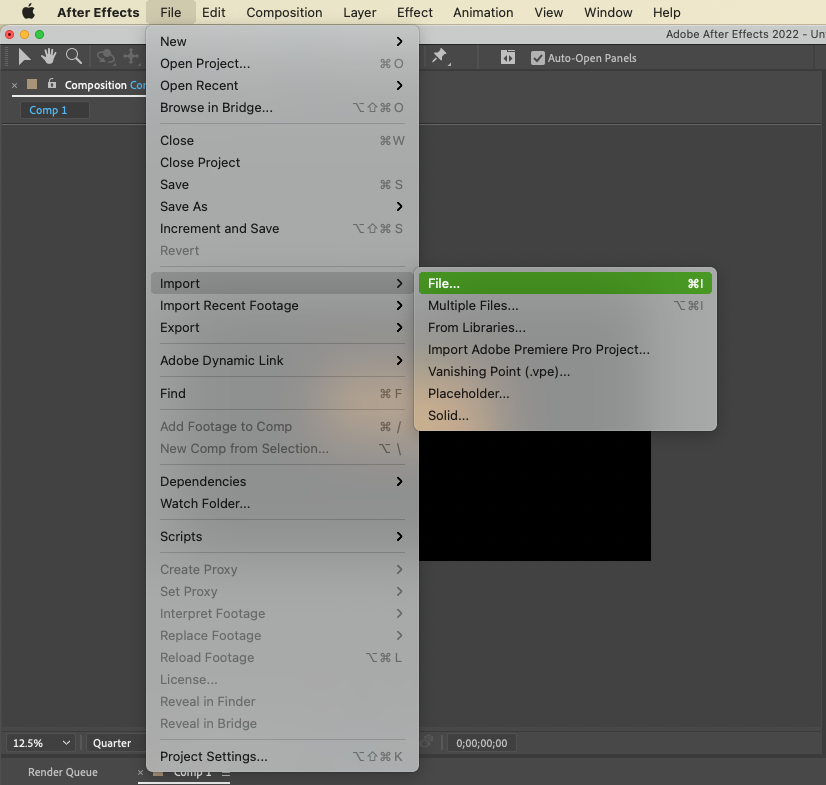
The first step is to import your desired audio files into the After Effects project. To do this, go to the “File” menu and select “Import” > “File”. Browse for your audio file and click “Open”. After Effects supports various audio file formats like MP3, WAV, and AIFF. Once imported, your audio file will appear in the project panel.
Step 2: Adding Audio to the Timeline
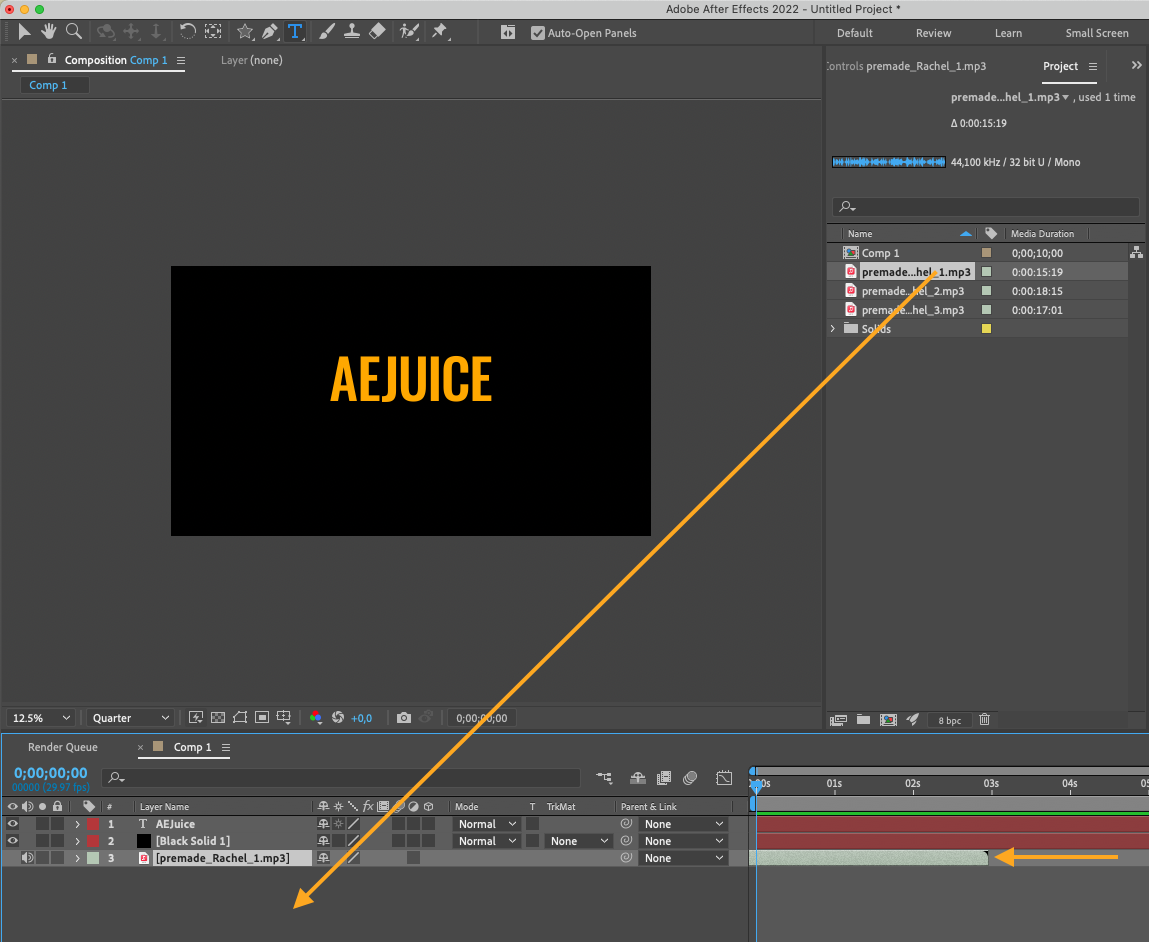
Drag and drop your audio file from the project panel onto the timeline. It will create a new audio layer. You can adjust the audio layer’s position and duration on the timeline to sync it with your video footage.
Step 3: Adjusting Volume Levels
Get 10% off when you subscribe to our newsletter

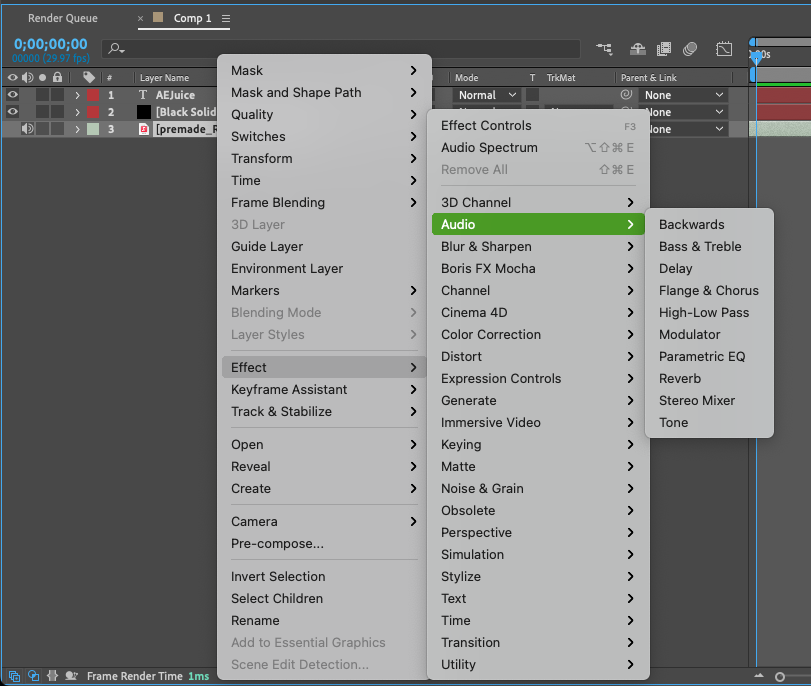
To fine-tune the audio levels, right-click the audio layer and go to the “Effect” menu. Under “Audio”, you’ll find options to adjust the overall volume, equalize, or add effects to your audio.
Use the “Stereo Mixer” effect to balance the audio levels of different layers and create a professional sound mix.
Step 4: Looping and Staggering Audio
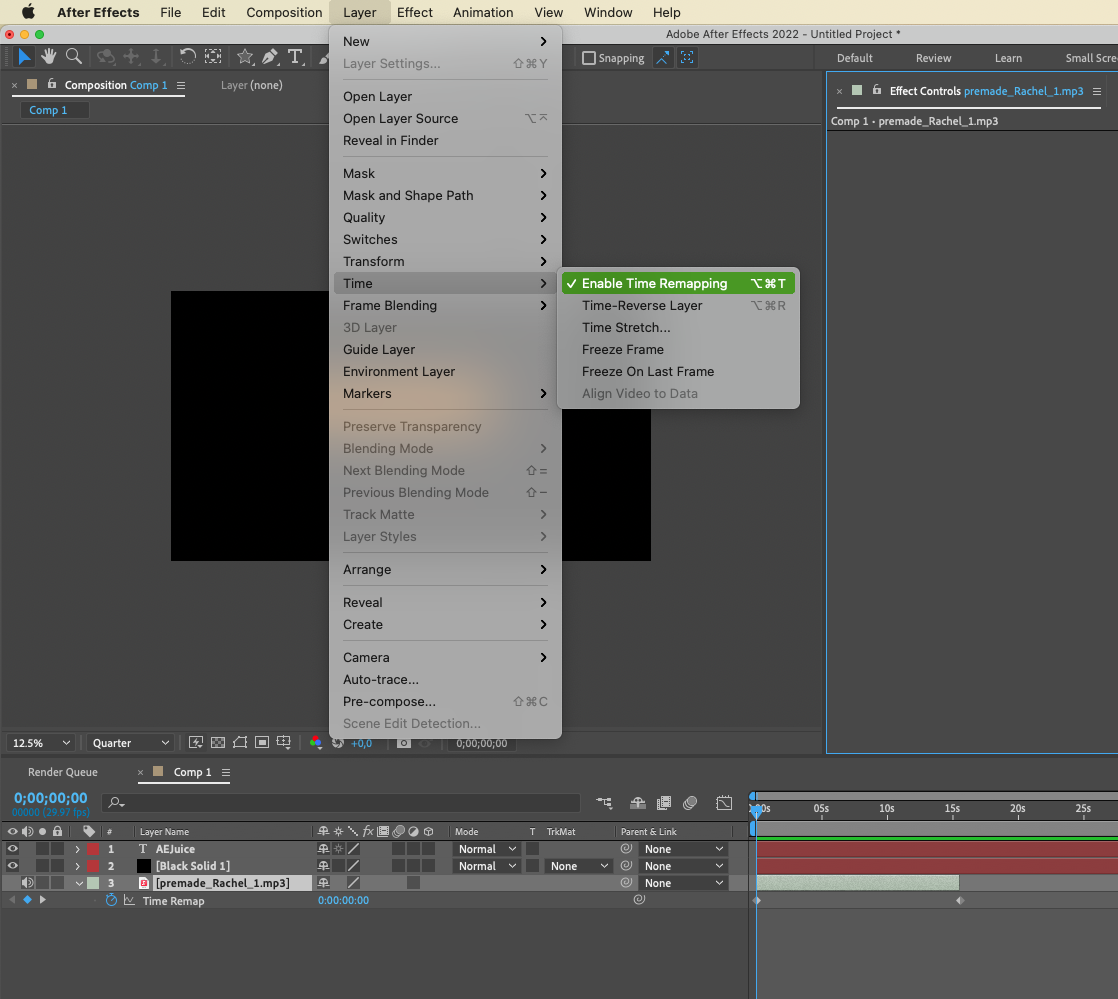
If you want your audio to loop or stagger, there are a few techniques you can use. To create a seamless loop, select the audio layer and go to “Layer” > “Time” > “Enable Time Remapping”. Then, add a keyframe at the end of the audio layer and move it to the beginning to create the loop. For staggering audio, duplicate the audio layer and offset the duplicate by a few frames.
Get 10% off when you subscribe to our newsletter

Step 5: Adding Sound Effects and Music Tracks
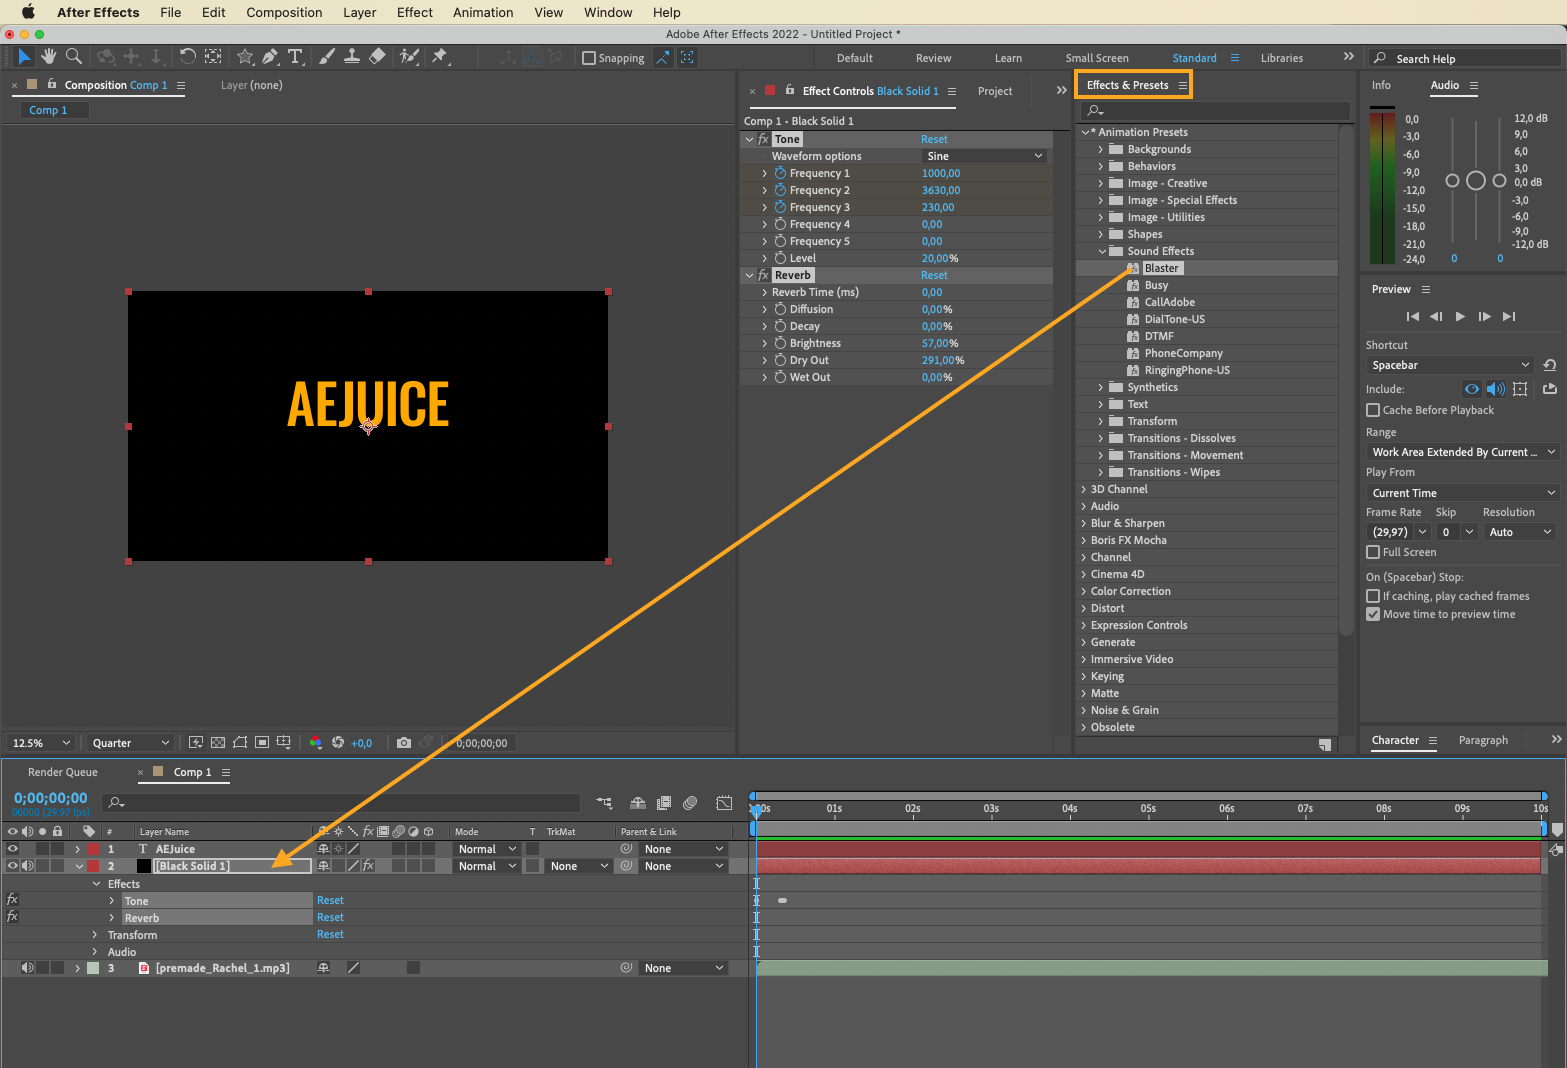
In addition to background music, you can also enhance your video with sound effects and music tracks. After Effects provides a wide range of presets and audio effects to choose from. Just drag and drop the desired sound effect from “Effects & Presets” > “Animation Presets” > “Sound Effects” onto the layer and adjust its timing and volume as needed.
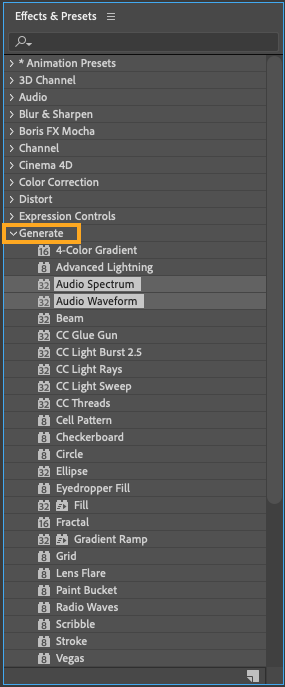
You can also use the “Audio Spectrum” or “Audio Waveform” effects from the “Generate” list to create visual representations of your audio.
Step 6: Export and Share Your Video
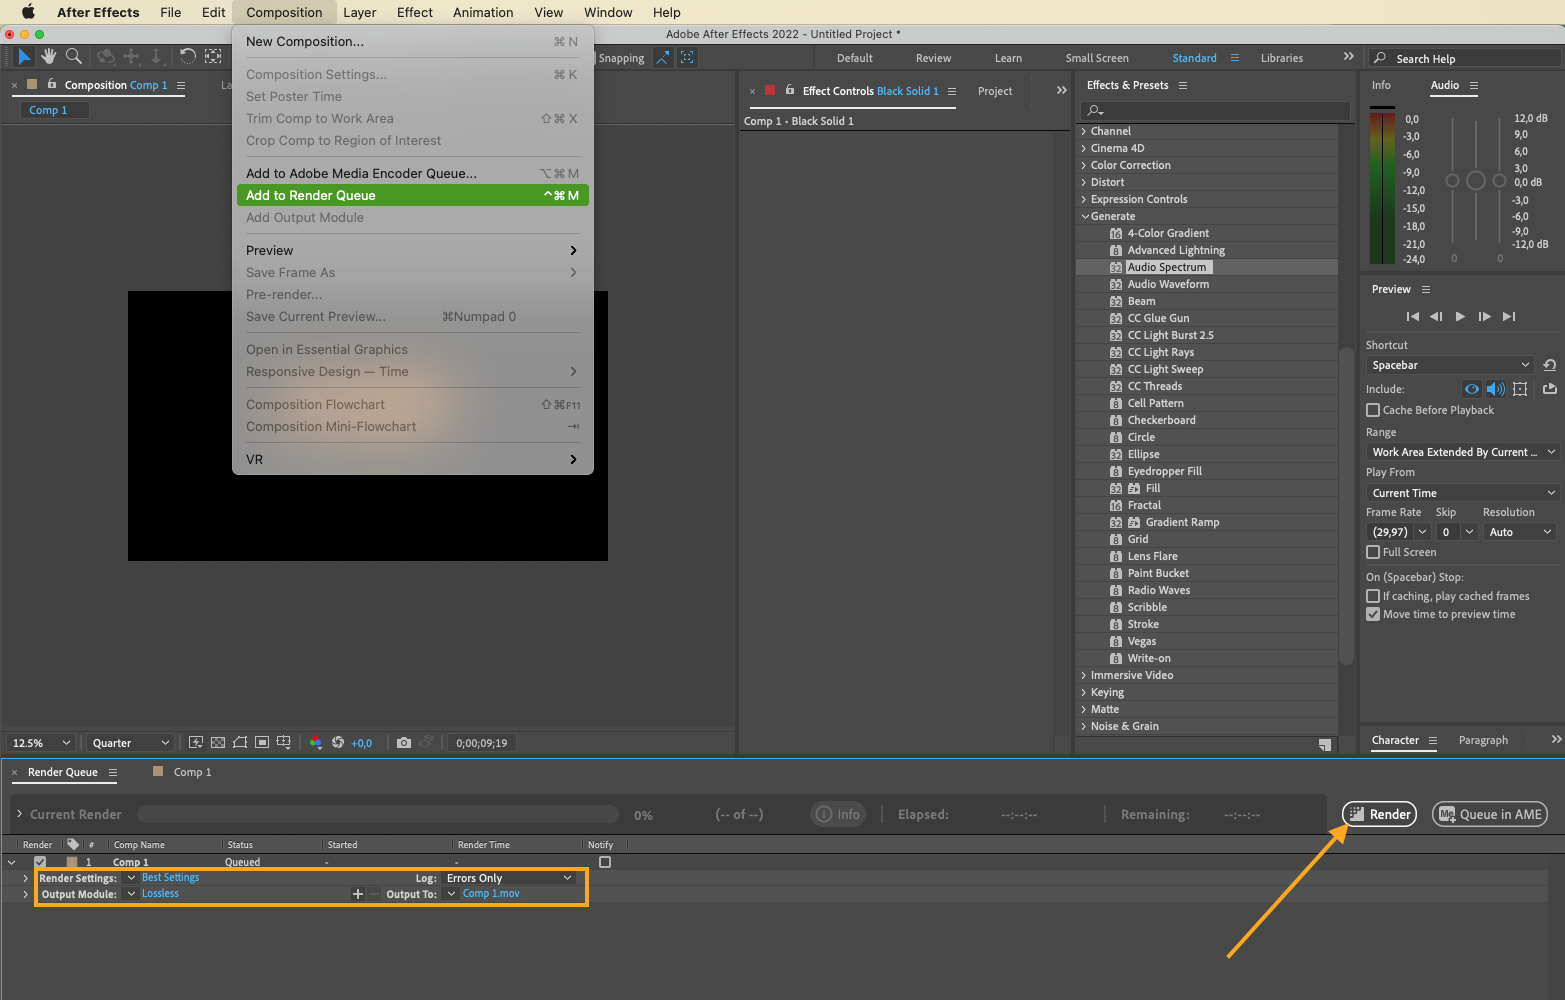
Once you are satisfied with your composition, it’s time to export and share your video. Go to the “Composition” menu and select “Add to Render Queue”. Choose your desired output settings, including format, resolution, and frame rate. Then, click on “Render” to export your video with the added music.
Conclusion
By following these simple steps, you can easily add music to your After Effects projects and take them to the next level. Experiment with different audio effects, loops, and soundtracks to create a unique and immersive experience for your audience. Remember, the right music can make all the difference in capturing attention, conveying emotions, and telling your story effectively. So, have fun exploring the world of audio design in After Effects, and let your creativity shine!


