Creating and Animating a Box in After Effects
Introduction
Animating a box in After Effects is a great way to understand basic motion principles. By using keyframes, anchor points, and motion blur, you can create smooth and realistic movement. This guide will take you through the entire process step by step.
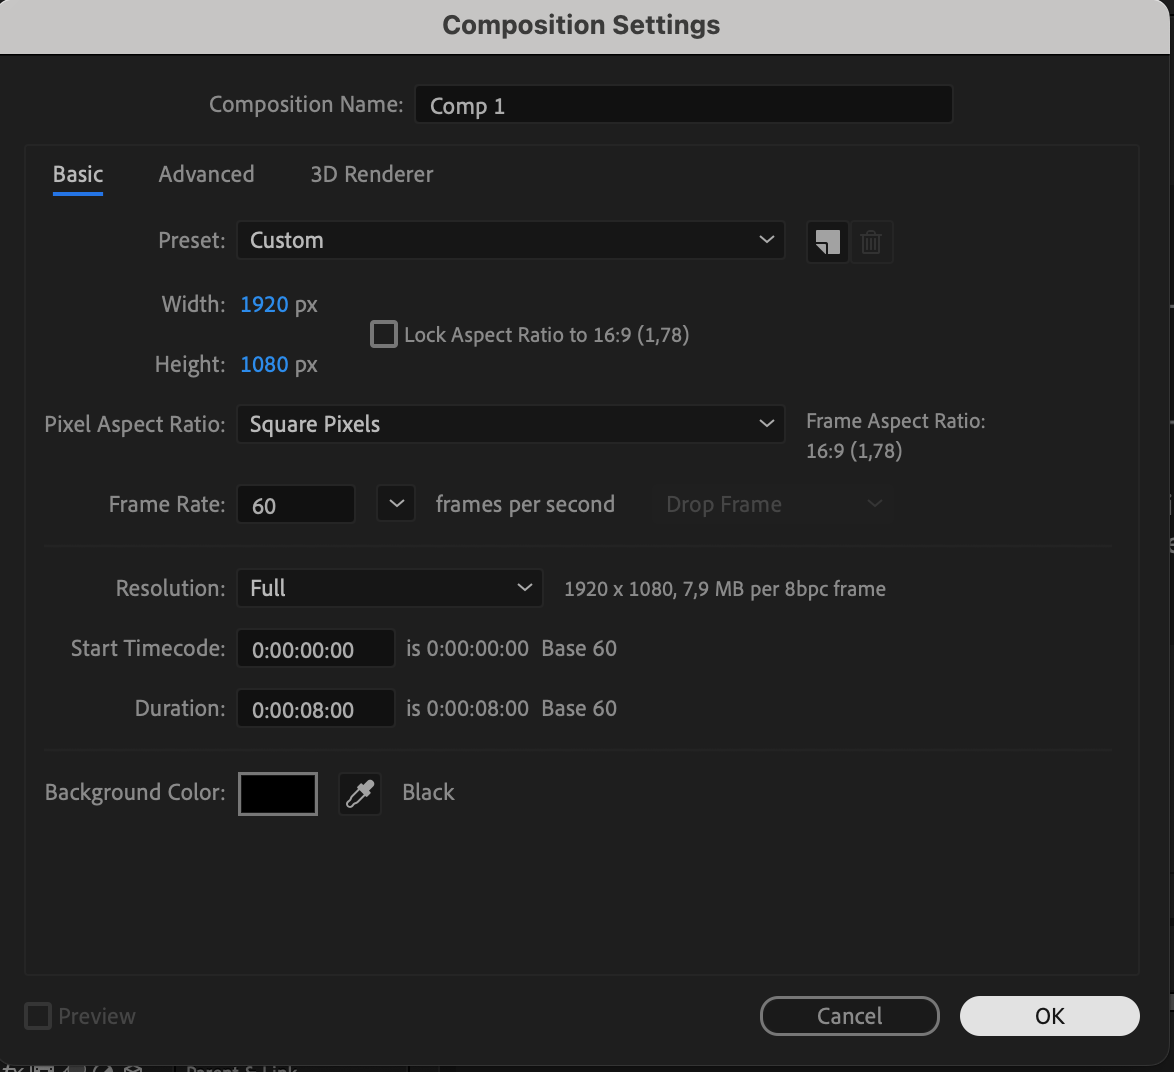
Step 1: Create a New Composition
Open After Effects and create a new composition. Set the resolution, frame rate, and duration according to your project needs. A standard size like 1920×1080 at 60 fps works well for most animations.
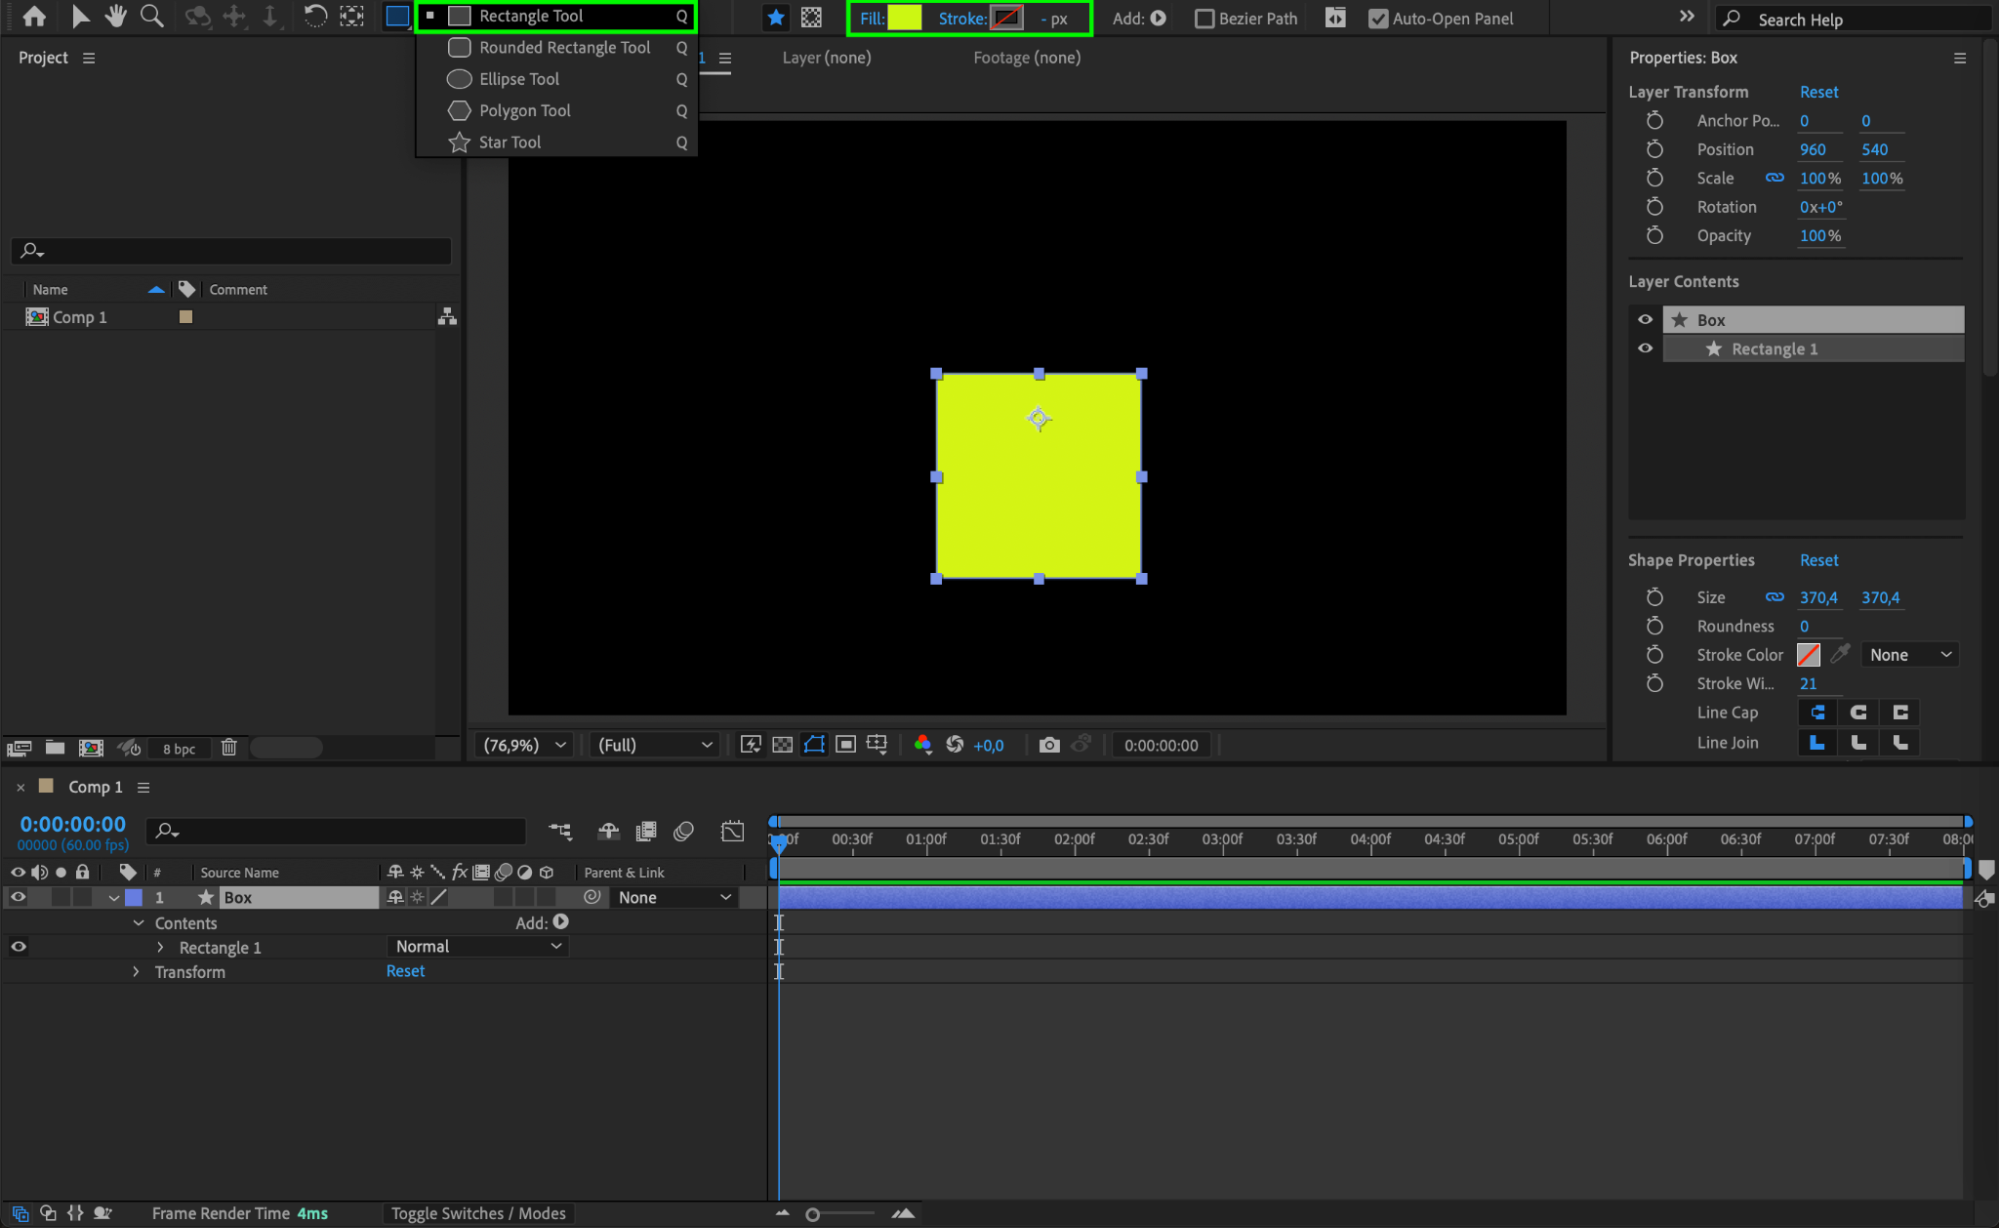
 Step 2: Draw a Box Using the Rectangle Tool
Select the Rectangle Tool (Q) from the toolbar. Click and drag on the composition window to draw a box. Adjust the fill and stroke colors in the Shape Layer properties if needed.
 Step 3: Adjust the Anchor Point
Use the Pan Behind Tool (Y) to move the anchor point to the bottom-right corner of the box. This will serve as the pivot point for rotation and movement.
 Step 4: Convert the Layer to 3D
Get 10% off when you subscribe to our newsletter

In the Timeline panel, enable the 3D switch for the shape layer. This allows you to manipulate the box in three dimensions, adding depth to the animation.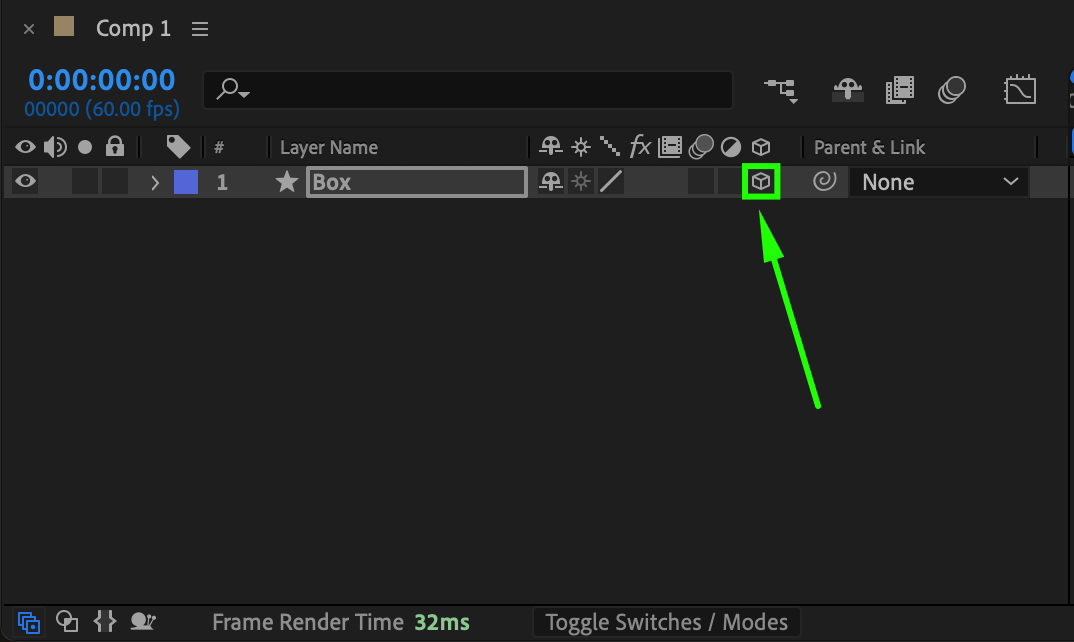 Step 5: Set Initial Keyframes
Expand the Transform properties and click the stopwatch icons for Position, Anchor Point, and Z Rotation when the box is positioned off-screen to the left. This marks the starting point of the animation. Step 6: Move Forward and Set New Keyframes
Move the Current Time Indicator (CTI) 30 frames forward by holding Shift + Ctrl/Cmd + Right Arrow. Click the diamond icon next to Position and Anchor Point to create keyframes. Then, set Z Rotation to 90 degrees to simulate a natural rolling effect.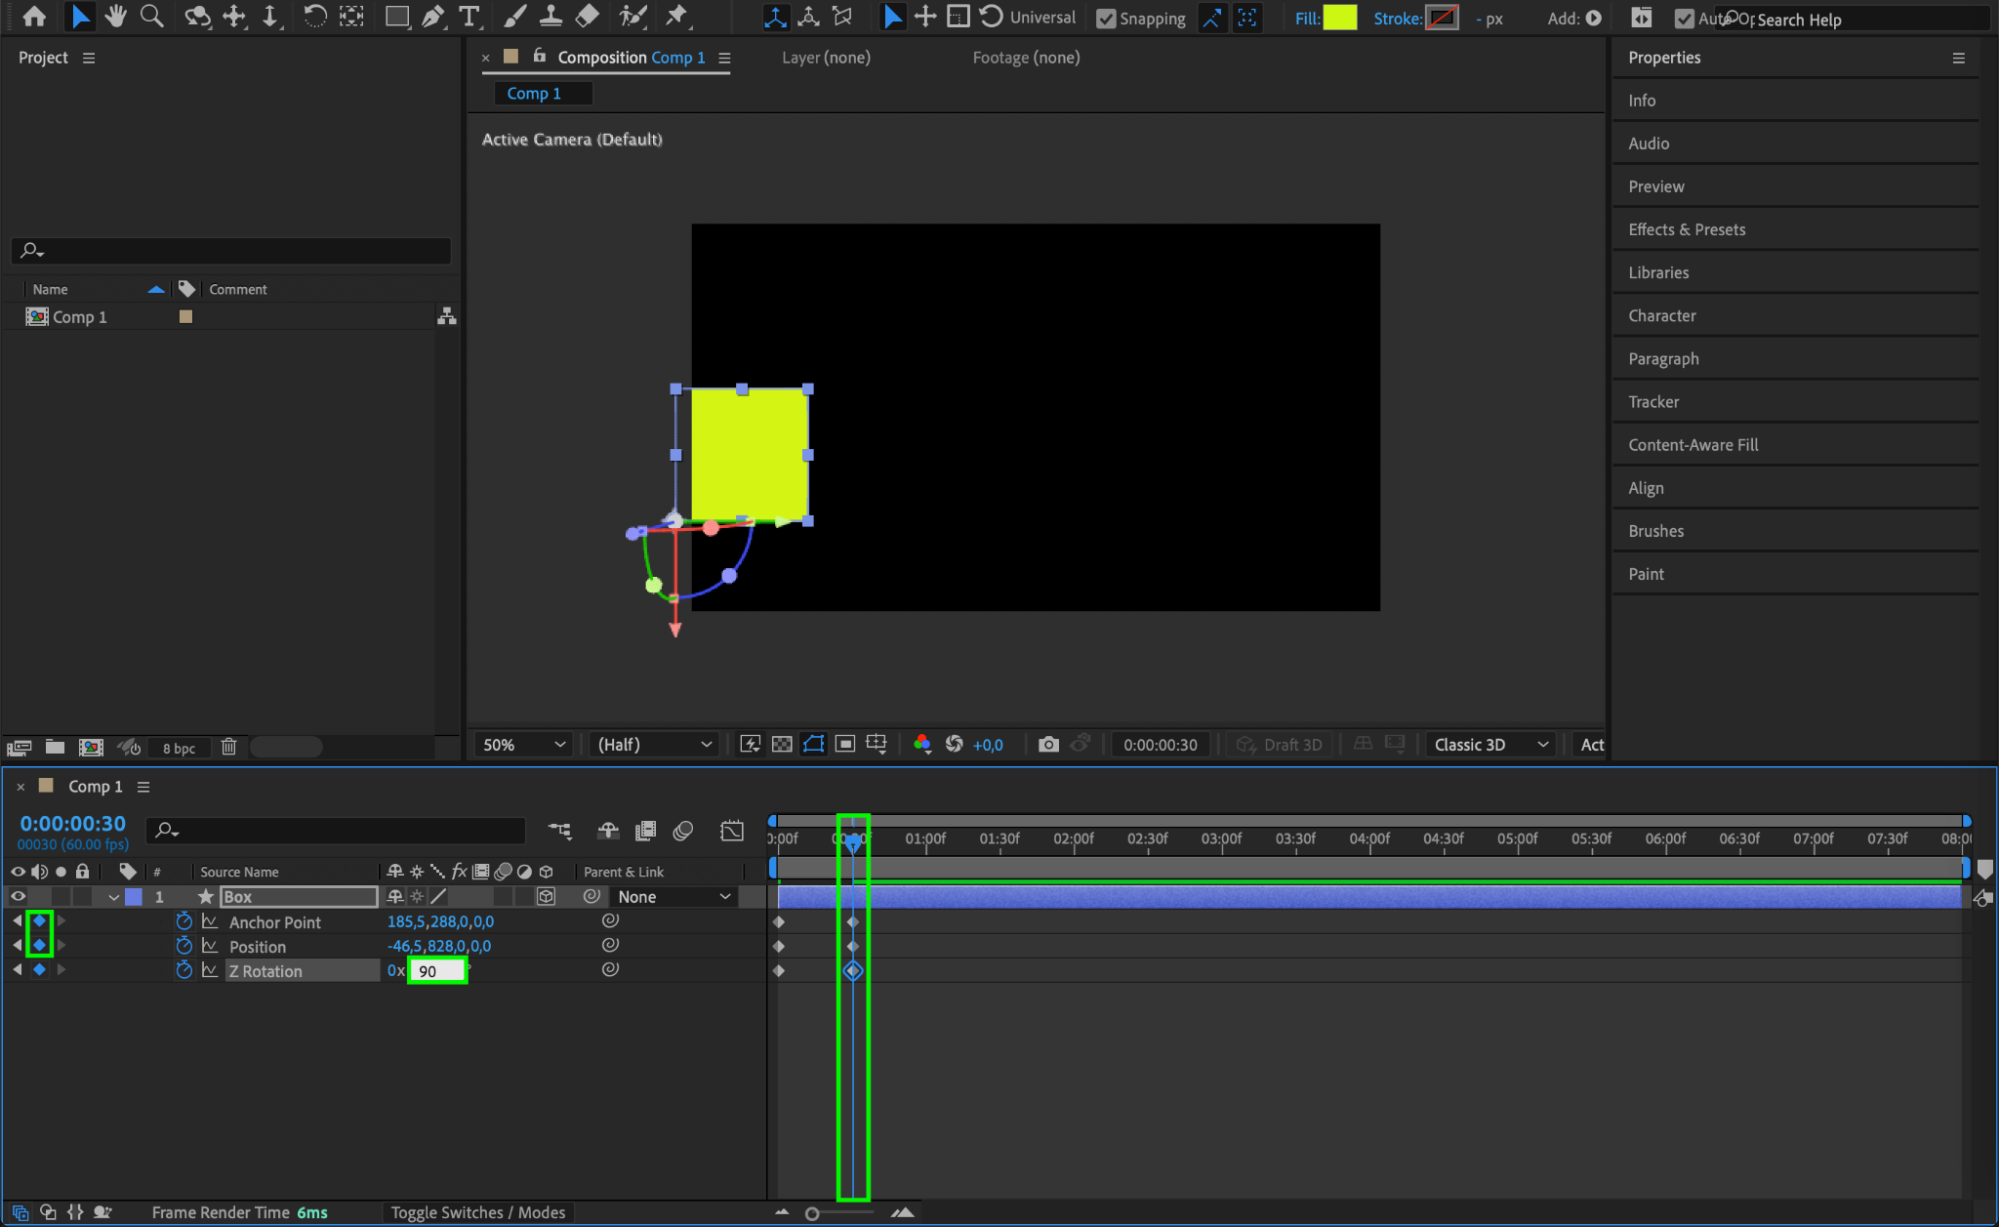 Step 7: Adjust the Anchor Point for the Next Flip
Move the CTI one frame forward. Click the diamond icon next to Position, Anchor Point, and Z Rotation to create new keyframes. Then, use the Pan Behind Tool to adjust the Y-axis anchor point, placing its base at the bottom-right corner.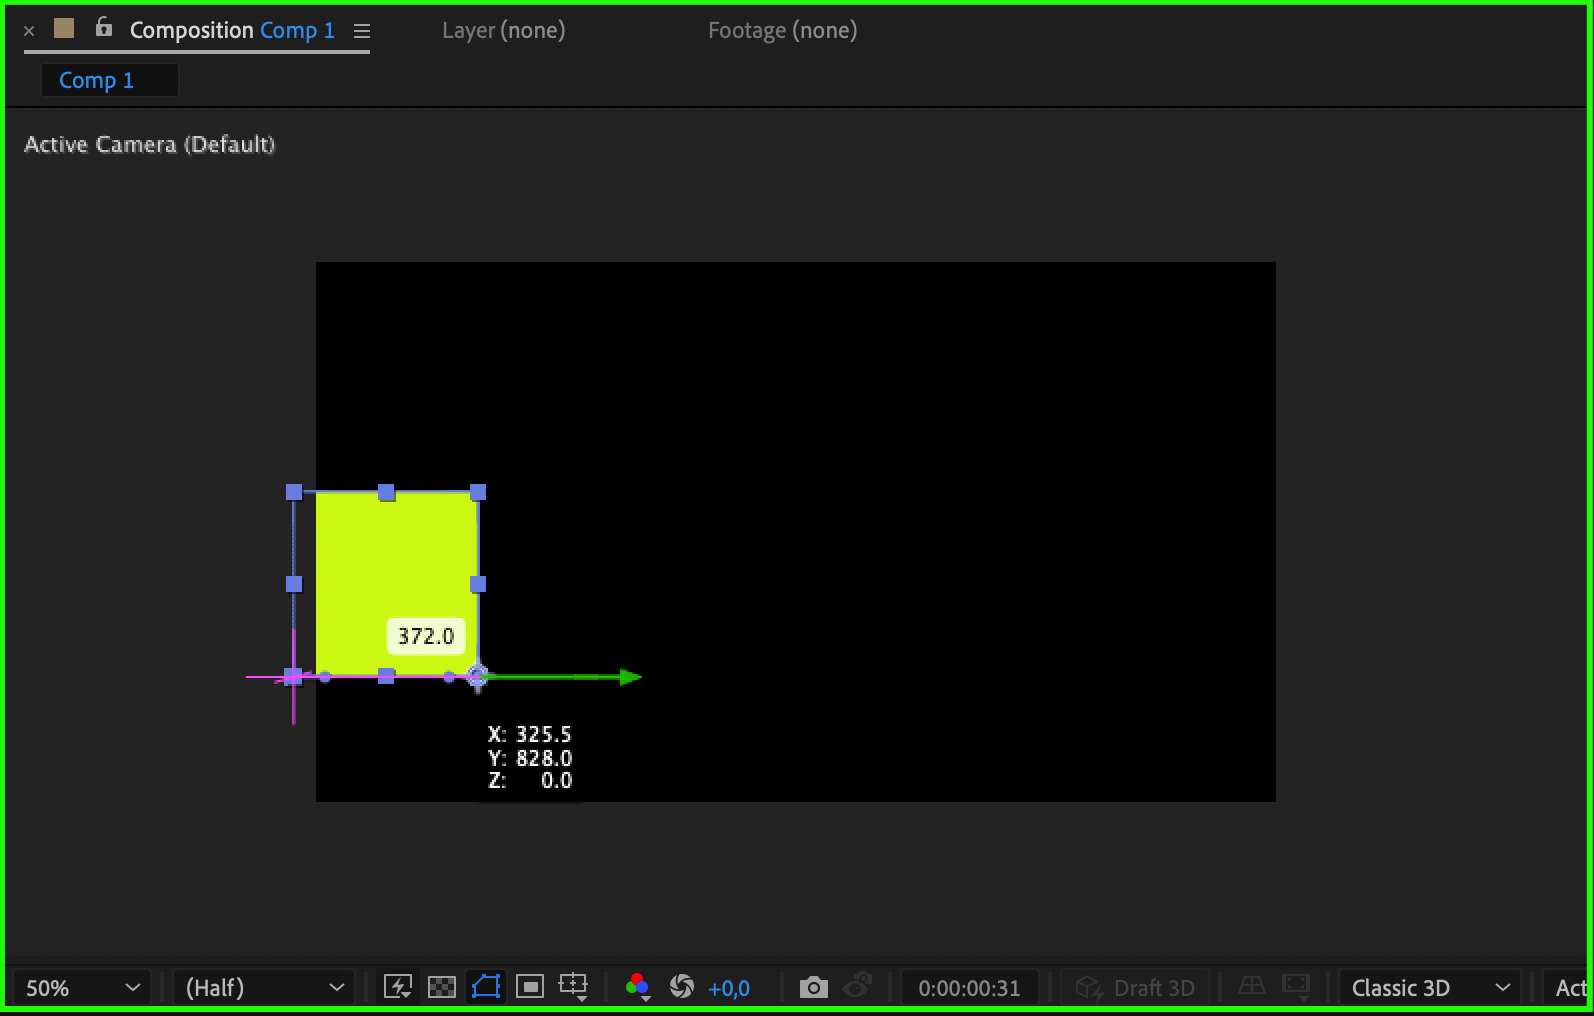
 Step 8: Continue the Rolling Animation
Move the CTI 30 frames forward again. Click the diamond icon next to Position and Anchor Point, and set Z Rotation to 180 degrees for the next step of the animation.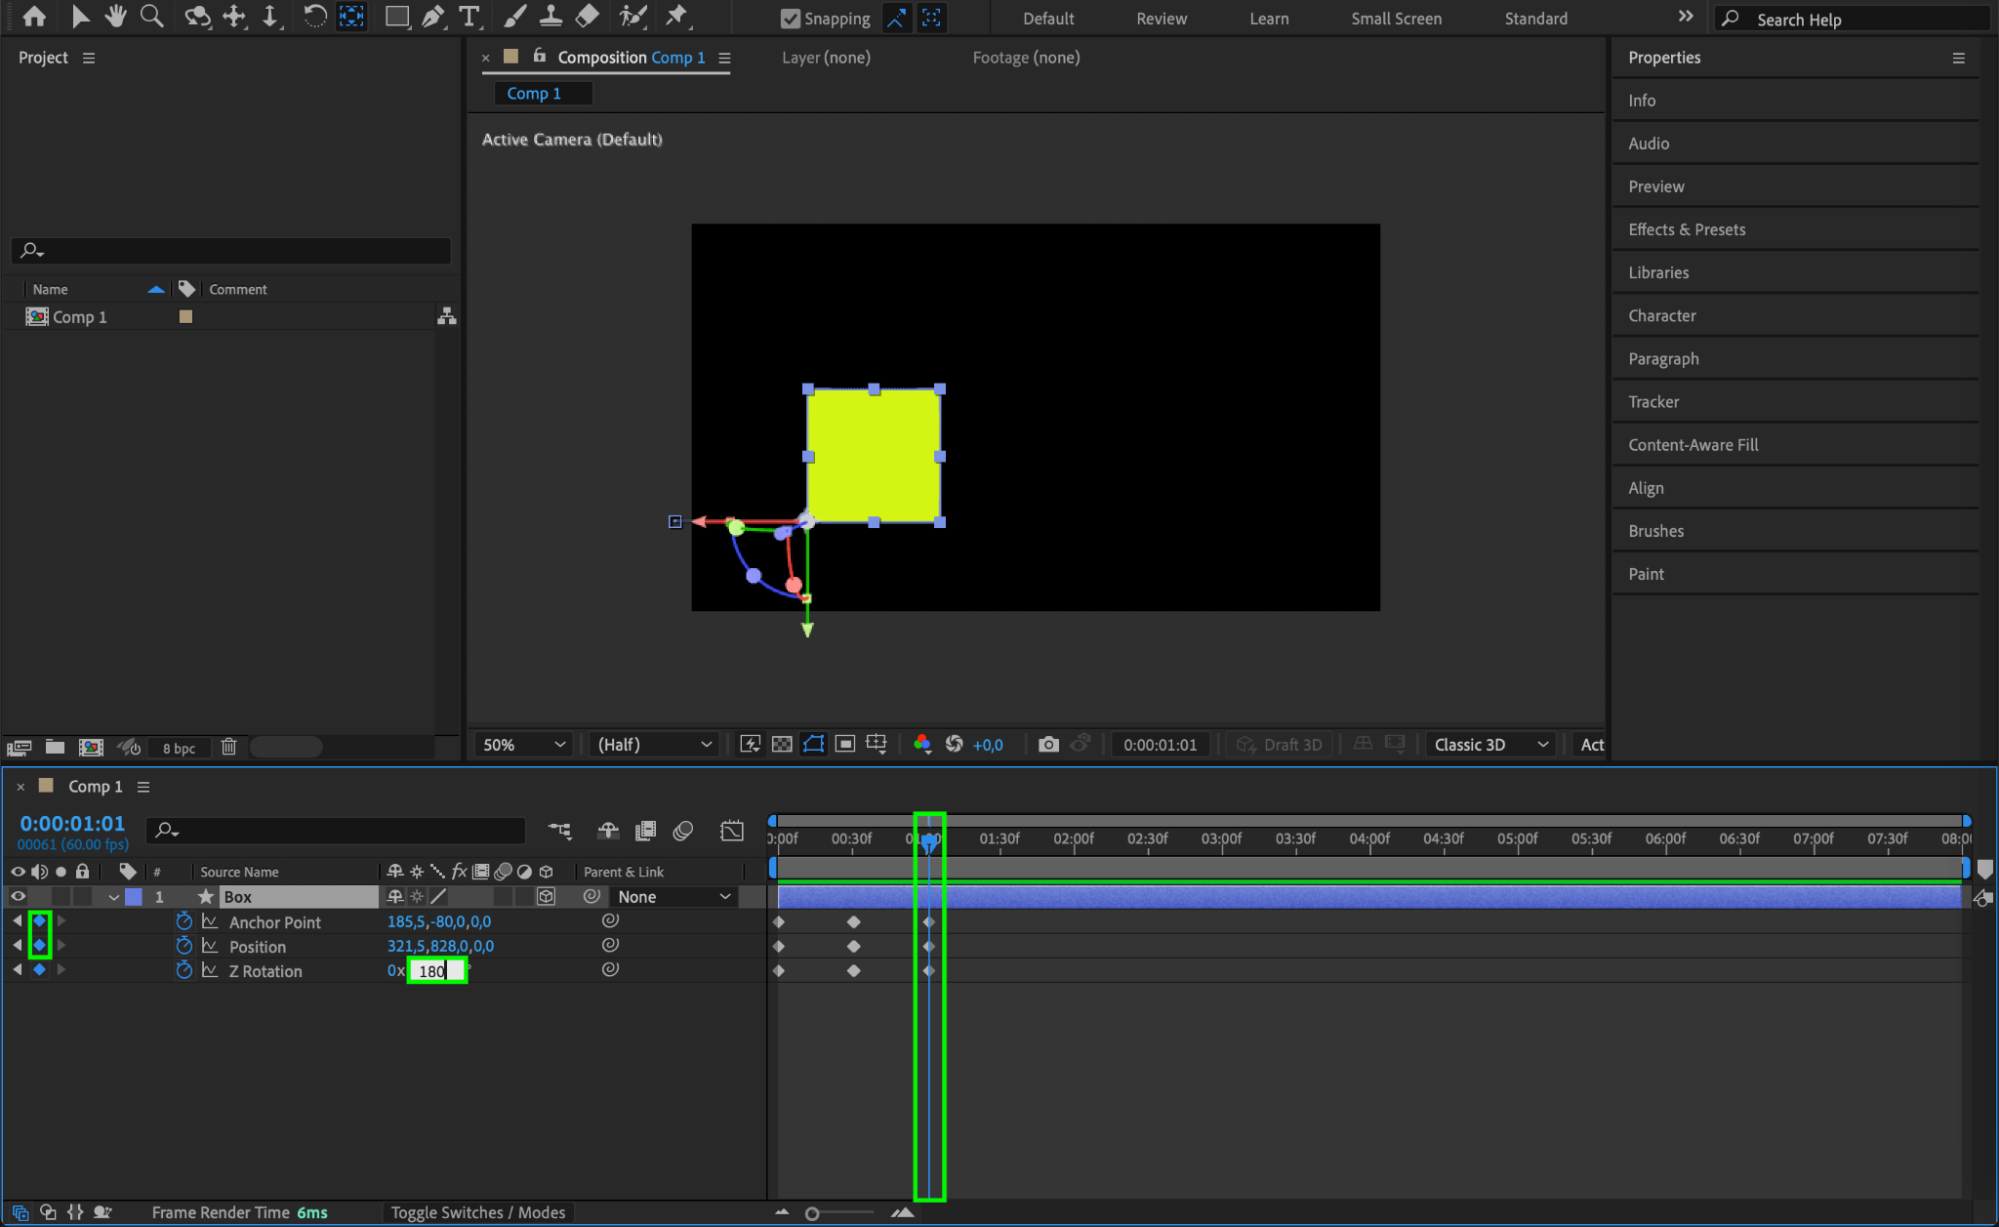 Step 9: Adjust the Anchor Point Again
Move the CTI one frame forward and create new keyframes by clicking the diamond icon next to Position, Anchor Point, and Z Rotation. Use the Pan Behind Tool to shift the X-axis anchor point, aligning its base with the bottom-right corner. Step 10: Repeat the Process
Continue repeating these steps to create a smooth rolling motion for the box across the composition.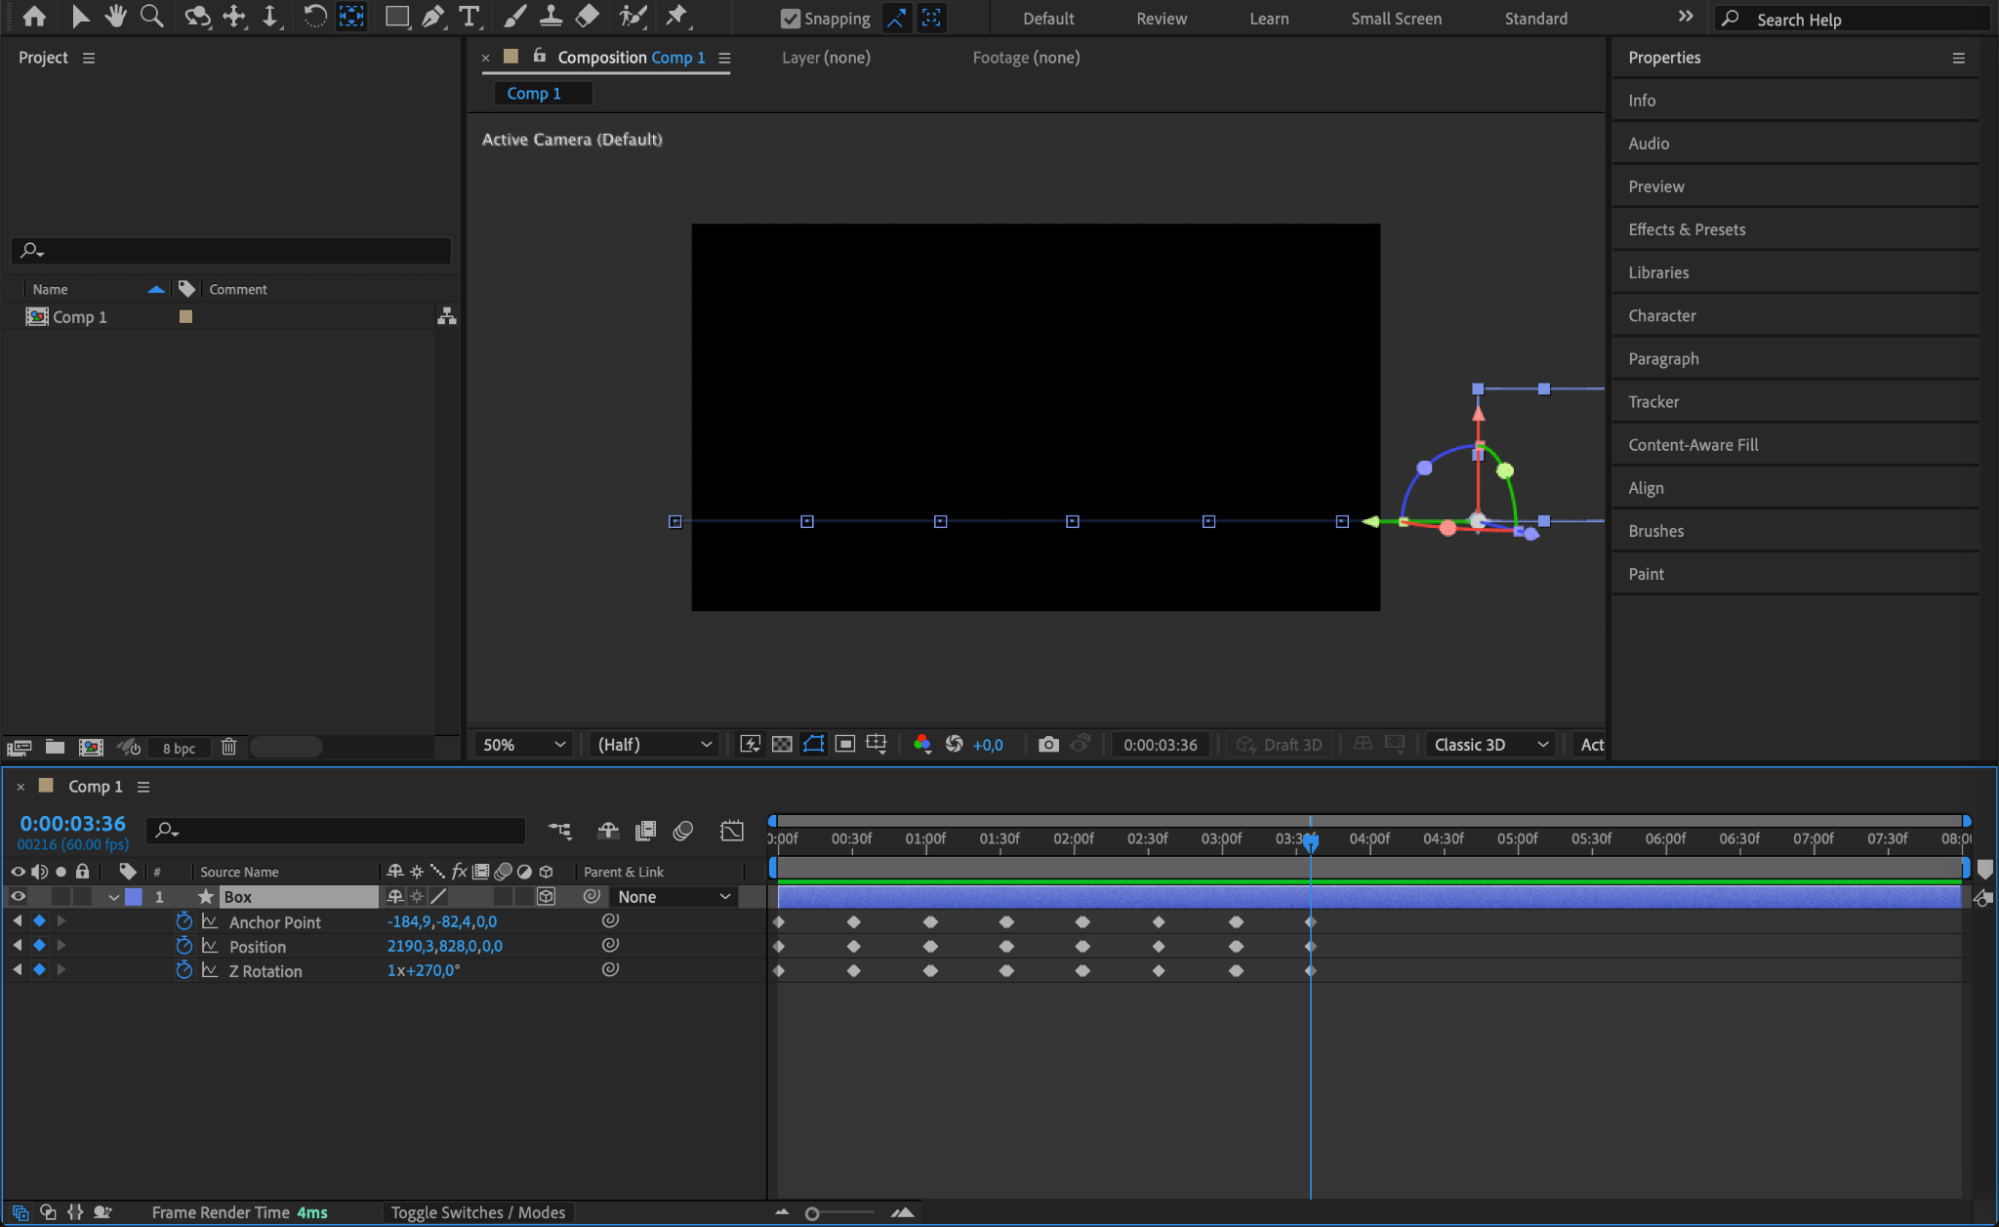 Step 11: Pre-compose the Animation
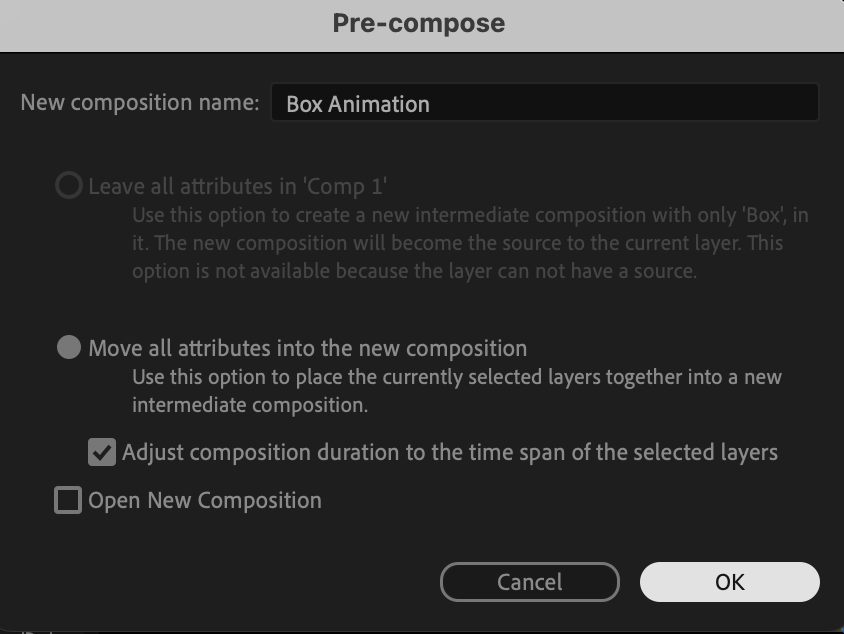
Select the animated layer and right-click on it. Choose Pre-compose to group all transformations into a single composition, making it easier to manage.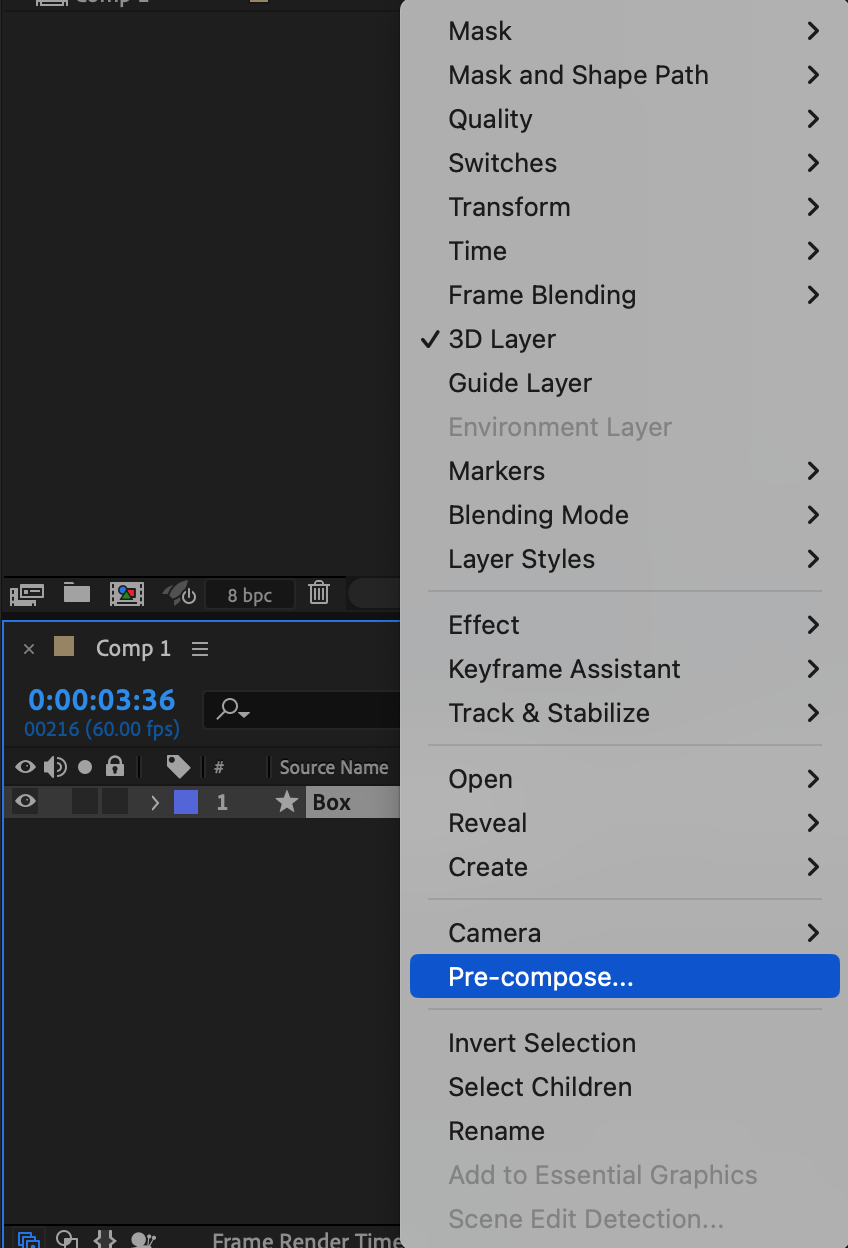
 Step 12: Enable Time Remapping
Right-click on the layer and choose Time > Enable Time Remapping to gain control over the playback speed and timing of the animation.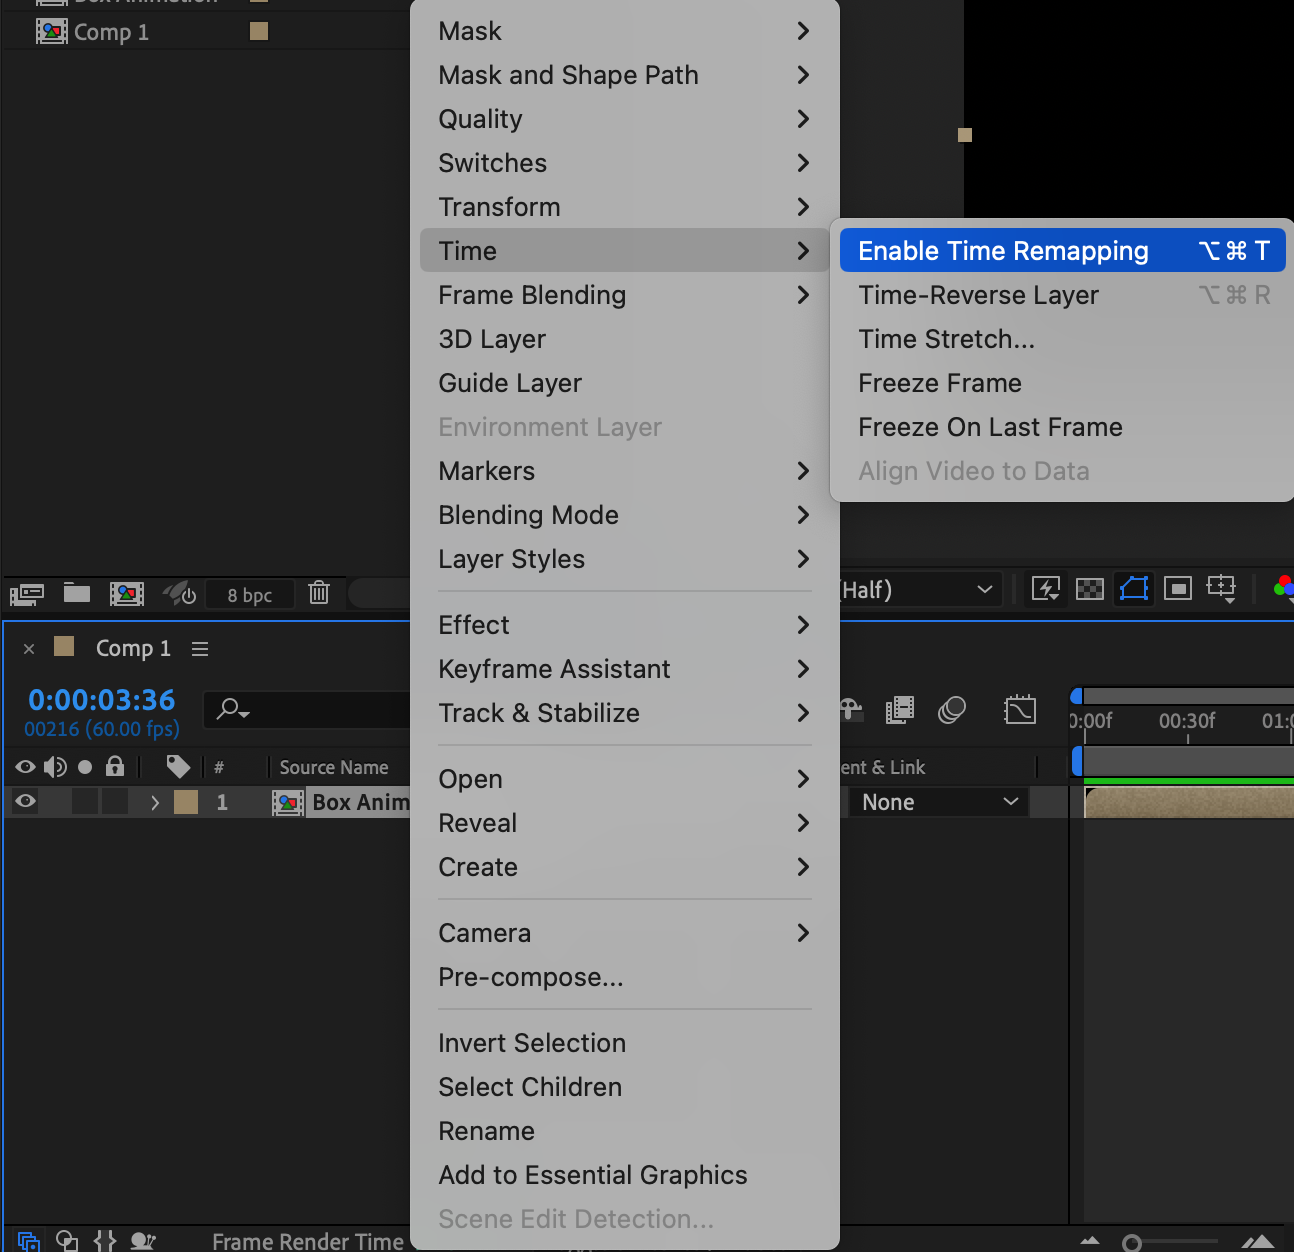 Step 13: Adjust Timing Keyframes
Move the CTI to the desired ending position of the box animation. Click the diamond icon to create a new keyframe, then delete the automatically generated final keyframe to maintain smooth movement.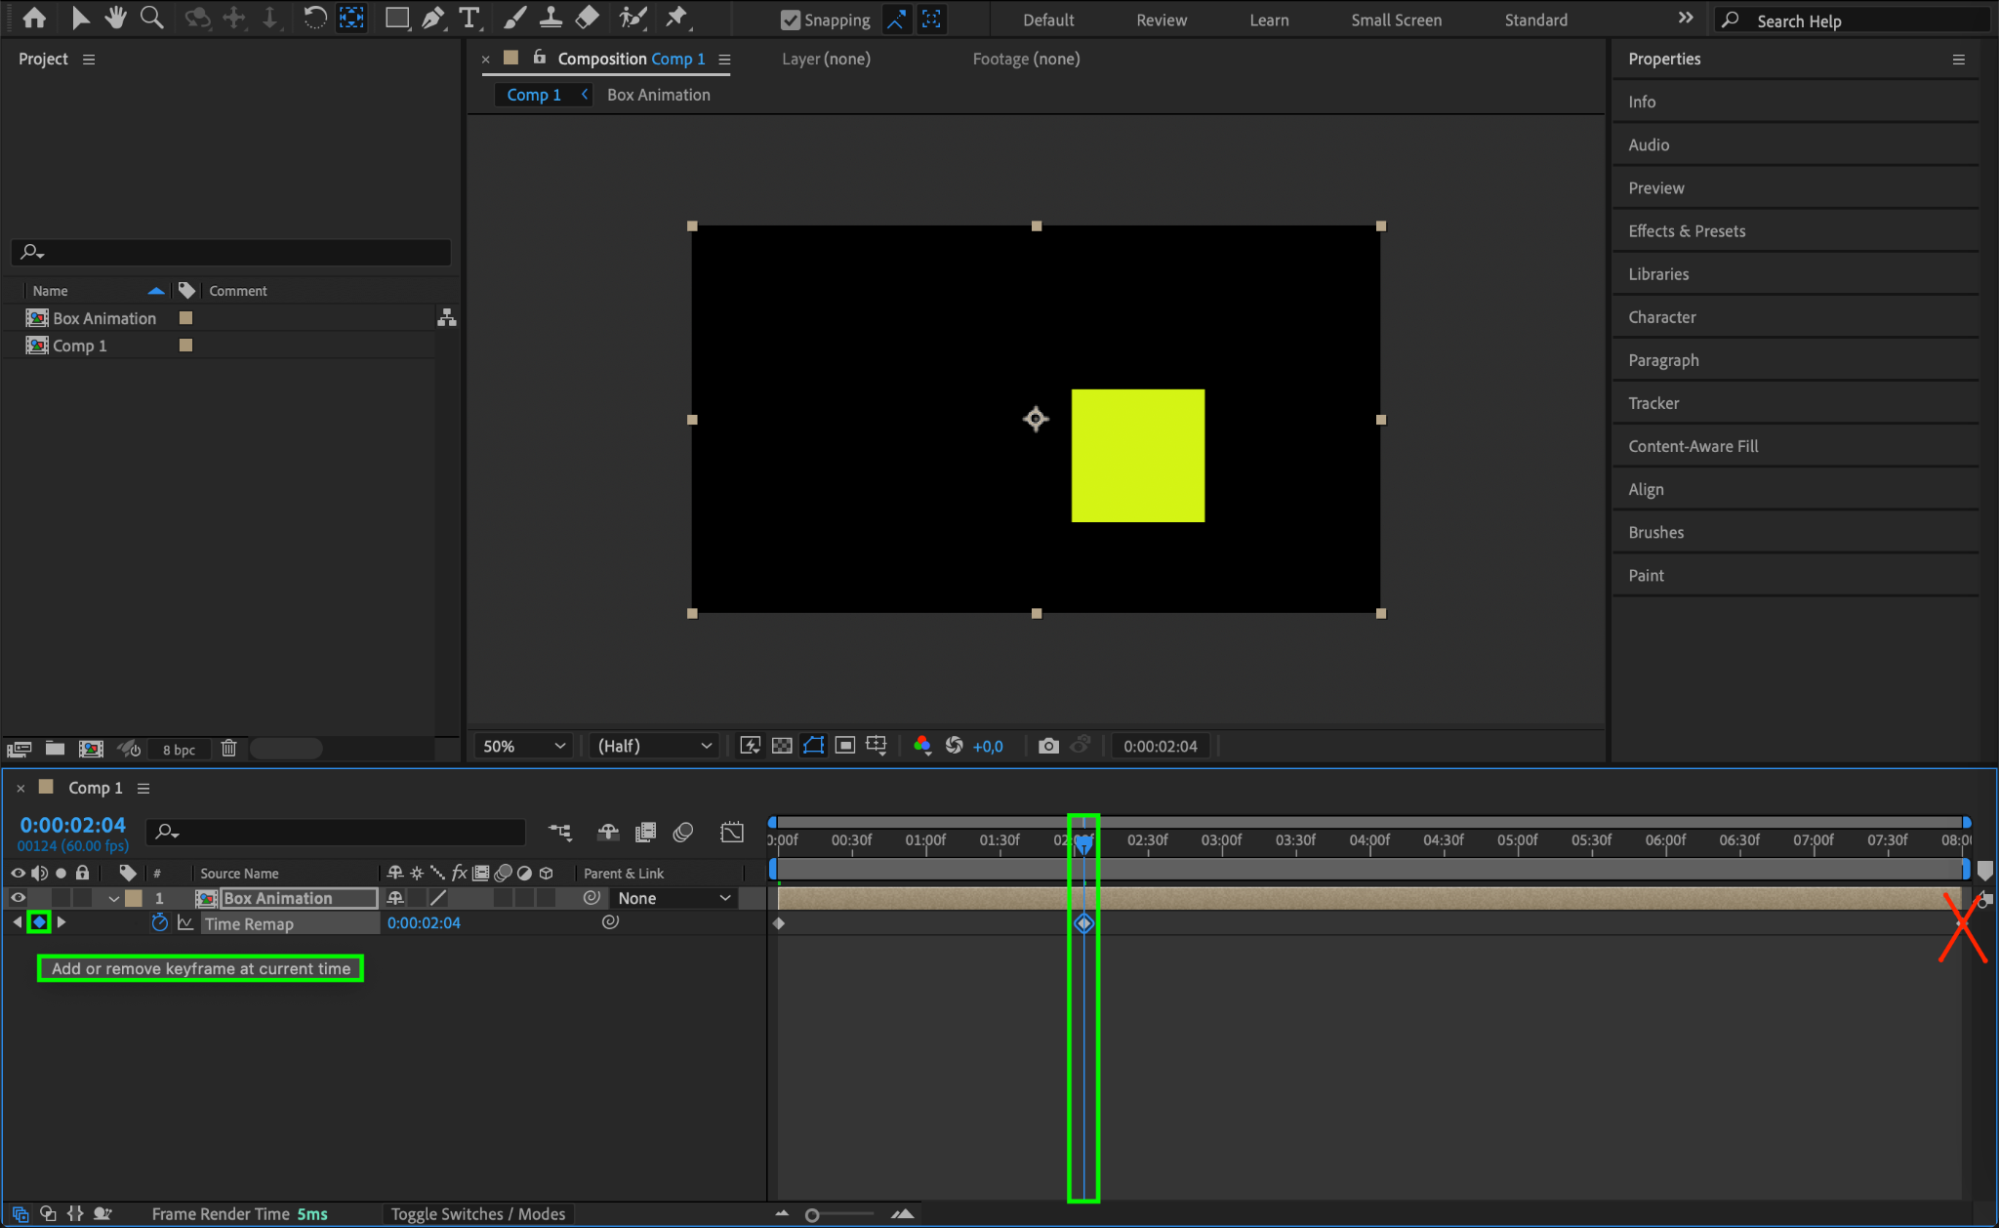 Step 14: Apply Easy Ease
Right-click the keyframes, go to Keyframe Assistant > Easy Ease to create smoother transitions between movements.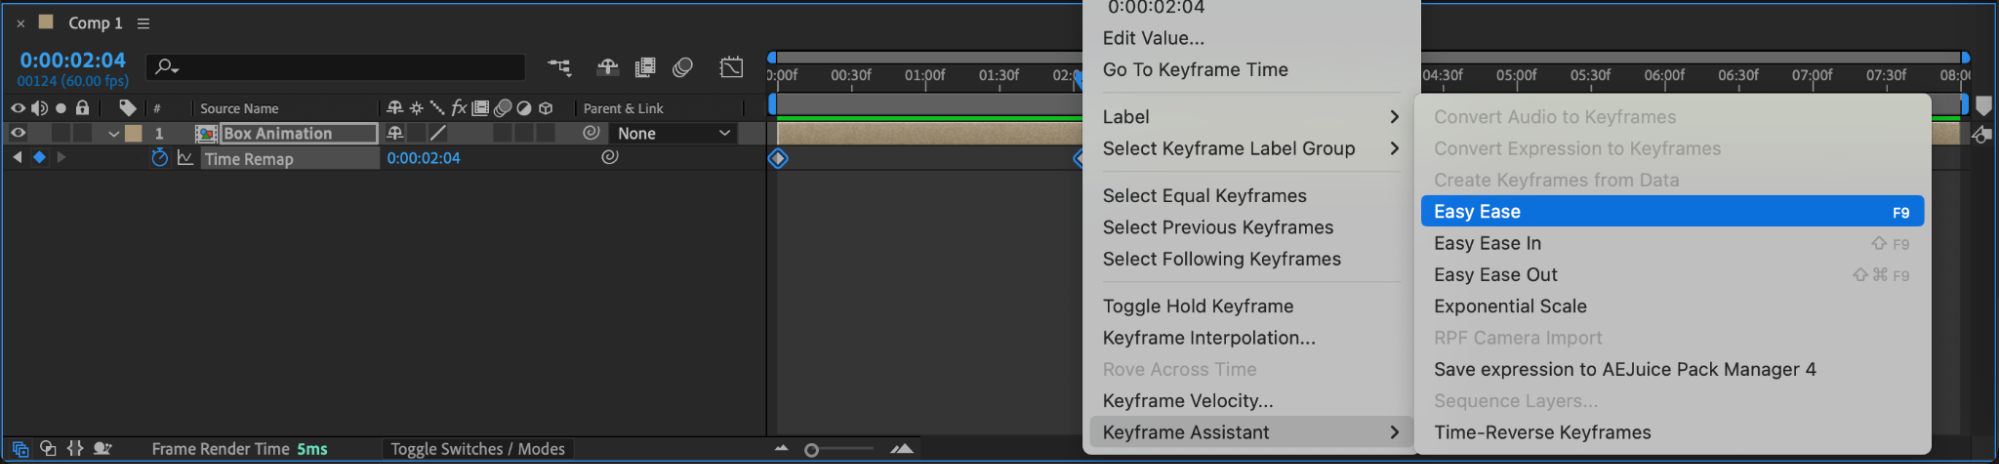 Step 15: Fine-tune in the Graph Editor
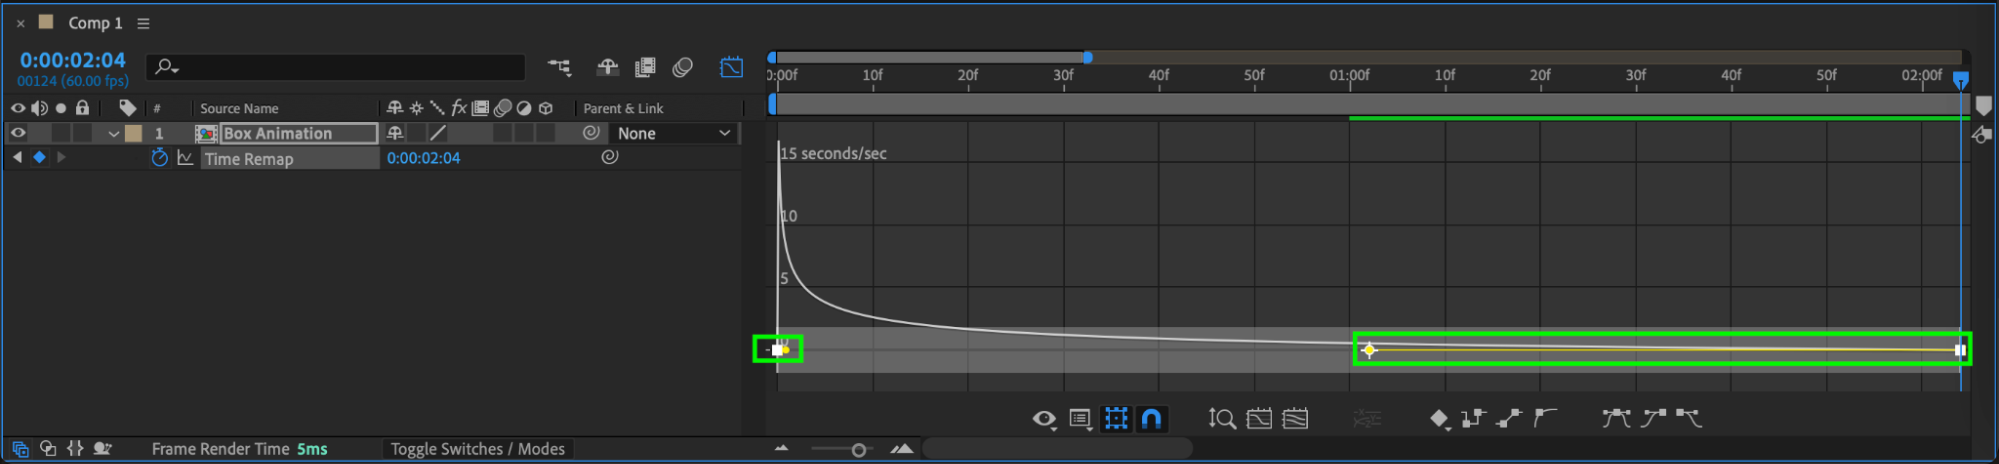
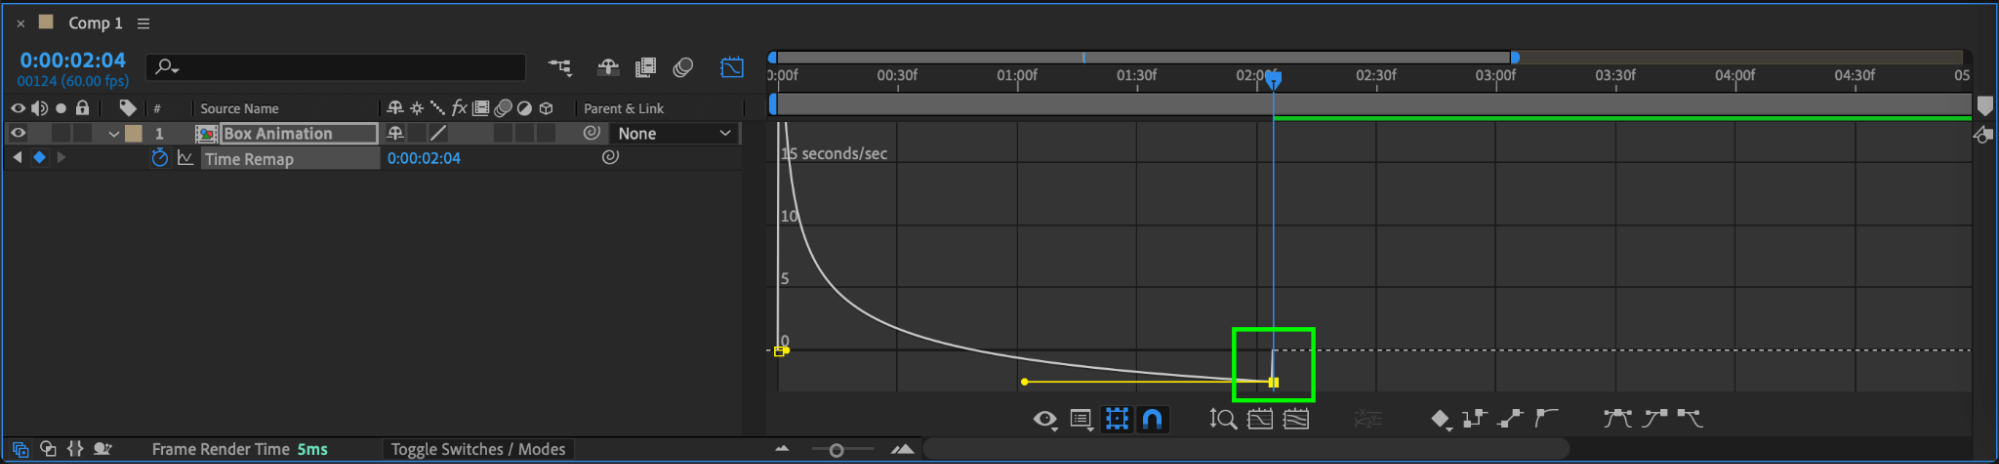
Open the Graph Editor and adjust the curves to refine motion acceleration and deceleration for a more natural animation.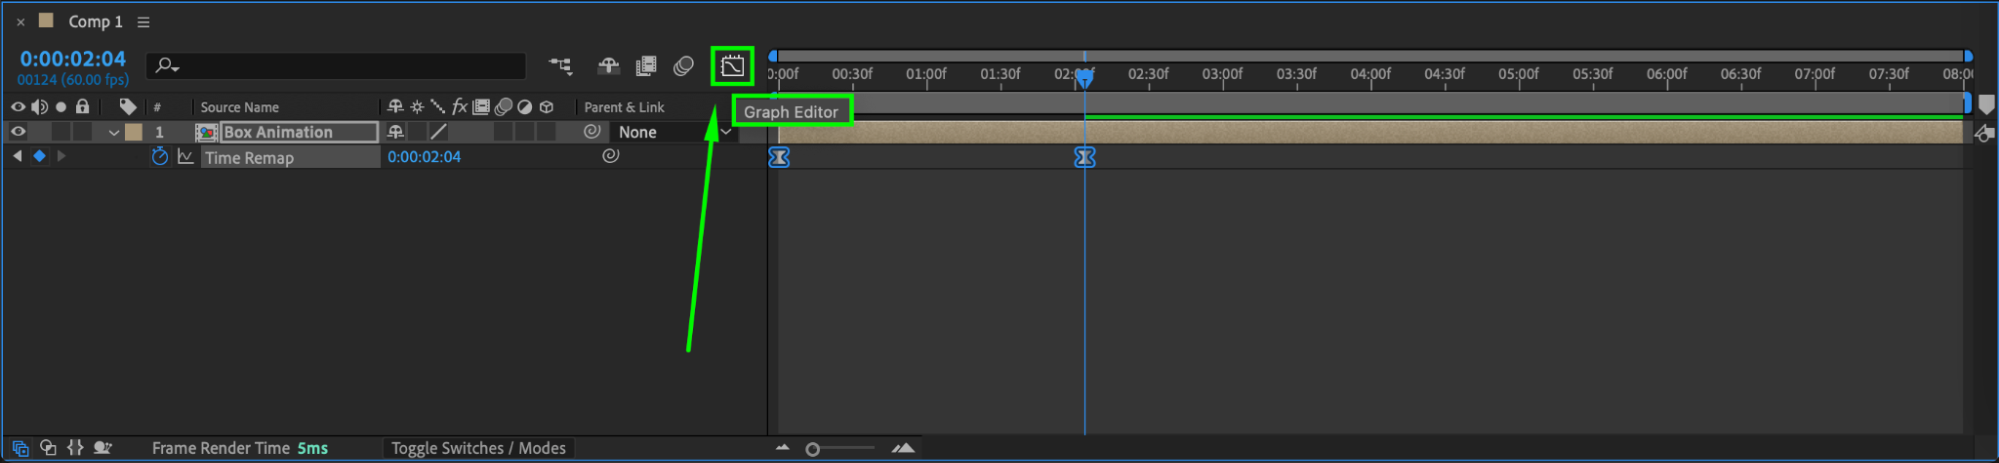
 Step 16: Enable Motion Blur
In the Timeline Panel, enable the Motion Blur checkbox for the layer to add a realistic blur effect to the animation.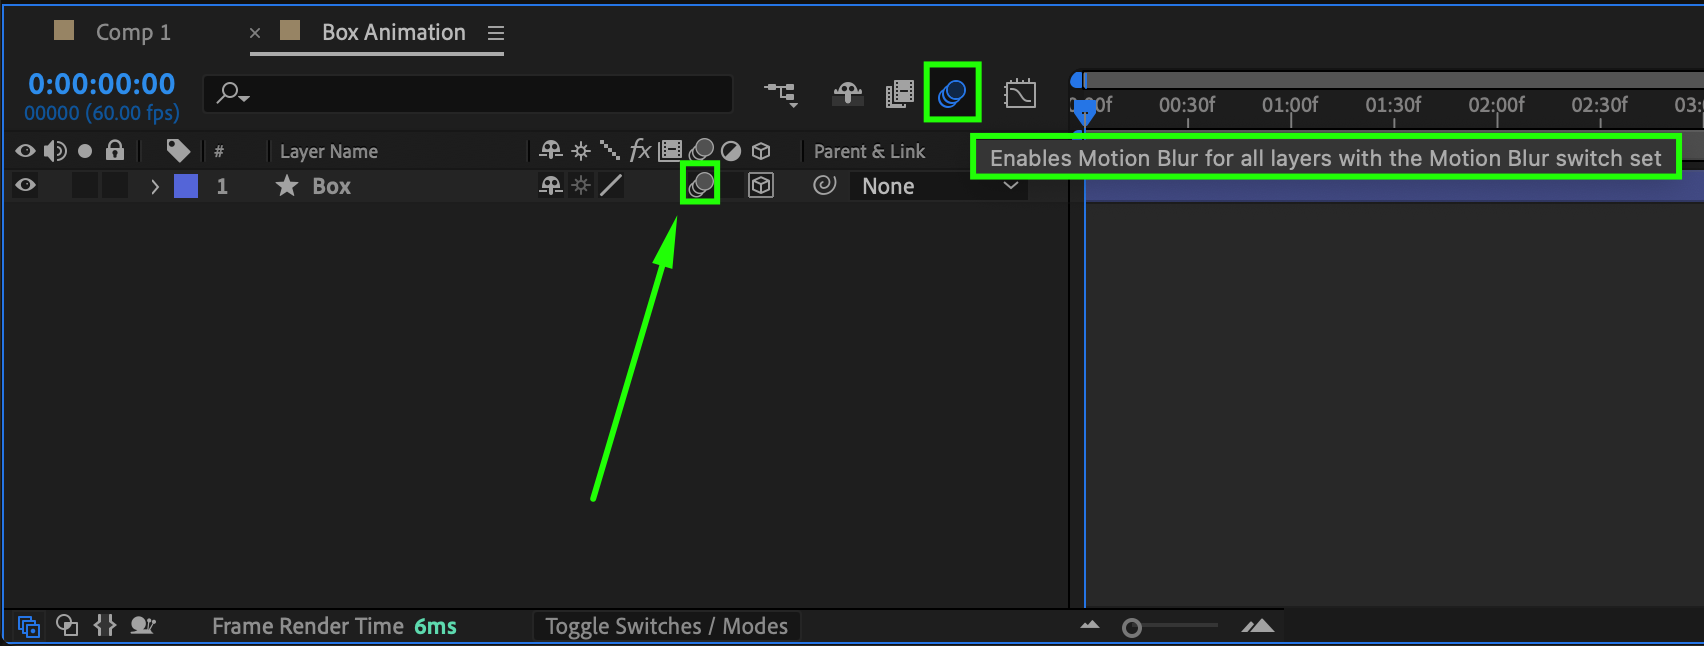 Step 17: Preview the Animation
Press the Spacebar to preview the animation and ensure the motion looks smooth and natural.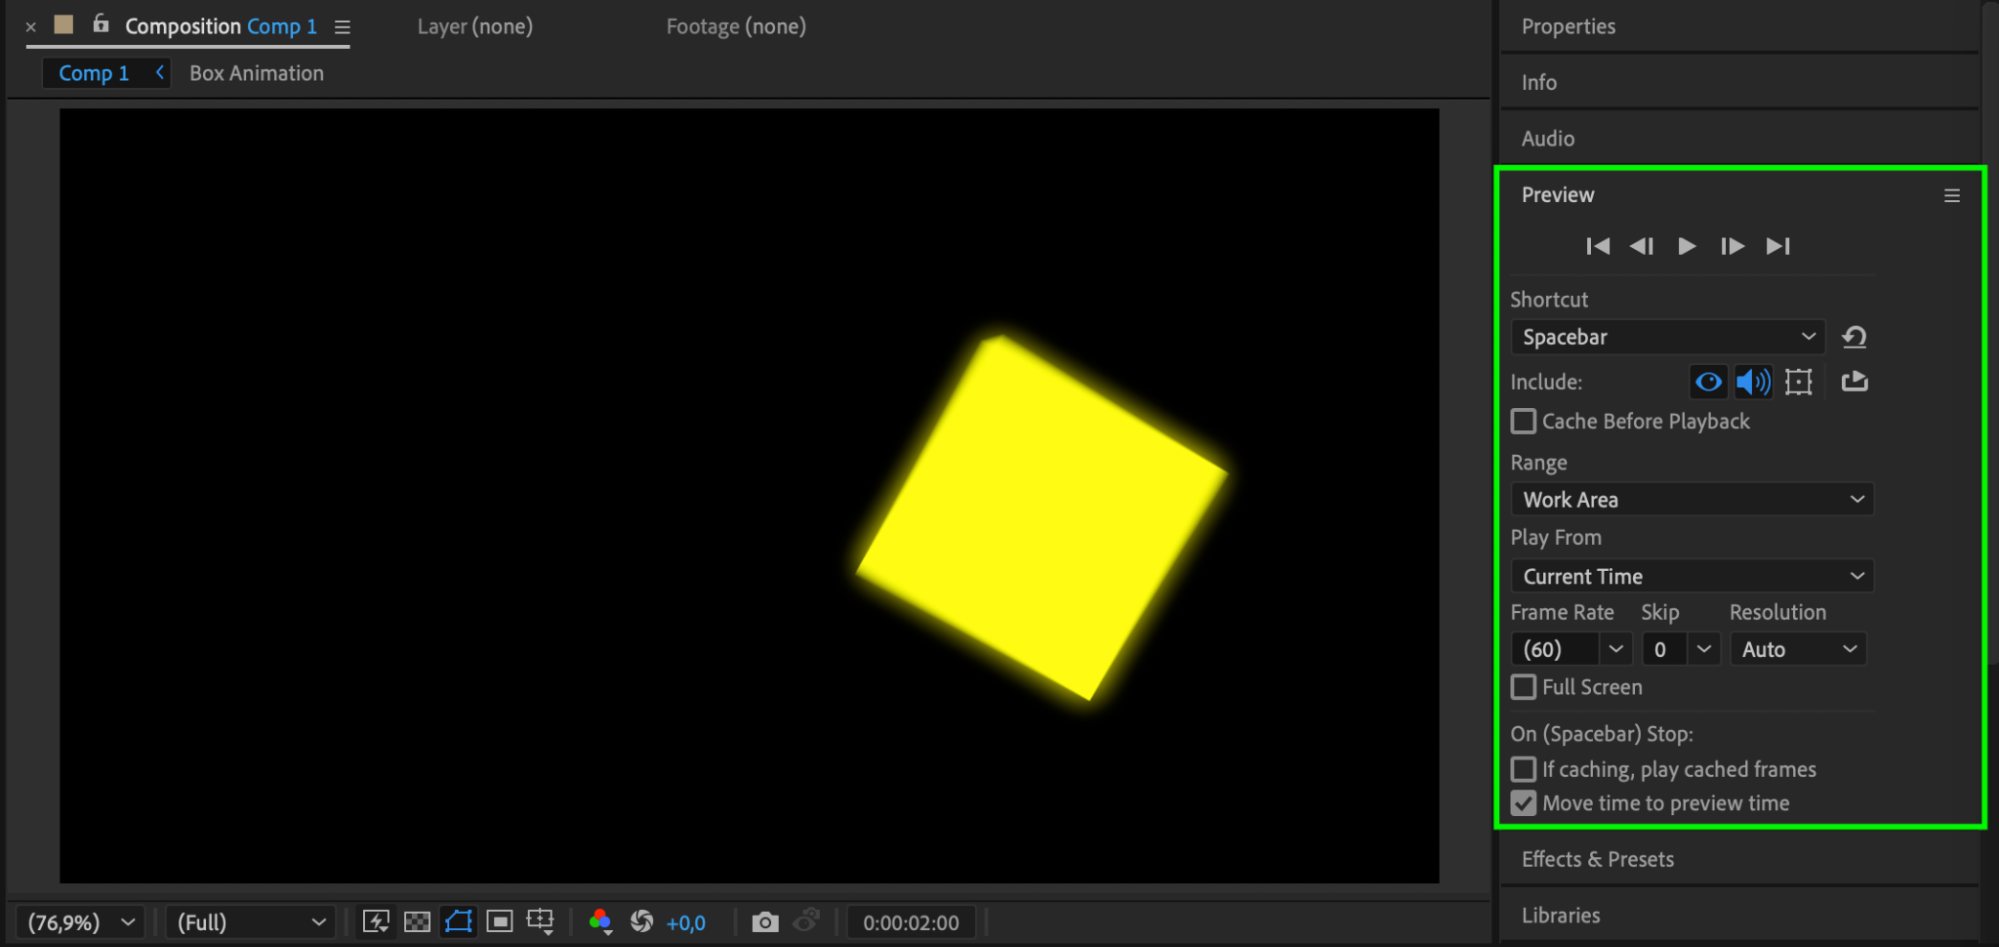 Step 18: Render the Final Animation
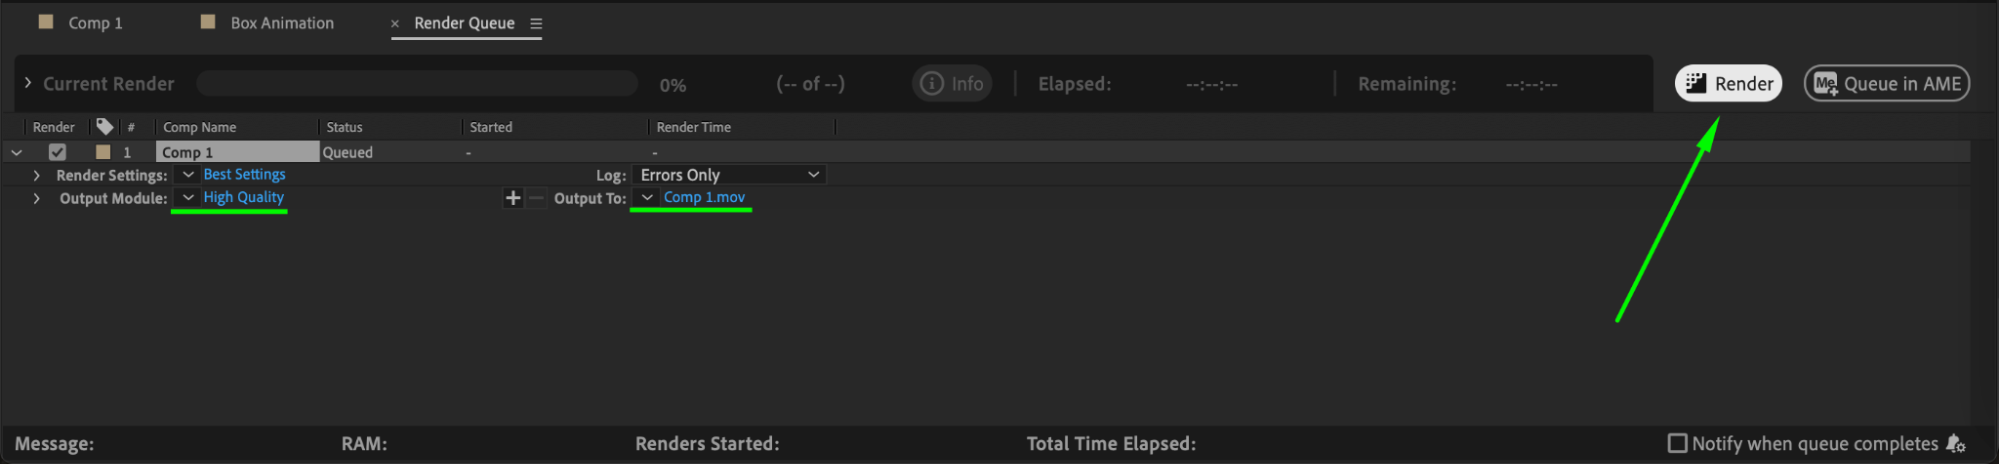
Go to Composition > Add to Render Queue, set the desired format and quality settings, and render the final animation.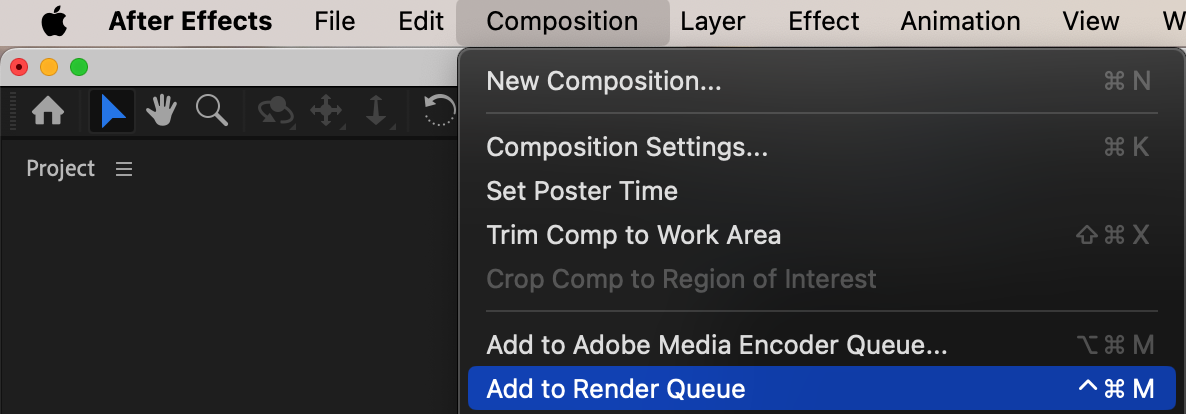
 Conclusion
Animating a box in After Effects requires careful anchor point adjustments, precise keyframe alignment, and motion blur for realistic movement. By following these steps, you can create smooth, professional-looking animations that enhance your motion graphics projects.
Our Bestsellers


