Guide to Animating Circles in After Effects
Introduction to Circle Animation in After Effects
Animating circles in After Effects is a versatile skill that can enhance your compositions, whether for creating dynamic motion graphics, icons, or visual effects. In this guide, we’ll cover step-by-step instructions on how to animate a circle with smooth movements and custom effects. We’ll explore the Shape Tool, keyframing techniques, and customization options to make your animations come to life.
Step 1: Create a New Composition
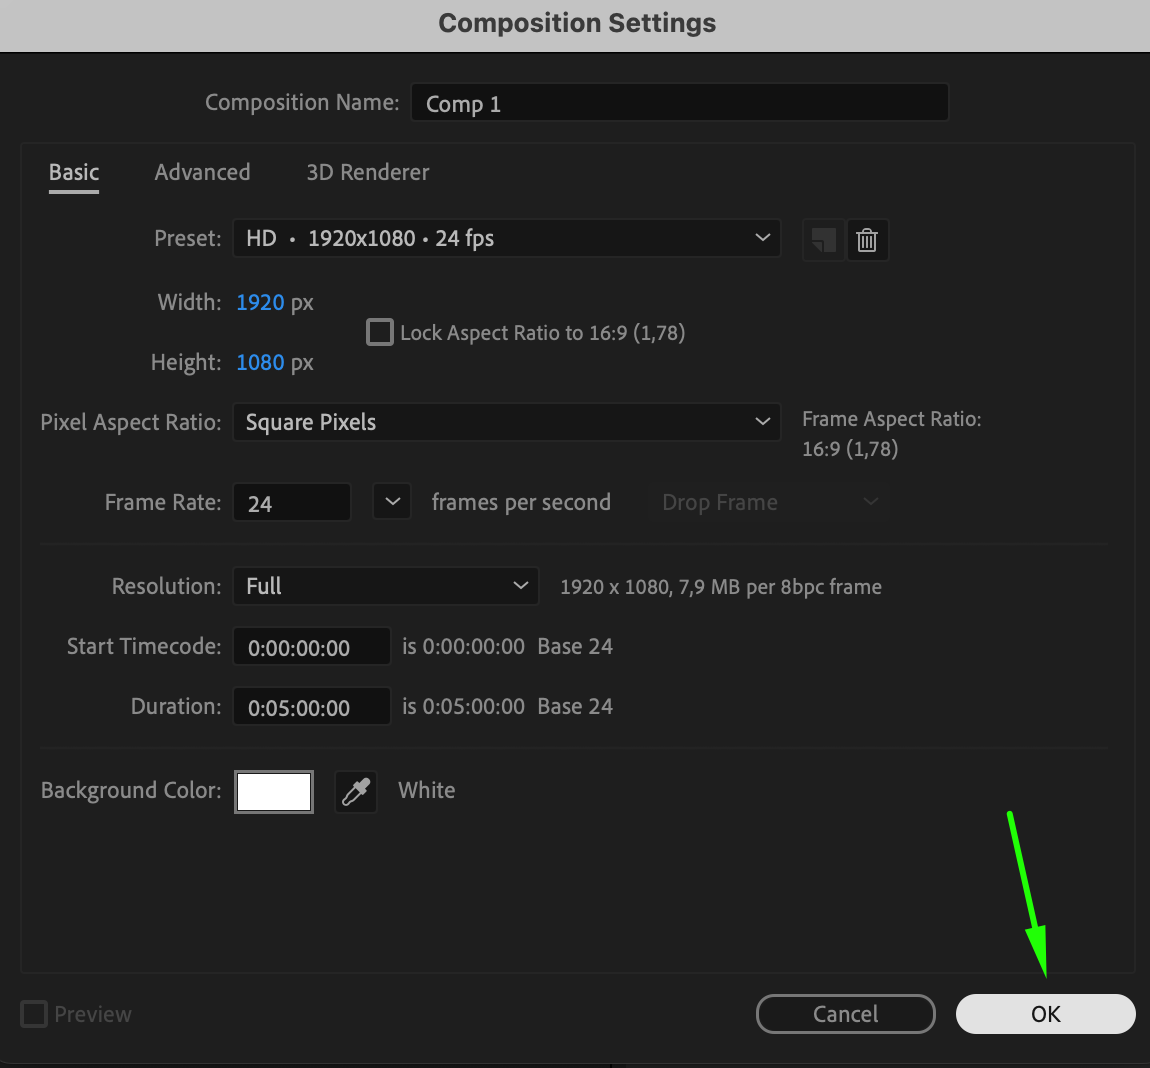
Start by creating a new composition. Go to Composition > New Composition and set your desired dimensions and duration. This will be the canvas for your circle animation. Adjust the frame rate if you want smoother animation; generally, 24 or 30 frames per second work well for most projects.
 Step 2: Draw a Circle with the Ellipse Tool
Select the Ellipse Tool from the toolbar or use the shortcut “Q”. Click and drag on the composition panel to create a circle. If you want a perfect circle, hold down the “Shift” key while drawing. Once created, rename the layer “Circle” by clicking on it and pressing Enter. This keeps your timeline organized.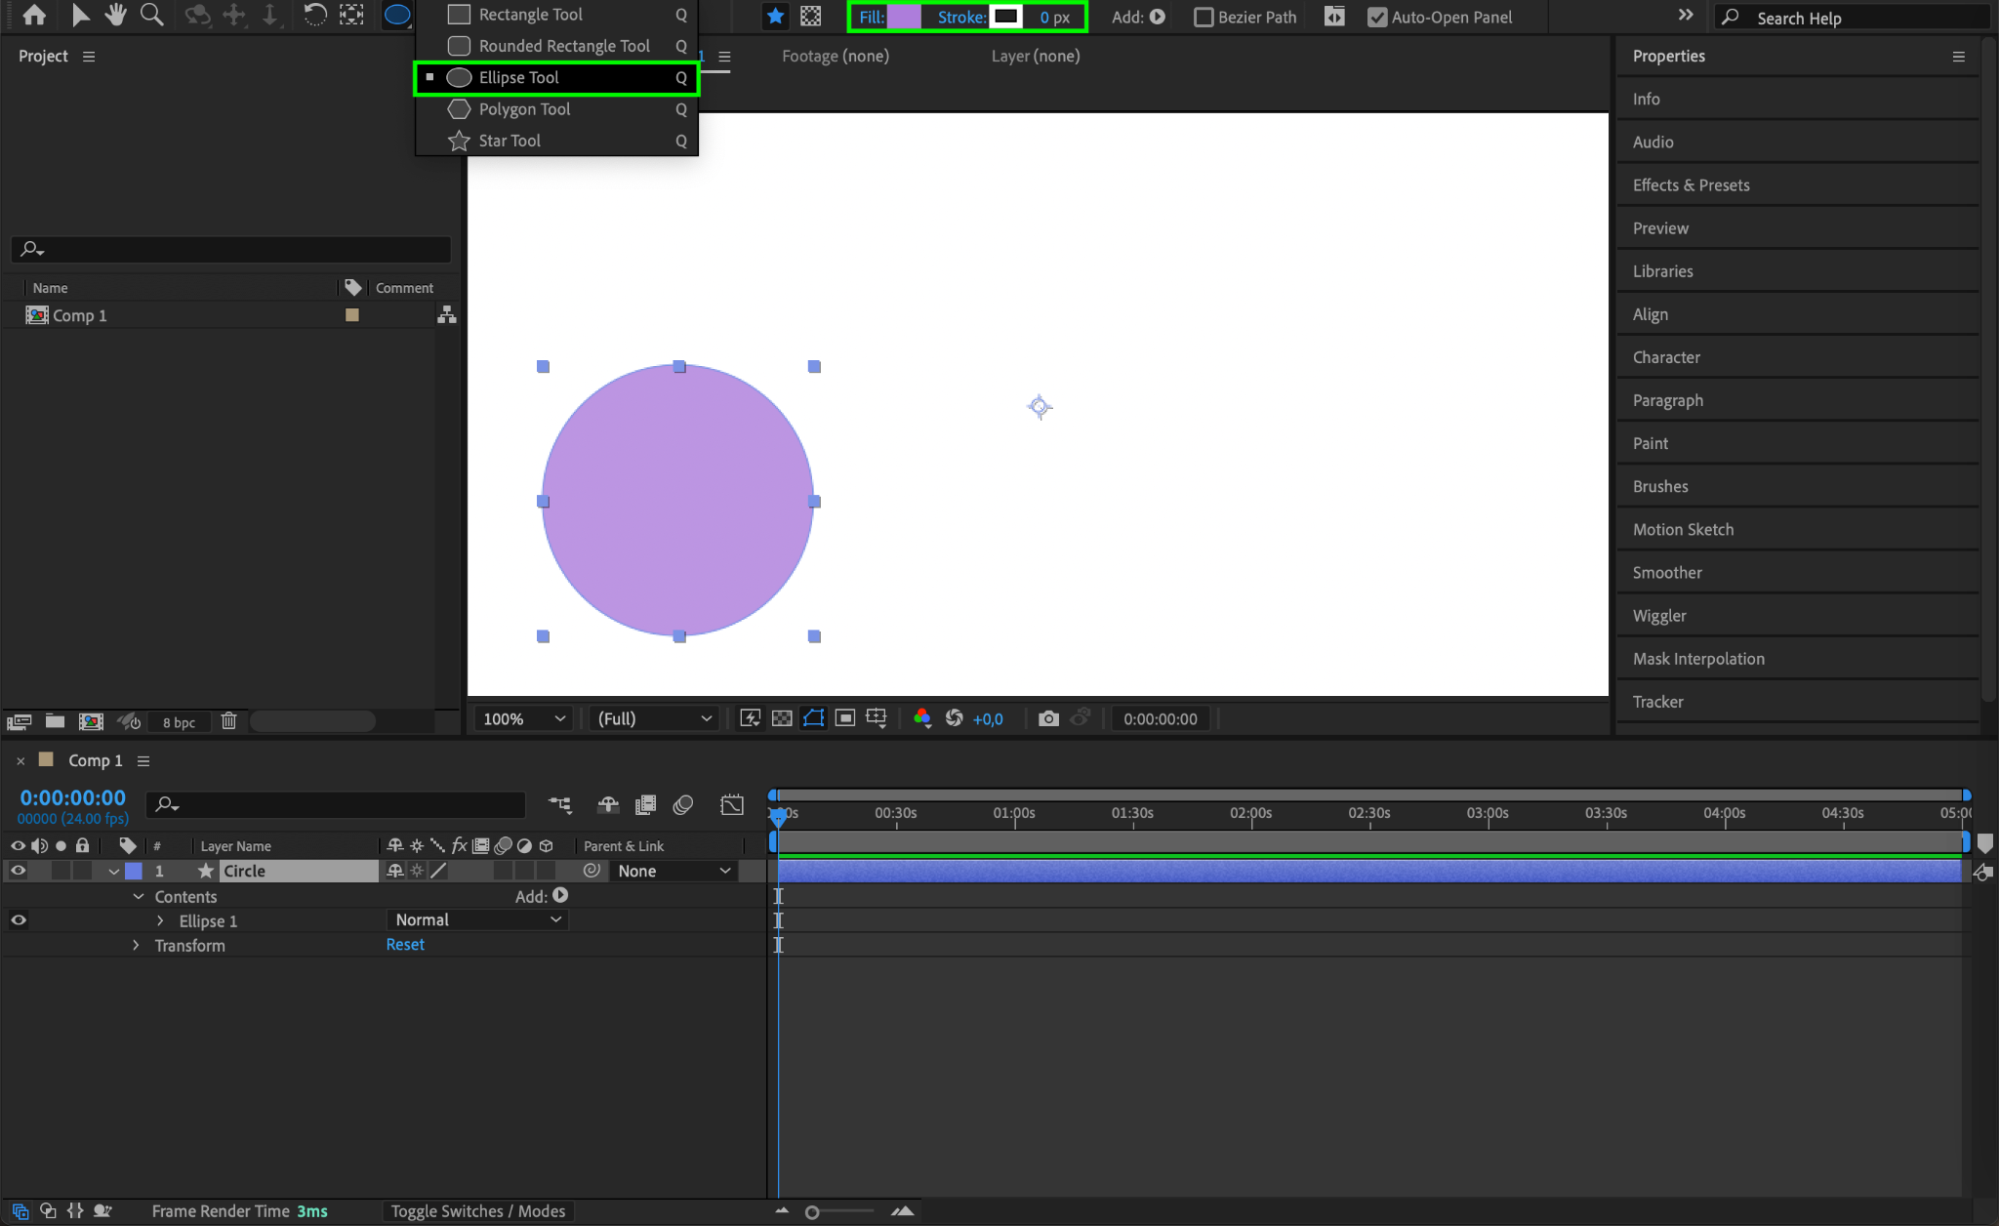 Step 3: Center the Anchor Point
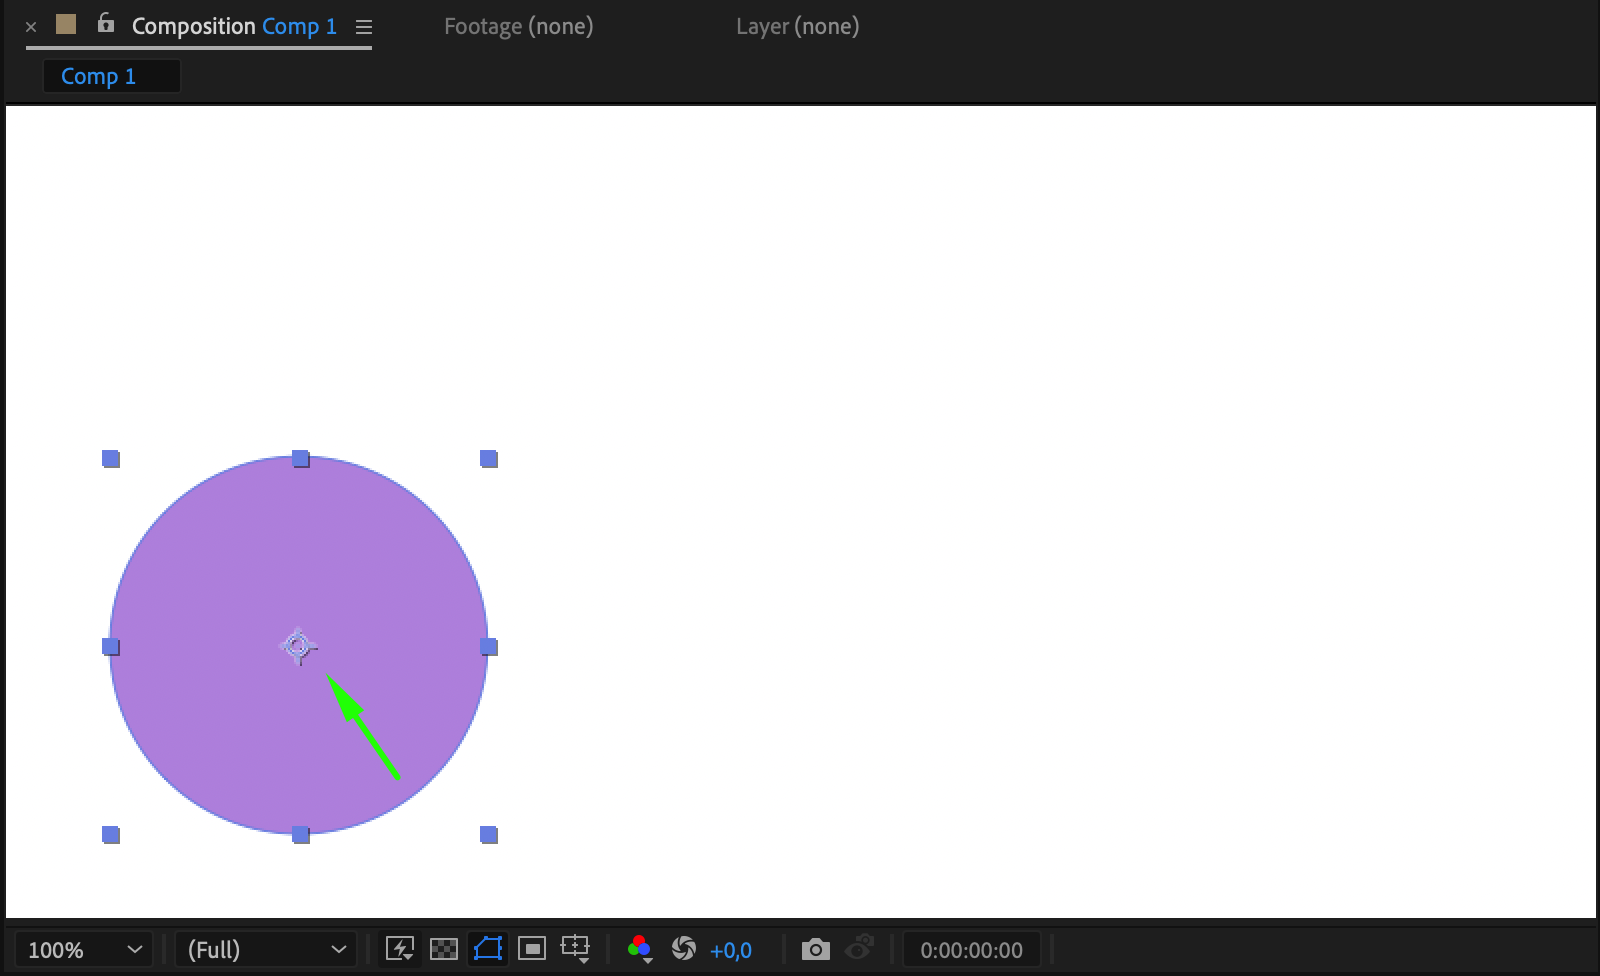
To animate the circle smoothly, ensure the anchor point is centered. With the circle layer selected, go to Layer > Transform > Center Anchor Point in Layer or press “Ctrl/Cmd + Alt + Home”. This centers the anchor point, allowing for more balanced rotation and scaling animations.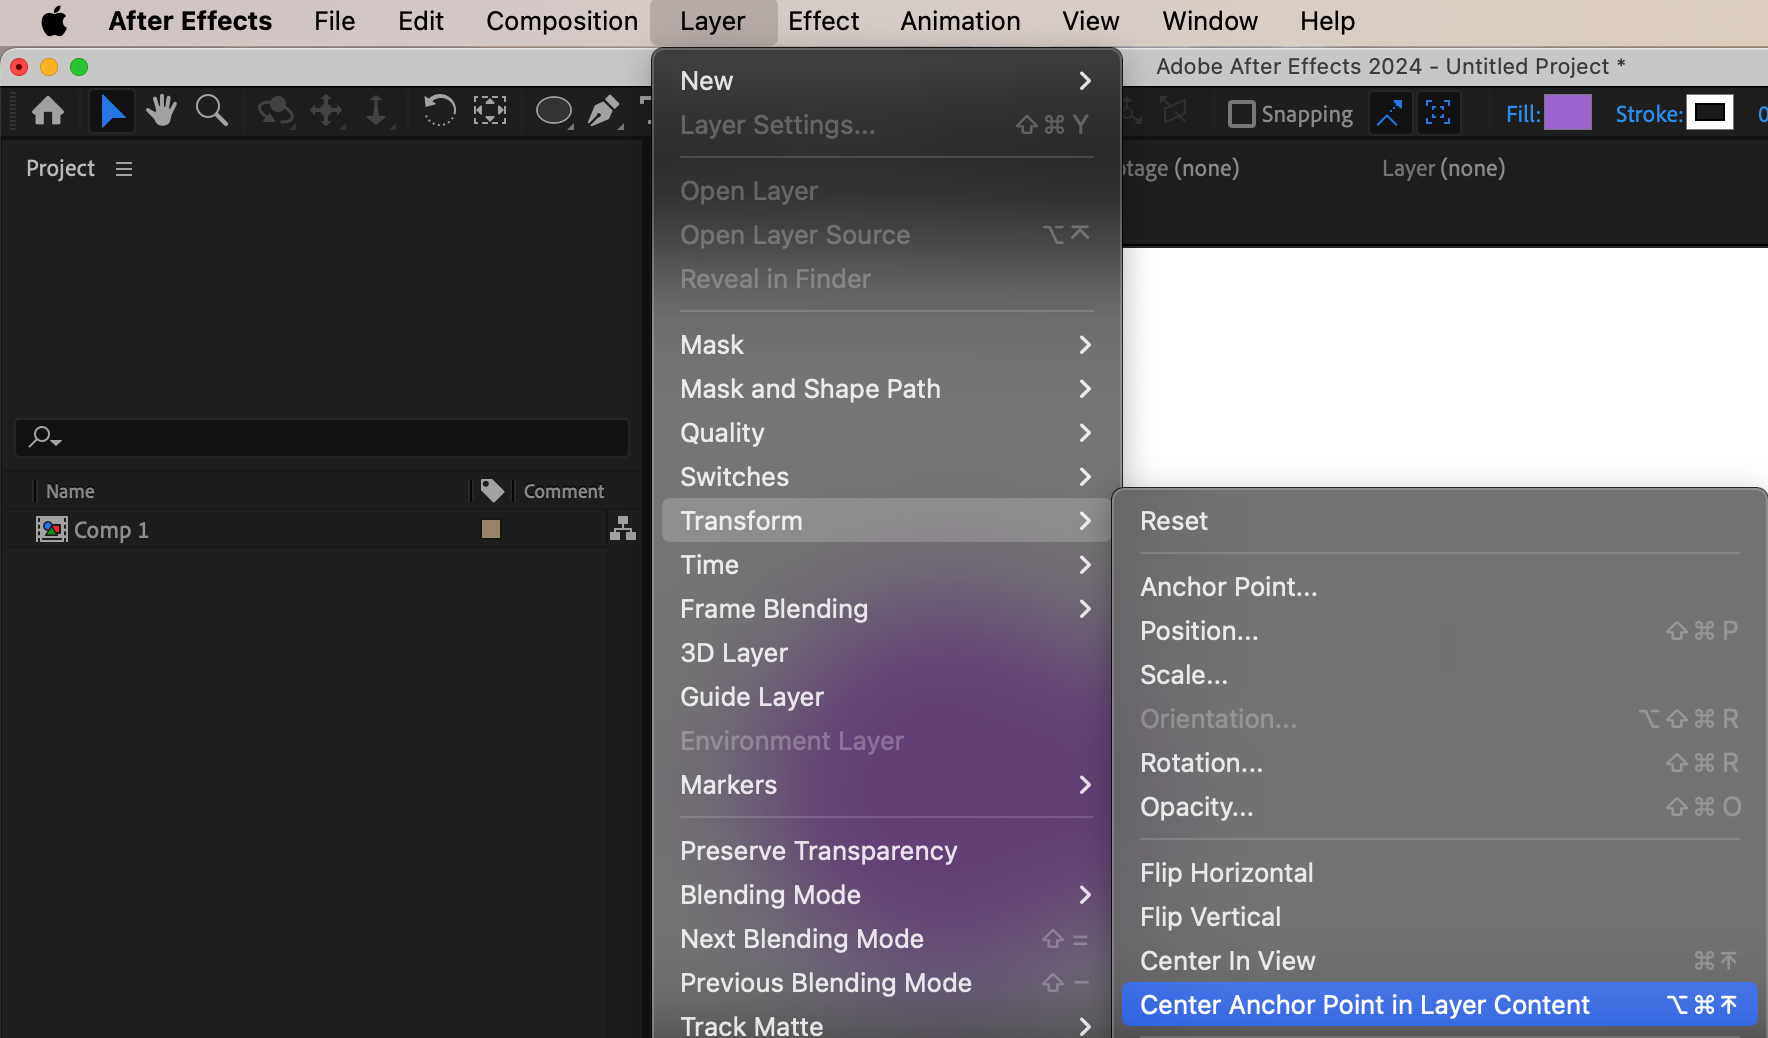
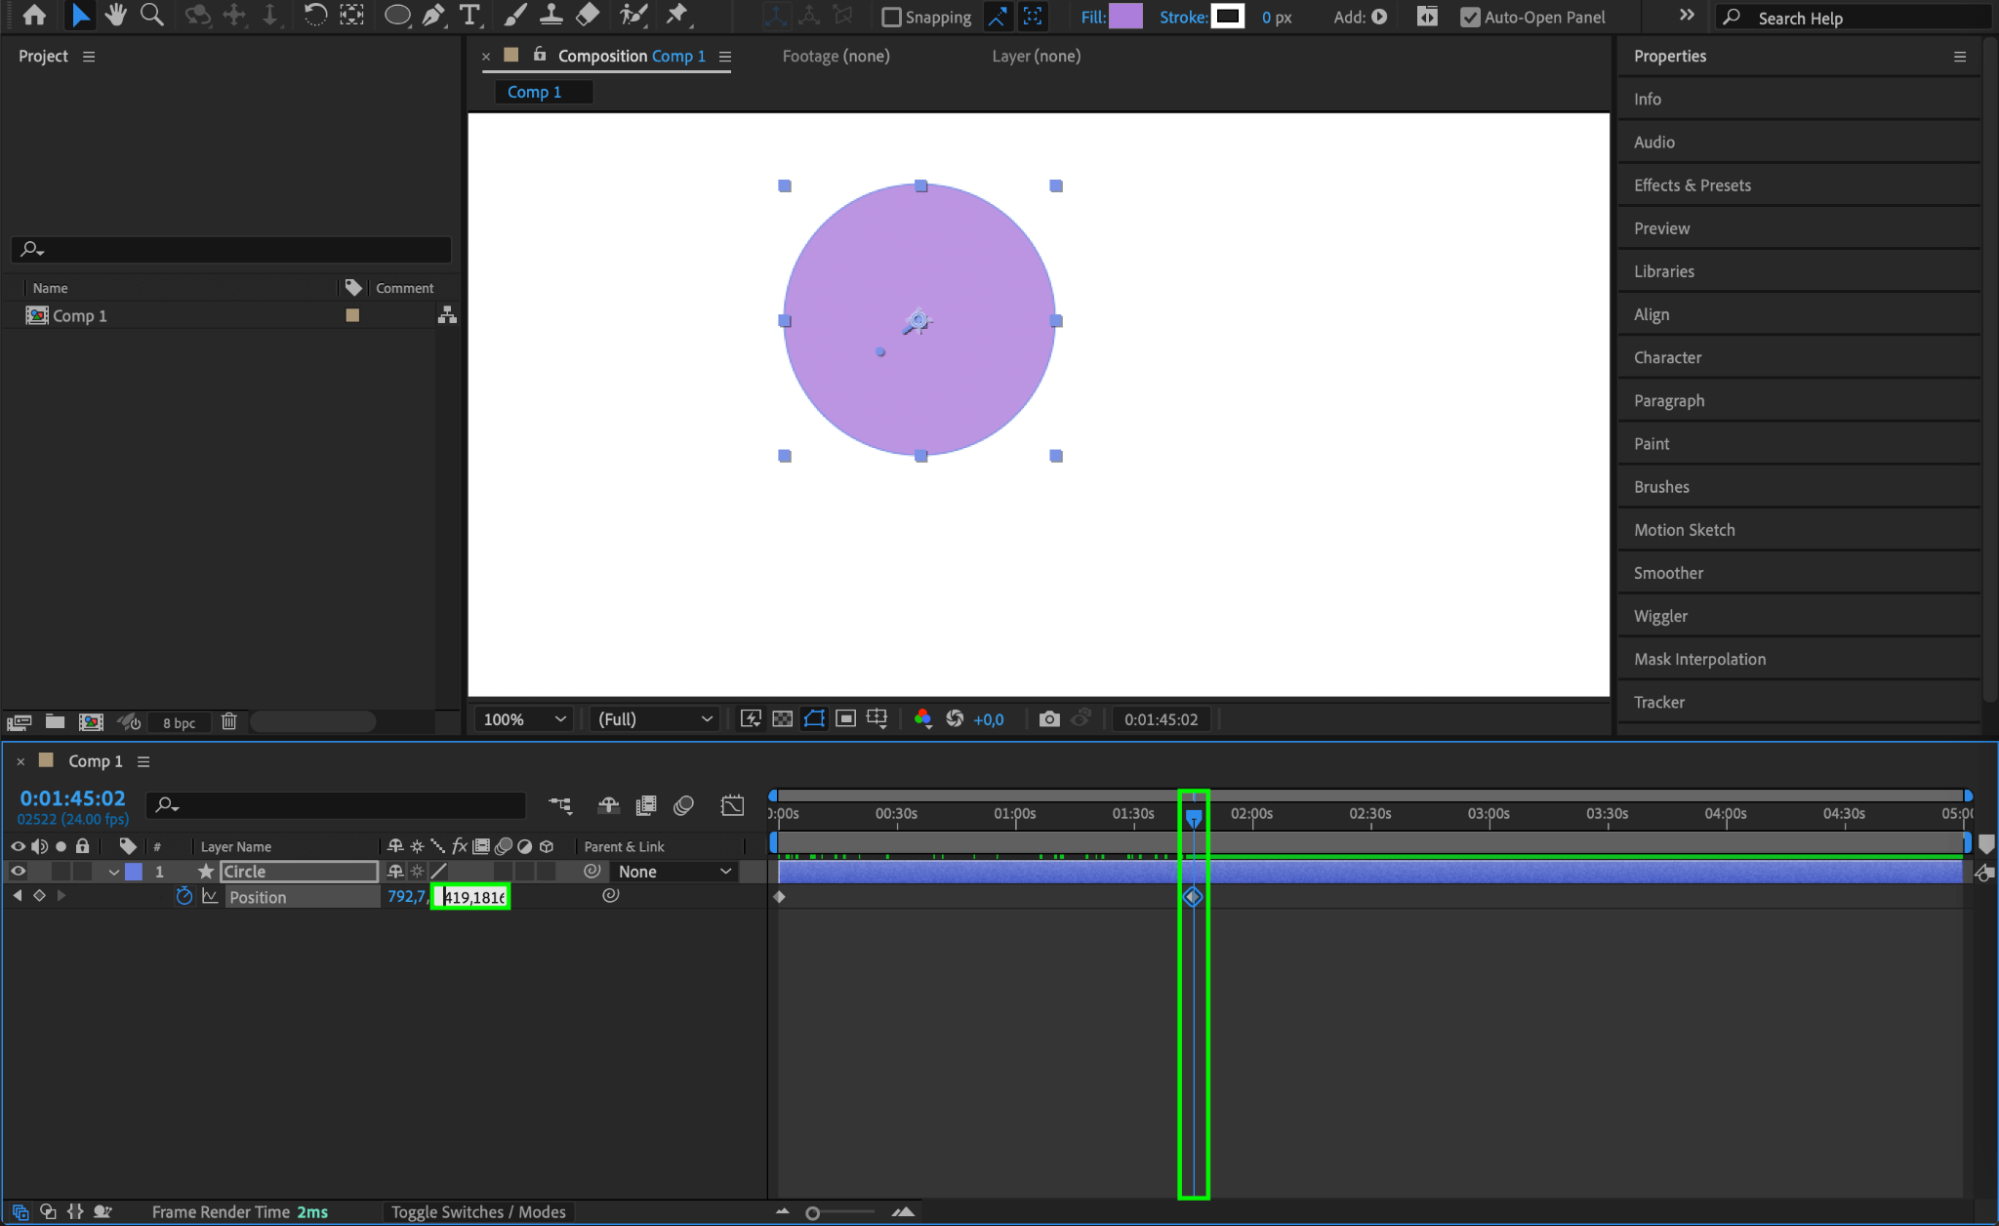
 Step 4: Add a Basic Position Animation
To animate the circle’s movement, select the circle layer and press “P” to open the Position property under Transform. Click the stopwatch icon next to Position to create a keyframe. Move the Current Time Indicator (CTI) to another point on the timeline, then adjust the circle’s position to set a second keyframe. The circle will now move between these two points.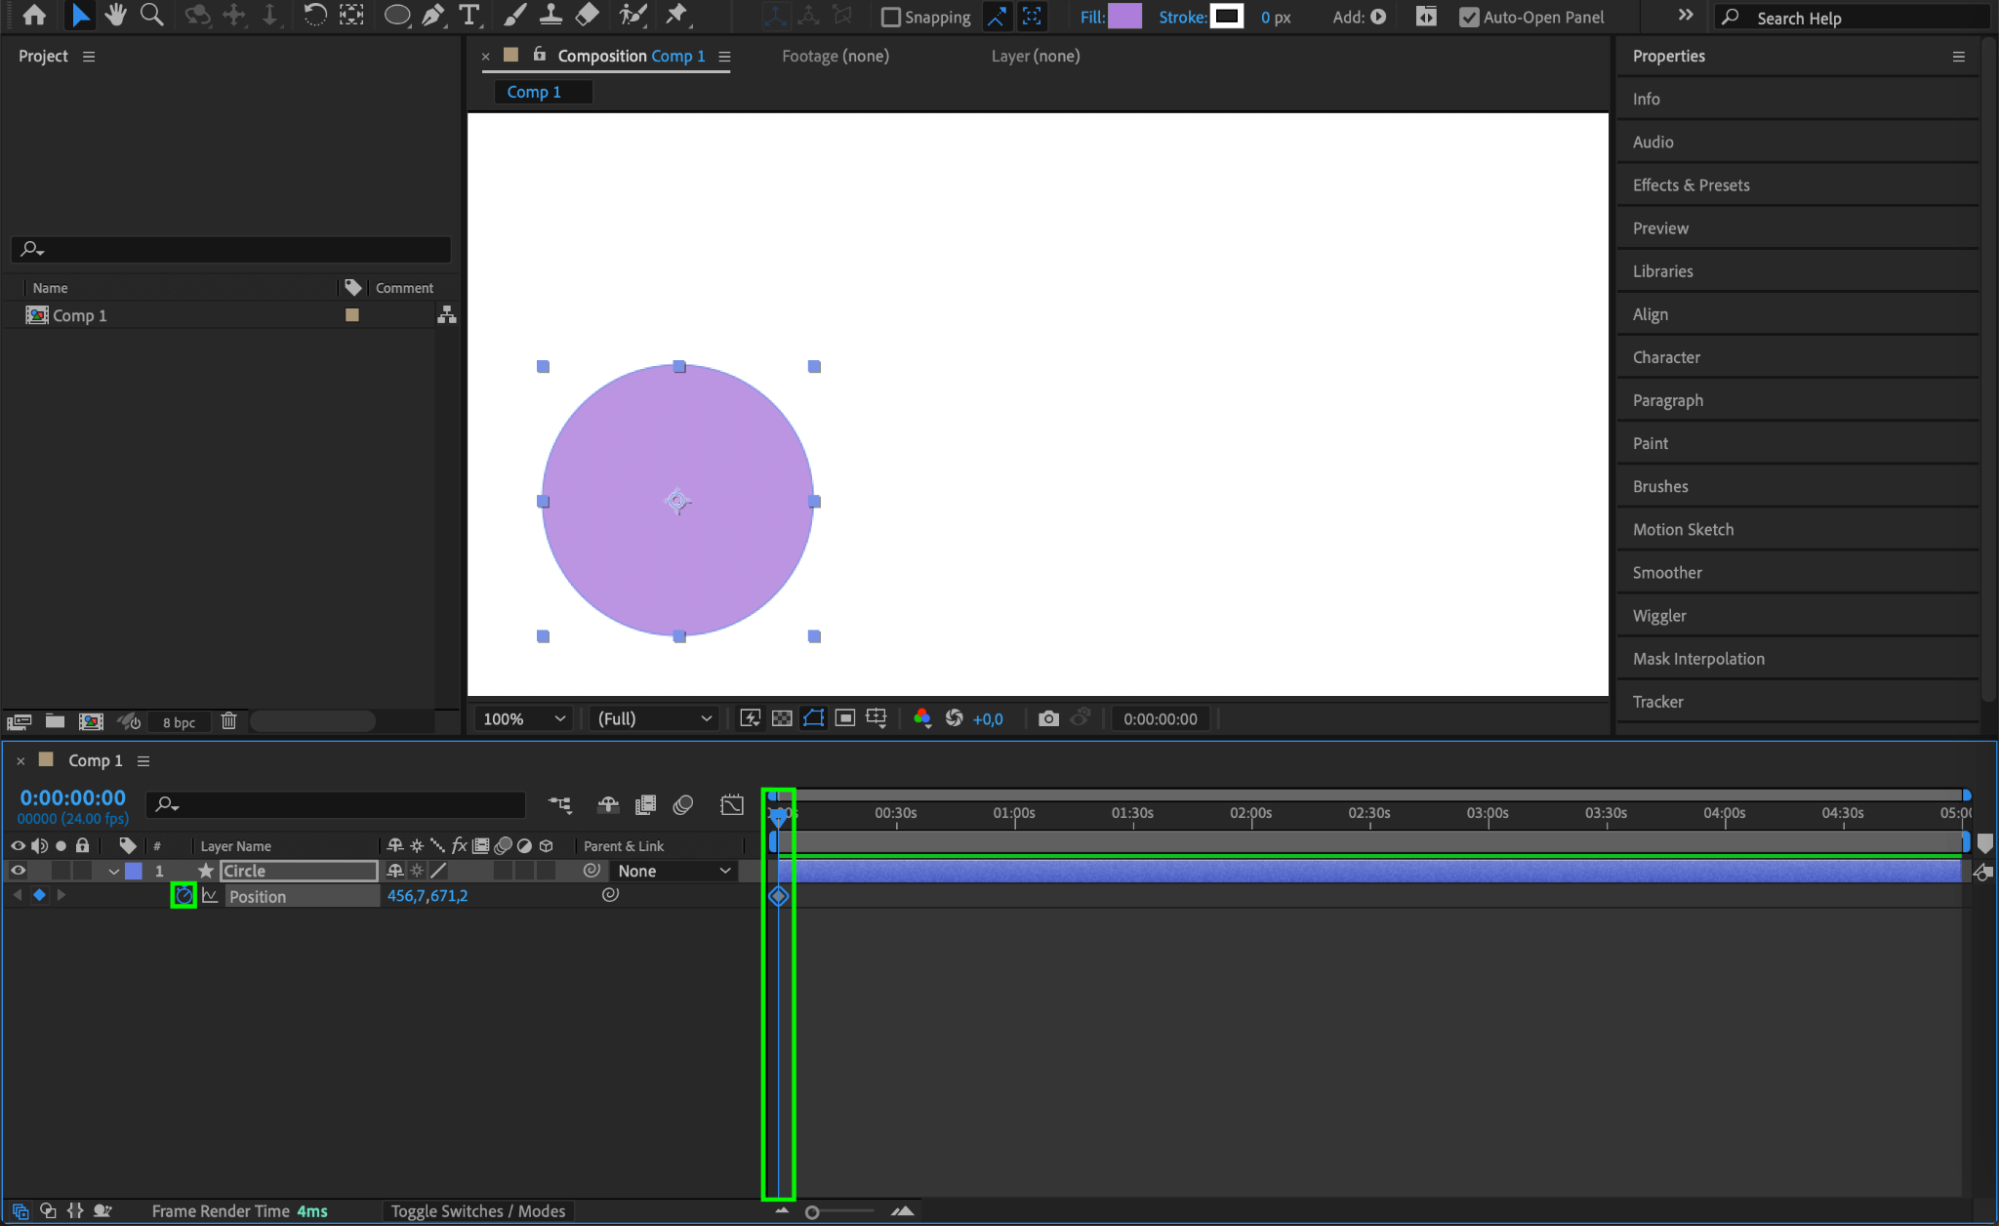
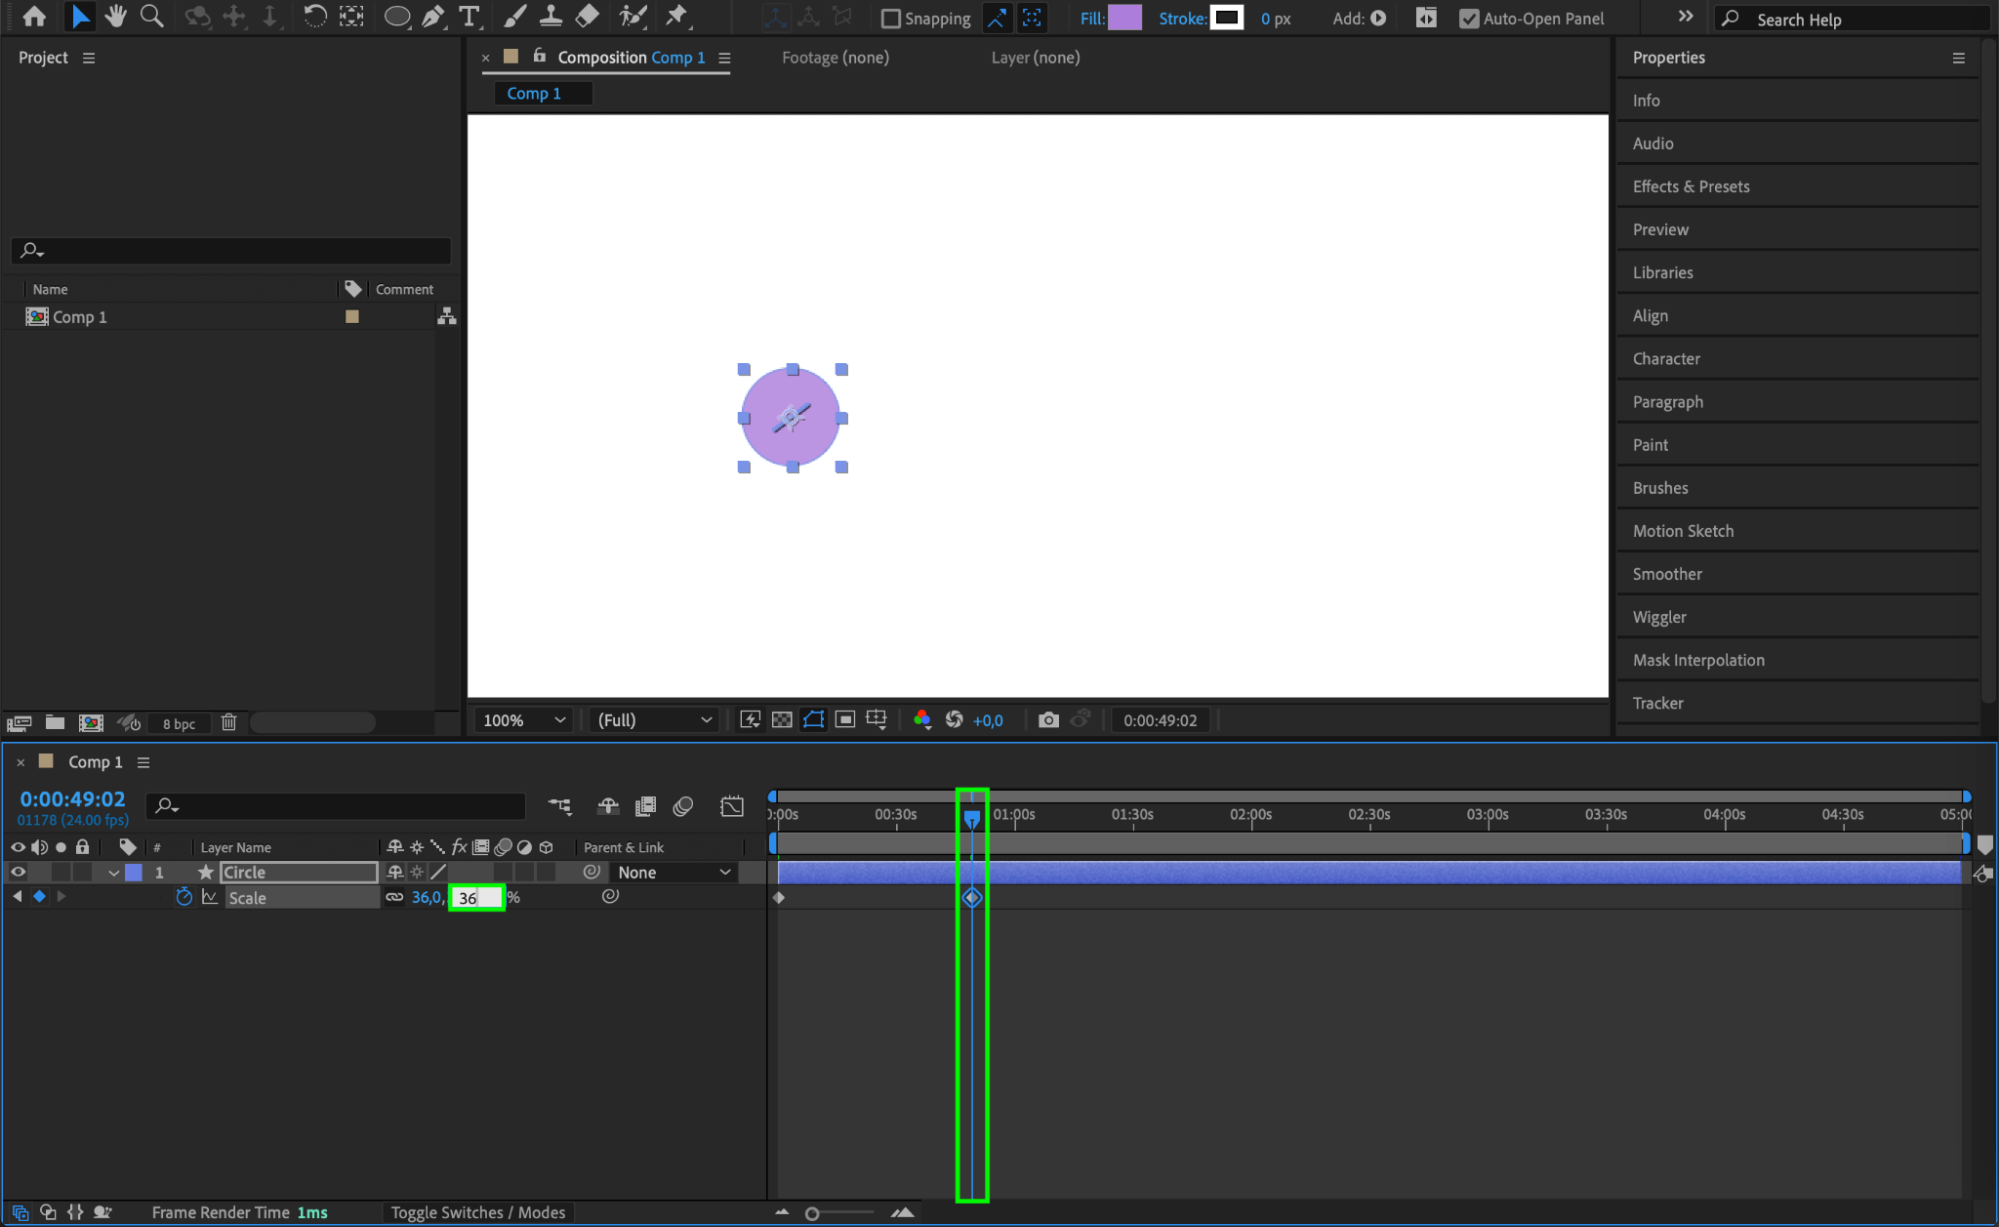
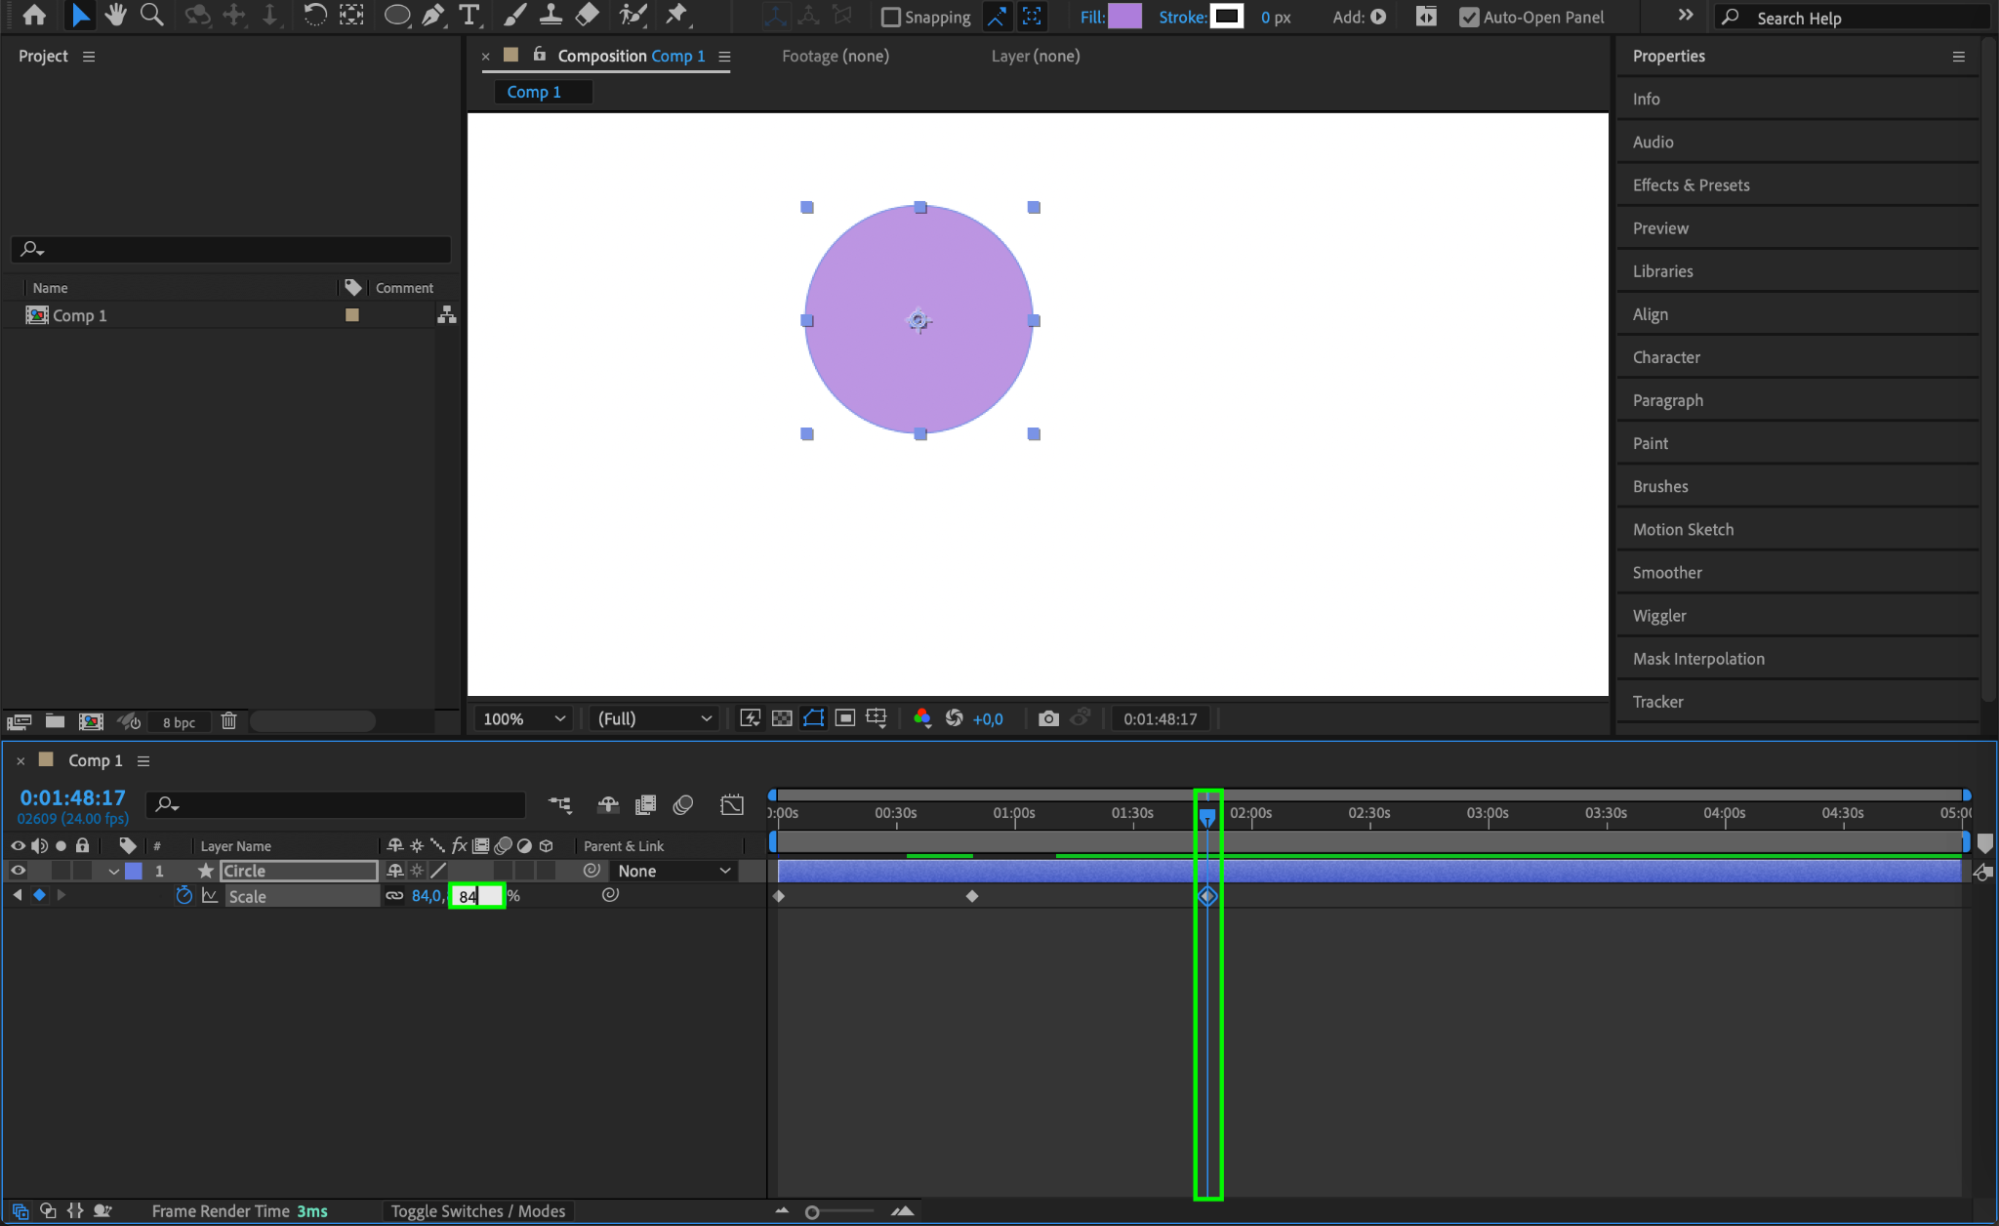
 Step 5: Animate the Scale of the Circle
Get 10% off when you subscribe to our newsletter

To add scale animation, press “S” to open the Scale property. Click the stopwatch icon to set a keyframe at the circle’s starting point. Move the CTI to another time and adjust the scale percentage. This scaling effect is useful for creating breathing or pulsating animations.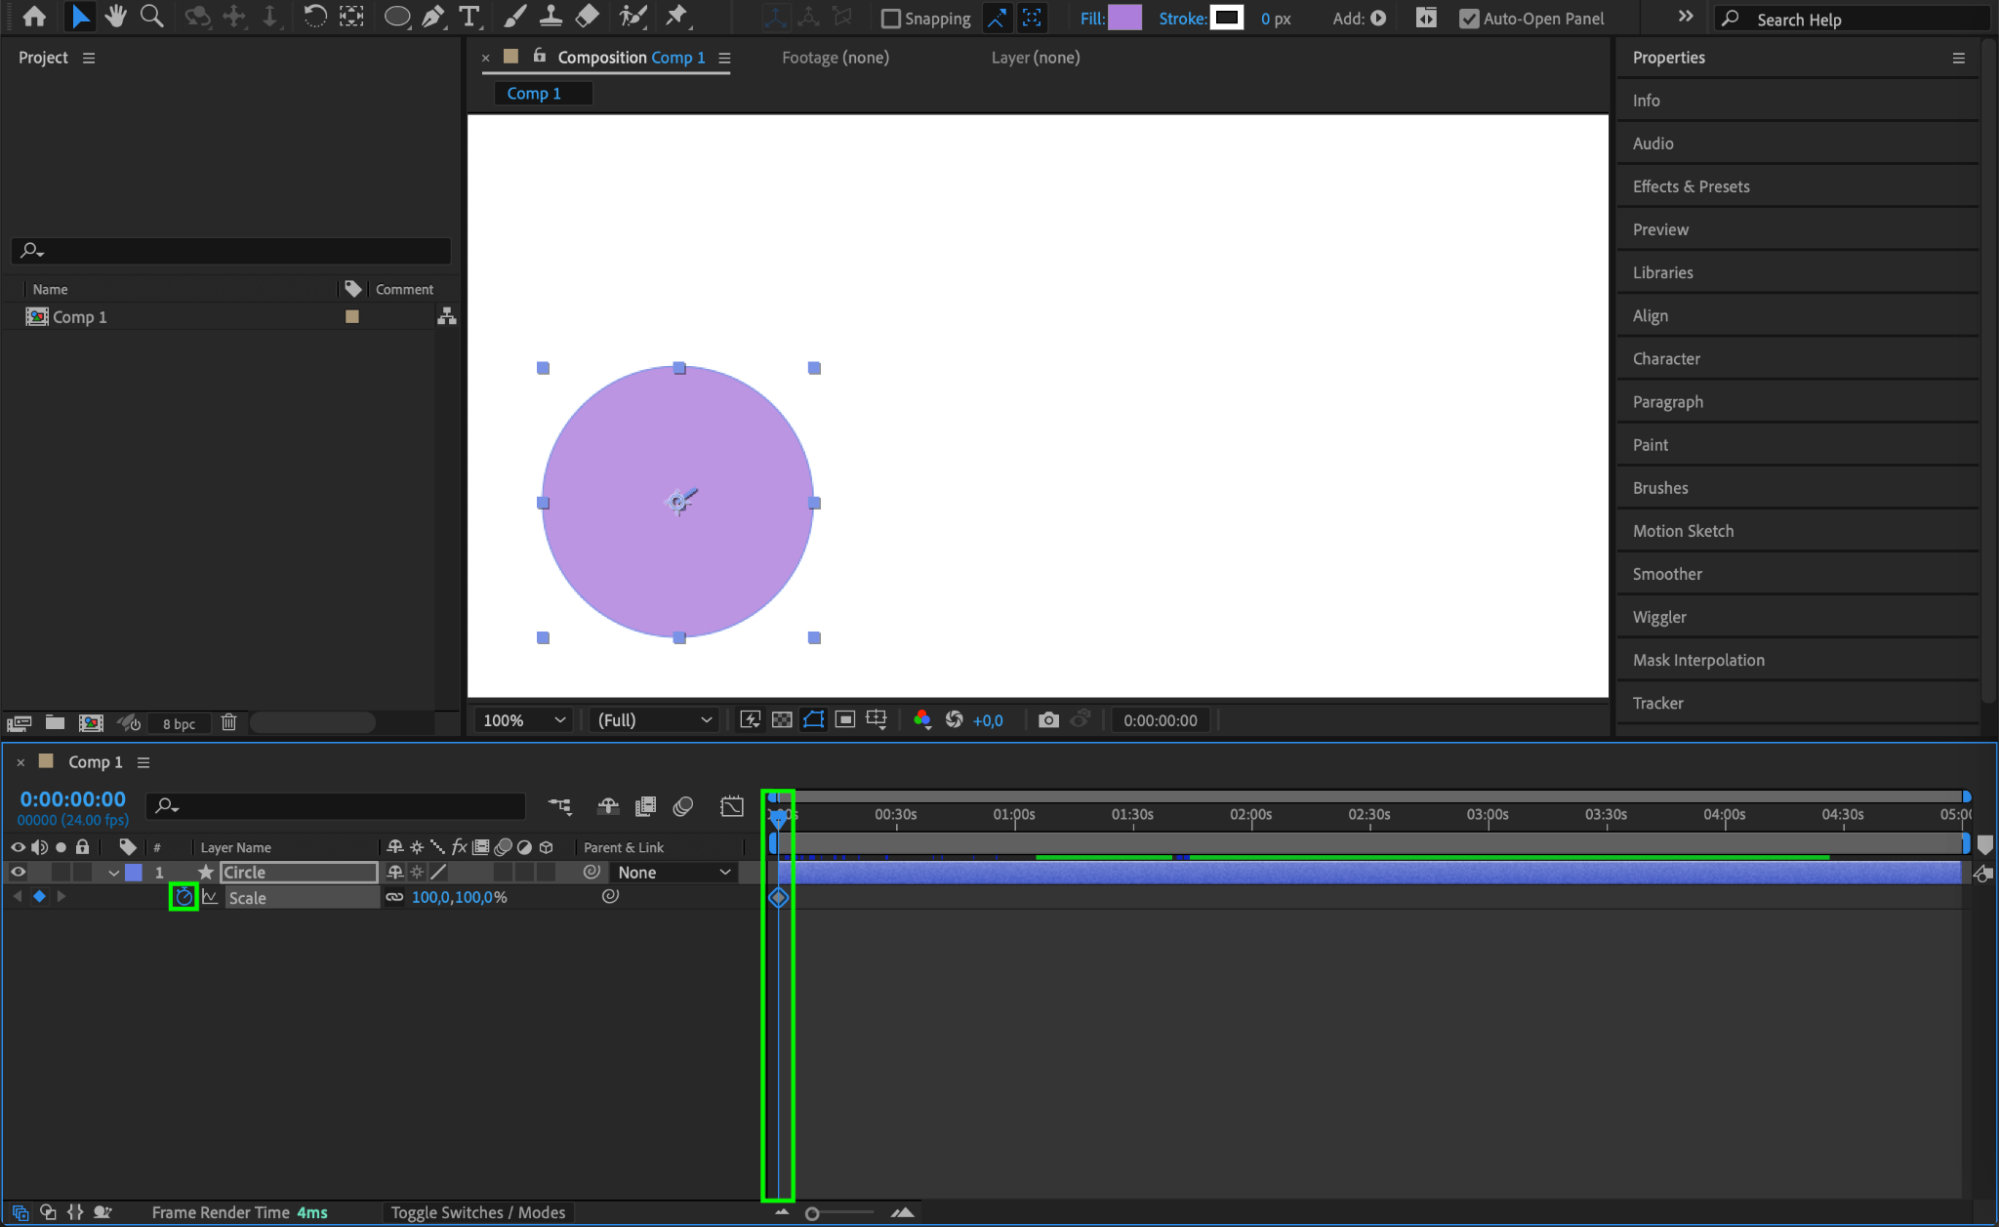
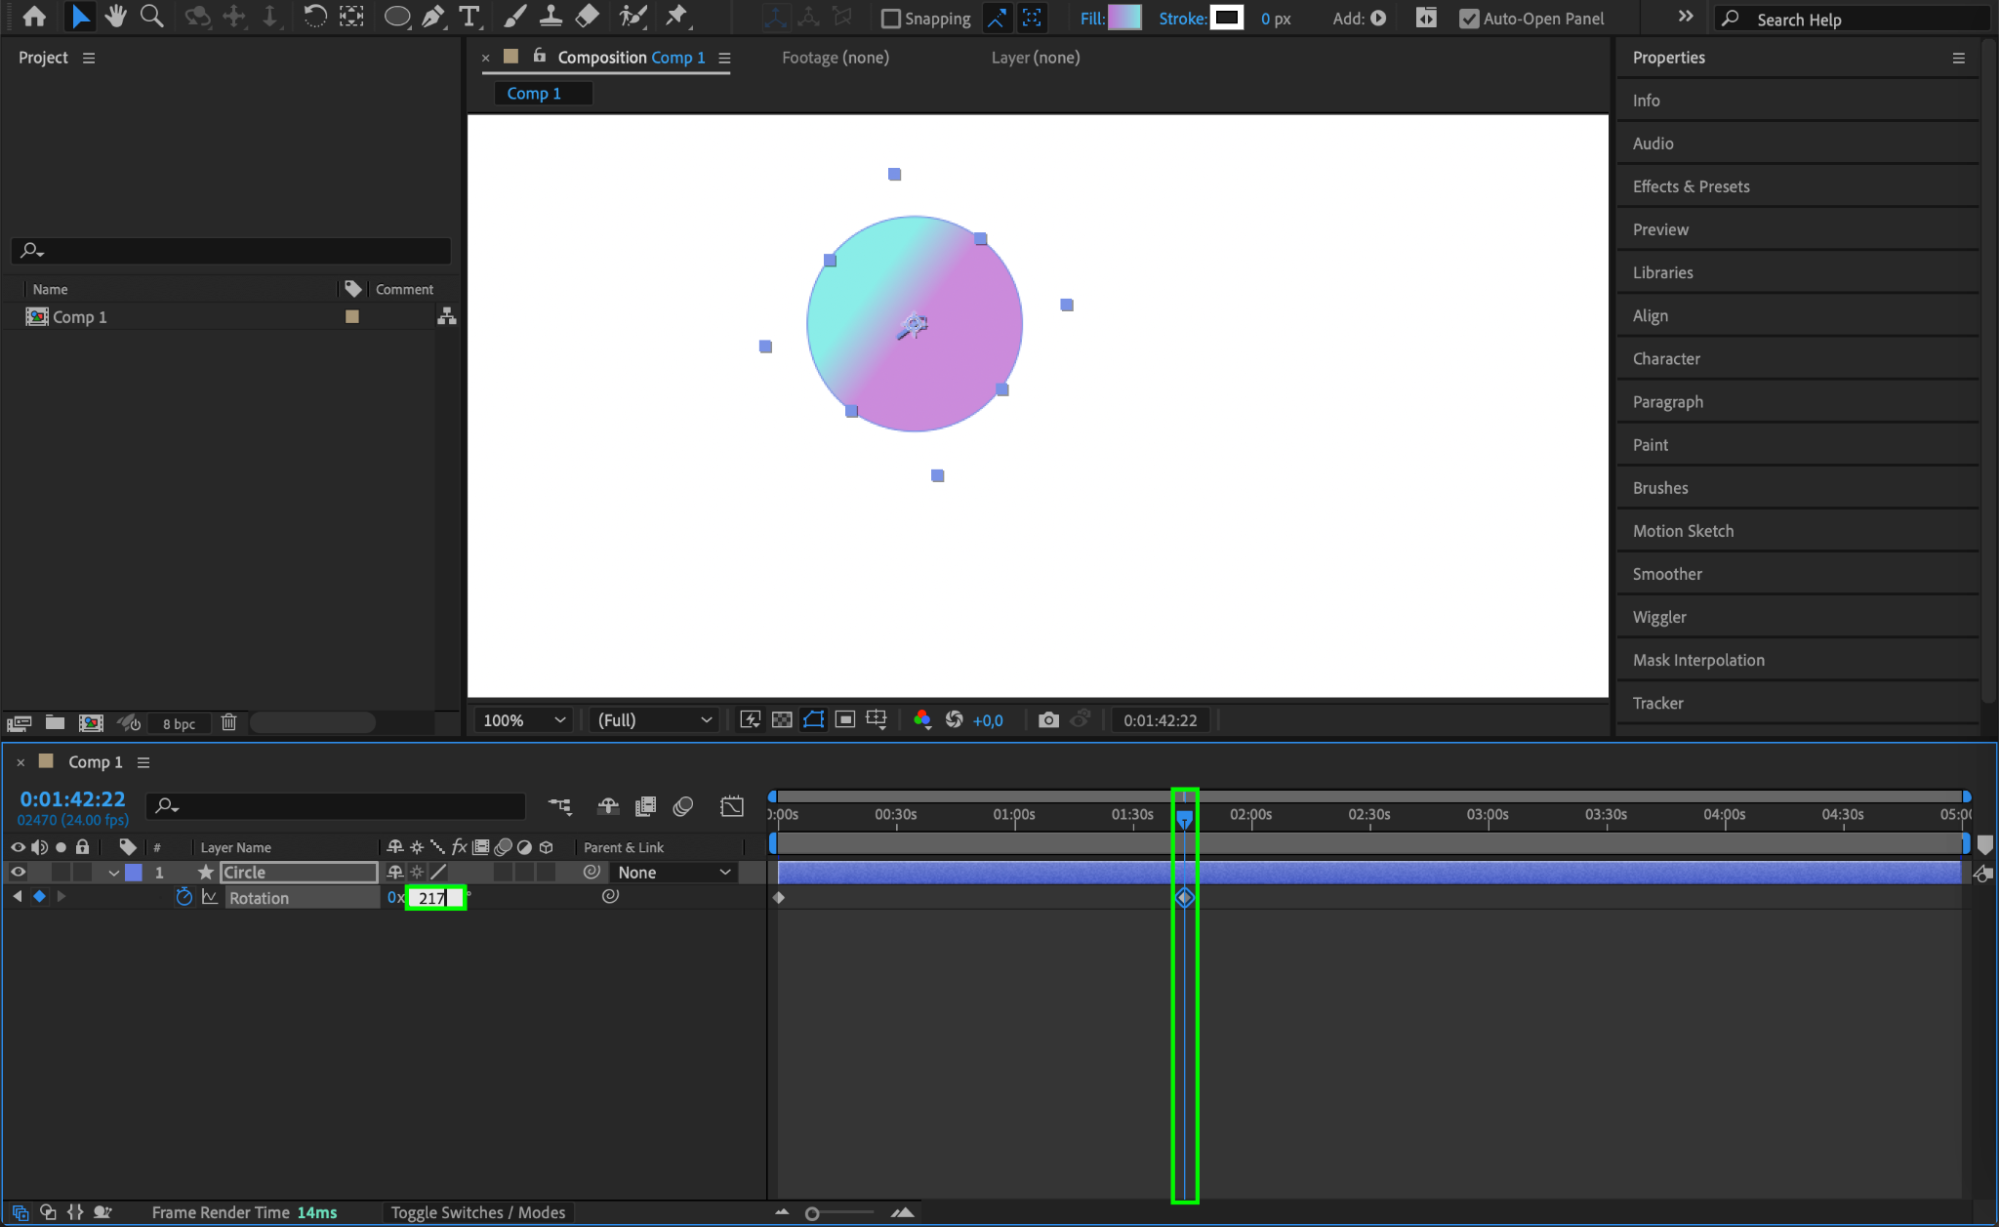
Step 6: Create a Rotation Animation
If you’d like to add rotation, press “R” to reveal the Rotation property. Set a keyframe by clicking the stopwatch icon, then move the CTI forward and increase the rotation value. For example, setting it to 1x will make the circle complete one full rotation over the selected time period. This adds dynamic movement to your animation.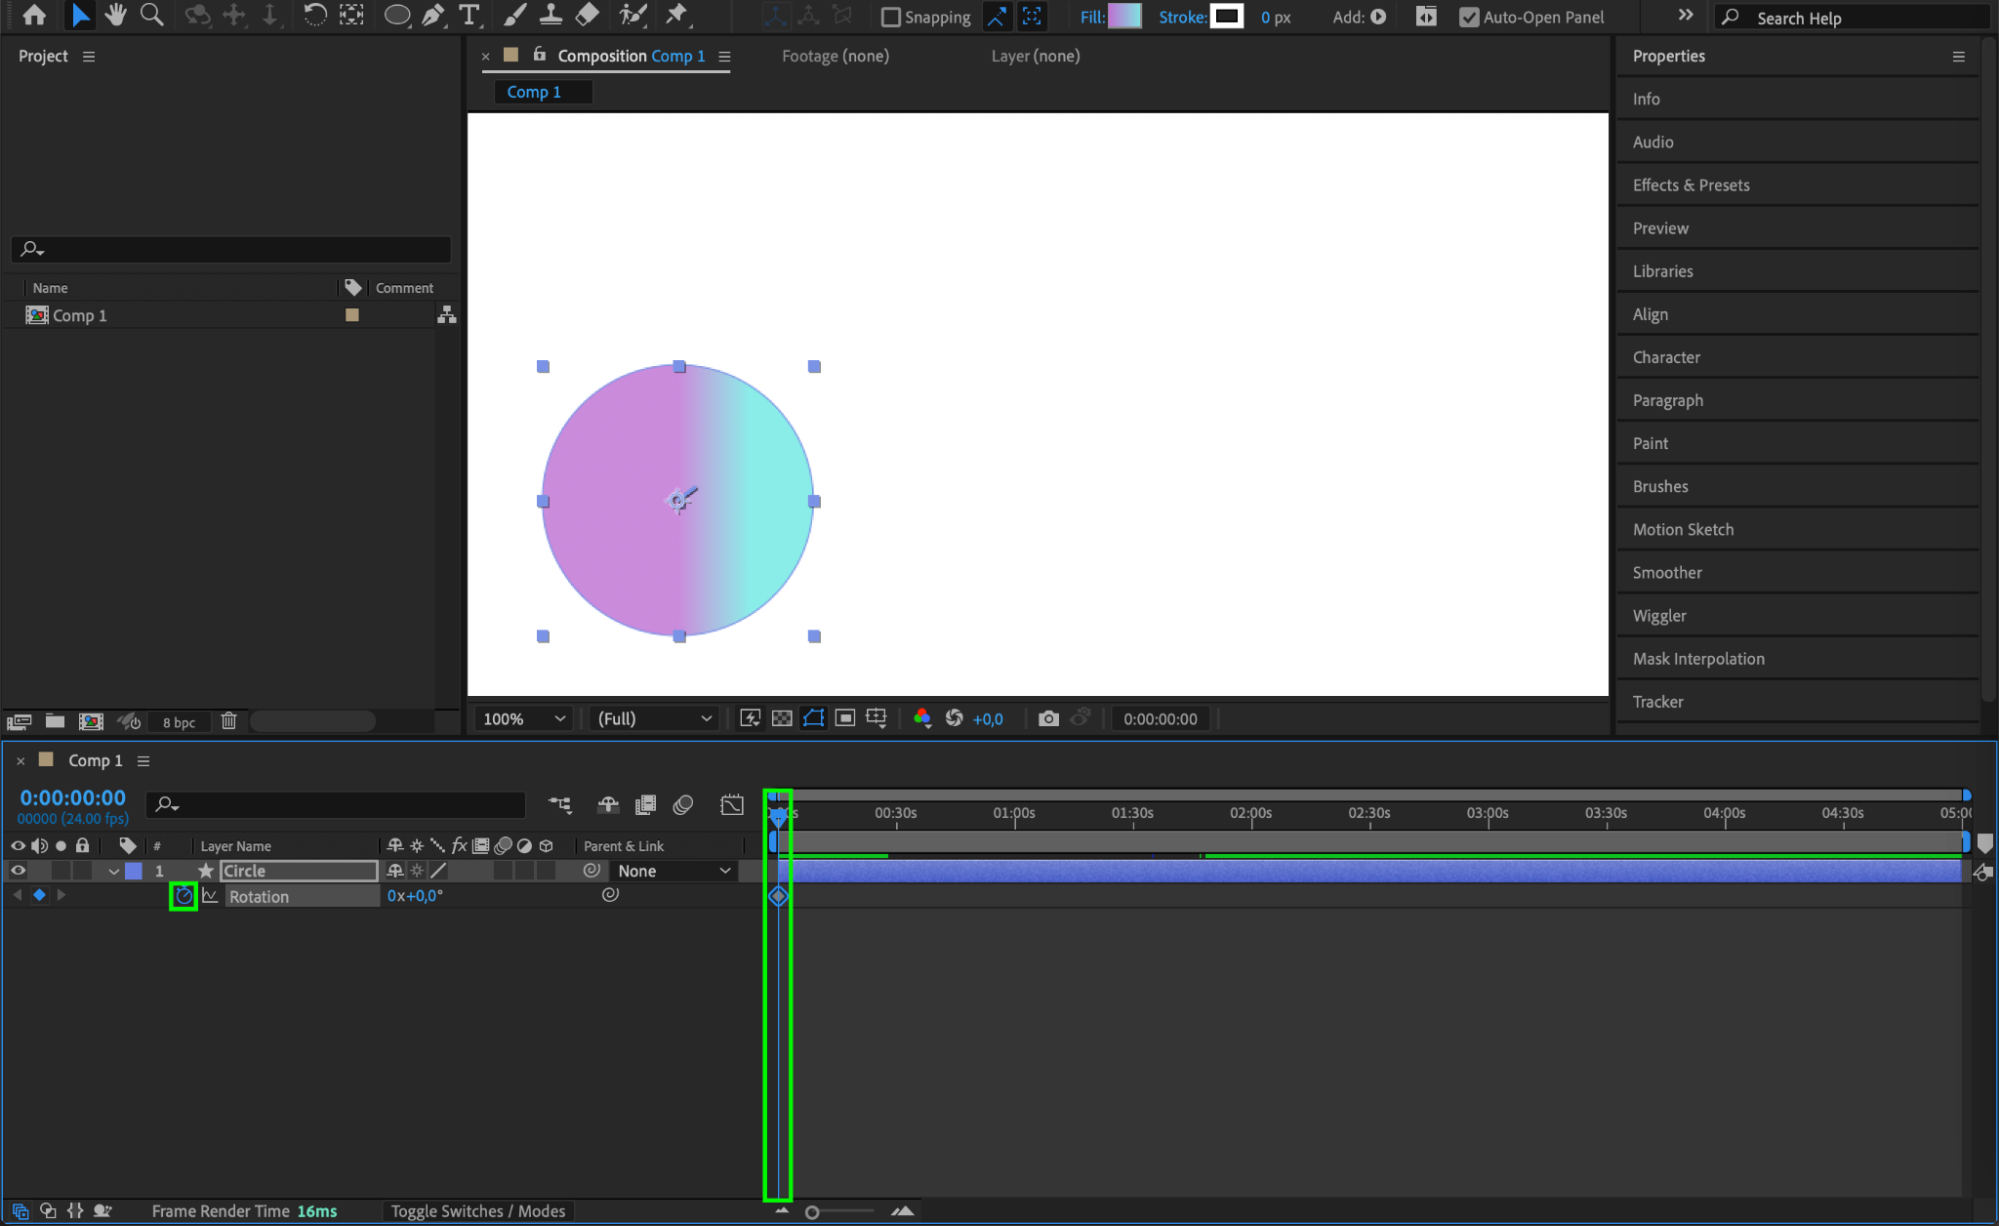
 Step 7: Apply Easy Ease for Smoother Transitions
For fluid transitions, use Easy Ease on the keyframes. Right-click on each keyframe, go to Keyframe Assistant > Easy Ease. This technique smooths out the animation, creating a more natural motion.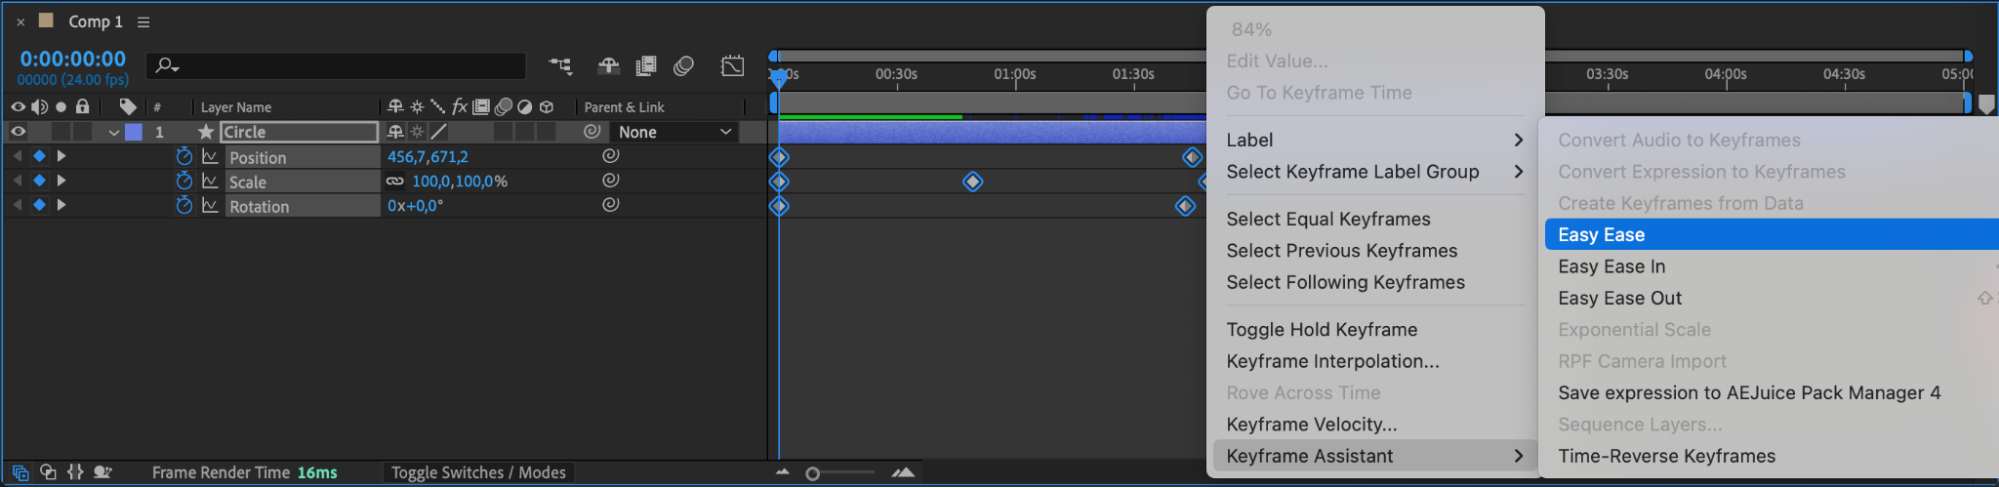 Step 8: Preview the Animation
Once your keyframes are set, press Spacebar to preview the animation. Adjust keyframe positions or values if needed to refine the motion. This preview allows you to fine-tune the animation before exporting.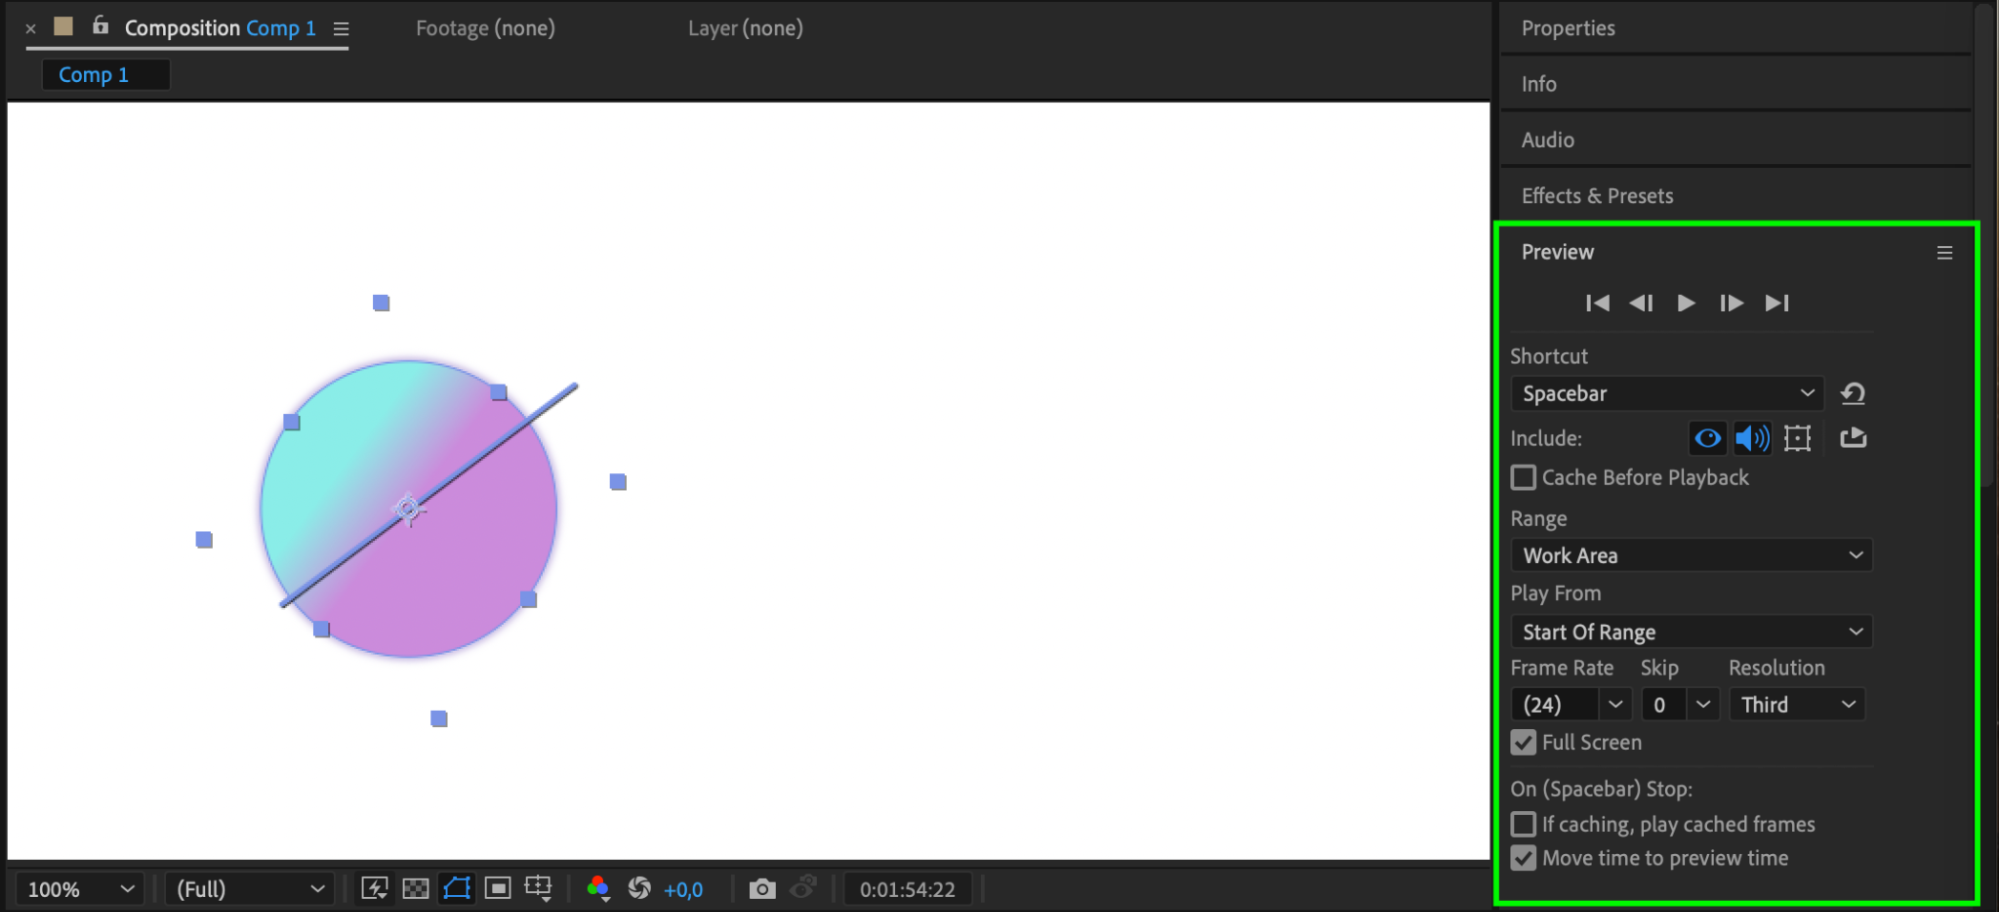 Step 9: Export Your Animated Circle
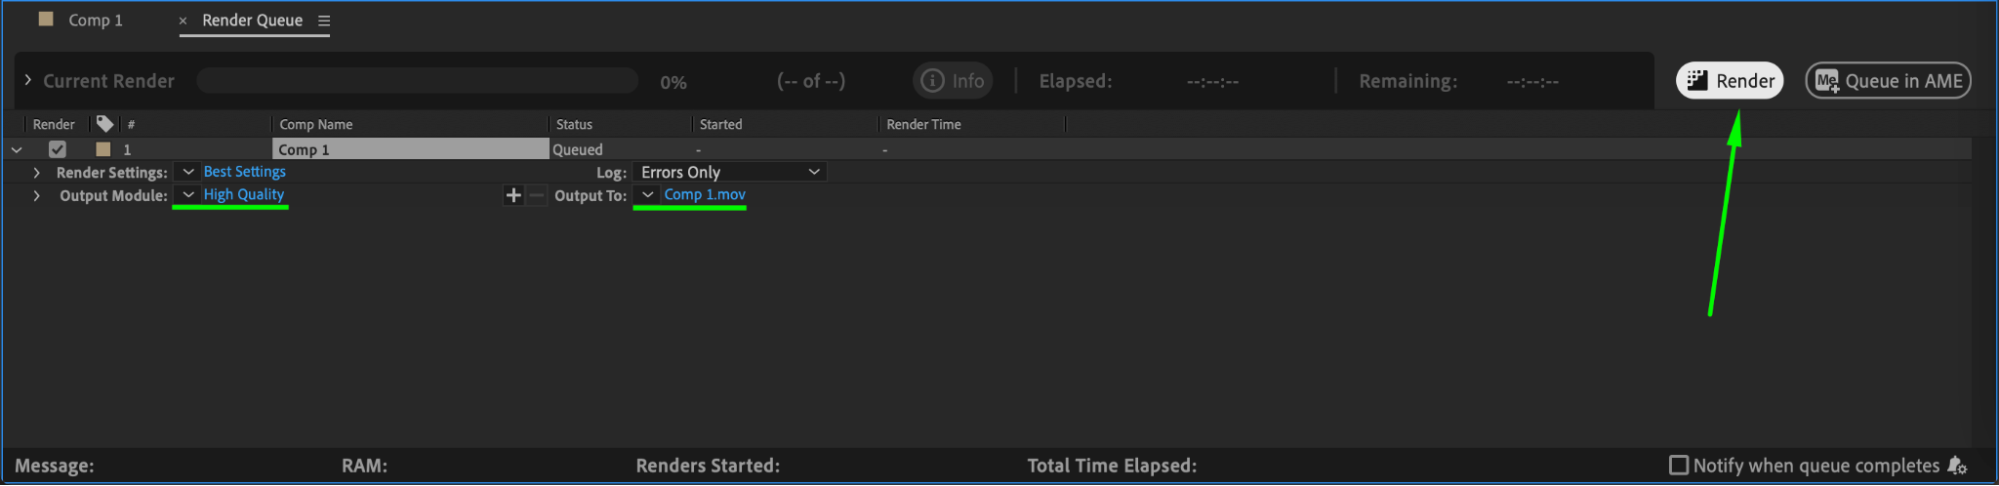
Once satisfied with the animation, go to Composition > Add to Render Queue to export it. Choose your desired format, and render the animation for use in your projects or as a standalone effect.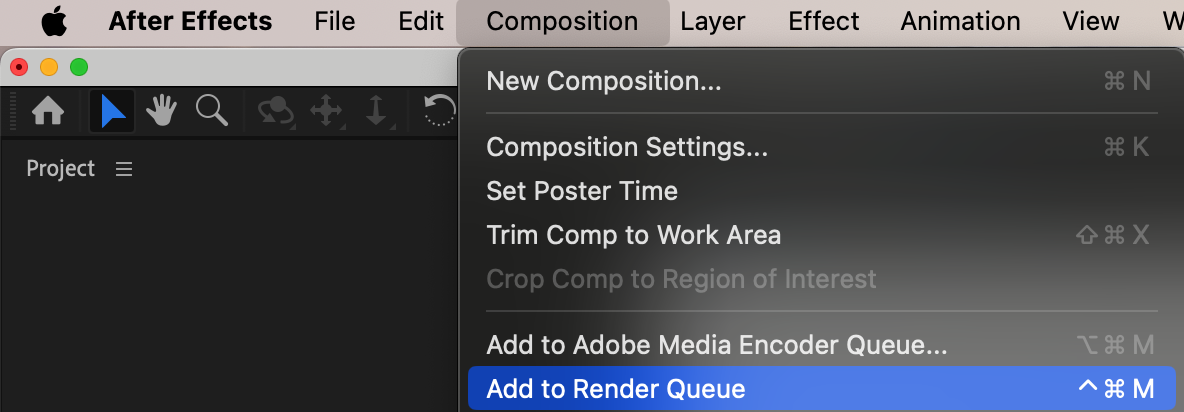
Conclusion
Animating a circle in After Effects is a foundational skill that can be applied to a wide range of creative projects. By mastering these keyframing techniques and experimenting with the transform properties, you can bring simple shapes to life with impactful animations.
Our Bestsellers


