Creating a Realistic Butterfly Flight Animation in After Effects
Introduction
Animating a butterfly in After Effects requires a combination of masking, 3D layer transformation, and motion path animation. By splitting the wings into separate layers and adjusting rotation, you can achieve a natural flapping motion. Adding motion blur and smooth keyframes will enhance realism.
Step 1: Create a New Composition
Open After Effects and create a new composition (Composition > New Composition) with your desired settings (e.g., 1920×1080, 25fps, 8s duration).
 Step 2: Import and Place the Butterfly Image
Go to File > Import > File, select your butterfly image, and drag it onto the timeline. Ensure the image is large enough to animate without losing quality.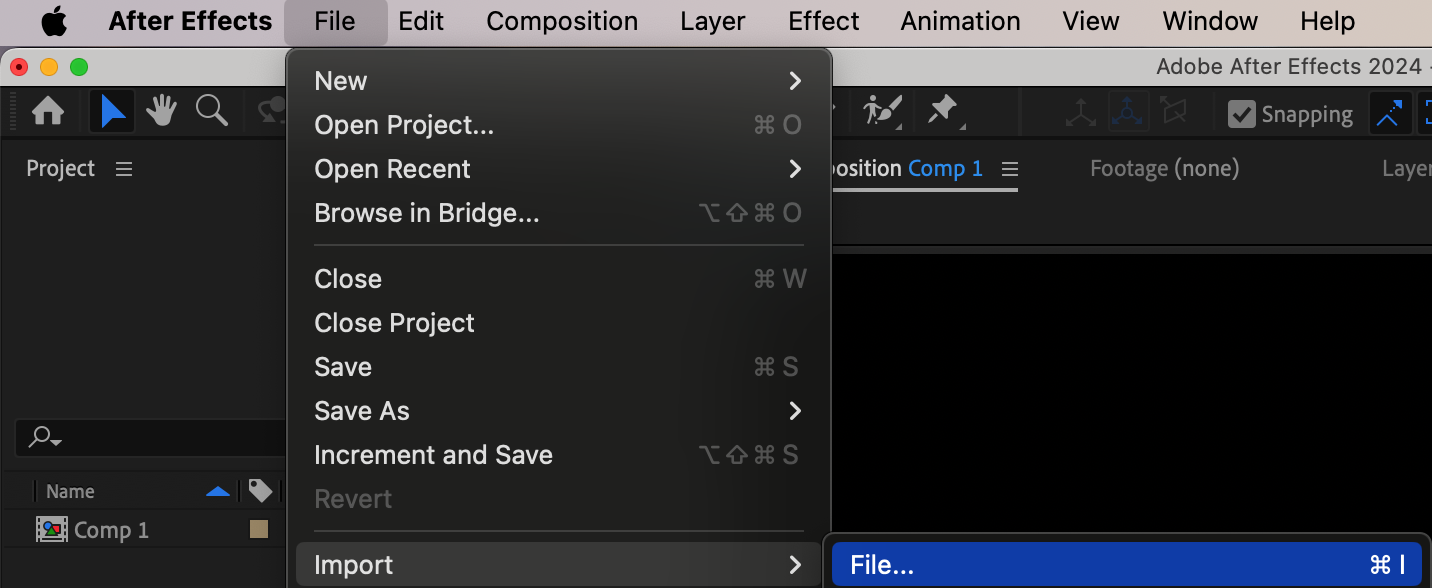
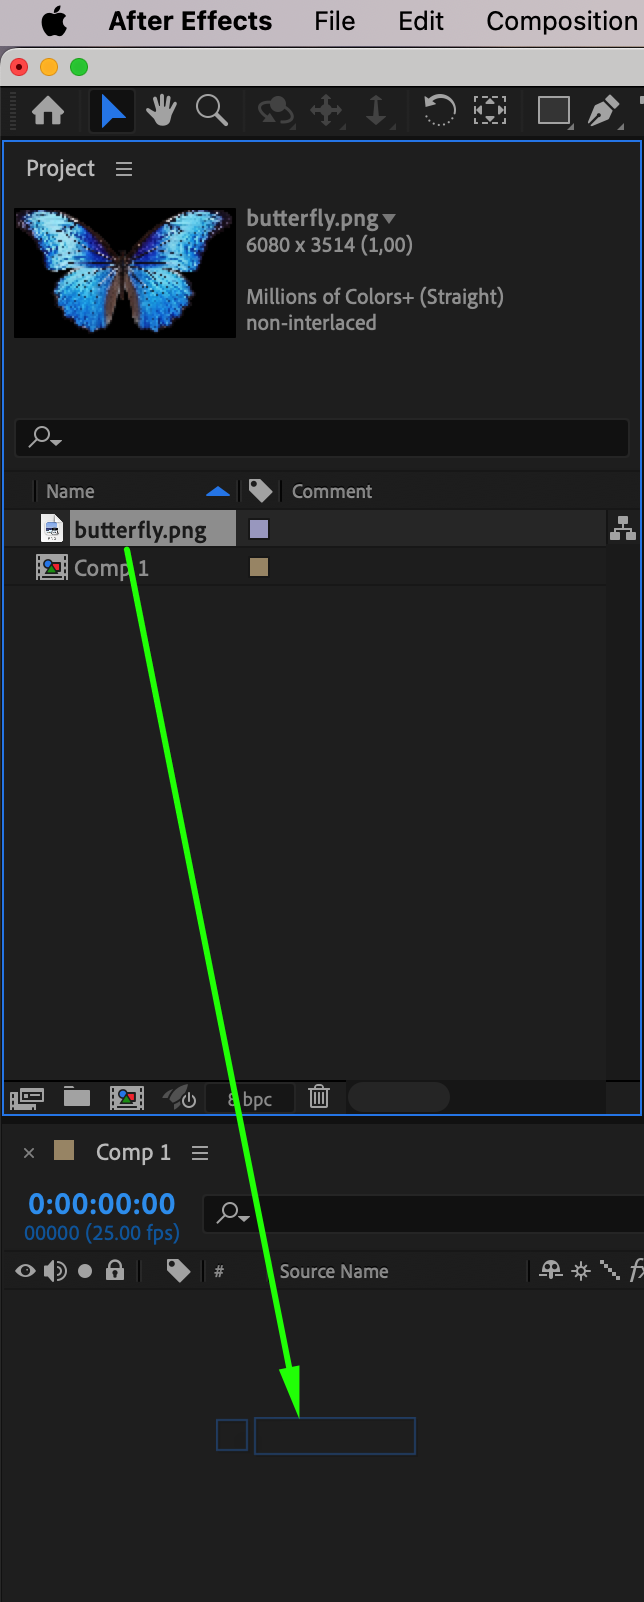 Step 3: Adjust Scale and Position
Get 10% off when you subscribe to our newsletter

Click the Toggle Transparency Grid button to see the transparency. Adjust the Scale (S) and Position (P) so the butterfly fits well in the composition.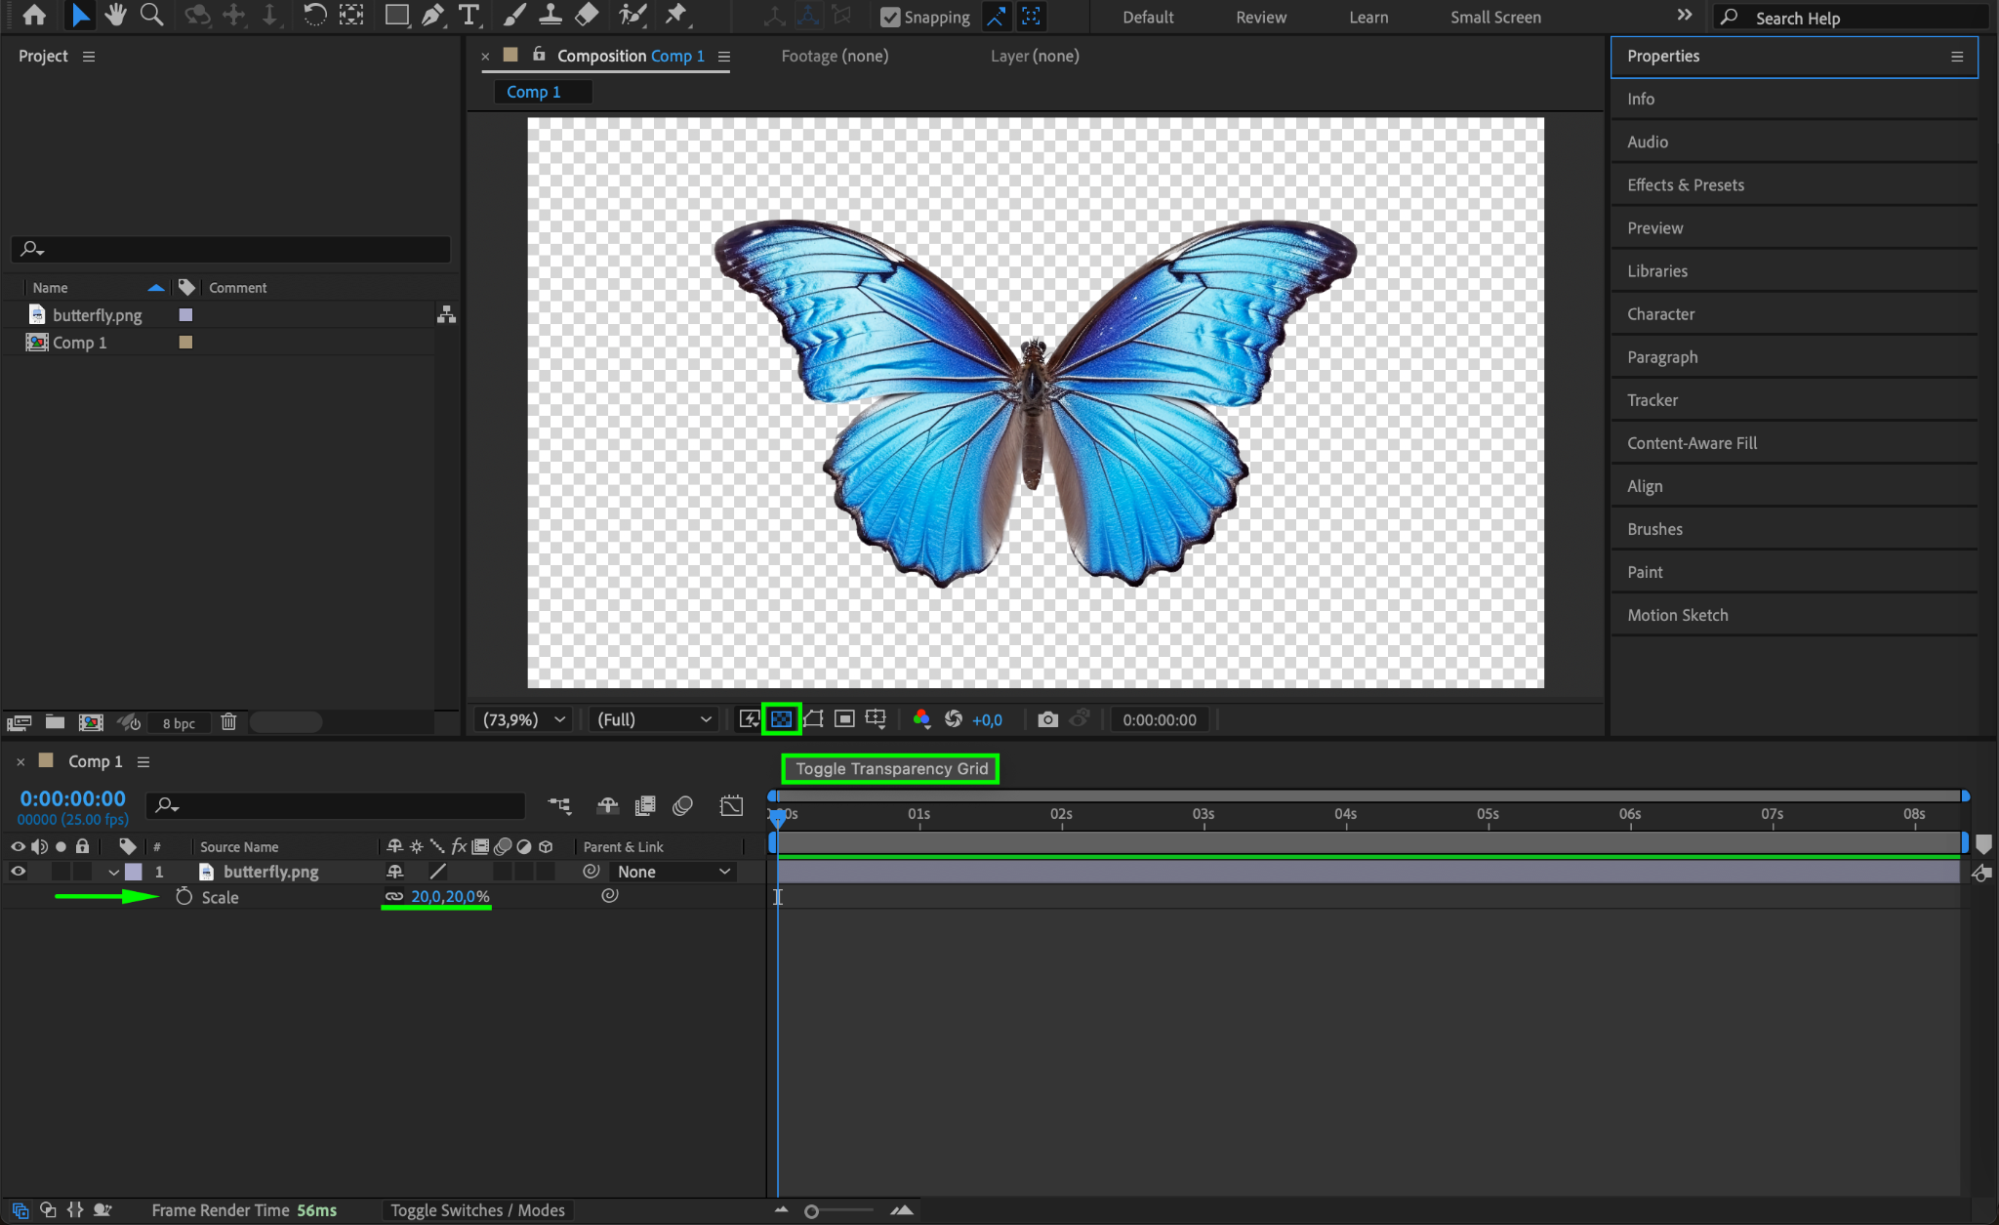 Step 4: Duplicate the Butterfly Layer
Select the butterfly layer and press “Ctrl/Cmd + D” to duplicate it. You will use these two layers to separate the left and right wings.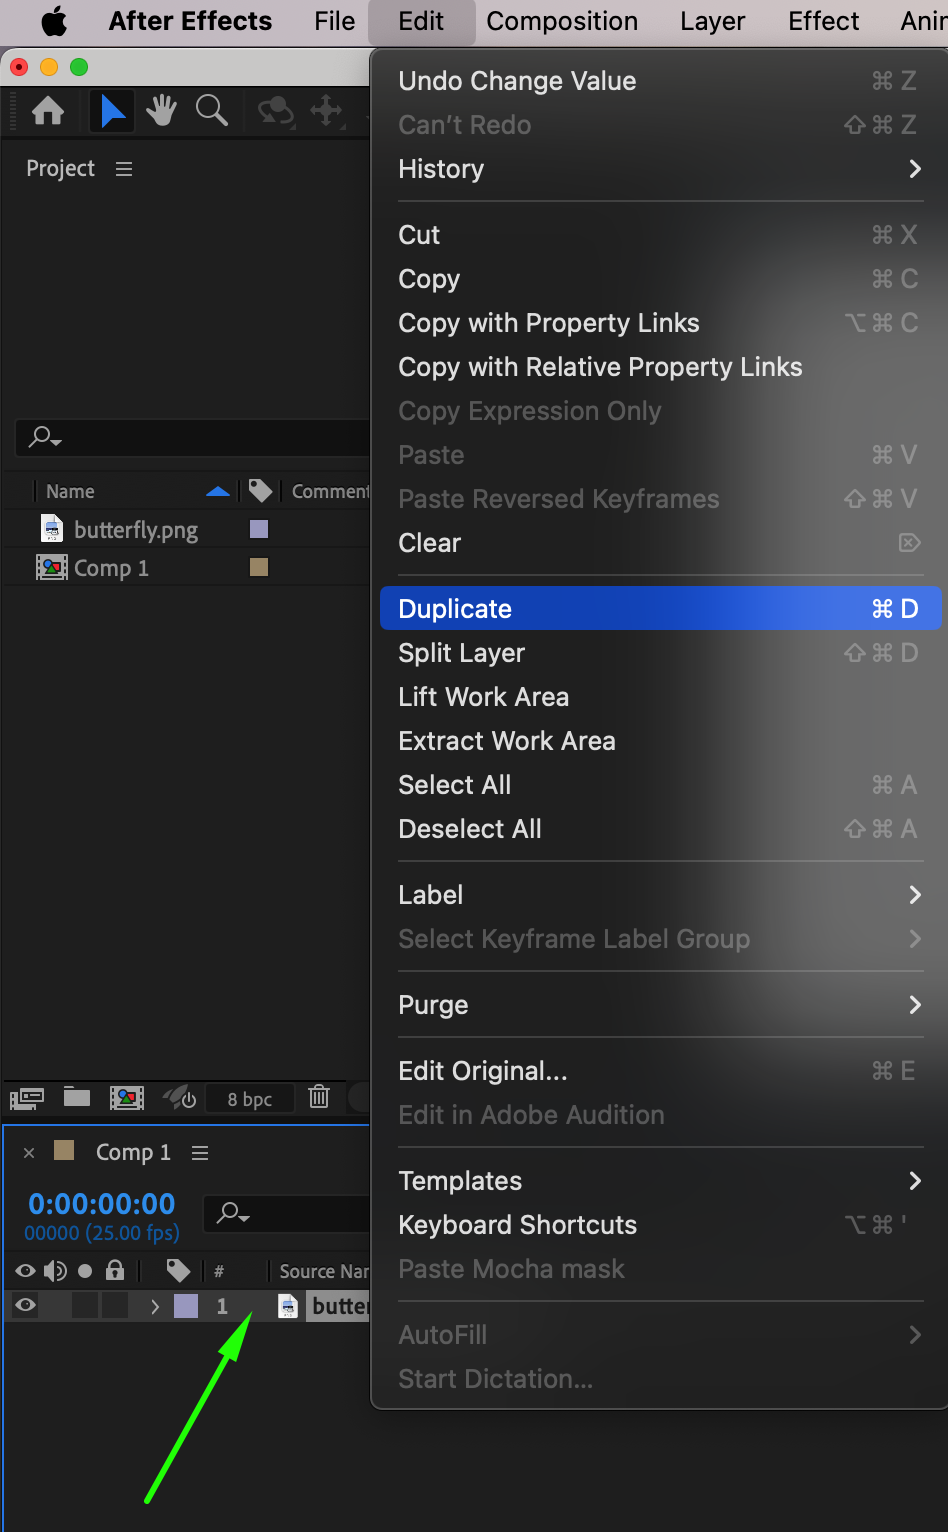 Step 5: Create Masks for Each Wing
Select the first butterfly layer and use the Rectangle Tool (Q) to mask out the right wing.
Set the Mask Mode to Add in the Mask settings.
Select the second layer and mask out the left wing in the same way.
Now, each layer should only contain one wing.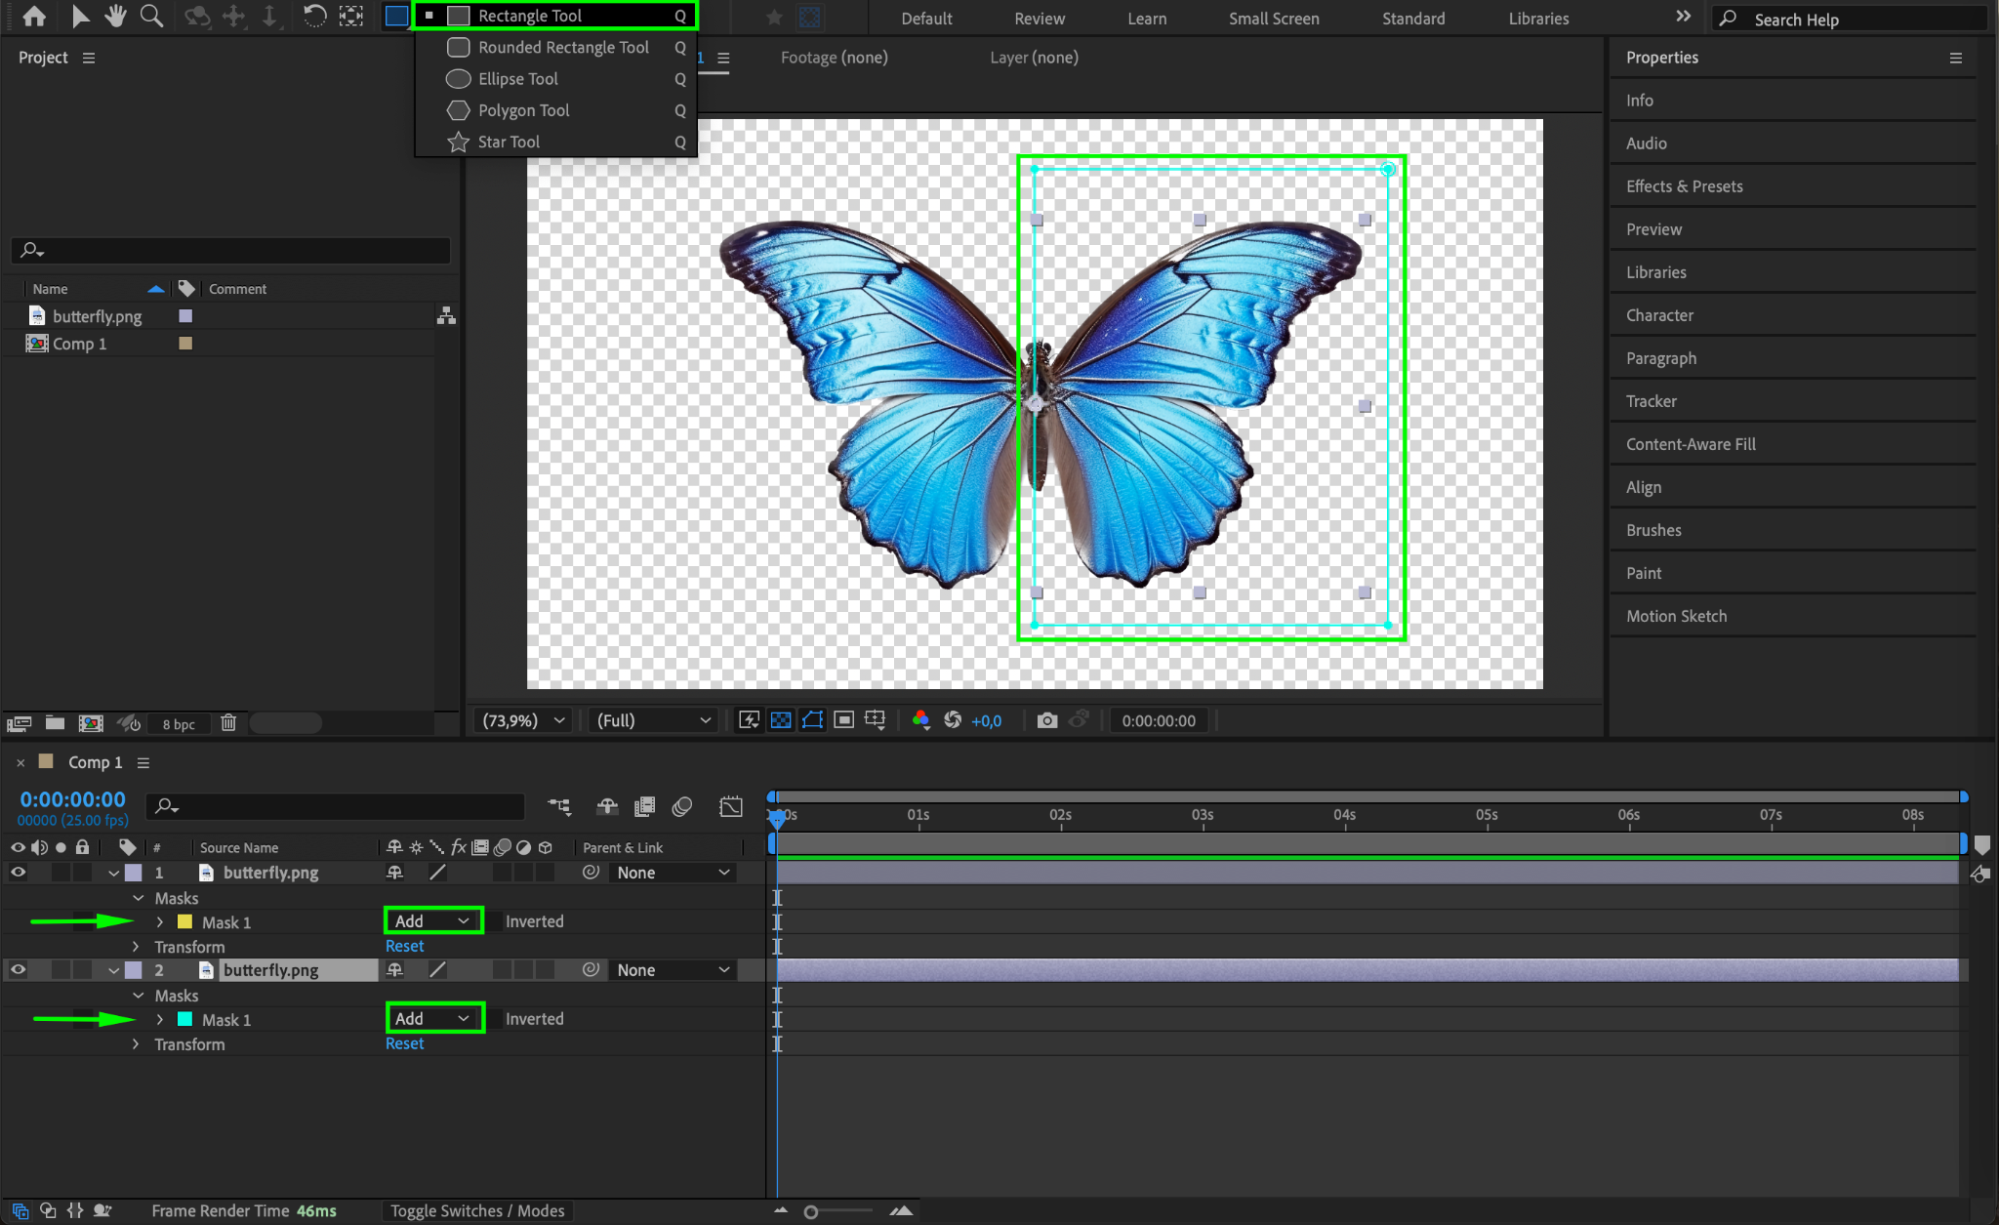 Step 6: Convert Layers to 3D
Select both wing layers and enable the 3D Layer switch (the cube icon in the timeline). This allows you to animate their rotation in 3D space.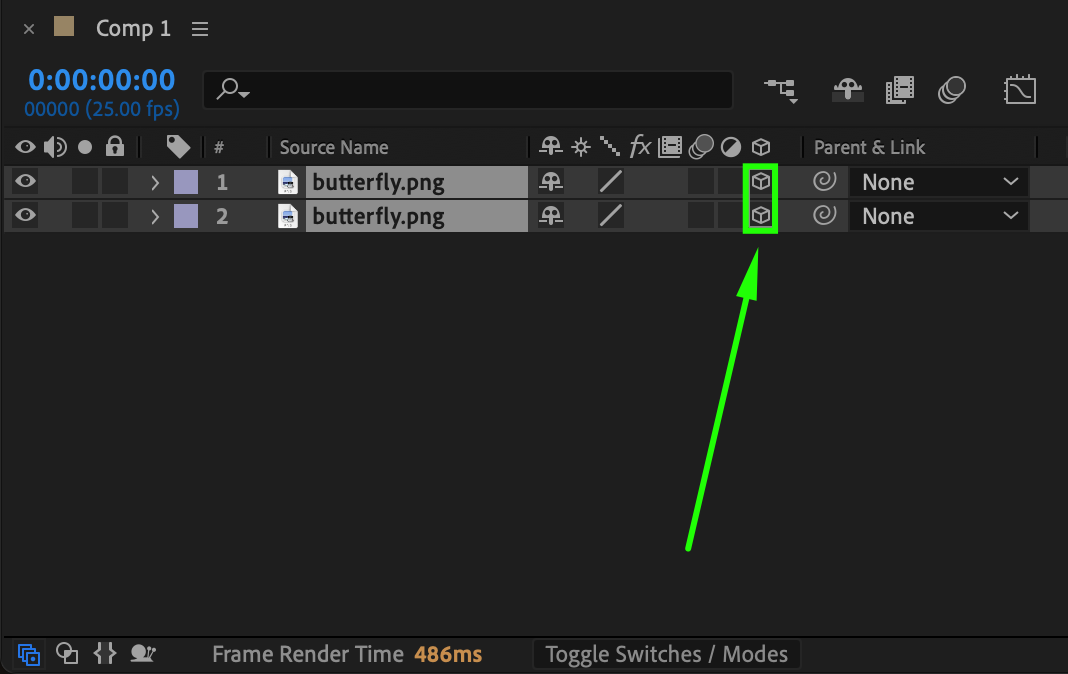 Step 7: Animate the Wing Flapping
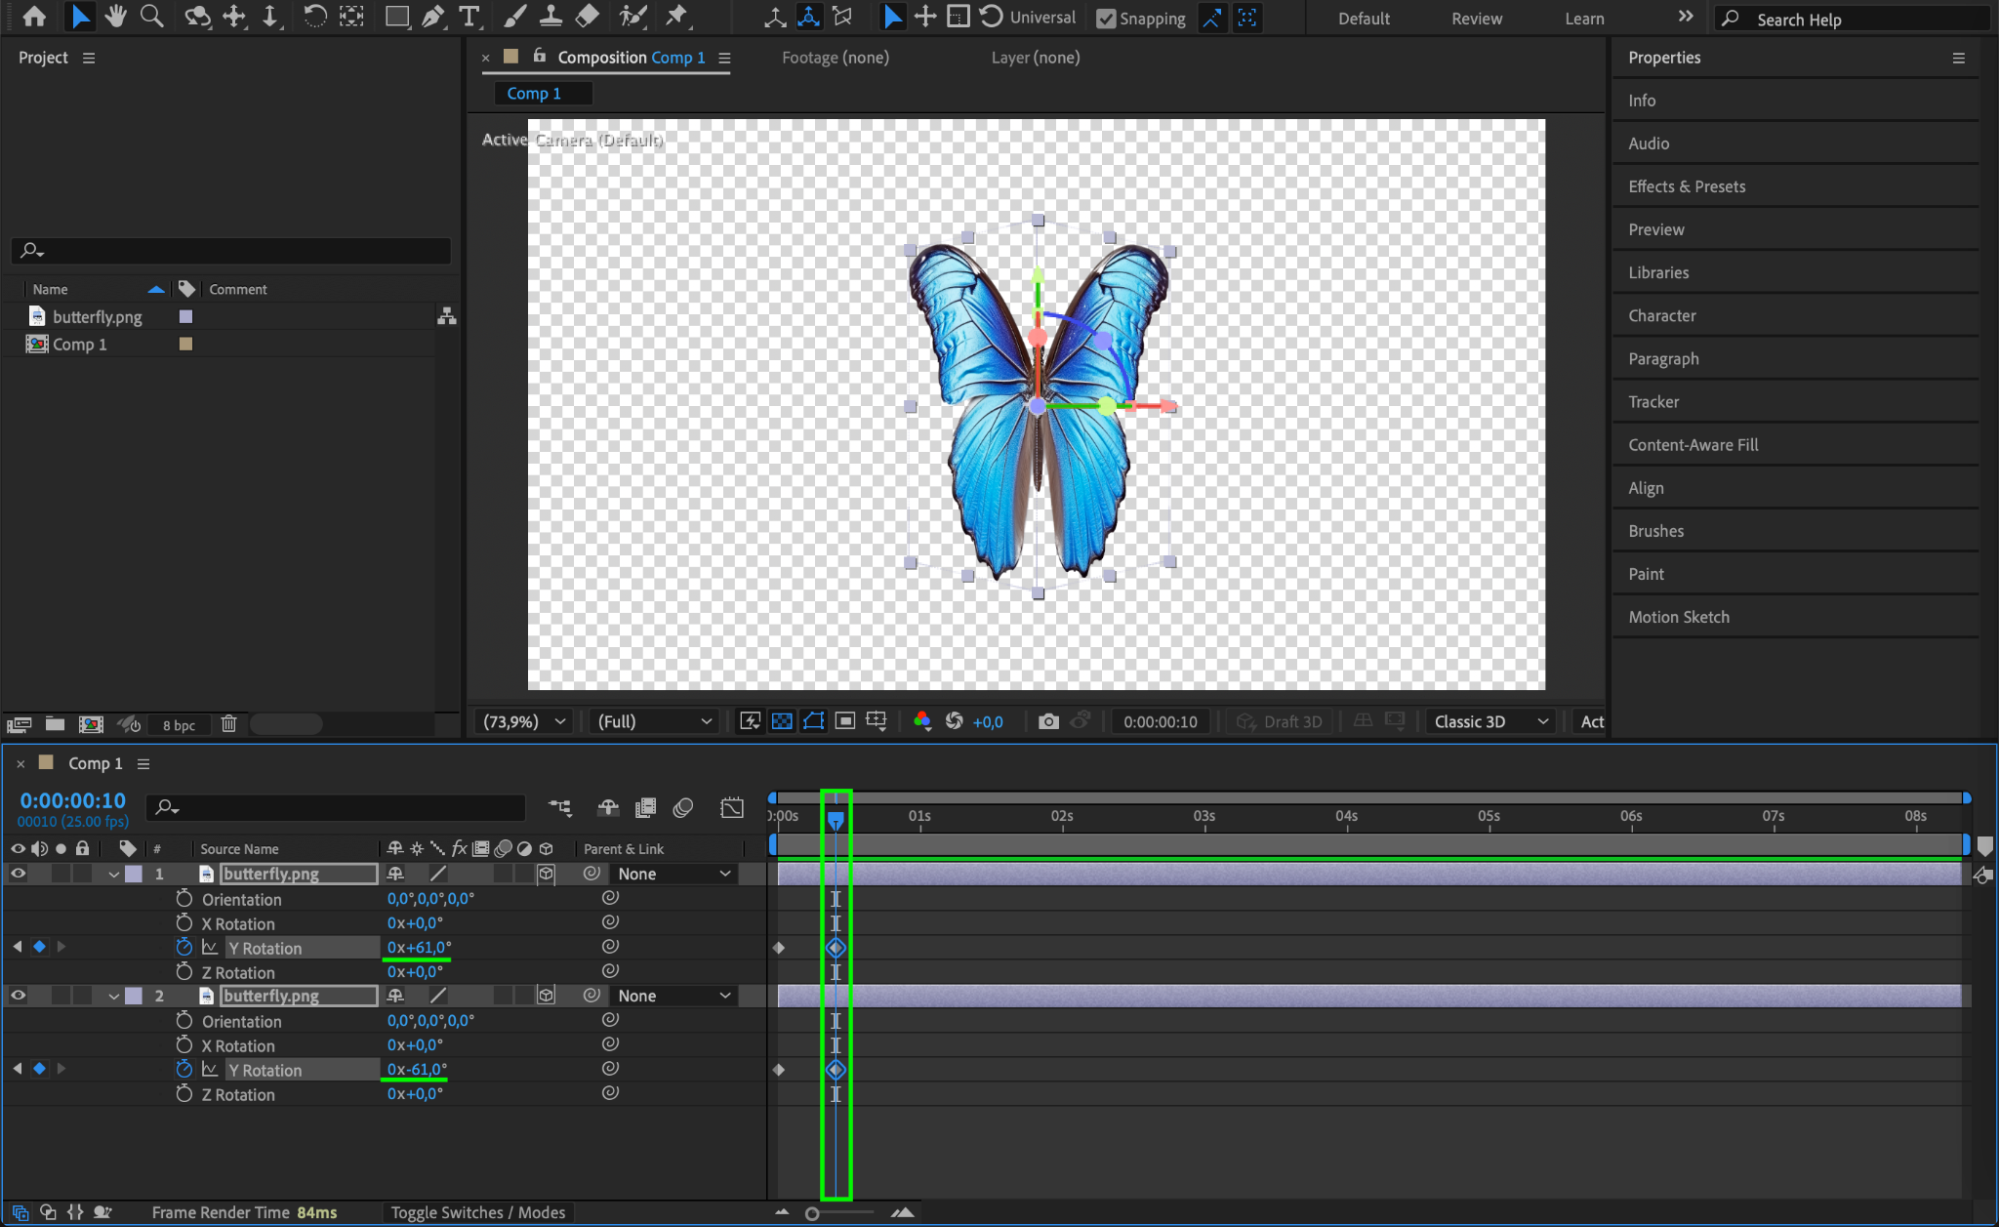
Move the Current Time Indicator (CTI) to the beginning of the timeline.
Get 10% off when you subscribe to our newsletter
Select both wing layers and press “R” to reveal the Rotation properties.
Click the stopwatch icon next to Y Rotation to create keyframes with the value 0.
Move the CTI forward a few frames (e.g., 5 frames) and change the right wing’s Y Rotation to -61° and the left wing’s to +61°.
Move the CTI forward again and reset Y Rotation back to 0°.
Get 10% off when you subscribe to our newsletter
Repeat this process to create a continuous flapping motion.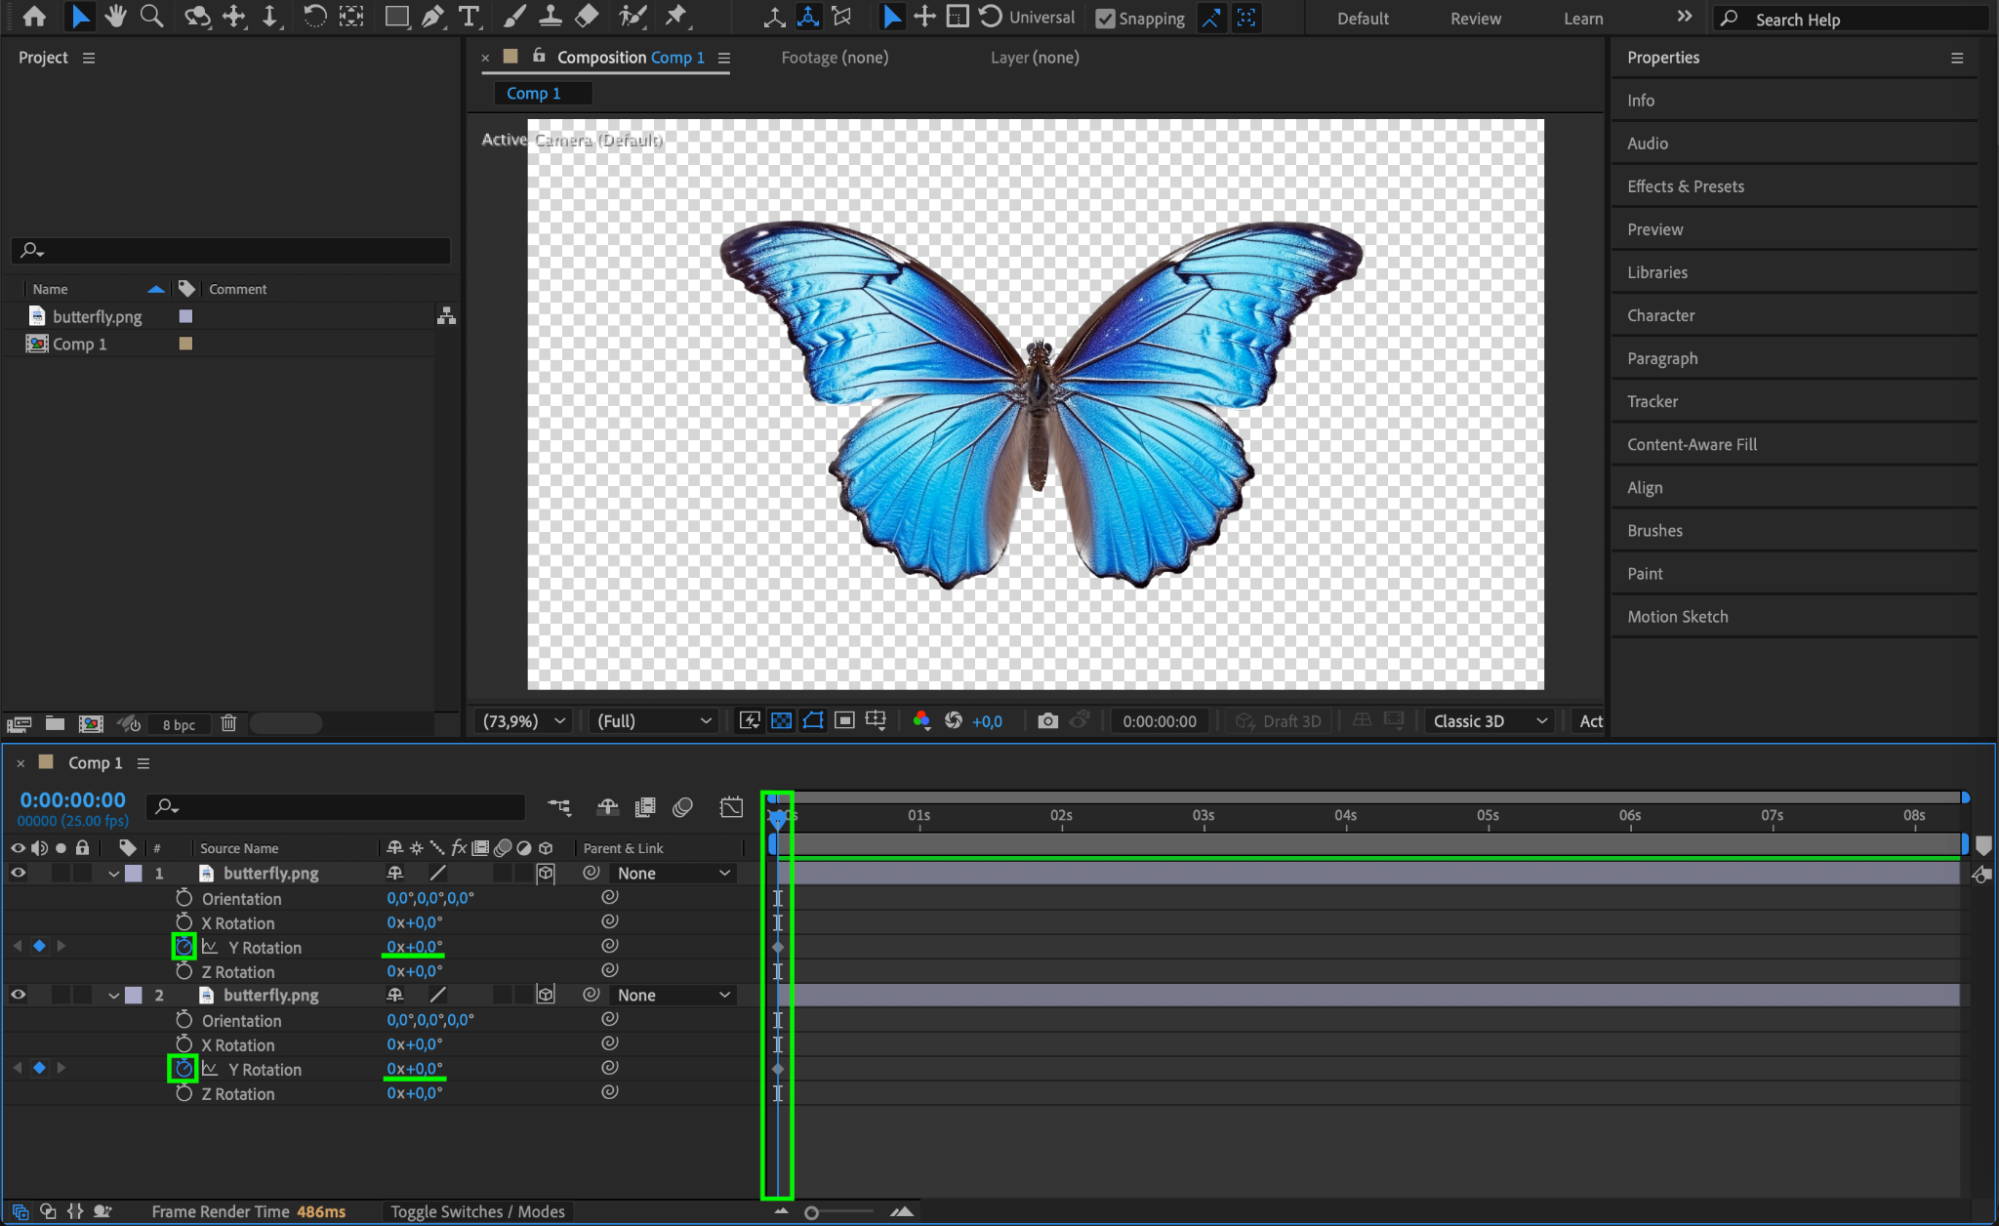
 Step 8: Smooth the Animation
Select all keyframes, right-click, and go to Keyframe Assistant > Easy Ease. This makes the animation more natural.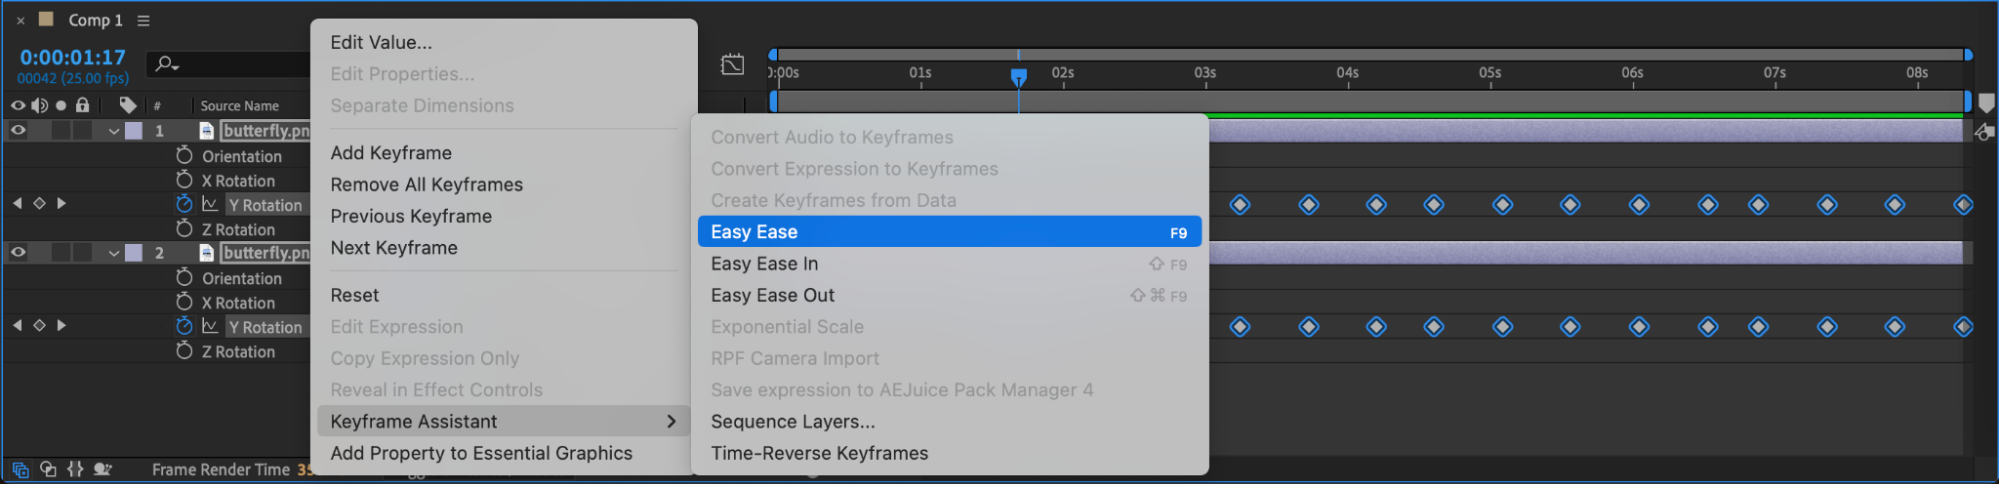 Step 9: Add a Null Object for Movement
Get 10% off when you subscribe to our newsletter
Go to Layer > New > Null Object.
Select both wing layers and Parent them to the Null Object (drag the pick-whip to the null).
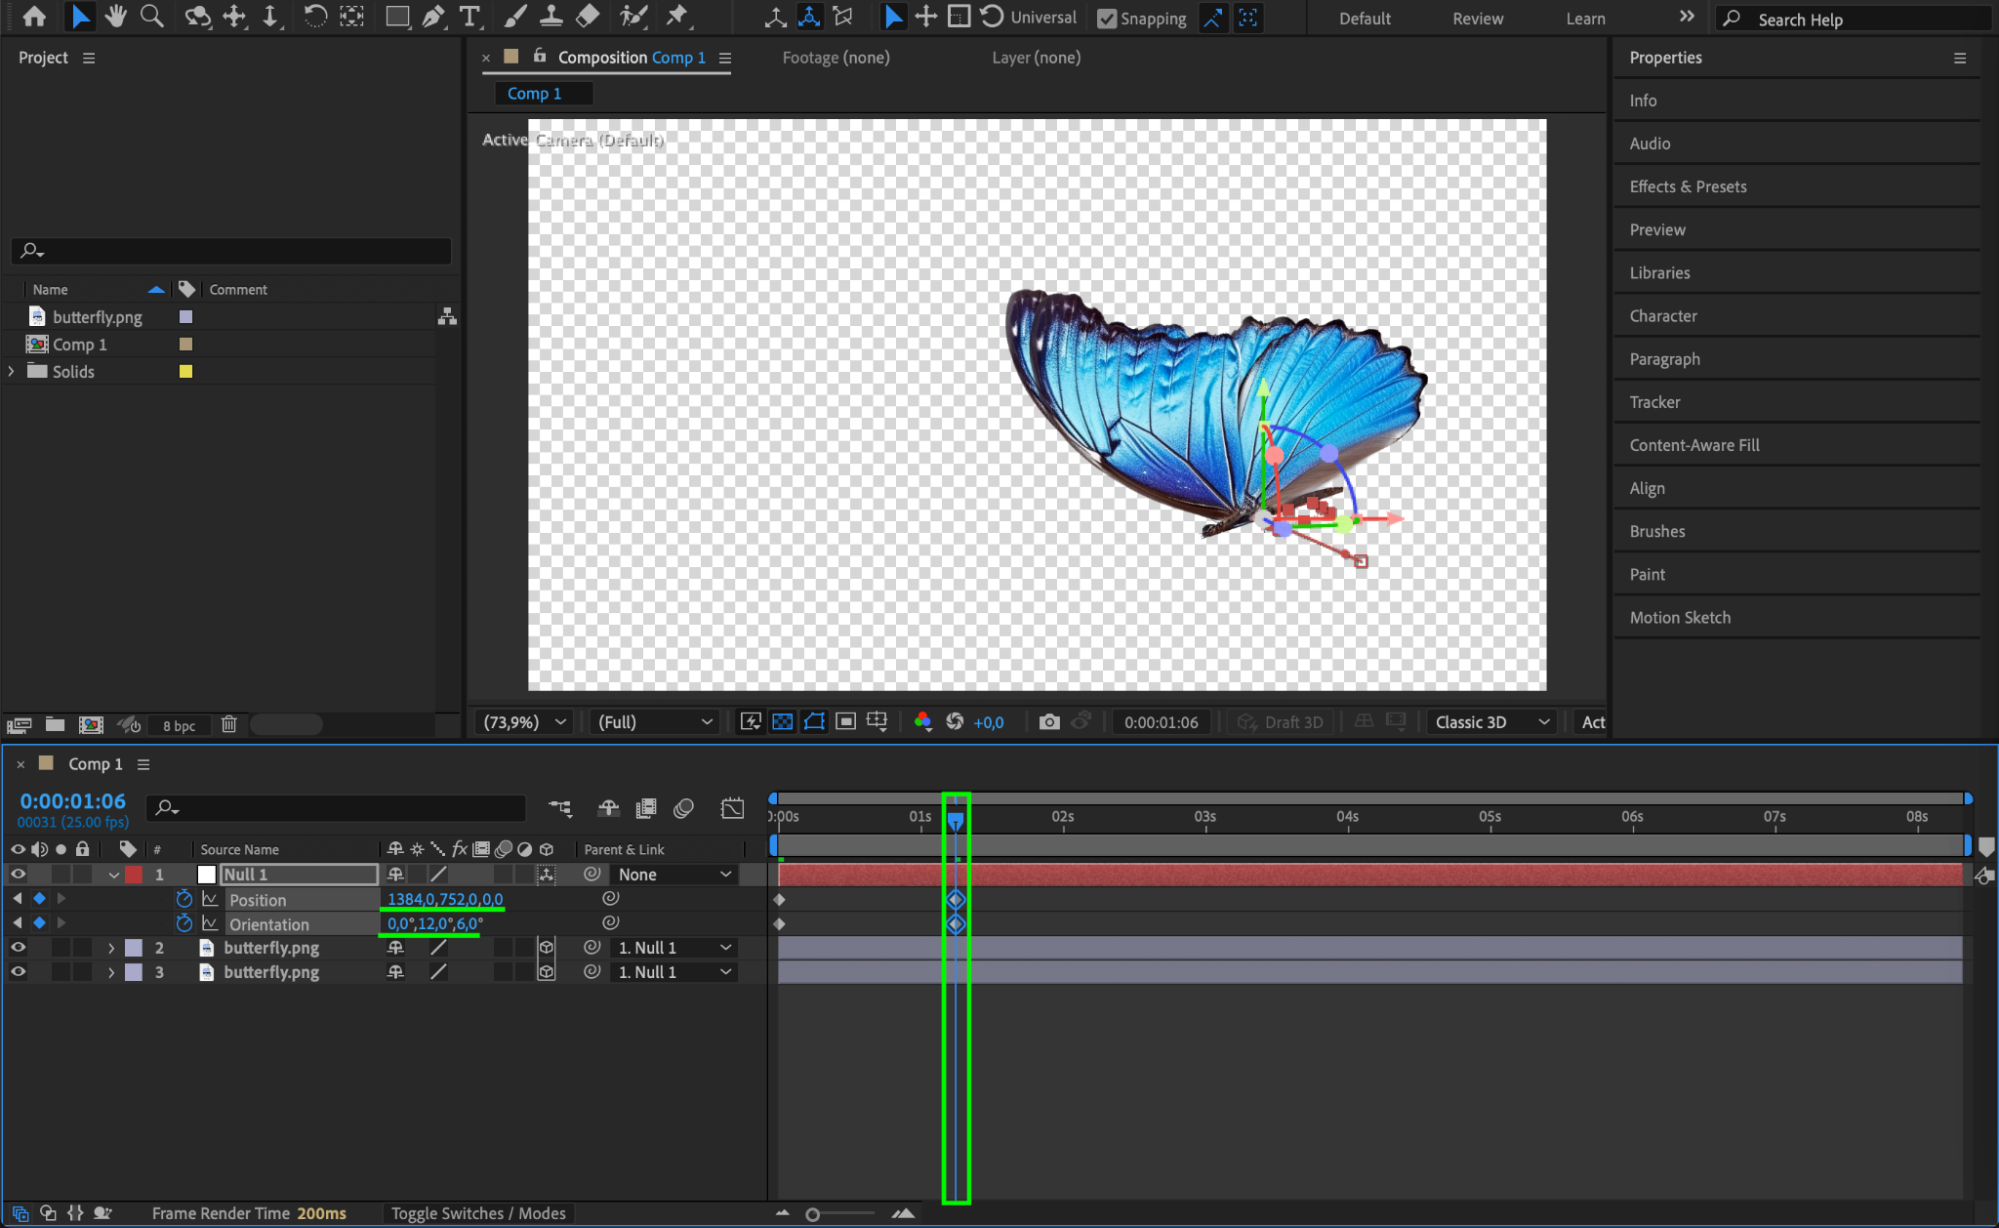
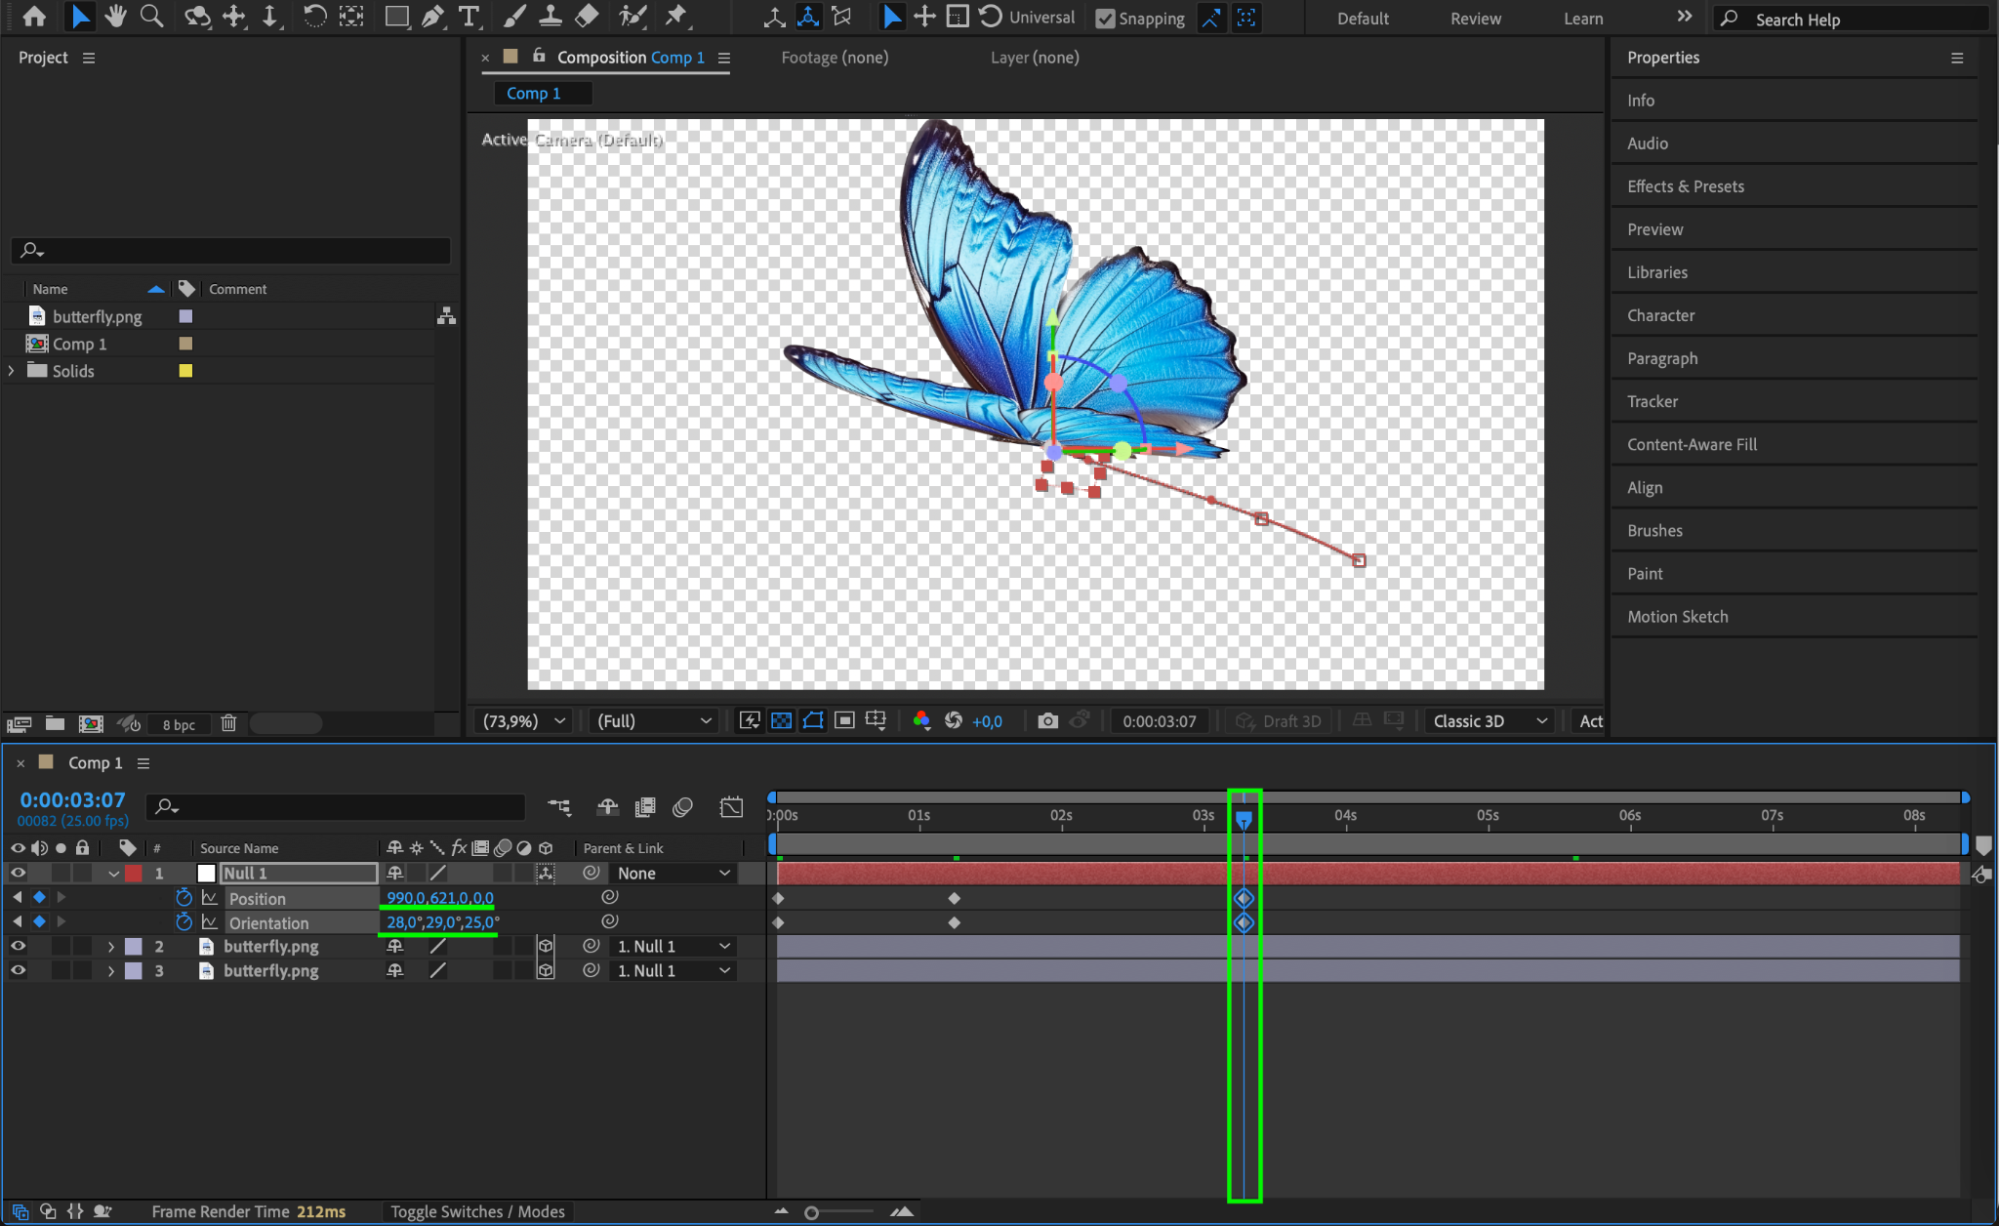
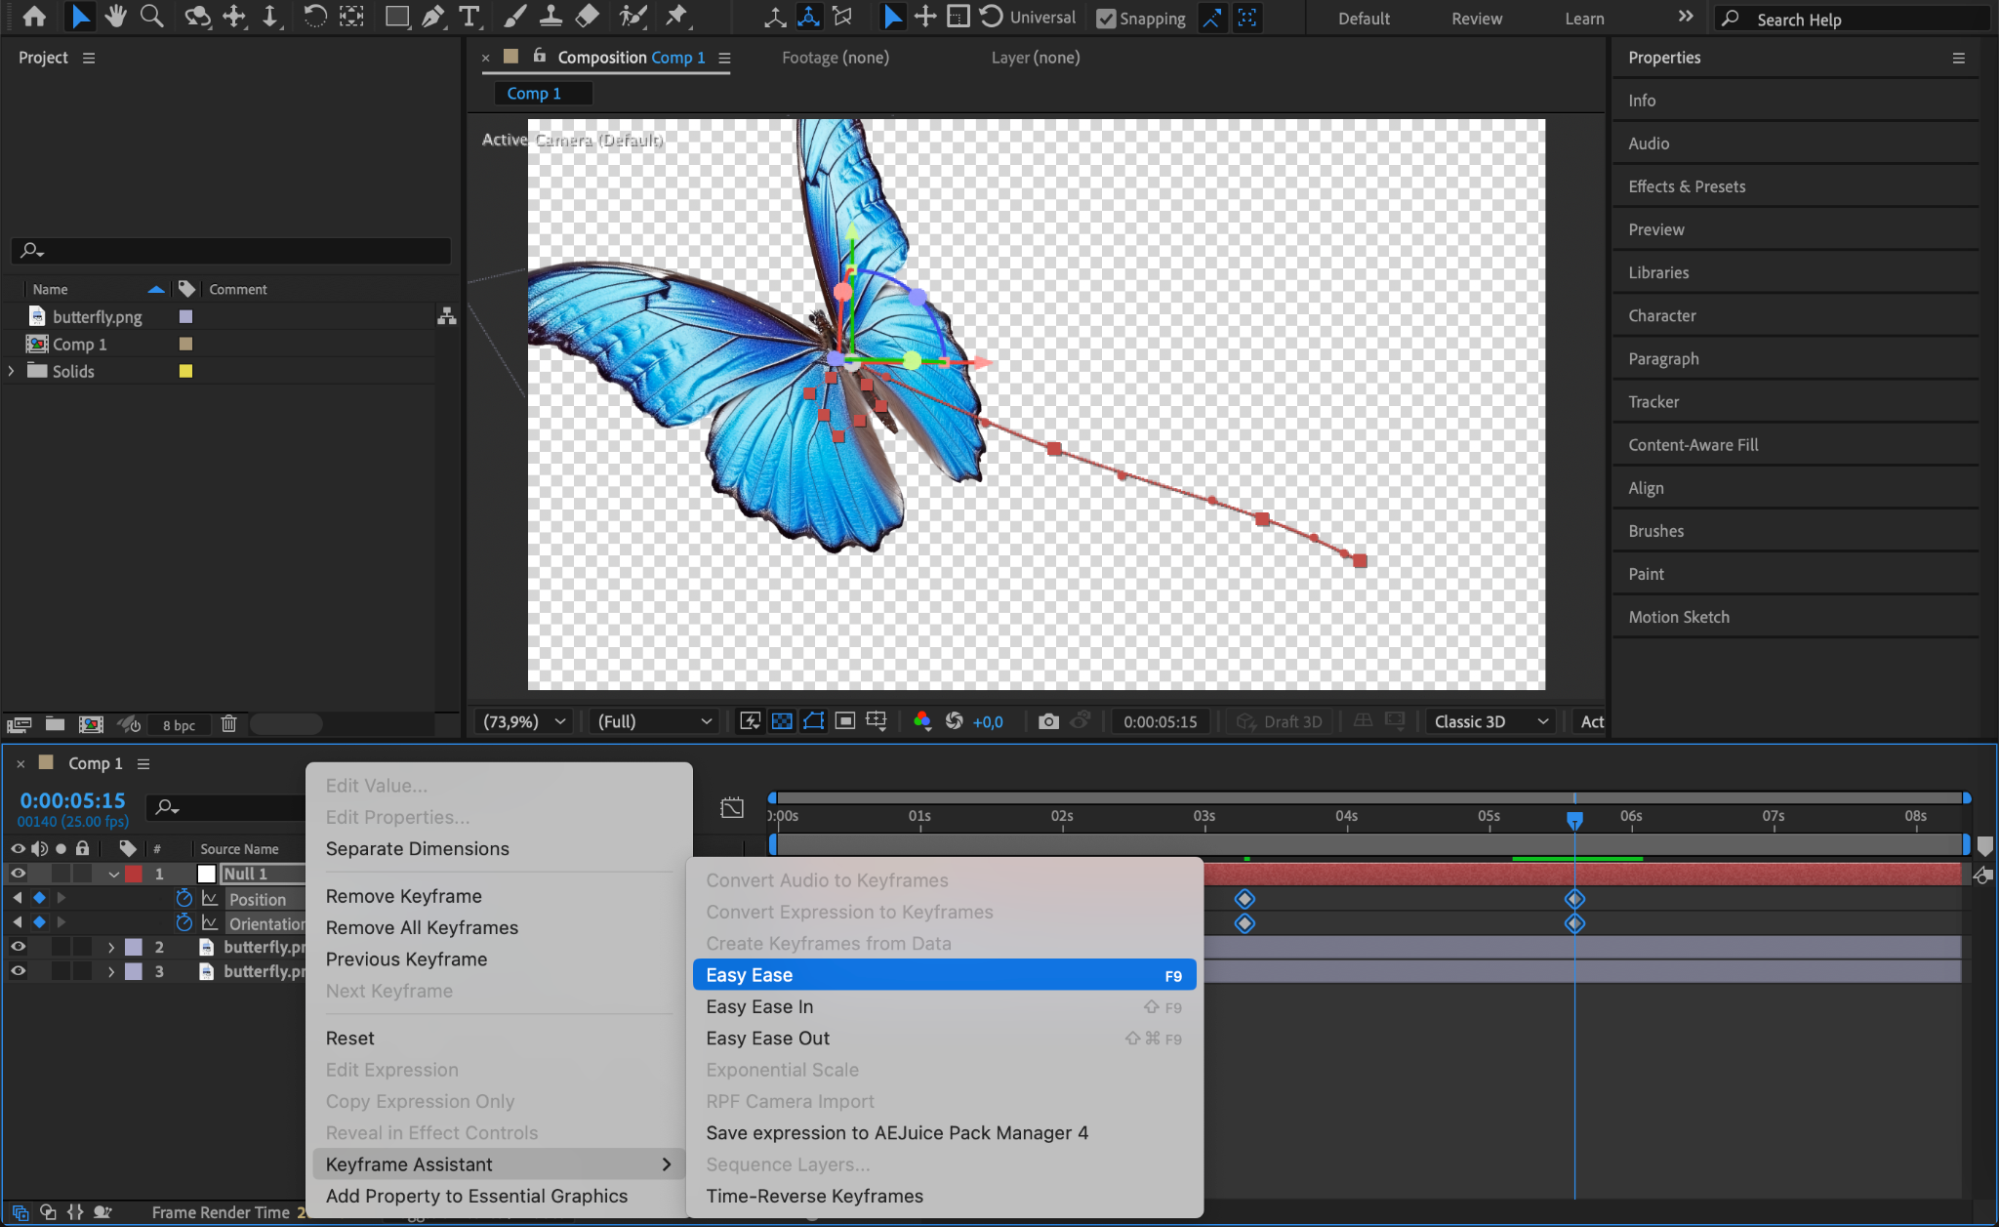
 Step 10: Animate the Butterfly’s Flight Path
Select the Null Object, press “P” to reveal the Position property and “R” for the Orientation property.
Click the stopwatch next to Position to create a keyframe at the starting point.
Move the CTI forward in the timeline and adjust the Position to create a natural curved flight path. You can also modify Orientation to make the butterfly tilt slightly as it moves.
Select all keyframes, right-click, and choose Keyframe Assistant > Easy Ease to smooth out the motion.
Get 10% off when you subscribe to our newsletter
 Step 11: Enable Motion Blur
Get 10% off when you subscribe to our newsletter
Check the Motion Blur box for both wing layers and enable the Global Motion Blur switch at the top of the timeline. This makes the wings look more natural in motion.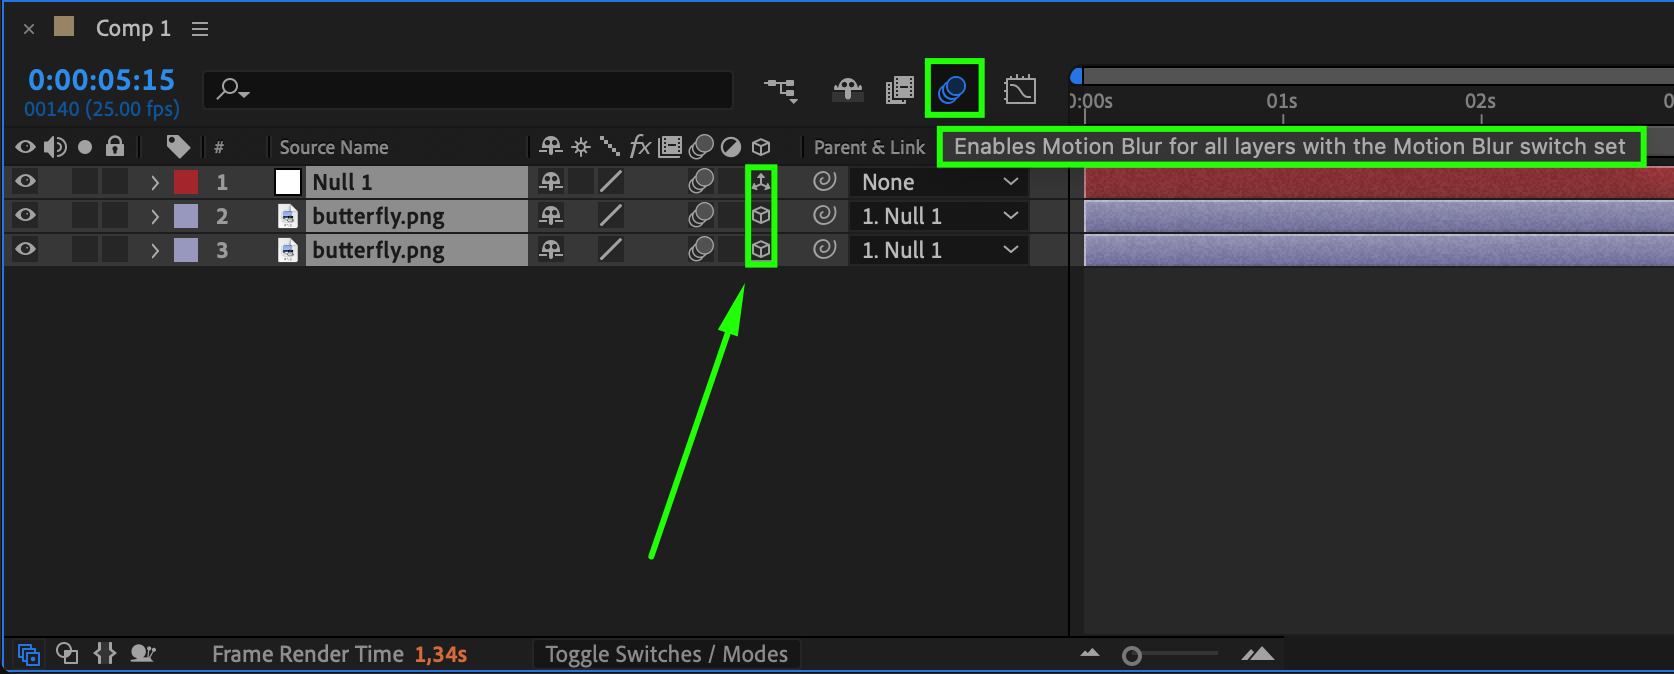 Step 12: Preview the Animation
Press Spacebar to preview the animation and make any necessary adjustments to timing and motion.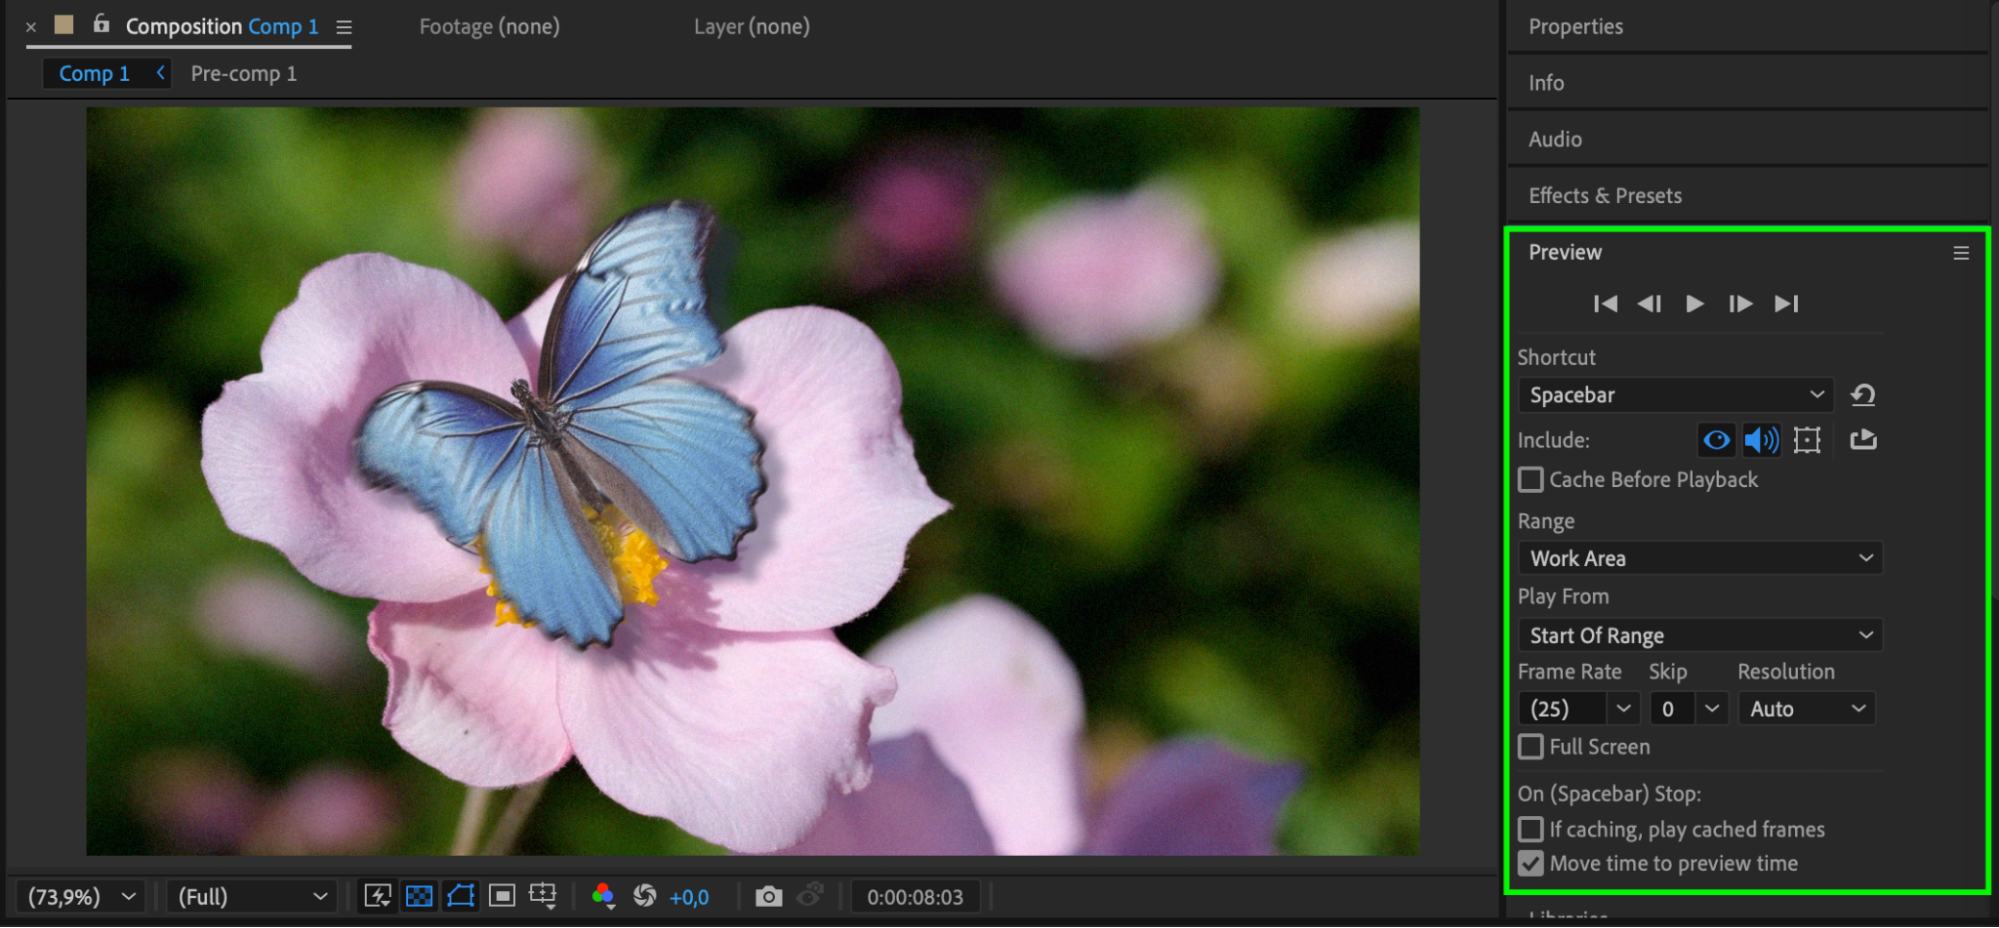 Step 13: Render the Final Animation
Get 10% off when you subscribe to our newsletter
Go to Composition > Add to Render Queue.
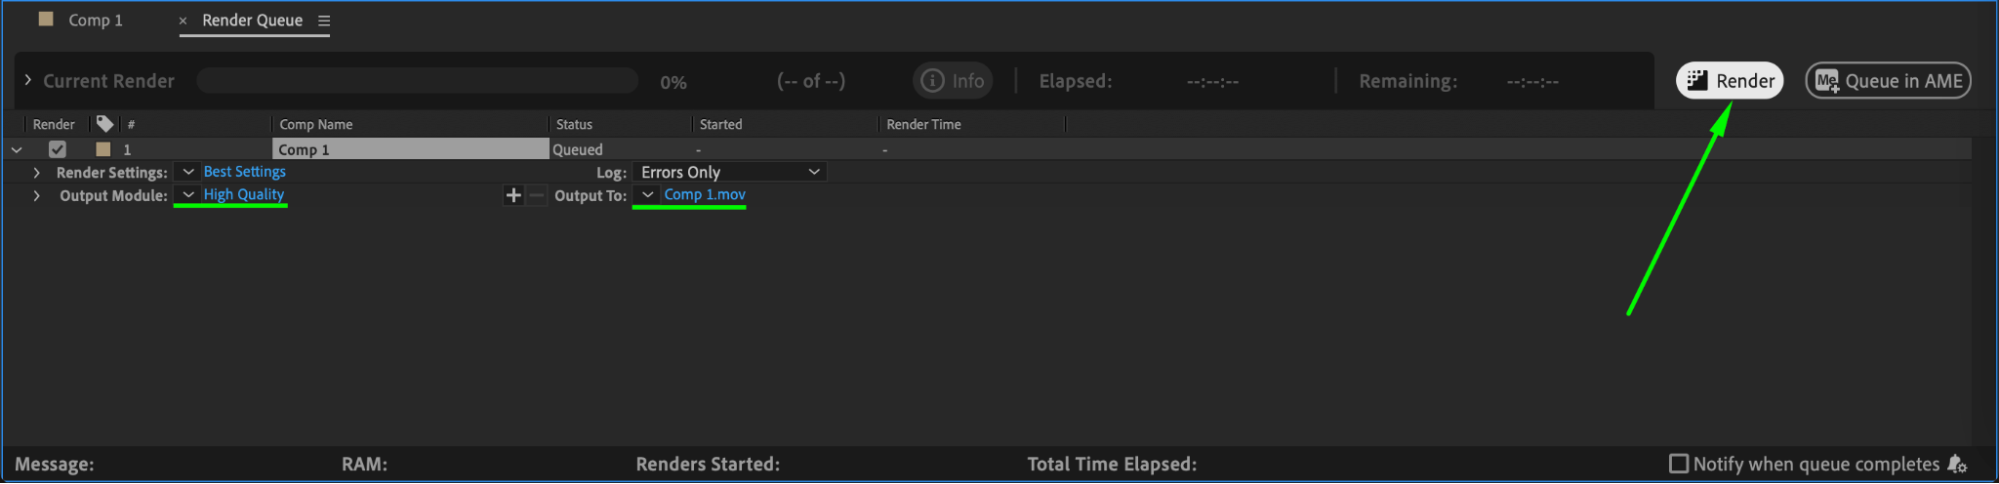
Set the output format to H.264 (MP4) for best results.
Click Render to export your animated butterfly.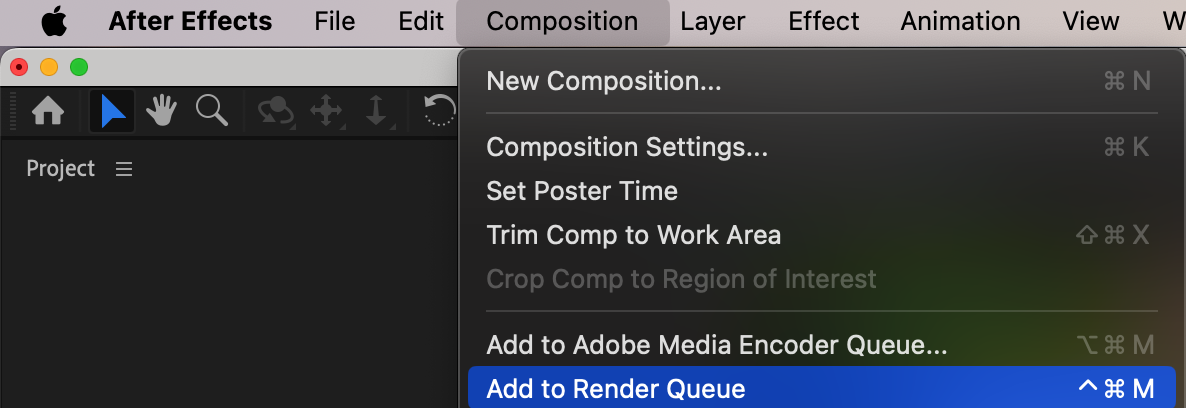
 Conclusion
Get 10% off when you subscribe to our newsletter
By following these steps, you can create a realistic butterfly flight animation in After Effects. Adjusting the wing flap speed, motion path, and motion blur will help refine the effect. Experiment with different movements to achieve a more natural look!
Our Bestsellers


