Creating a Glowing Path Animation in After Effects
Introduction
A glowing path effect can add a dynamic and eye-catching element to your videos. In this tutorial, we will use the CC Particle System II effect and the Motion Sketch tool to create a smooth animated glow. Follow these steps to set up and animate the effect.
Step 1: Create a New Composition
Get 10% off when you subscribe to our newsletter

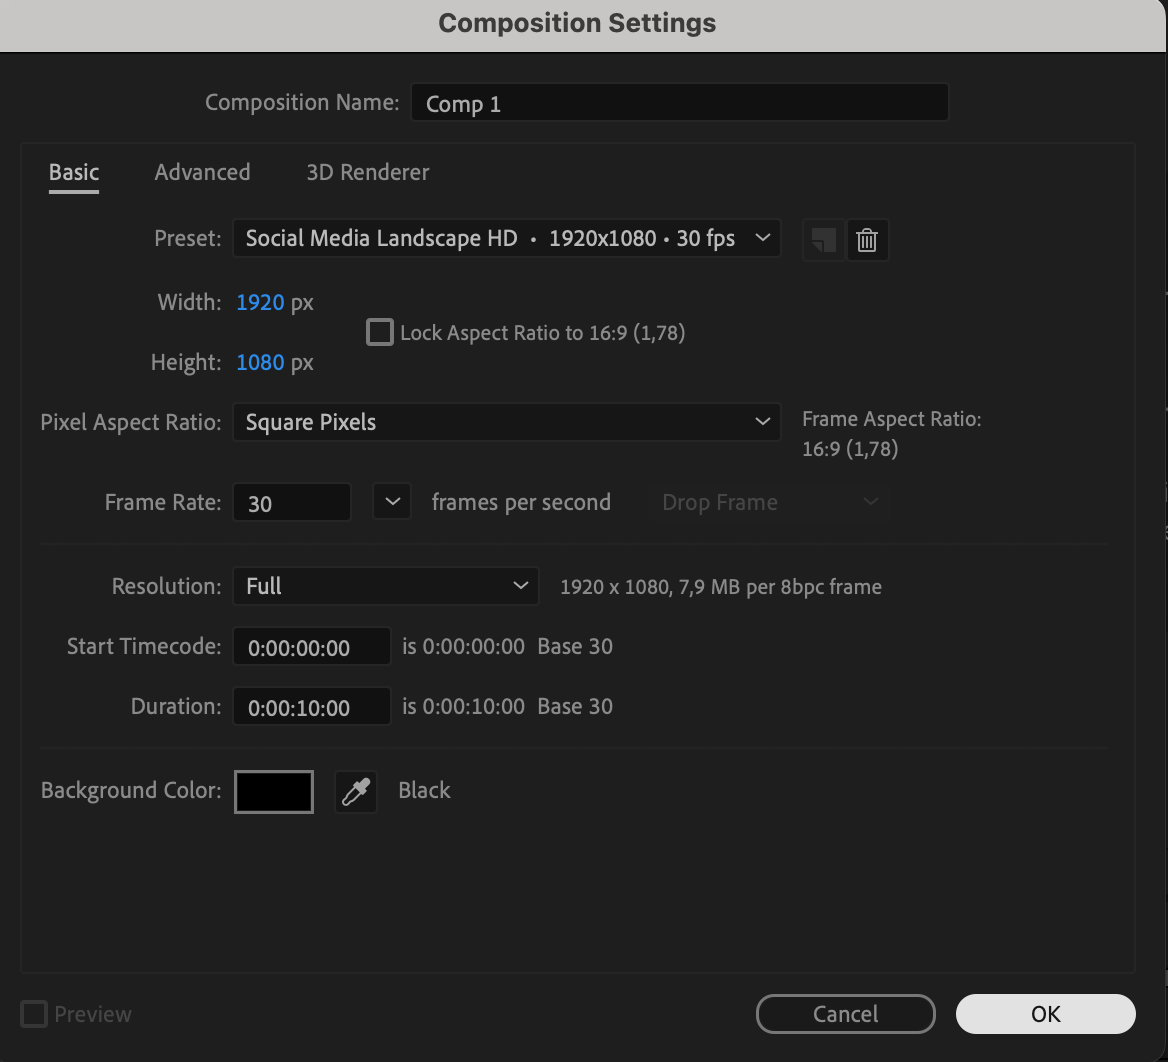
Go to Composition > New Composition, set the resolution to 1920×1080, frame rate to 30 fps, and duration to 10 seconds.

 Step 2: Add a Solid Layer
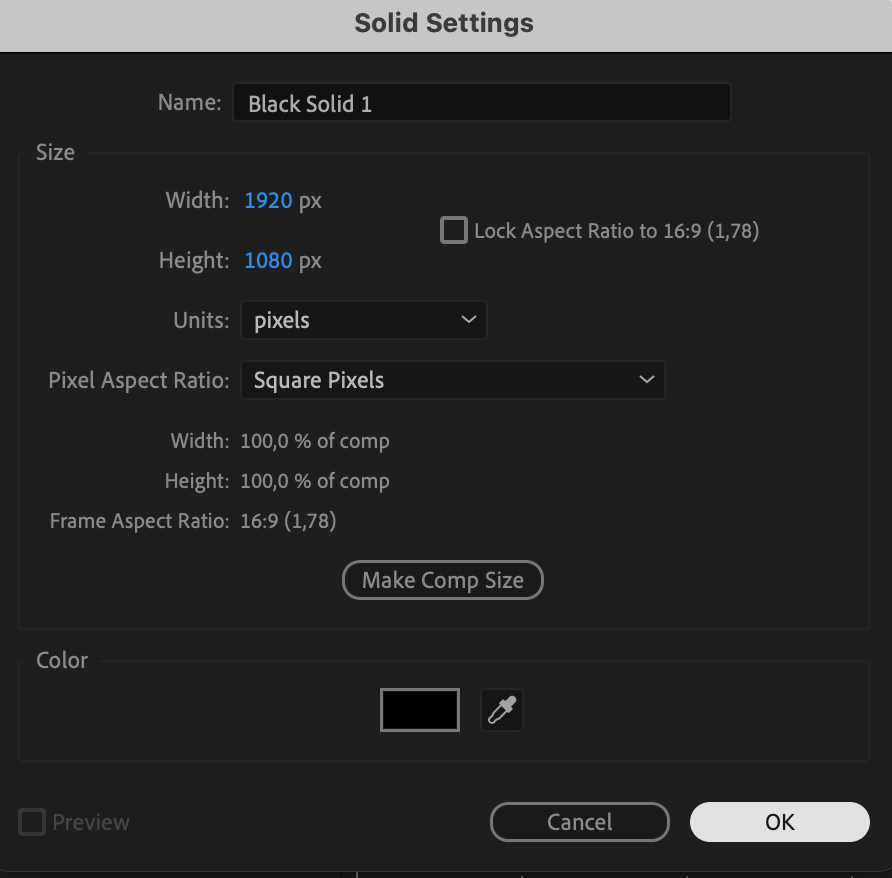
Go to Layer > New > Solid. Set its color to black and make sure it matches the composition size.
 Step 3: Apply CC Particle System II
With the solid layer selected, go to the Effects & Presets panel and search for CC Particle System II. Apply it to the solid layer.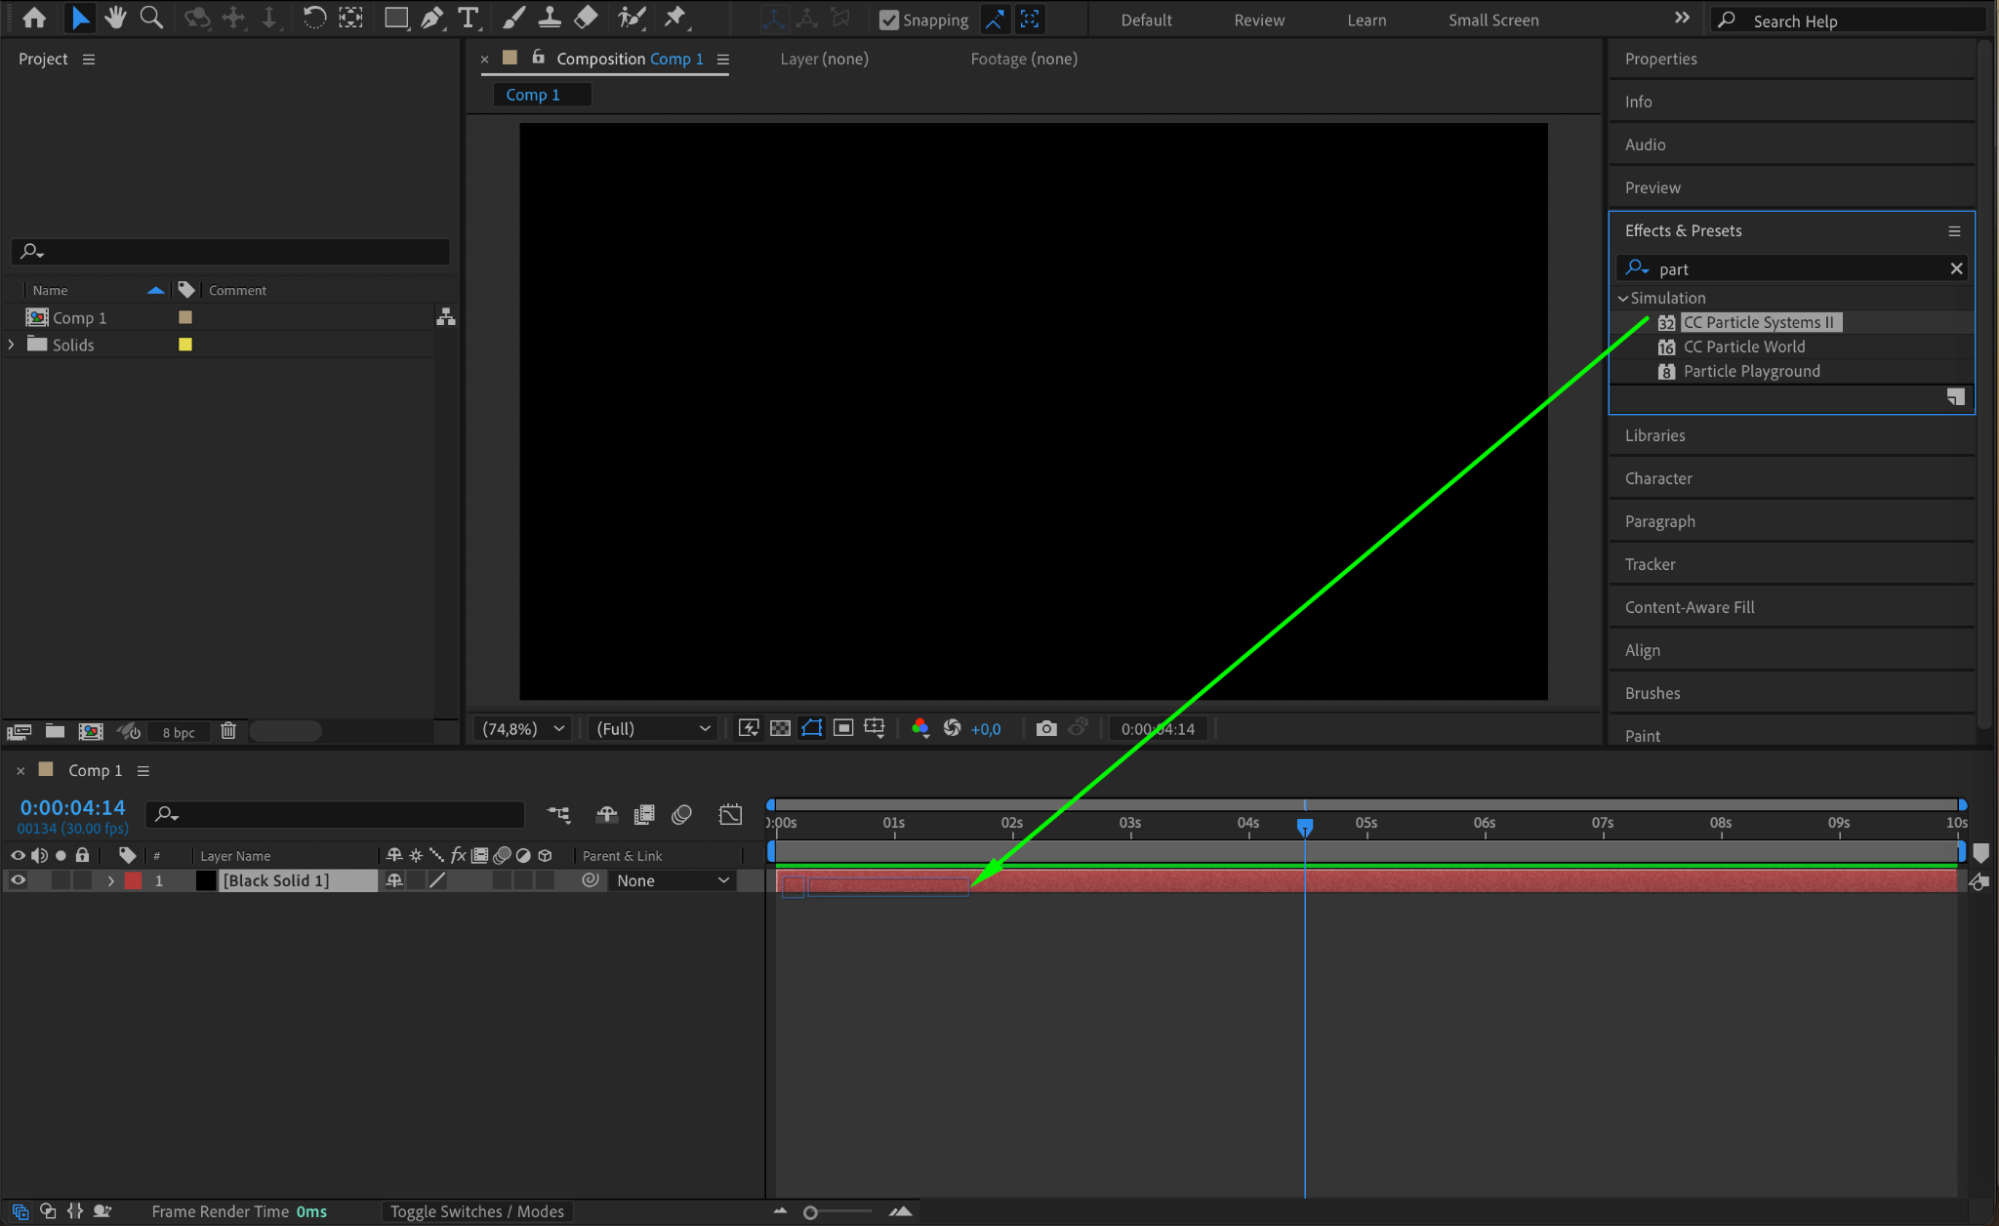 Step 4: Adjust Particle Settings
In the Effect Controls panel, adjust the settings:
Birth Rate: 25
Longevity: 3
Producer Position (Radius X, Y): 0
Animation: Twirl
Velocity: 0.05
Inherit Velocity: -5
Gravity: 0
Resistance: 0.1
Particle Type: Faded Sphere
Birth Size: 0.05
Death Size: 0
Size Variation: 100
Max Opacity: 100
Birth Color & Death Color: Choose any color (you can adjust this later to change the glow effect). Step 5: Create a Null Object
Go to Layer > New > Null Object. This will control the movement of the glow effect.
Step 6: Adjust the Anchor Point of the Null Object
Select the Null Object, choose the Pan Behind Tool (Y), and move the Anchor Point to the center. Then, use the Align Panel to center it both horizontally and vertically.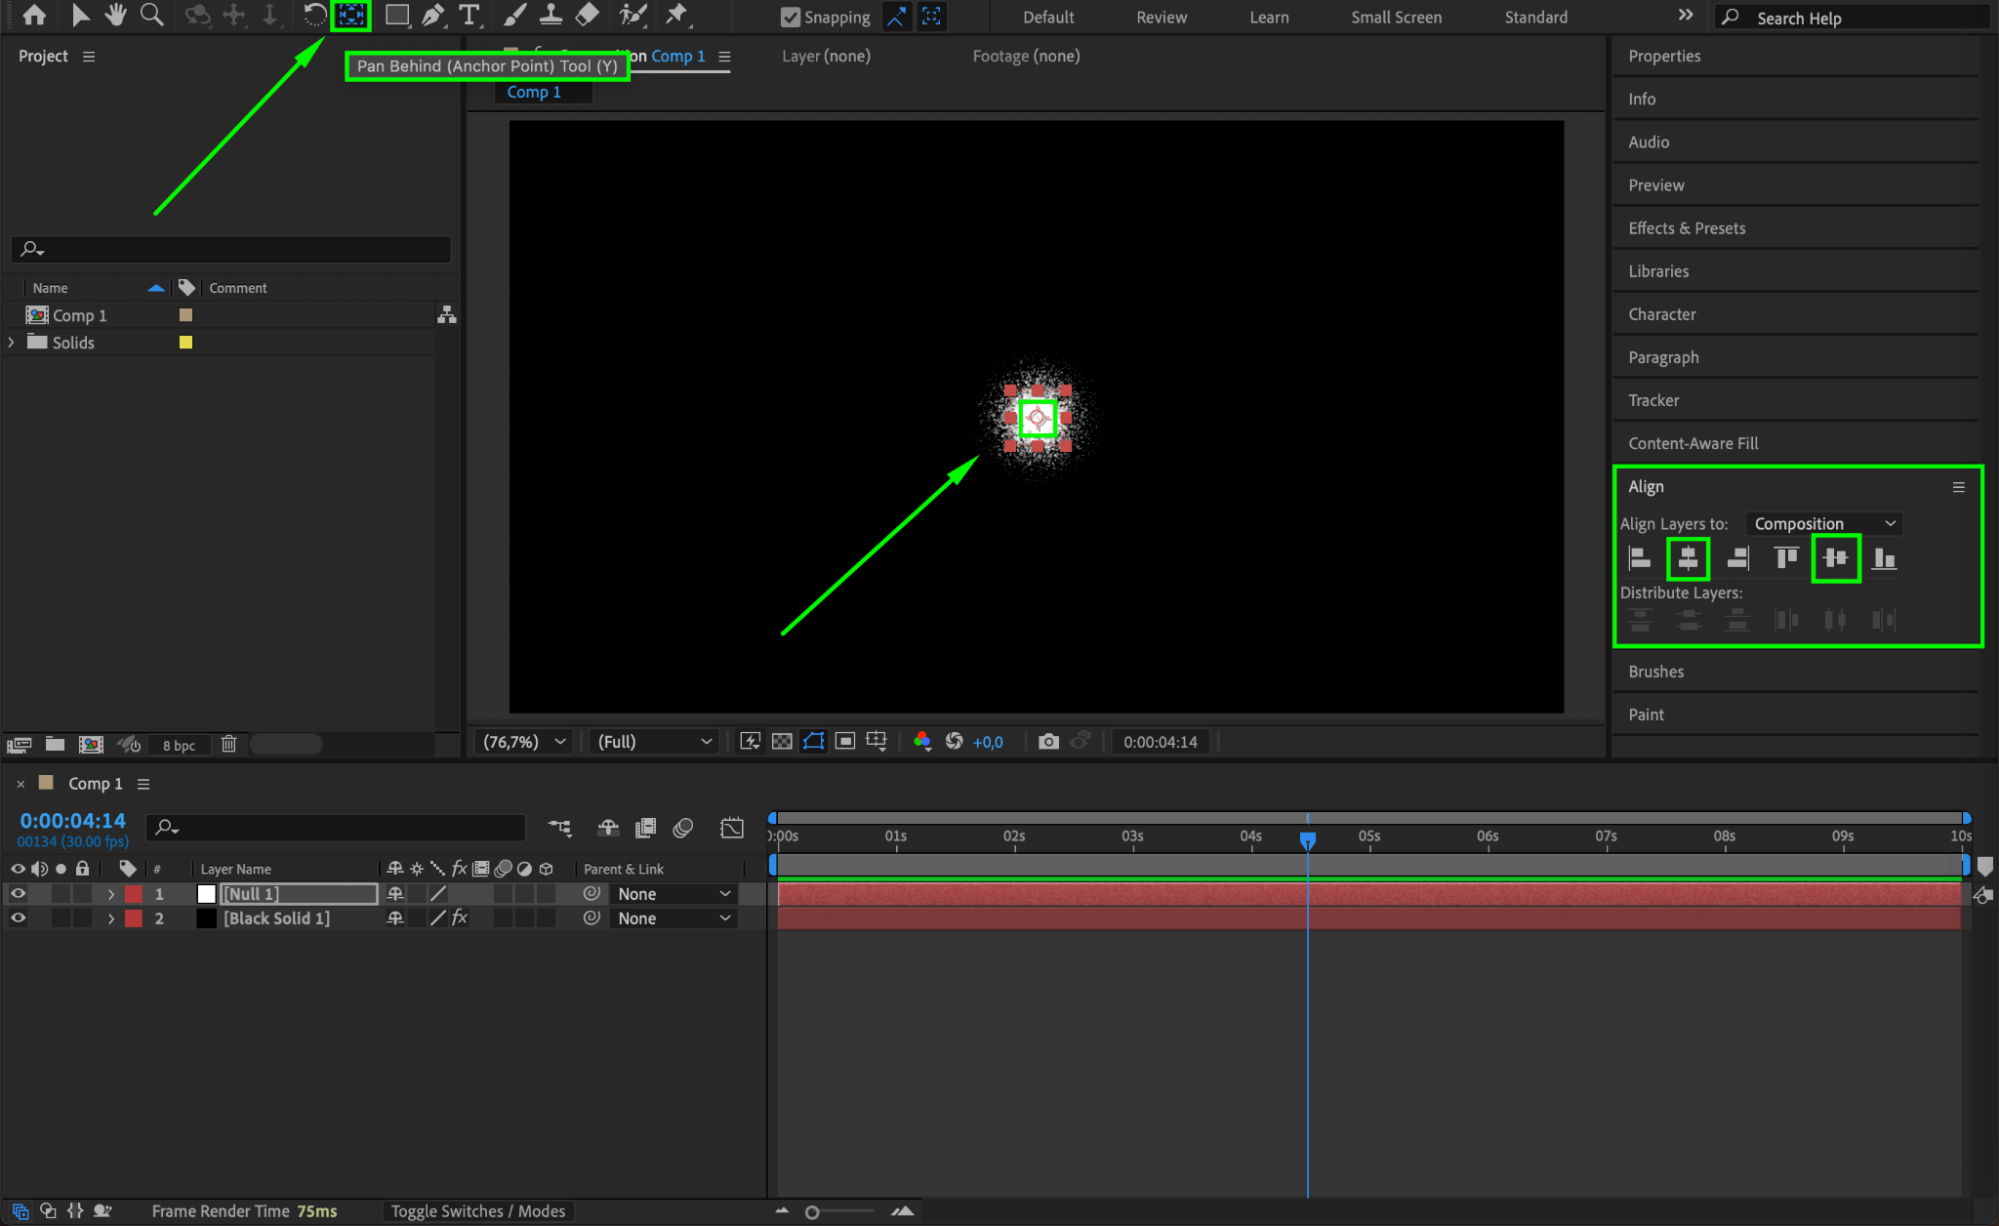 Step 7: Open Motion Sketch
Go to Window > Motion Sketch to open the panel.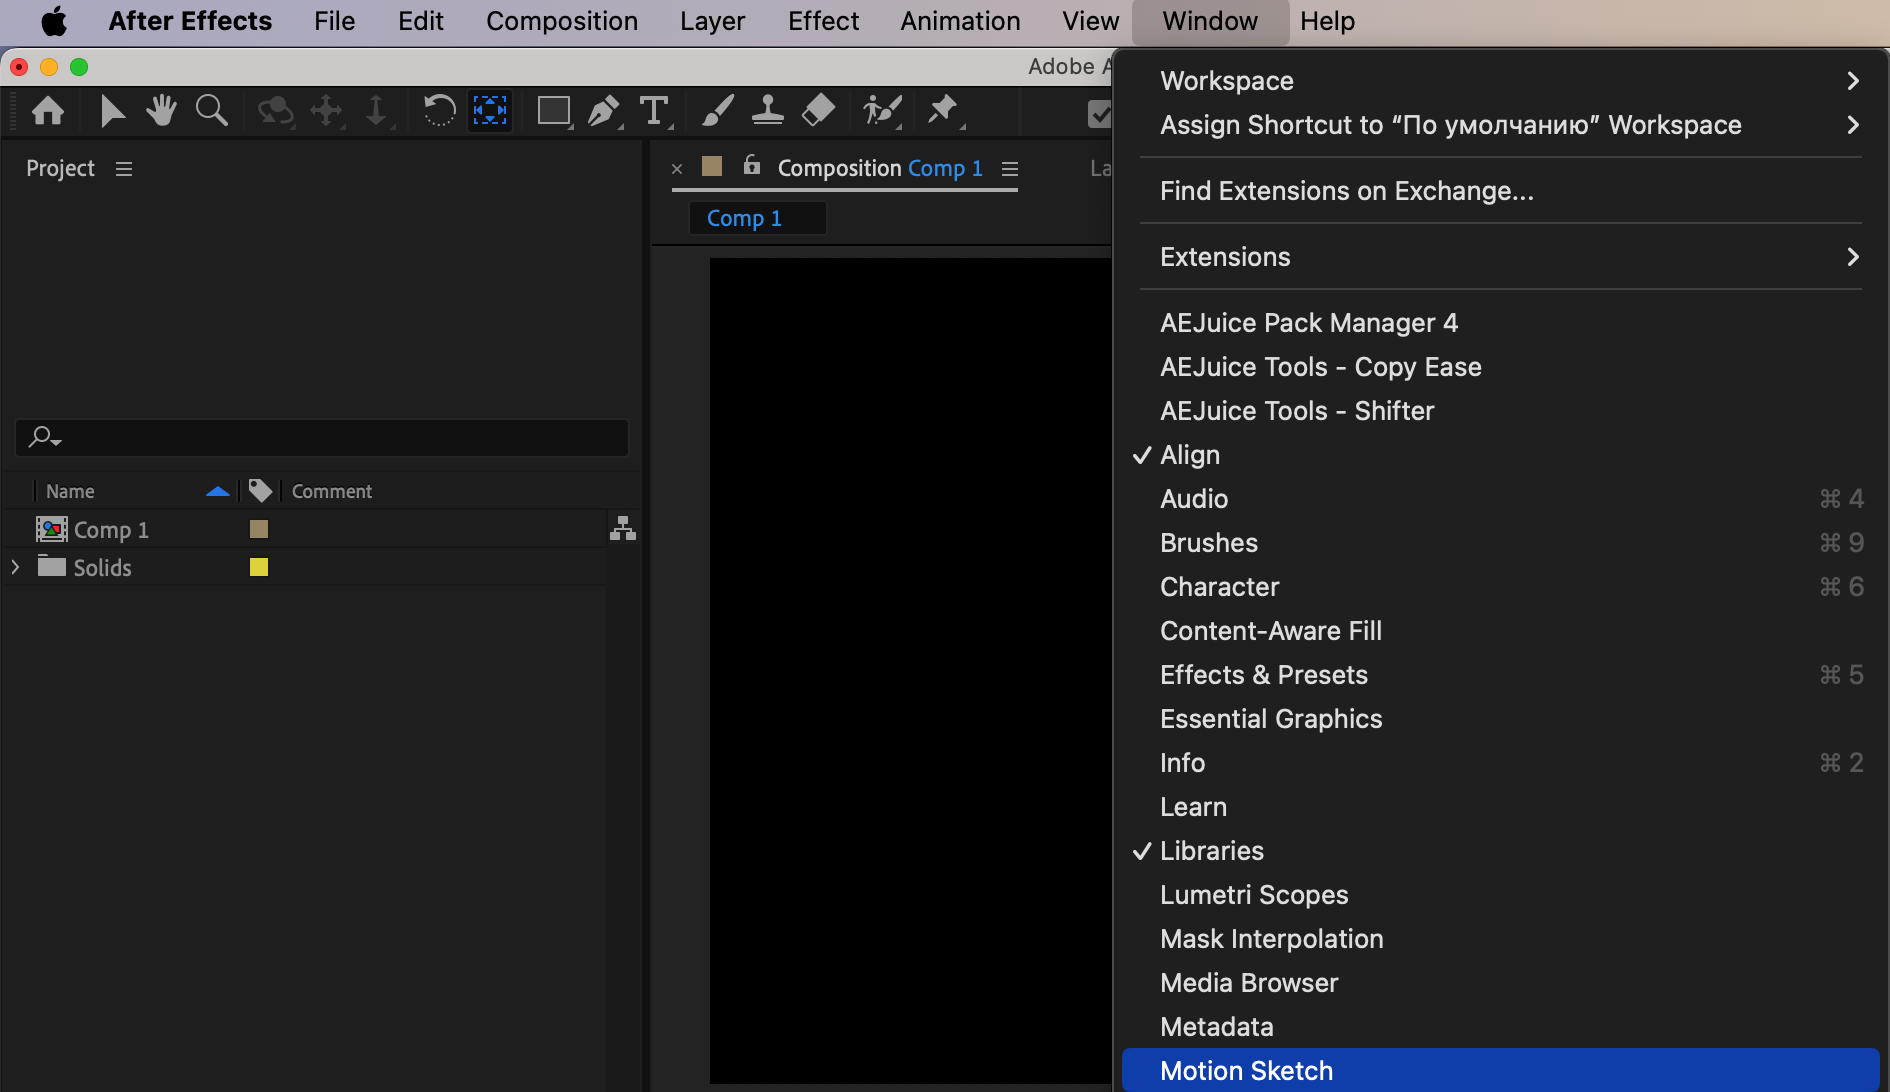 Step 8: Draw the Glowing Path
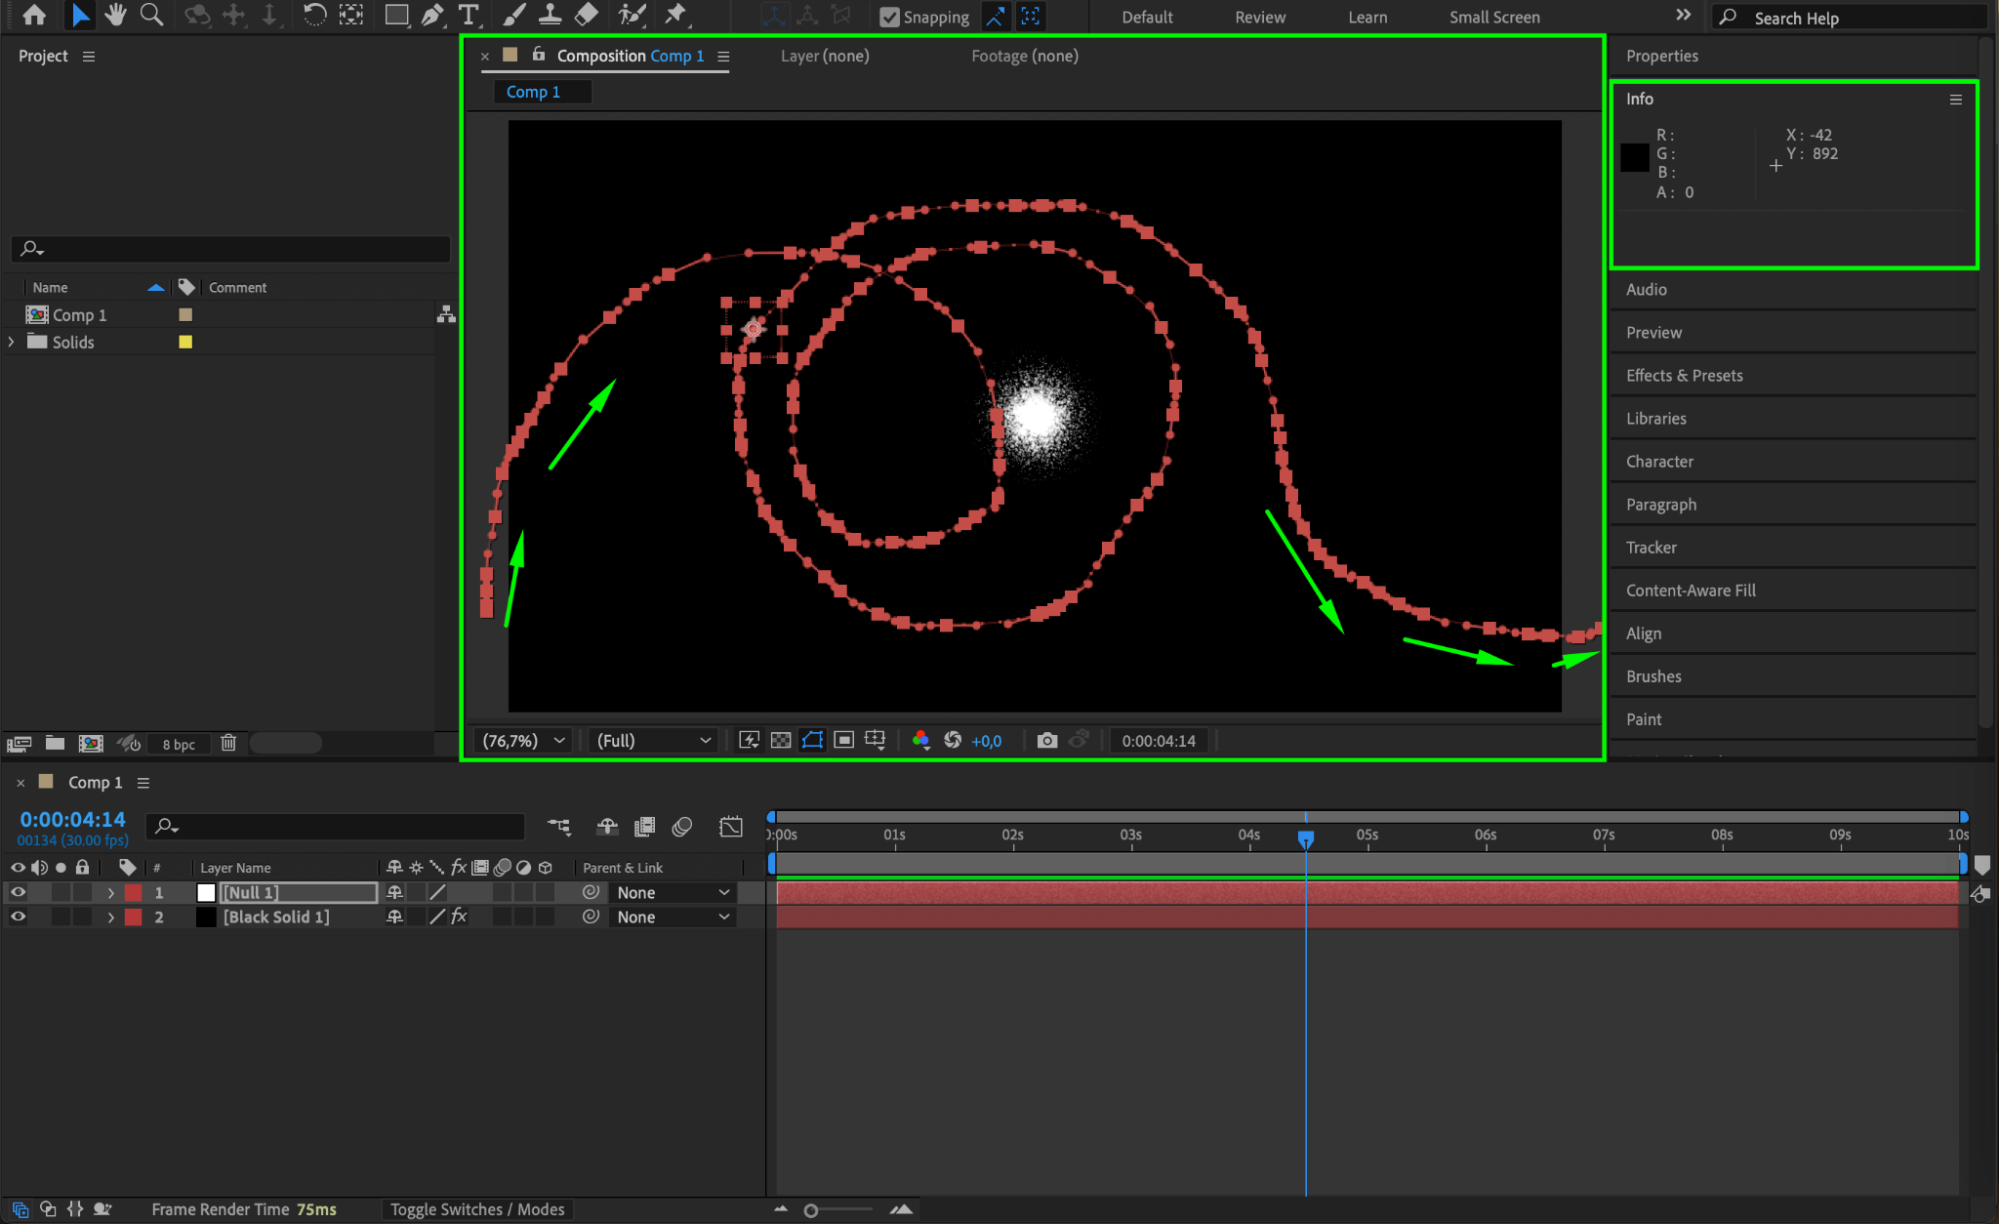
In the Motion Sketch panel, press Start Capture and use your mouse to draw a path while holding the left mouse button. This will create keyframes for the movement.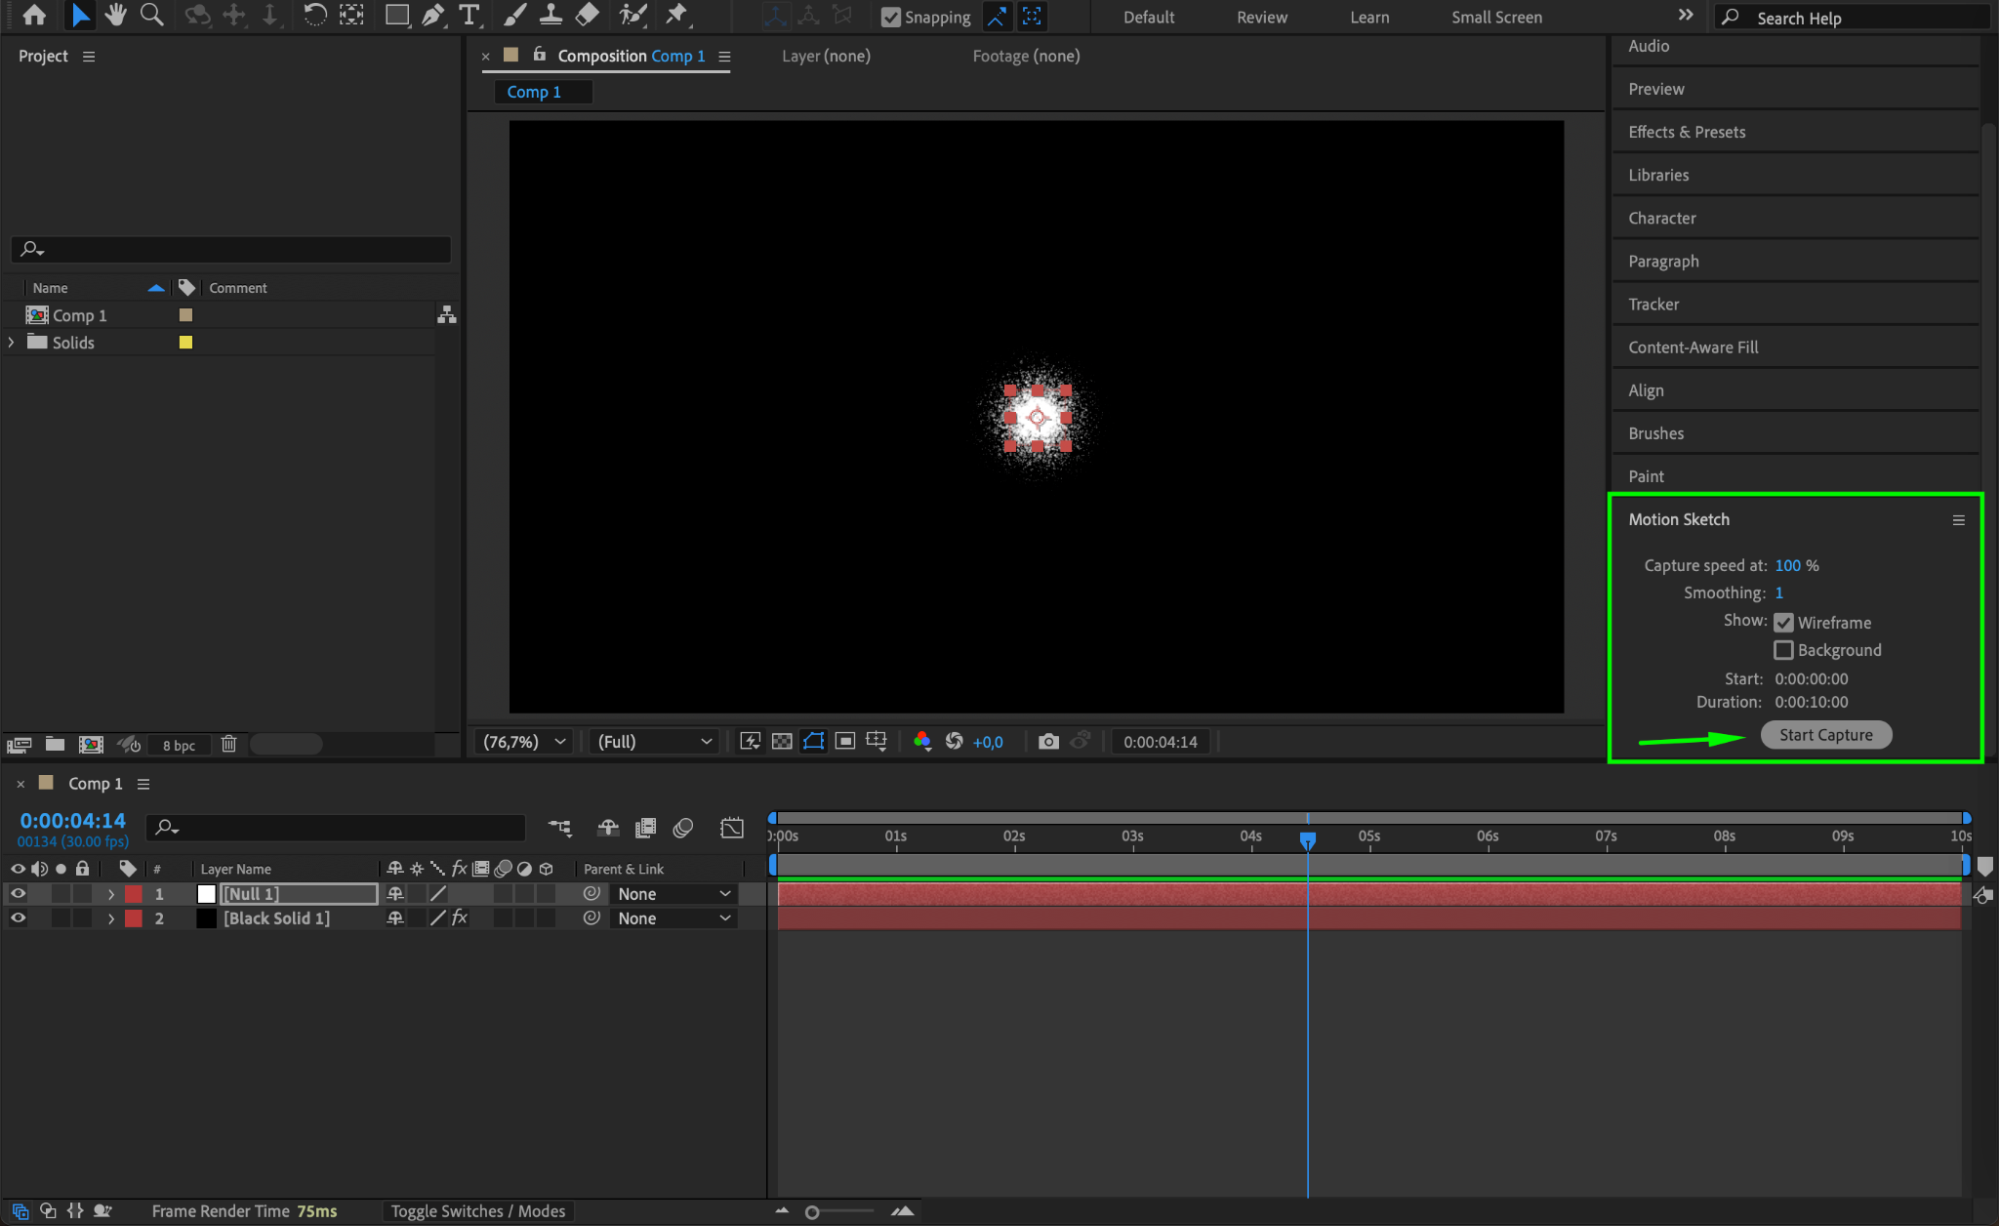
 Step 9: Smooth the Keyframes
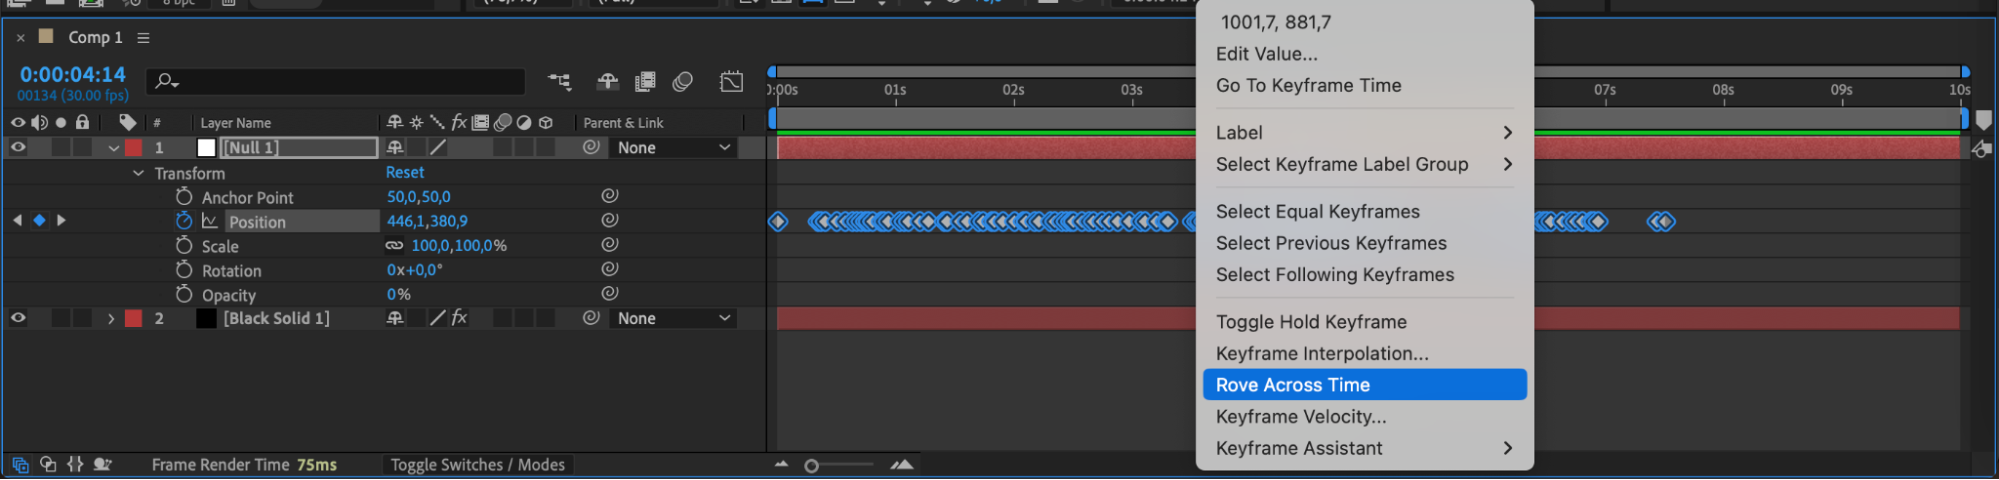
Expand the Null Object’s Position property in the Timeline. Select all keyframes, right-click, and choose Rove Across Time. Then, move the last keyframe to the end of the composition to ensure a smooth animation.
 Step 10: Parent the Solid Layer to the Null Object
Expand the Solid Layer’s Transform properties, then use the Pick Whip tool to parent the Position of the solid layer to the Null Object’s Position. This links the glow to the movement.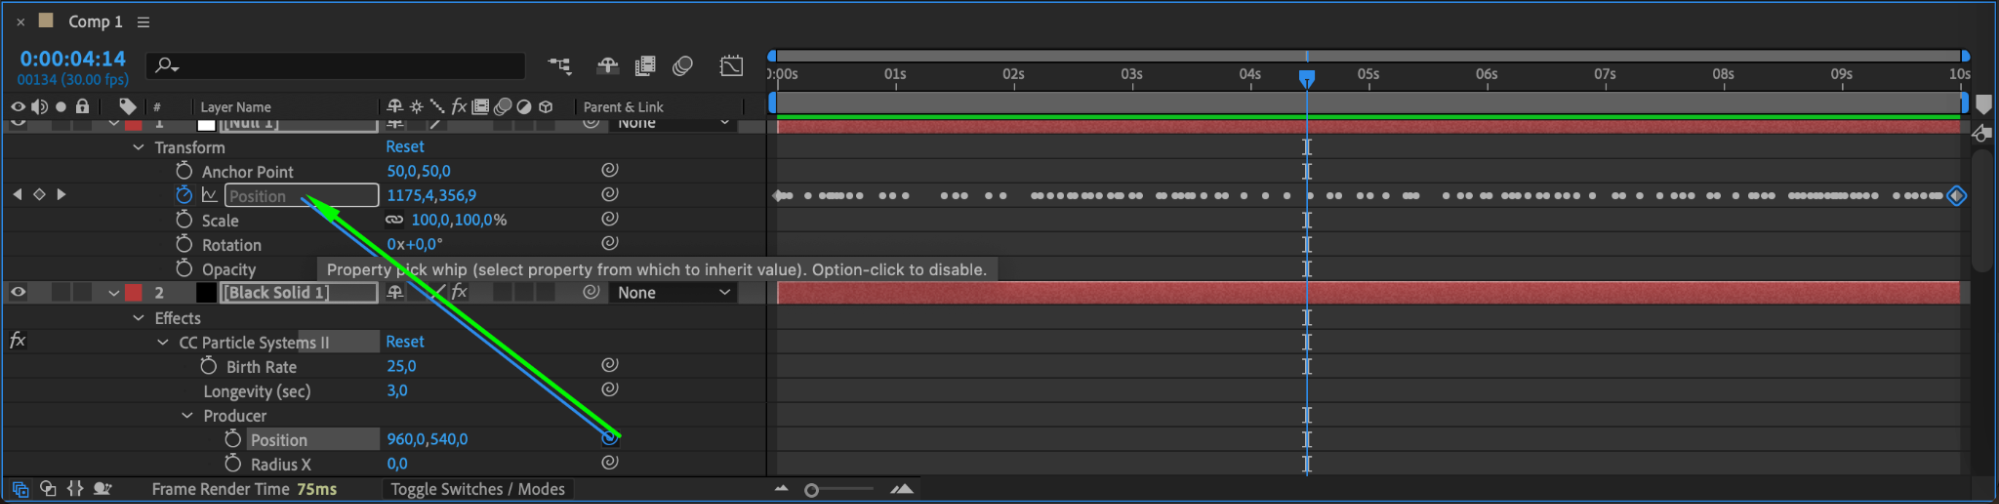 Step 11: Apply the Glow Effect
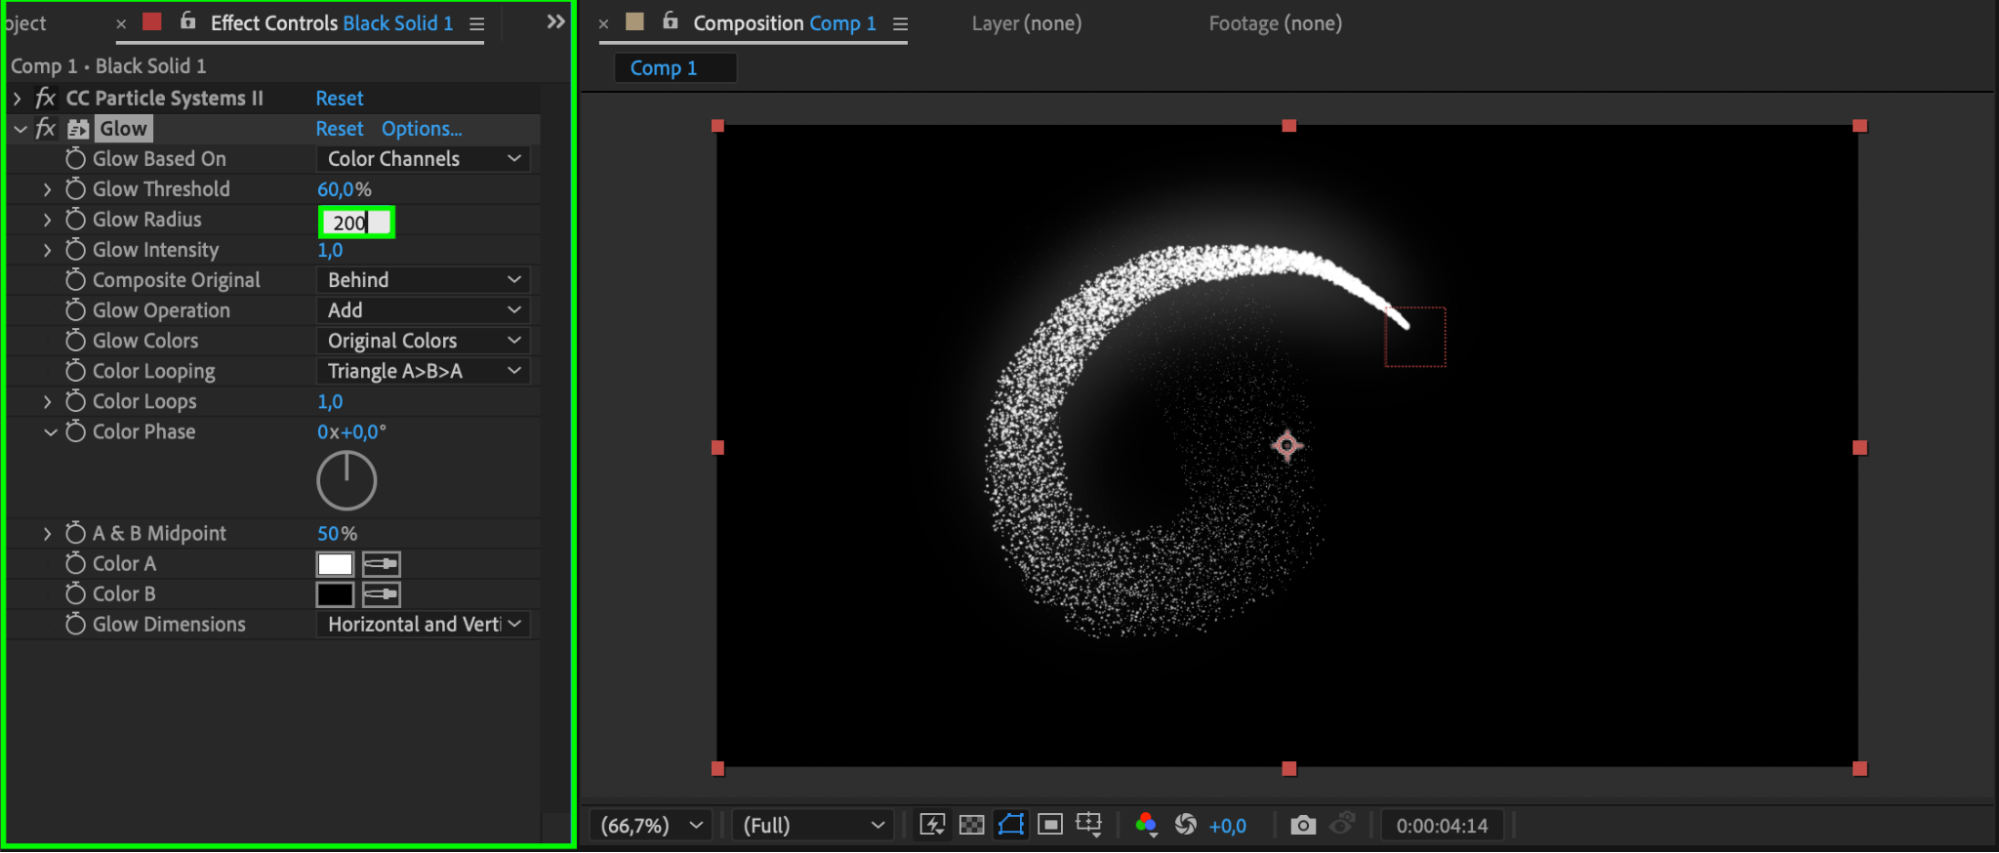
With the Solid Layer selected, go to the Effects & Presets panel and apply the Glow effect. In the Effect Controls, set Glow Radius to 200.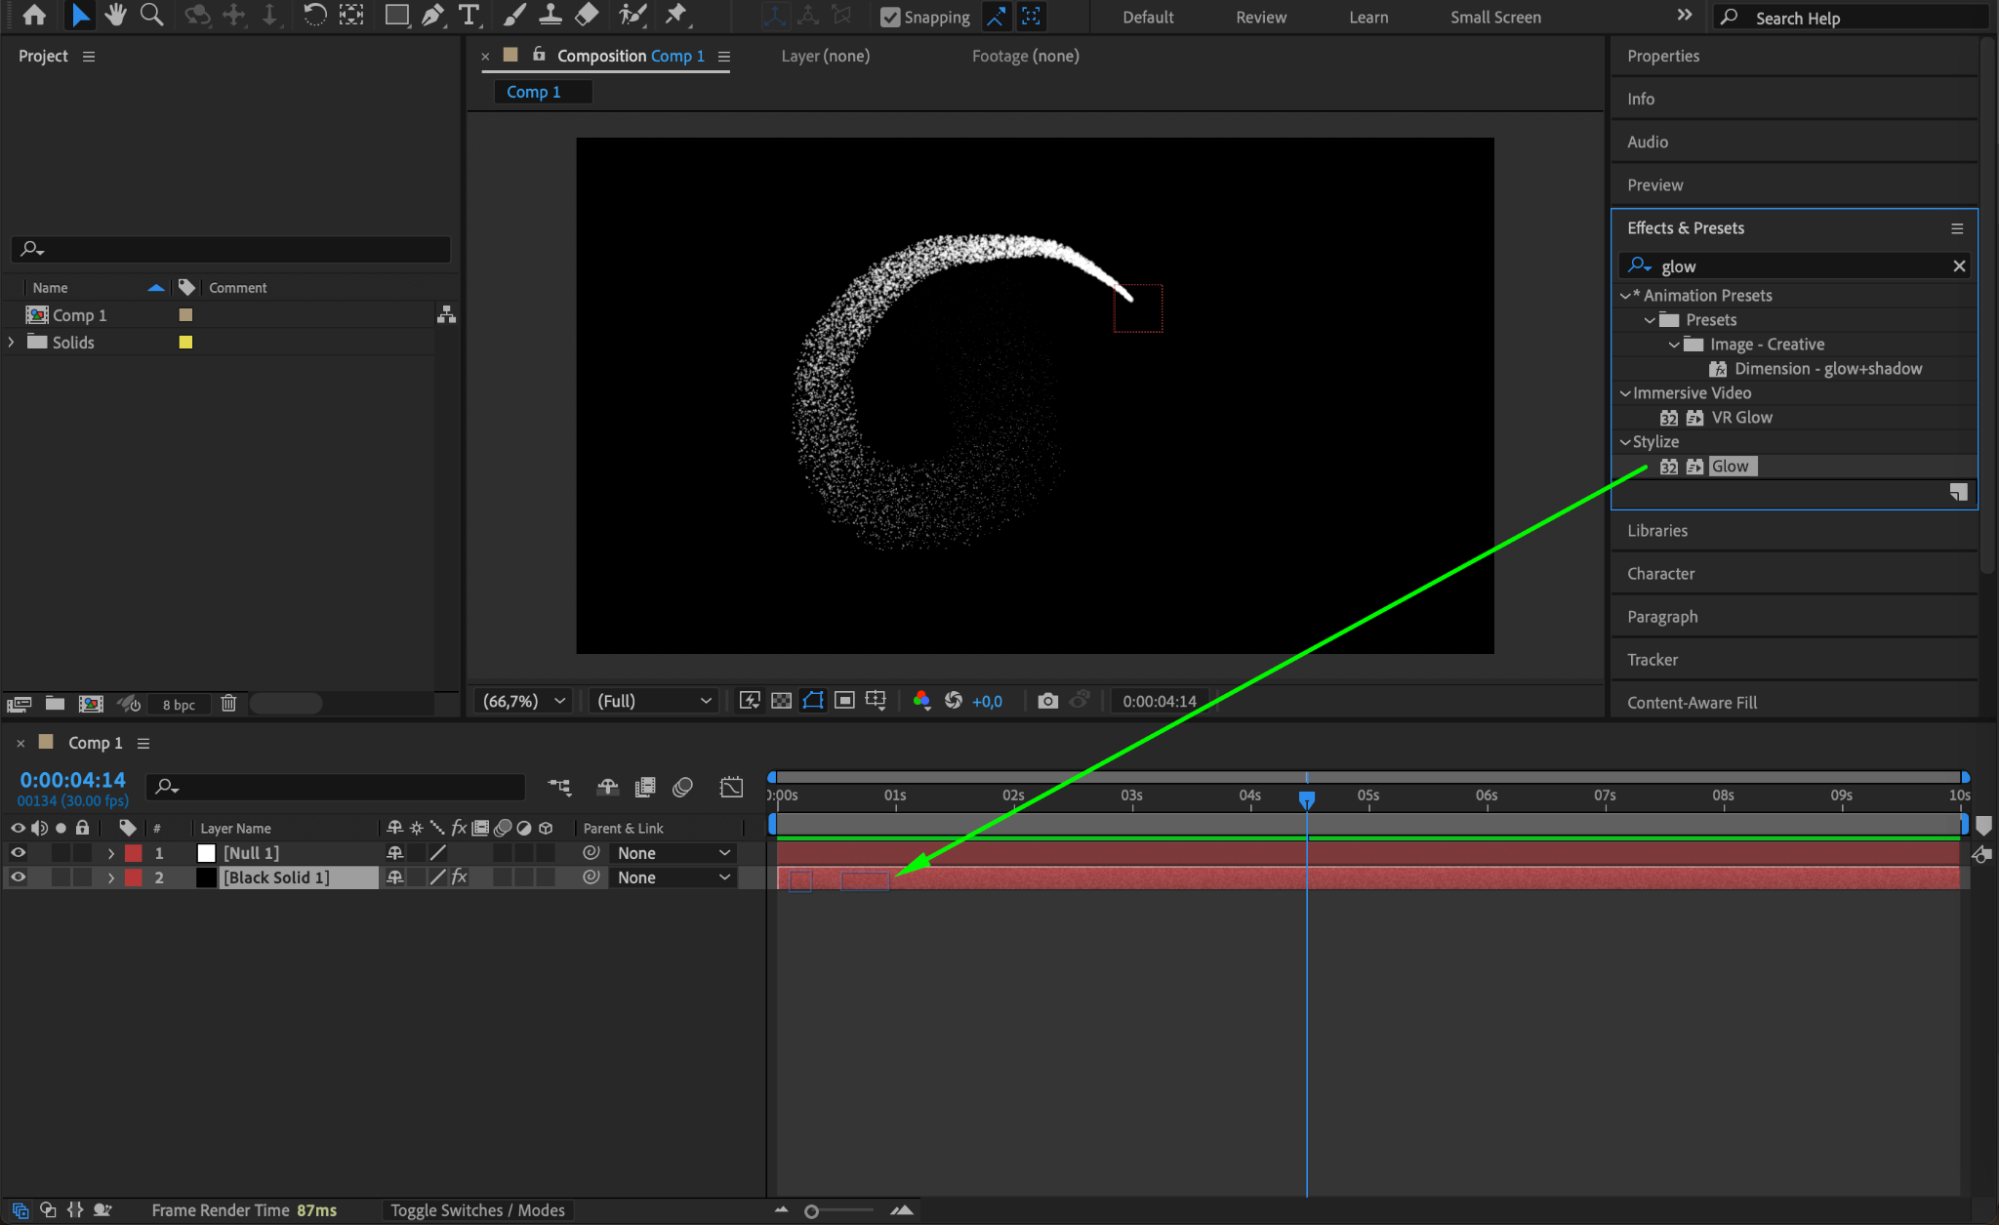
 Step 12: Enhance the Glow Effect
Duplicate the Glow Effect (Ctrl/Cmd + D) and change the Glow Radius of the second effect to 600 for a stronger glow.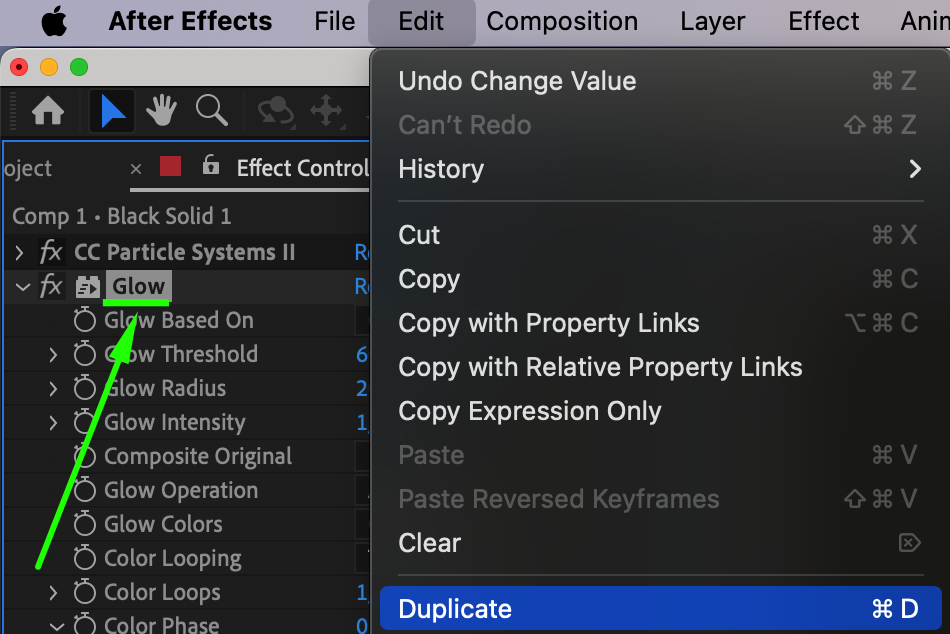
 Step 13: Preview the Animation
Press Spacebar to preview the animation and check the glow effect.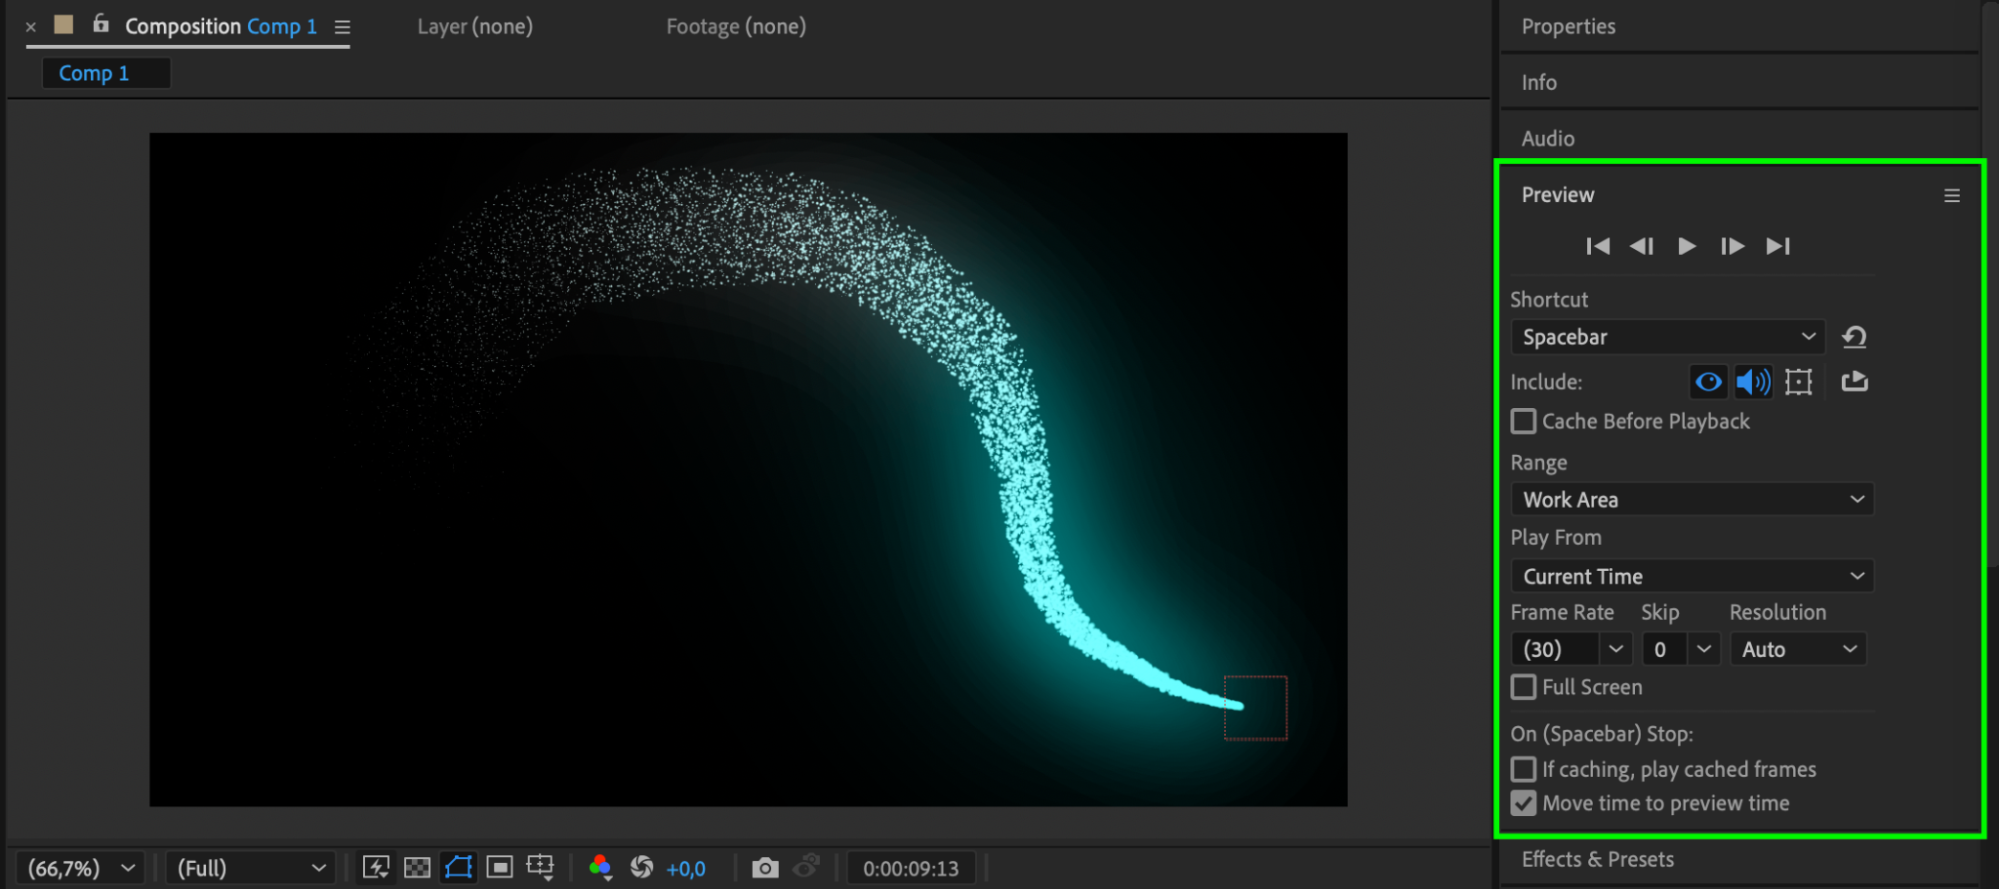 Step 14: Render the Final Animation
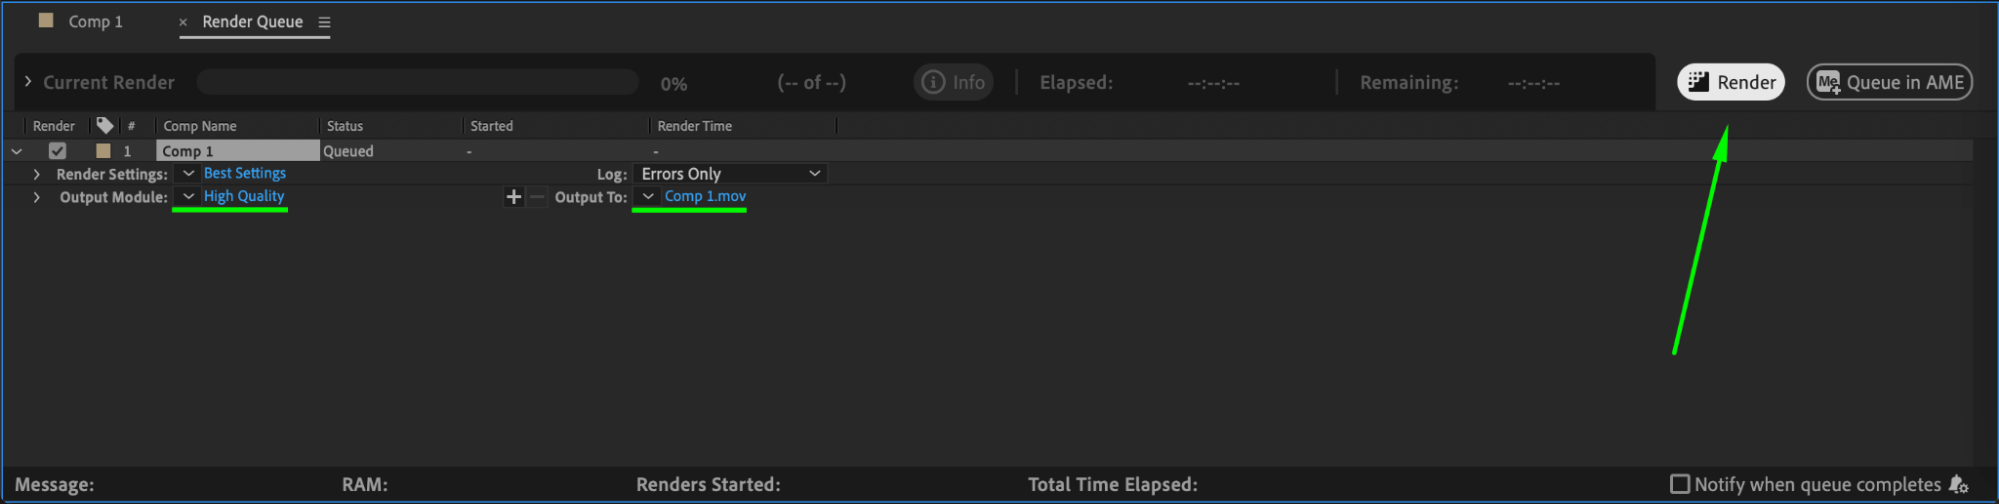
Go to Composition > Add to Render Queue, set the output format, and click Render.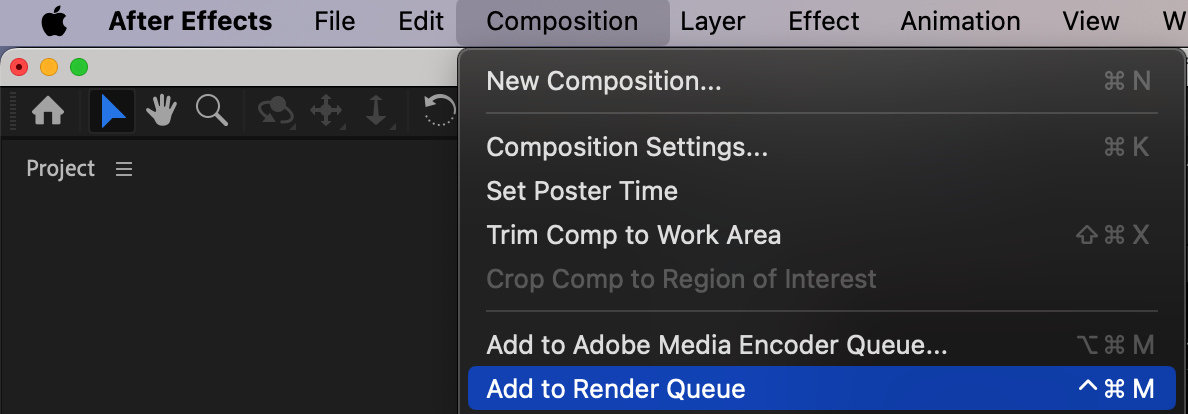
Conclusion
This technique allows you to create smooth and dynamic glowing path animations in After Effects. You can customize the colors, speed, and intensity of the glow for different effects. This method is useful for sci-fi animations, UI motion graphics, and magical effects.
Our Bestsellers


