Creating Realistic Bubble Animation in After Effects
Introduction
Animating bubbles in After Effects allows you to create a realistic floating effect for underwater scenes, motion graphics, or abstract backgrounds. By using shape layers, layer styles, and distortion effects, you can achieve a natural and dynamic look. Follow these steps to create animated bubbles with reflections and depth.
Step 1: Create a New Composition
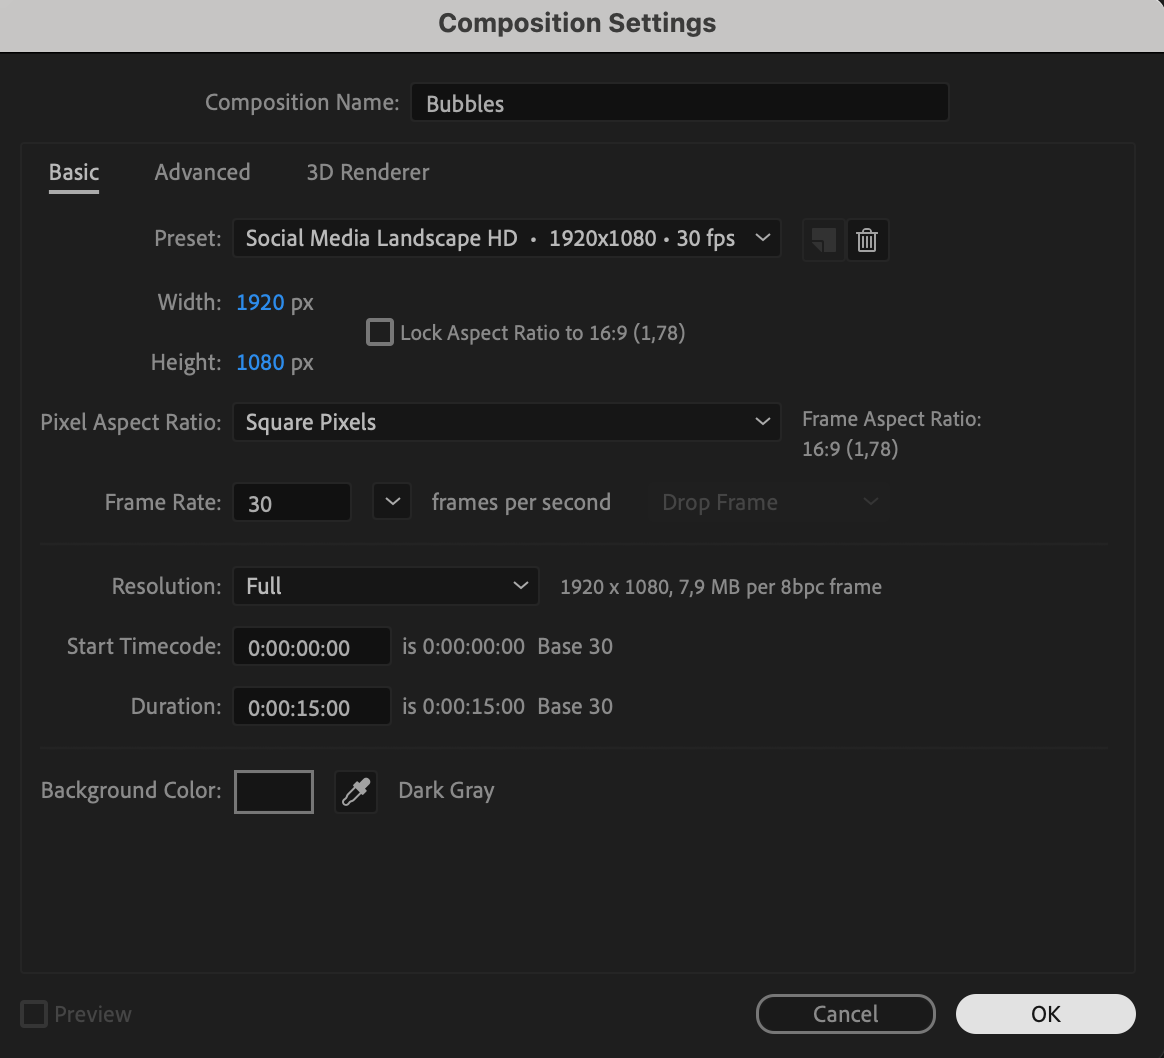
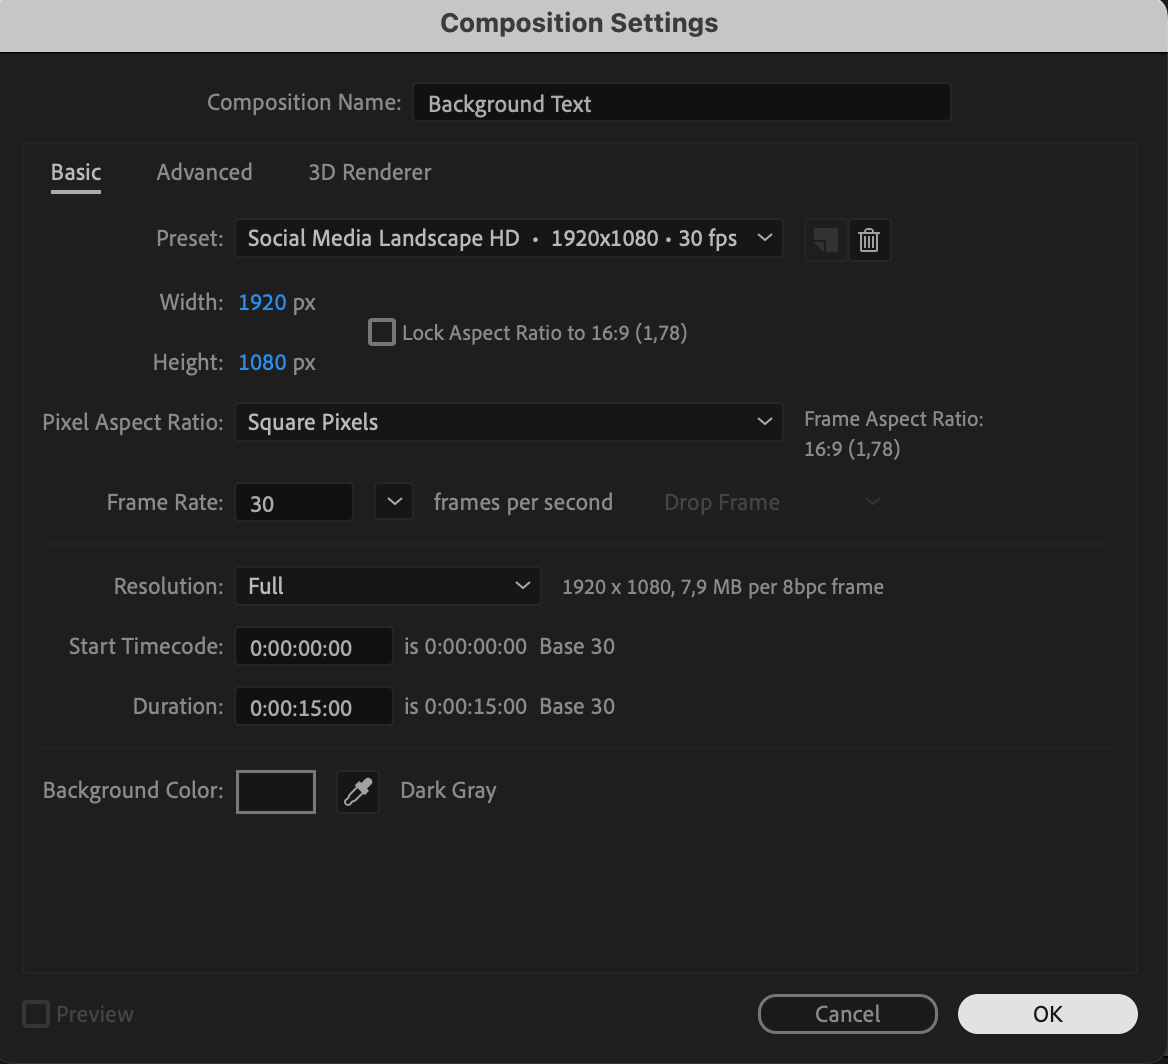
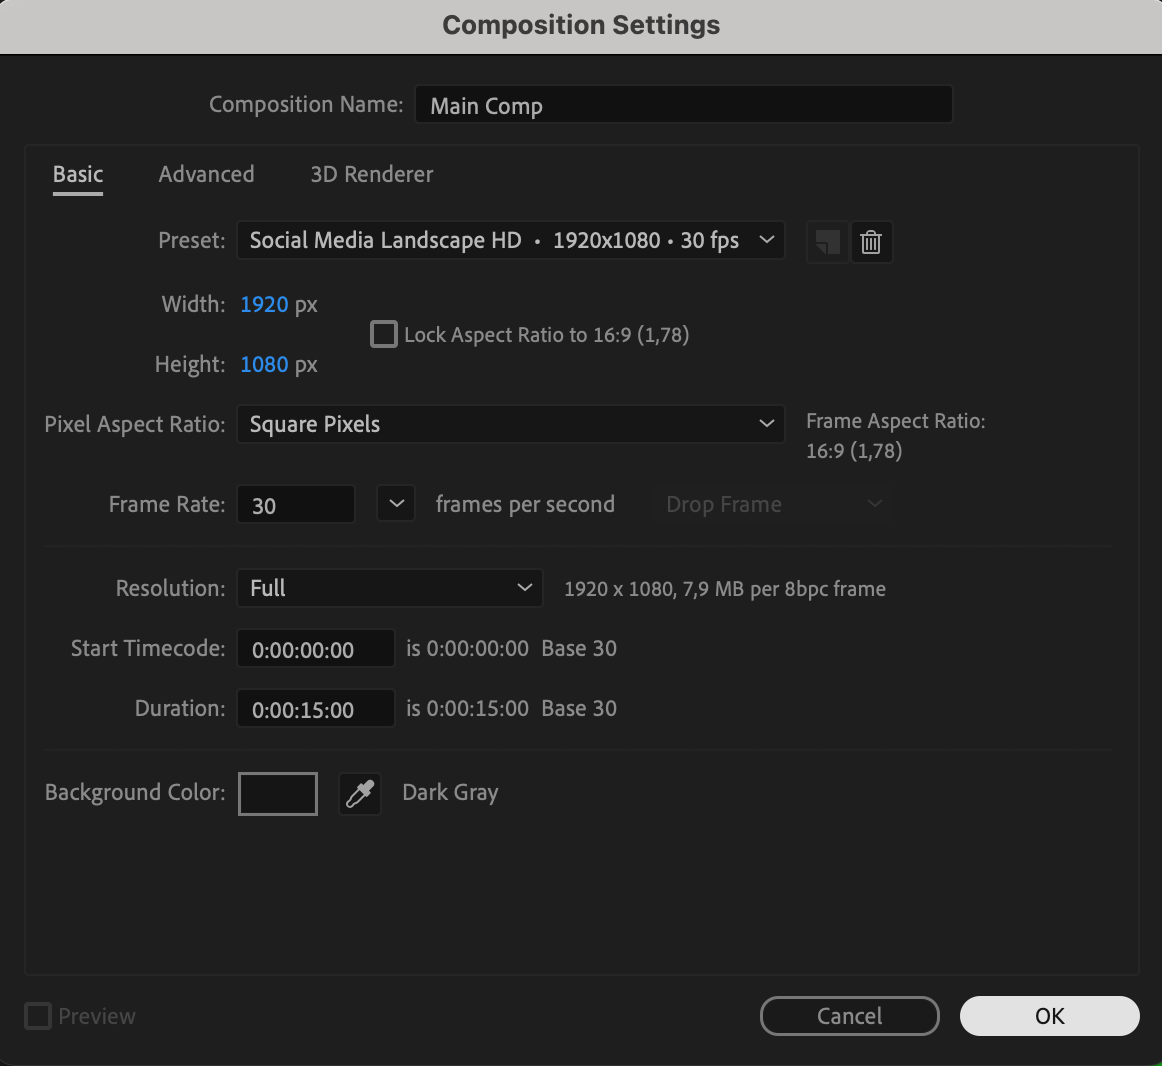
Go to Composition > New Composition, name it “Bubbles”, and set the following parameters:
Resolution: 1920×1080 pixels
Frame rate: 30 fps
Duration: 15 seconds
This will be the main workspace for your bubble animation.
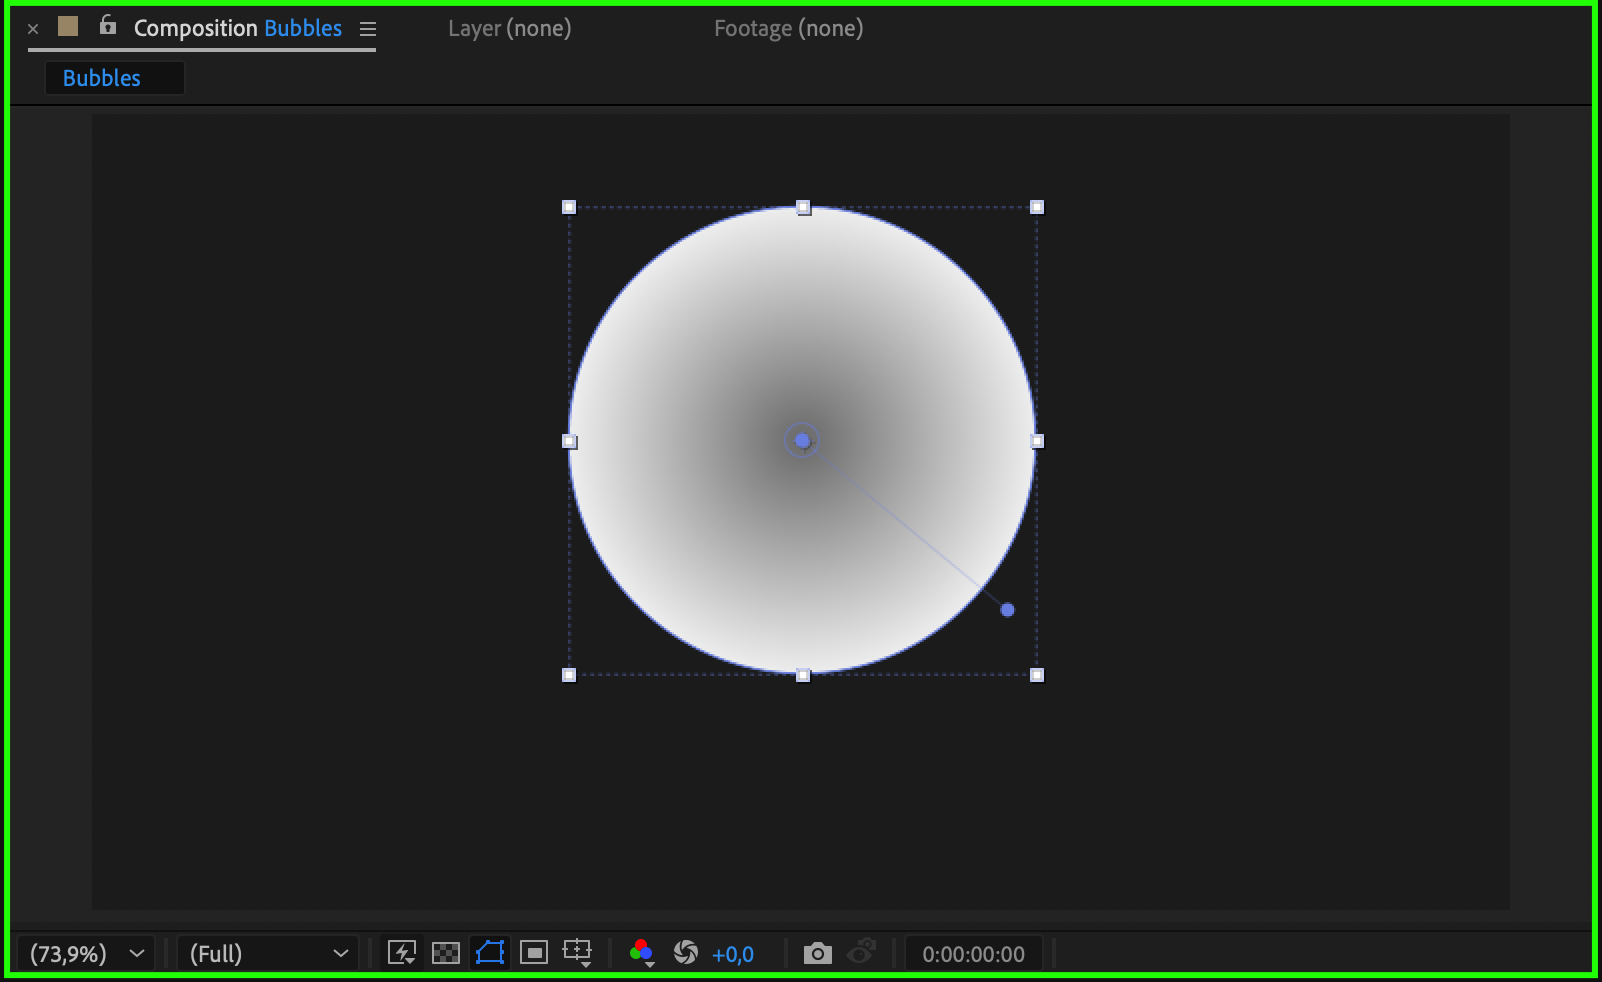
 Step 2: Draw a Bubble Shape
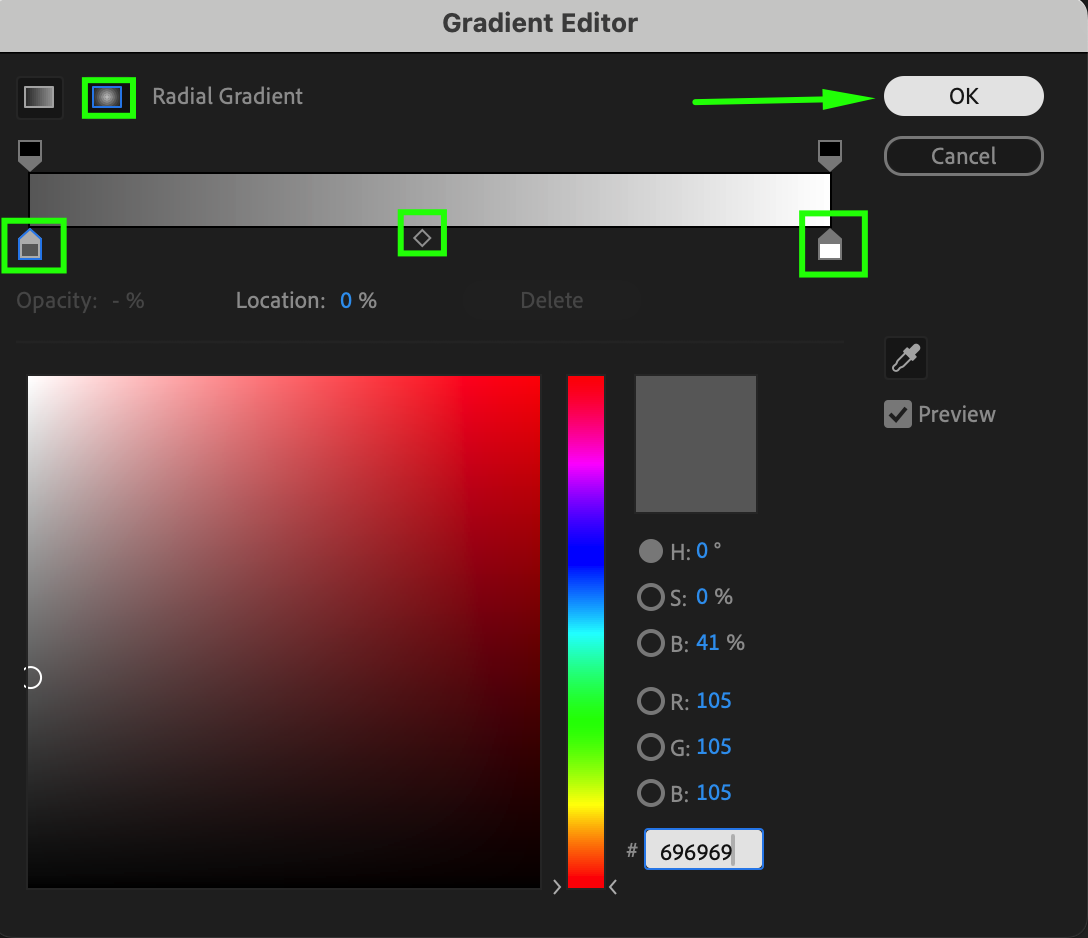
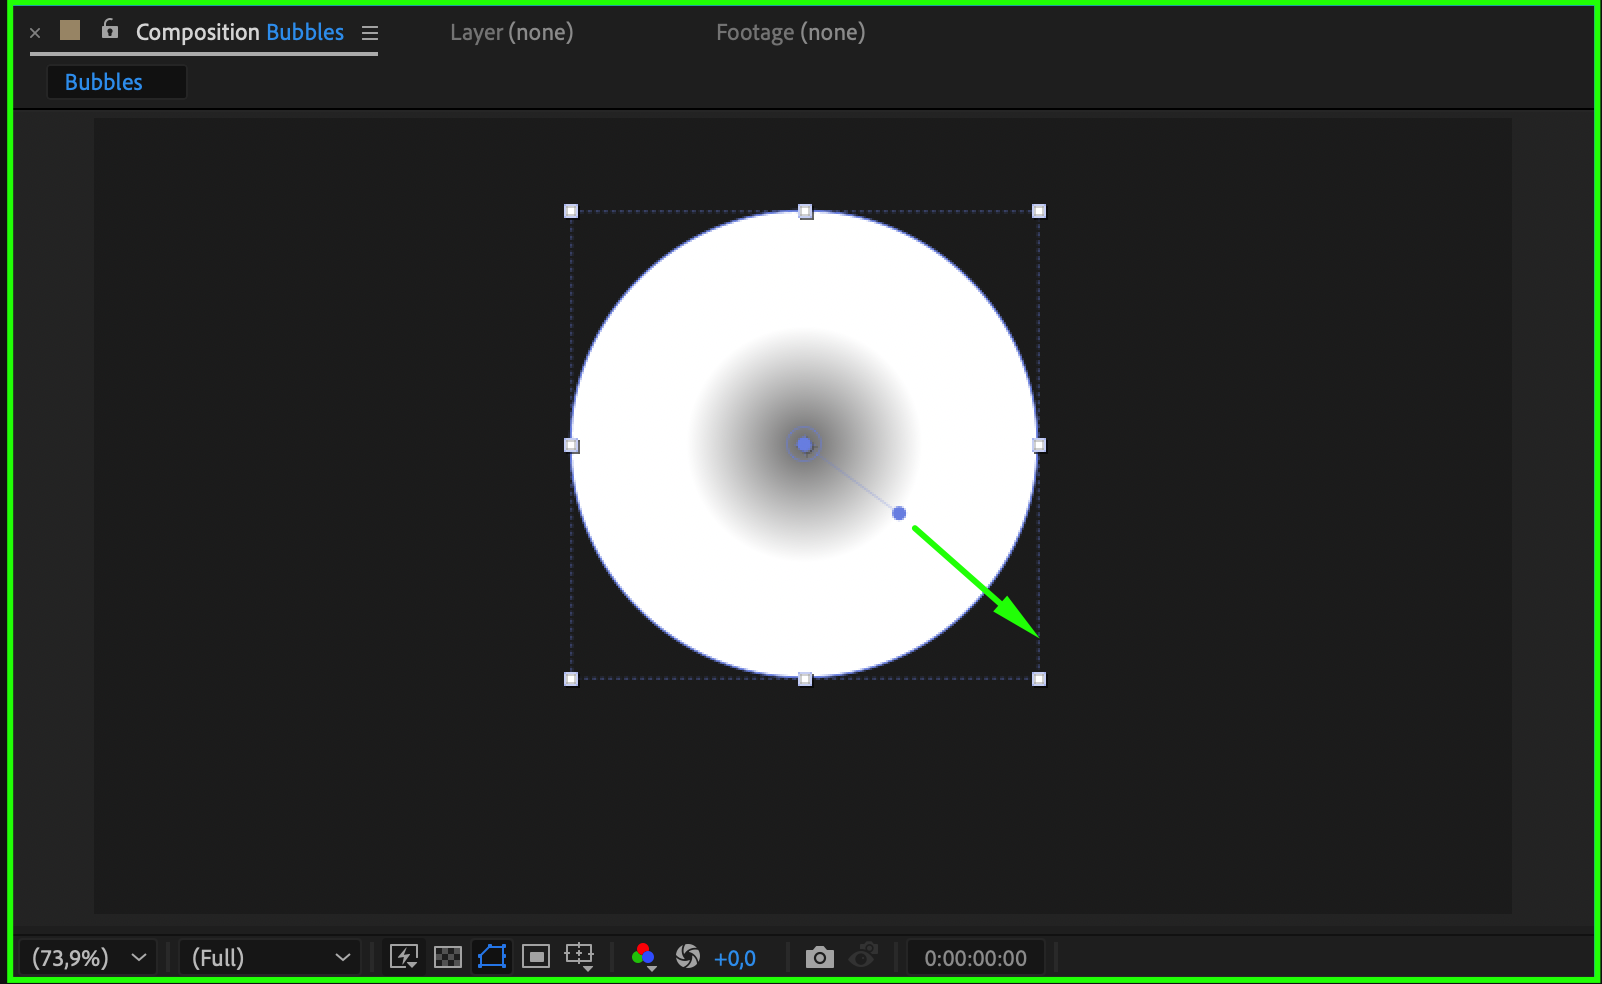
Select the Ellipse Tool (Q) and draw a circle. Set the Fill to Radial Gradient with gray and white colors to create a soft, transparent bubble effect.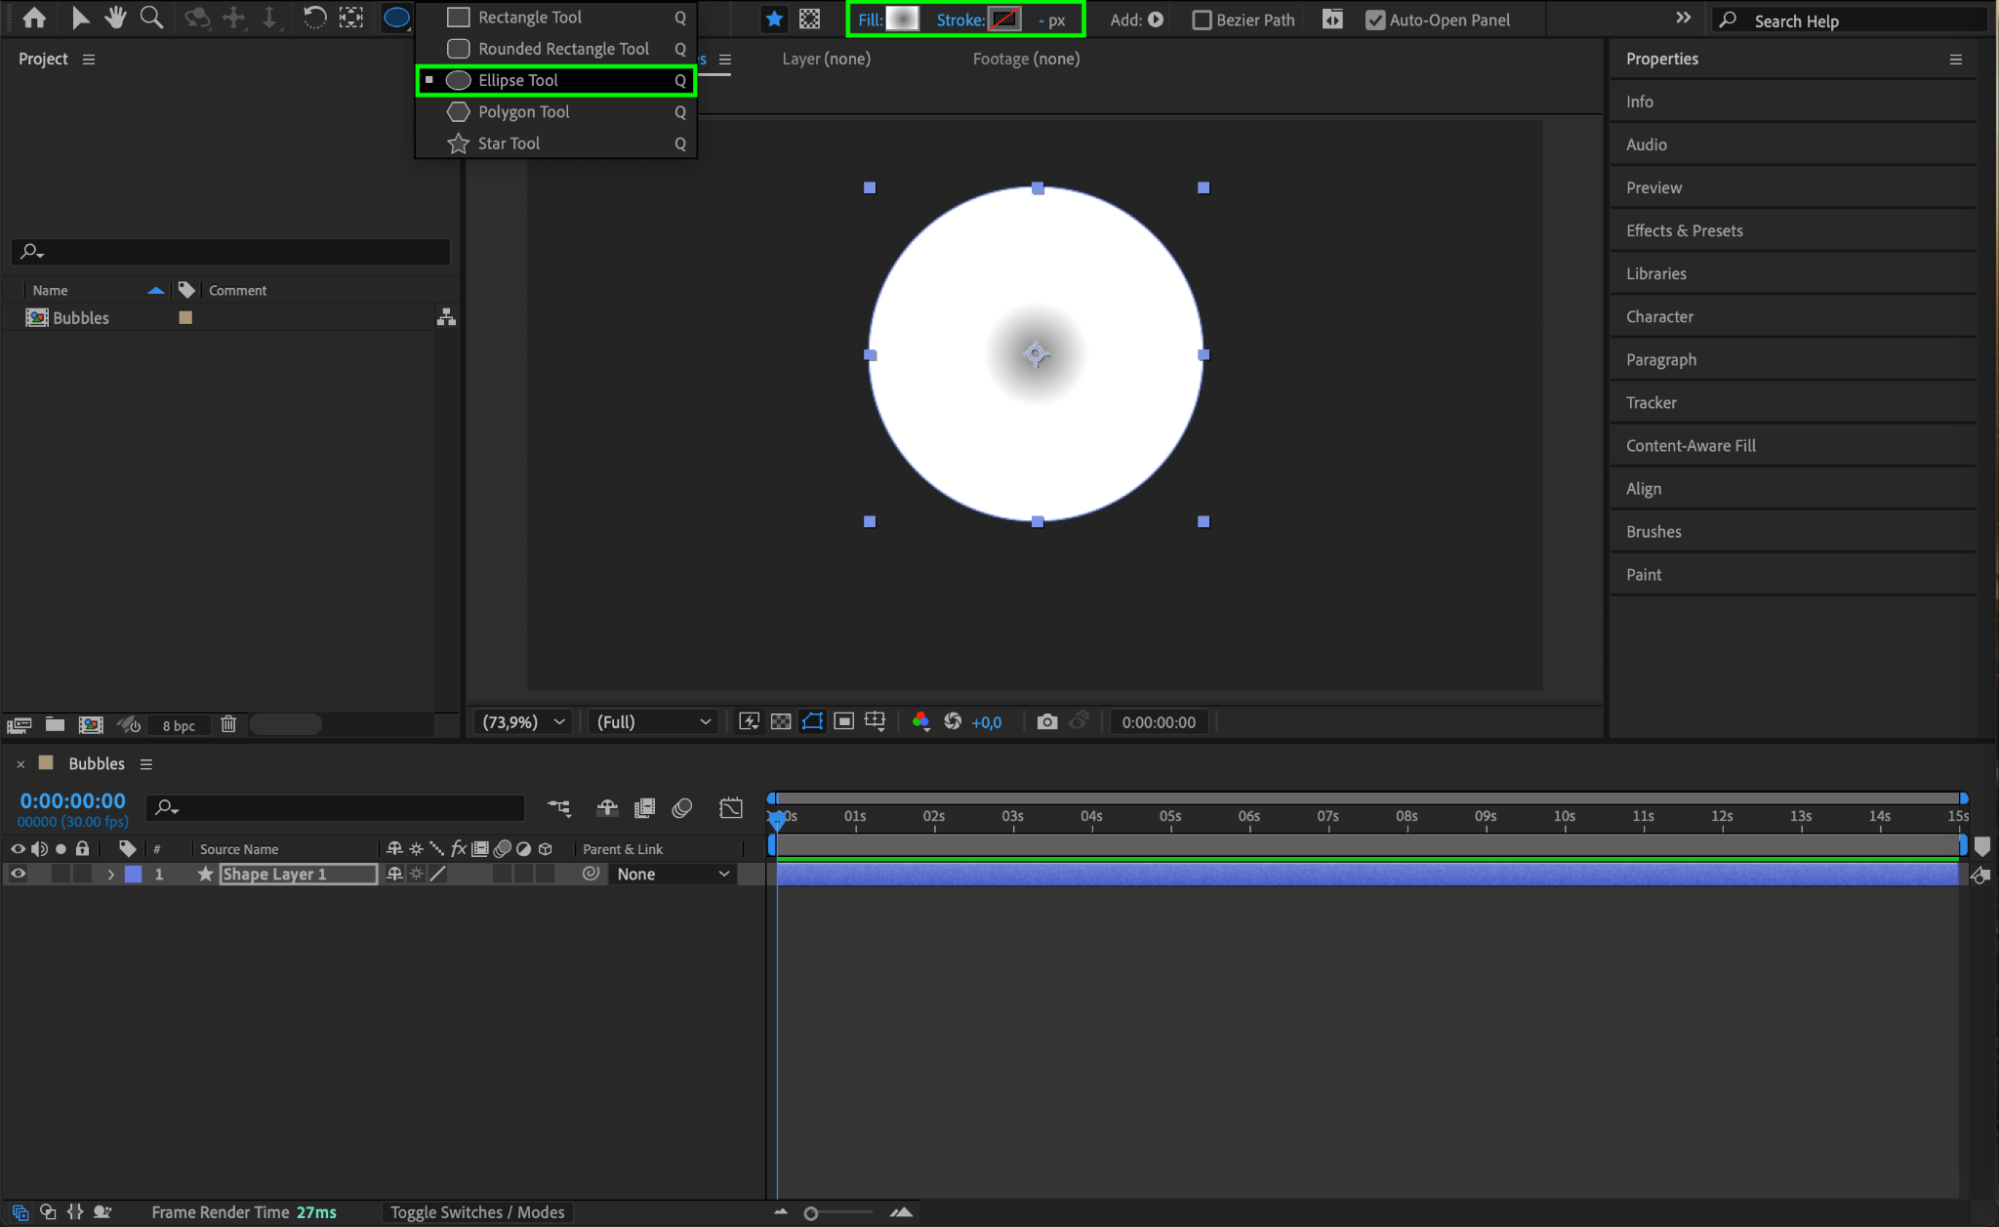
 Step 3: Apply Layer Styles
Right-click the shape layer and choose:
Layer Styles > Inner Shadow
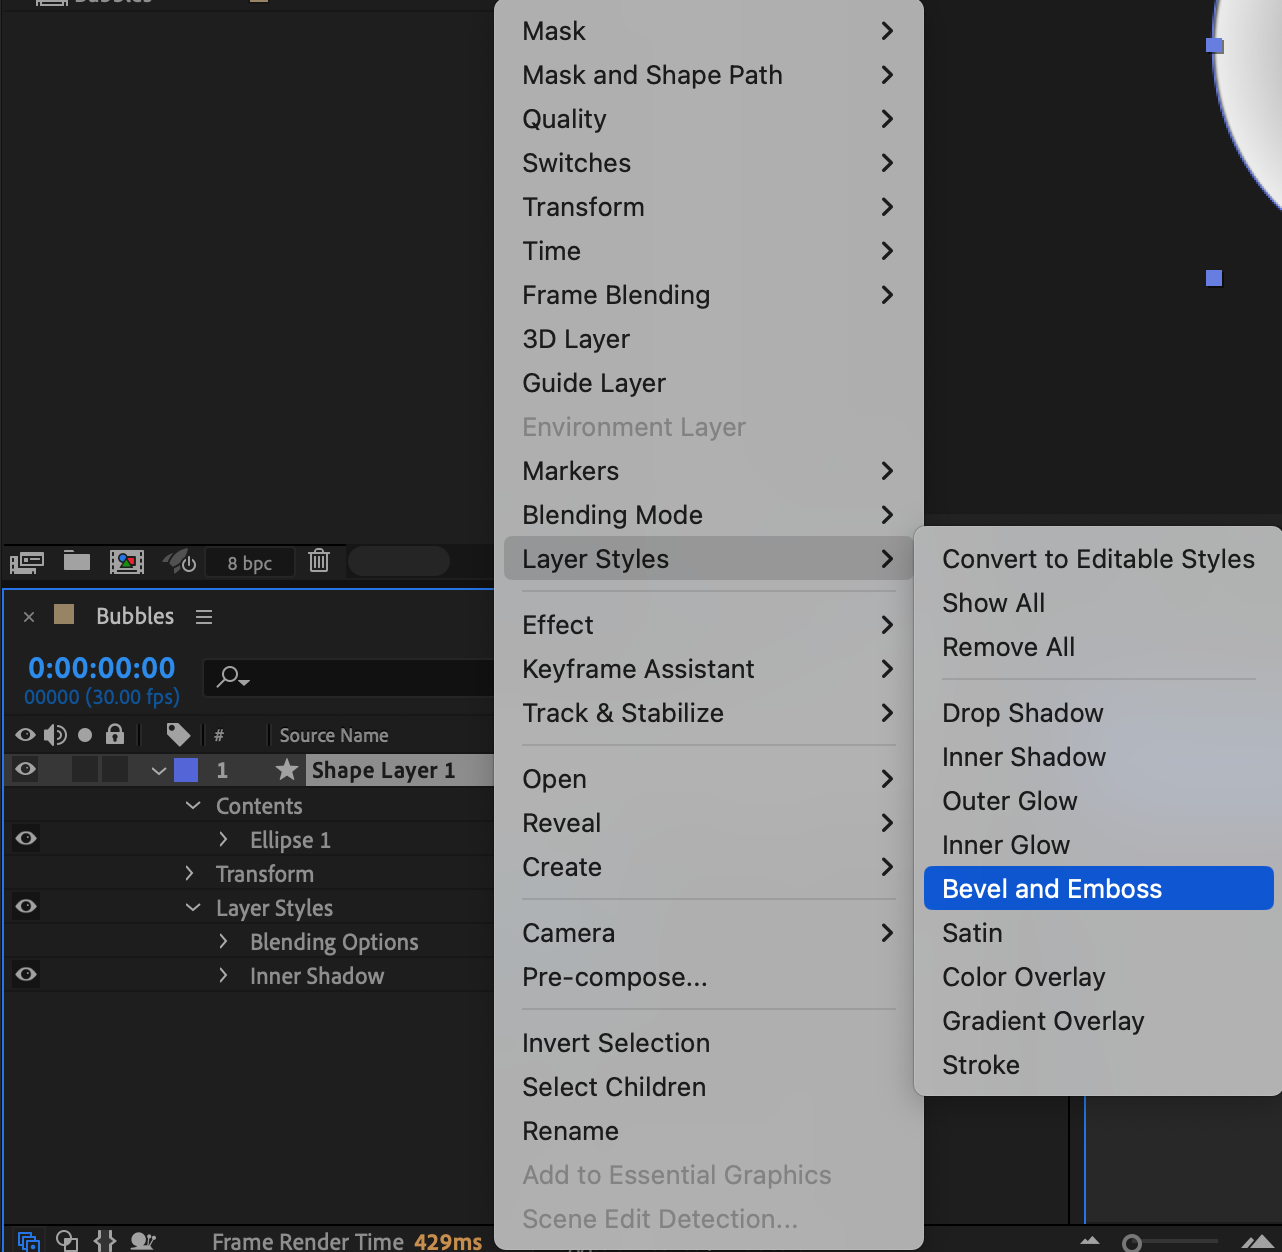
Layer Styles > Bevel and Emboss
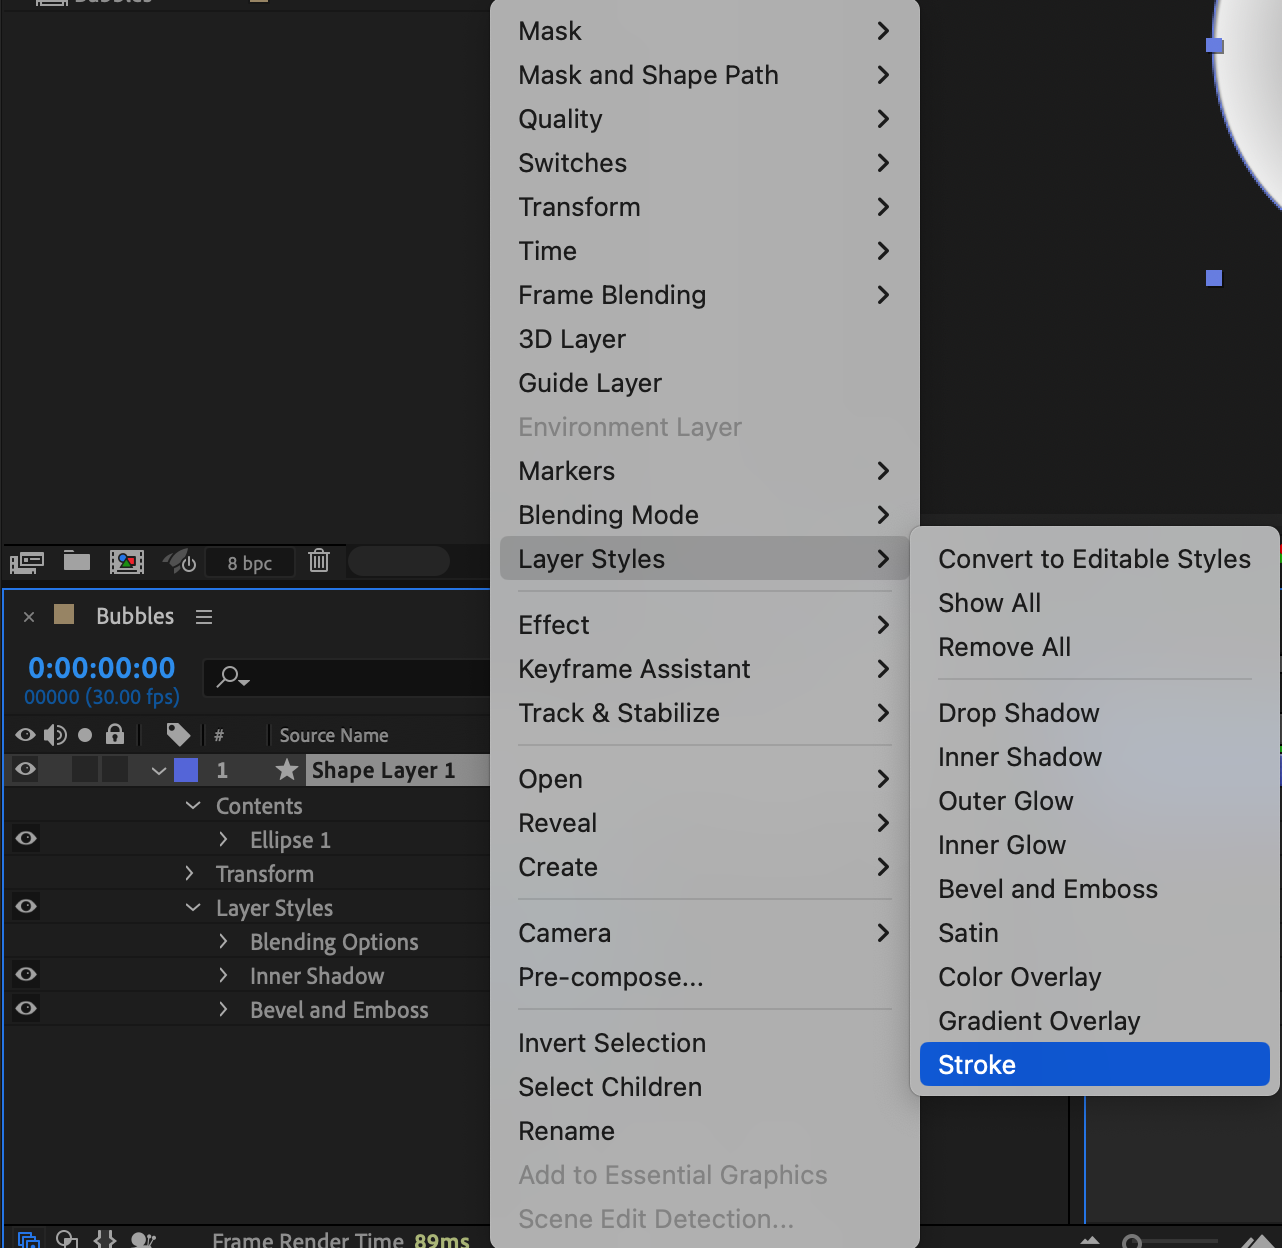
Layer Styles > Stroke
These effects will help define the bubble’s appearance.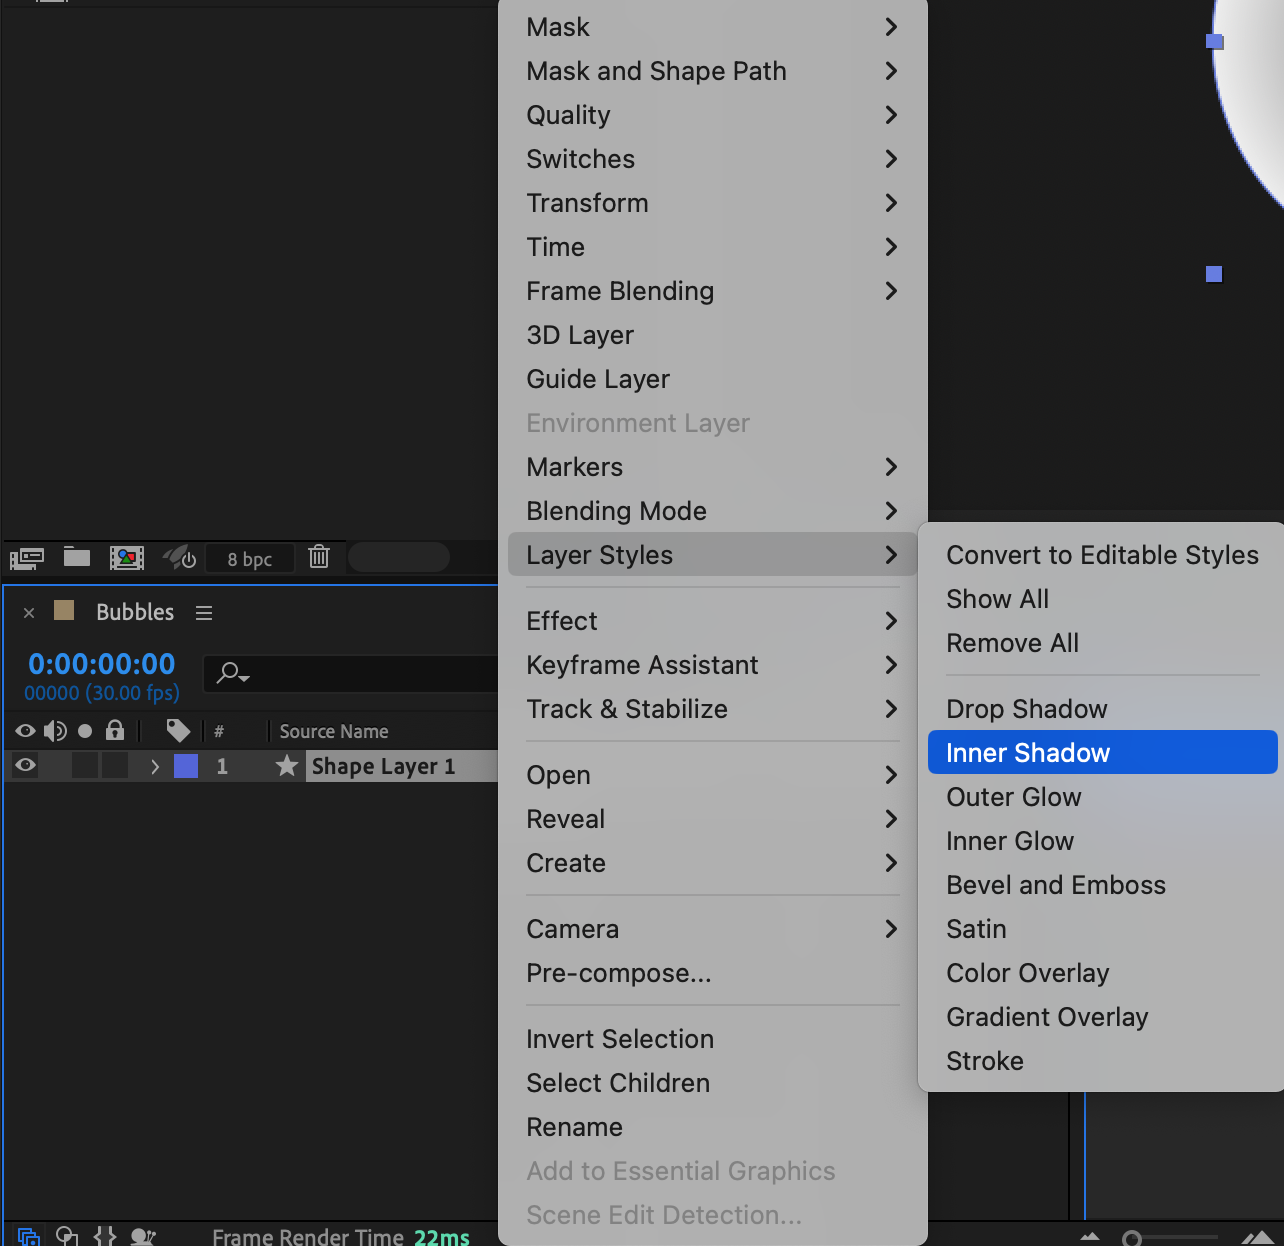
 Step 4: Adjust Layer Style Properties
Modify the settings for a more realistic look:
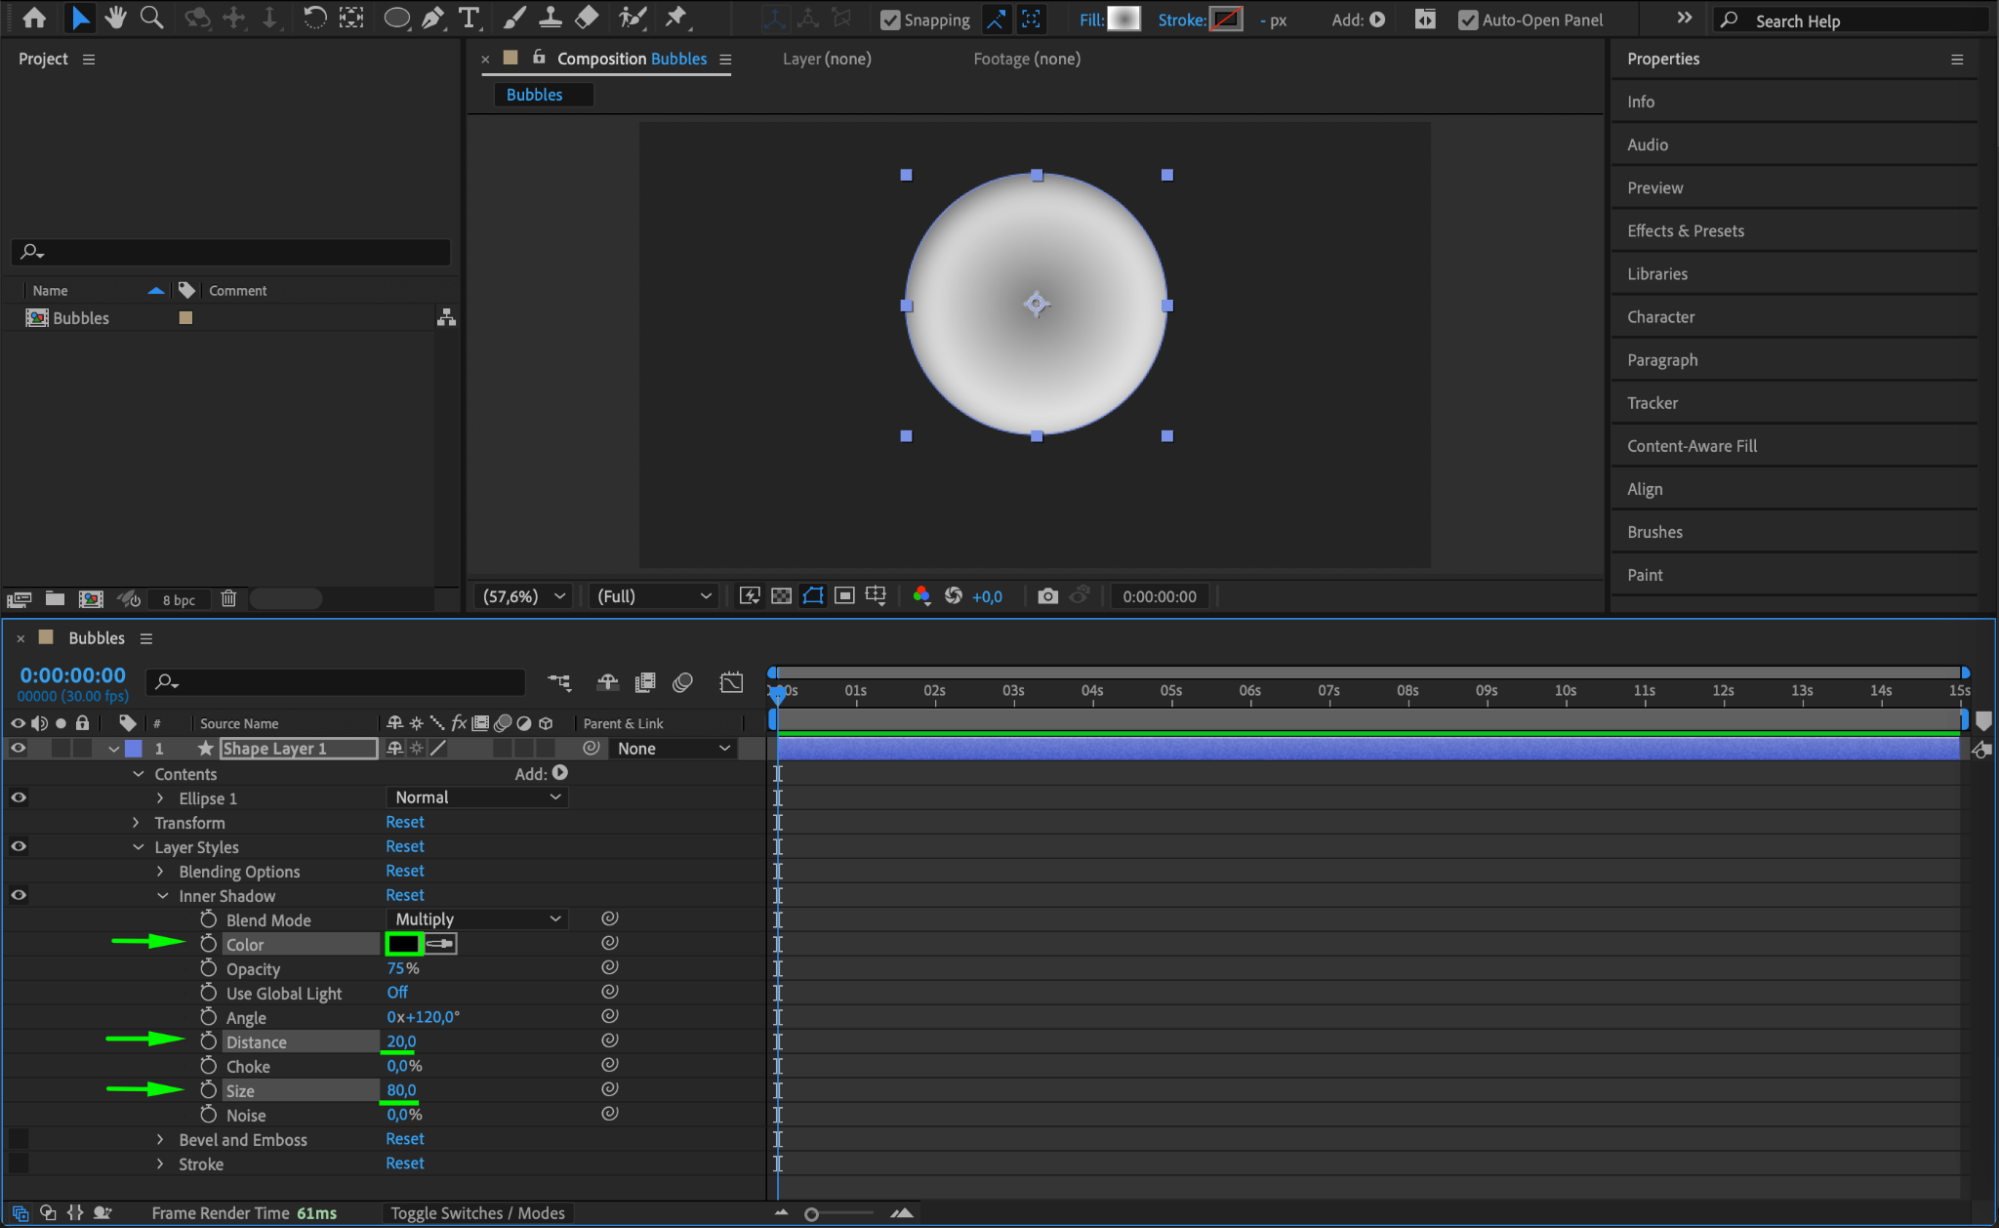
Inner Shadow:
Color: Black
Distance: 20
Size: 80
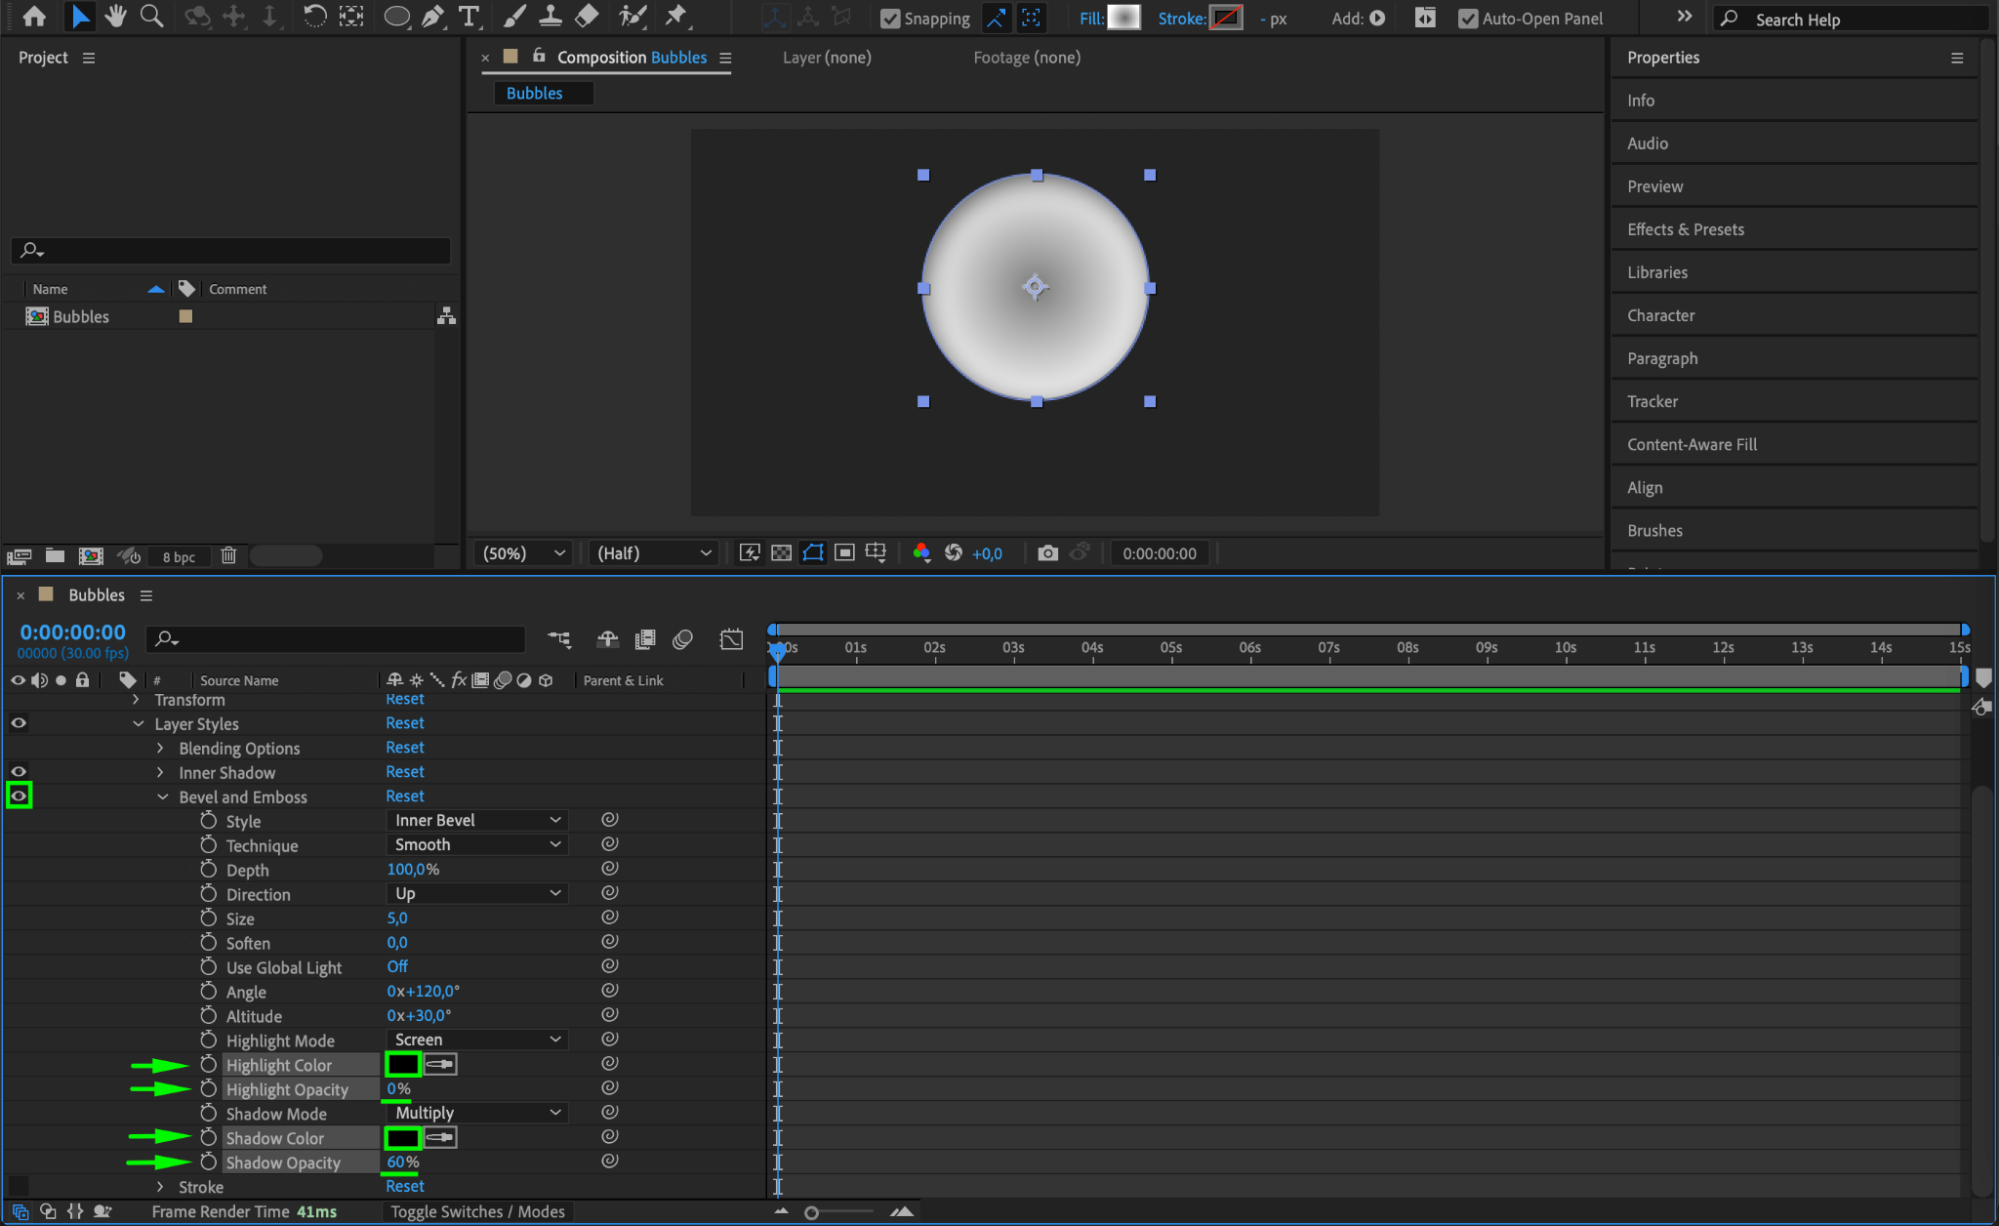
Bevel and Emboss:
Highlight Color: Black
Highlight Opacity: 0
Shadow Color: Black
Shadow Opacity: 60
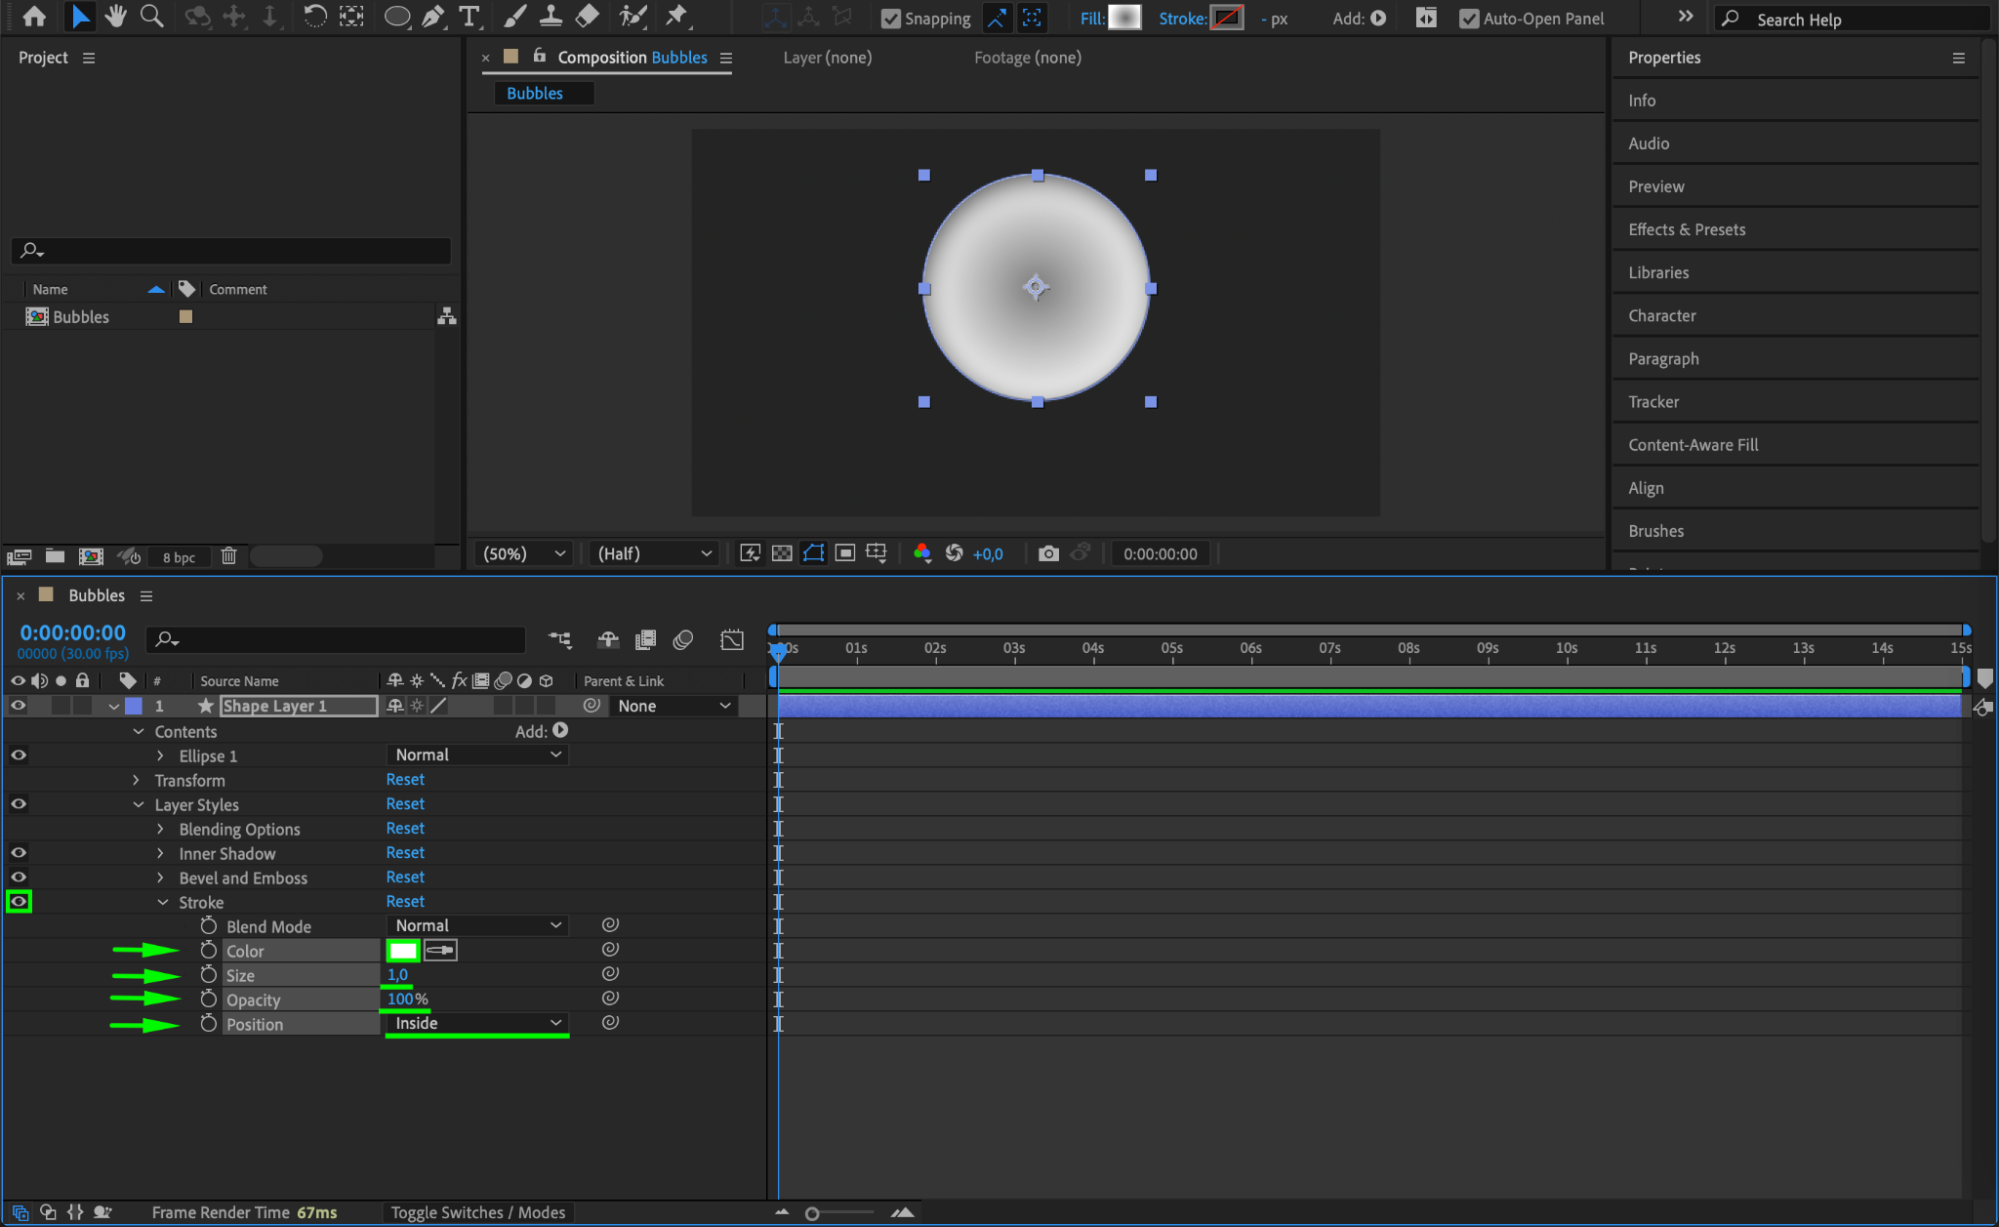
Stroke:
Color: White
Size: 1
Opacity: 100
Position: Inside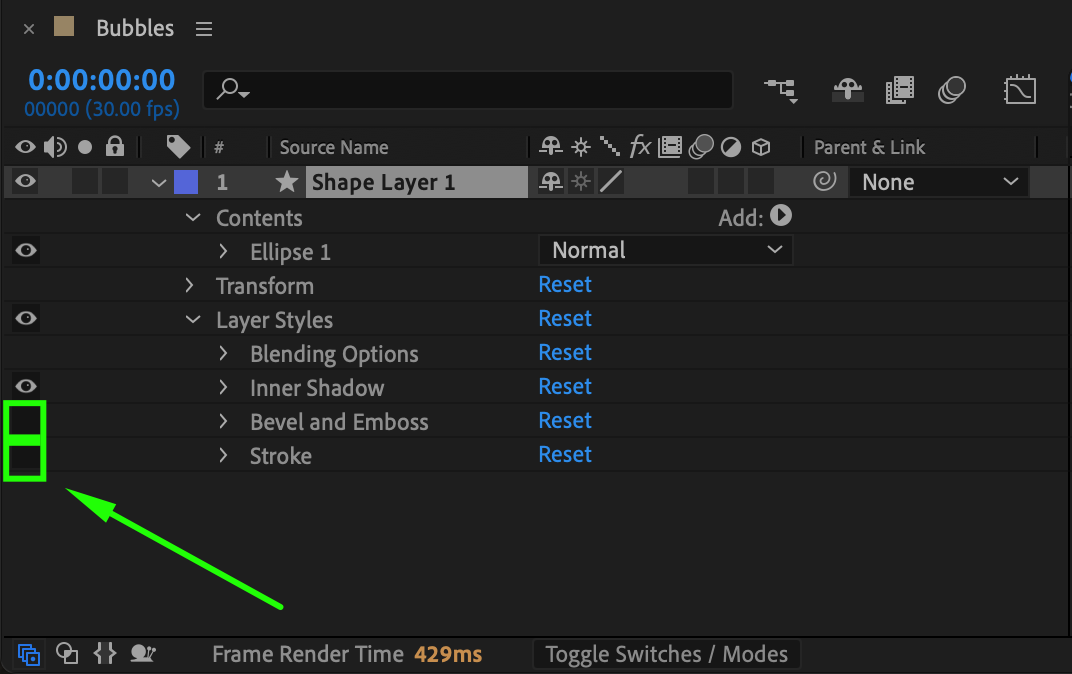
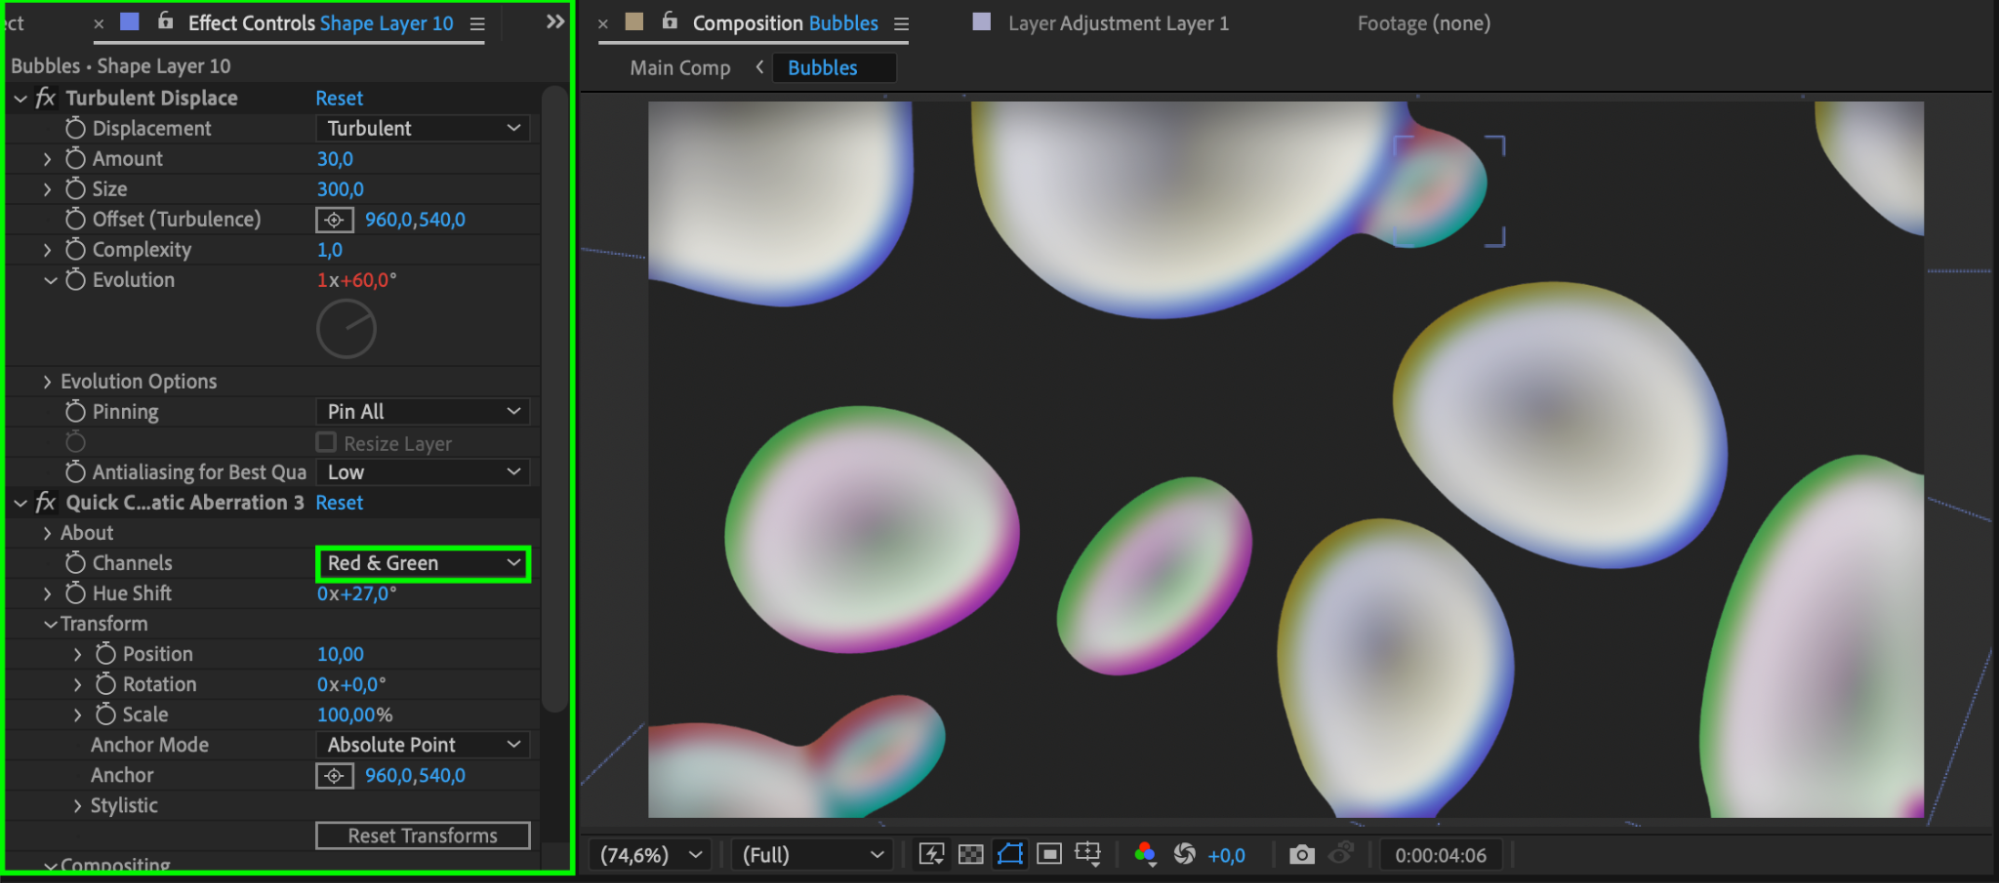
 Step 5: Apply Turbulent Displace Effect
Get 10% off when you subscribe to our newsletter

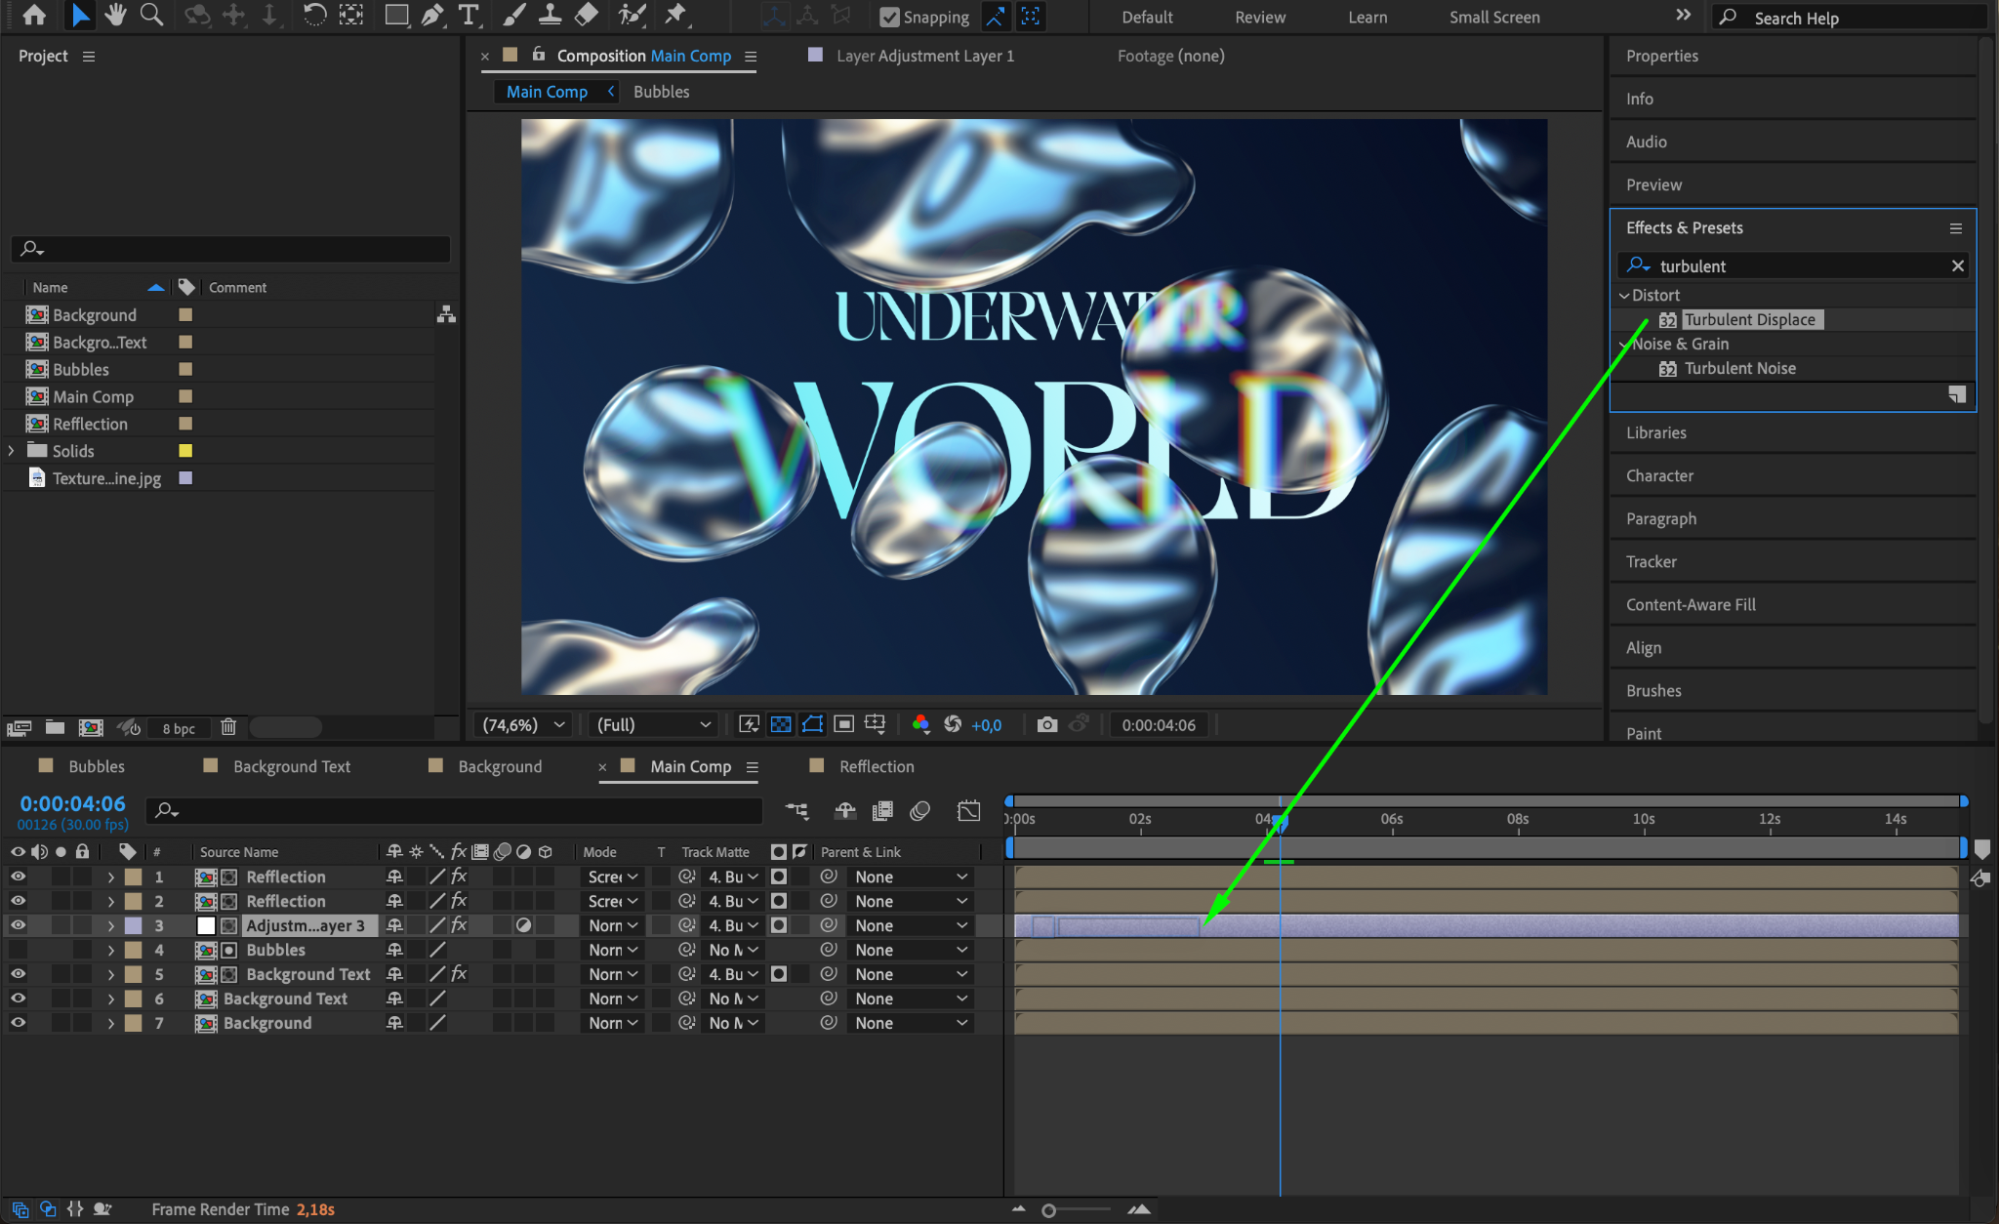
Go to Effects & Presets, search for Turbulent Displace, and apply it to the shape layer.
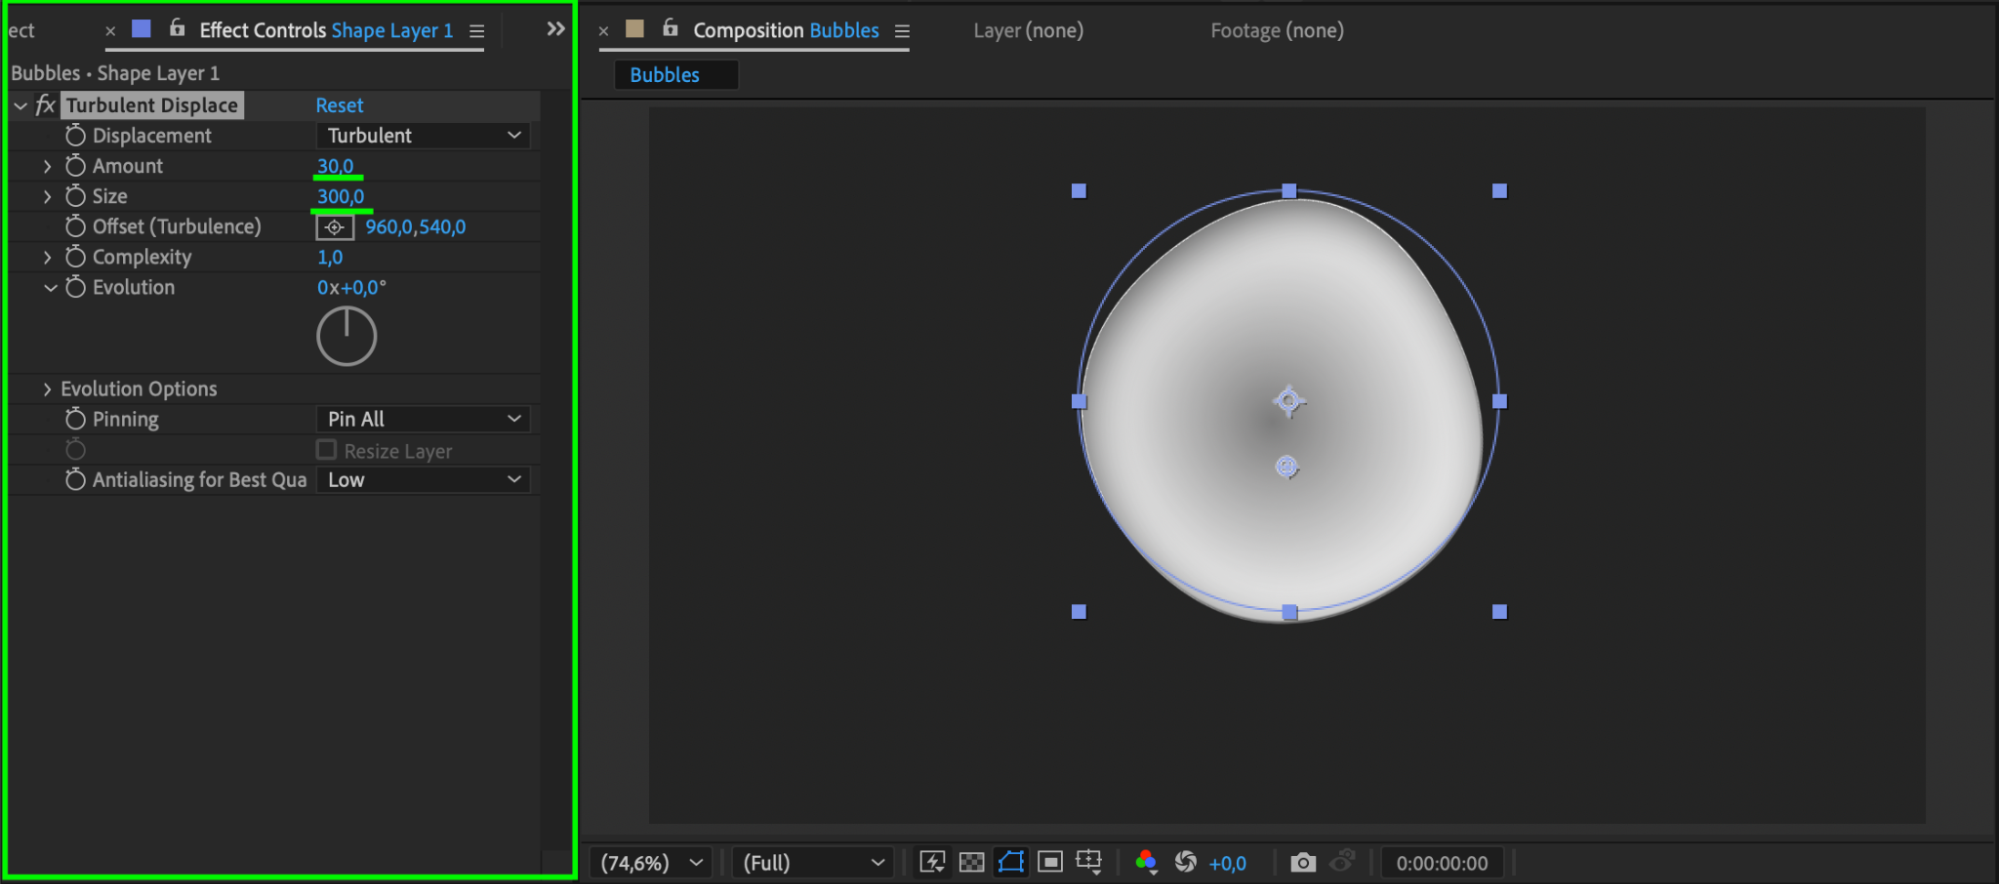
Set the following values:
Amount: 30
Size: 300
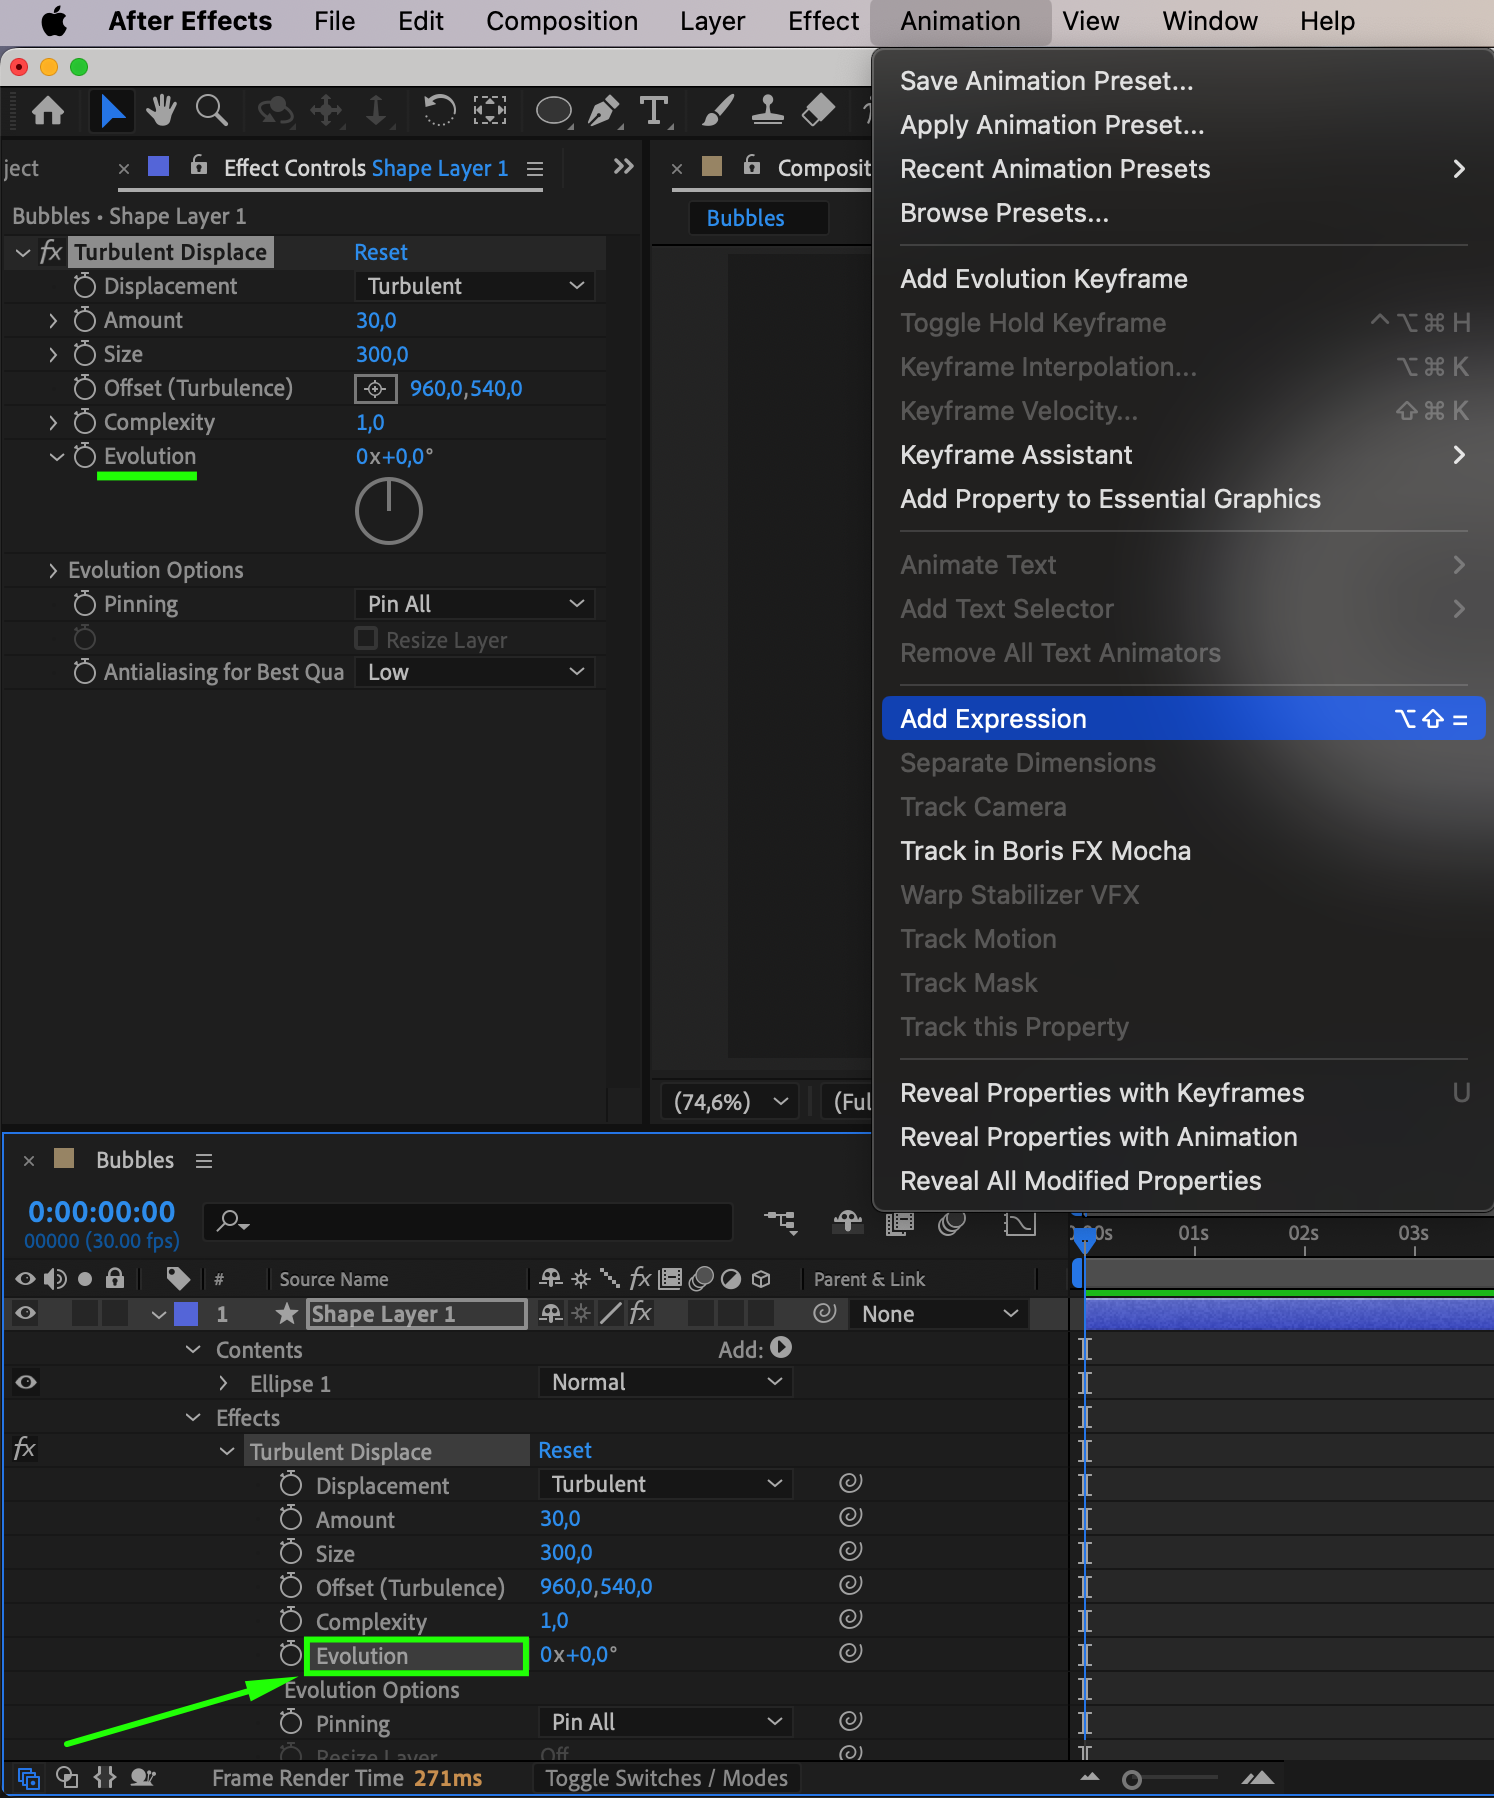
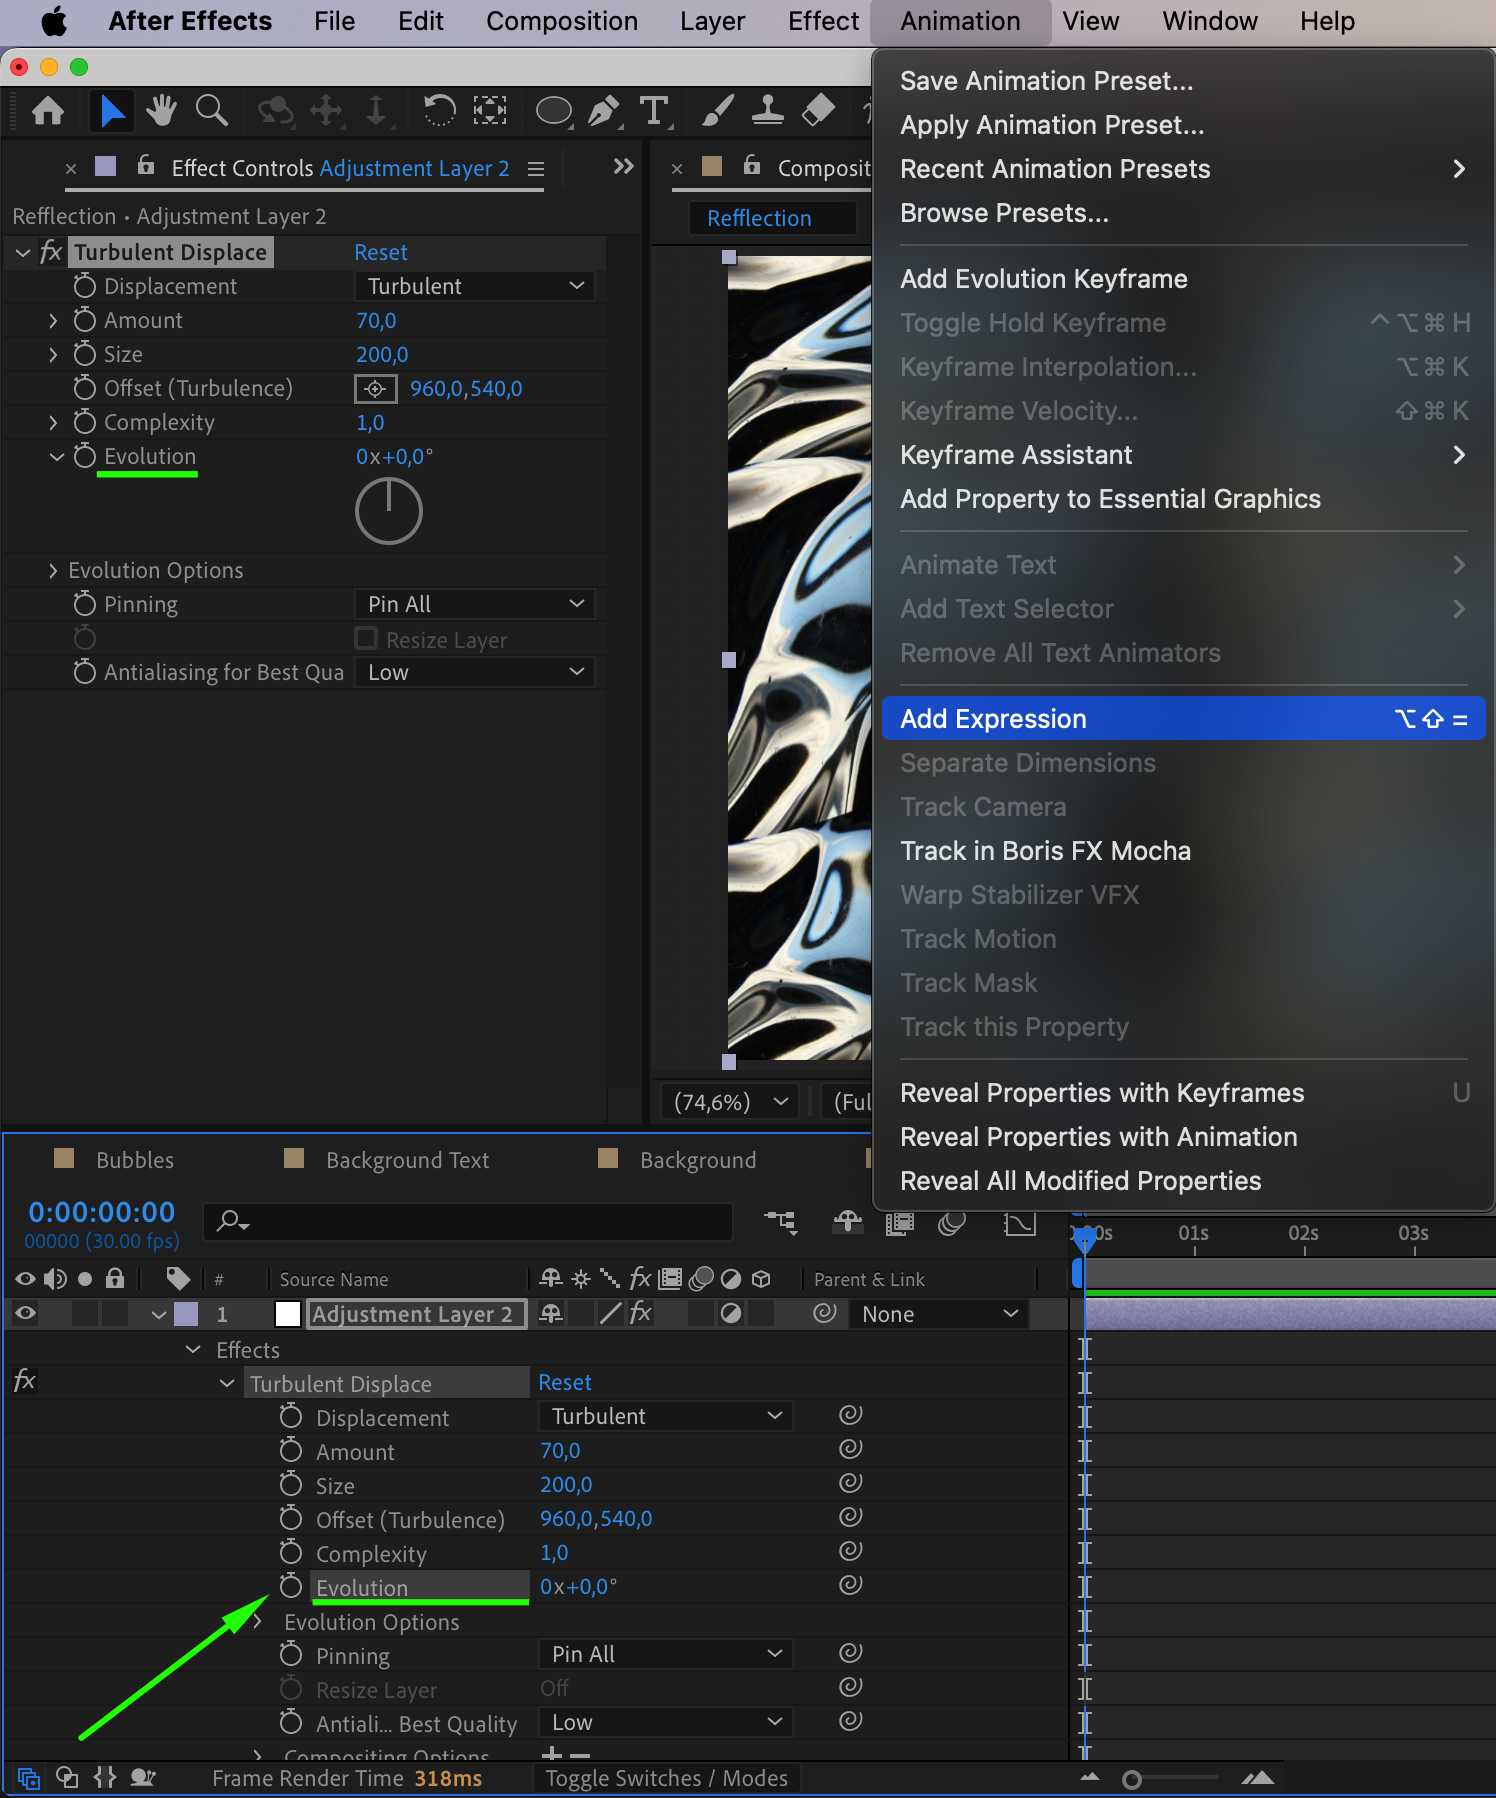
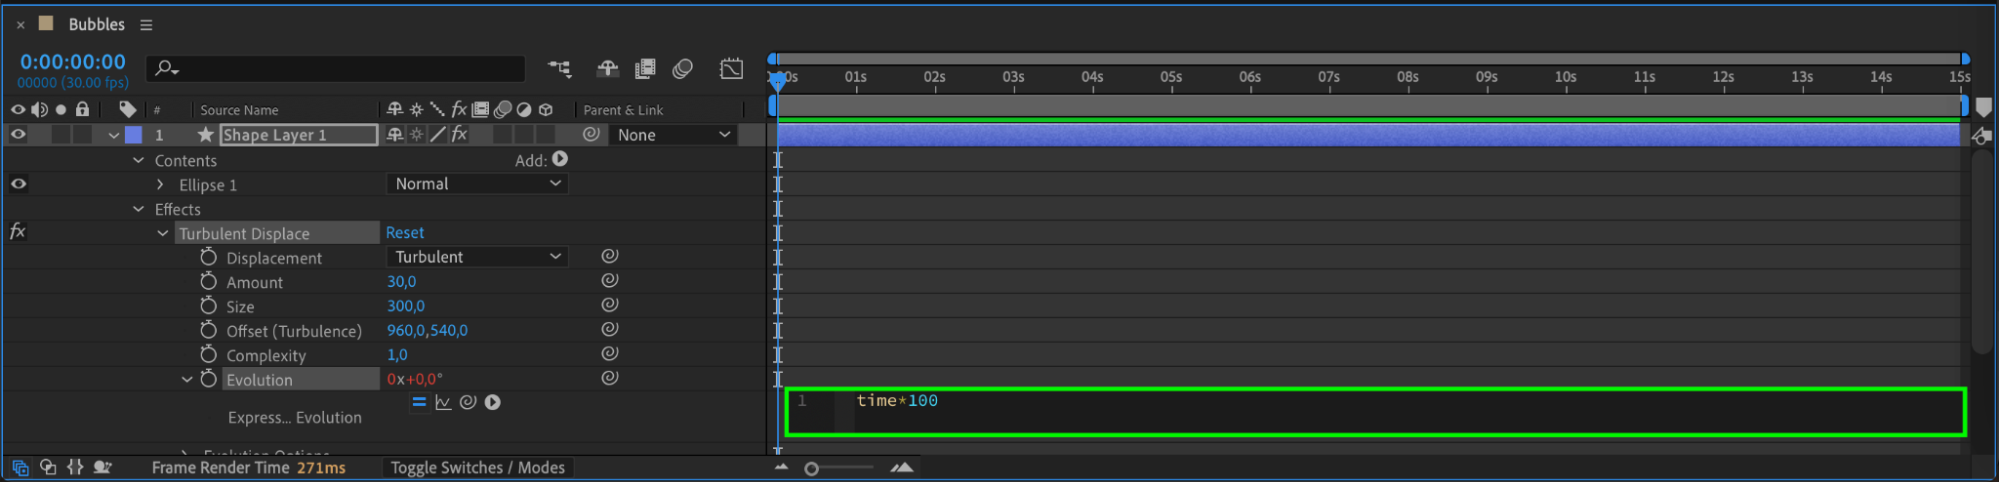
To animate the distortion, go to Animation > Add Expression under Evolution and enter:
time*100
This makes the bubble continuously move and deform slightly, adding realism.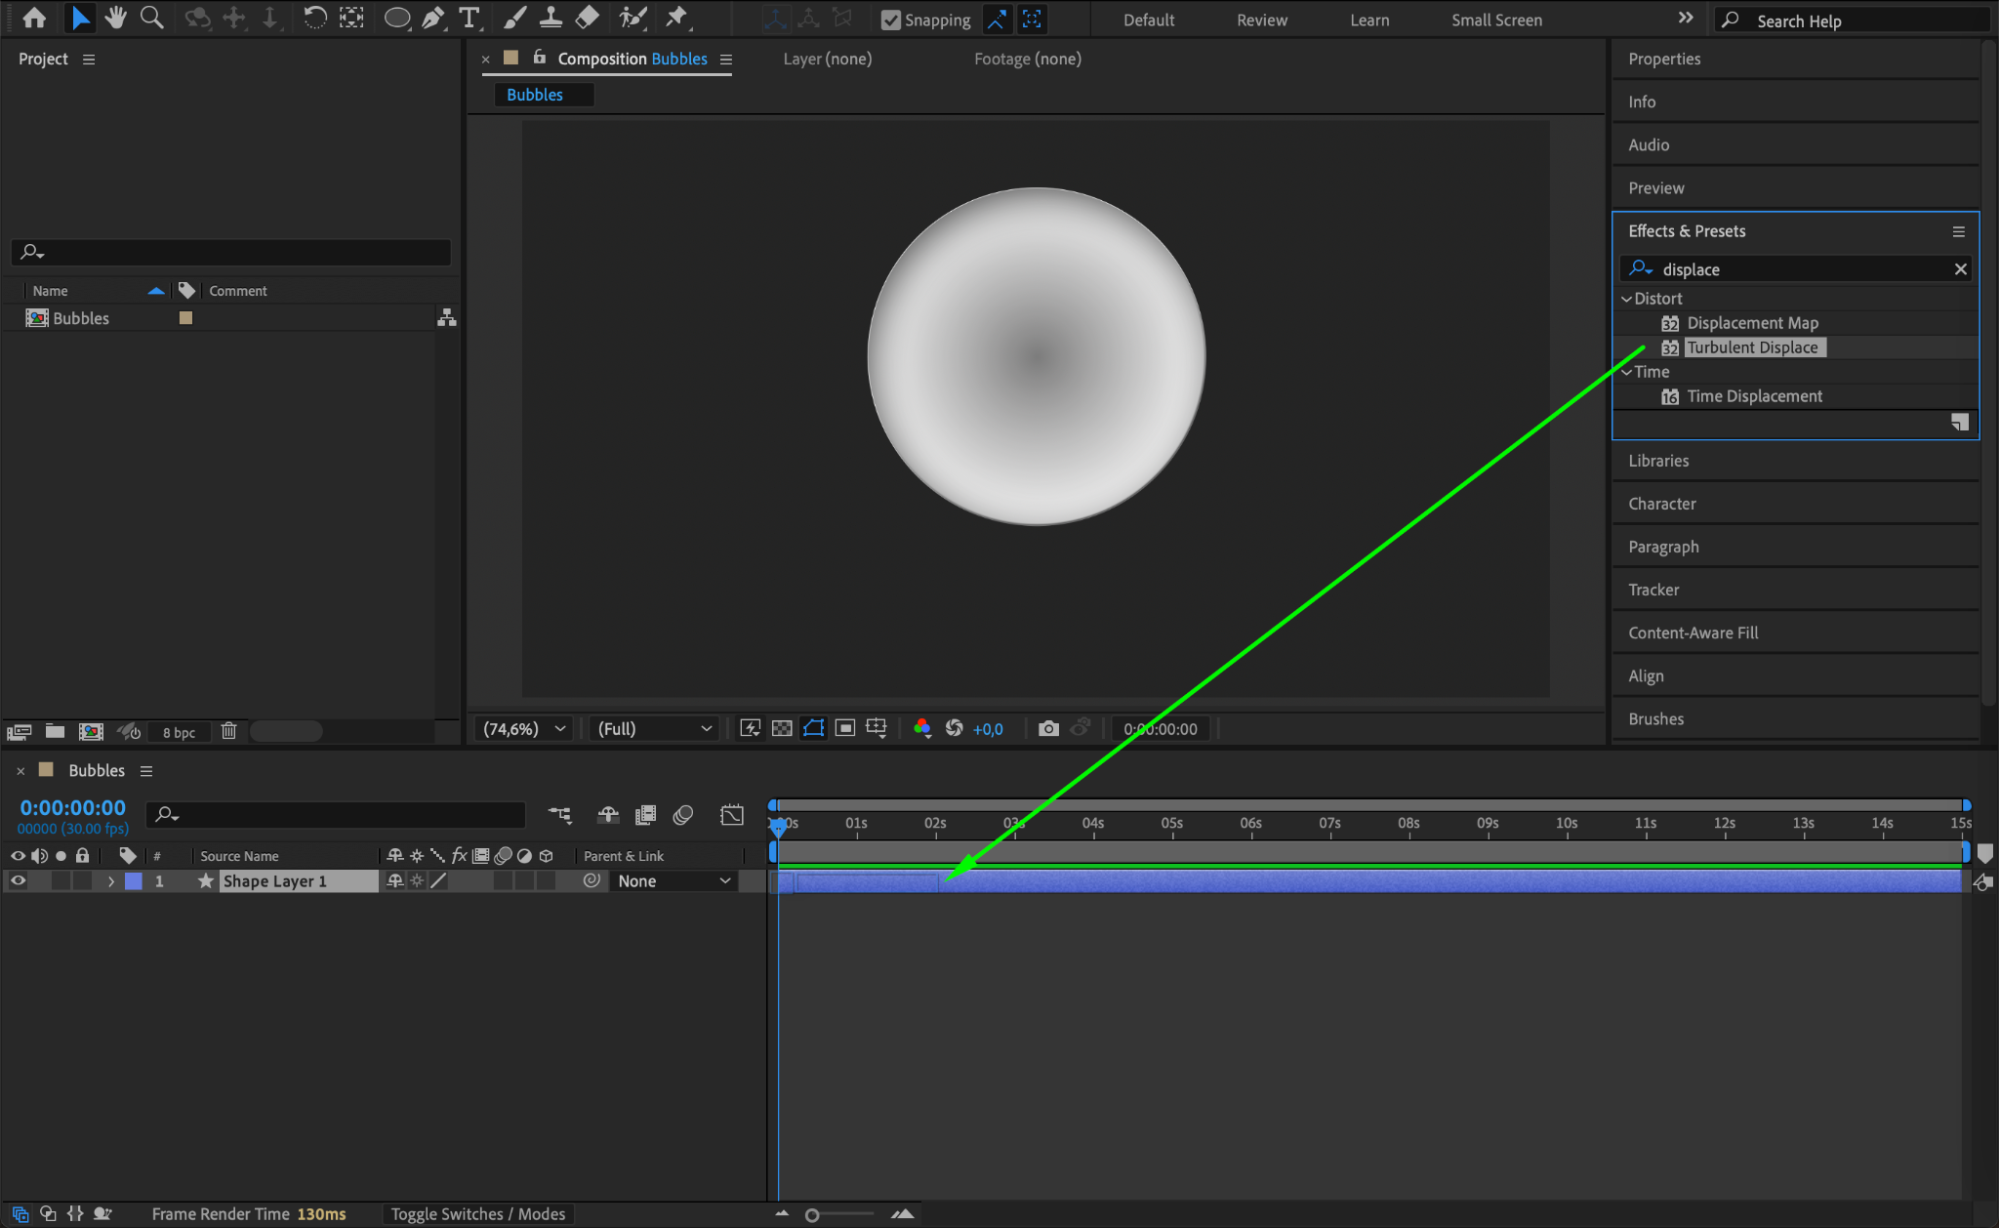
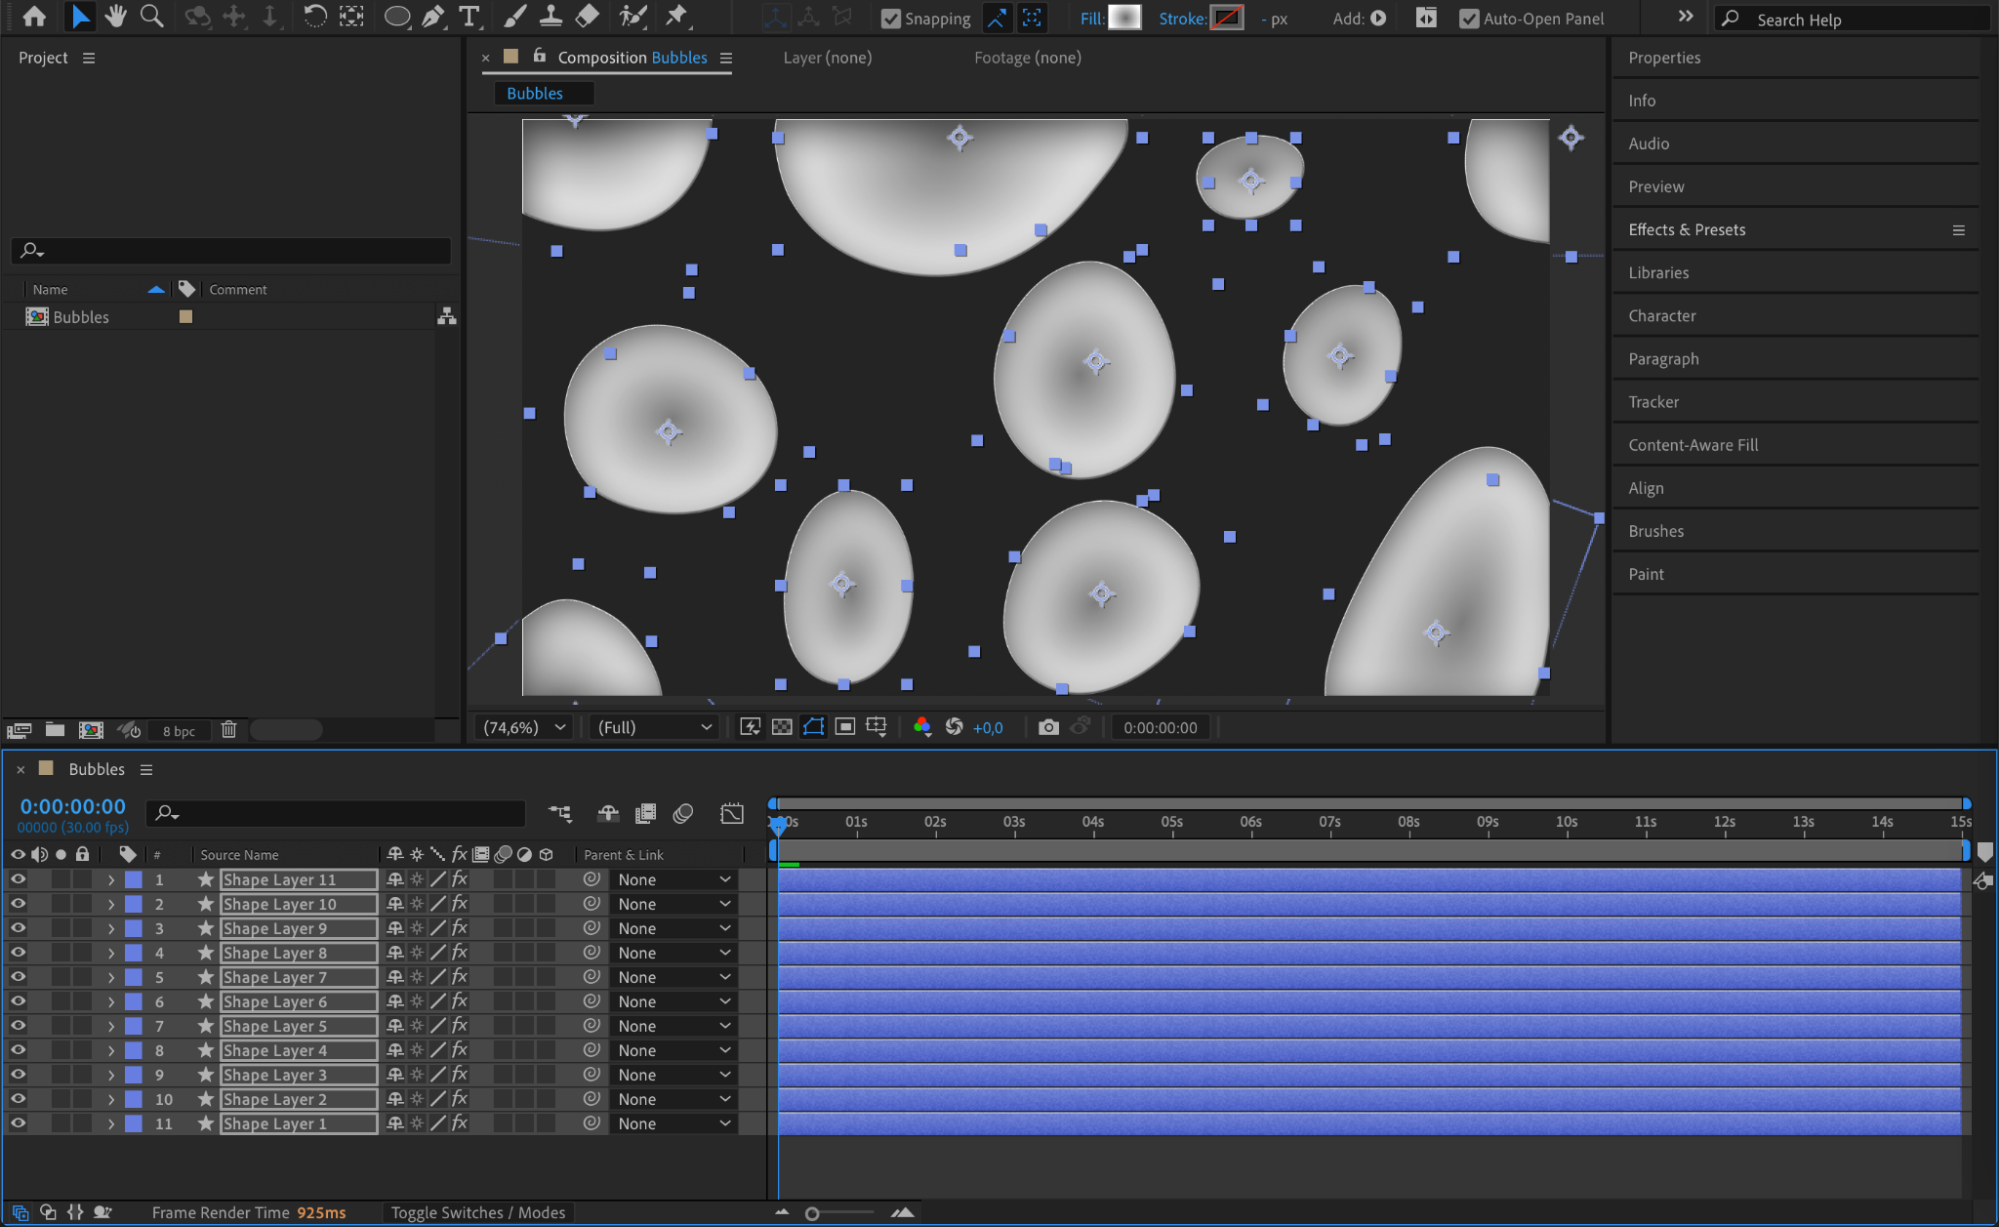
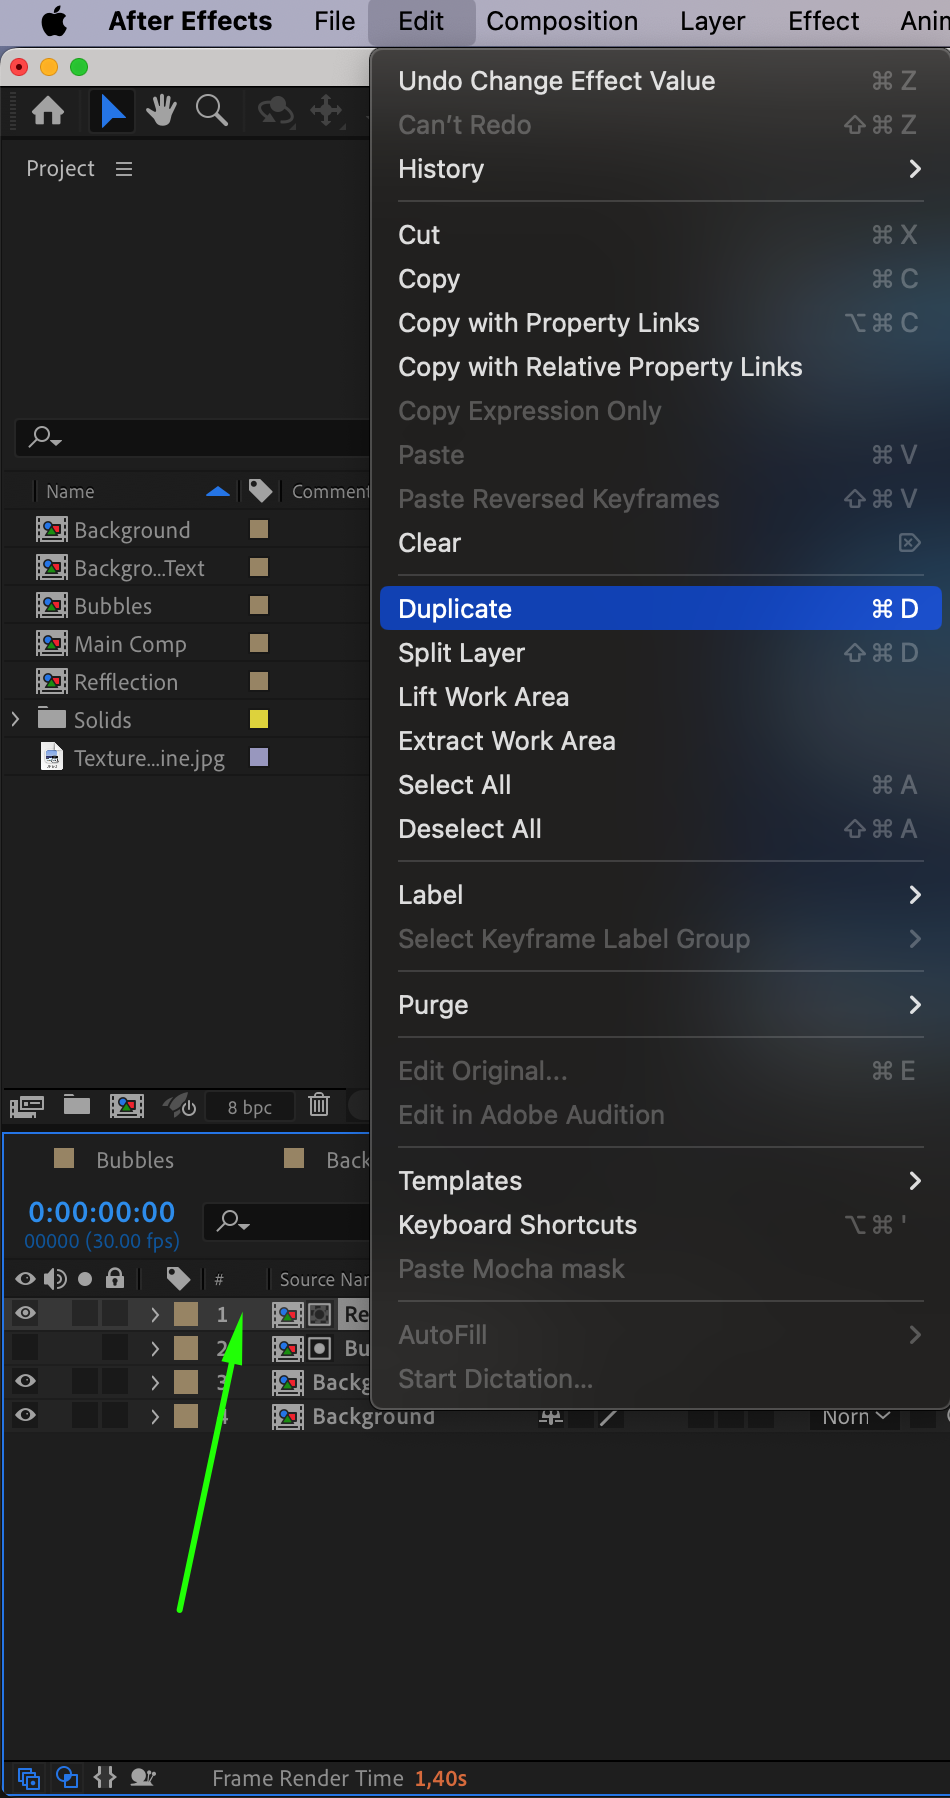
Step 6: Duplicate the Bubble
Select the bubble layer, then go to Edit > Duplicate. Create around 11 copies and vary their positions and sizes slightly to make them look more natural.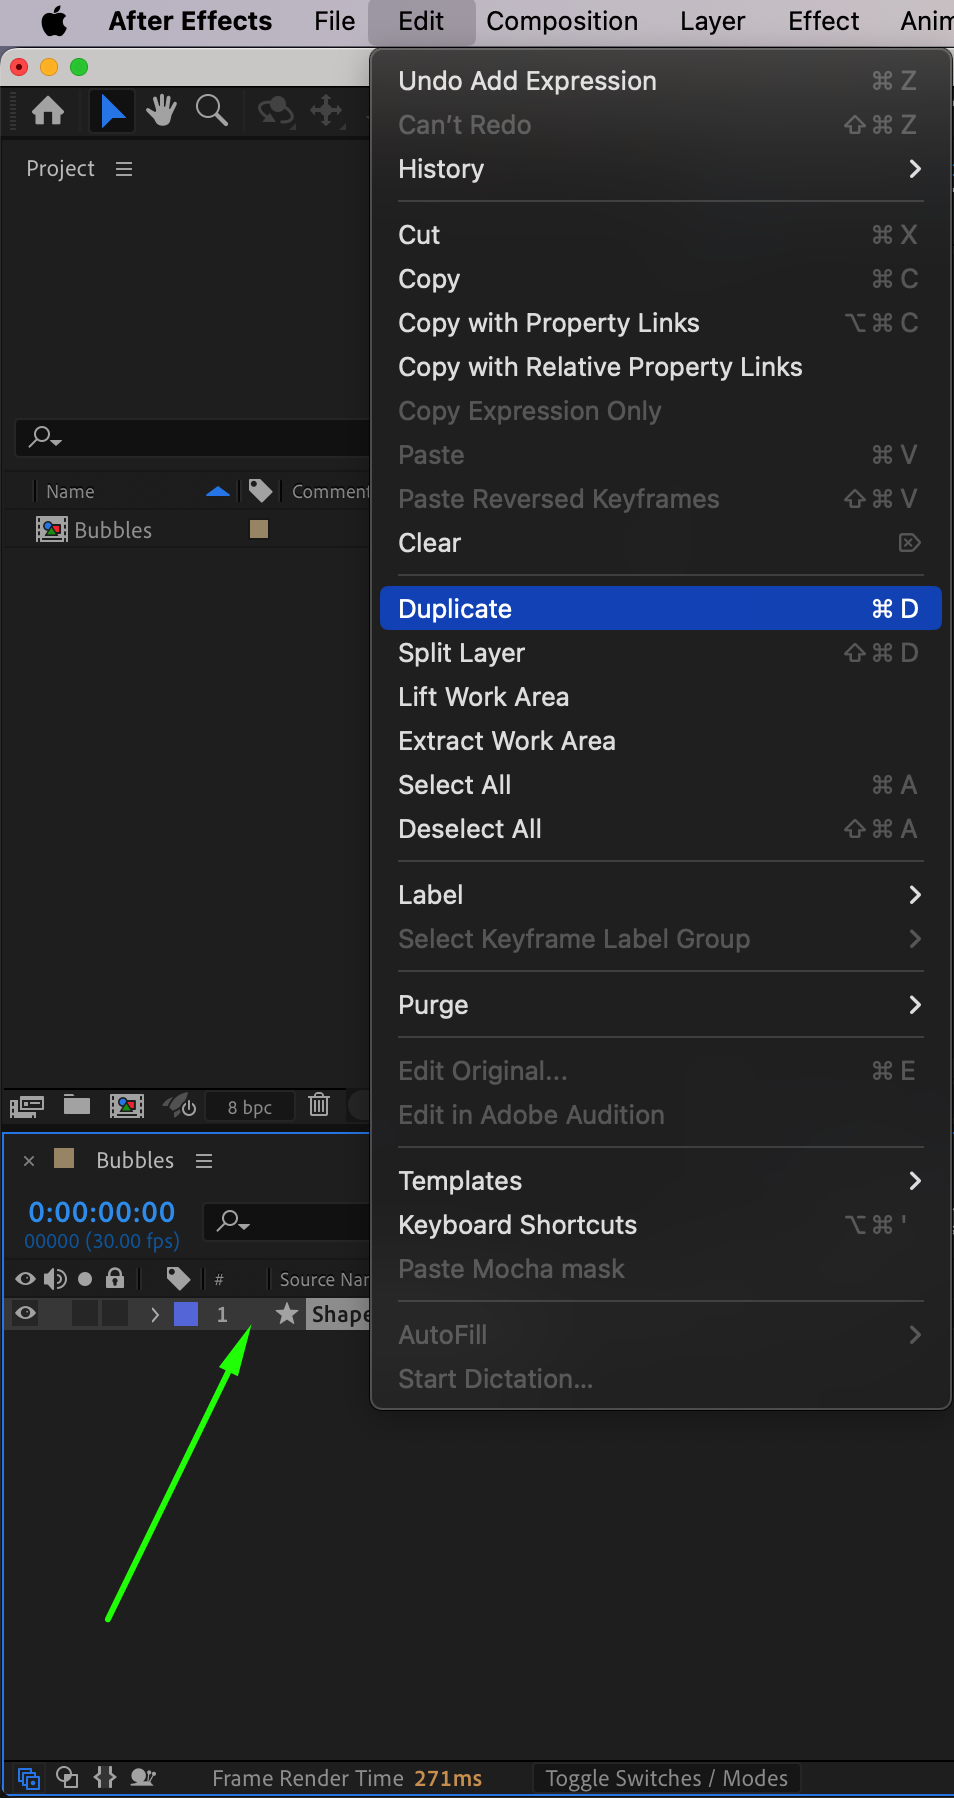
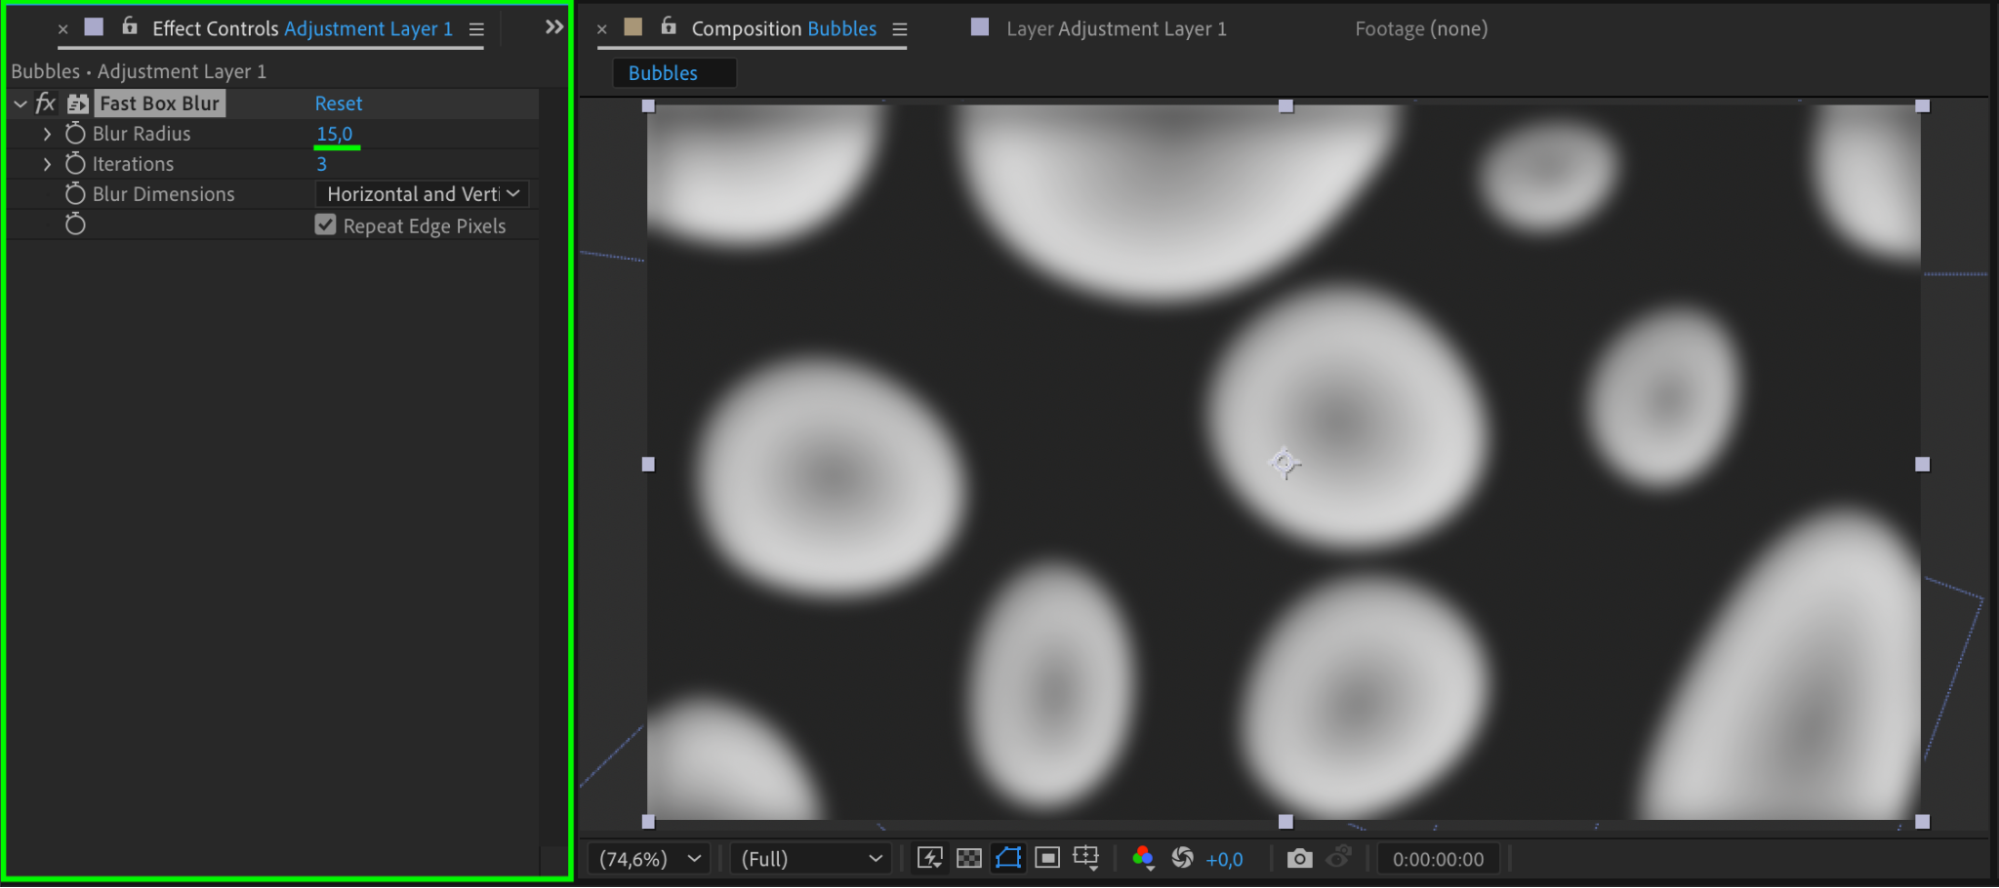
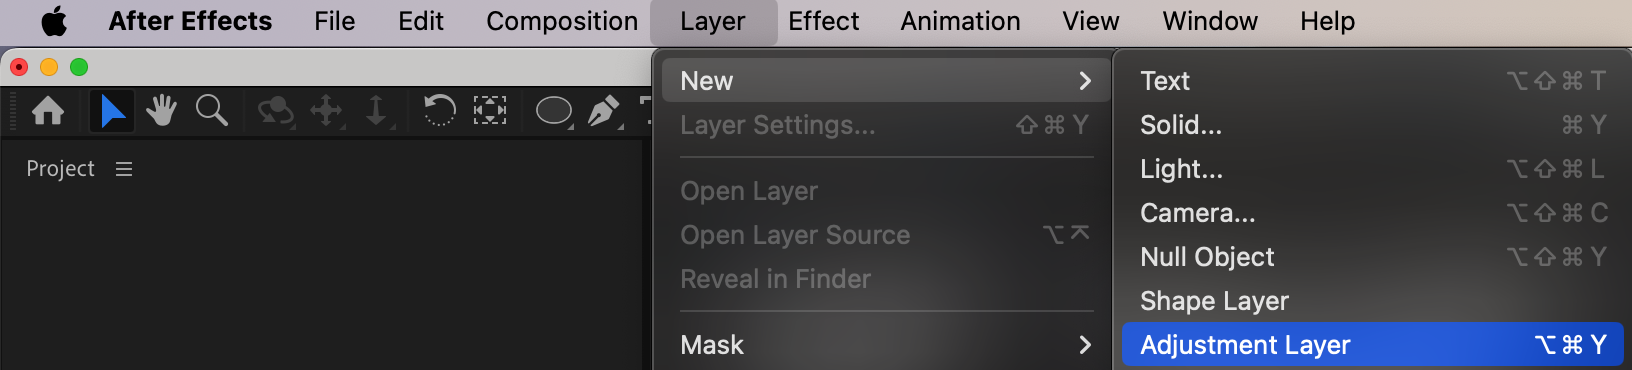
 Step 7: Create an Adjustment Layer
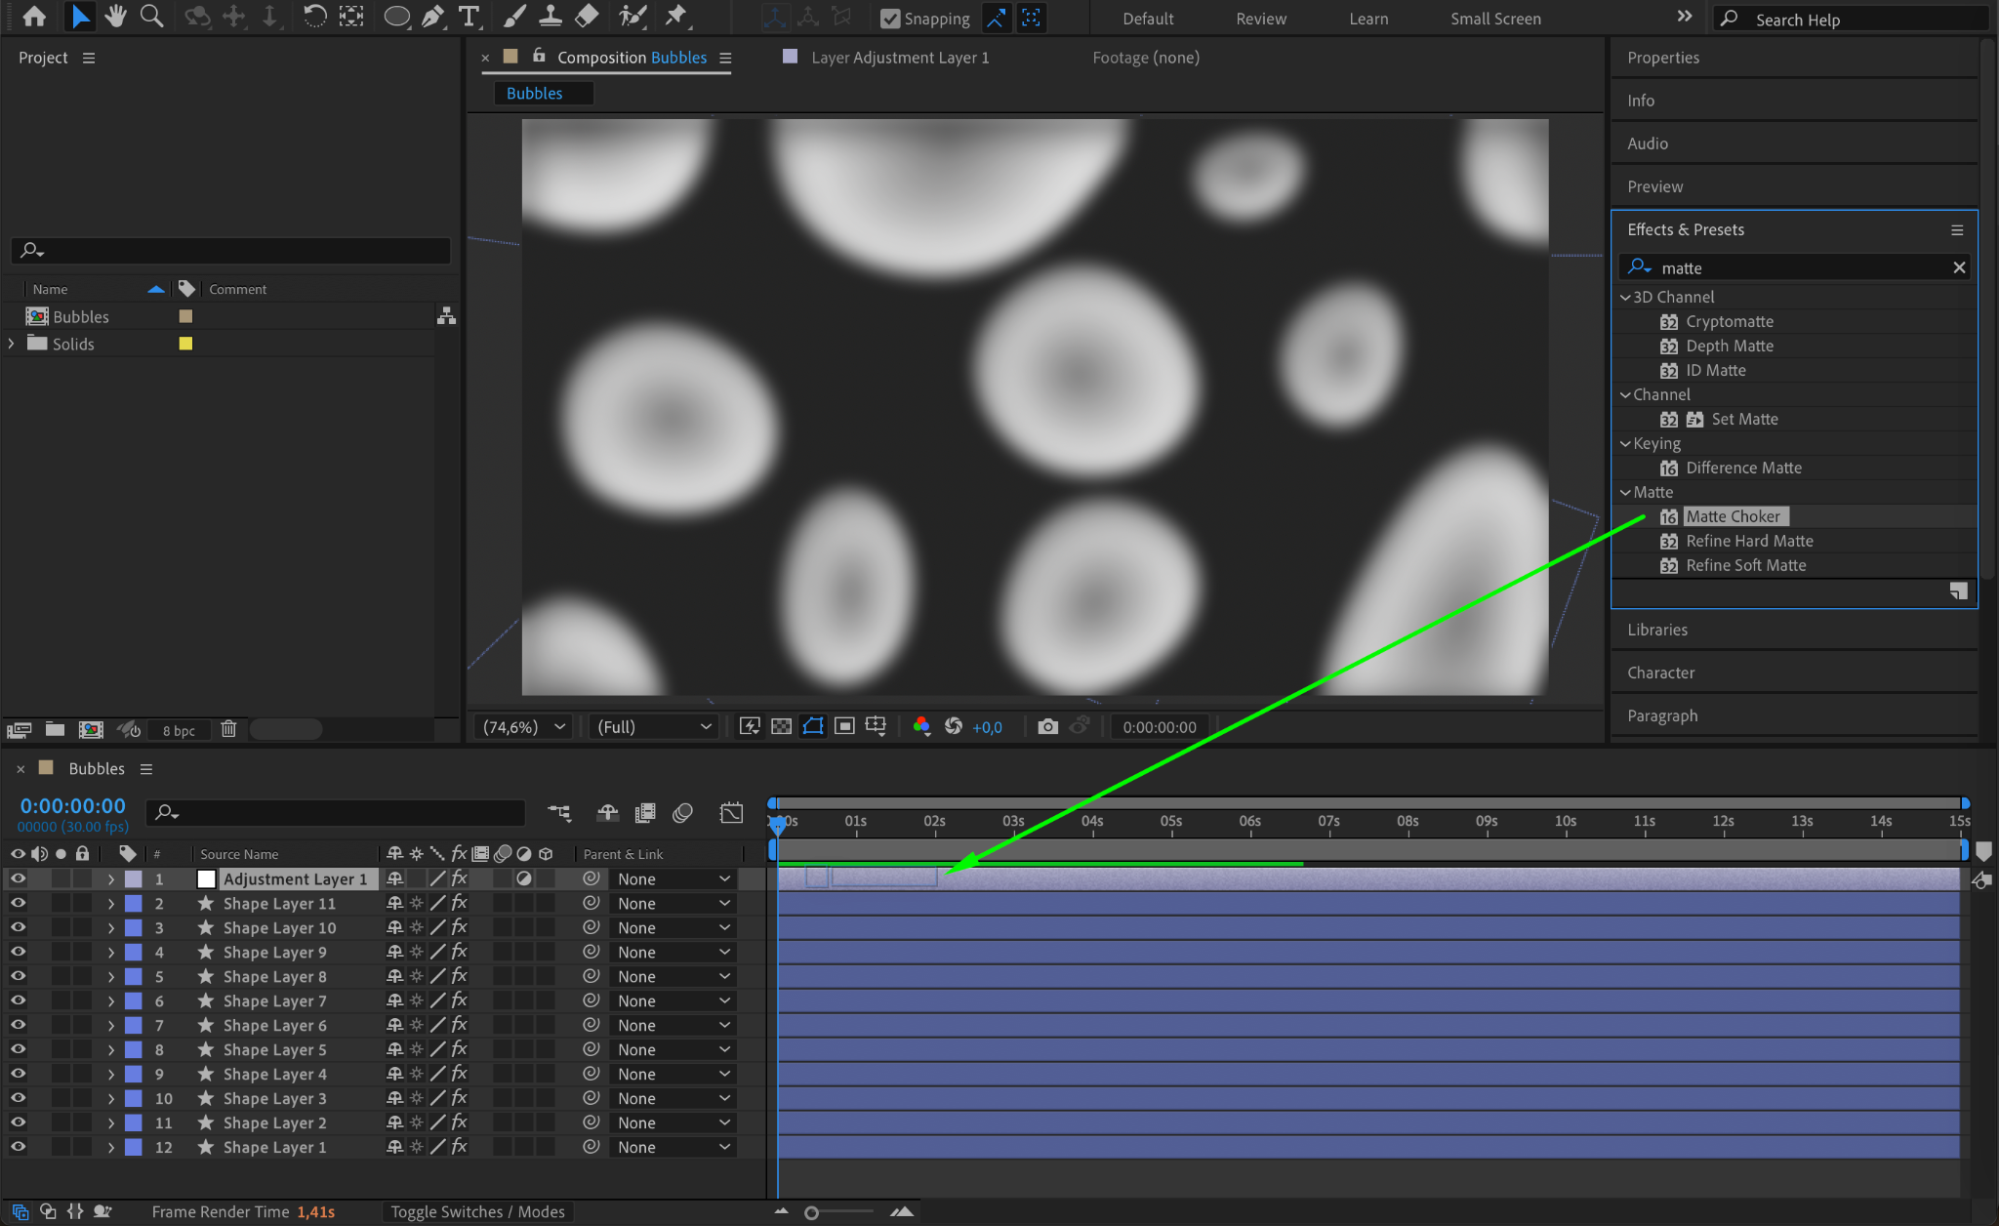
Go to Layer > New > Adjustment Layer. Apply the Fast Box Blur effect and set Blur Radius to 15 to soften the bubbles and add depth.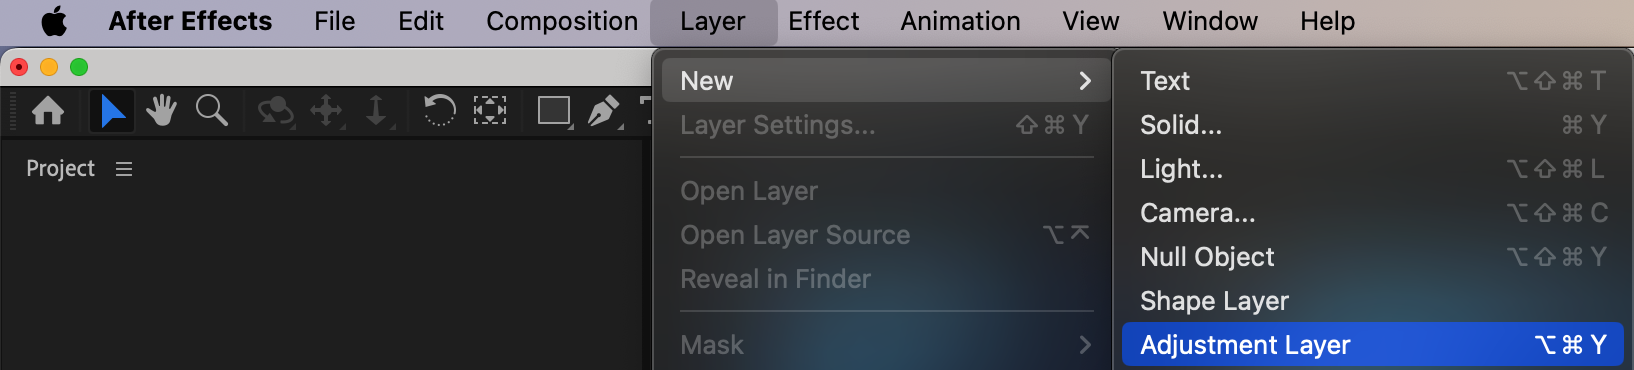
 Step 8: Apply Matte Choker Effect
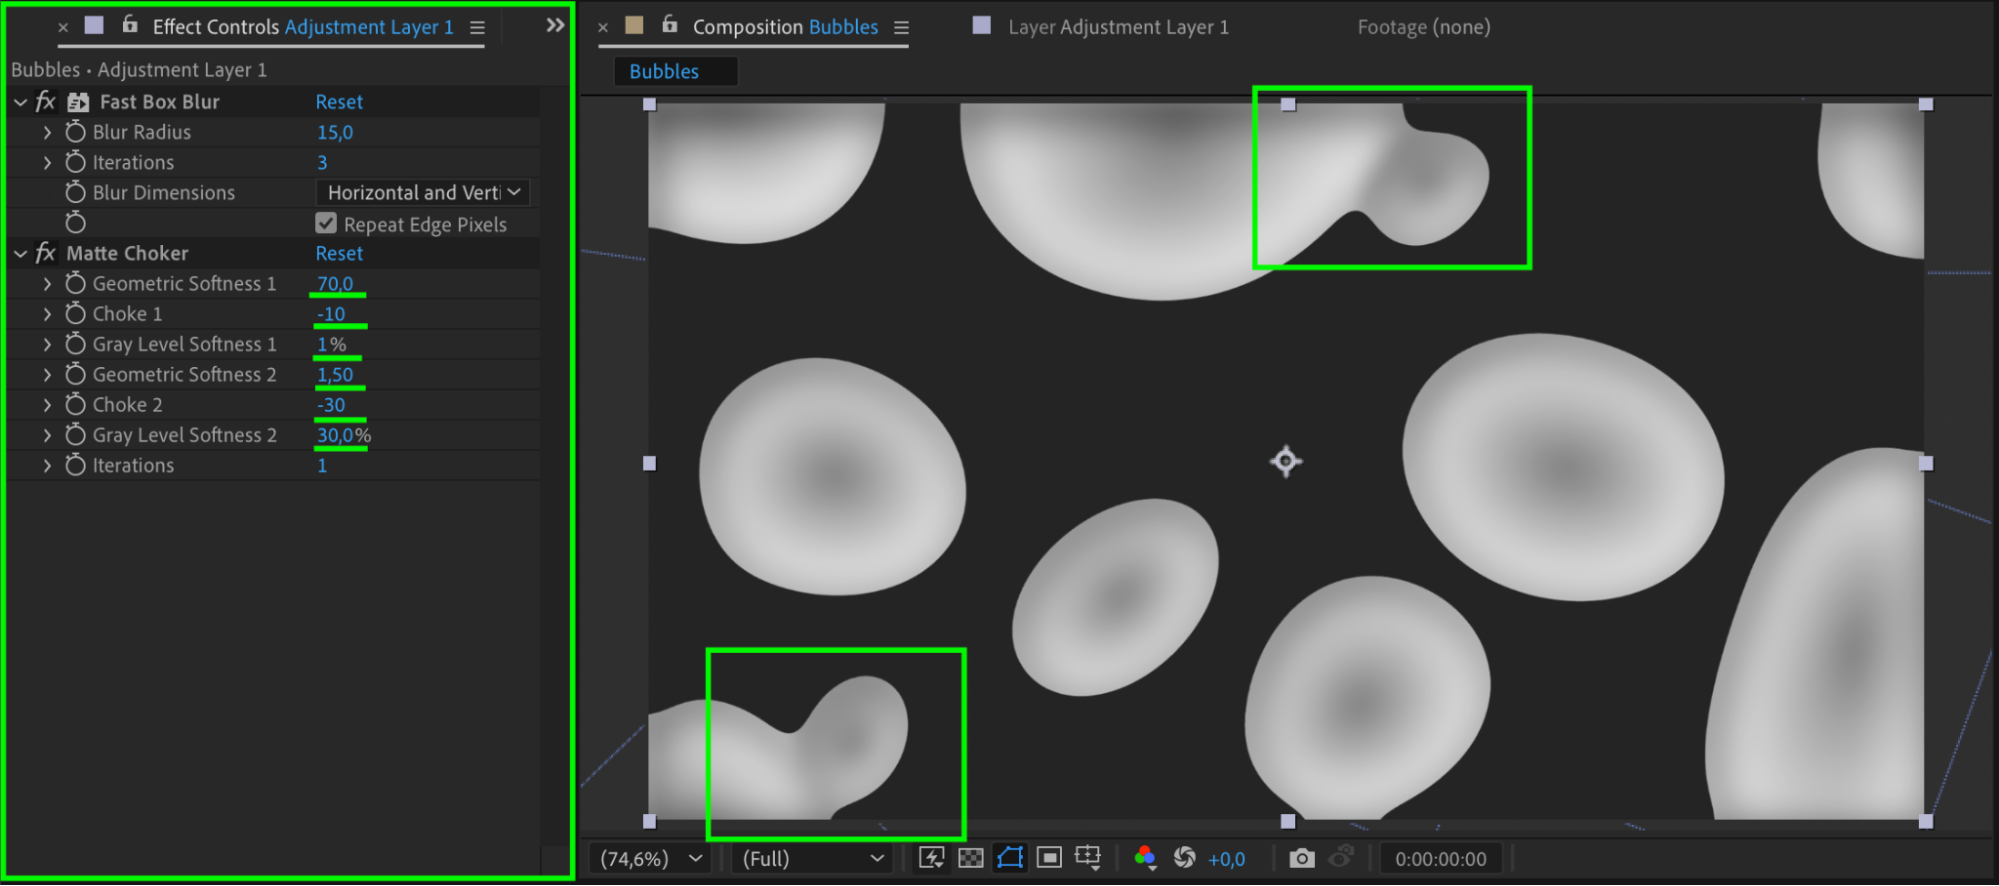
With the adjustment layer selected, apply the Matte Choker effect and set:
Geometric Softness 1: 70
Choke 1: -10
Gray Level Softness 1: 1
Geometric Softness 2: 1.5
Choke 2: -30
Gray Level Softness 2: 30
Now, smaller bubbles will blend naturally when they move closer to larger ones.
 Step 9: Create a Background for the Text
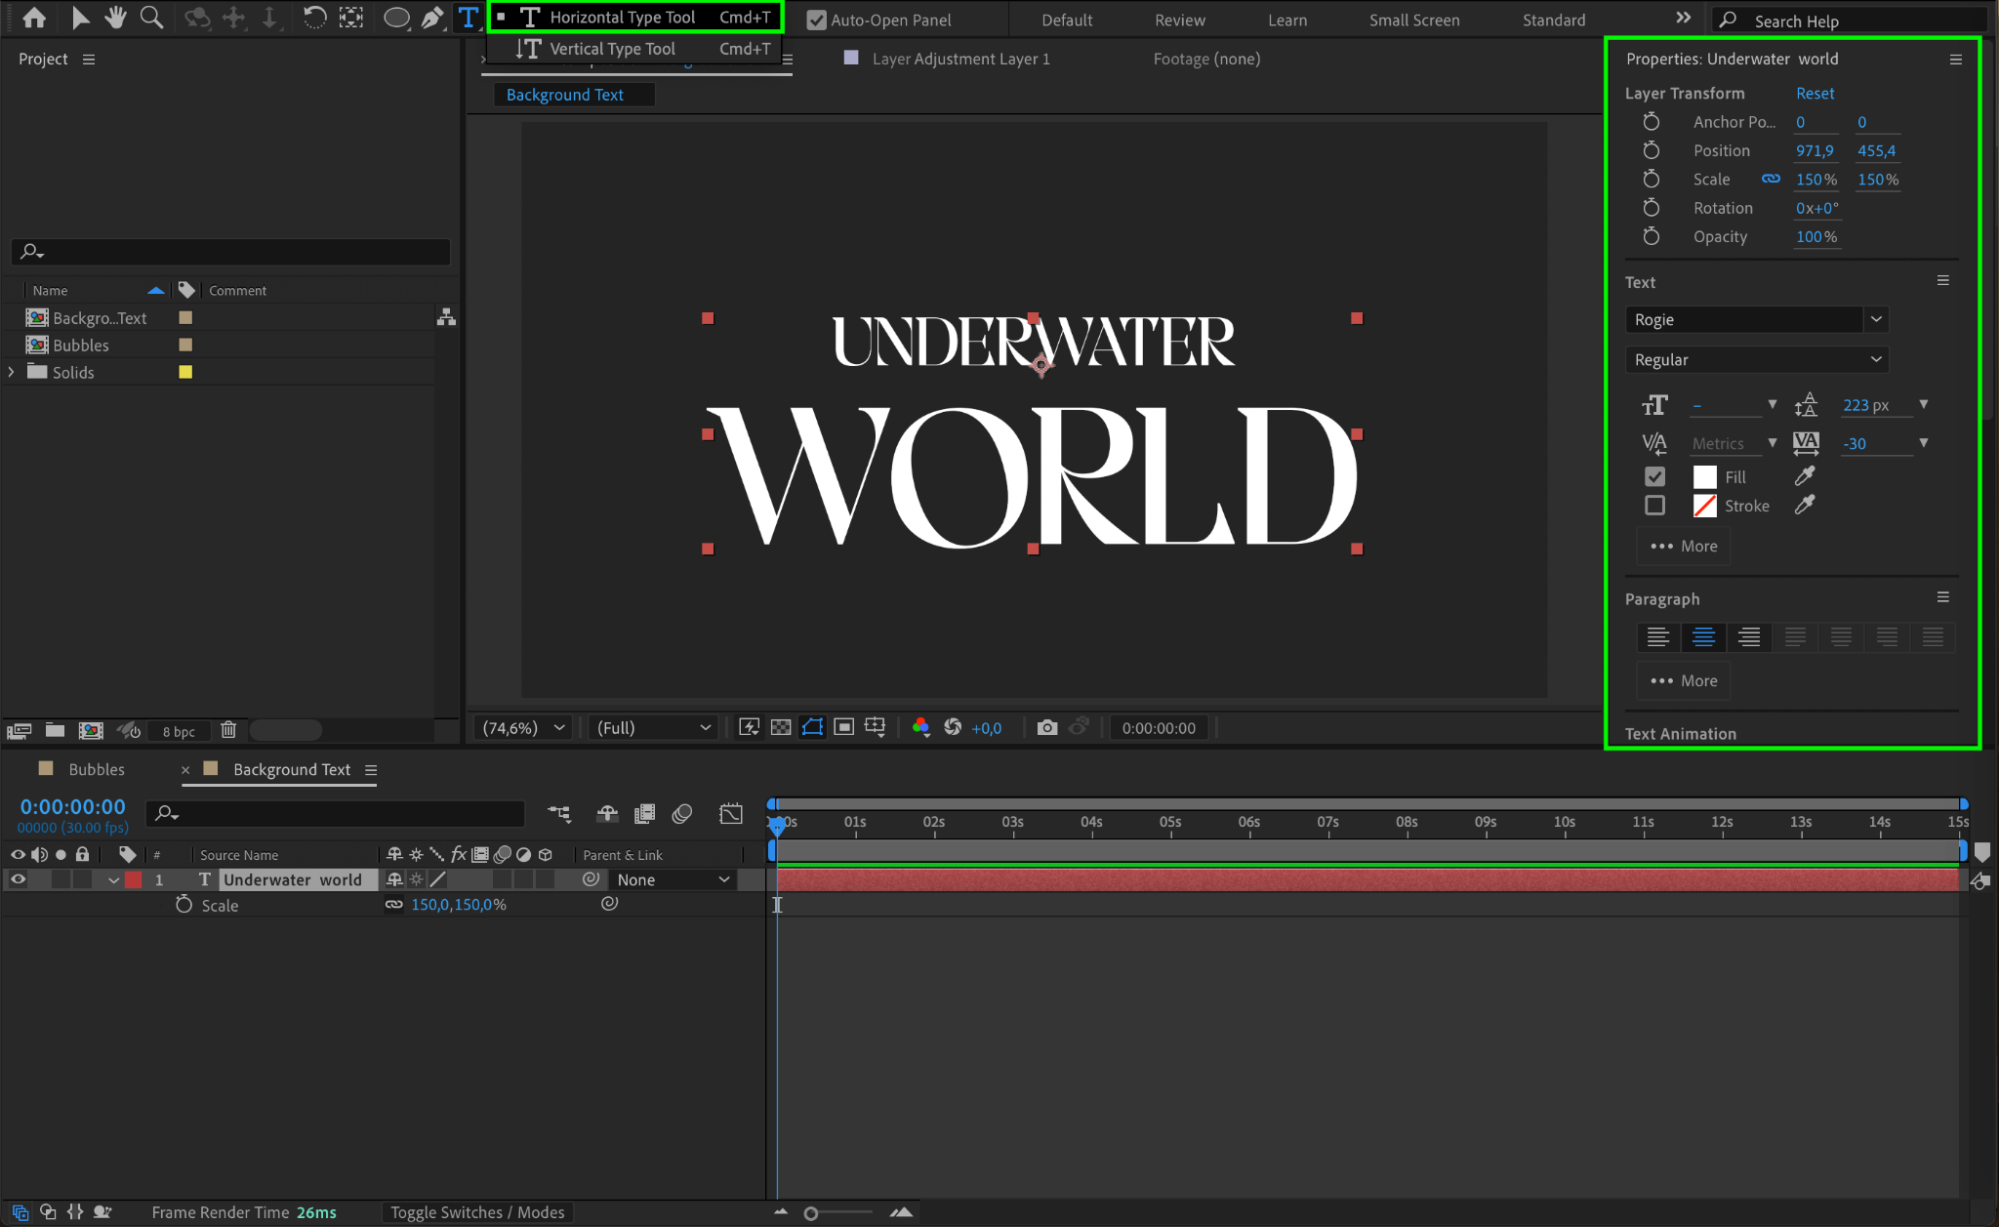
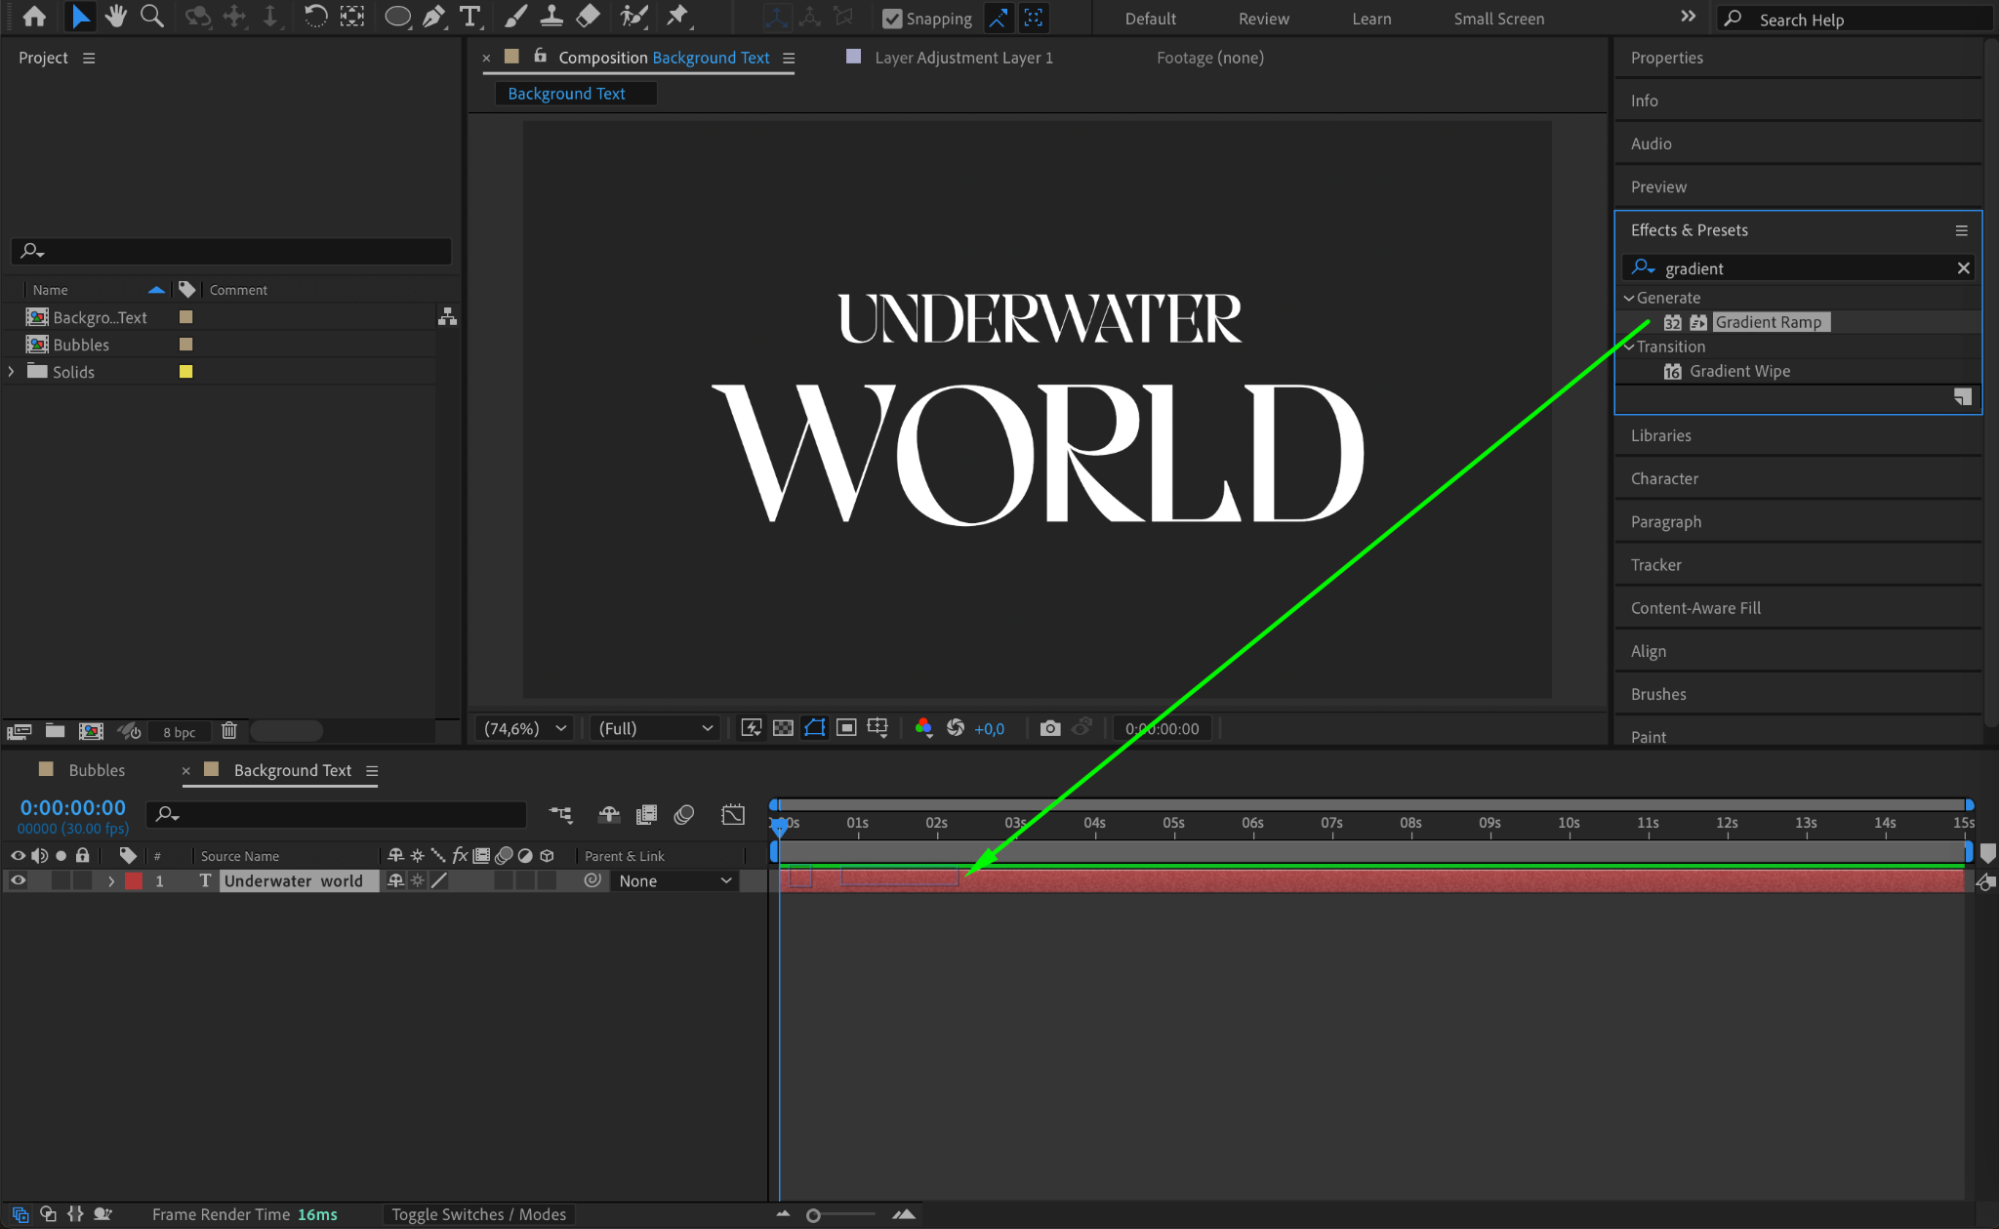
Go to Composition > New Composition and name it “Background Text”.
Use the Type Tool to create text.
Apply the Gradient Ramp effect and set the colors to white and light blue to give a soft glowing effect.

Step 10: Create a Background for the Scene
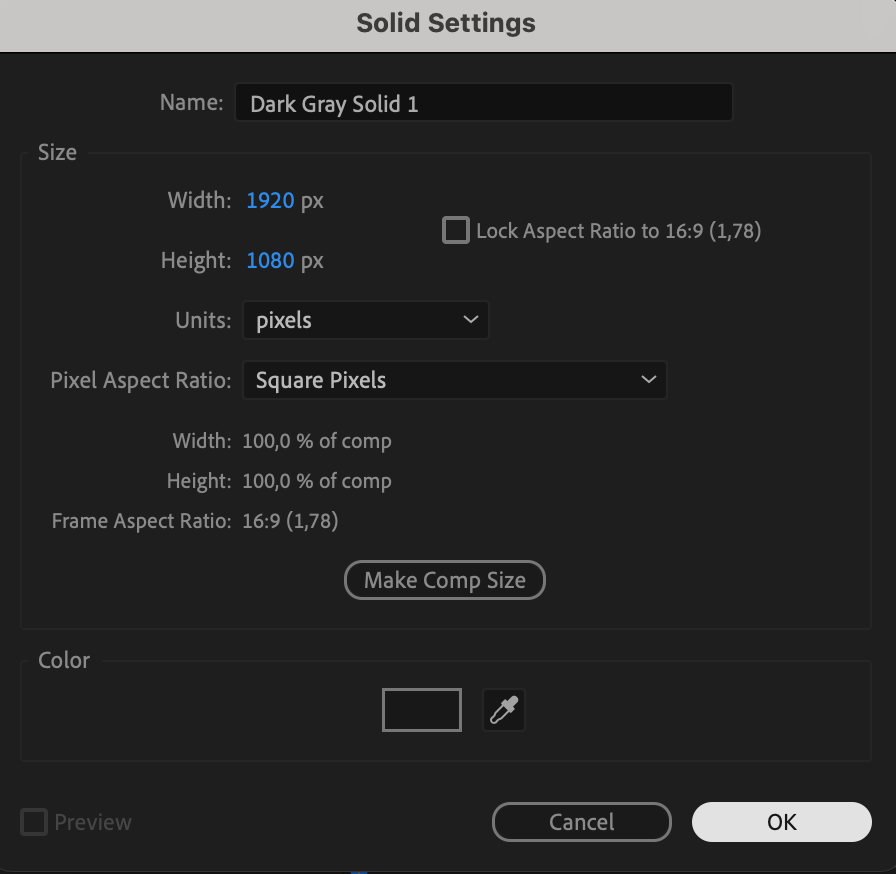
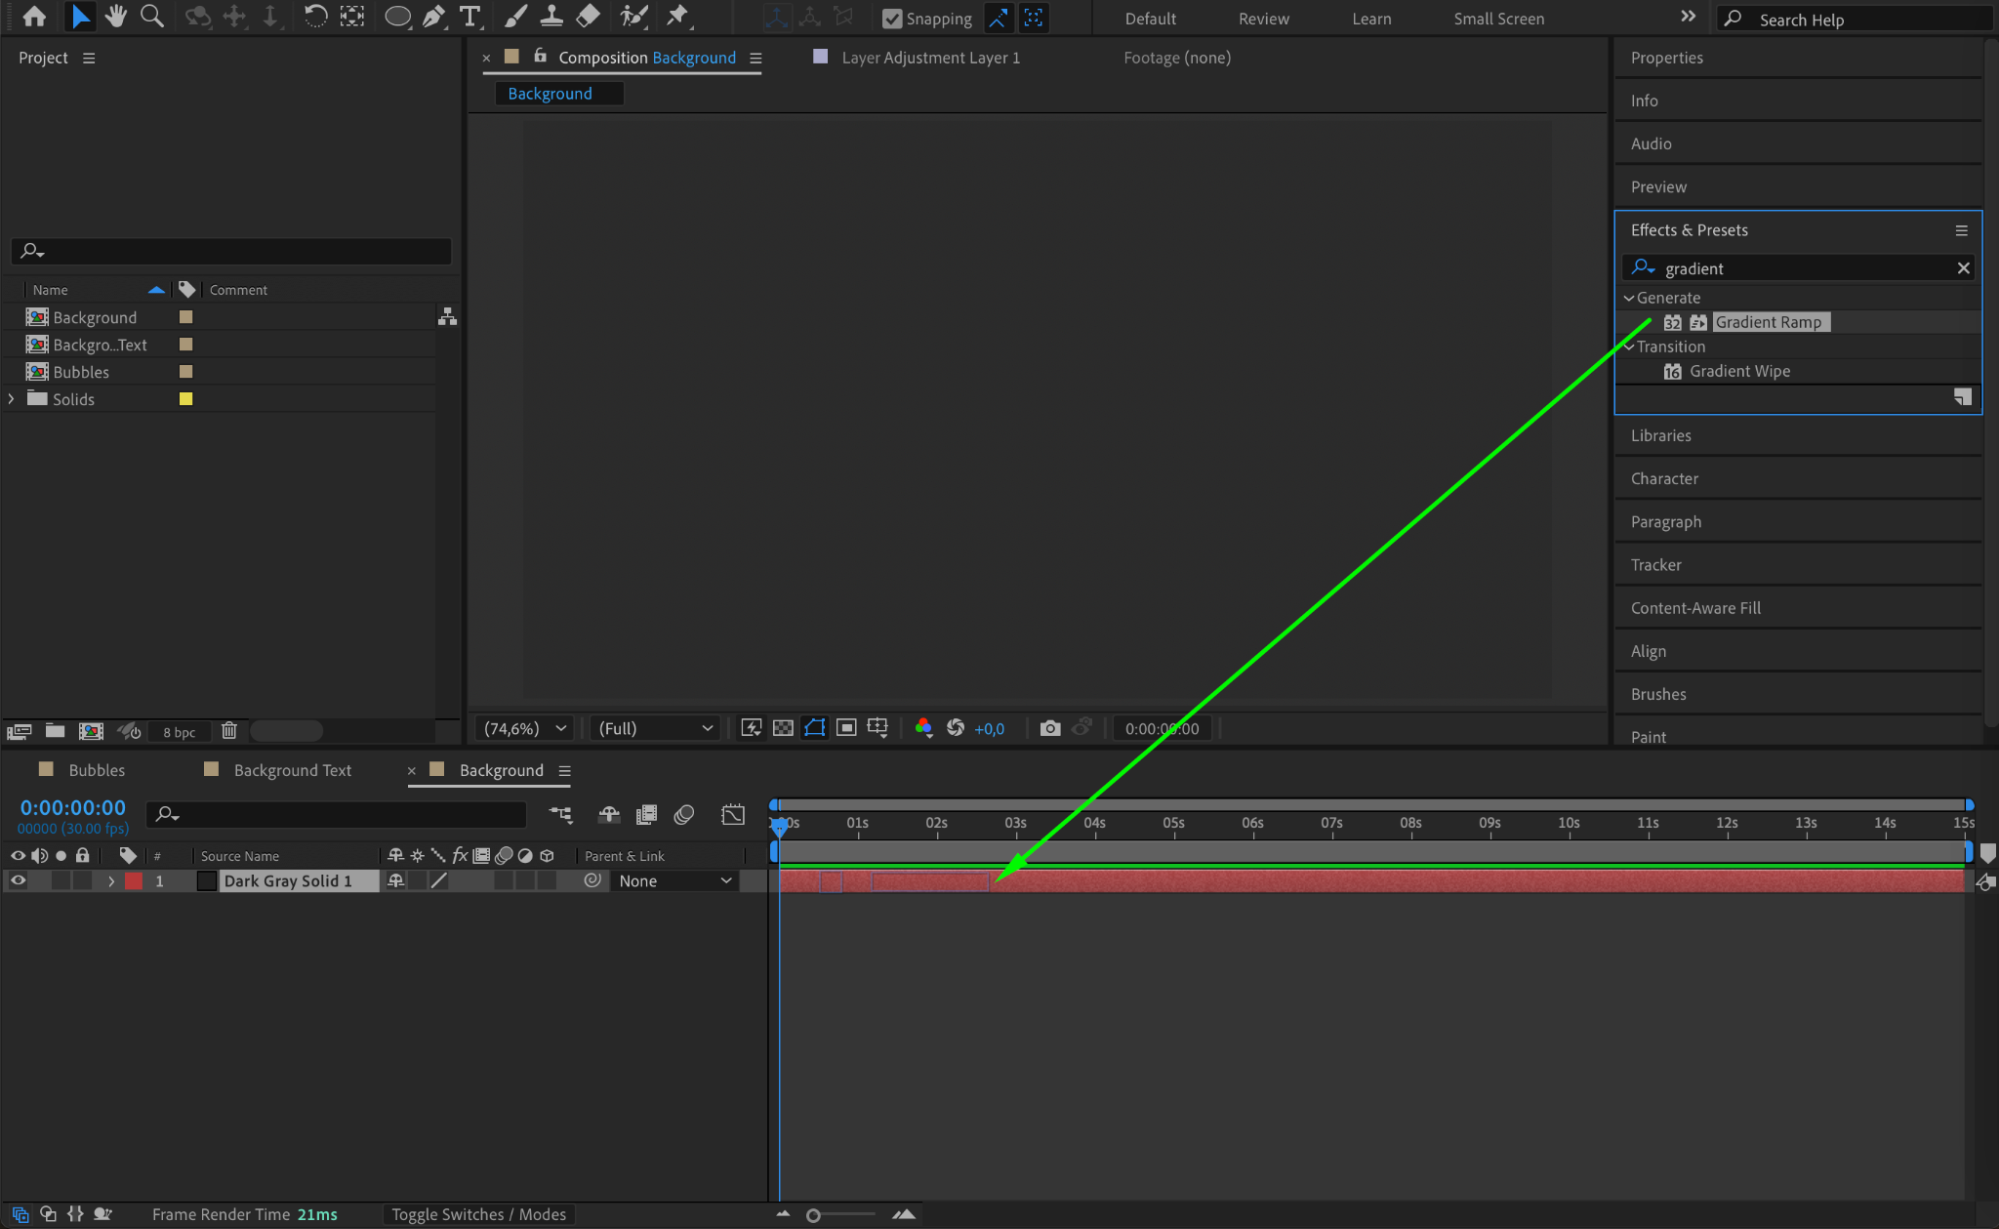
Go to Composition > New Composition, name it “Background”, and add a Solid Layer.
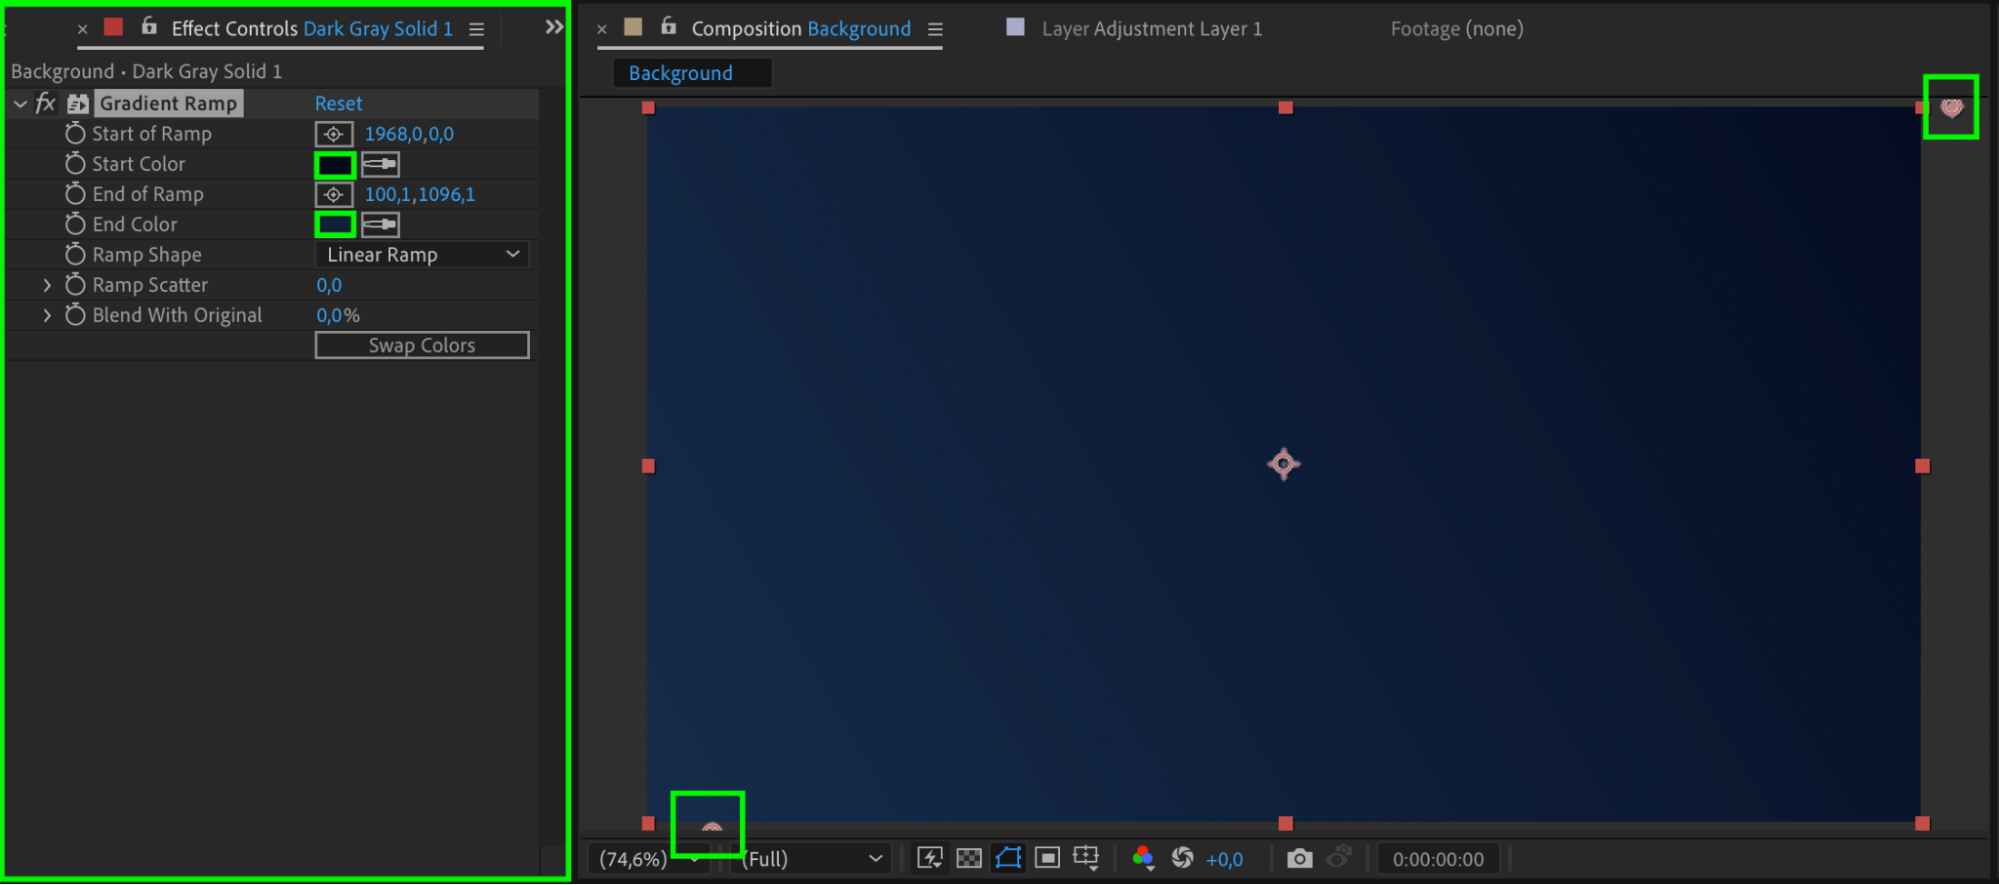
Apply the Gradient Ramp effect and set the colors: Start Color: #070A18, End Color: #111F3.
This creates a deep, dark background for contrast.


 Step 11: Combine Everything in the Main Composition
Go to Composition > New Composition, name it “Main Comp”, and click the Toggle Transparency Grid button.
Drag all previous compositions into this one.

 Step 12: Create a Reflection Layer
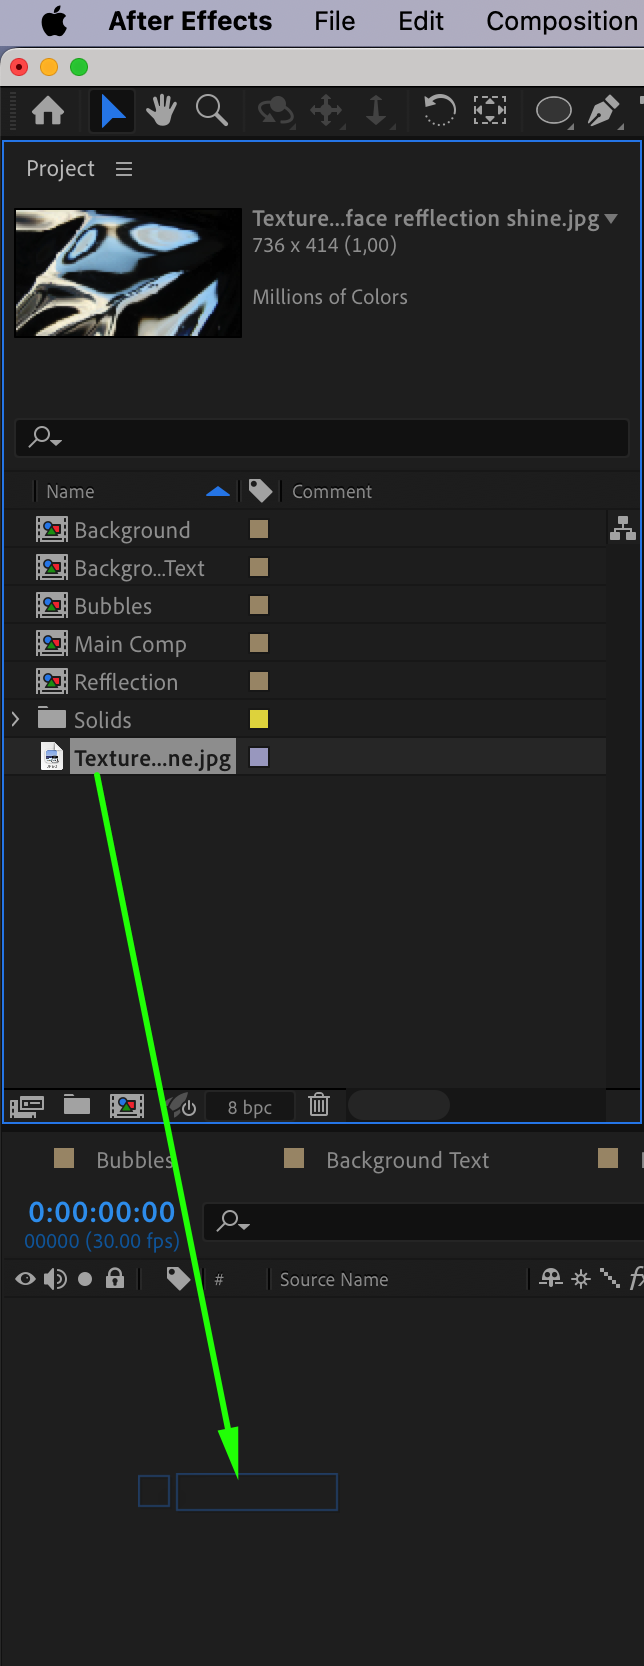
Go to Composition > New Composition, name it “Reflection”, and import a surface texture image to simulate reflection.
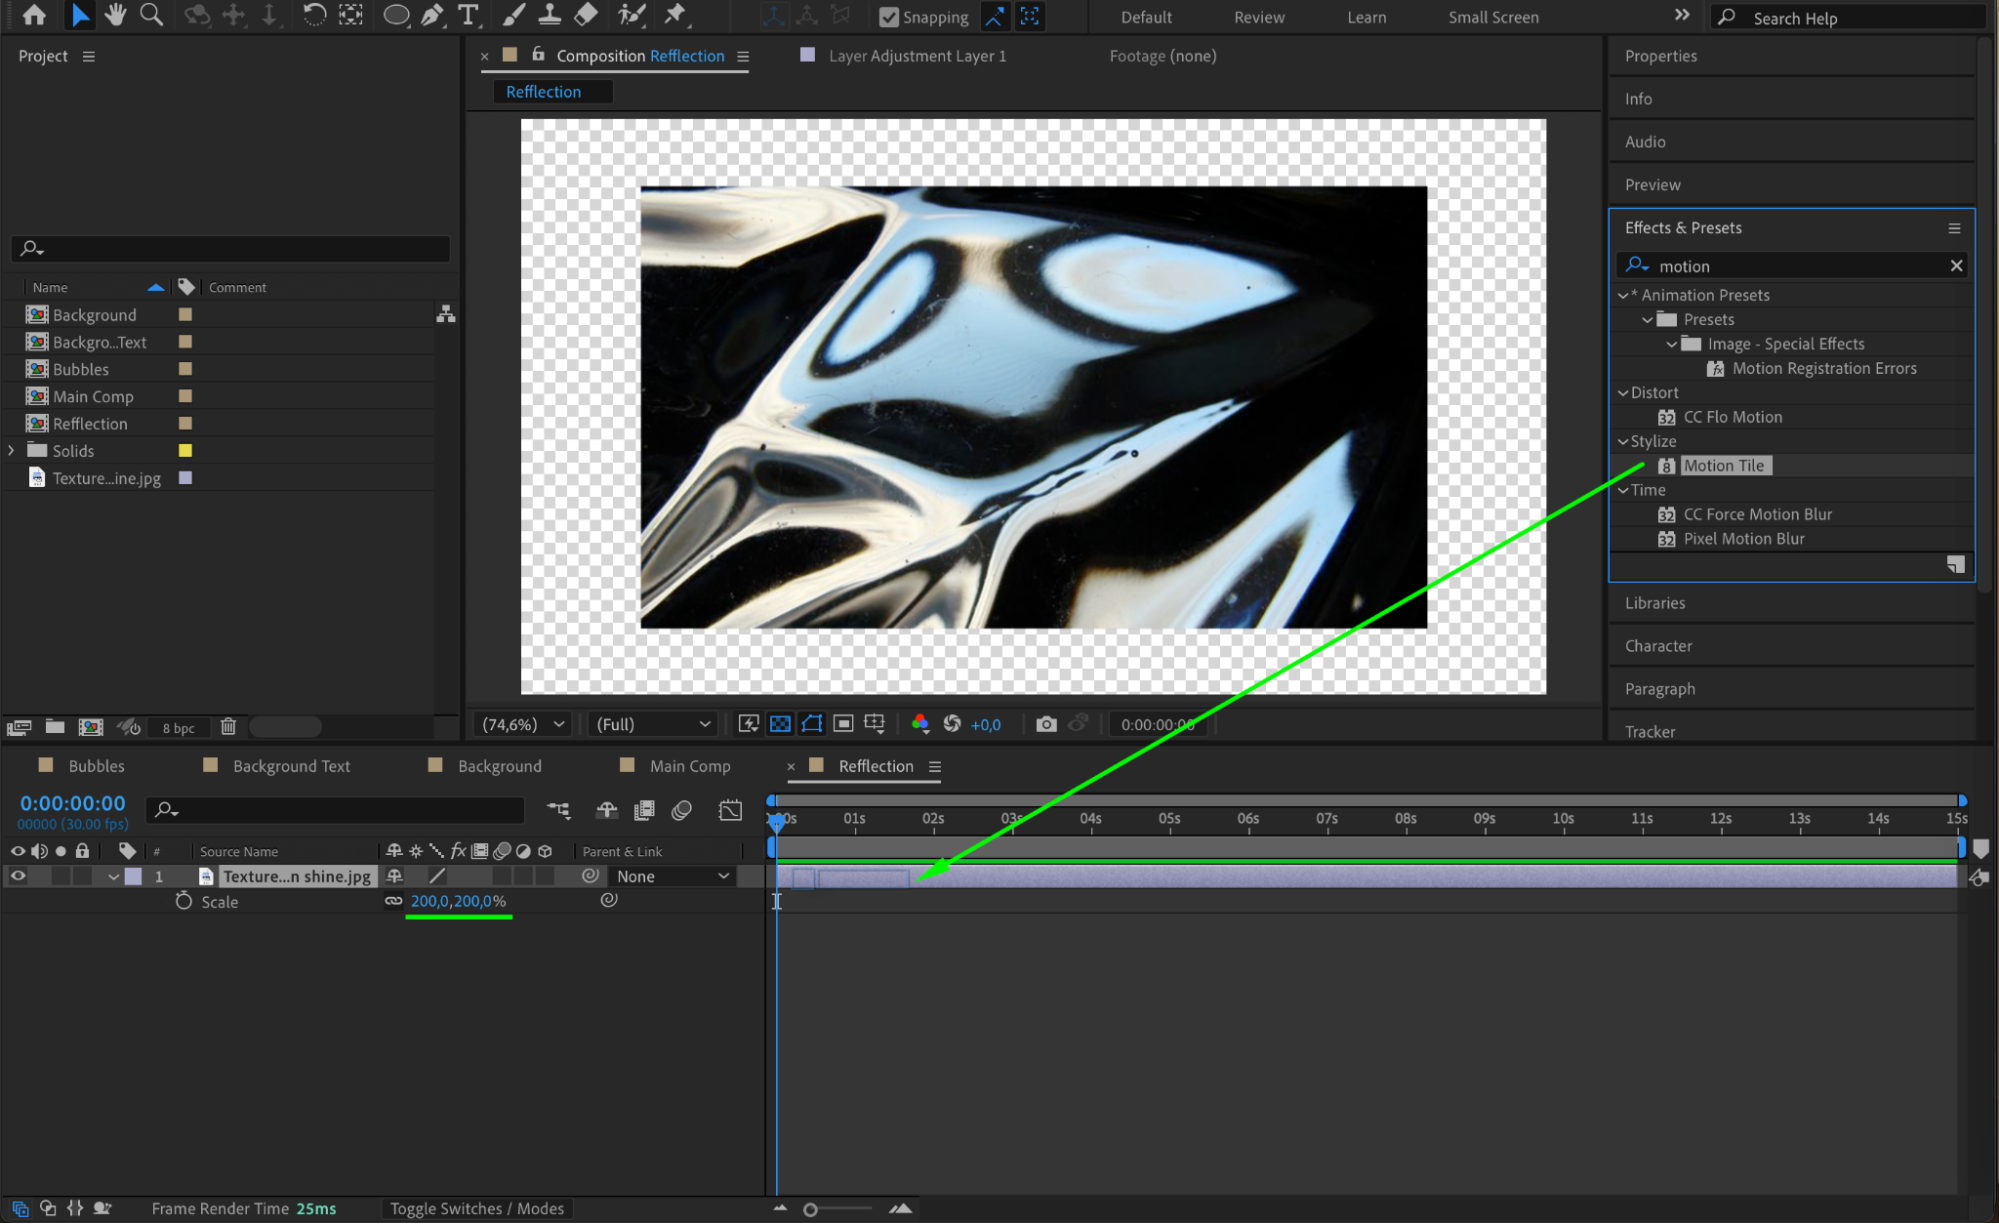
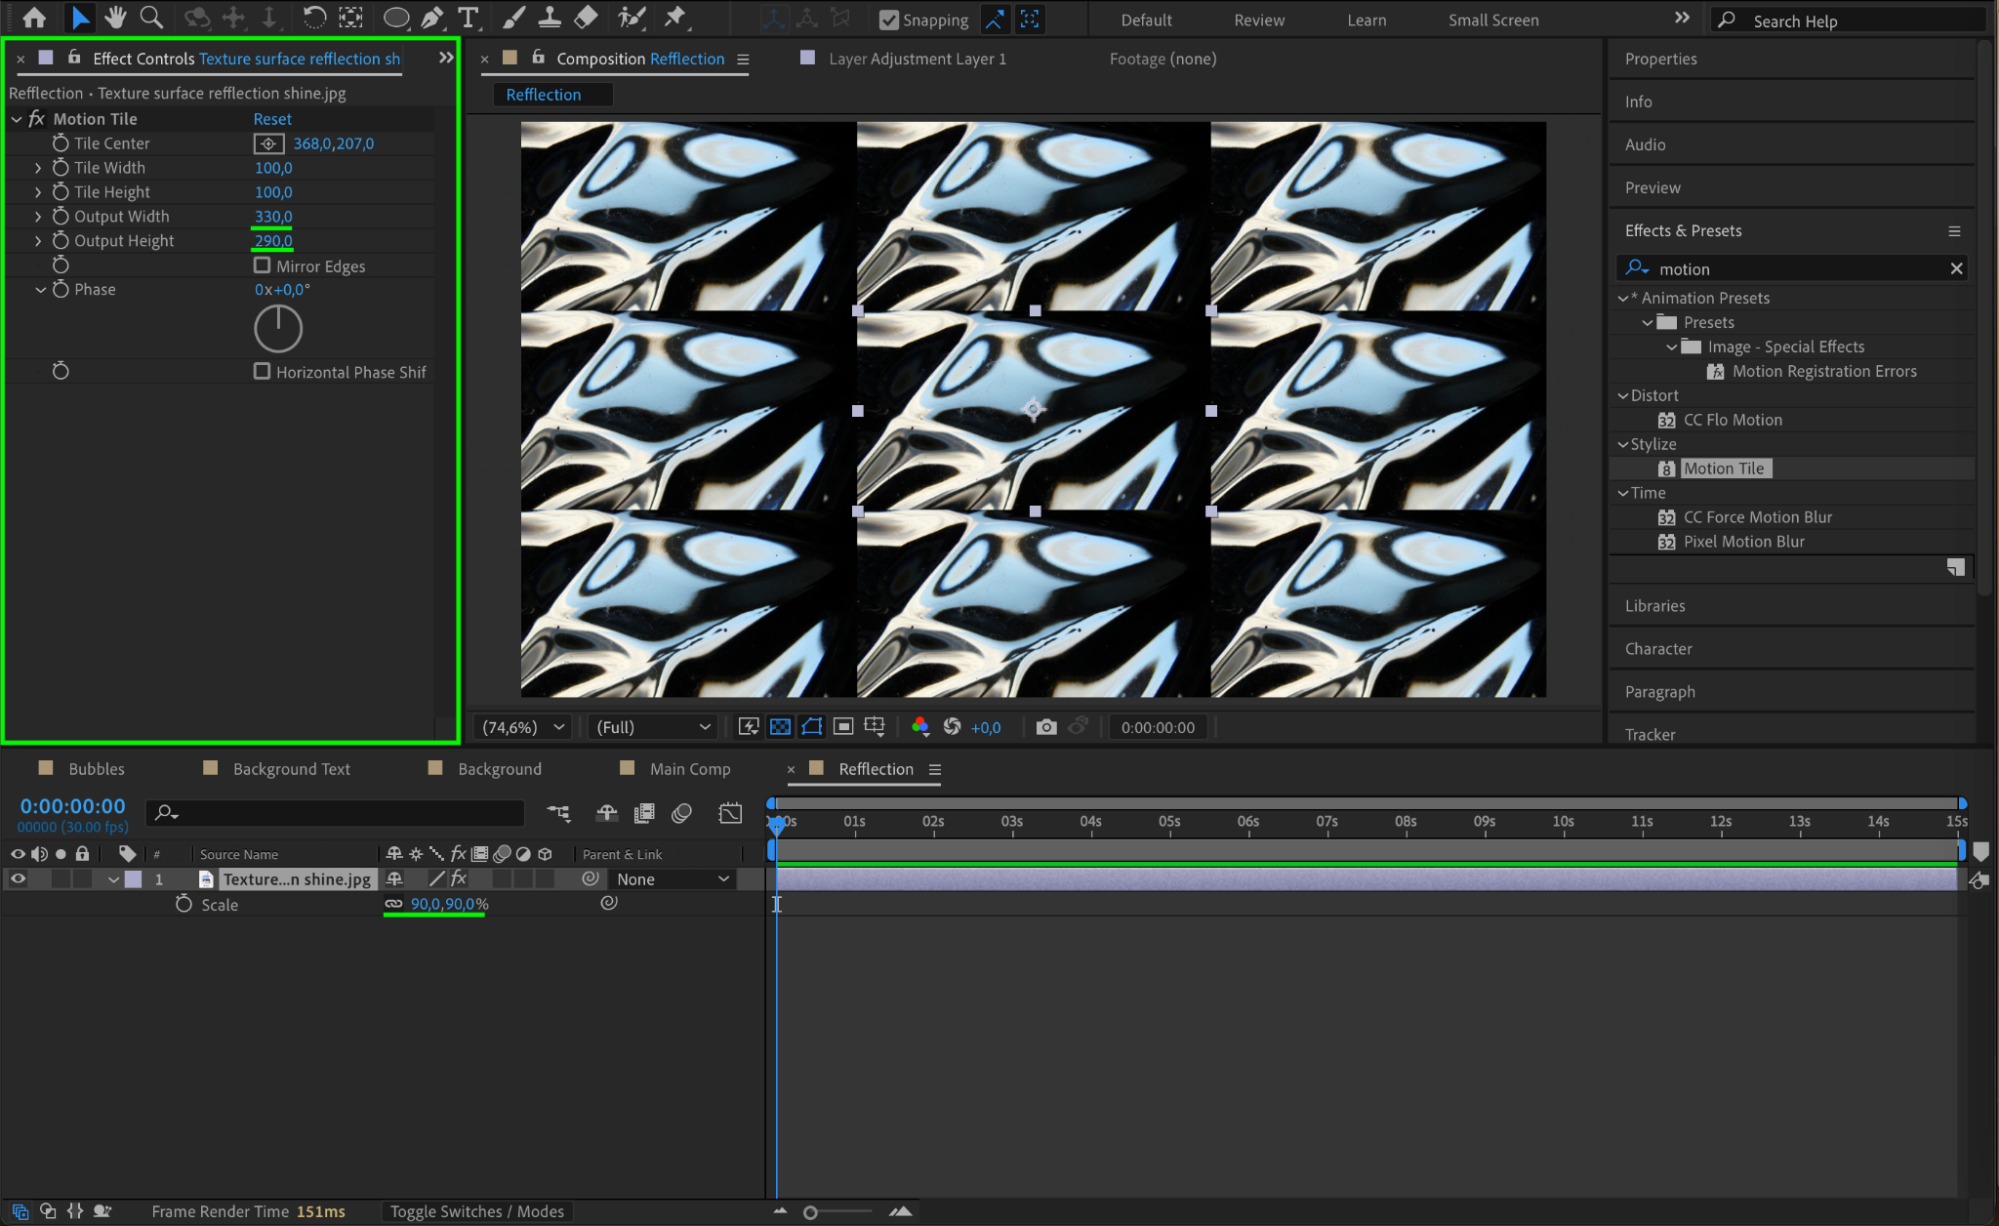
Apply the Motion Tile effect and set:
Output Width: 330
Output Height: 290
Adjust Scale (S) to around 90

 Step 13: Apply Distortion to the Reflection
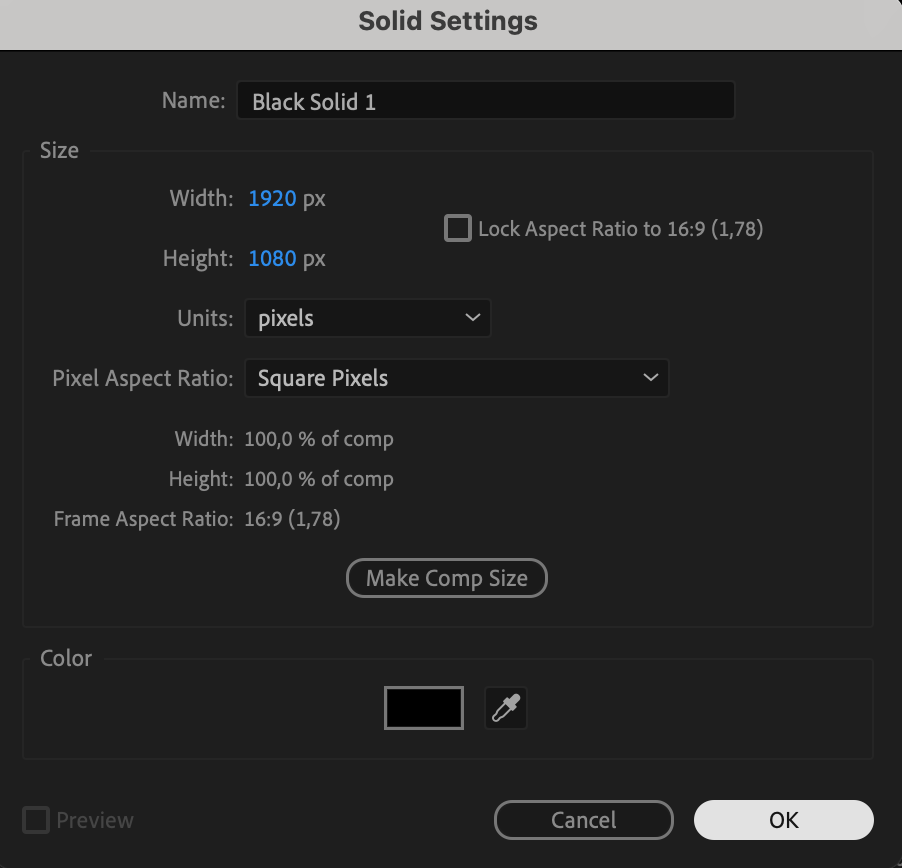
Go to Layer > New > Solid and place it below the texture layer.
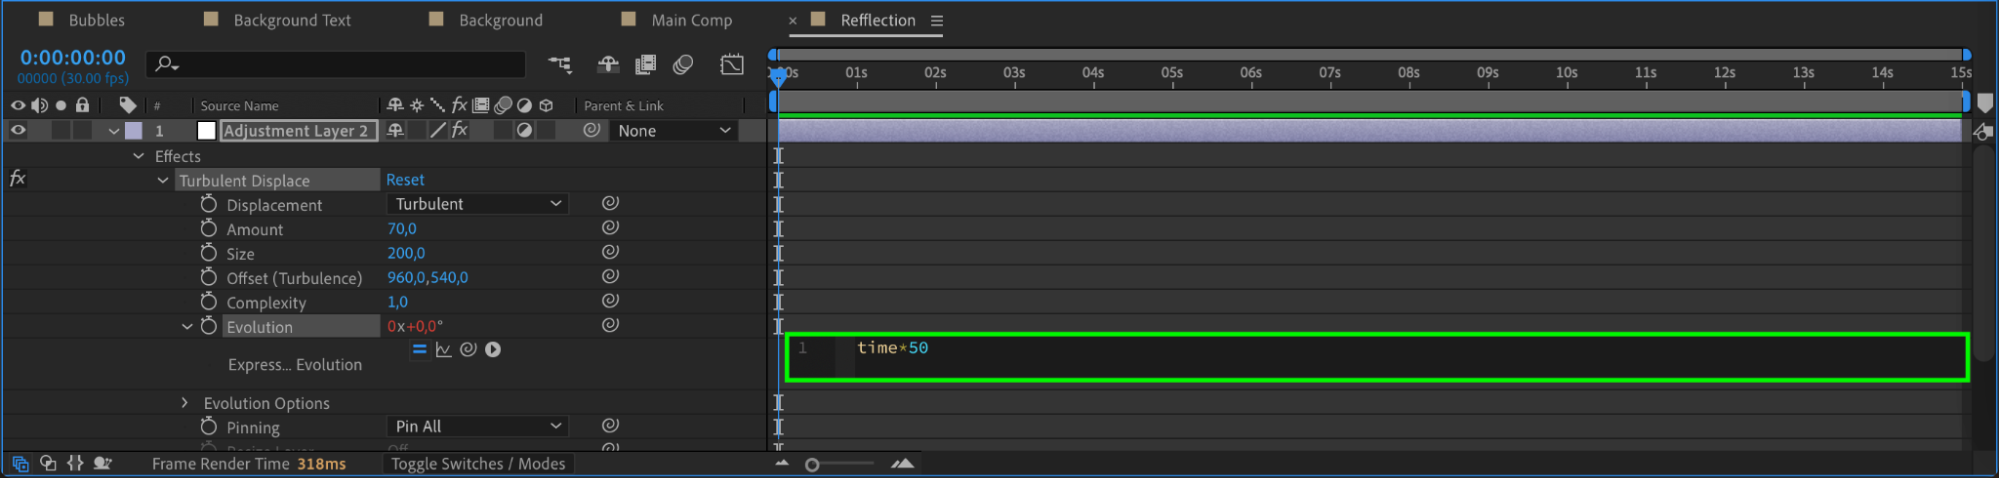
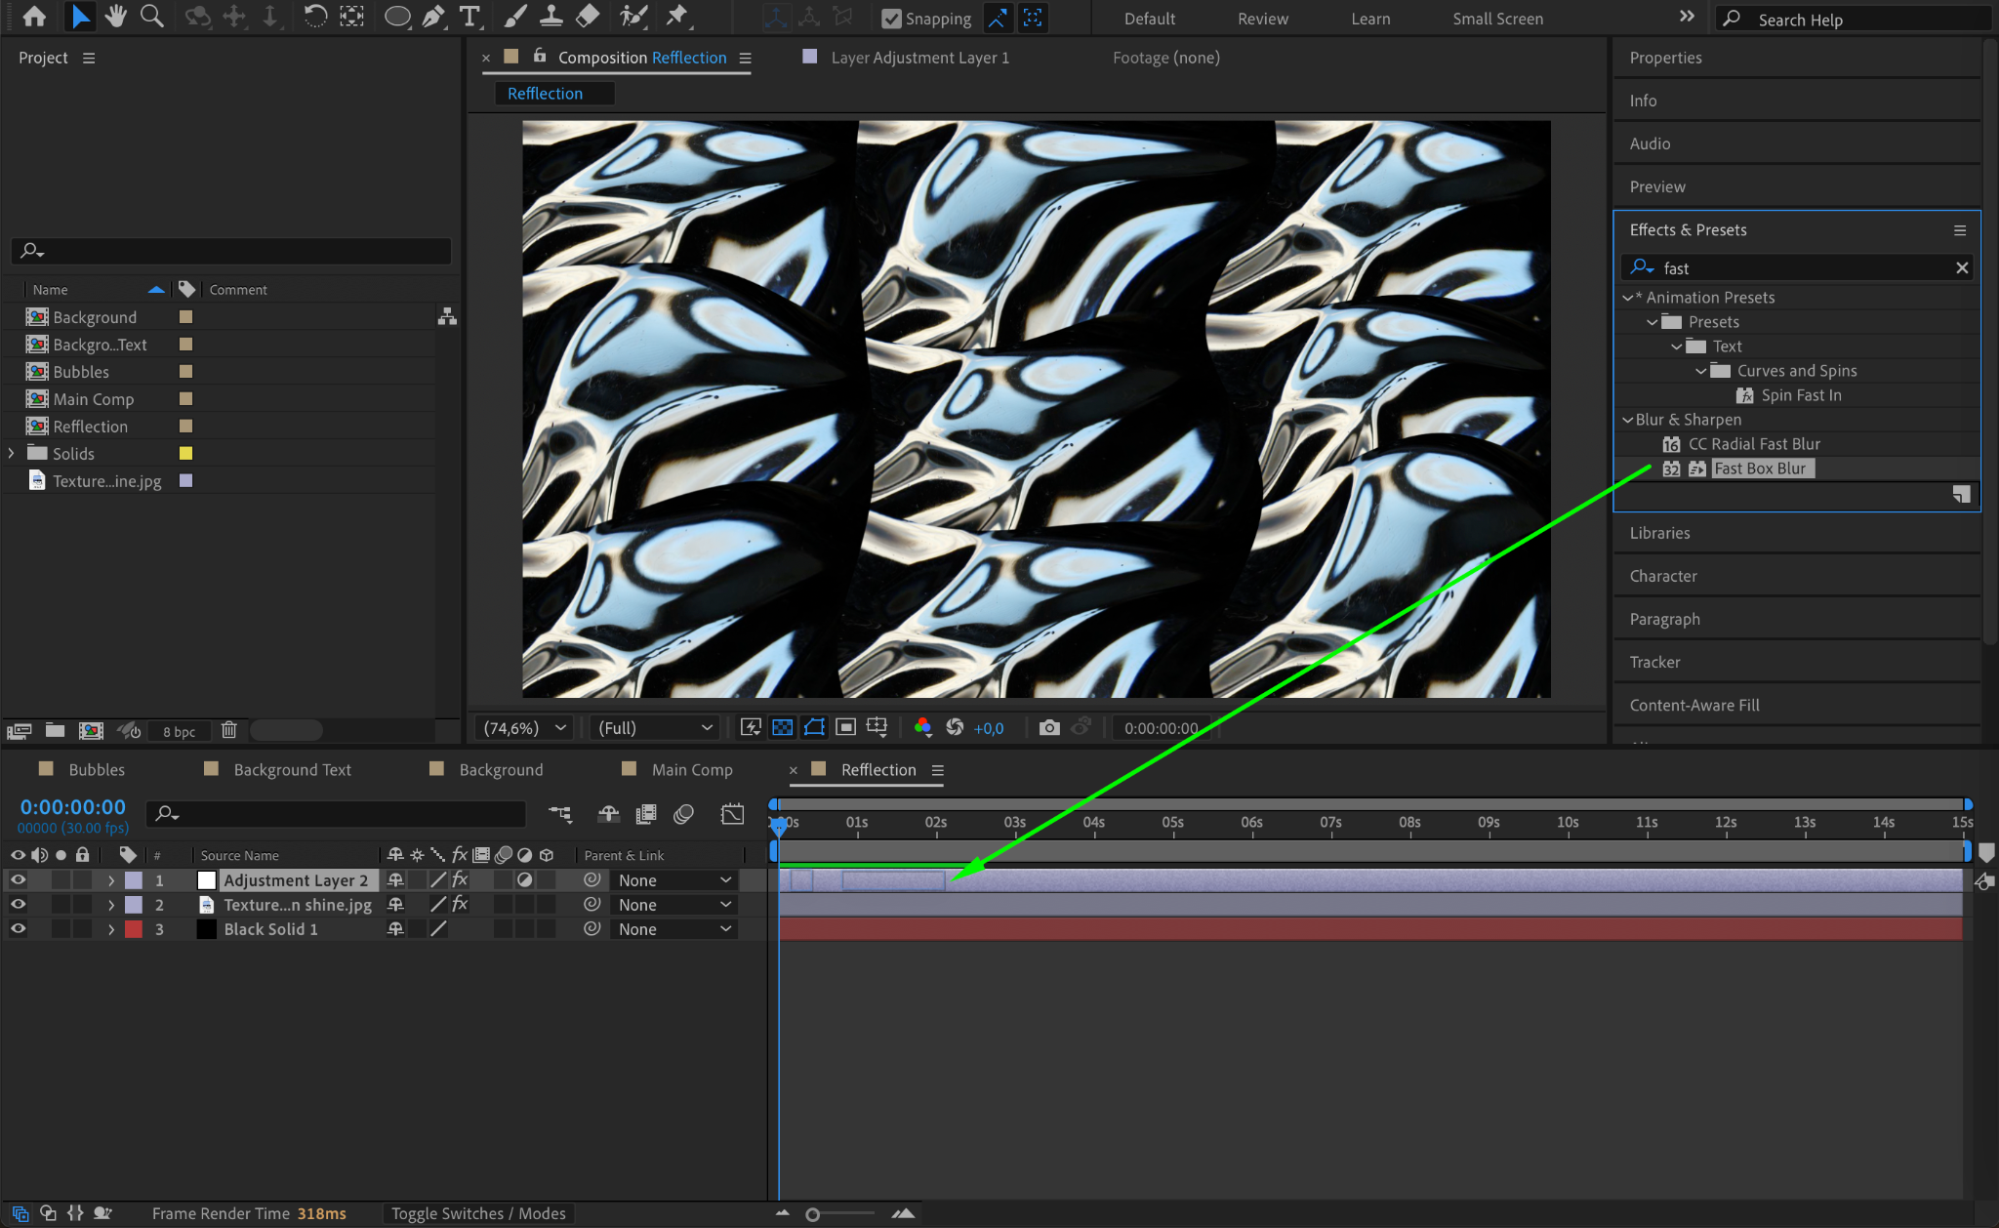
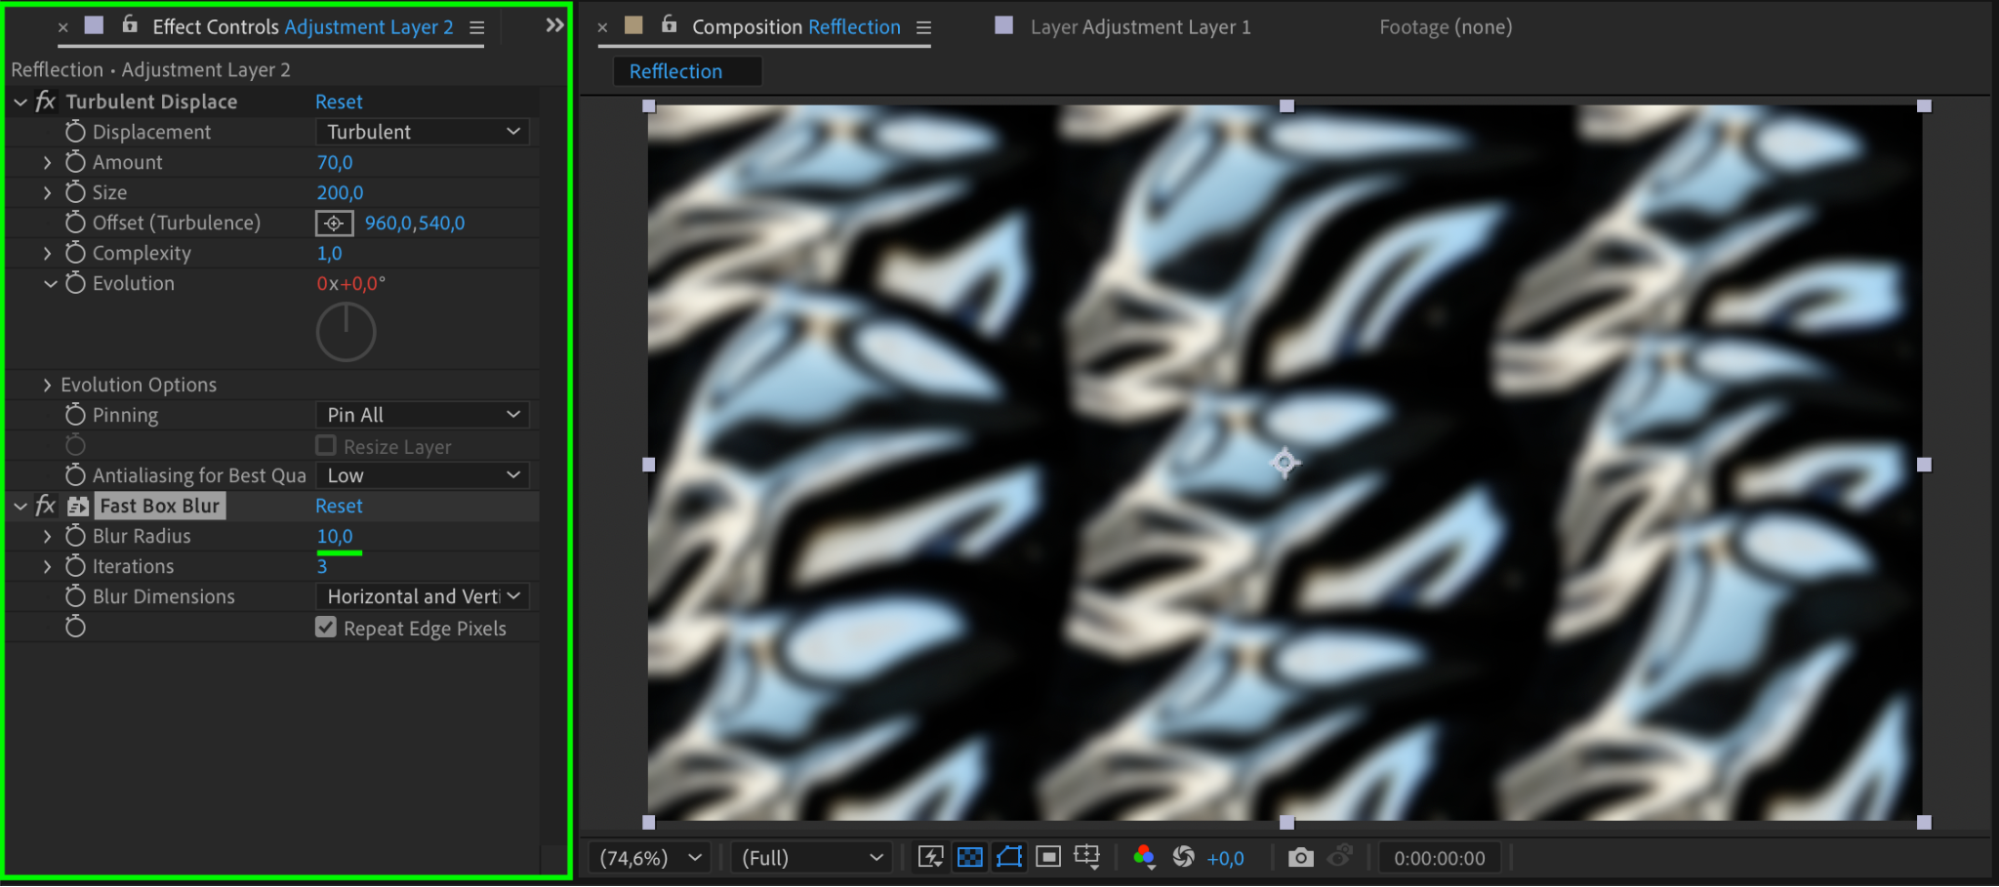
Create another Adjustment Layer and apply:
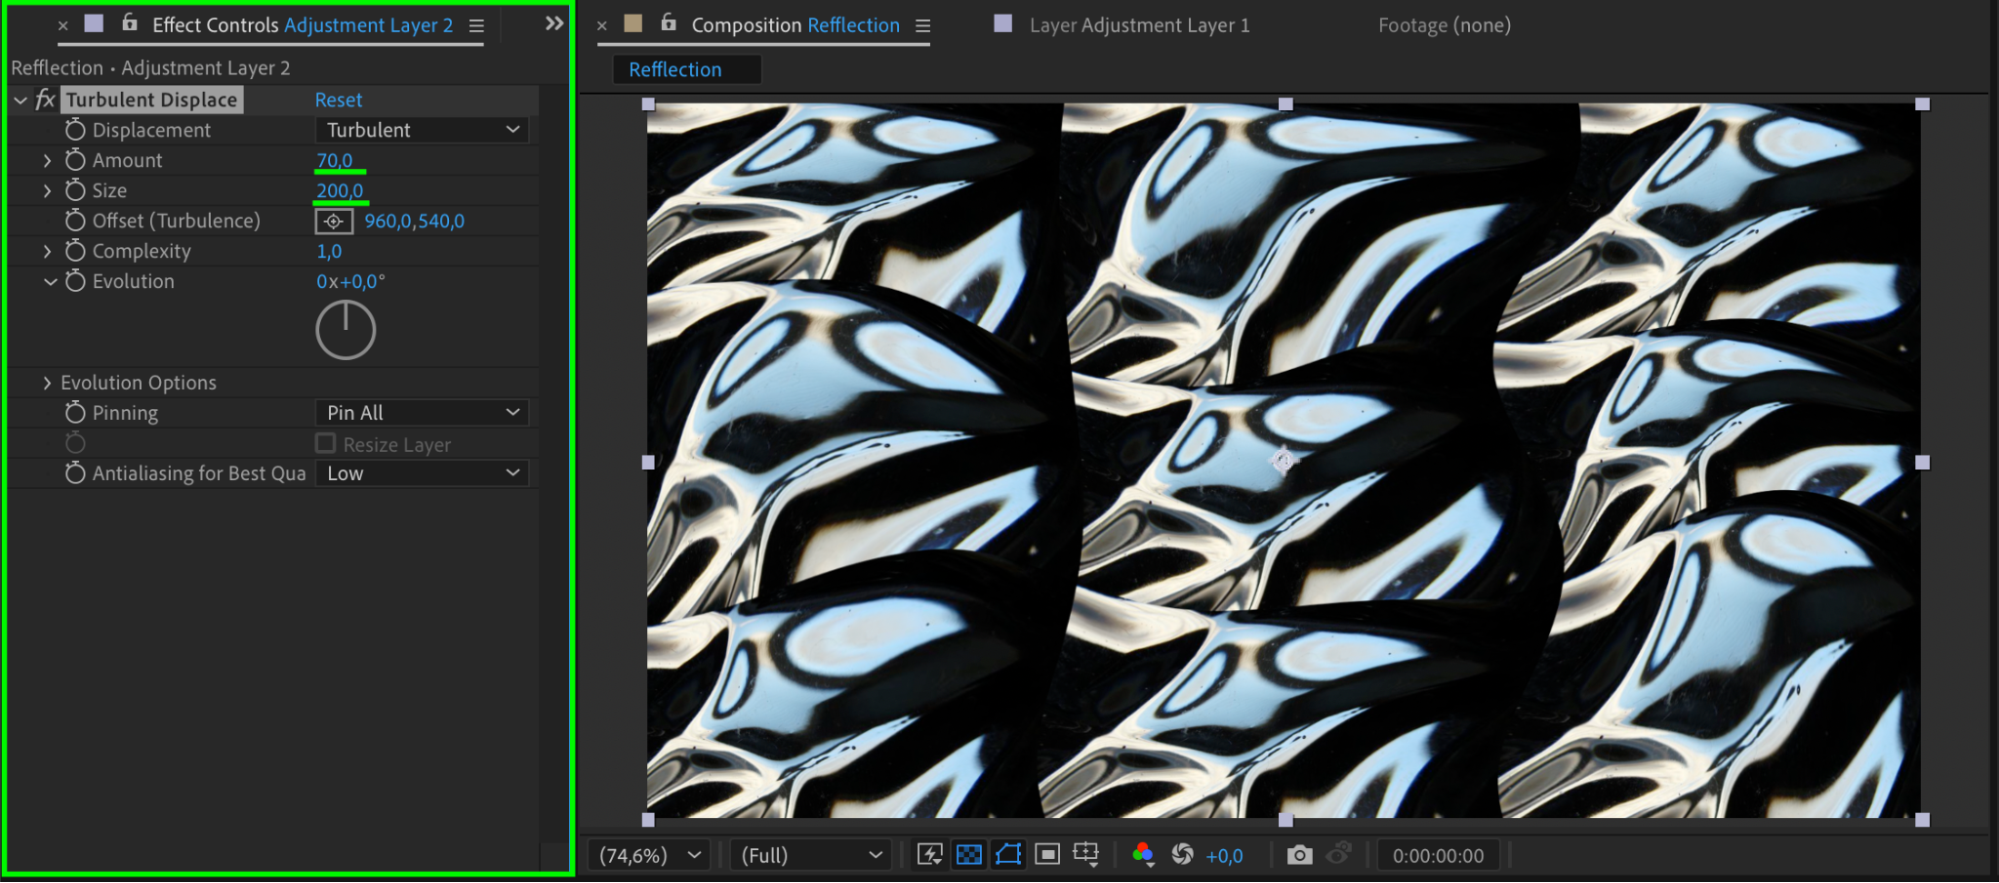
Turbulent Displace (Amount 70, Size 200)
Expression for Evolution: time*50
Fast Box Blur (Blur Radius 10)

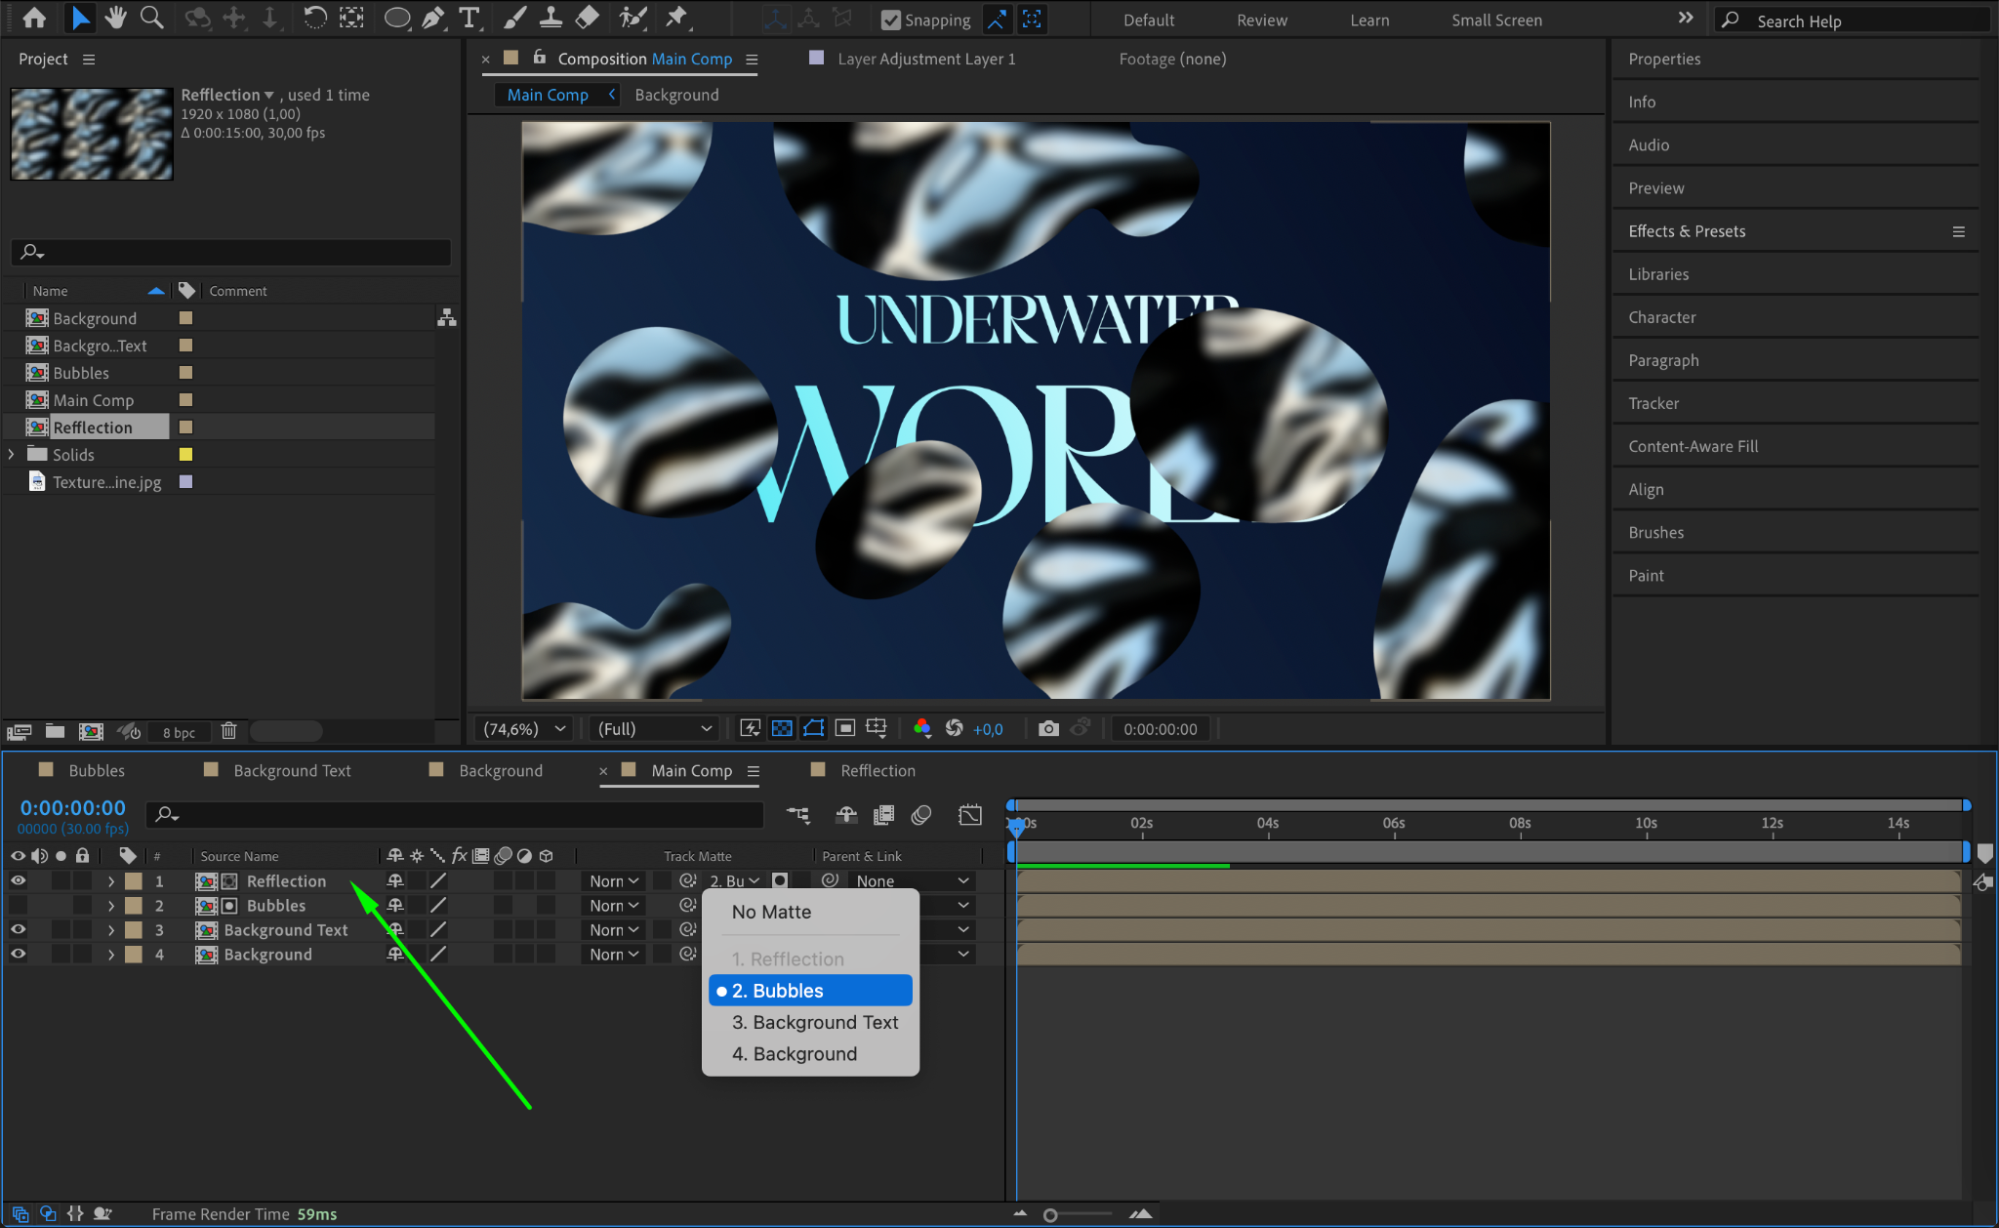
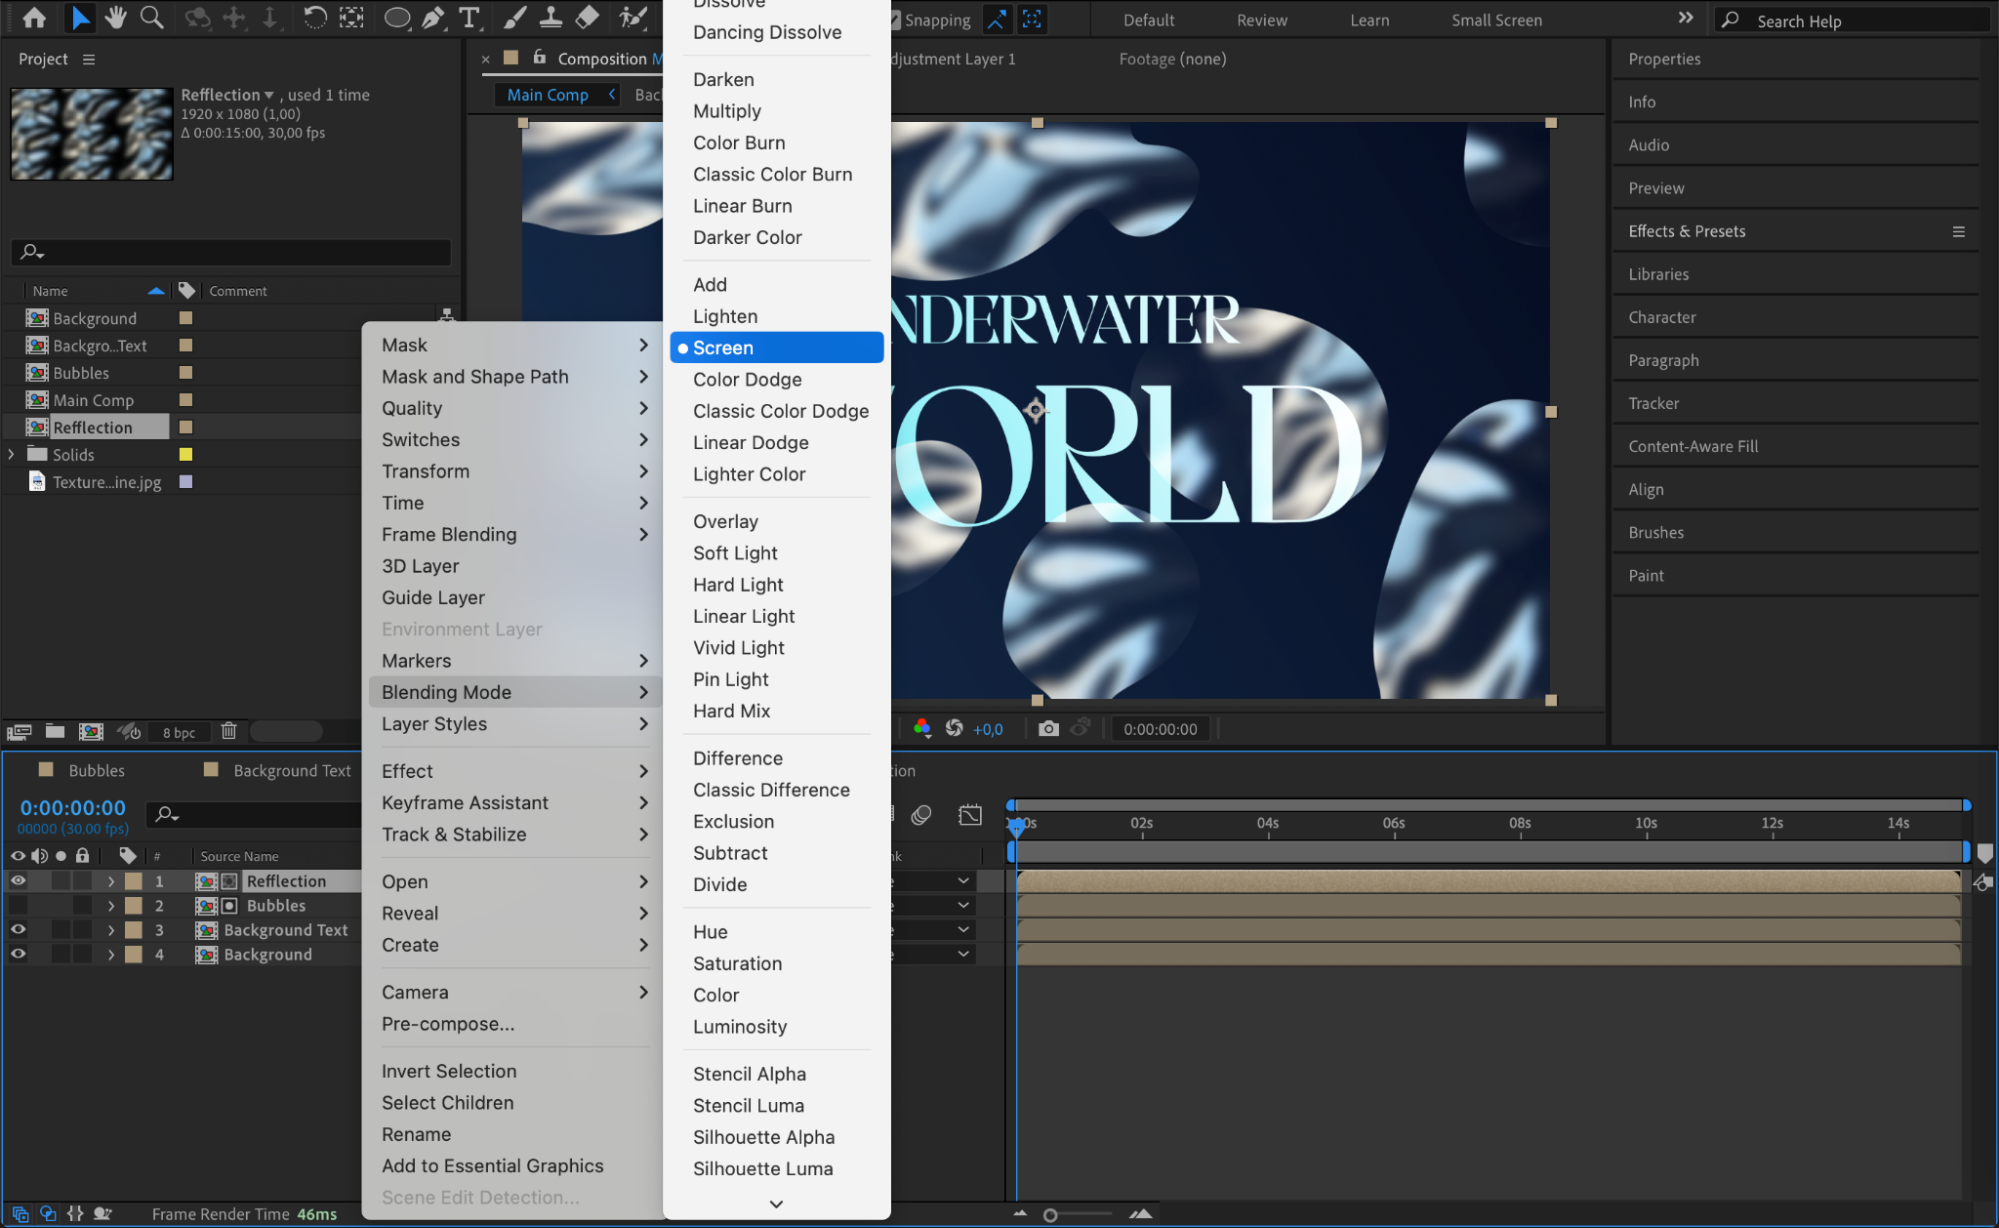
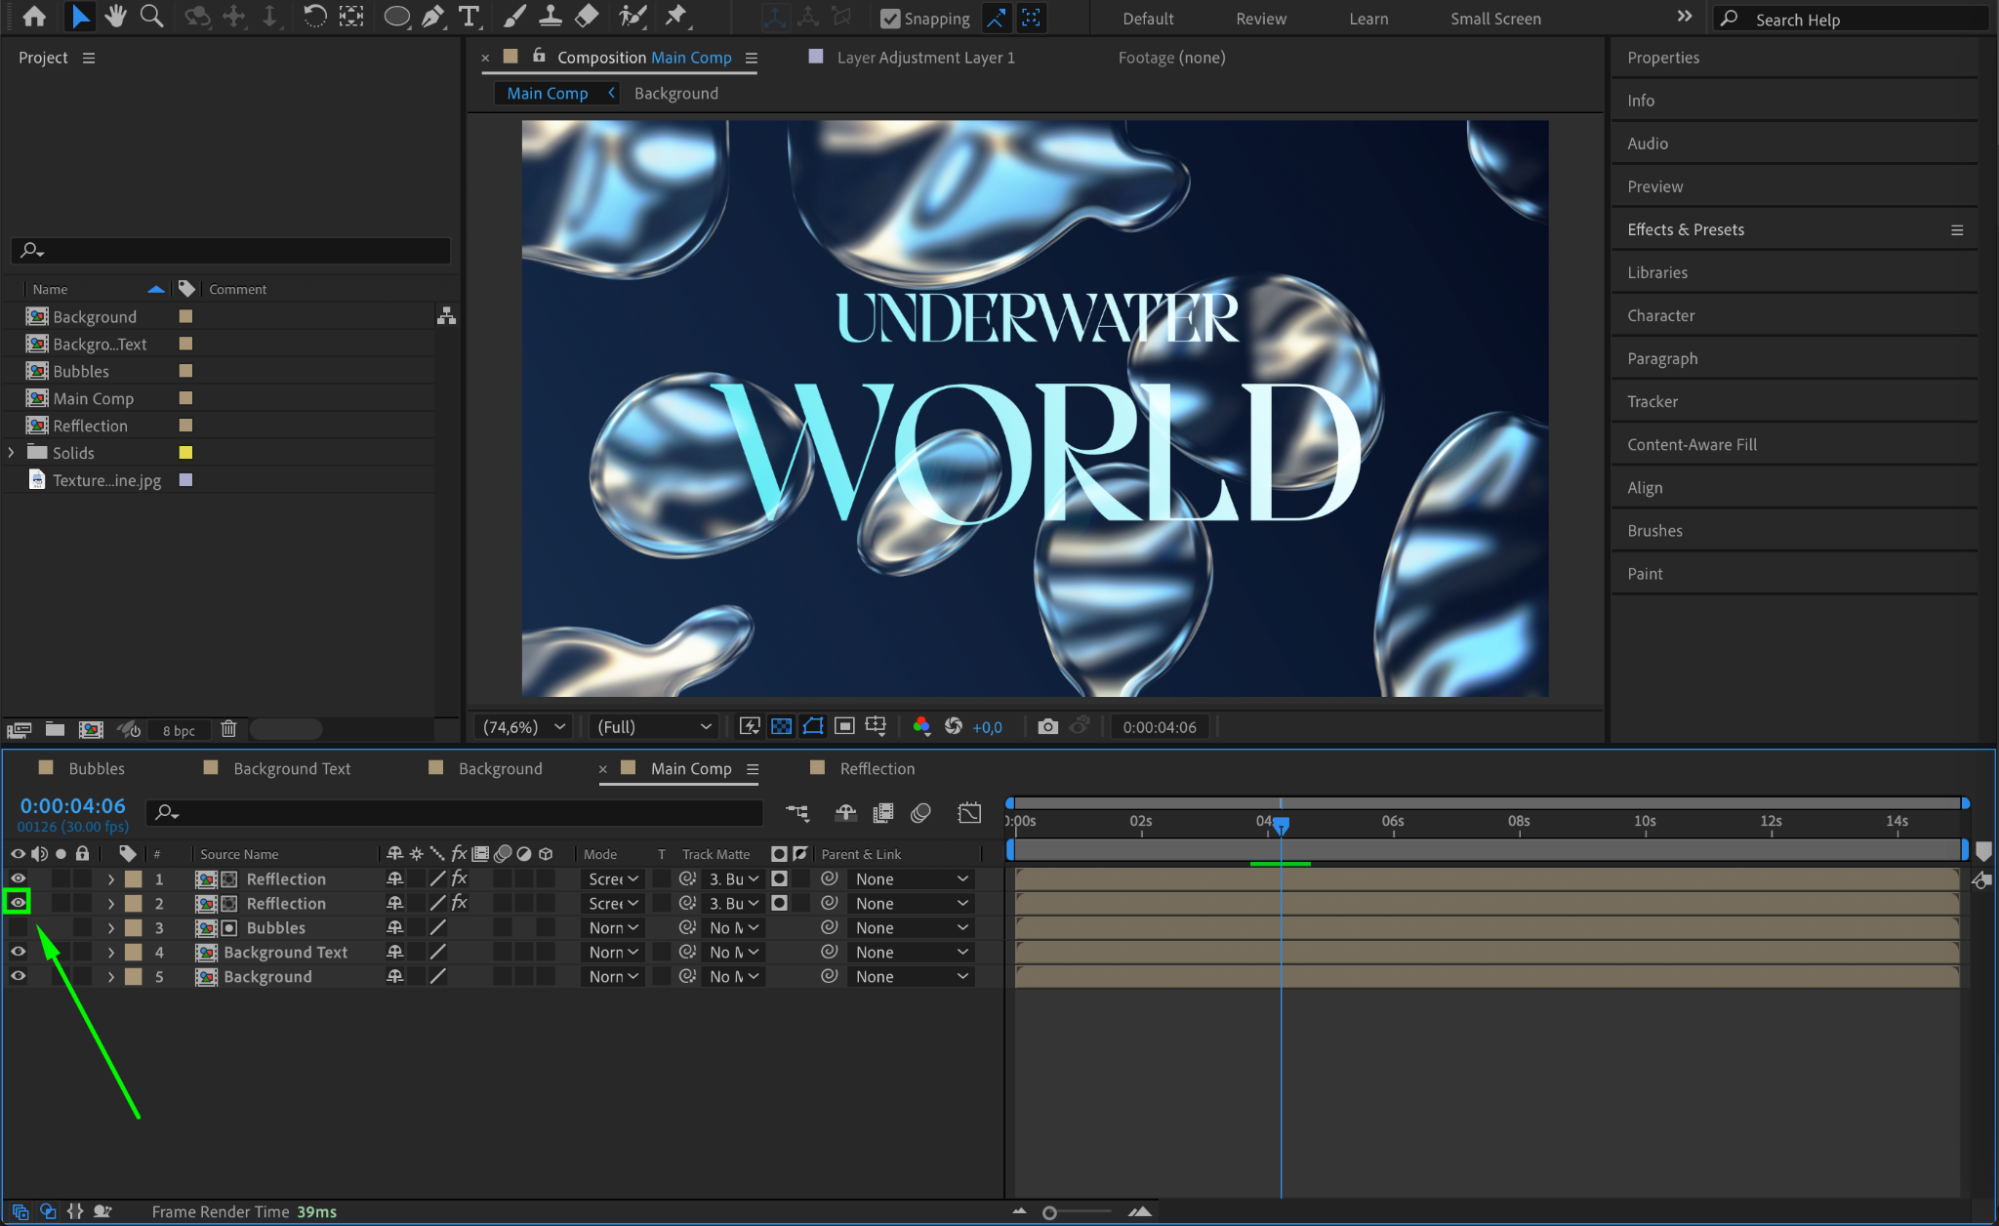
 Step 14: Blend the Reflection with the Bubbles
Drag the Reflection Composition into “Main Comp”.
In the Track Matte column, select Bubbles Comp, and set the Blending Mode to Screen.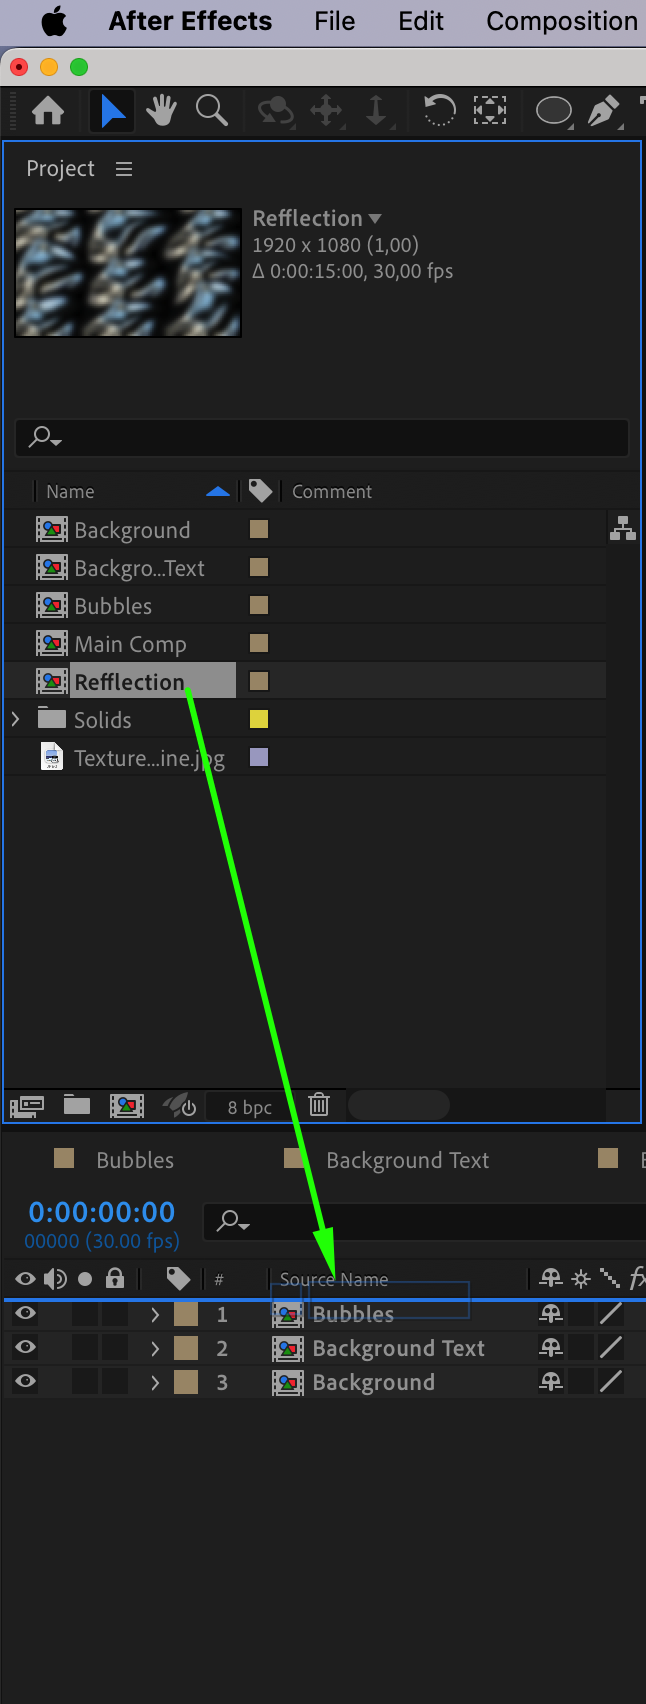
 Step 15: Apply CC Effects for Reflection
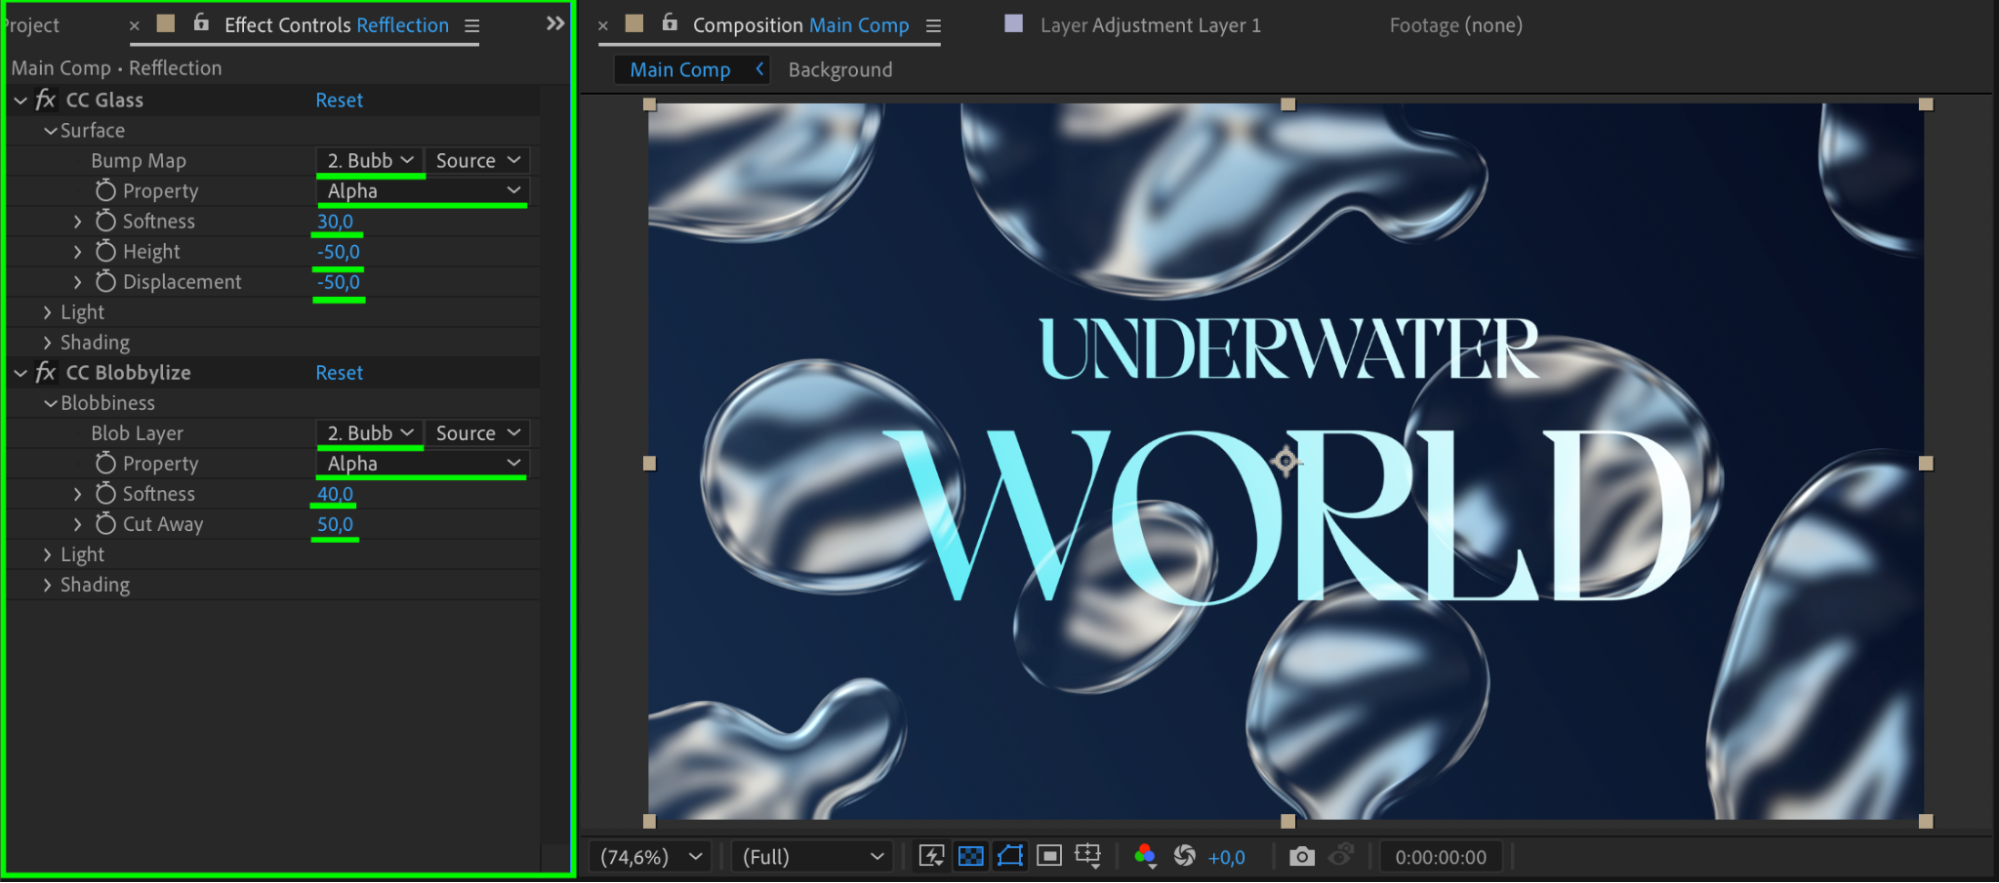
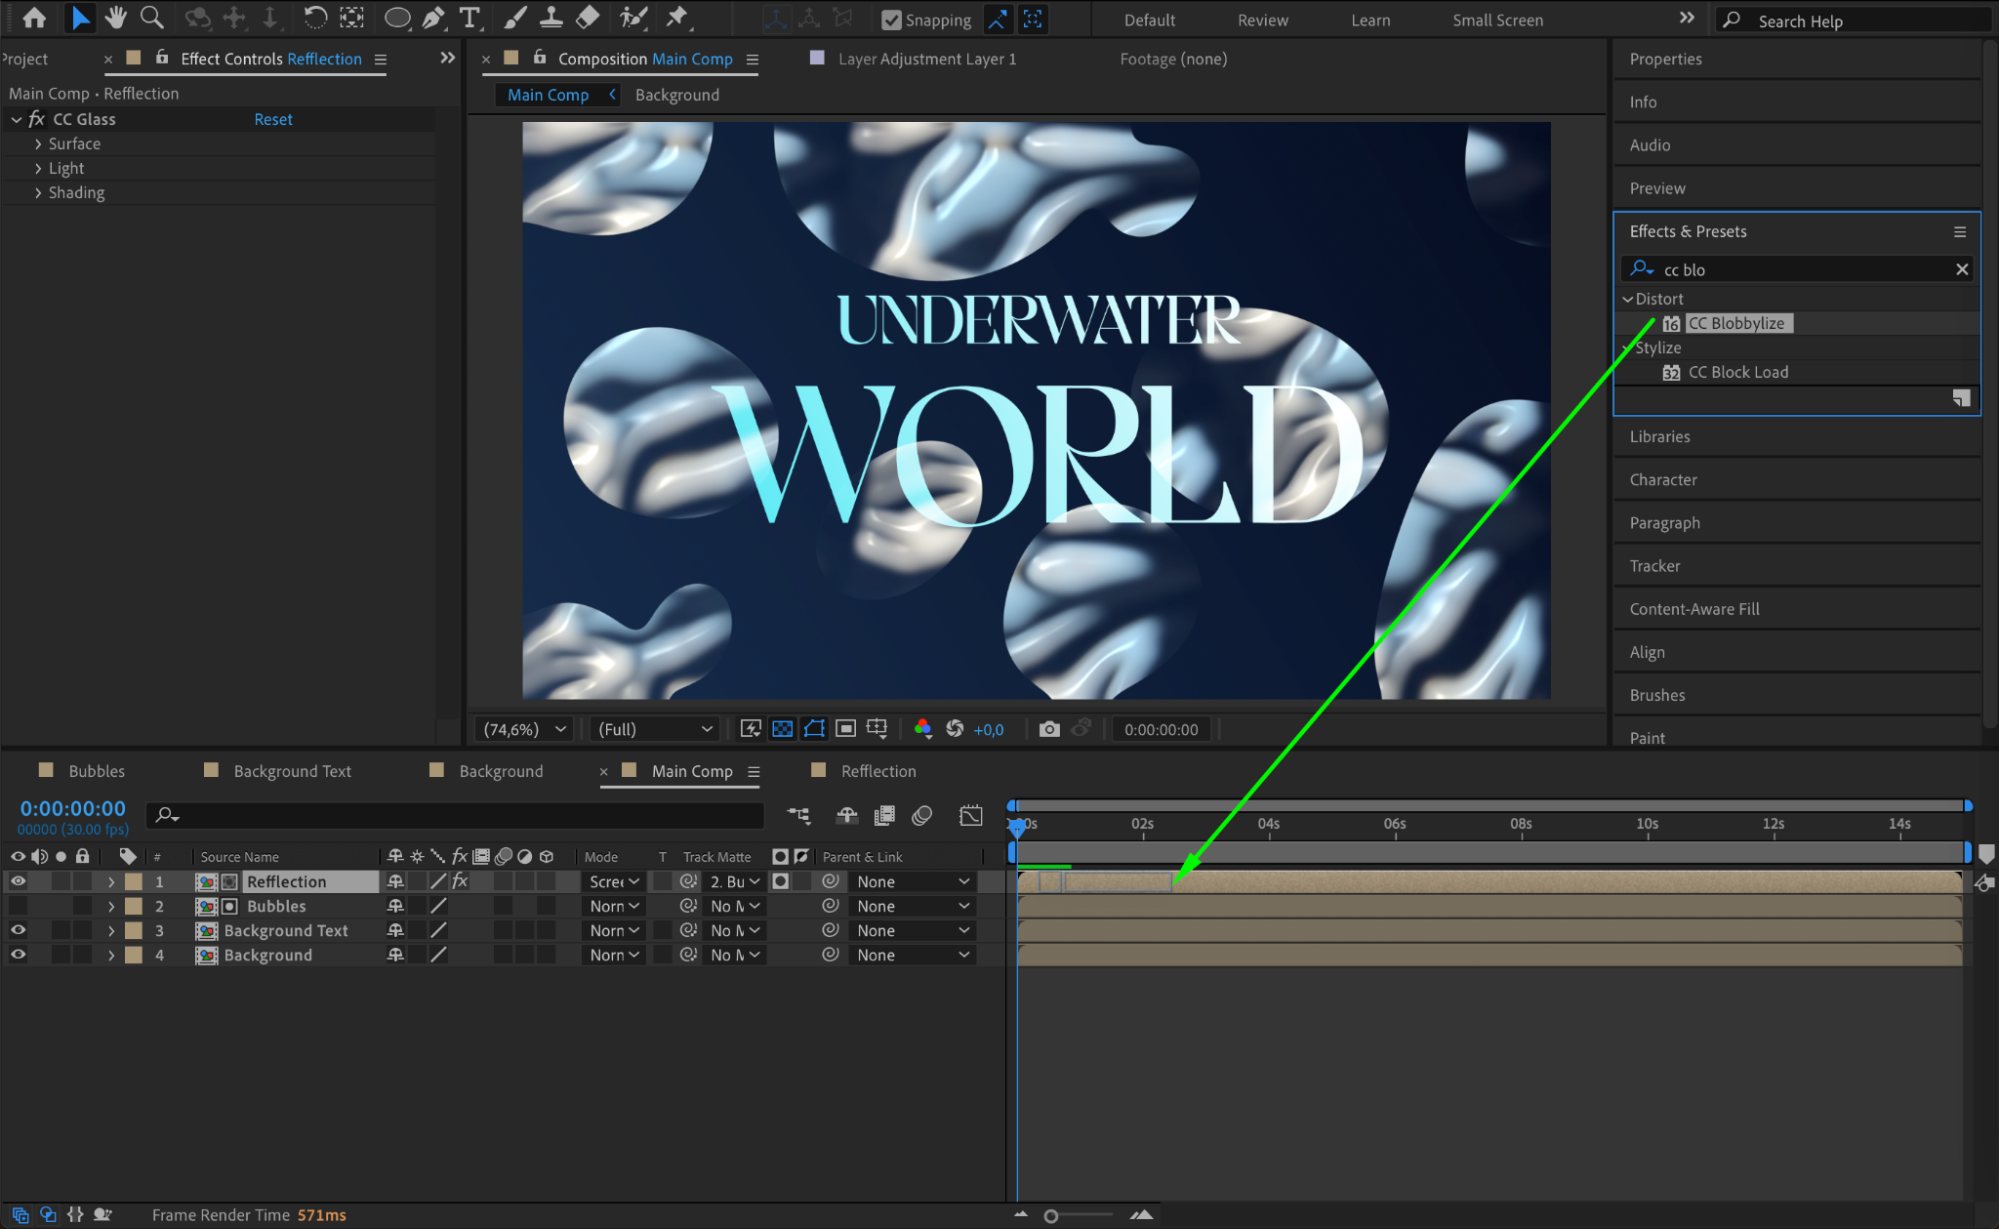
Apply the following effects to the Reflection Comp:
CC Glass
CC Blobbylize
Adjust these settings:
Bump Map: Bubbles Comp
Property: Alpha
Softness: 30
Height: -50
Displacement: -50
Blob Layer: Bubbles Comp
Cut Away: 50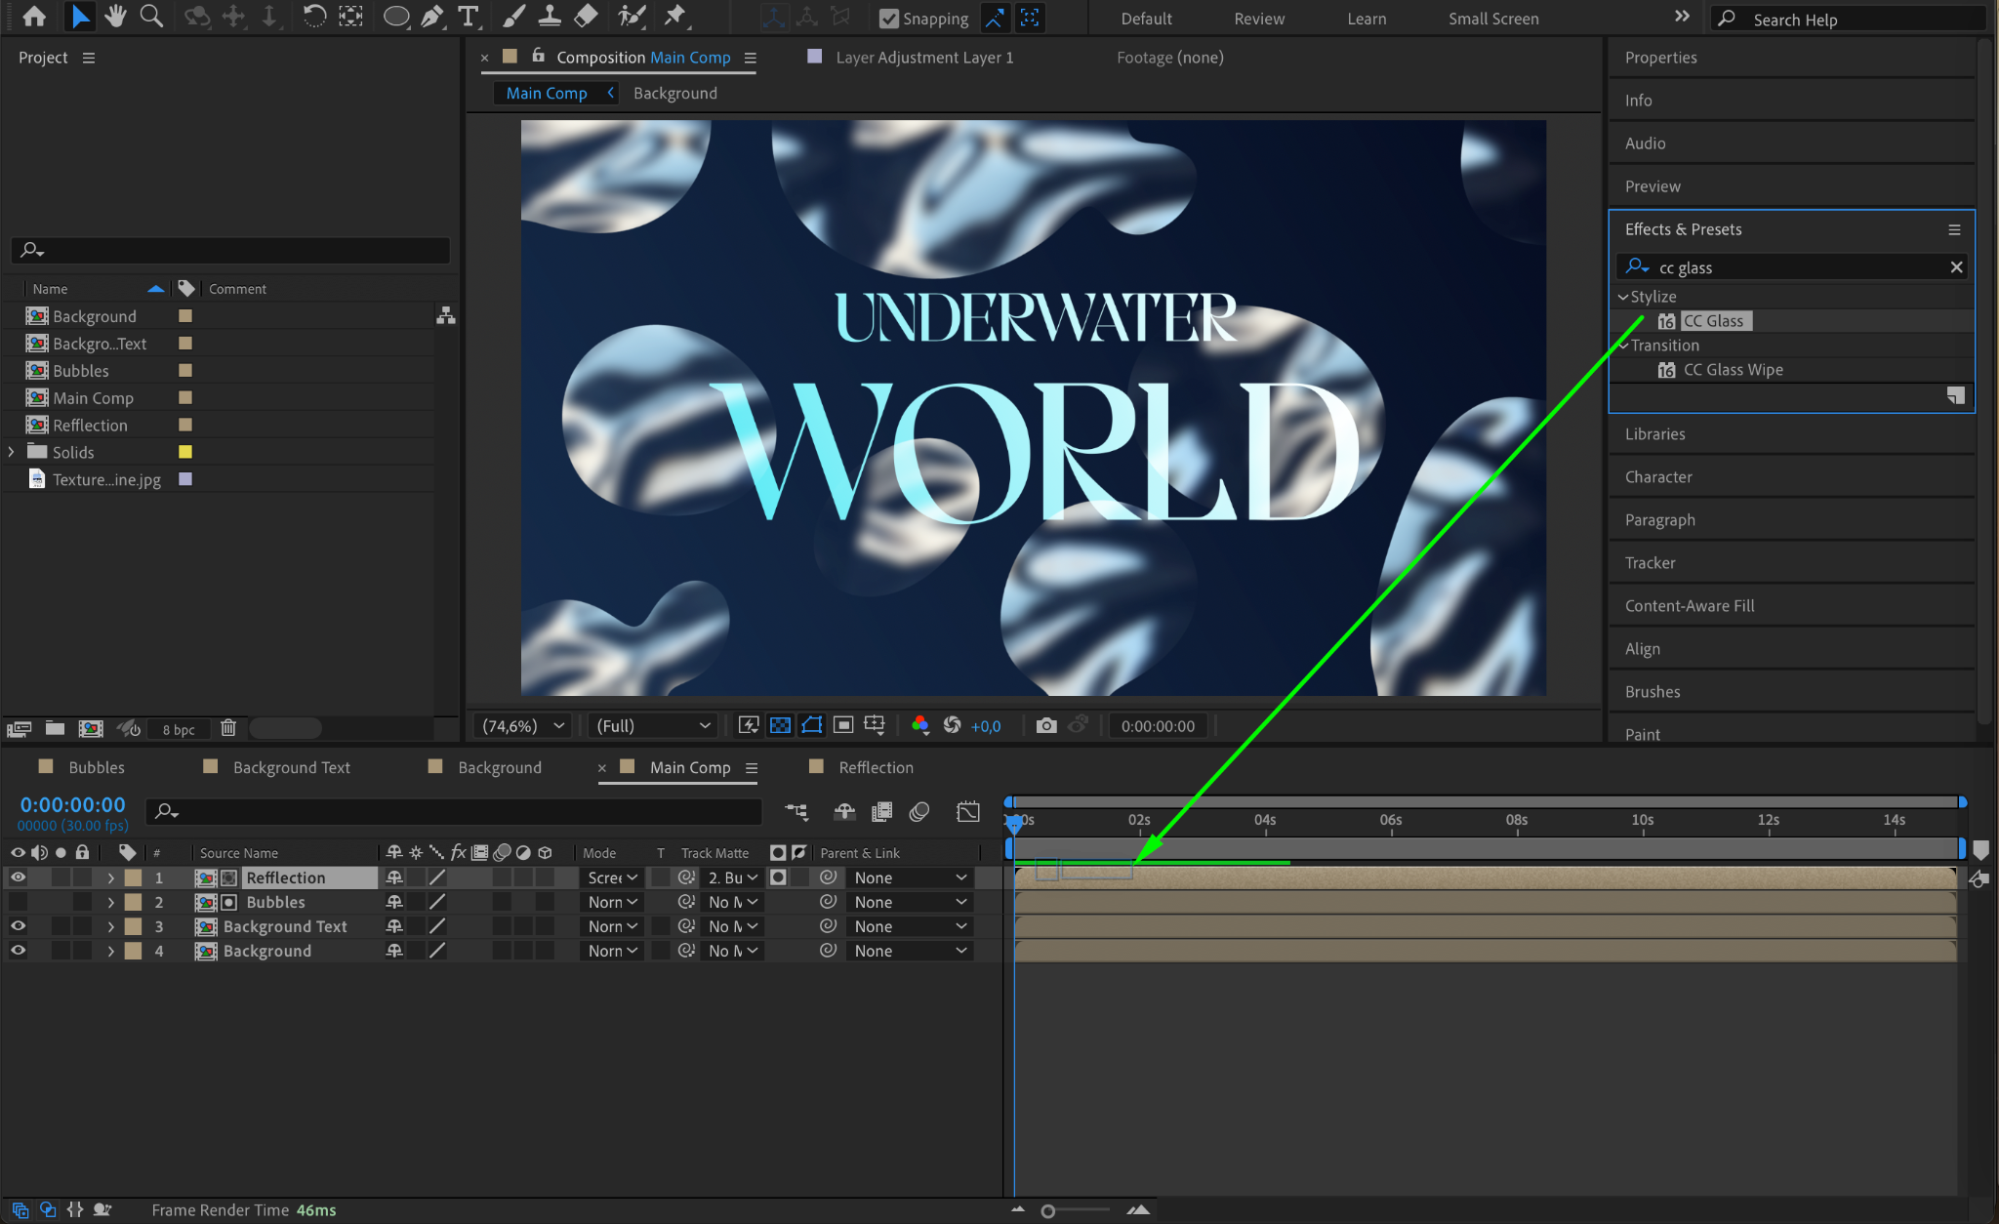
 Step 16: Enhance Colors and Glow
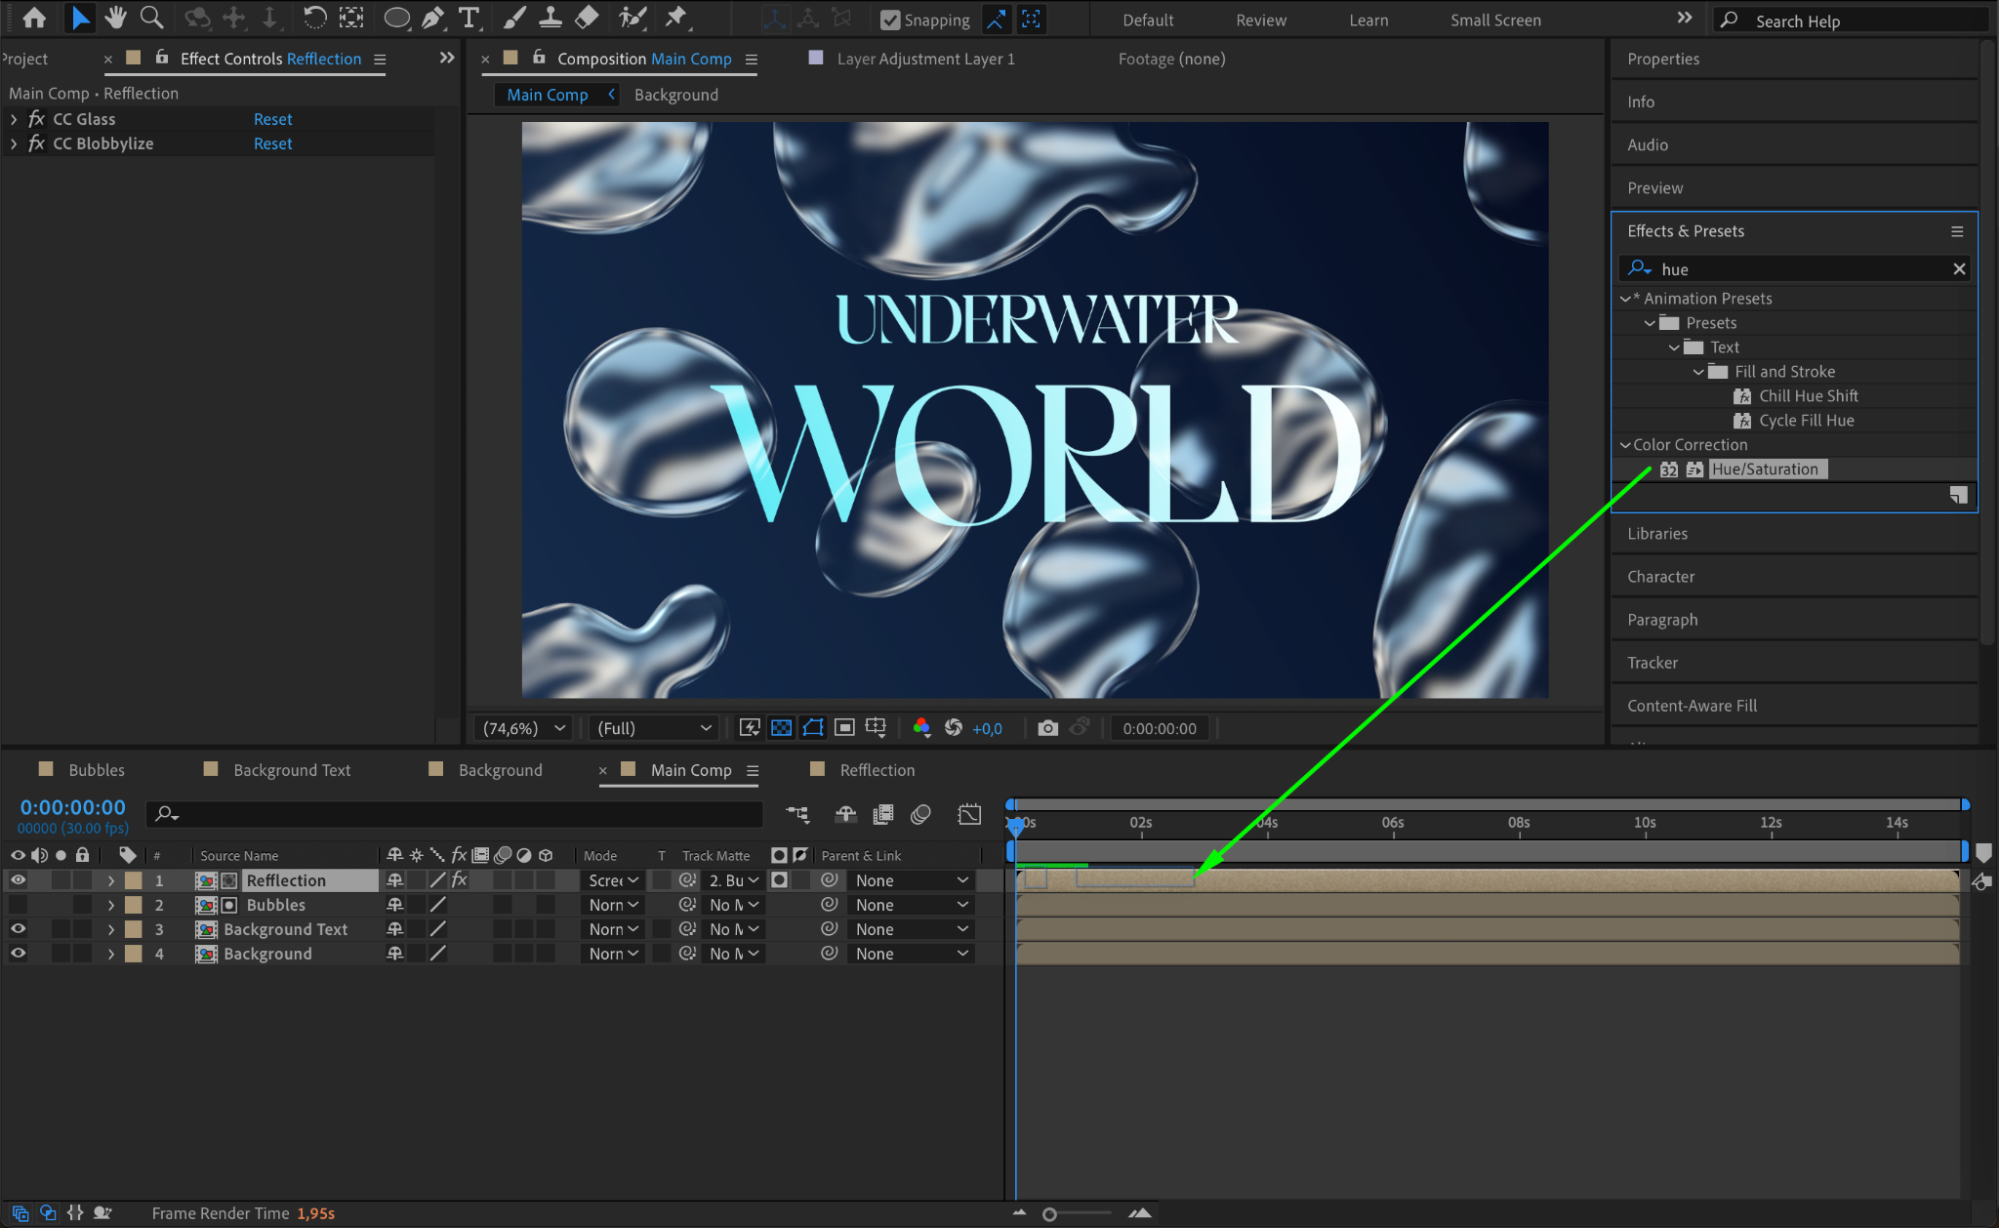
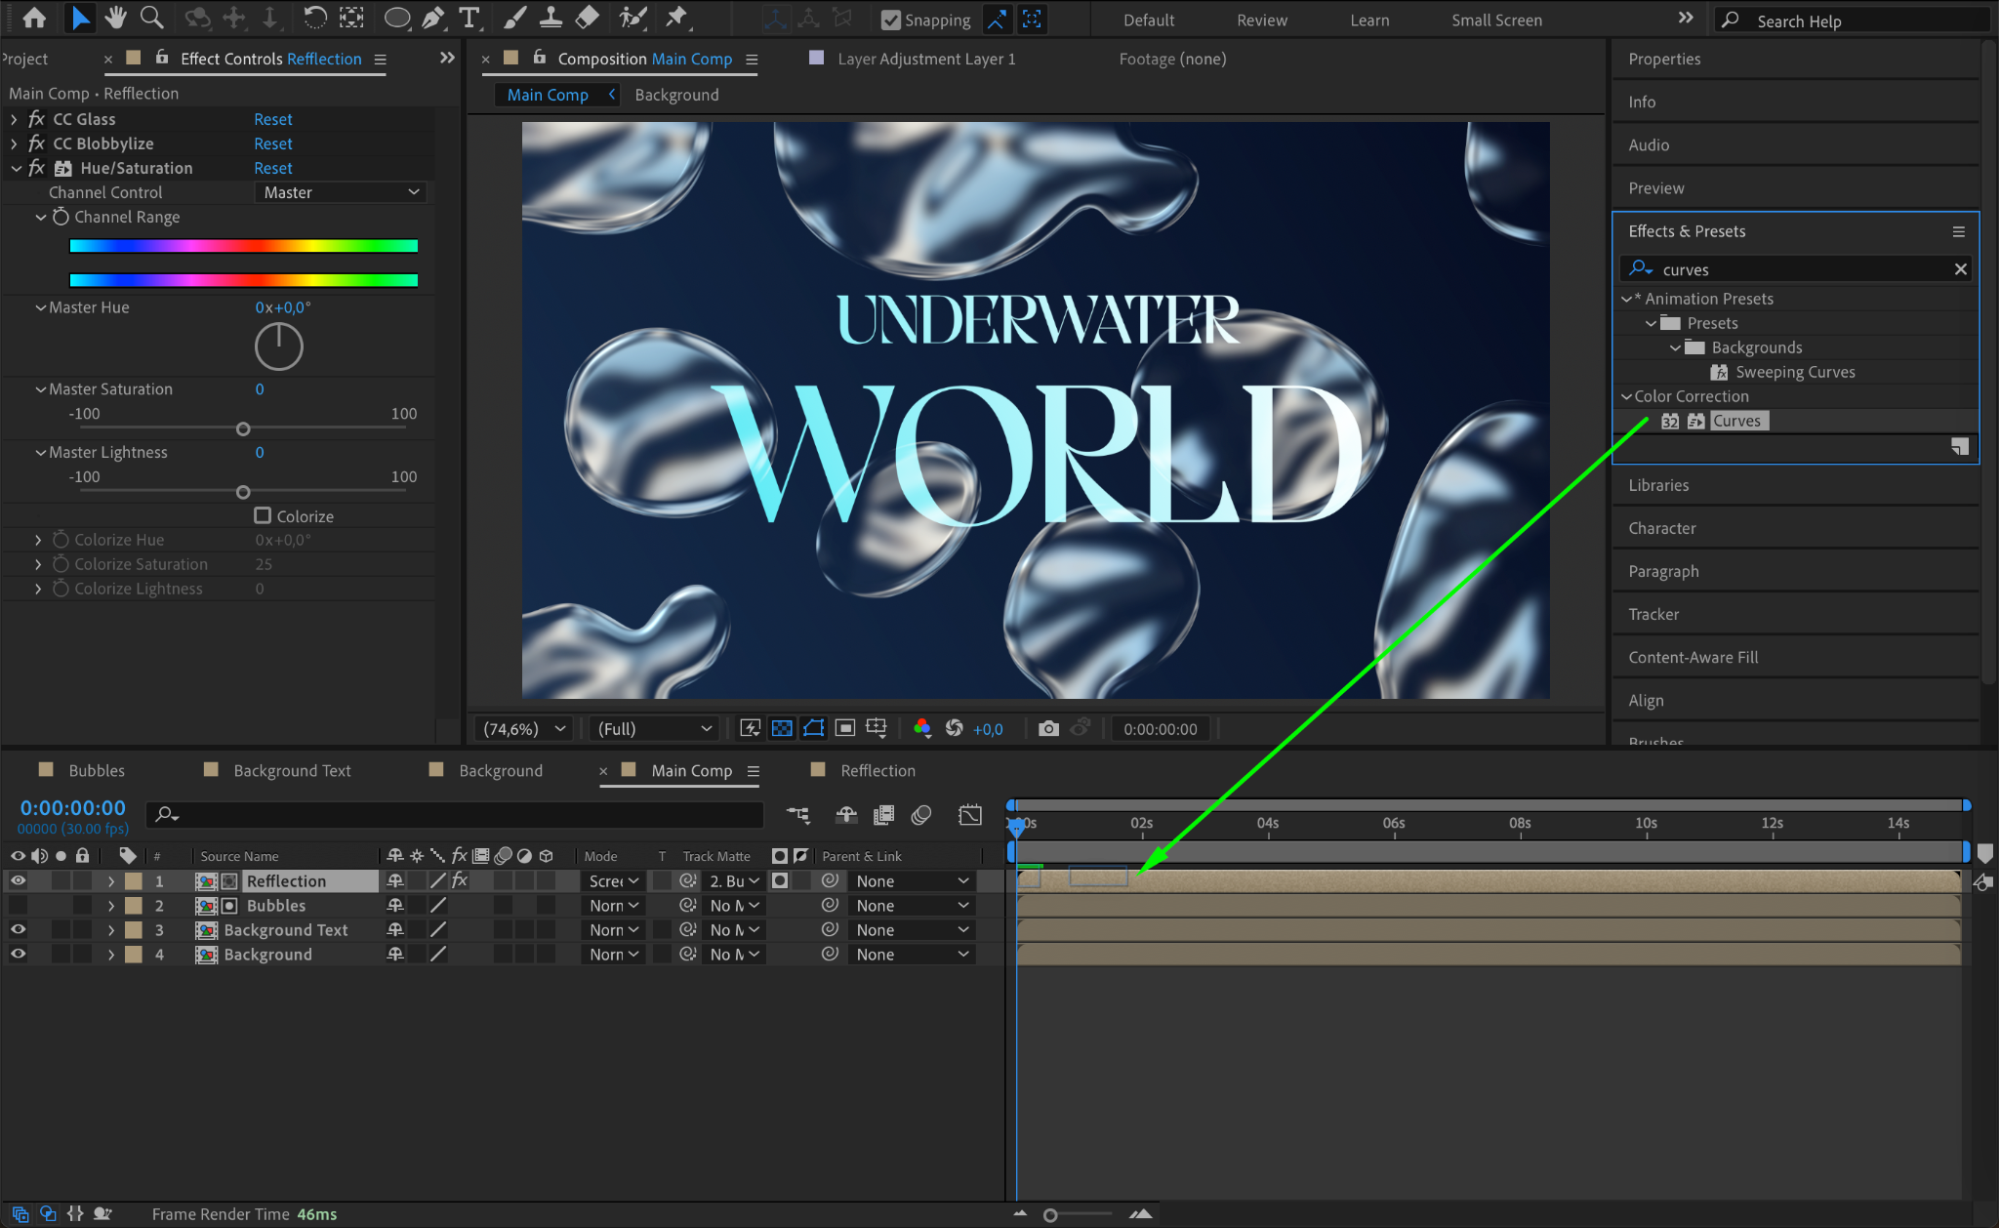
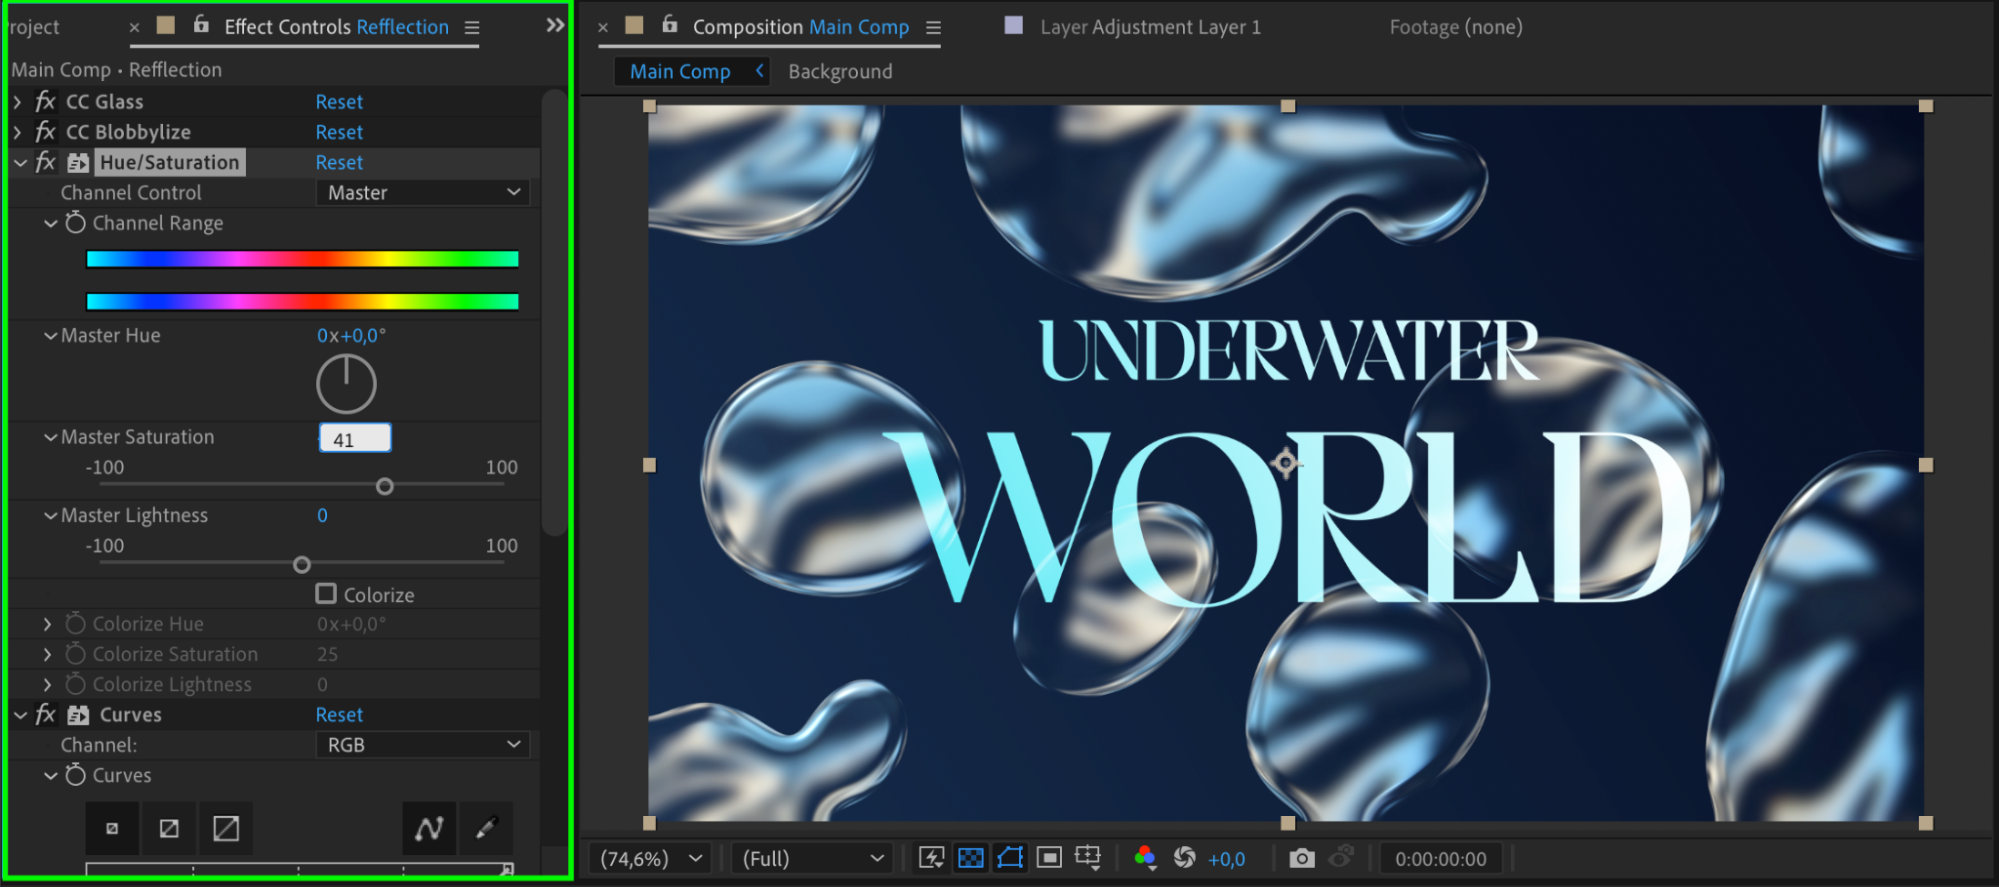
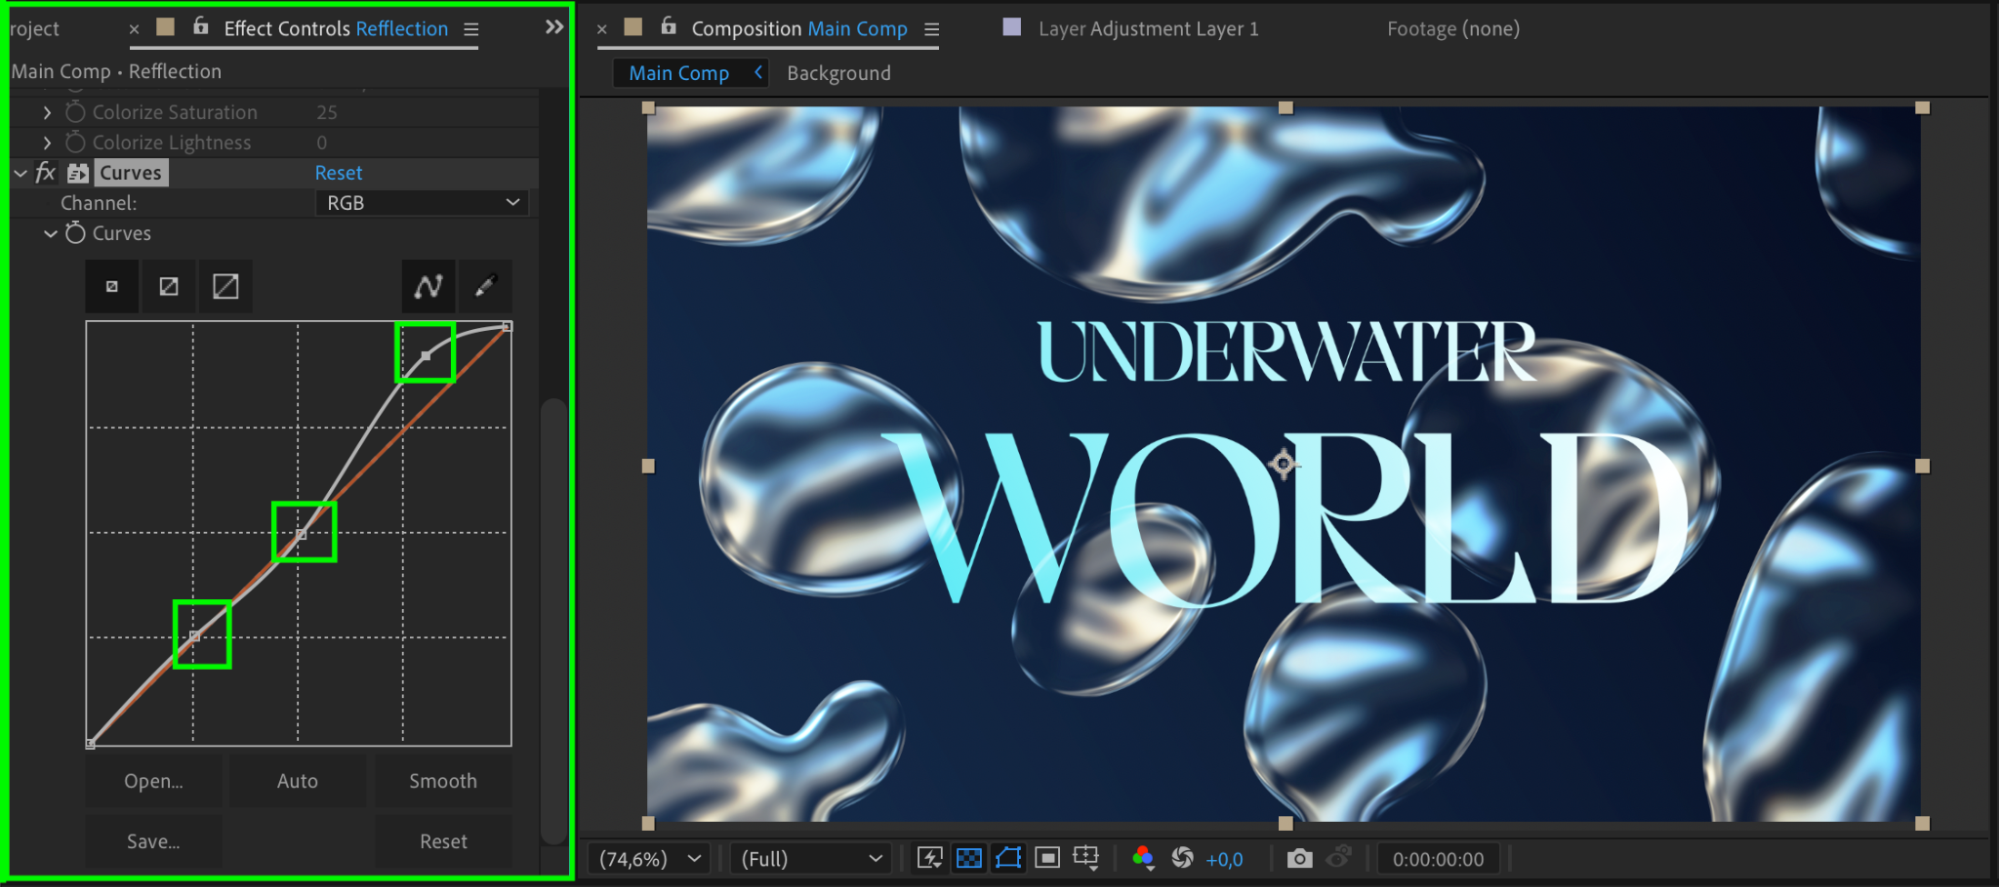
Apply Hue/Saturation and Curves effects to the Reflection Comp.
Set Master Saturation to 41 and adjust the Curves for better contrast.
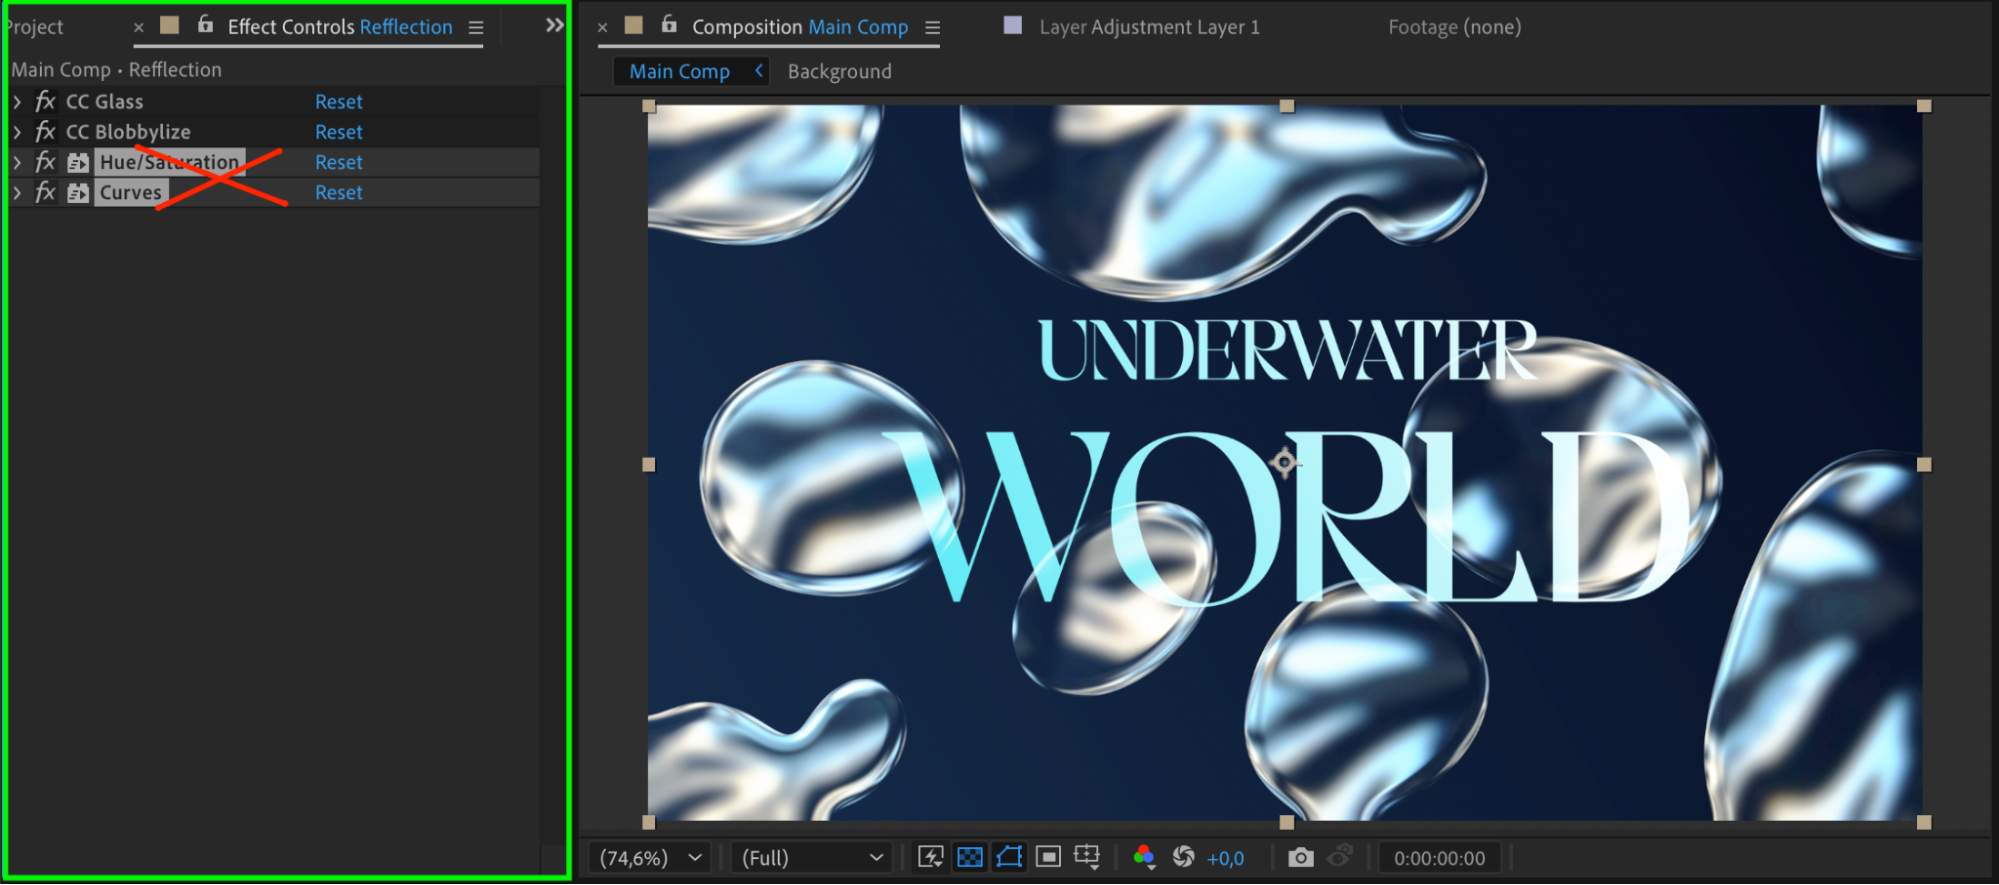
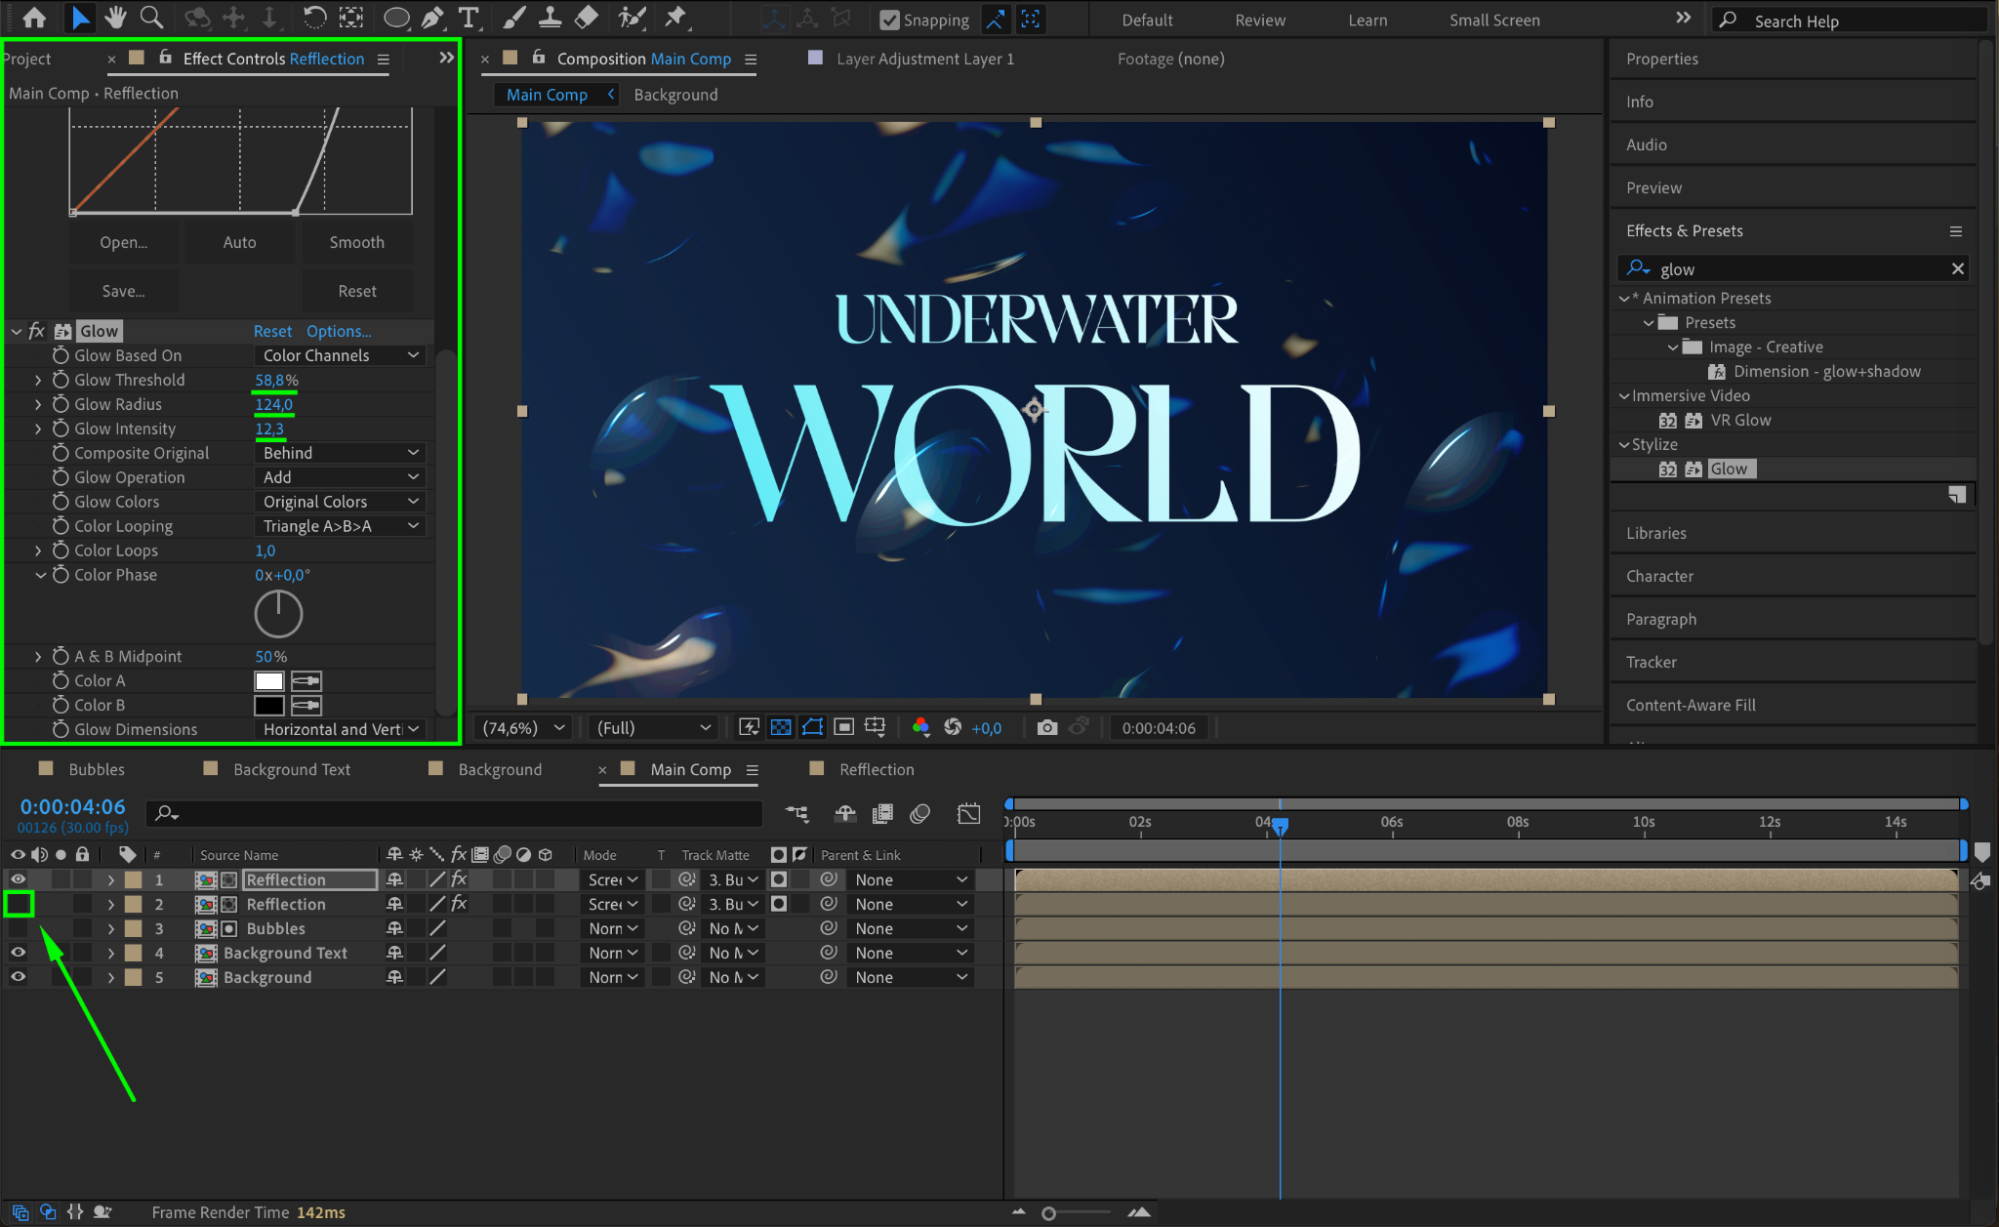
Duplicate the Reflection Comp, remove the Hue/Saturation and Curves, and add:
Glow Effect: Glow Threshold: 58.8, Glow Radius: 124, Glow Intensity: 12.3
Enable visibility for the original Reflection Comp again.

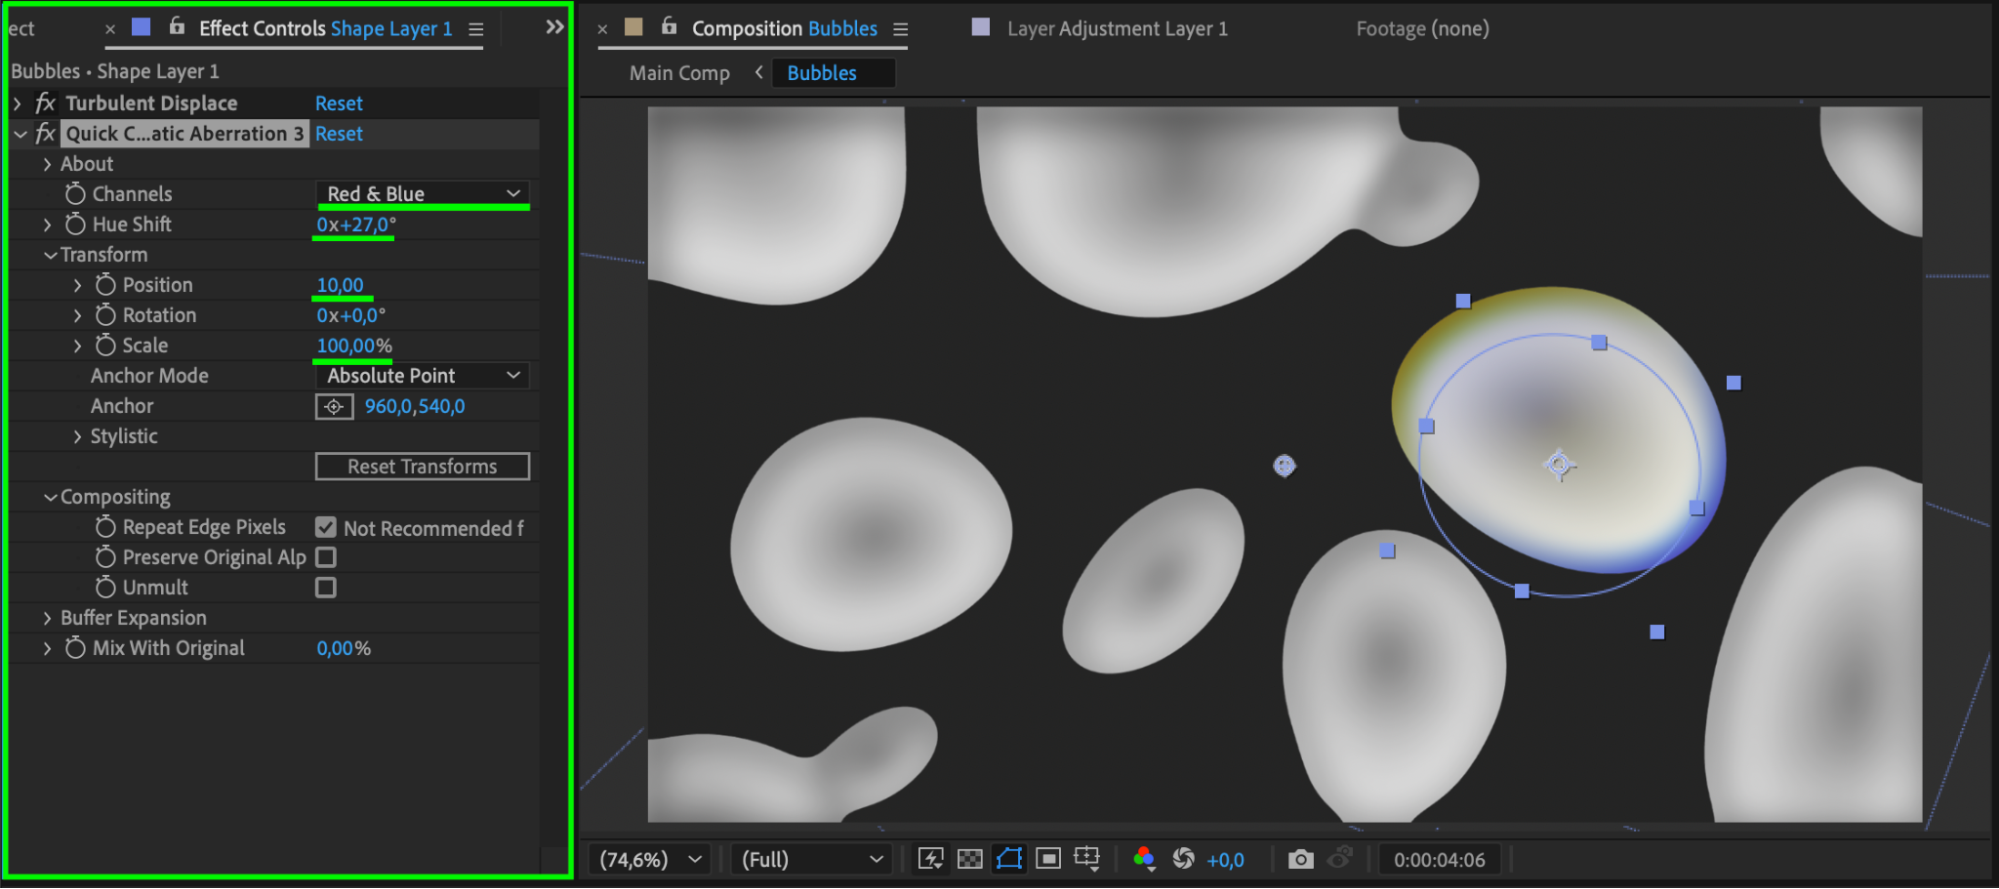
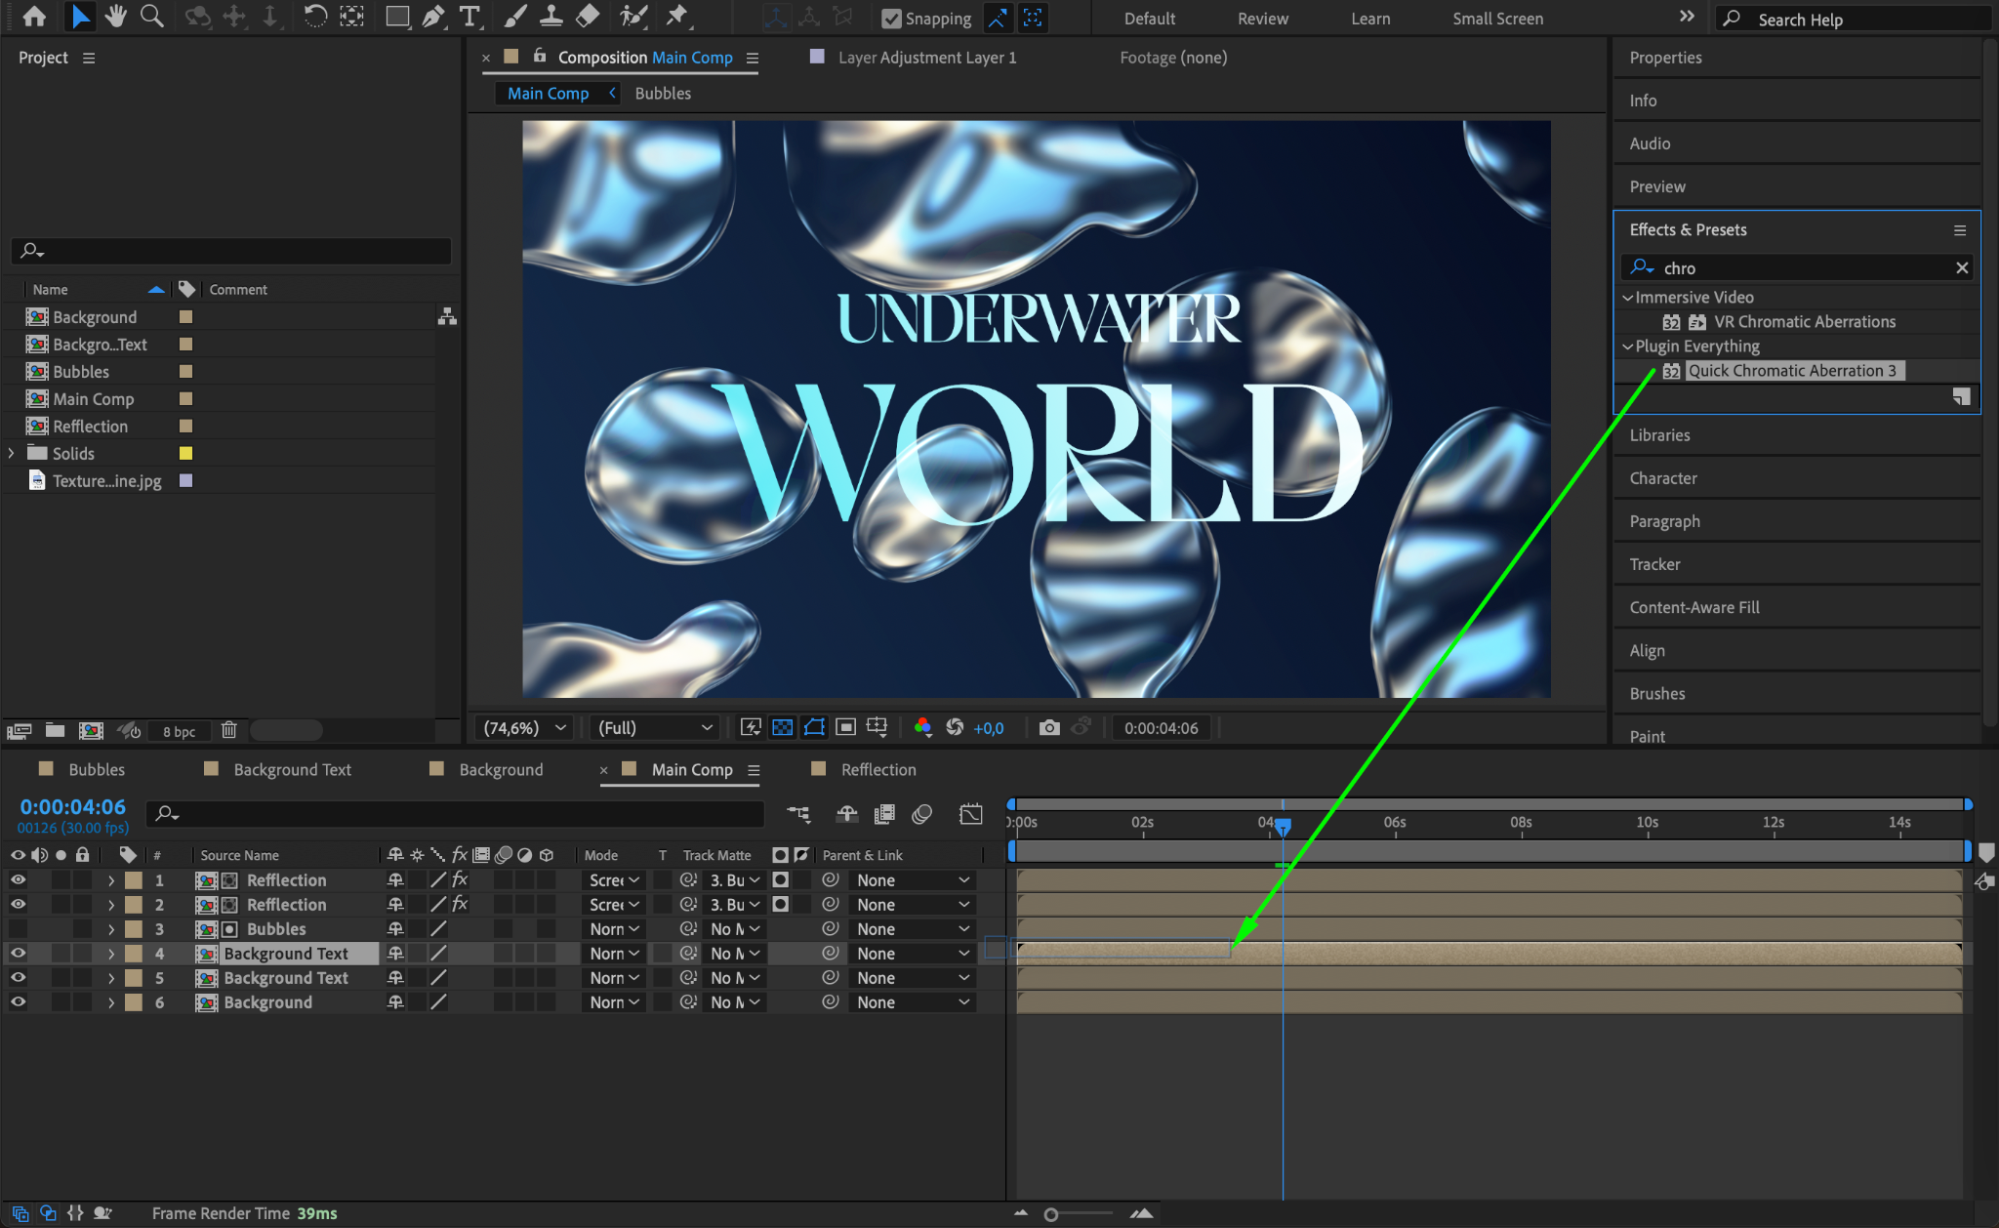
 Step 17: Add Chromatic Aberration
Apply the Quick Chromatic Aberration 3 (free plugin) to the Bubbles Comp.
Set the following:
Channels: Hue Shift 27°
Position: 10
Scale: 100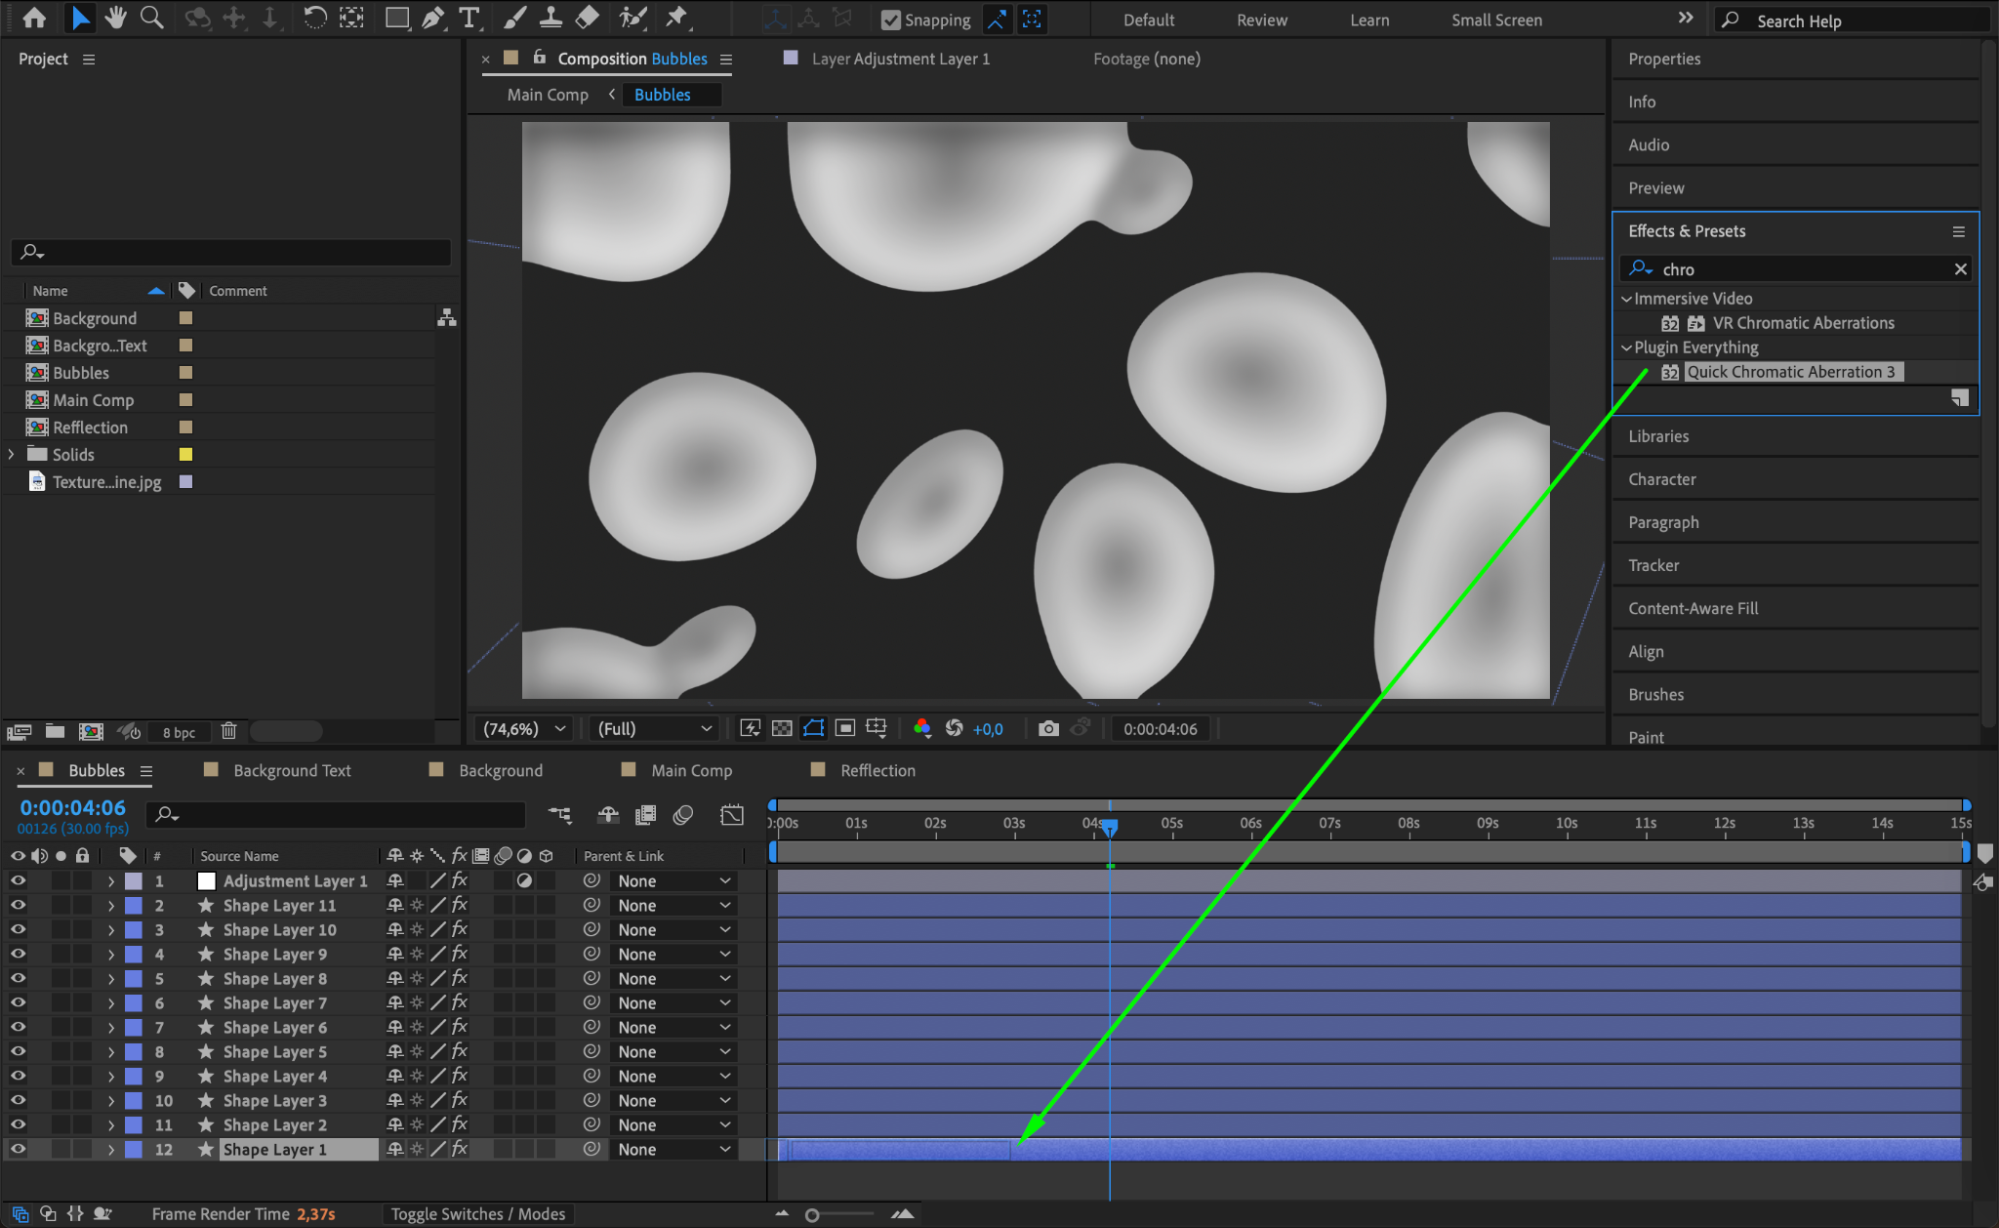

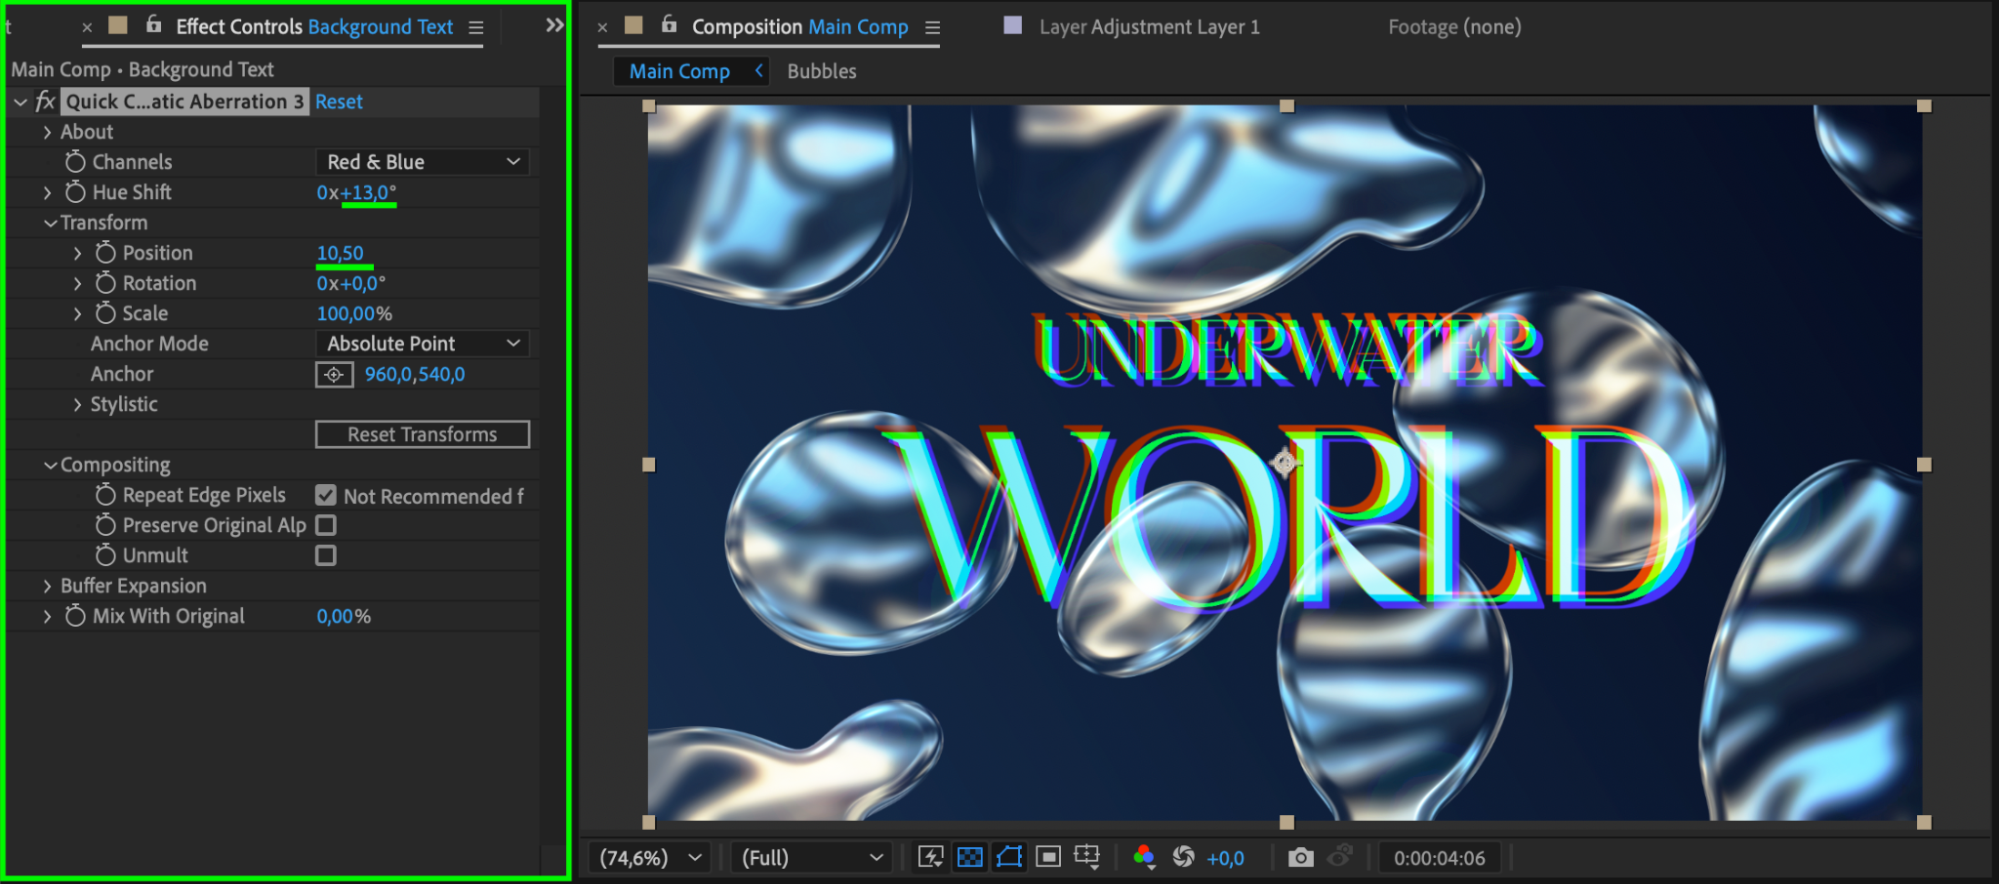
 Step 18: Adjust the Text Background
Duplicate the Background Text Comp.
Apply Hue Shift (13) and Position (10.5).
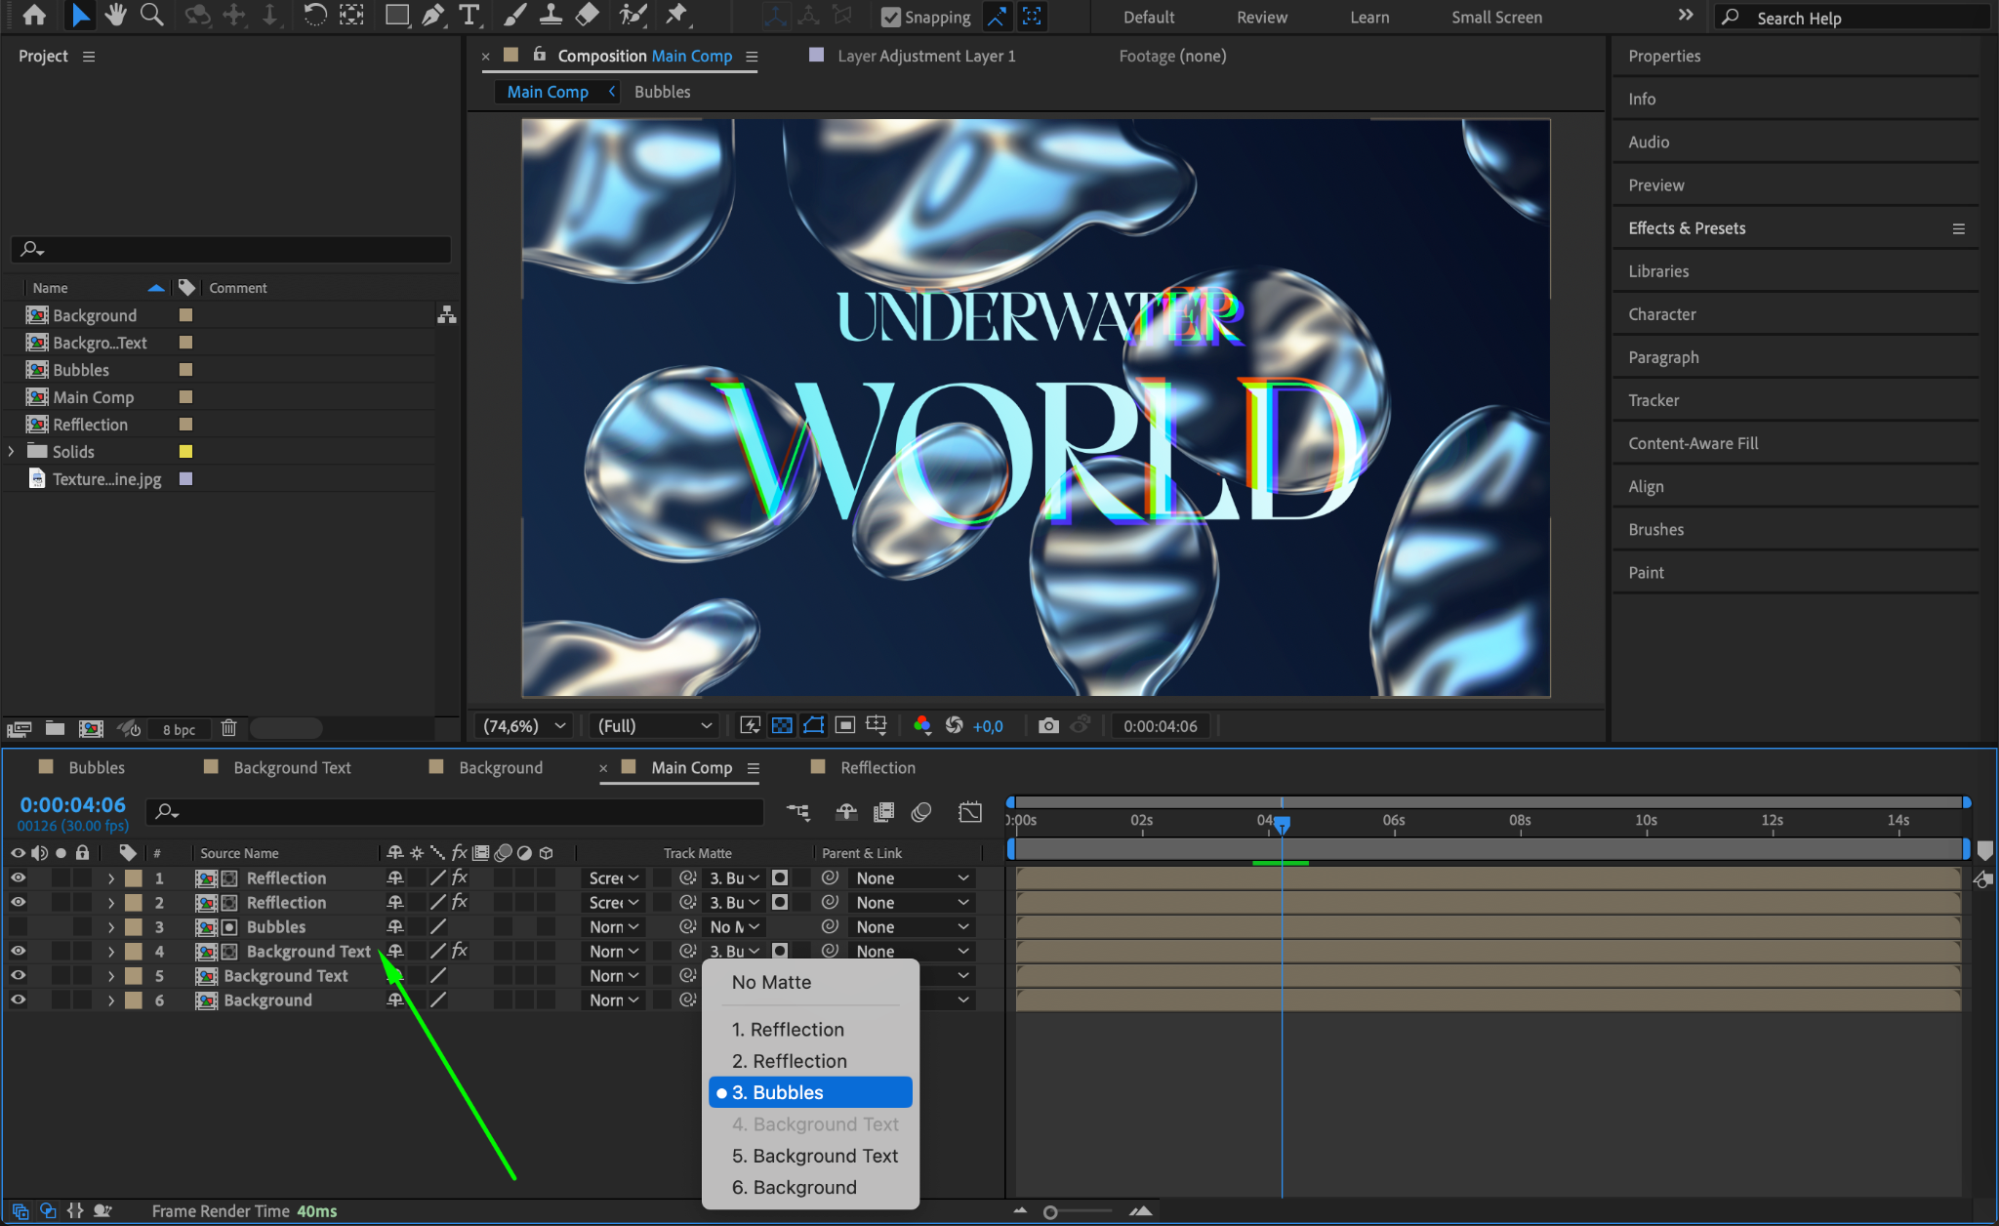
In the Track Matte Column, choose Bubbles Comp as the matte.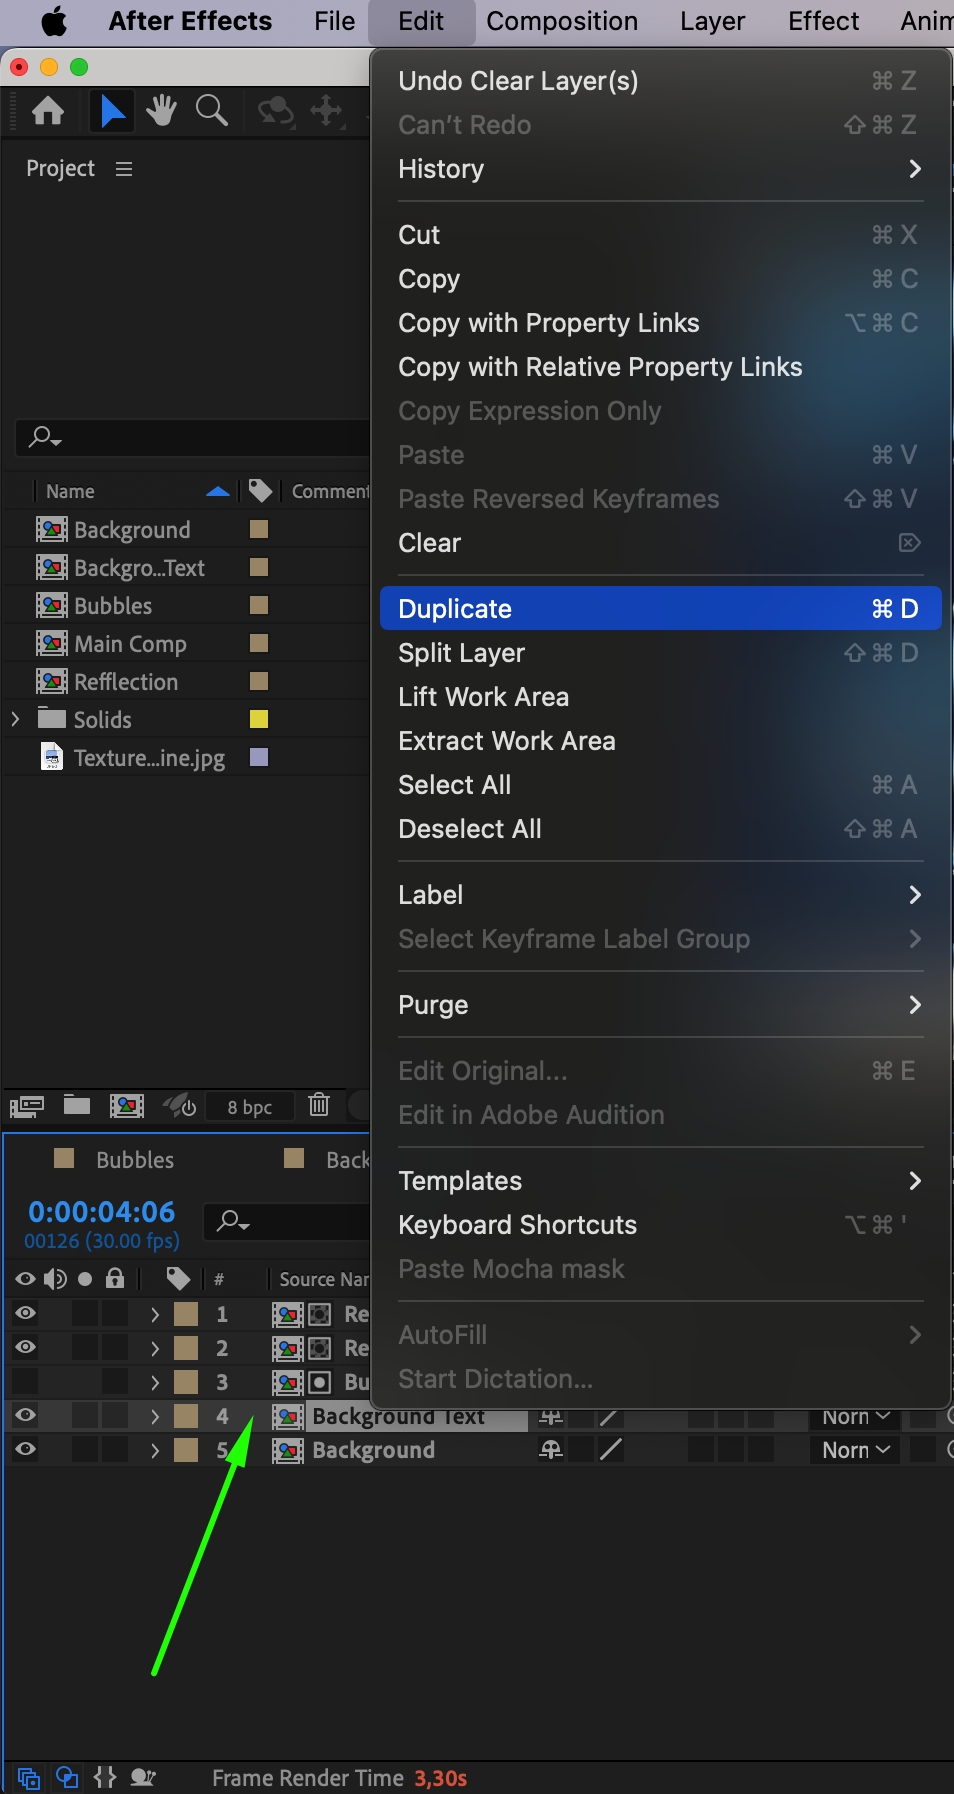
 Step 19: Final Touches
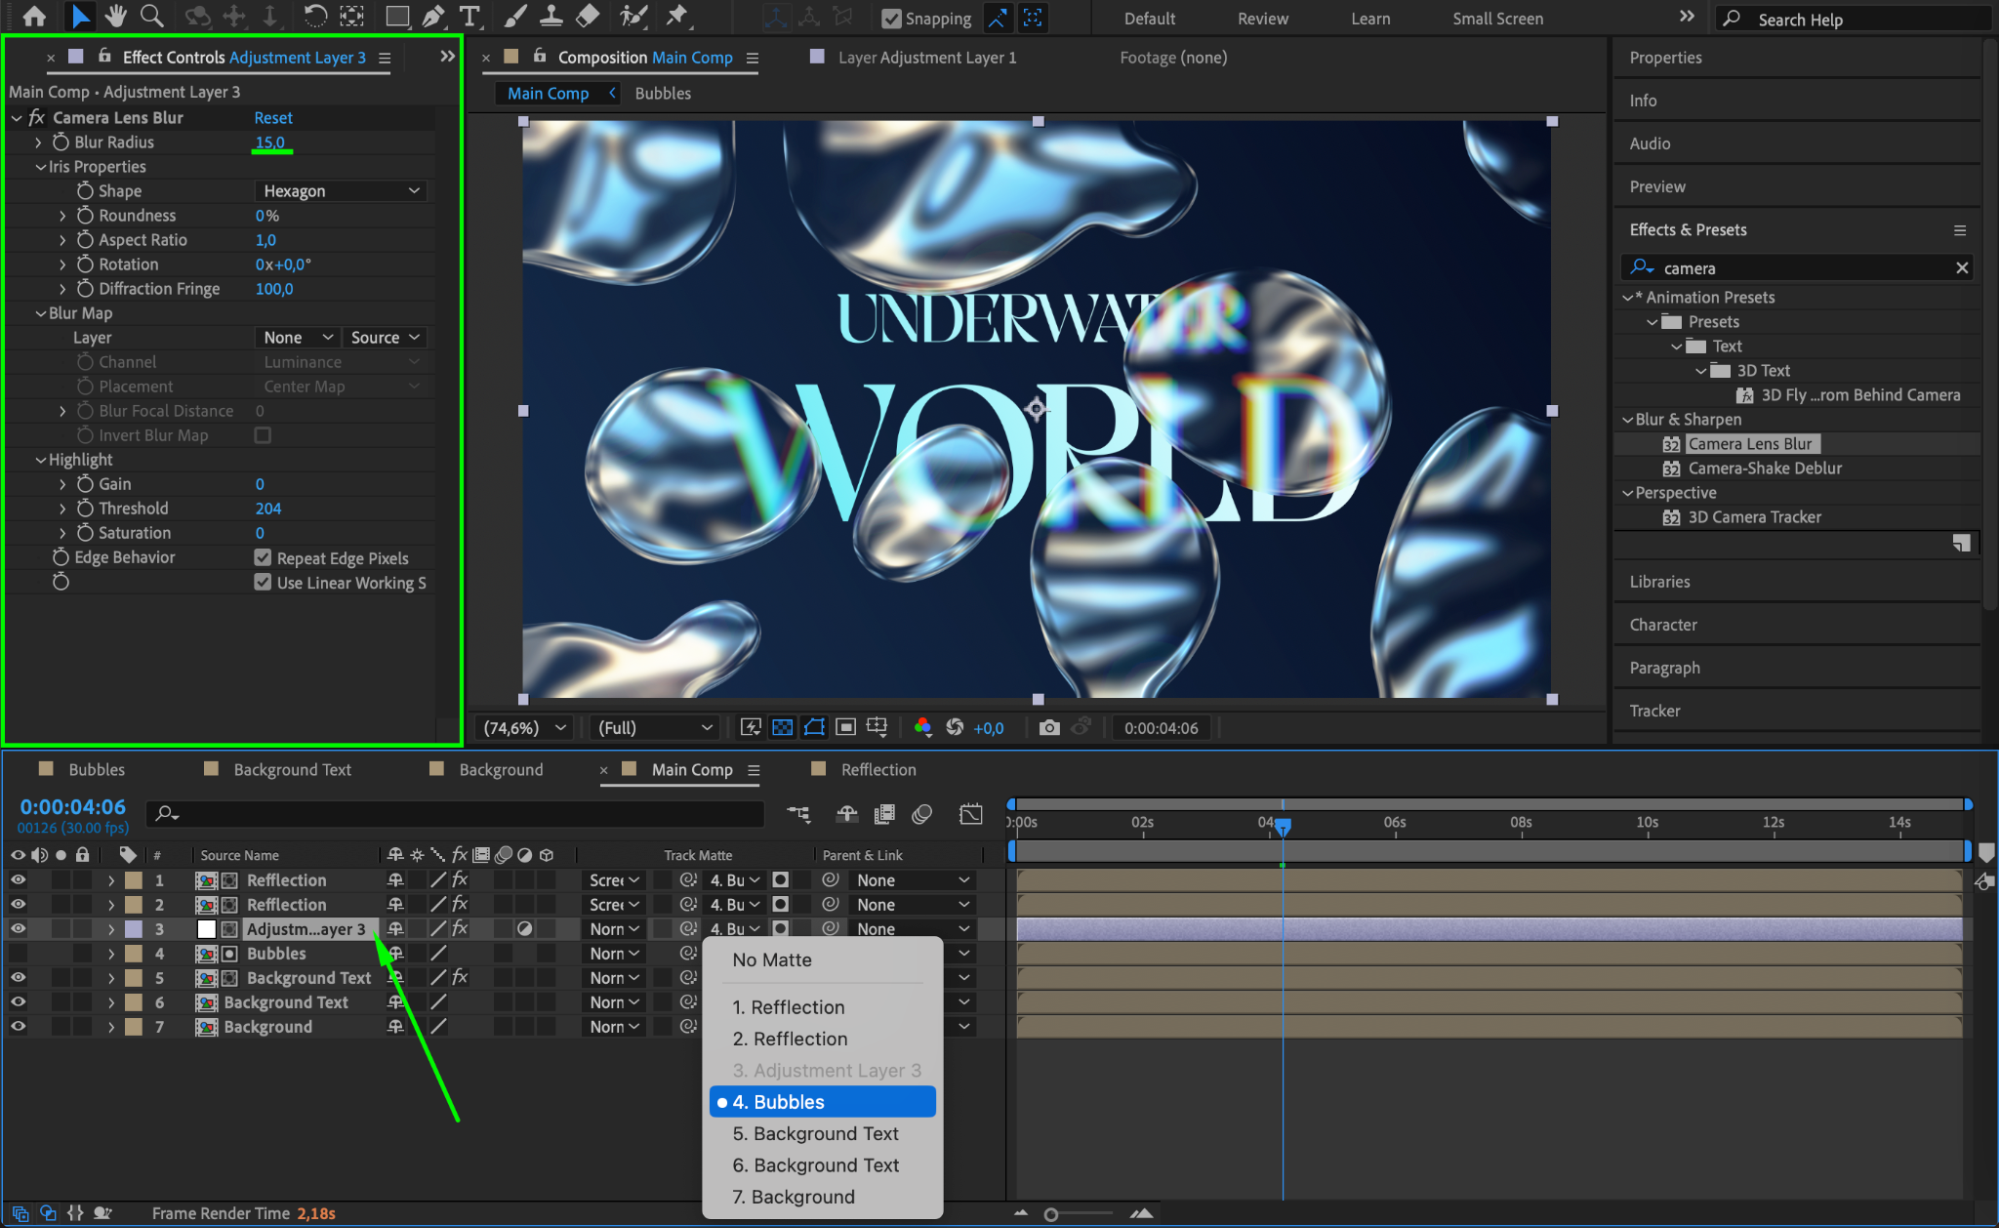
Add a new Adjustment Layer and apply Camera Lens Blur with Blur Radius 15.
In the Track Matte Column, choose Bubbles Comp for the adjustment layer.
Apply Turbulent Displace (Amount 50, Size 100, Evolution time*50).


 Step 20: Preview and Render
Press Spacebar to preview the animation. If everything looks good, go to Composition > Add to Render Queue, select your desired format, and click Render.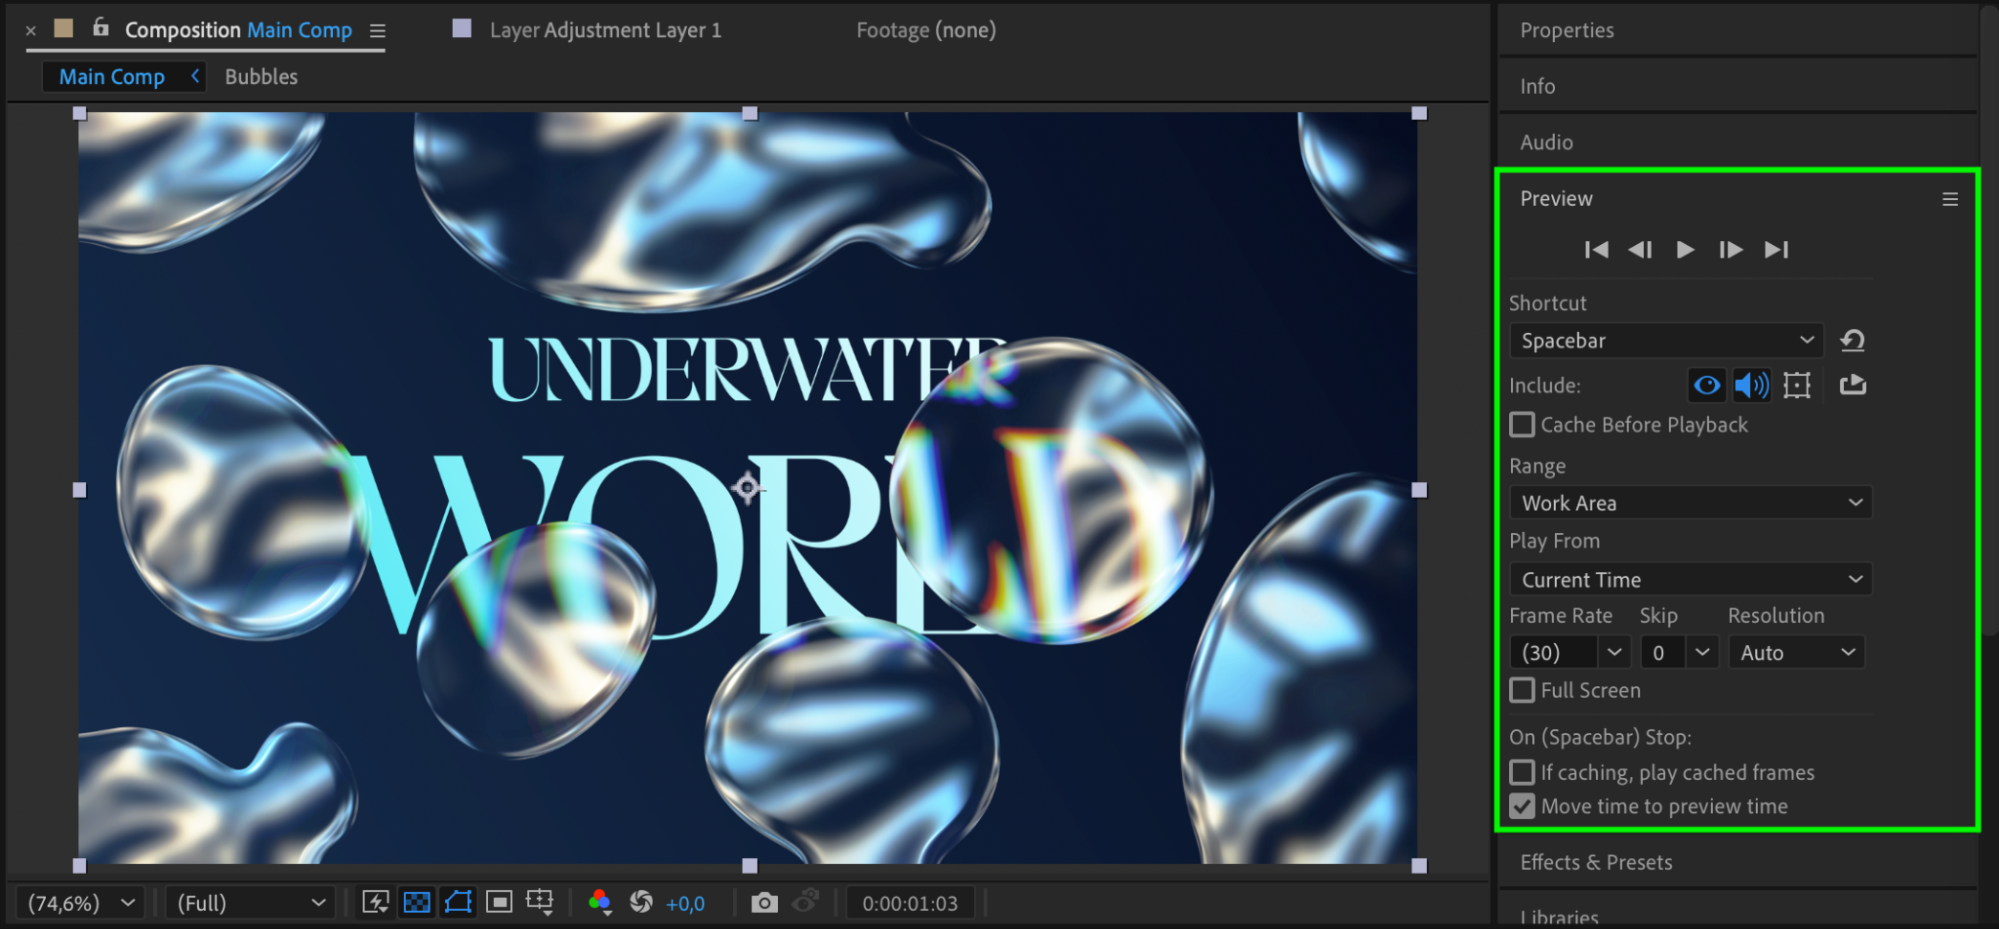
Conclusion
By following these steps, you can create realistic floating bubbles in After Effects using shape layers, blending modes, and distortion effects. This technique is useful for motion graphics, animated backgrounds, and underwater scenes. Experiment with different sizes, speeds, and colors for unique results.
Our Bestsellers


