How to Create and Animate Stroke in After Effects
Understanding Stroke Animation in After Effects
Creating dynamic and eye-catching stroke animations in After Effects can take your designs to the next level. In this blog post, we will explore effective techniques and tools to help you animate strokes in After Effects.
Get 10% off when you subscribe to our newsletter

Before we dive into the techniques, let’s quickly understand what stroke animation is. In After Effects, strokes refer to the outlines or paths of shapes or text layers. Animating strokes involves manipulating these paths over time to create movement, reveal or hide elements, or add a sense of depth to your animations.
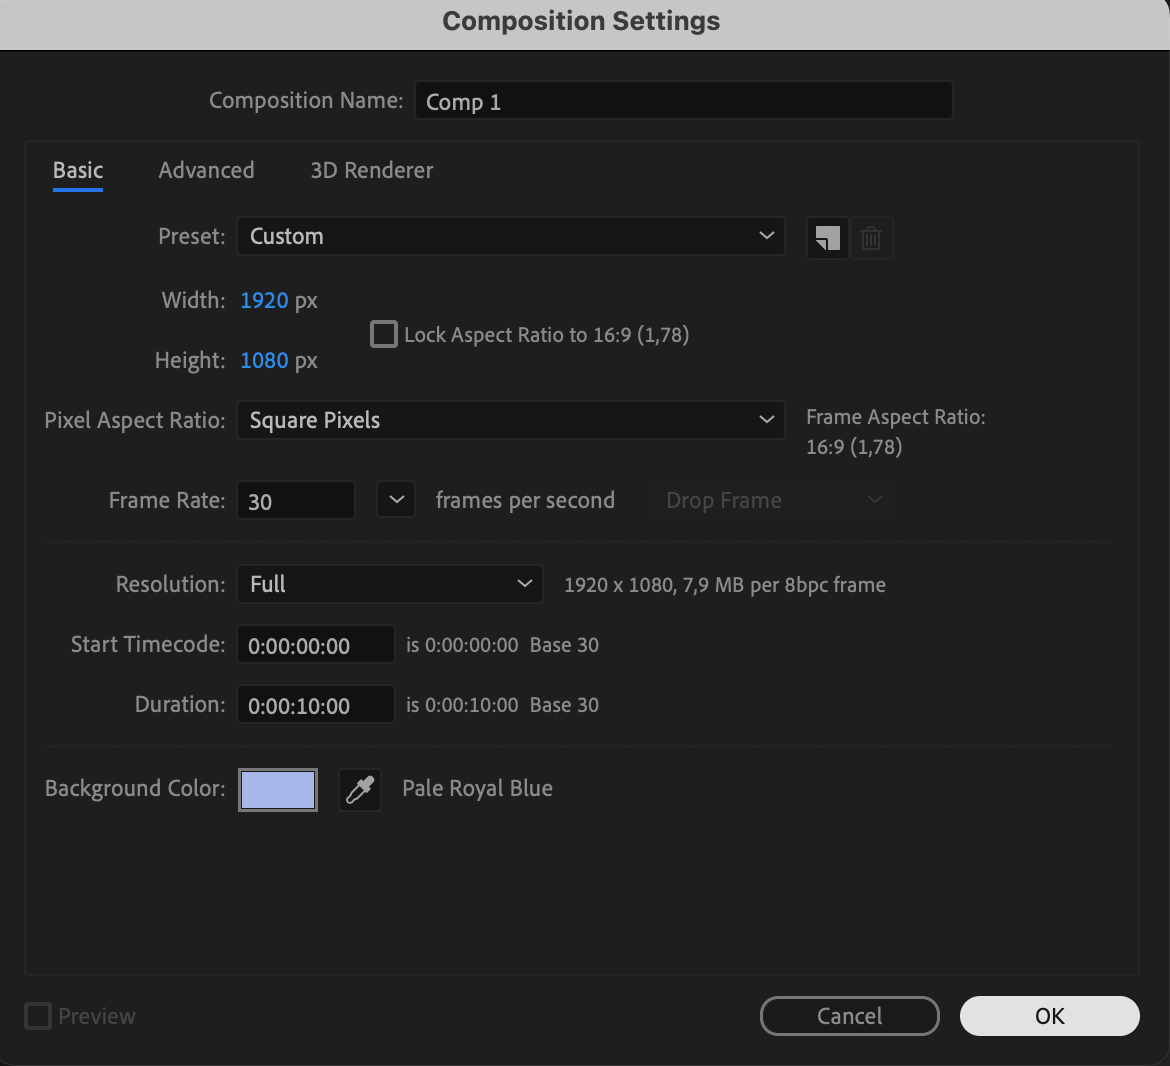
Step 1: Create a New Composition
Open After Effects and create a new composition. Set the parameters for your composition (e.g., duration, frame rate, resolution).
 Step 2: Create a Text Layer
Get 10% off when you subscribe to our newsletter

Select the Horizontal Type Tool (Ctrl/Cmd + T). Click anywhere in the composition window and type your desired text. Adjust the text properties using the Character panel (e.g., font, size, color).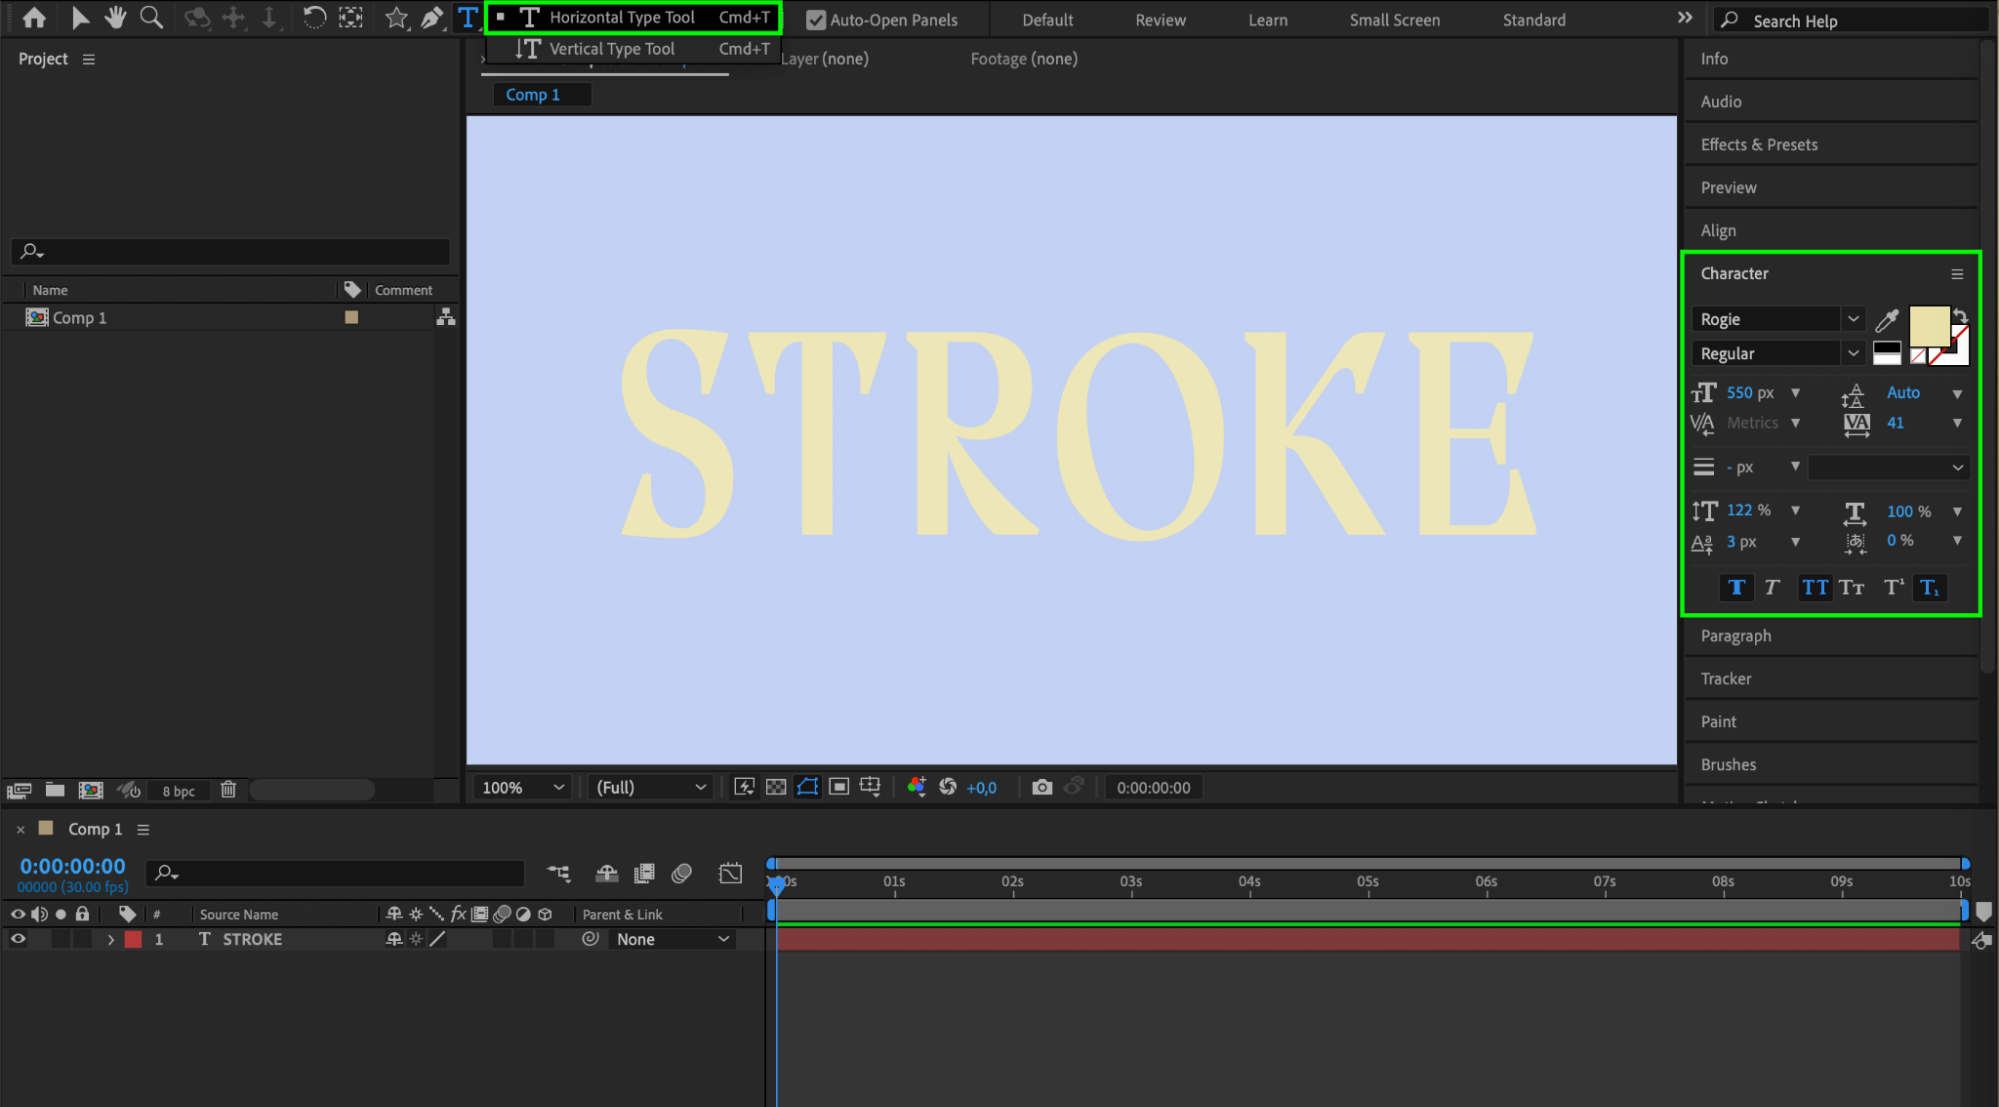 Step 3: Convert Text to Shapes
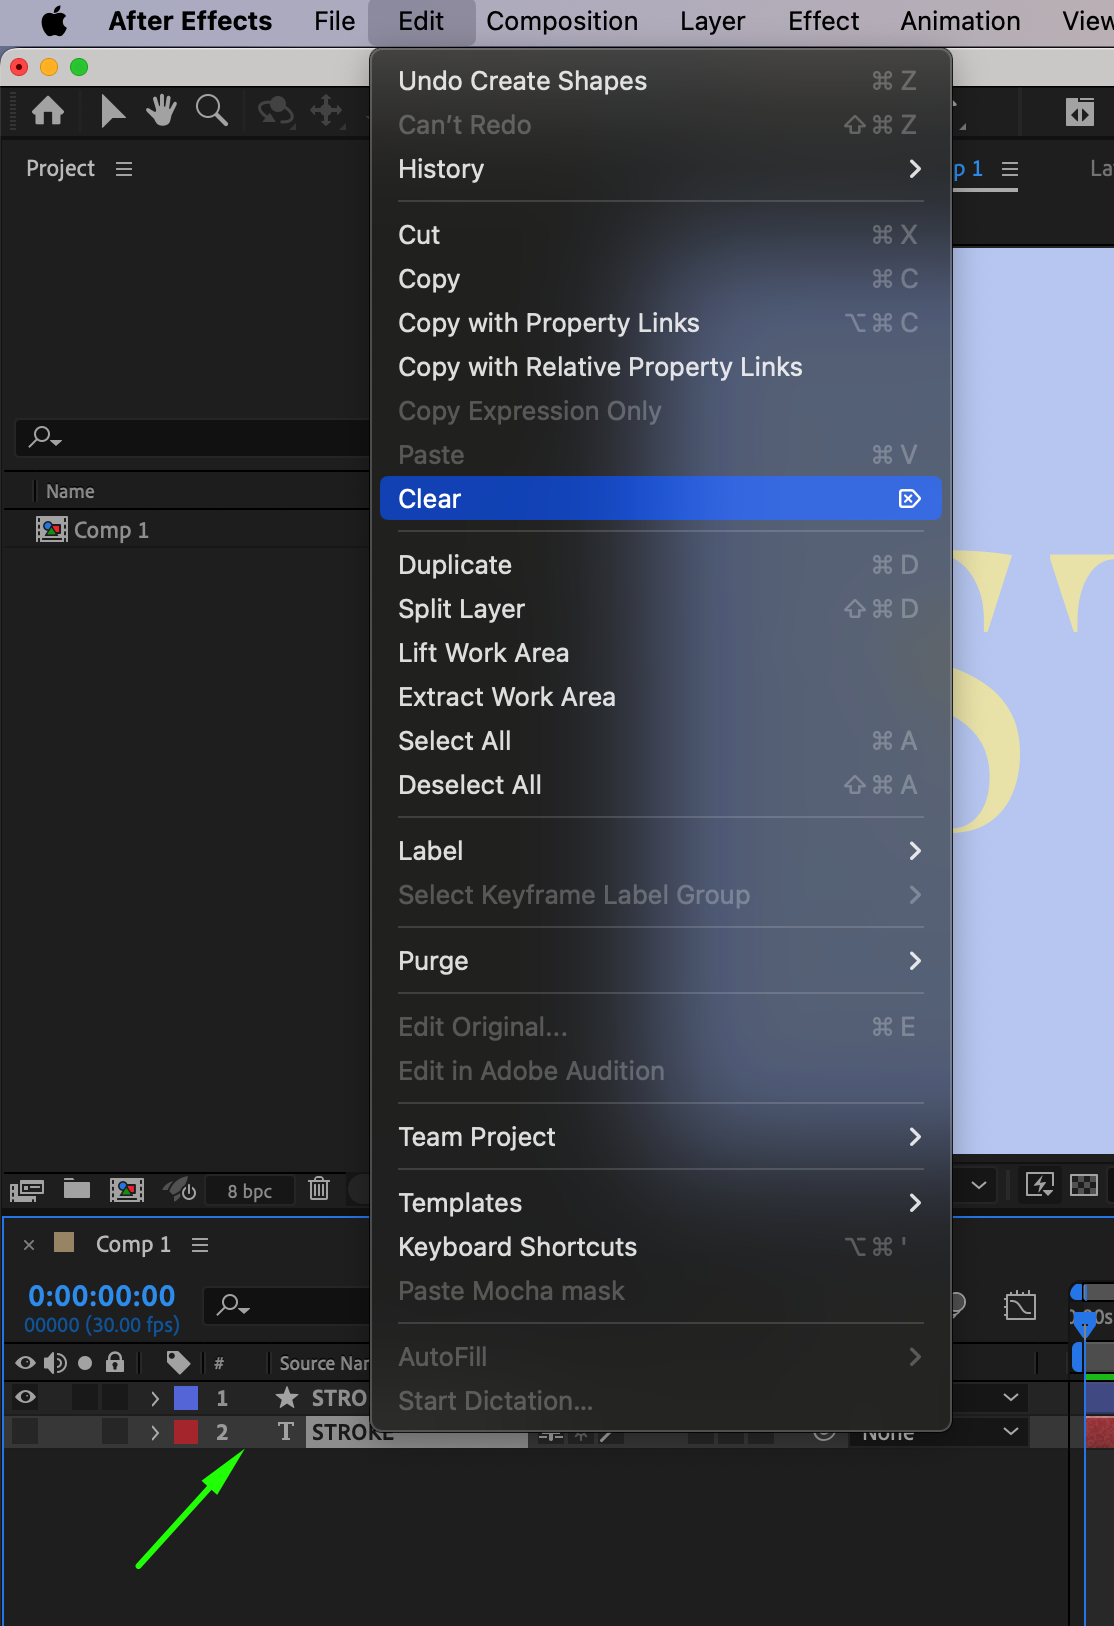
Right-click on the text layer in the timeline. Go to Create > Create Shapes from Text. A new shape layer will be created, and you can delete the original text layer.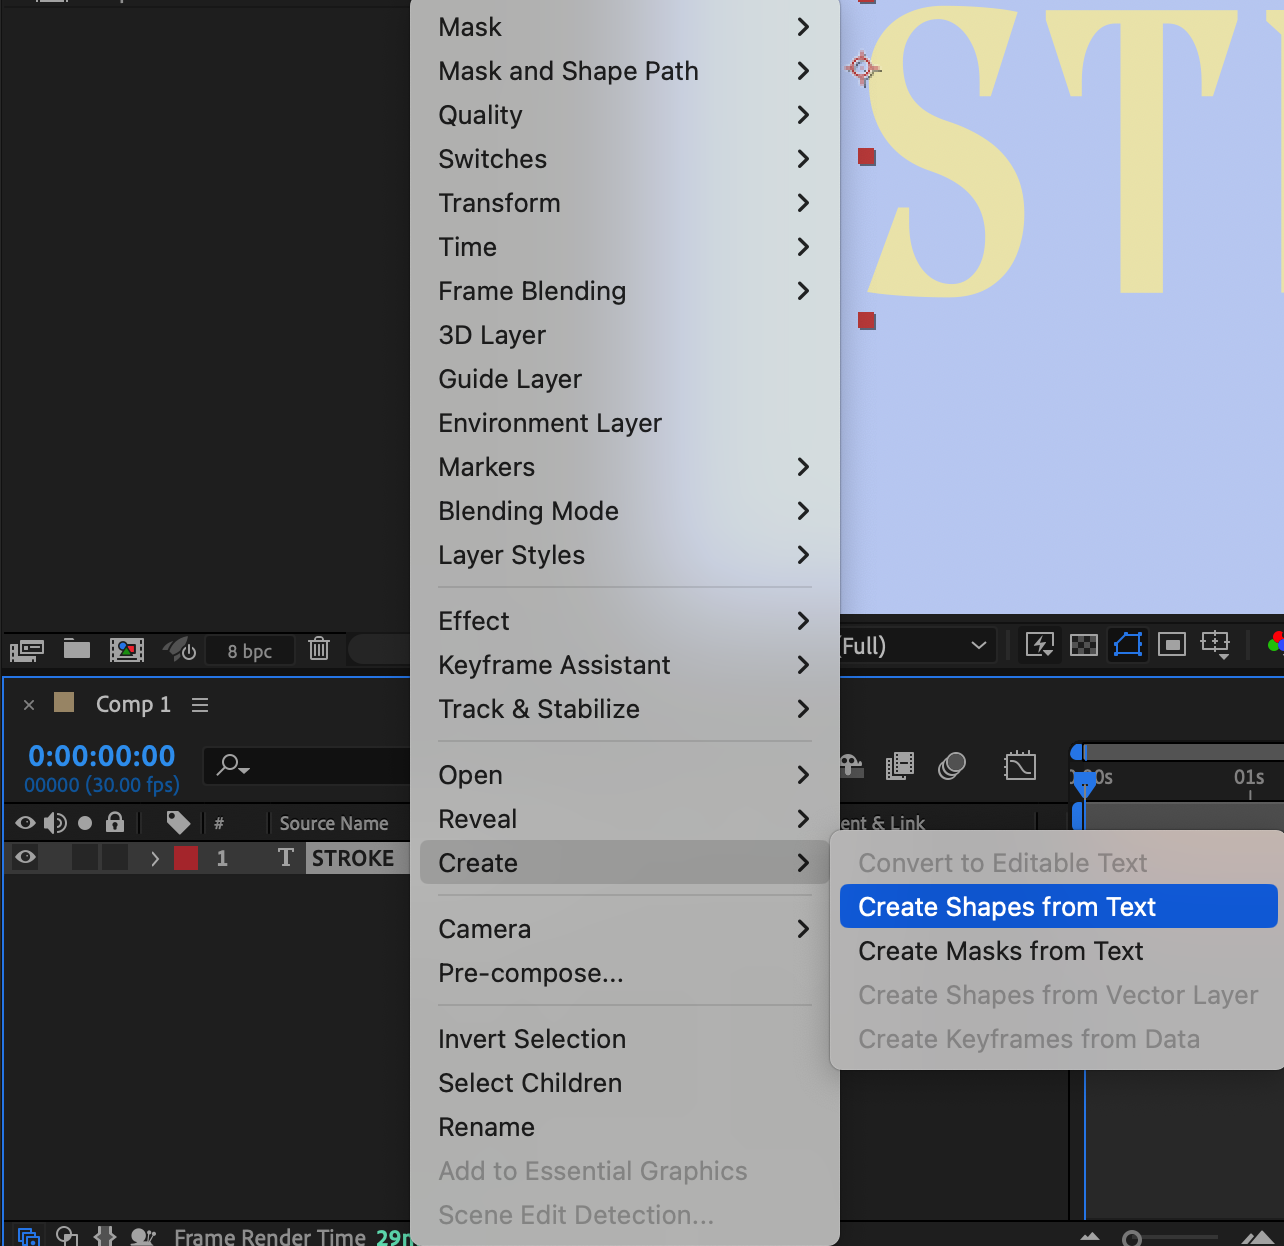
 Step 4: Add Trim Paths
Get 10% off when you subscribe to our newsletter

Expand the properties of the new shape layer. Click on the small triangle next to Add to open the menu. Select Trim Paths from the list.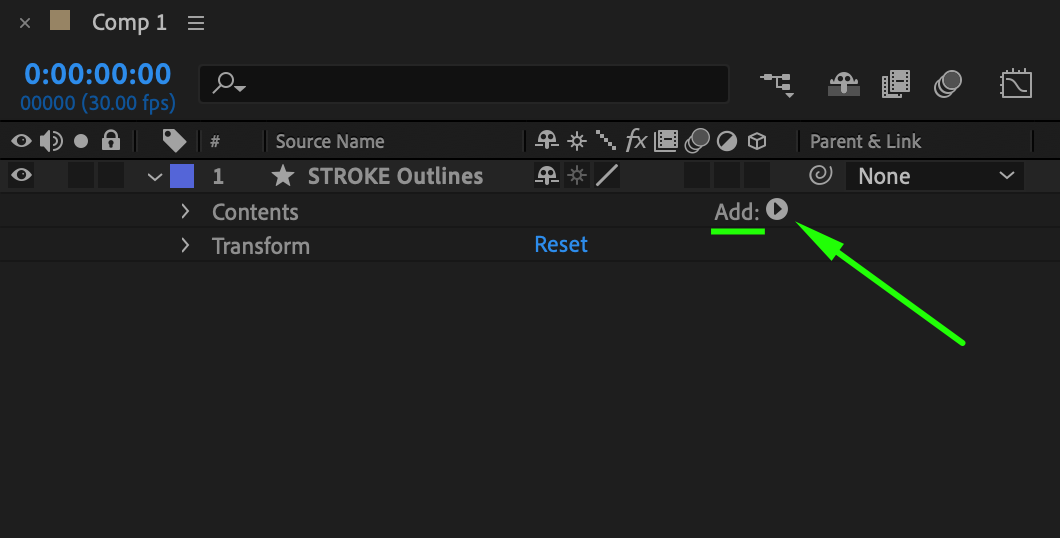
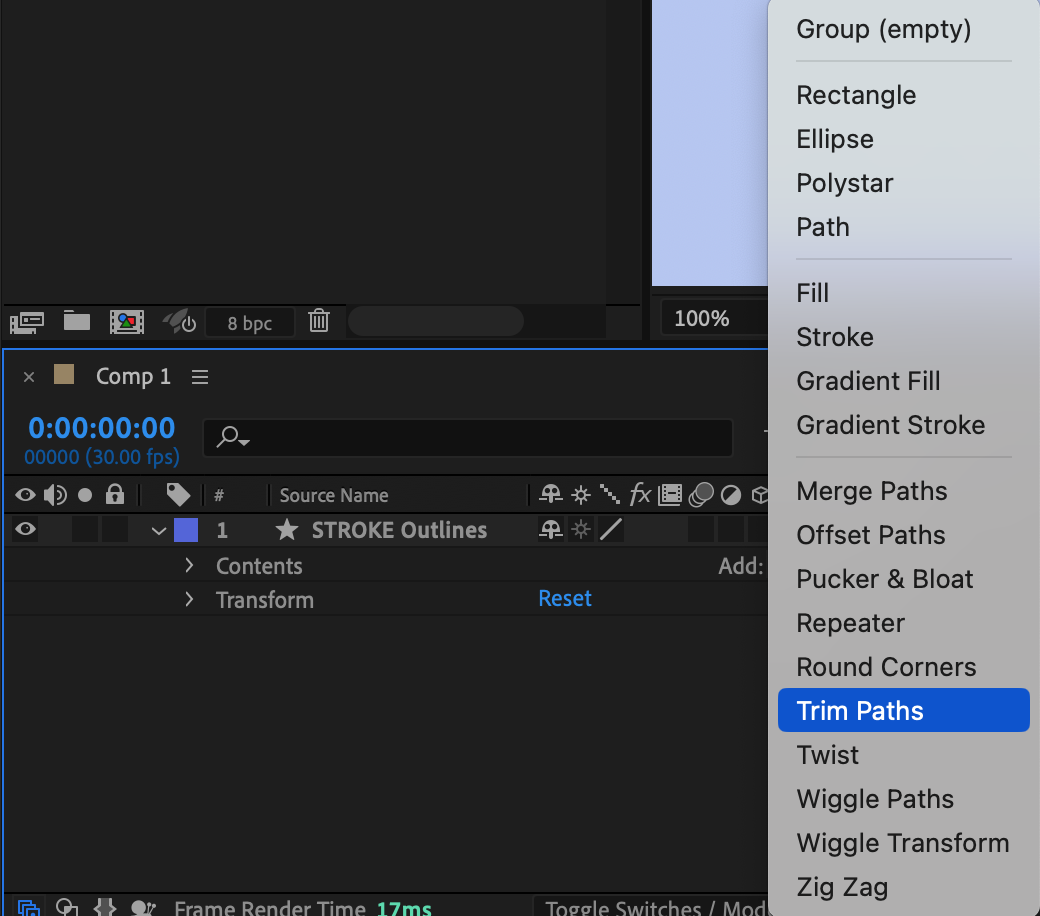 Step 5: Set Stroke Properties
Select the shape layer. In the top toolbar, click on the fill color and set it to None. Click on the stroke color and choose your desired color. Set the stroke width to your preference.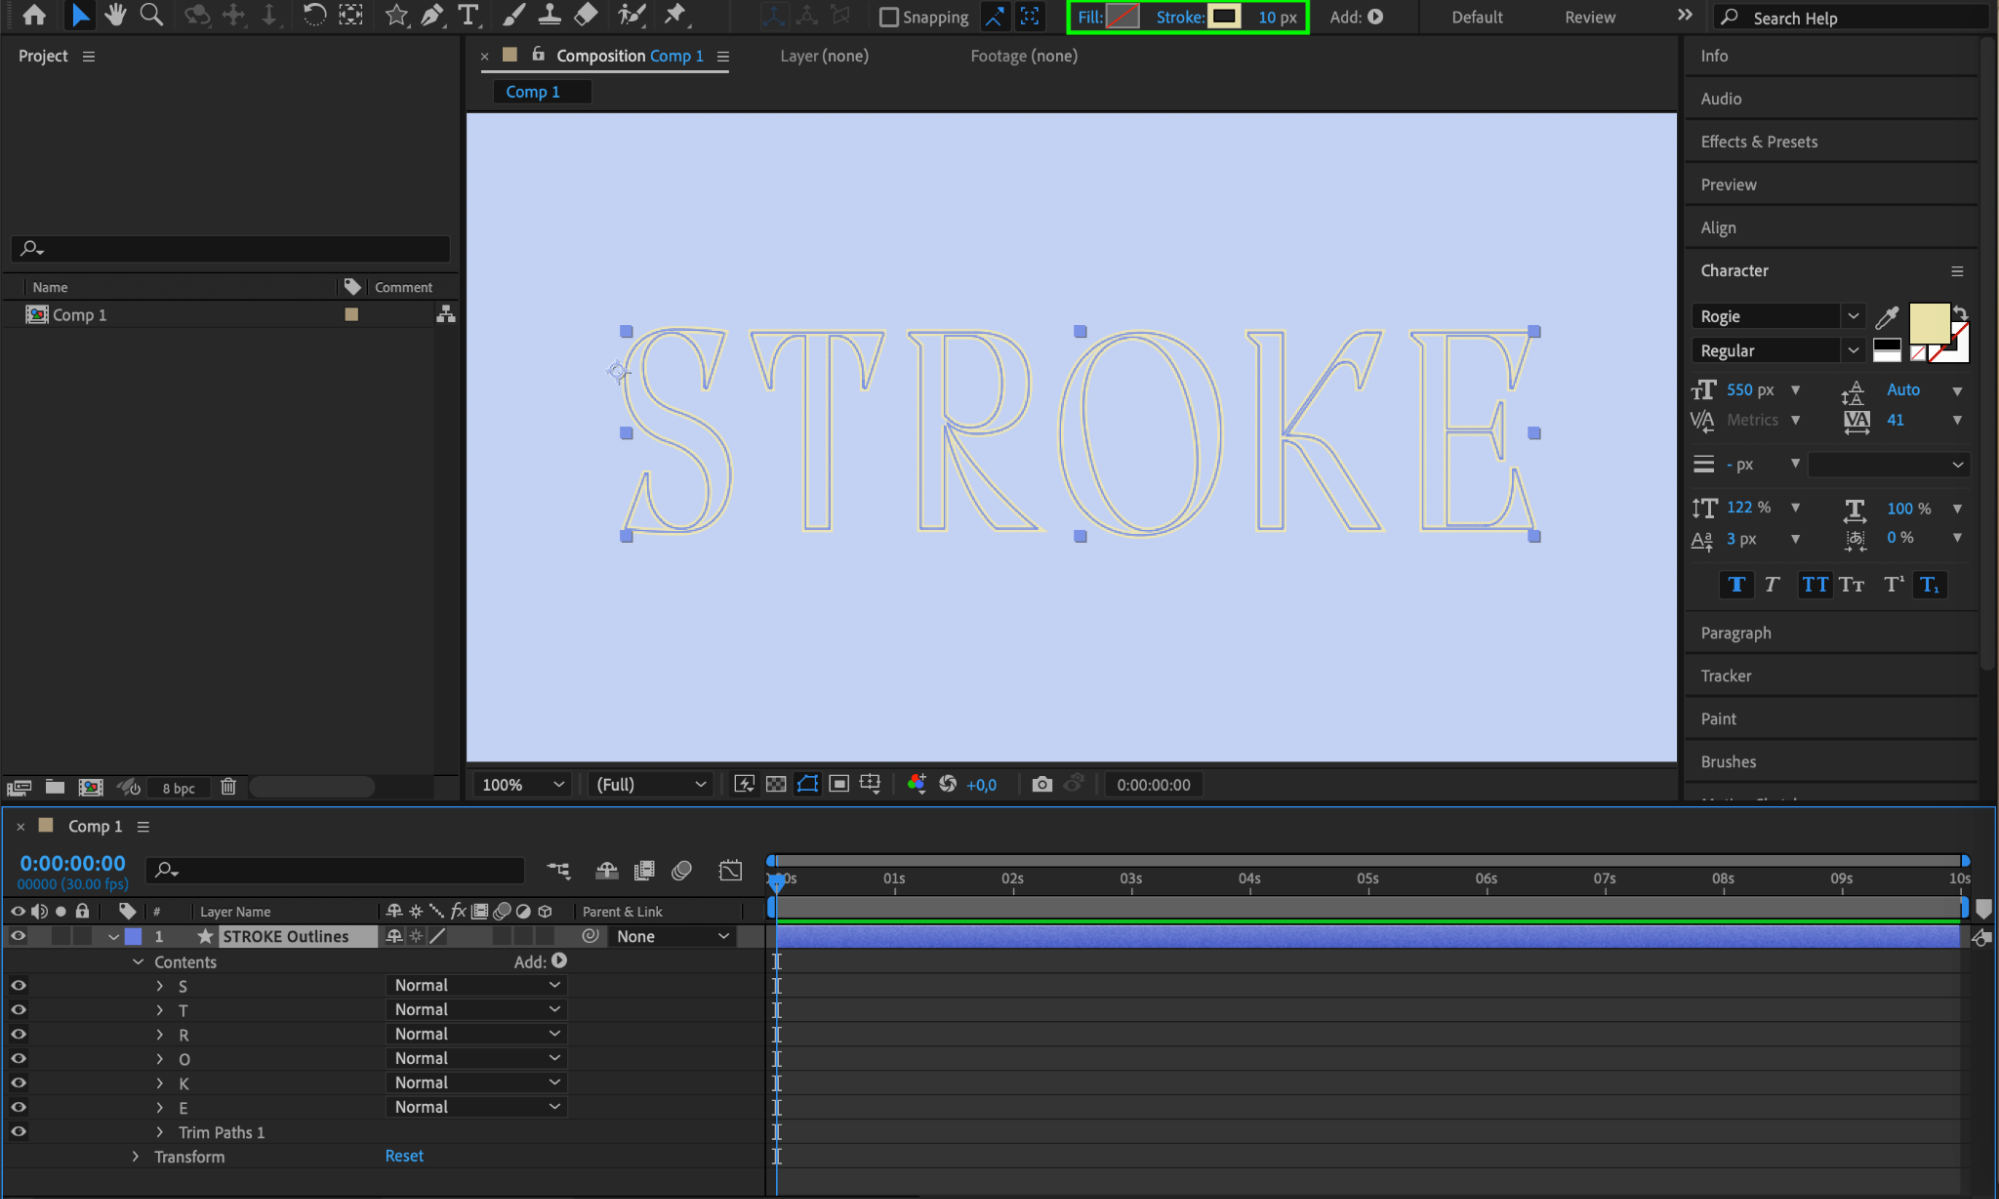 Step 6: Animate the Stroke
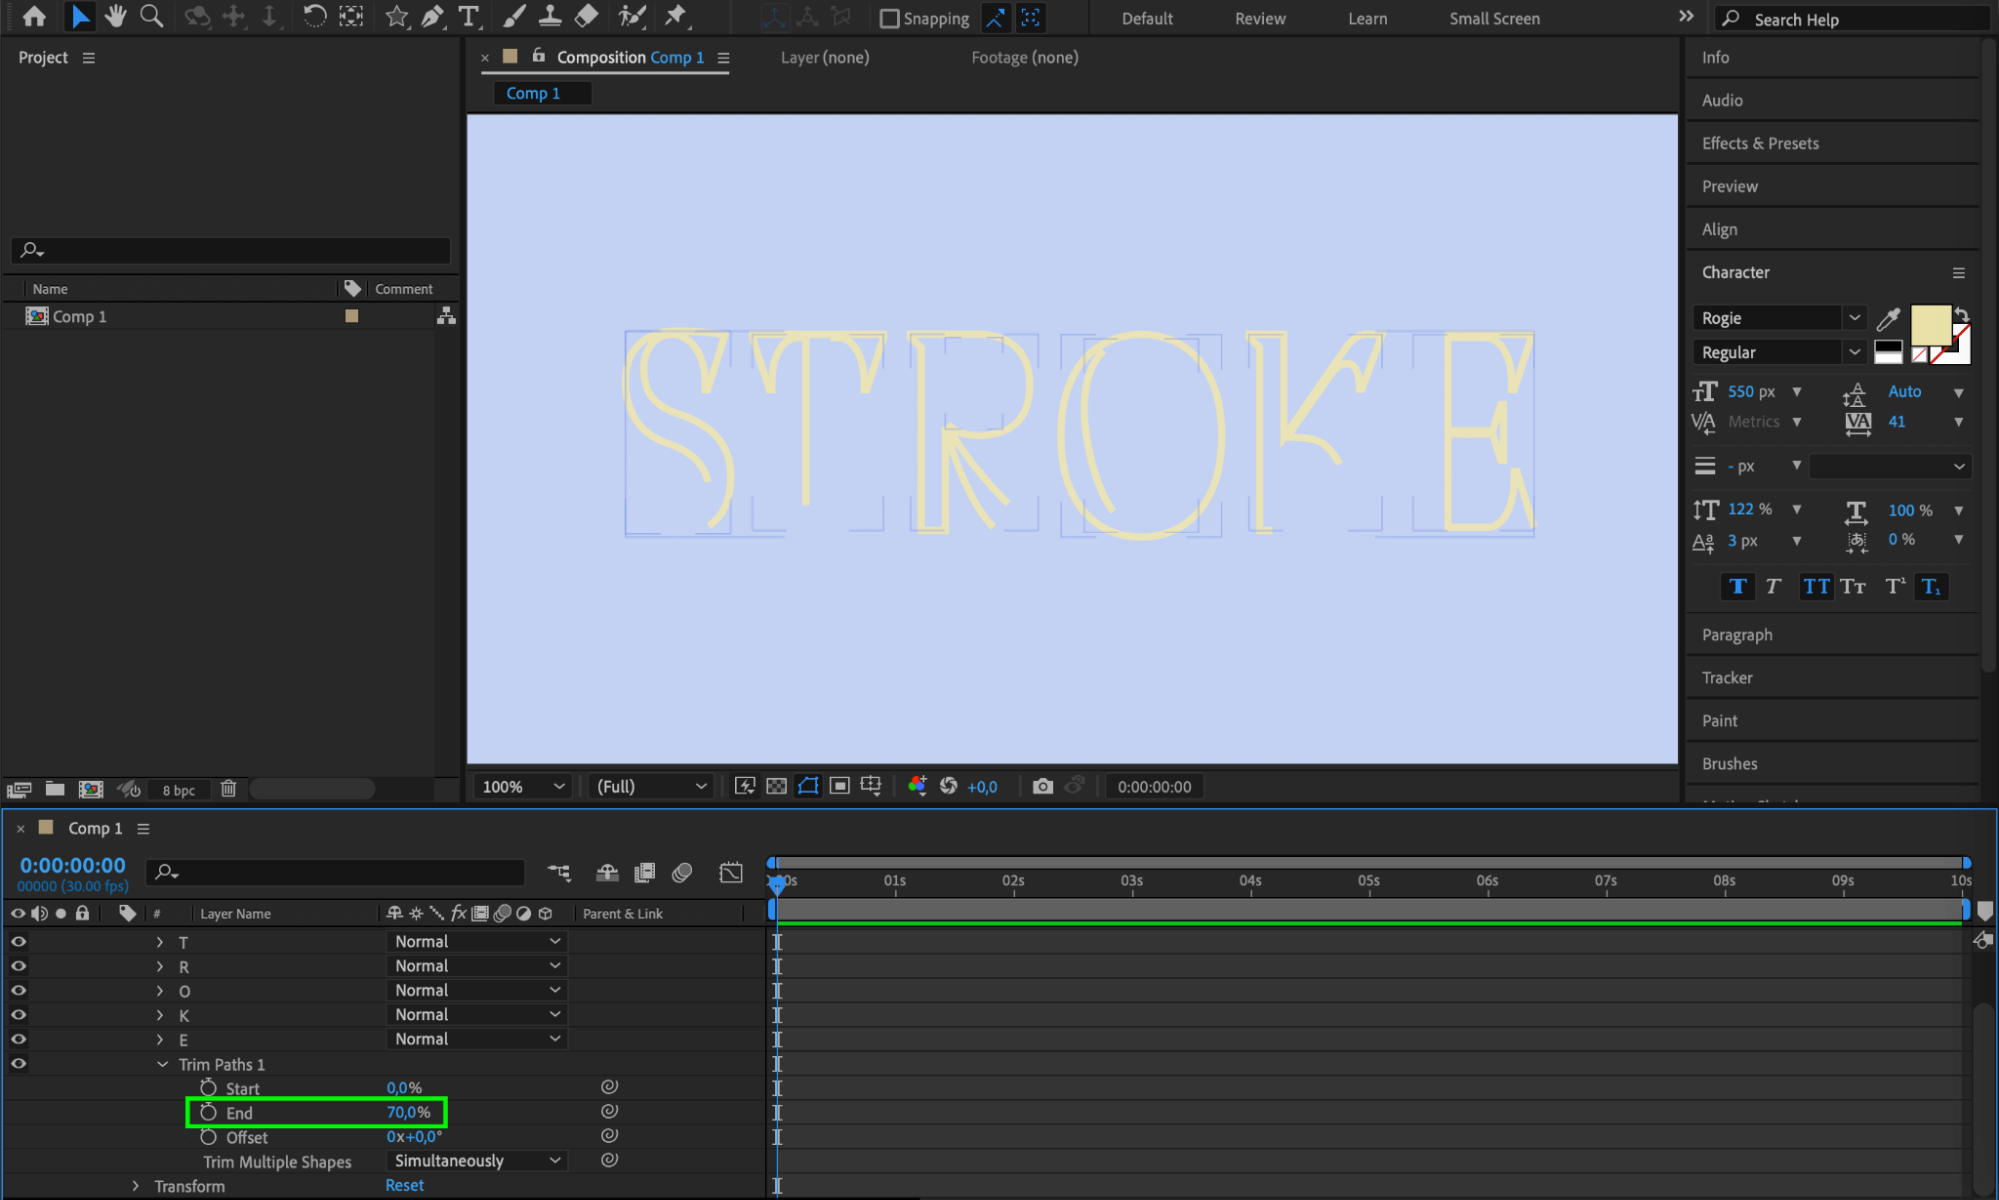
Expand the shape layer properties and navigate to Contents > Trim Paths 1. Set the End value to 70%. Set keyframes for the Offset parameter:
Move the playhead to the beginning of the composition and click the stopwatch icon next to Offset. Set the value to 0.
Move the playhead to the end of the composition and set the Offset value to 5.

 Step 7: Preview the Animation
Get 10% off when you subscribe to our newsletter

Press the spacebar to preview the animation.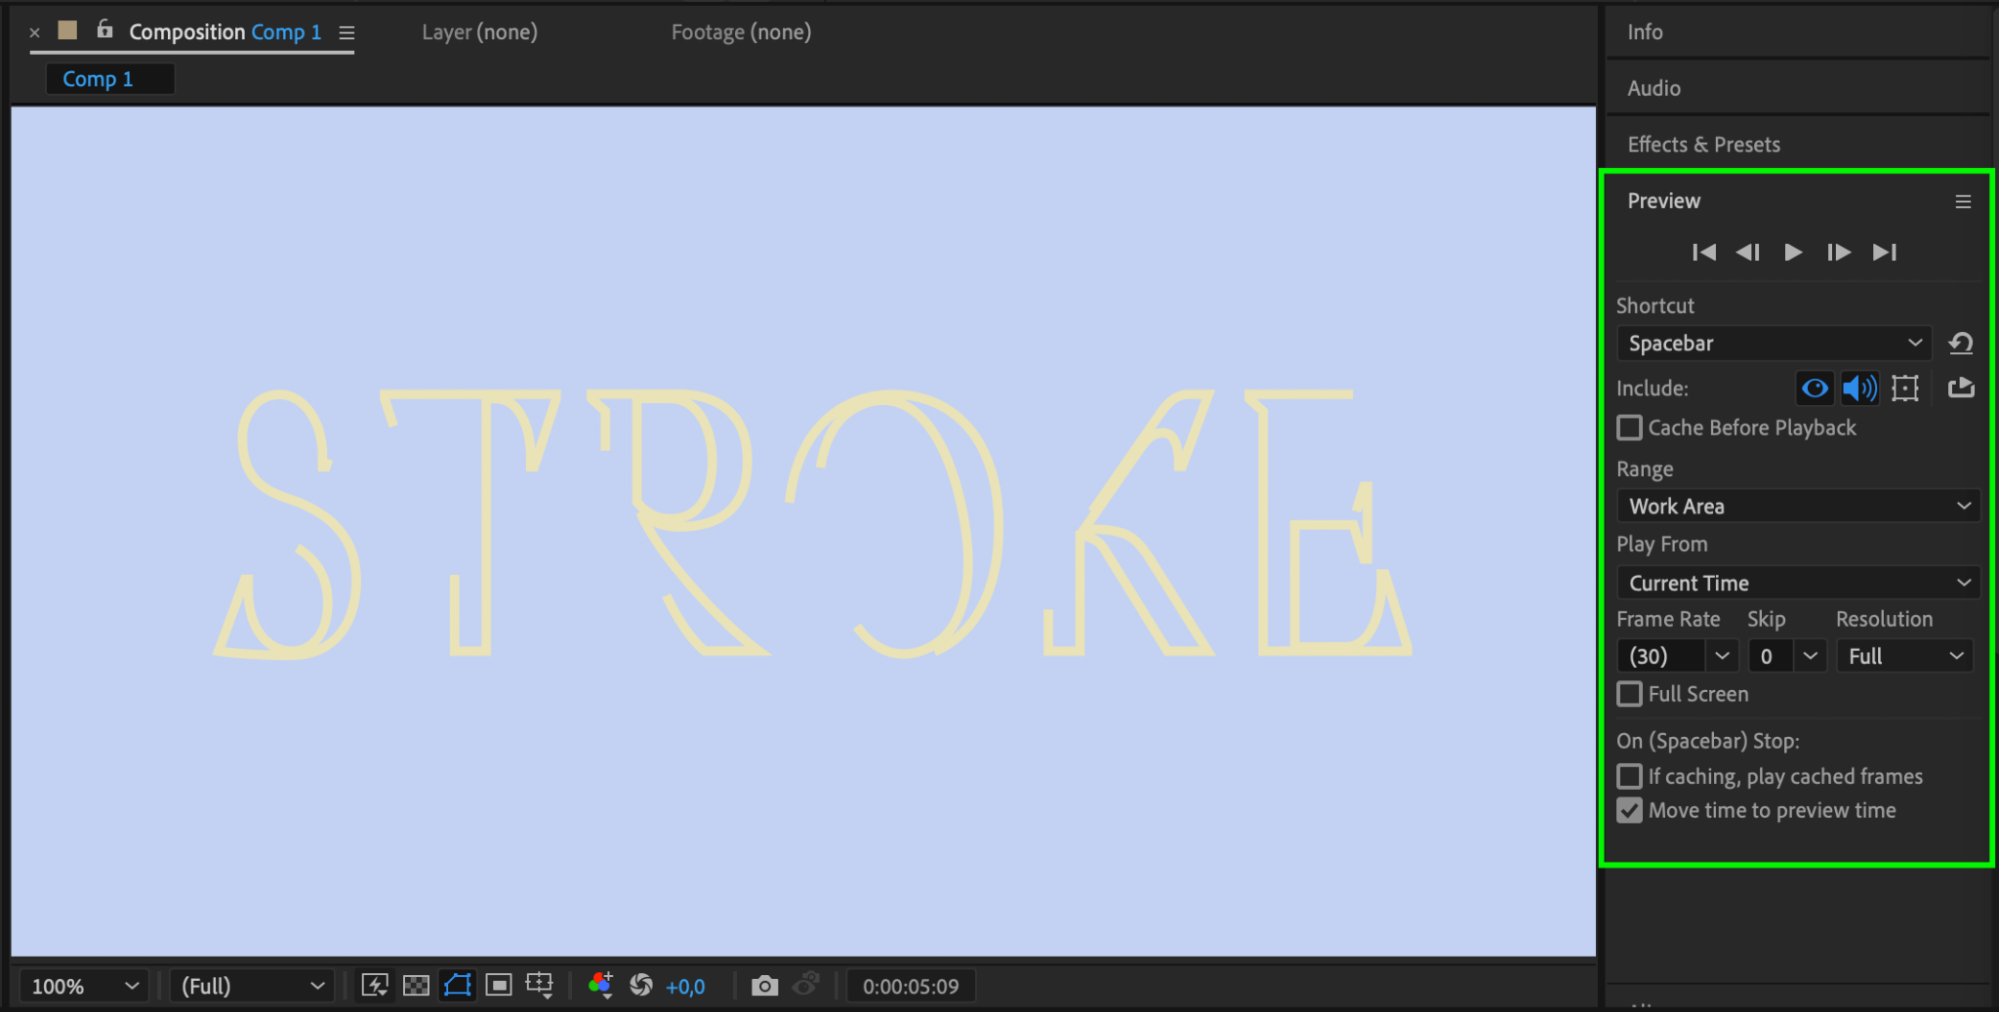 Additional Tips:
Easing: Use the Keyframe Assistant (Right-click on keyframes > Keyframe Assistant > Easy Ease) to smooth out the animation.
Motion Blur: Enable motion blur for the shape layer for a more dynamic look (toggle the motion blur switch in the timeline).
Complex Animations: Combine Trim Paths with other shape properties for more complex animations.
Conclusion
In conclusion, animating strokes in After Effects opens up a world of creative possibilities for your designs. By mastering the techniques and tools available, you can bring life and movement to your motion graphics and visual projects.
To amplify your creative possibilities, you can also use plugins and presets. AEJuice offers plugins and preset packs that provide pre-animated strokes and assets, allowing you to easily customize and incorporate stunning animation into your projects. So, go ahead and explore the power of stroke animation in After Effects to create captivating animations that impress your audience.


