Unlocking Animation Potential in Adobe After Effects
Introduction: Embark on Your Animation Journey
Embark on a journey into the dynamic realm of animation with Adobe After Effects. This guide is your passport to mastering the art of motion graphics, offering step-by-step instructions and insider tips to bring your visions to life. Whether you’re a novice or a seasoned animator, prepare to delve into the boundless possibilities of After Effects and unleash your creative potential like never before.
Animating in Adobe After Effects can be both exciting and challenging. Here’s a general guide to help you get started:
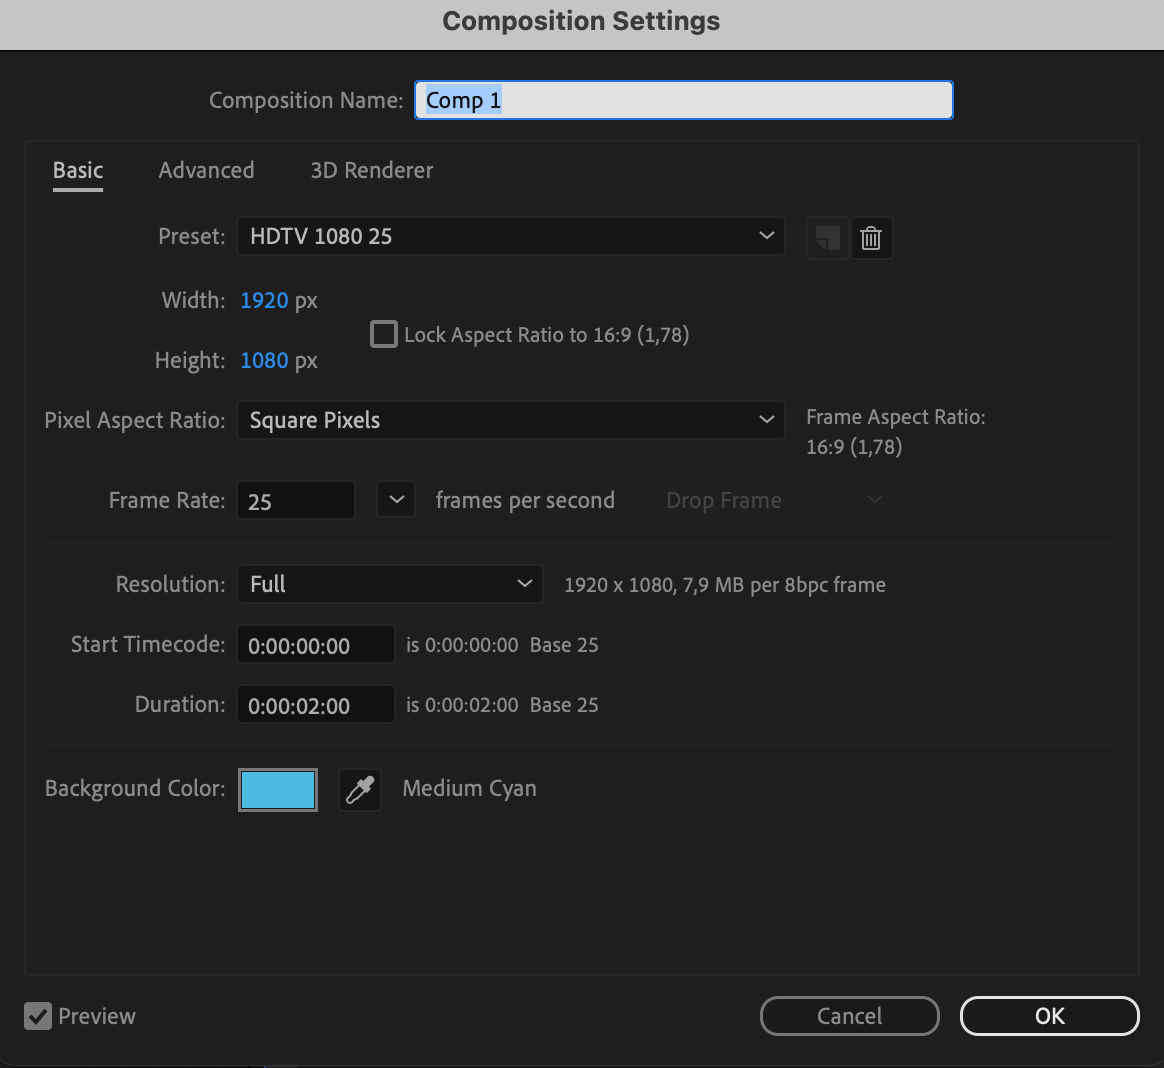
1. Create a New Composition:
Open After Effects and create a new composition. Set the dimensions, duration, and frame rate according to your project needs.

Get 10% off when you subscribe to our newsletter

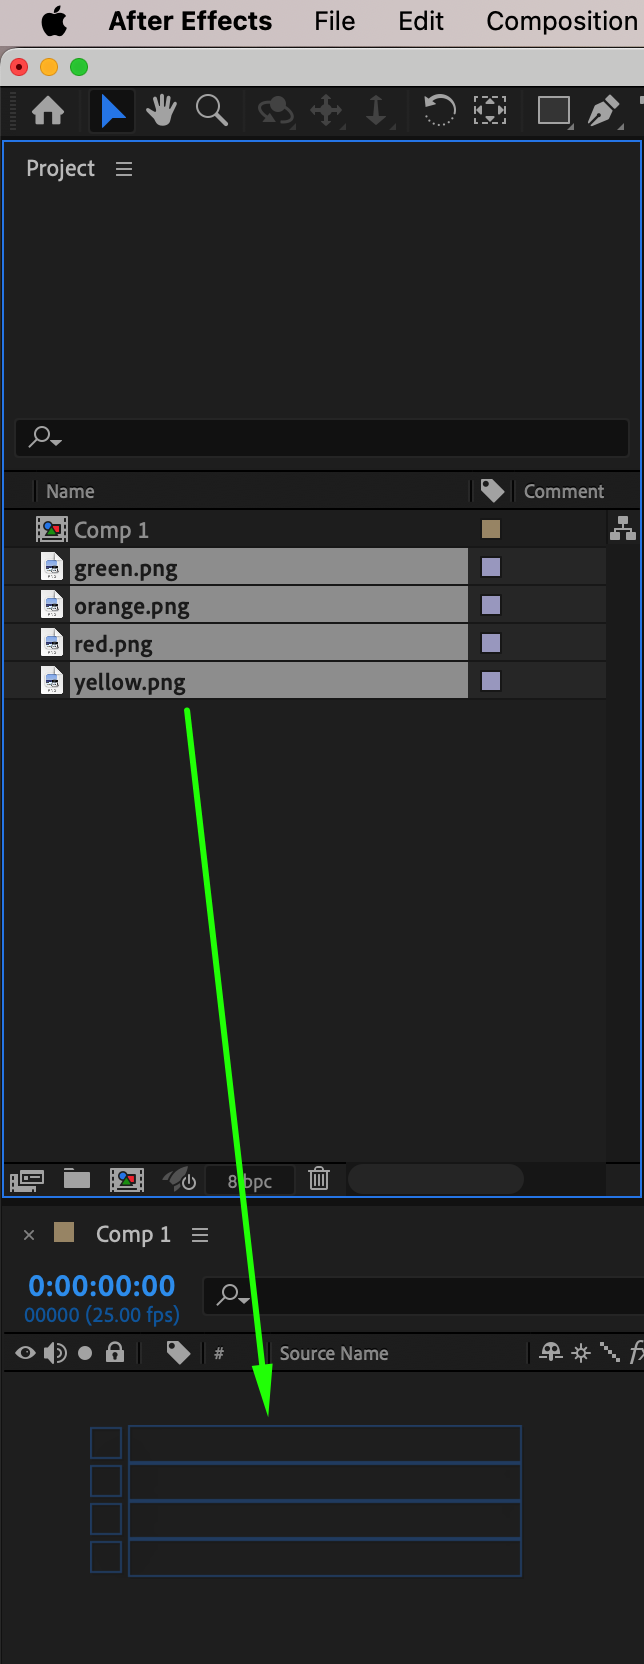
2. Import Assets:
Import the assets you want to animate into your composition by going to File > Import > File. This can include images, videos, audio files, etc.

Get 10% off when you subscribe to our newsletter

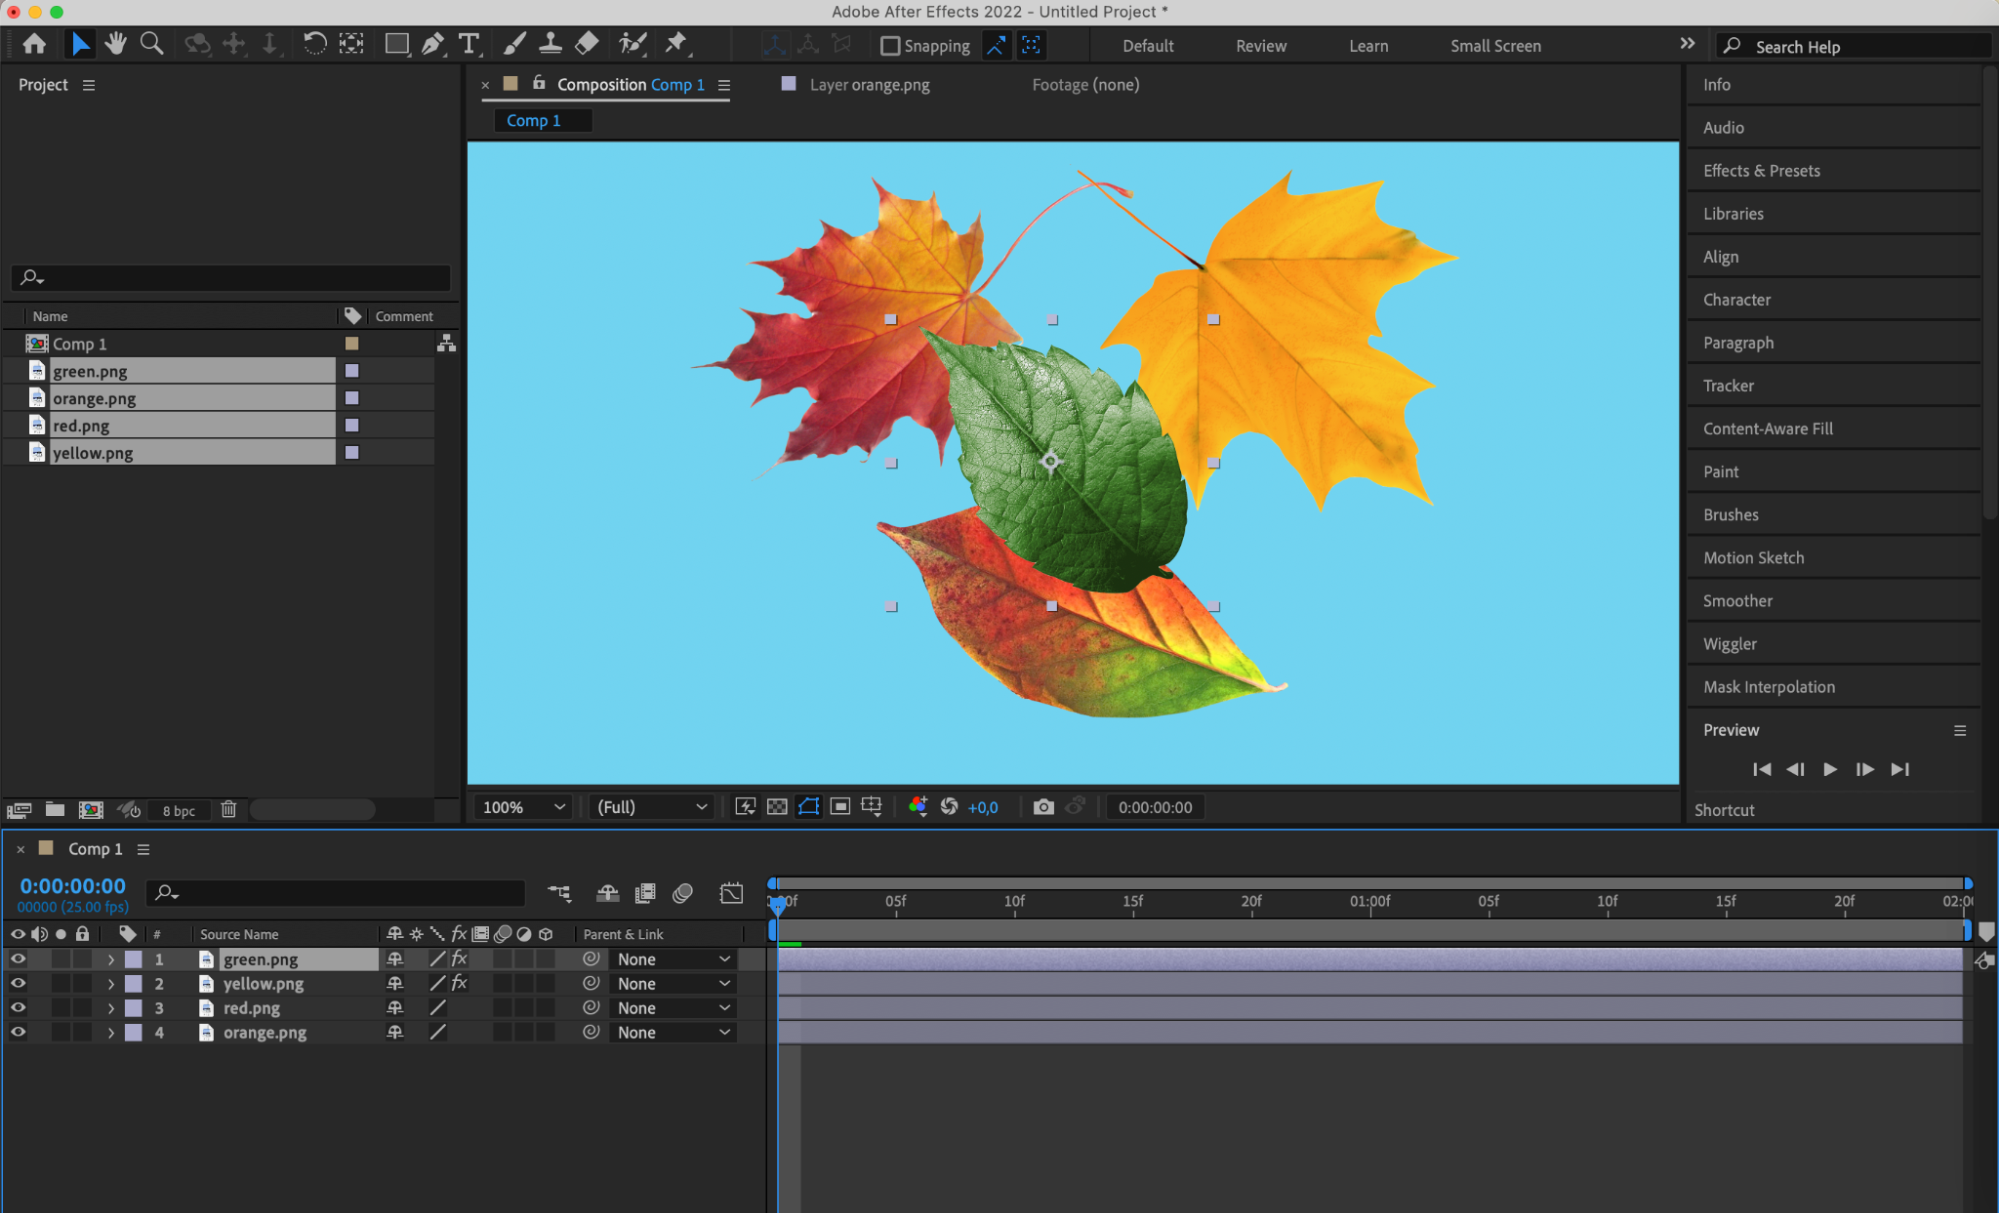
3. Arrange Layers:
Arrange your assets in the timeline panel. Layers are stacked from bottom to top, with the topmost layer being the one closest to the viewer.
Get 10% off when you subscribe to our newsletter

4. Animate Position, Scale, Rotation, and Opacity:
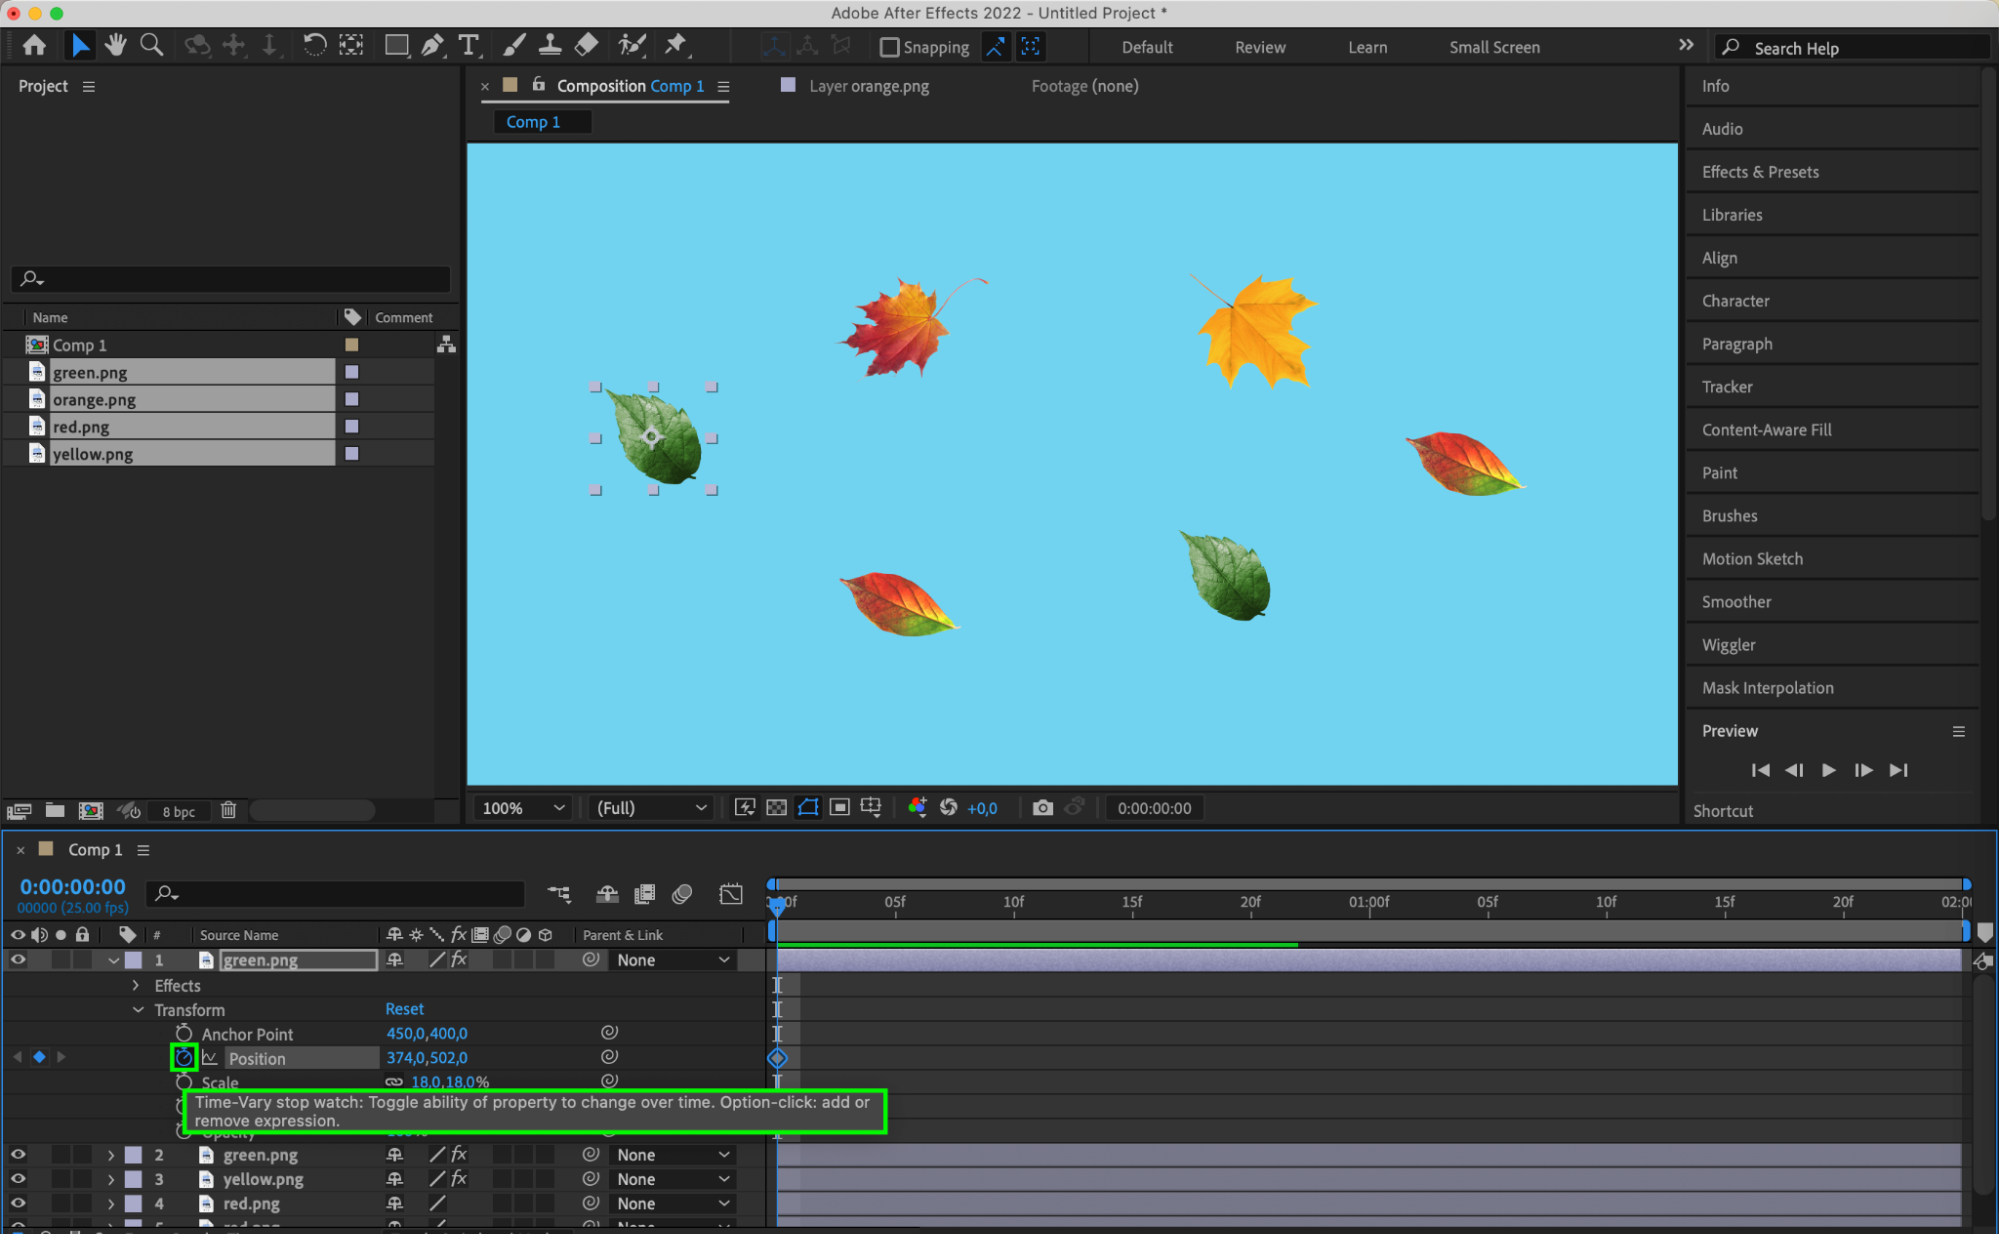
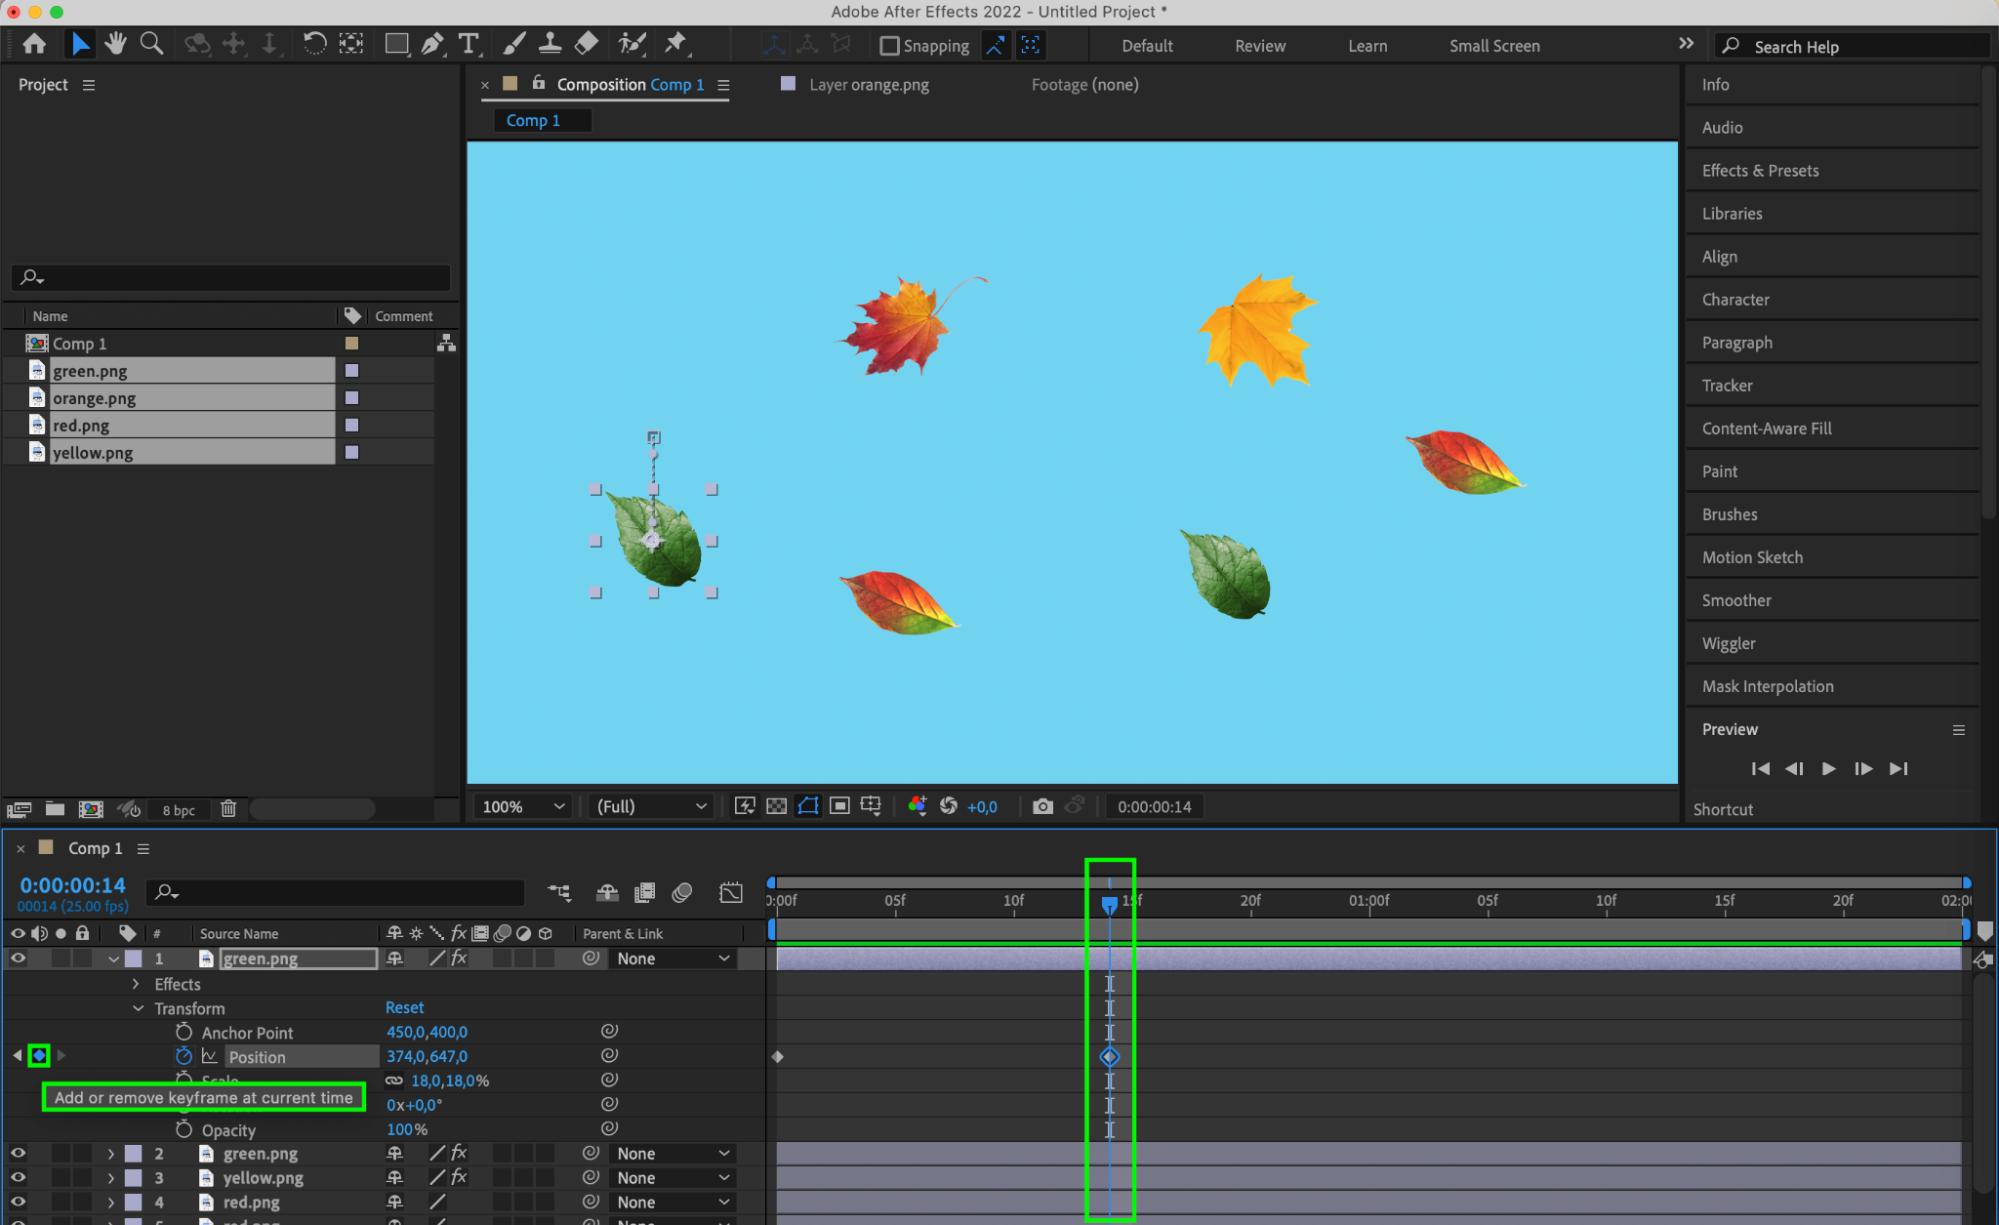
Select the layer you want to animate and press ‘P’ for position, ‘S’ for scale, ‘R’ for rotation, and ‘T’ for opacity. Click on the stopwatch icon next to each property to create keyframes. Move the playhead to a different time and adjust the property values to create animation.

5. Work with Keyframes:
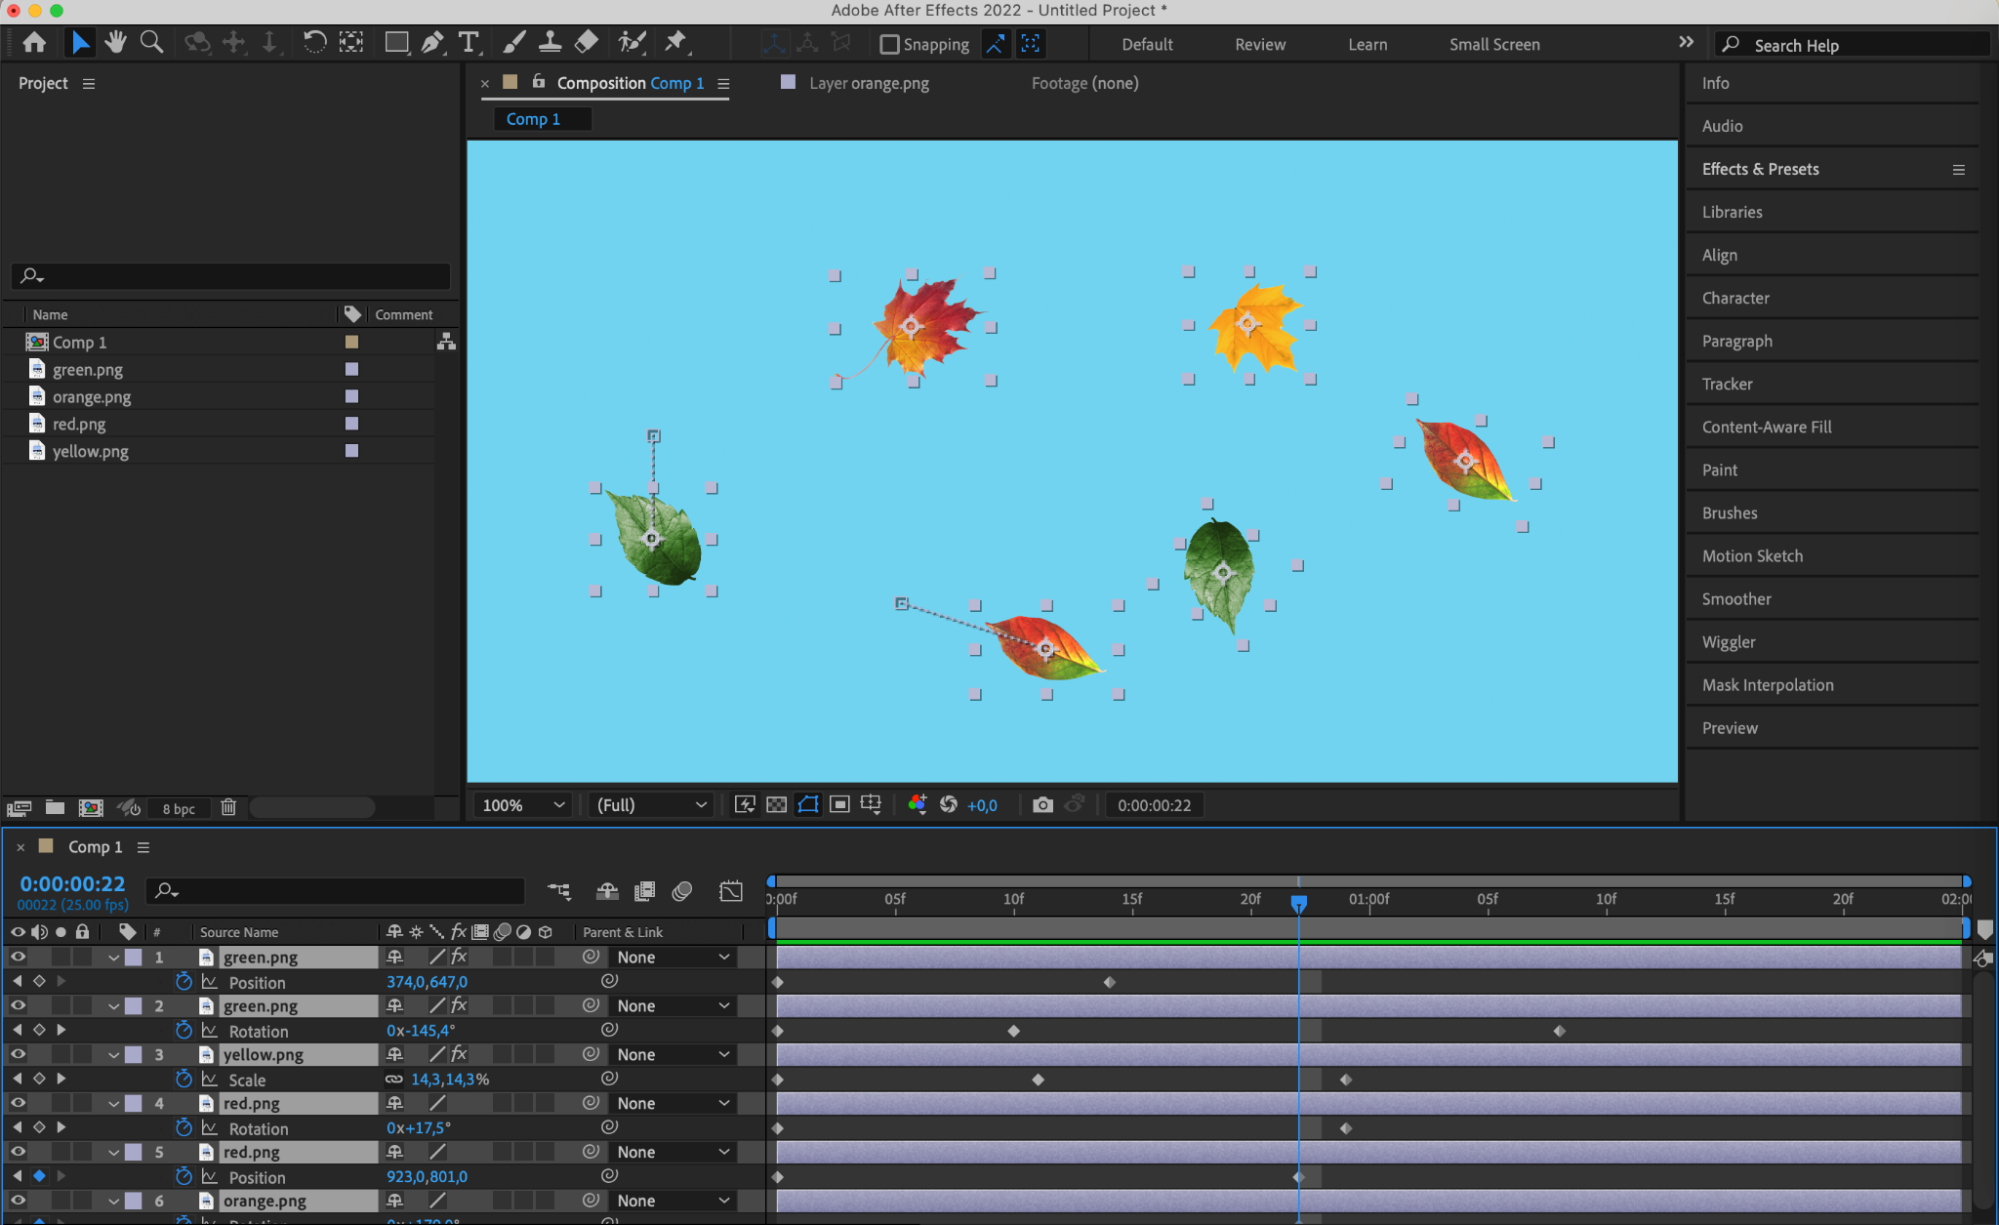
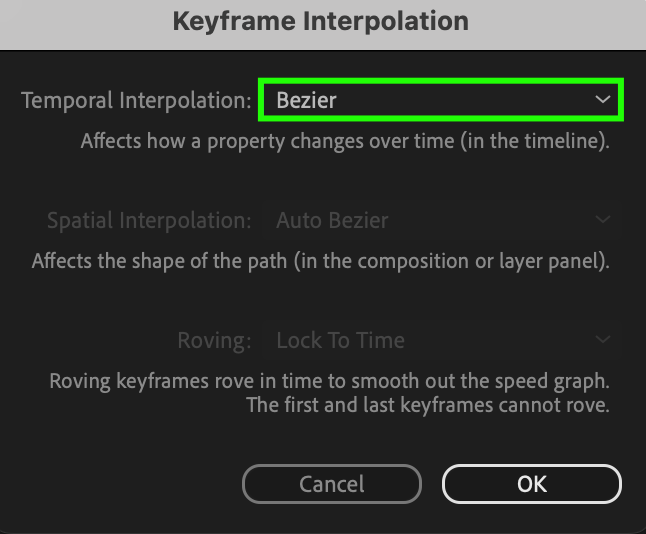
Keyframes are the foundation of animation in After Effects. They mark the beginning and end of an animation sequence. Experiment with different types of keyframes (linear, bezier, etc.) to achieve the desired motion.
Get 10% off when you subscribe to our newsletter



Get 10% off when you subscribe to our newsletter

6. Utilize Parenting and Null Objects:
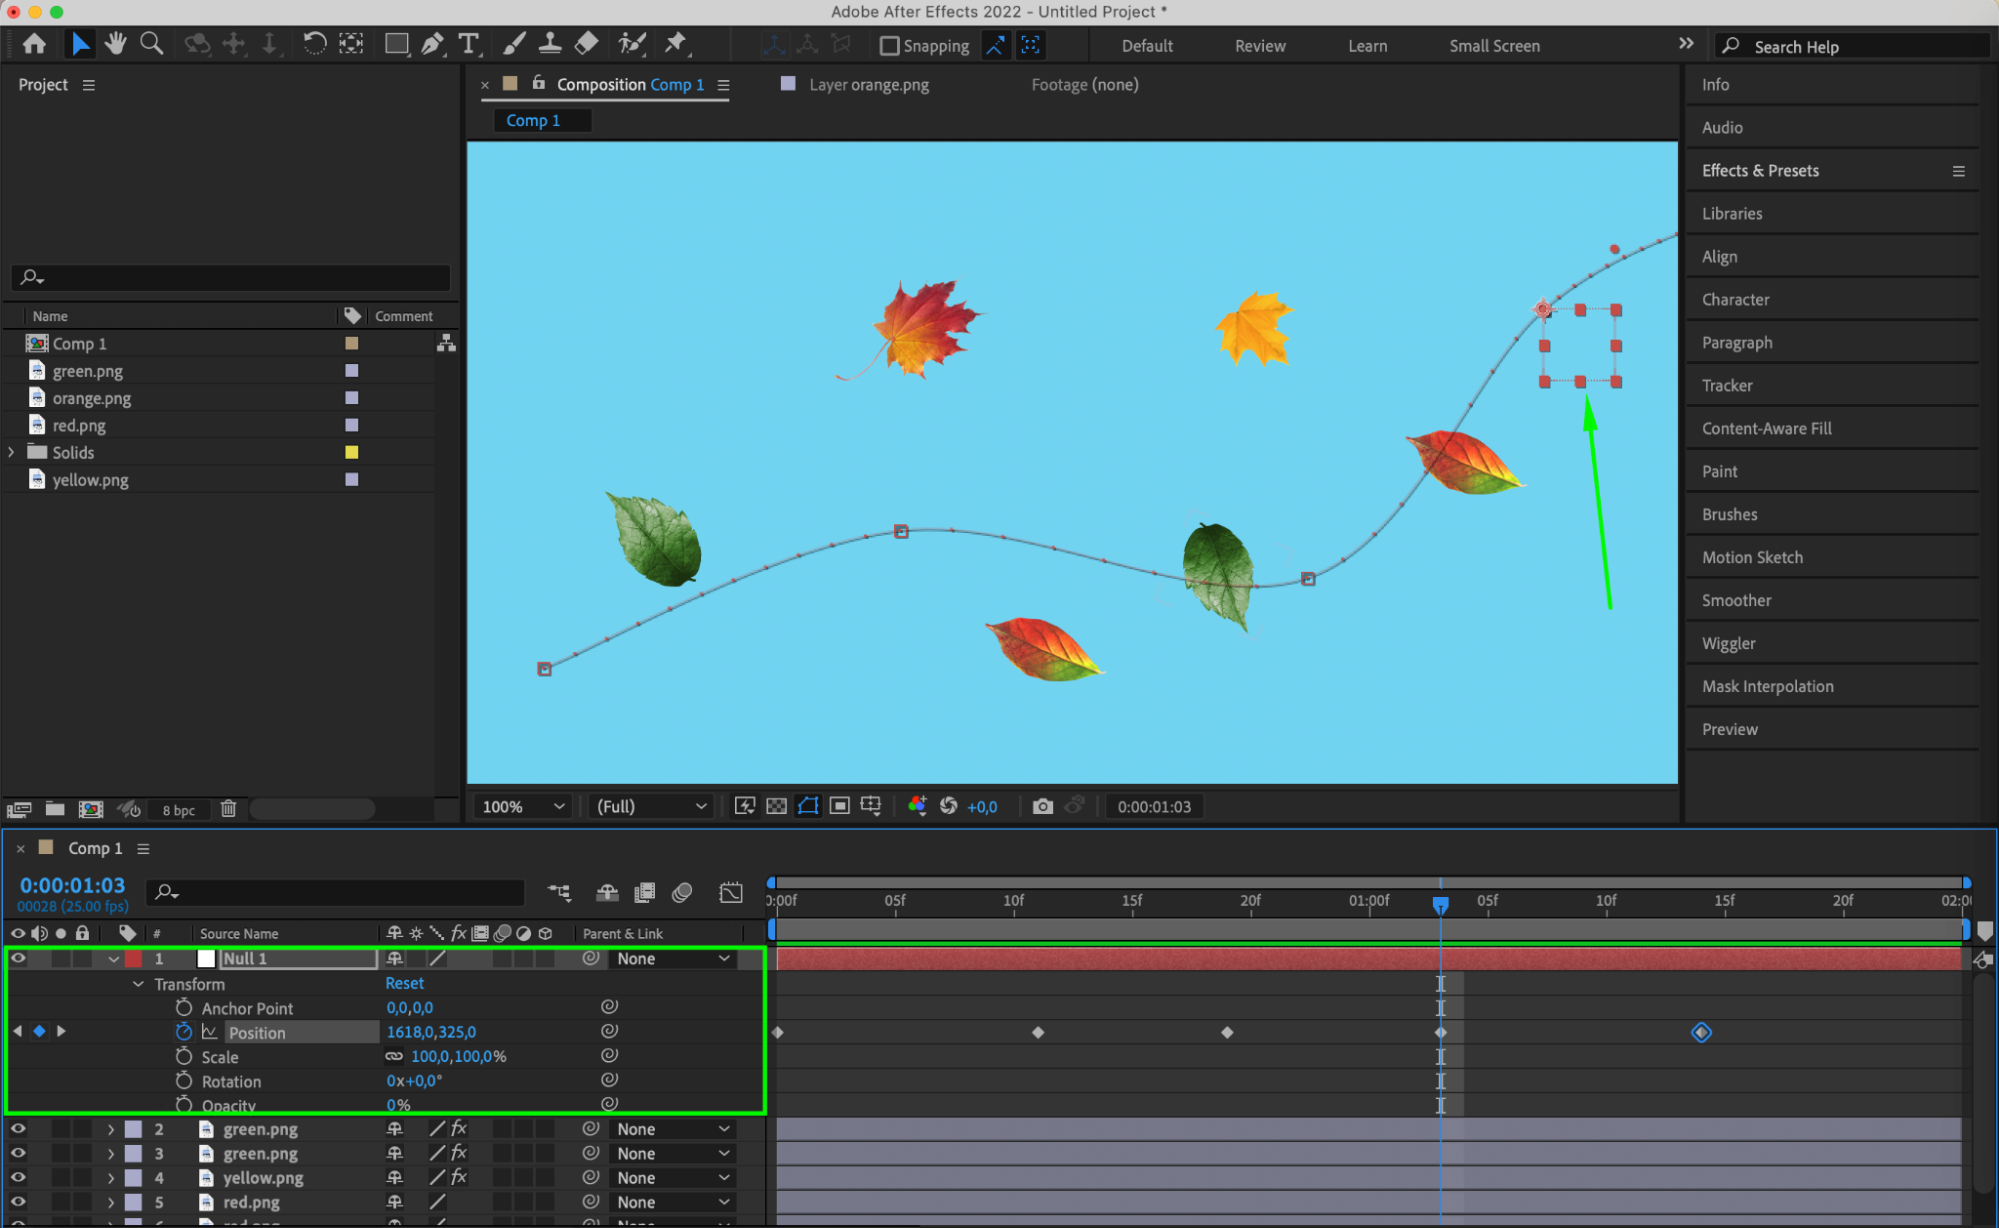
Parenting in Adobe After Effects involves linking the motion of one layer to another. By creating a null object and parenting layers to it, you can control the animation of multiple layers simultaneously. This technique simplifies complex animations, allowing for efficient motion control and organization within your composition.

Get 10% off when you subscribe to our newsletter



Get 10% off when you subscribe to our newsletter

7. Use Animation Presets:
After Effects provides various animation presets that you can apply to your layers to create complex animations quickly. You can find these presets in the Effects & Presets panel.

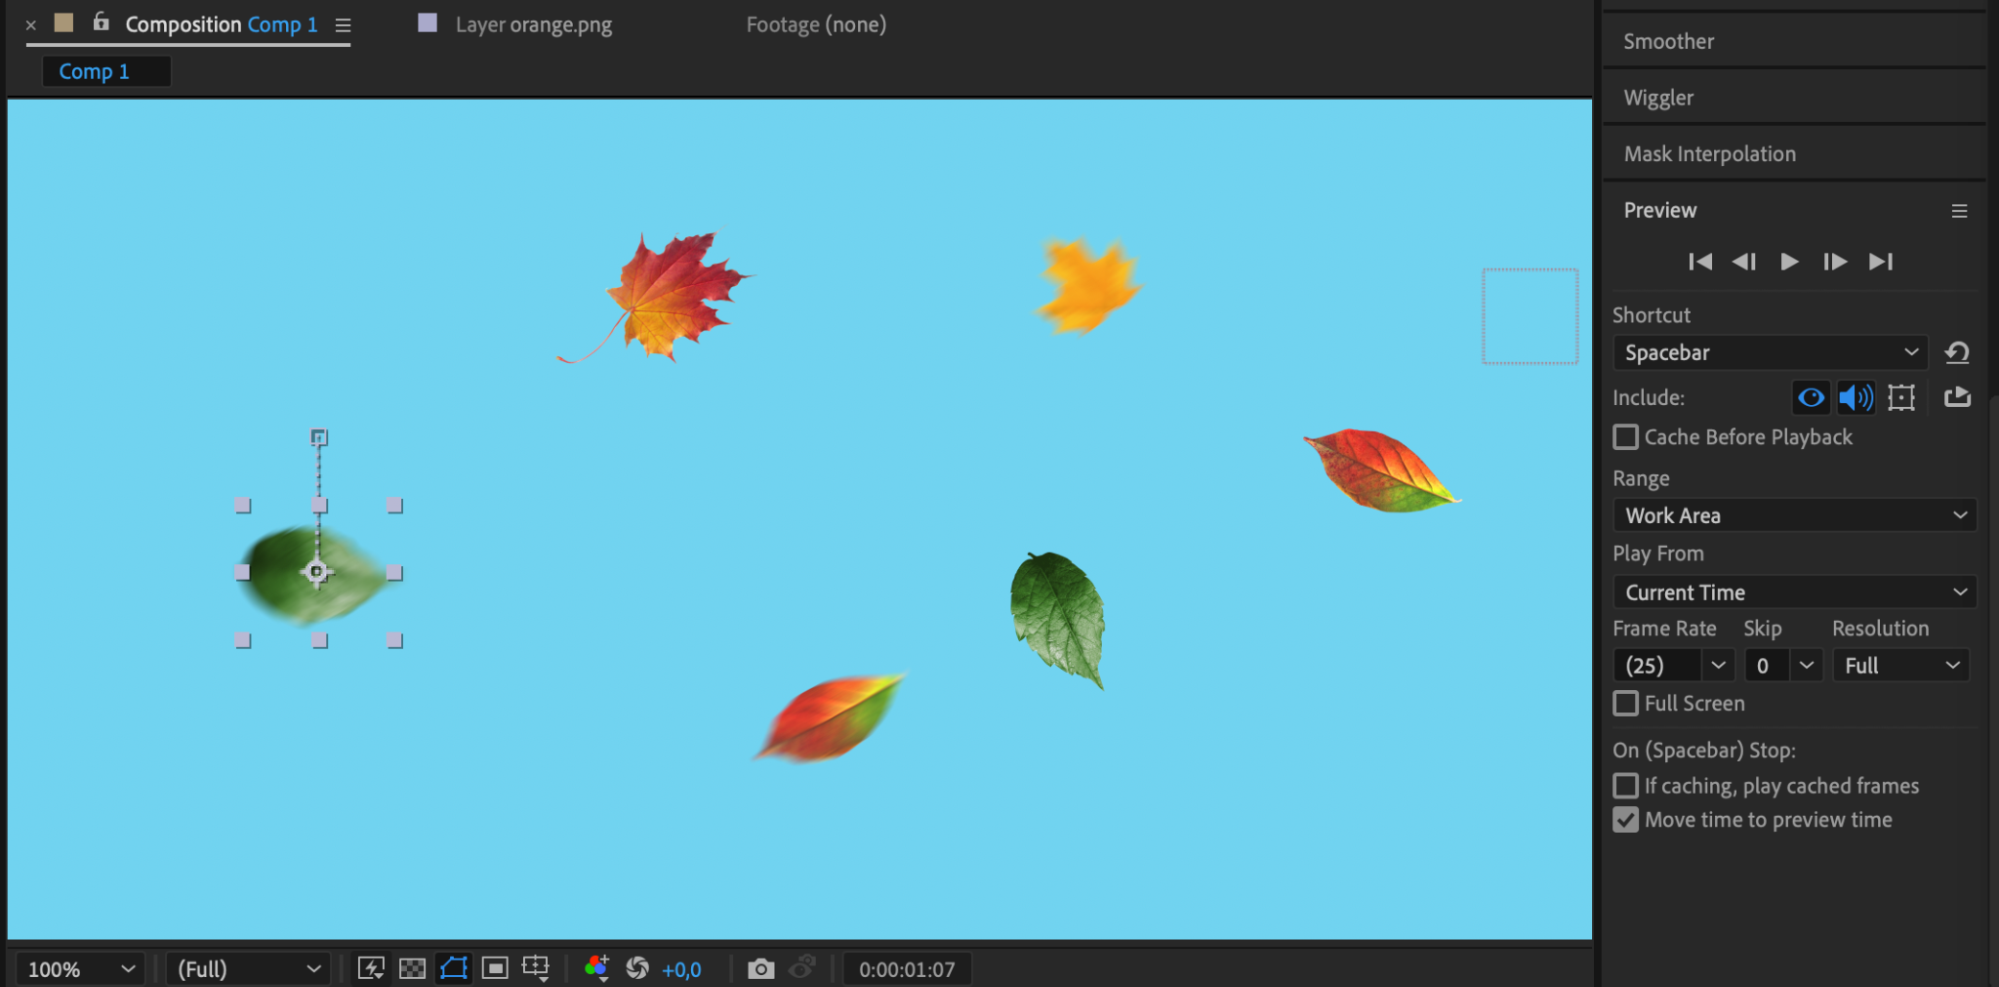
8. Enable Motion Blur for Realistic Motion:
By toggling the “Enable Motion Blur” button in Adobe After Effects, you can quickly add a sense of realism to your animations by simulating motion blur. This feature helps to mimic the blurring effect that occurs naturally when objects move quickly in real life. Simply enable the motion blur option for individual layers or the entire composition to enhance the fluidity and believability of your motion graphics.

Get 10% off when you subscribe to our newsletter


9. Preview Your Animation:
Utilize the preview feature in Adobe After Effects by pressing the spacebar to view your animation in real-time. This allows you to assess the motion and timing of your elements. Make adjustments to the timing and easing to fine-tune your animation for the desired effect, ensuring smooth and polished motion.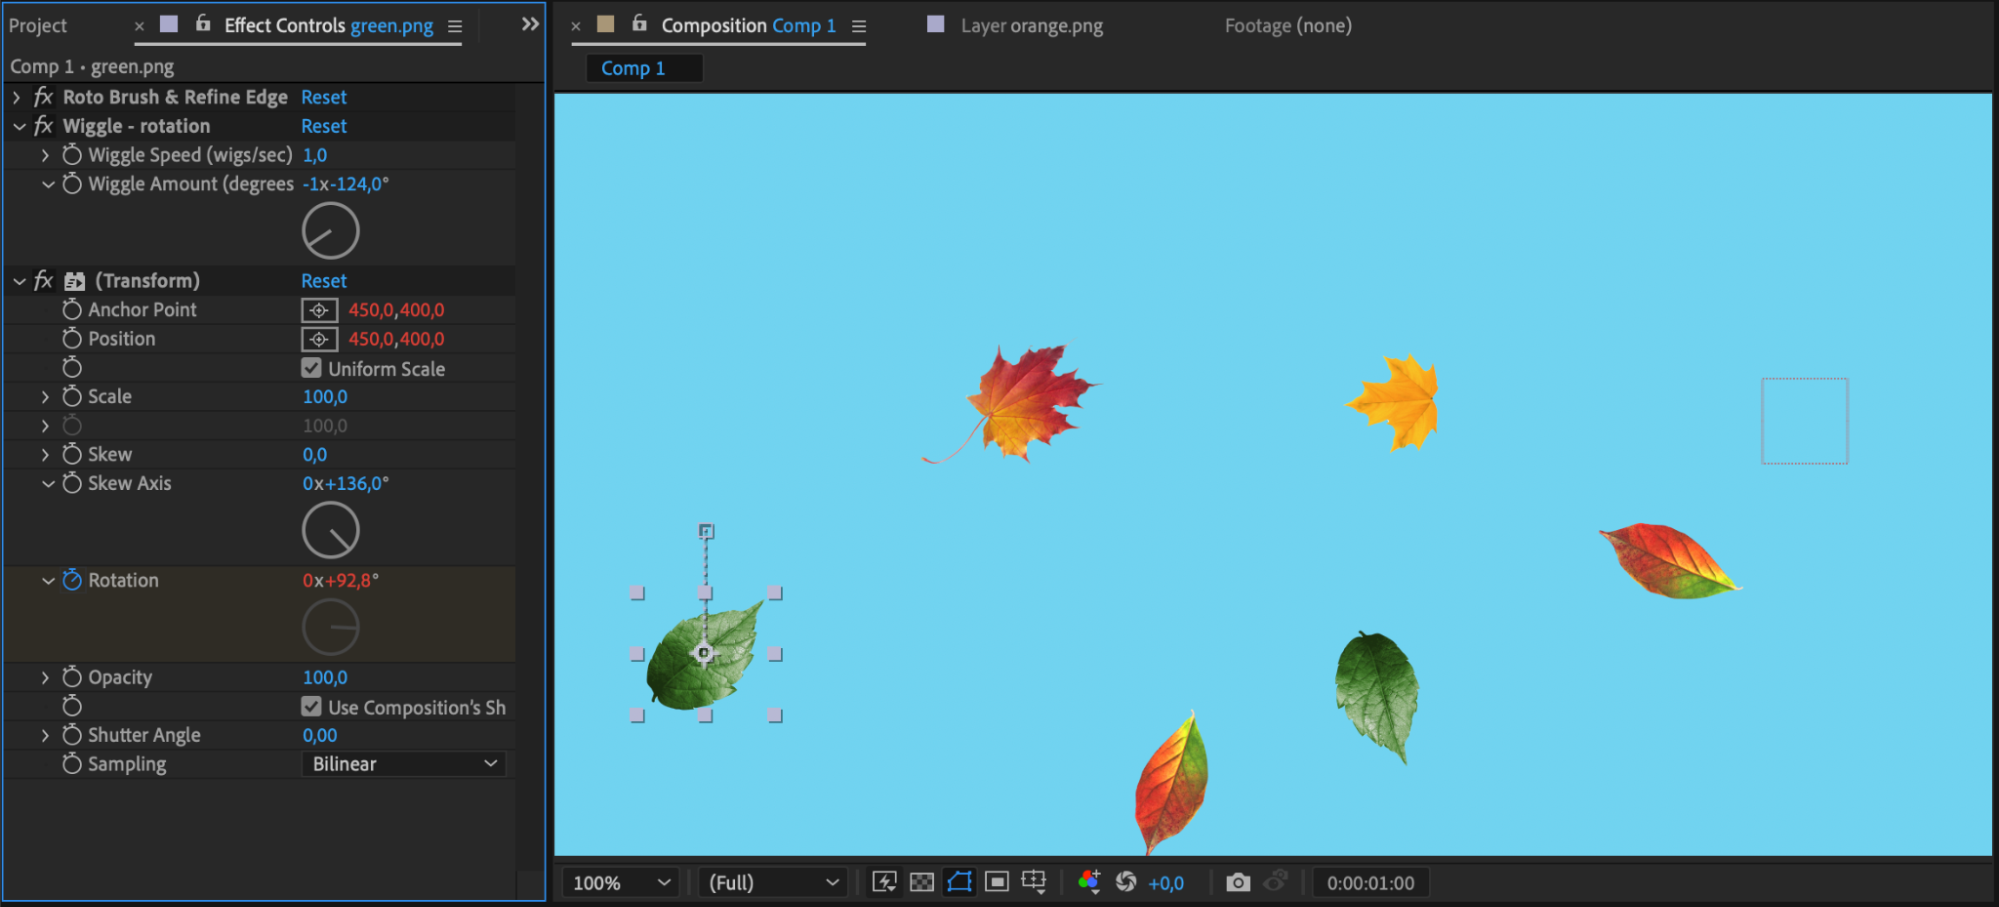
Conclusion
By the conclusion of this guide, you will have acquired a comprehensive skill set and creative mindset to animate using Adobe After Effects with confidence and finesse. Whether you’re creating animations for personal projects, client work, or educational purposes, this article will serve as a valuable resource to sharpen your animation skills and push the boundaries of what is possible in the realm of motion graphics. Embrace the art of animation, unlock your creative potential, and let Adobe After Effects be your canvas for bringing your wildest imaginations to life in mesmerizing motion graphics. Let’s dive deep into the magical world of animation and watch as your visions take flight in vibrant and captivating animations that leave a lasting impact.


