Using 3D Animation Presets in Adobe After Effects
Introduction to 3D Presets for Motion Graphics and Design
Adding 3D animation to your videos helps create more depth and visual interest. With 3D animation presets, you can animate text, shapes, and imported models in After Effects quickly and professionally. This 3D animation presets tutorial will show you how to use AEJuice tools — some of the best 3D animation templates for motion graphics — to enhance your project with just a few clicks.
Step 1: Set Up a 3D-Ready Project
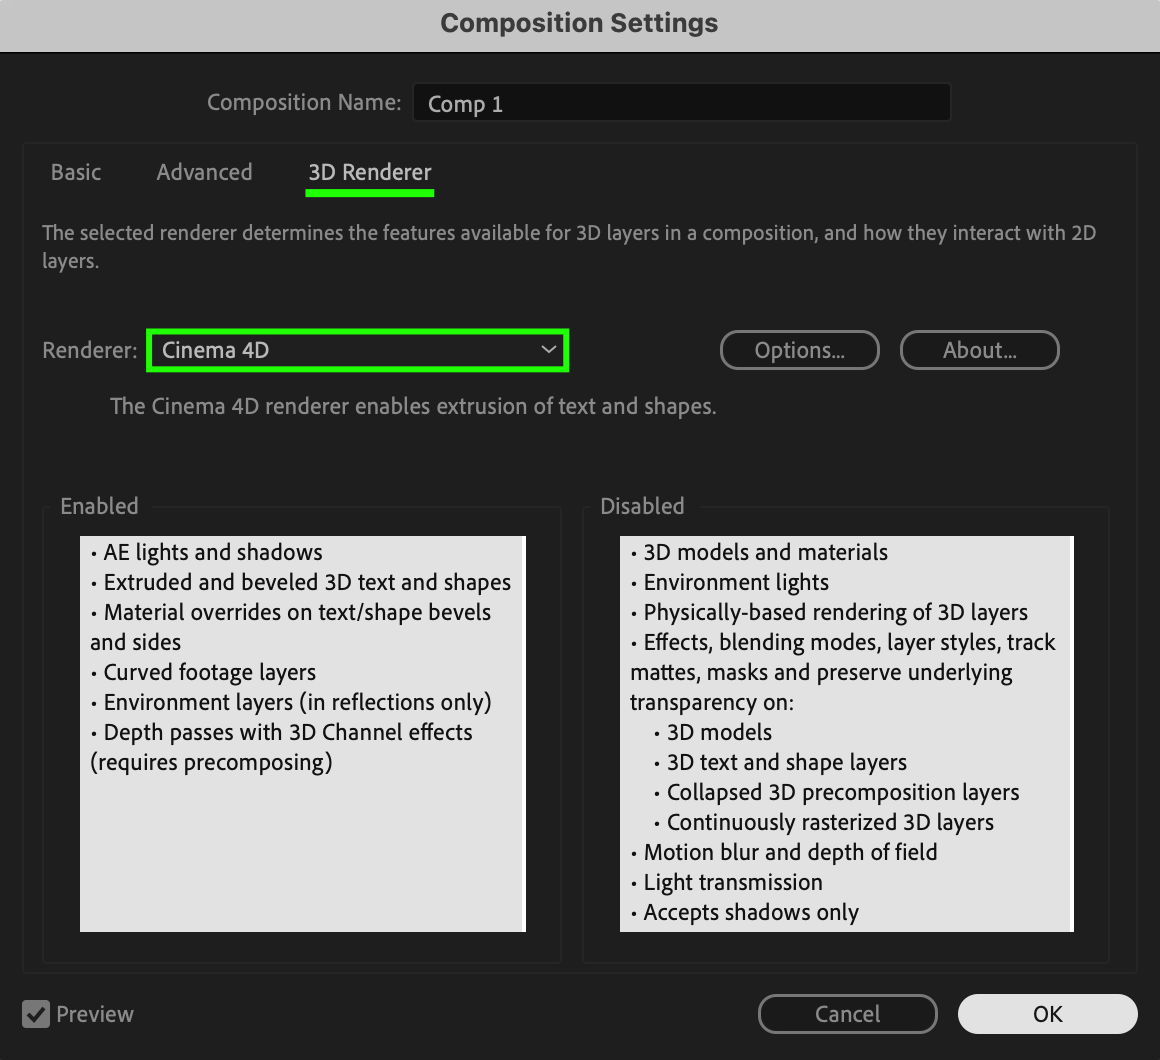
Start by opening your After Effects project. If you’re using 3D text or shapes (not imported 3D models), you’ll need to enable depth. Go to Composition > Composition Settings, and under the 3D Renderer tab, choose Cinema 4D as the renderer. This allows for features like extrusion and better 3D control.
Get 10% off when you subscribe to our newsletter

Step 2: Make Your Layer 3D
Go to the timeline and enable the 3D Layer switch by clicking the cube icon next to your layer. If you’re working with text or shapes, increase the Extrusion Depth to around 65 in the layer’s geometry options to give it a real 3D look in your scene.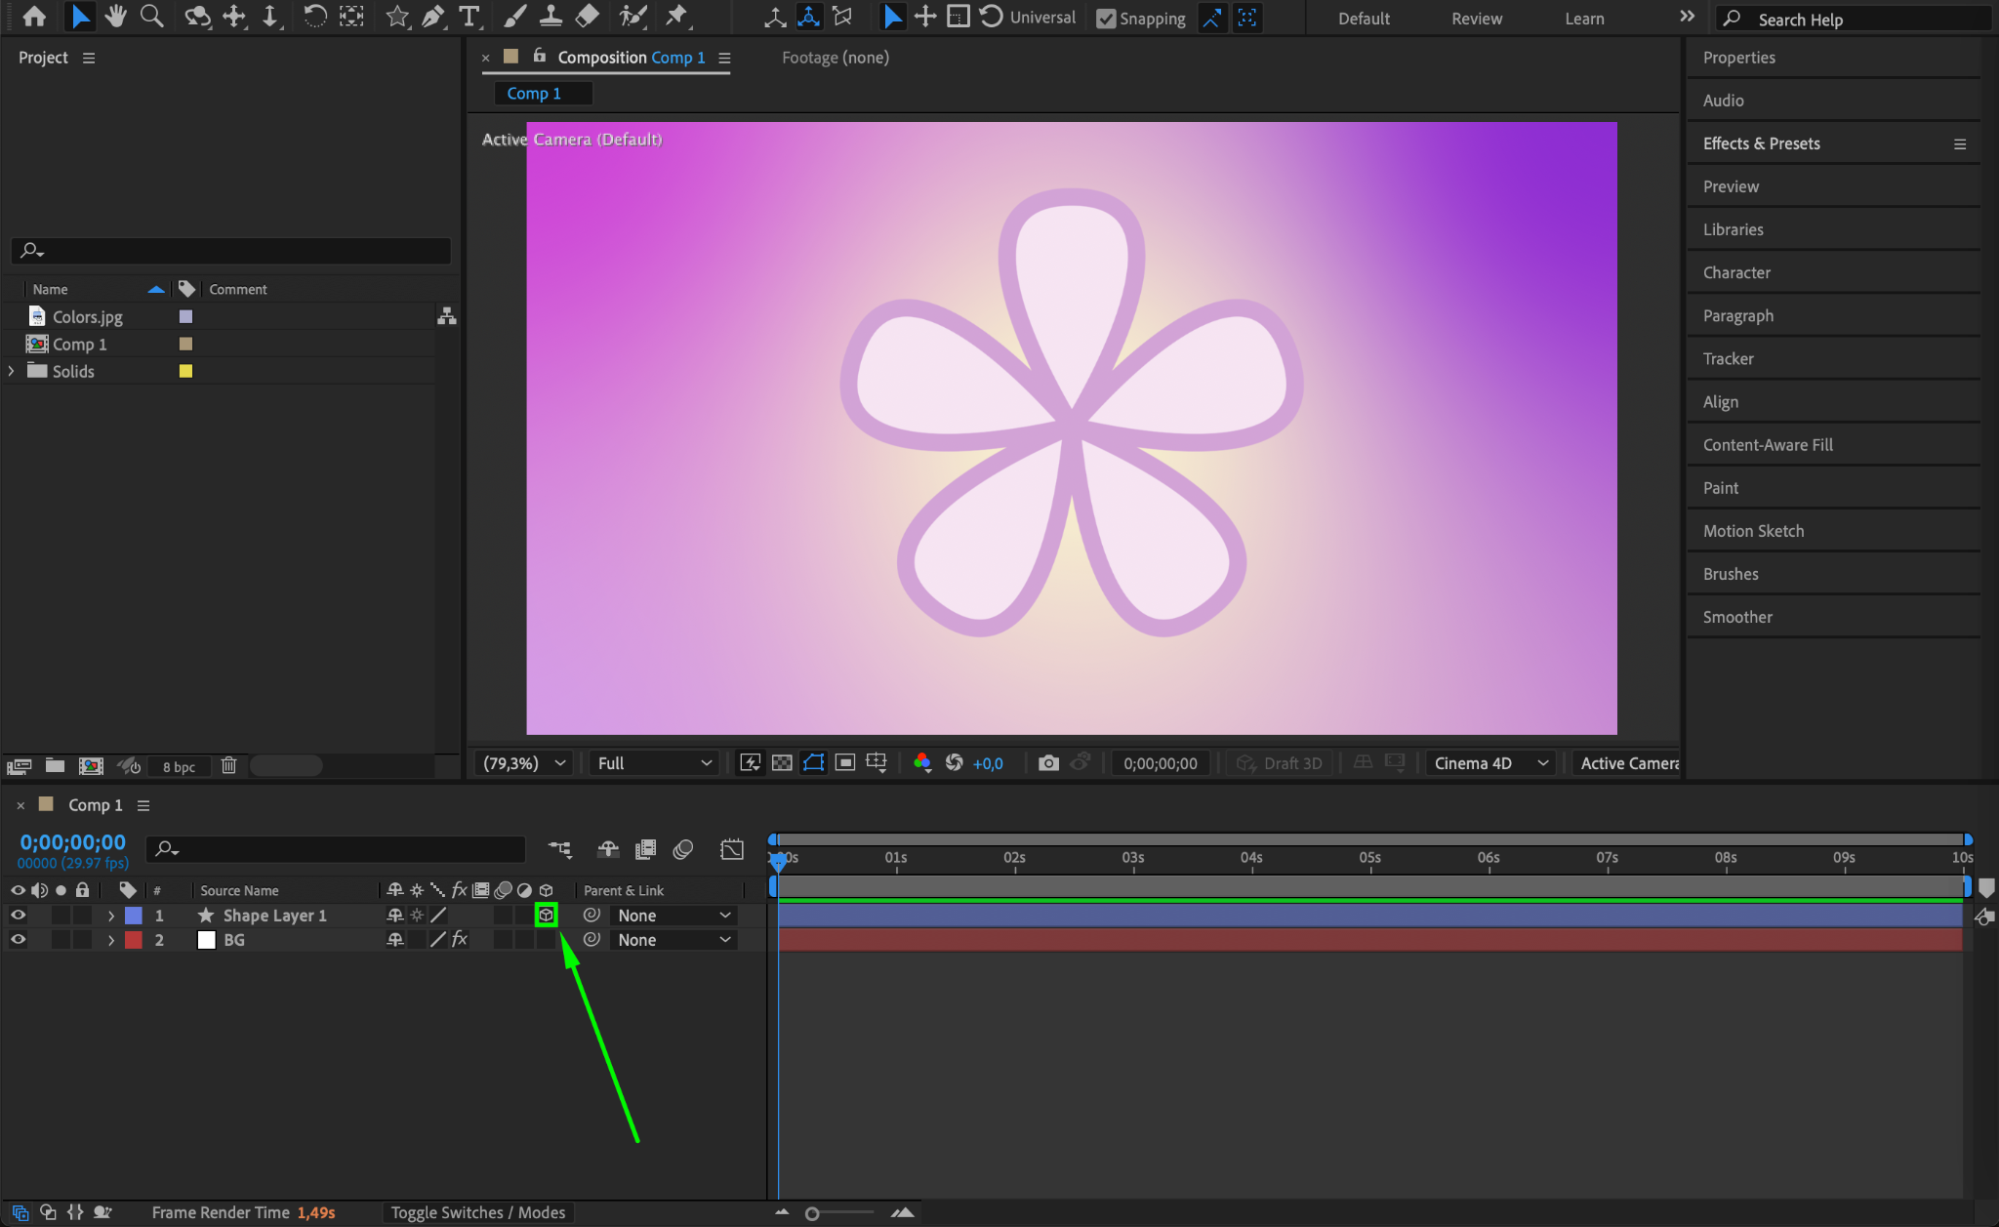
 Step 3: Open AEJuice Pack Manager
Go to Window > AEJuice Pack Manager 4 to open the AEJuice panel. This is where you can access all available animation packs and presets for your project.
Step 4: Download the 3D Animation Presets Pack
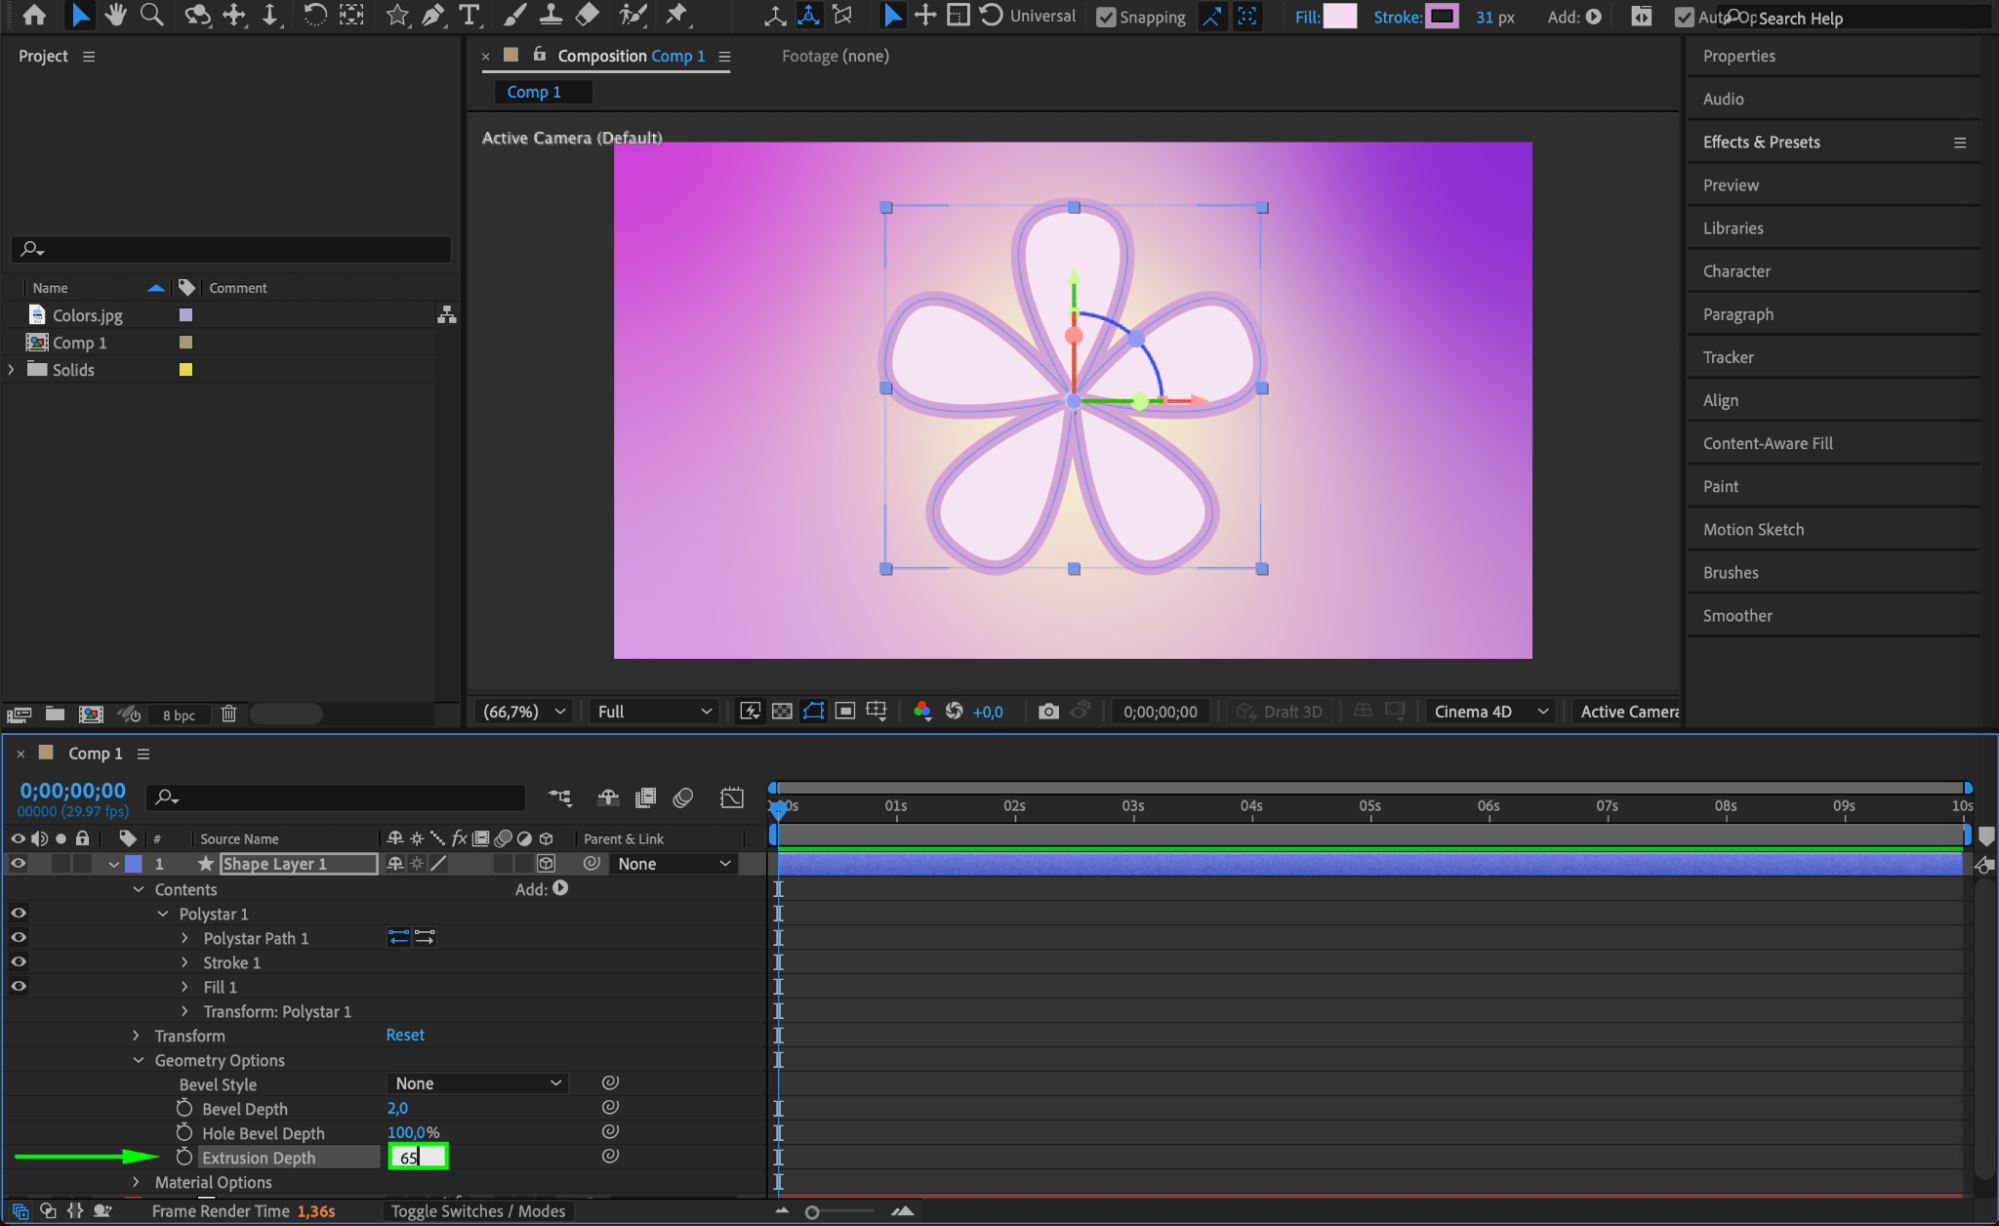
In the Pack Manager, search for the 3D Animation Presets Pack. If it’s not already installed, click to download it. Once downloaded, you can preview and select from many 3D-ready animation templates. Step 5: Apply a 3D Animation Preset
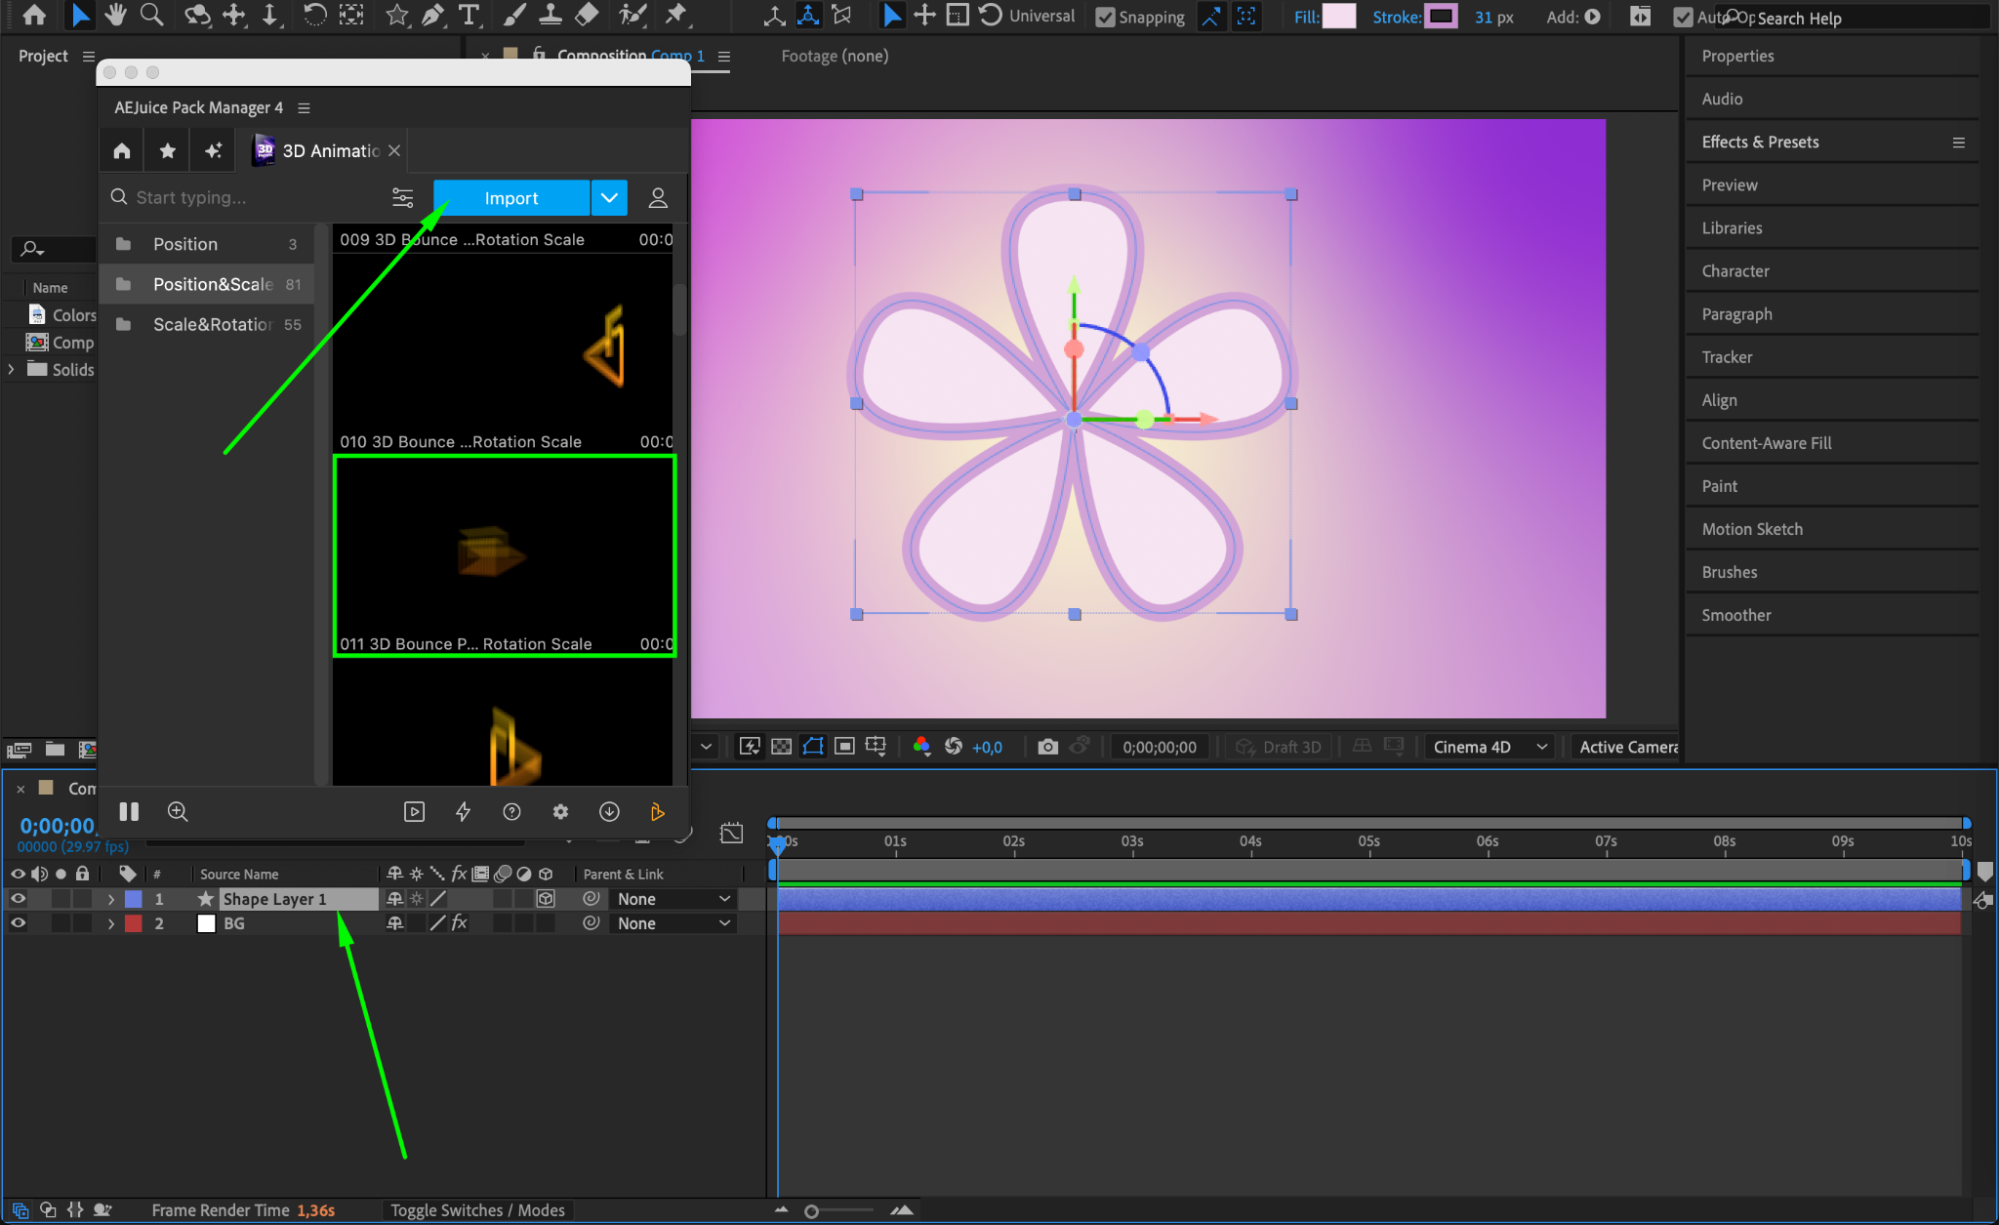
Select the 3D layer you want to animate. Then, in the AEJuice panel, choose your desired preset and click Import. The animation will be automatically added to your selected layer.
 Step 6: Customize
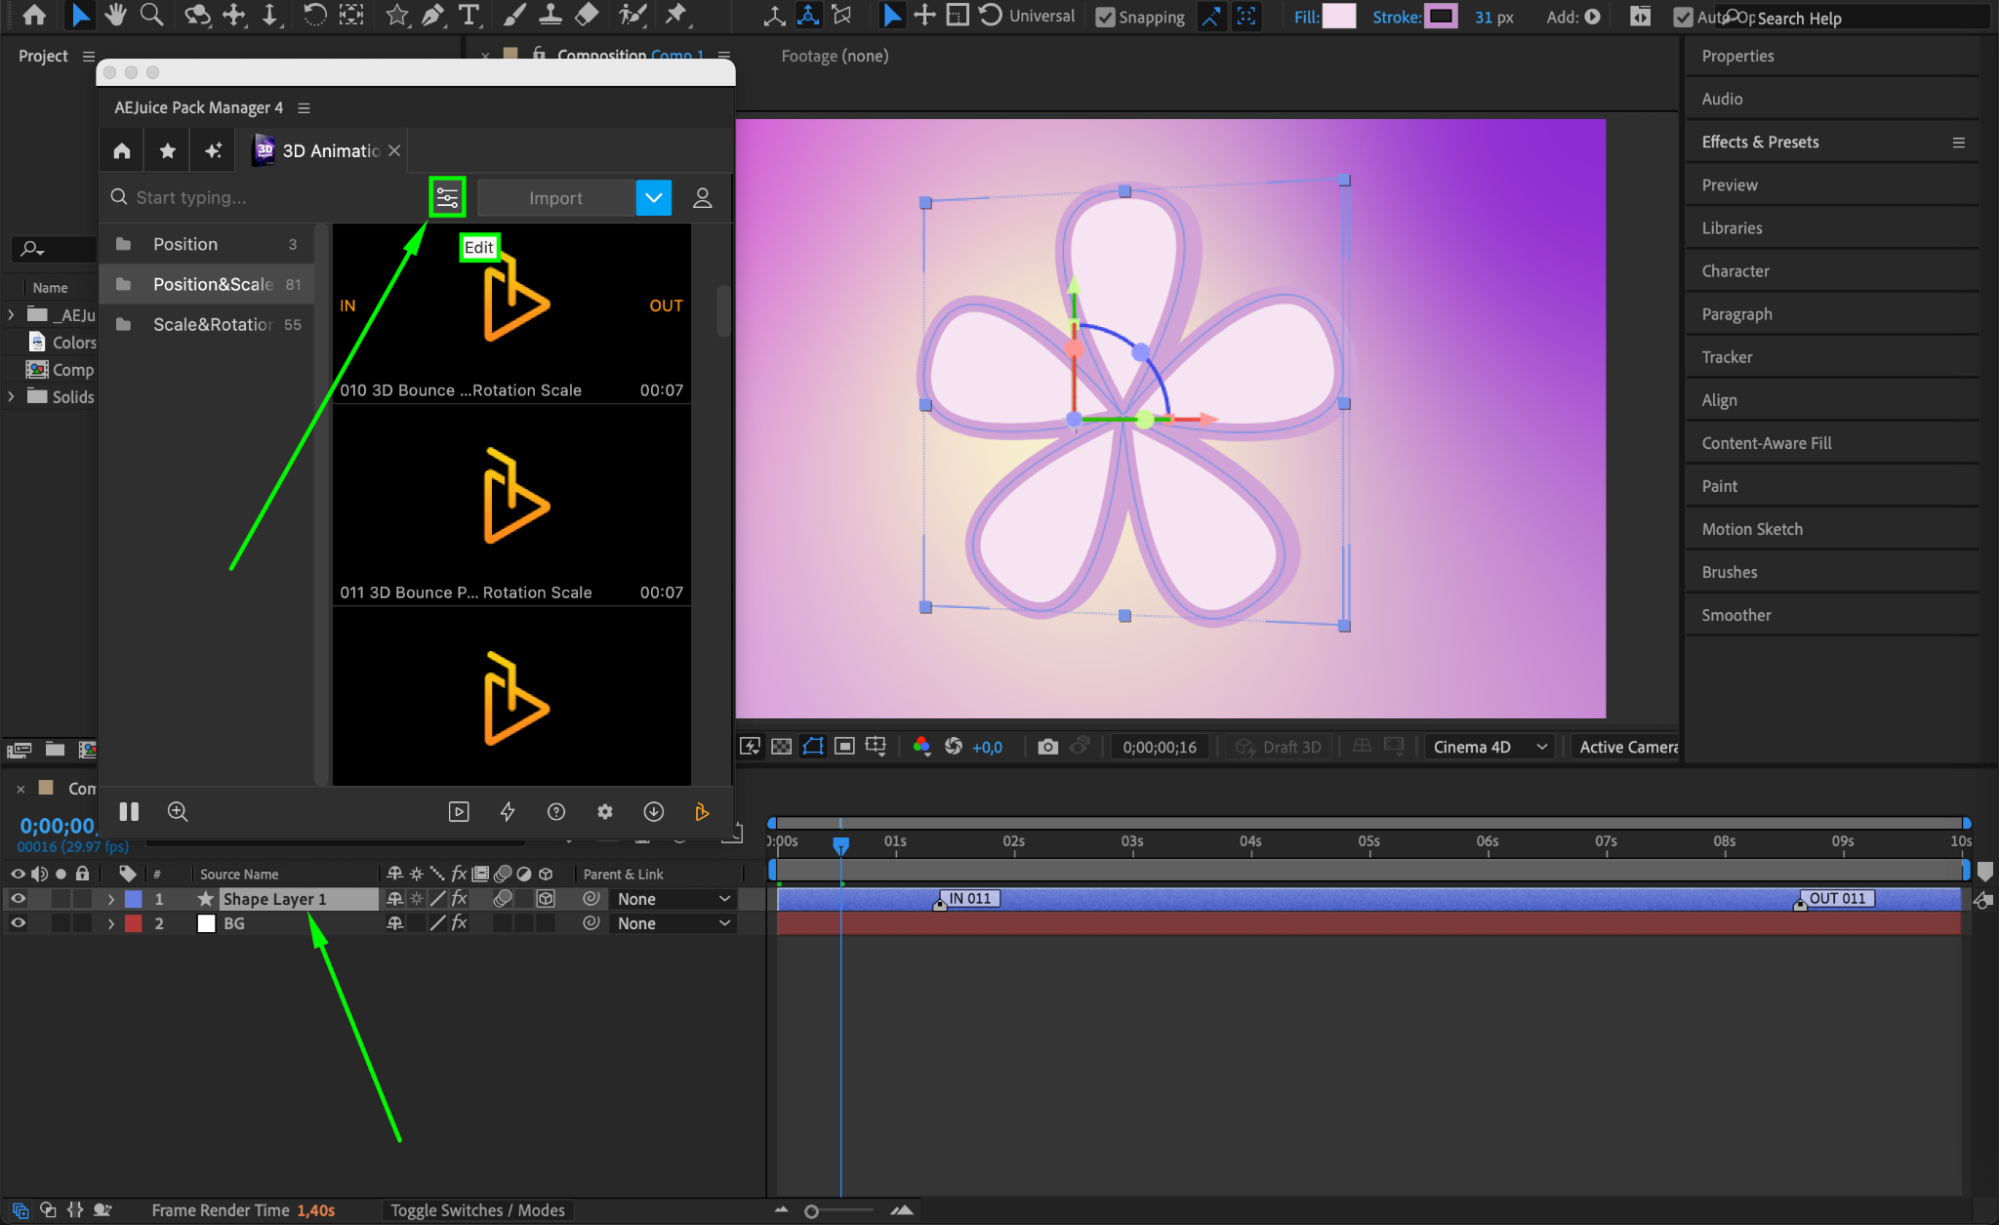
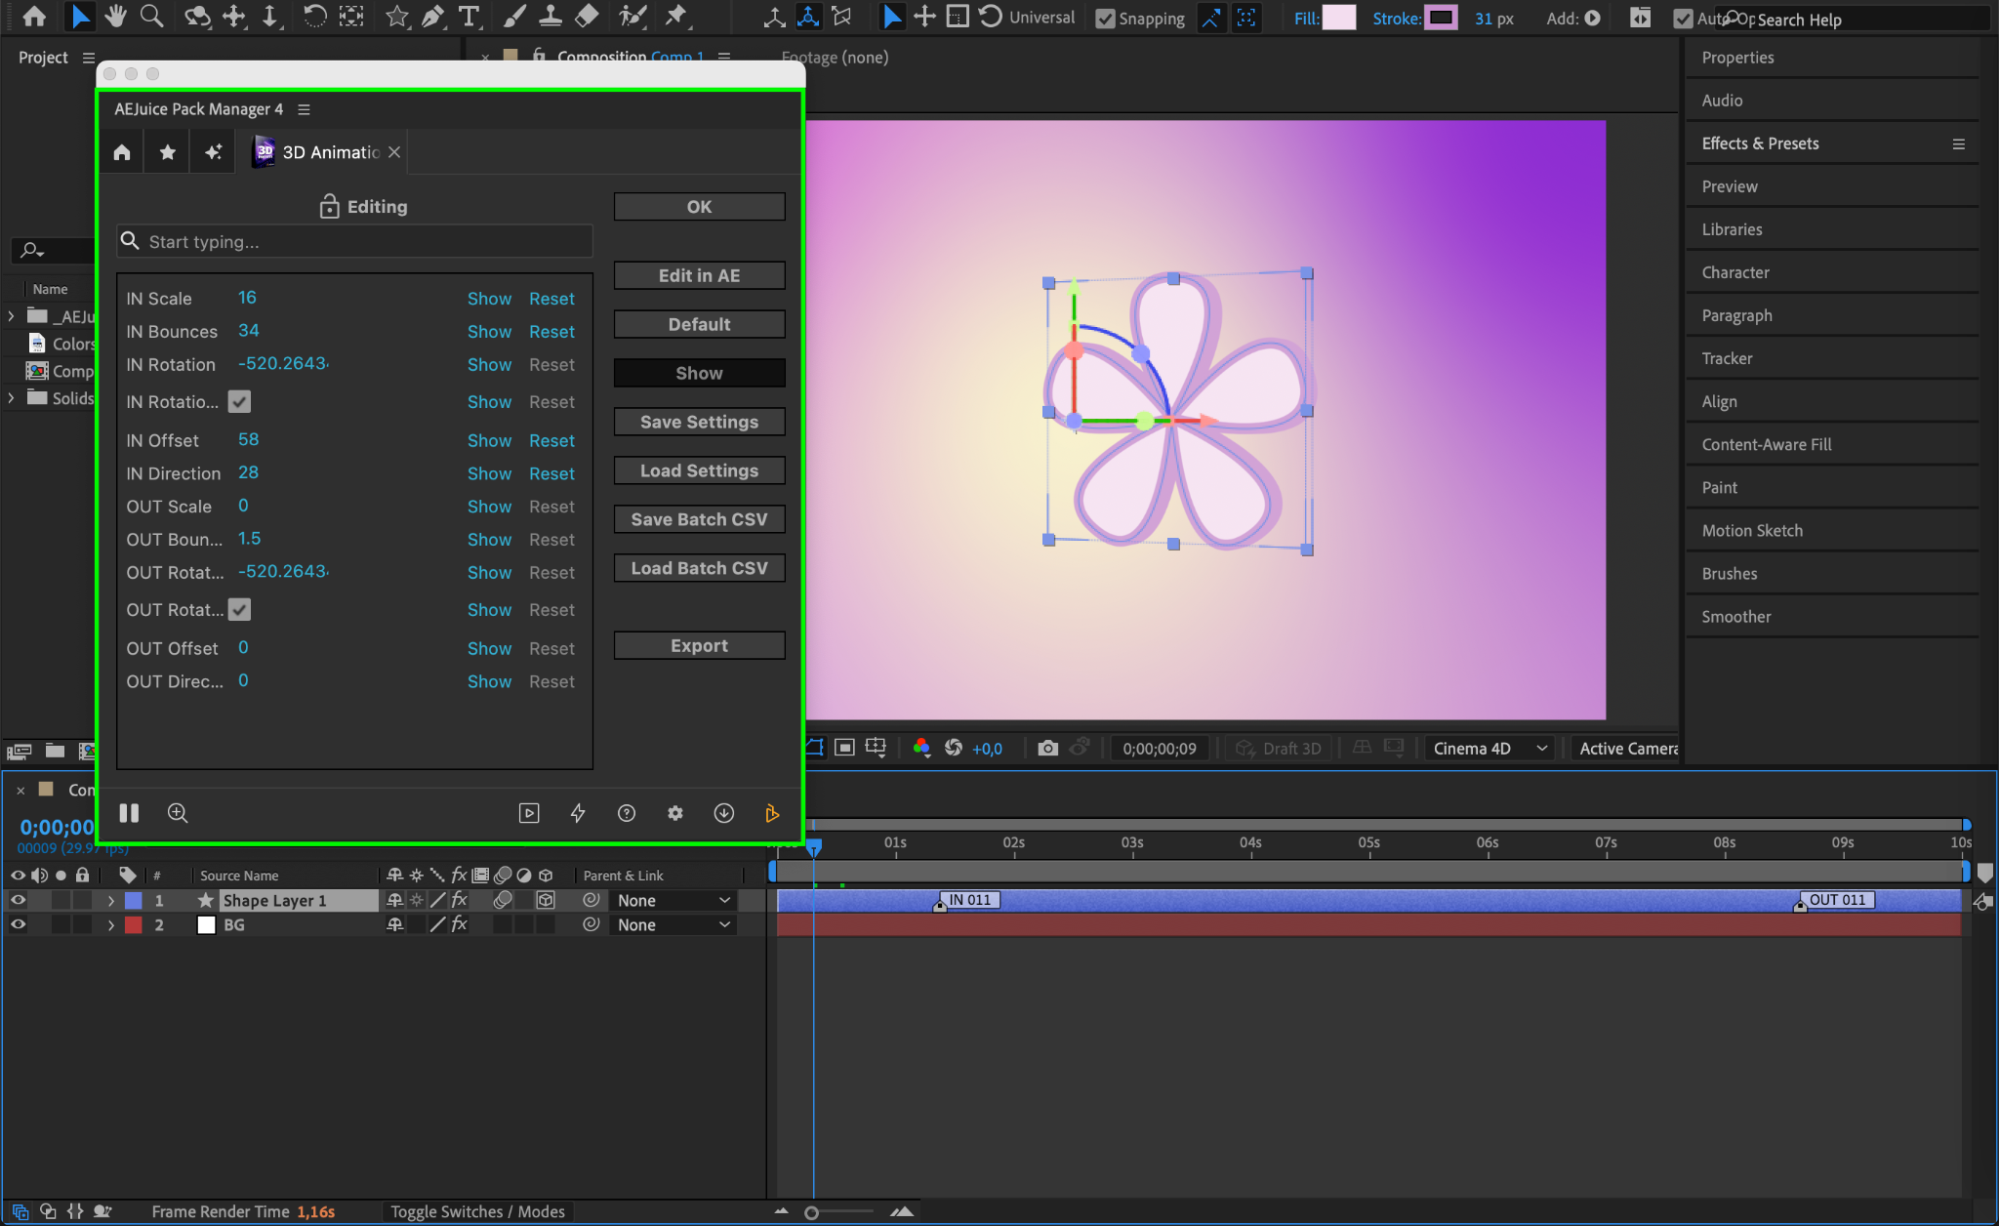
Select your 3D layer in the timeline. Then, in the AEJuice Pack Manager 4 panel, click the Edit button (represented by three sliders). This opens a customization panel where you can adjust settings like in/out scale, bounce, rotation, and other preset parameters to better fit your animation needs.
Step 7: Adjust In and Out Markers
On the timeline, you can move the In and Out markers of your layer to speed up or slow down the animation. This allows you to better control the pacing and rhythm of the 3D motion.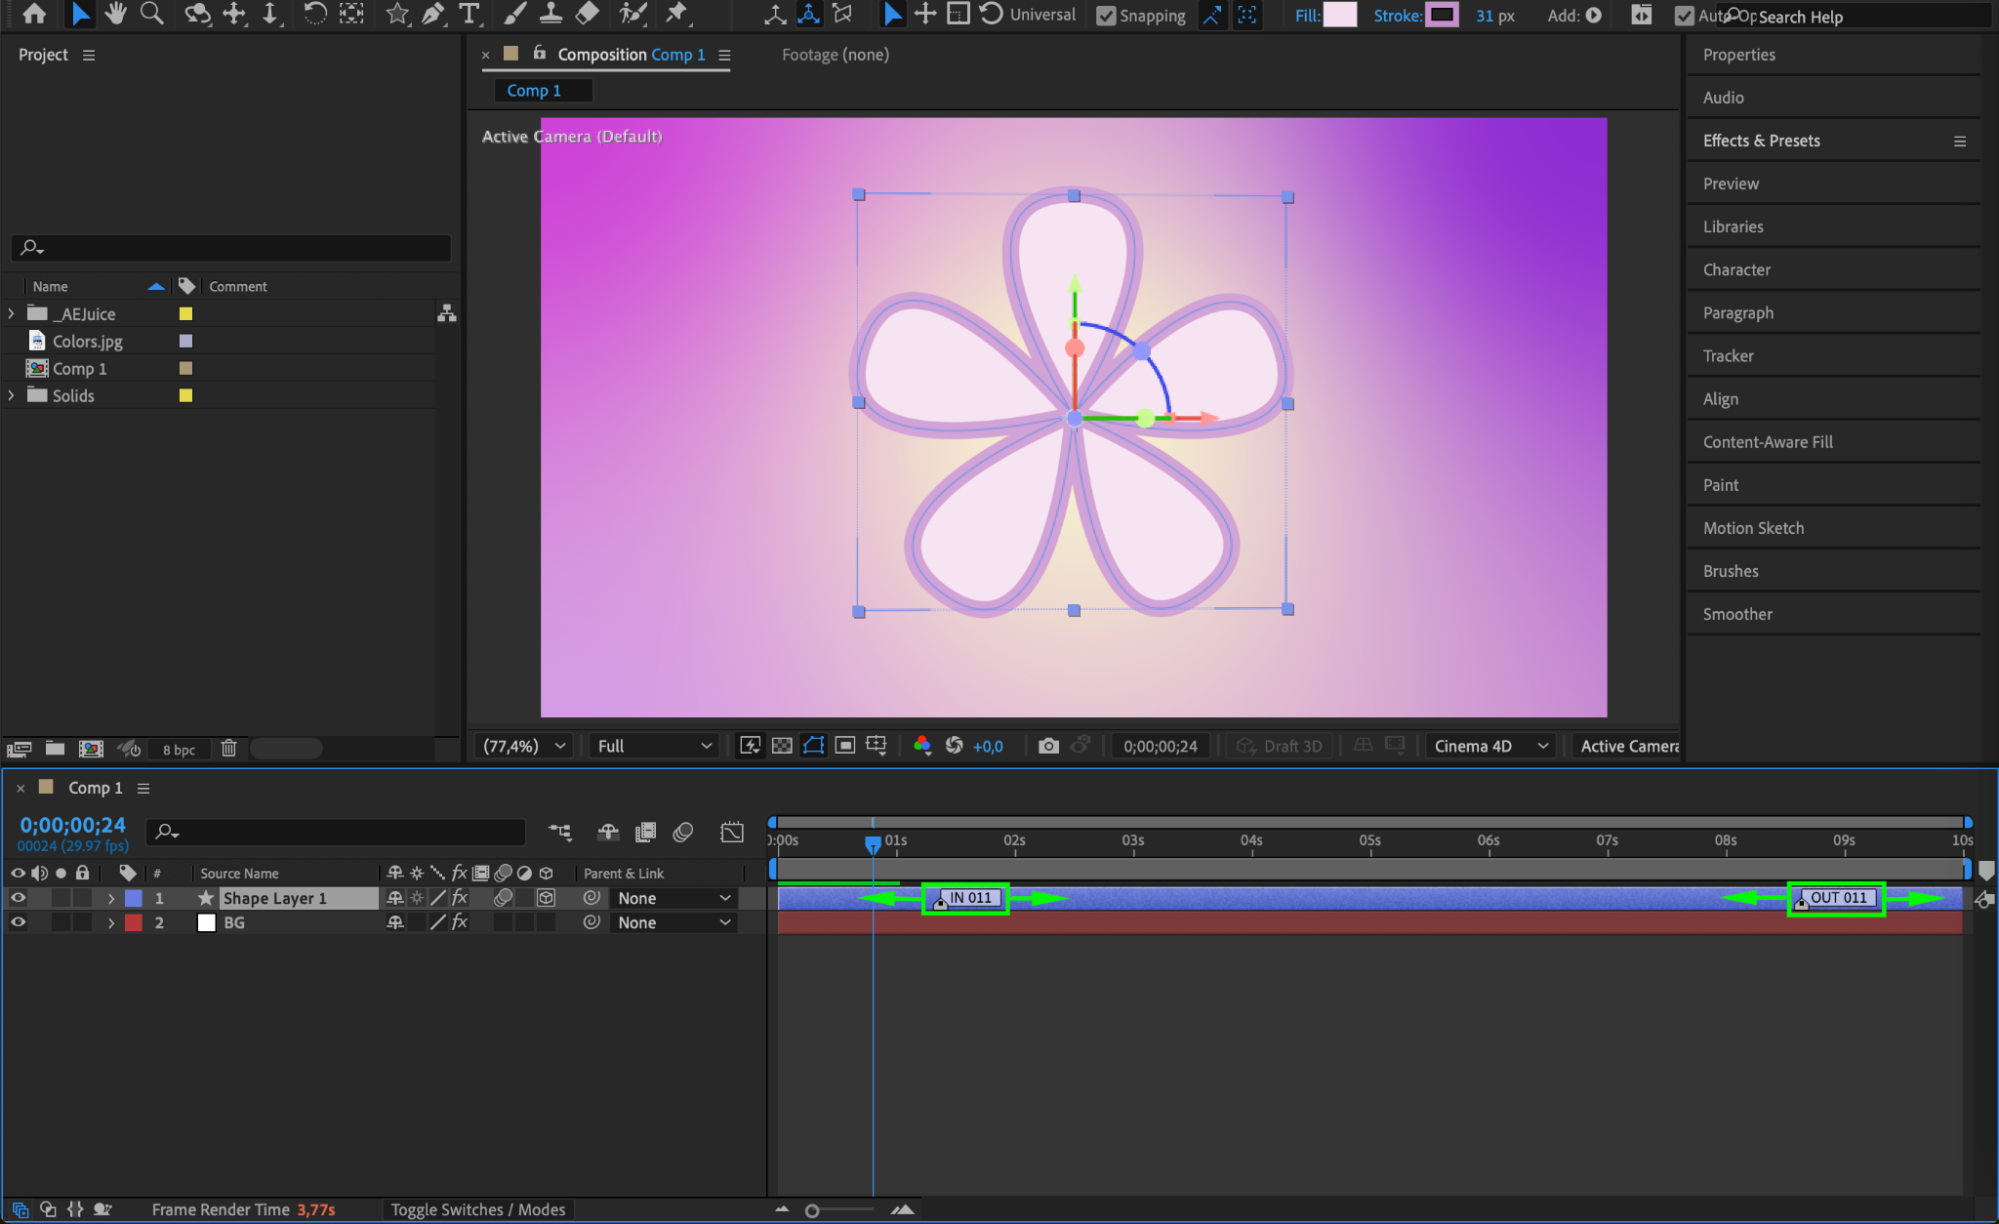 Step 8: Enable Motion Blur for Realism
Turn on the Enable Motion Blur for All Layers switch (the three overlapping circles icon at the top of the timeline panel). This will add a natural blur to fast movements, making your animation smoother and more realistic.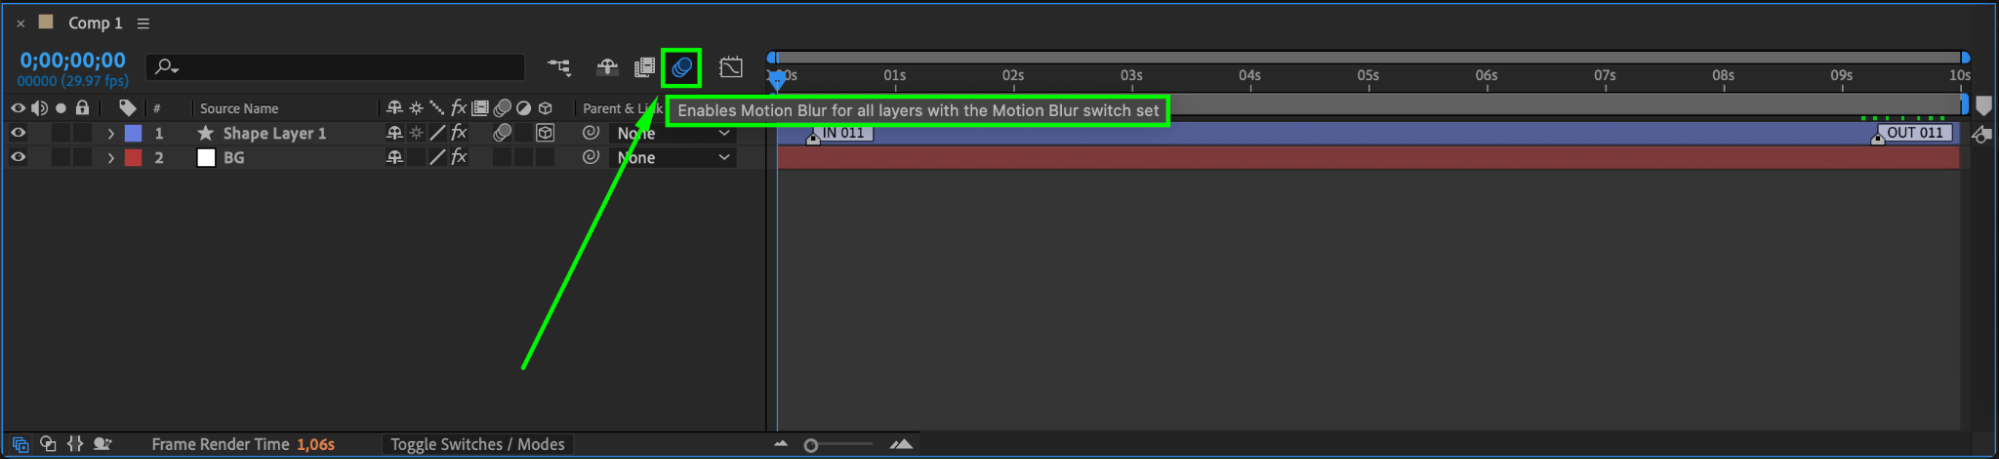 Step 9: Preview and Fine-Tune
Press Spacebar to preview your animation. Make final adjustments to the position, scale, rotation, or even add lights and shadows if you’re working in a 3D environment to enhance realism. Conclusion
By following these steps, you can easily animate 3D text, shapes, or objects using AEJuice’s ready-made presets. It’s a fast, flexible, and professional way to bring your motion graphics to life with high-quality 3D animation tools.
Our Bestsellers


