Mastering Linear Wipe Transitions in After Effects
Introduction: What is the Linear Wipe Effect?
The Linear Wipe effect in After Effects is a versatile transition that gradually reveals or hides a layer using a smooth, straight-line wipe. This effect is commonly used in video editing to add a polished and professional touch. In this guide, we’ll explore how to apply and customize a Linear Wipe transition step by step.
Get 10% off when you subscribe to our newsletter

Step 1: Import Your Files
To begin, import the files you want to use in your composition. Navigate to File > Import > File, select your media, and click Open. These files can include video clips, images, or other media assets needed for your project.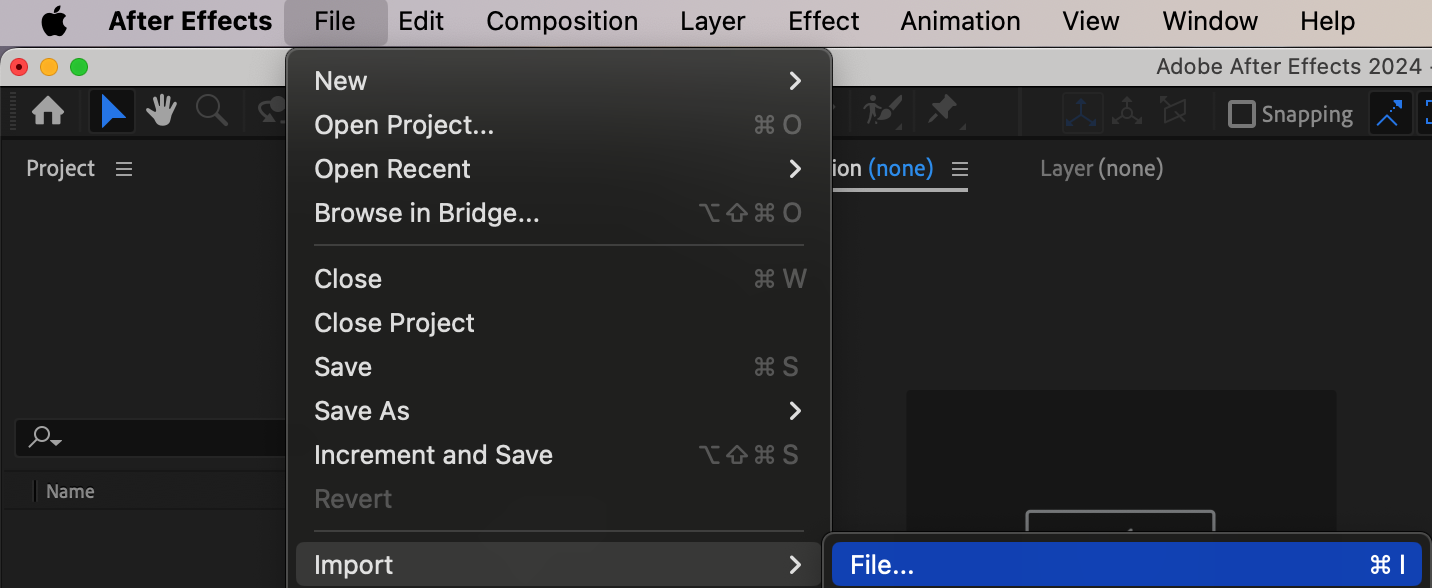 Step 2: Add Files to the Timeline
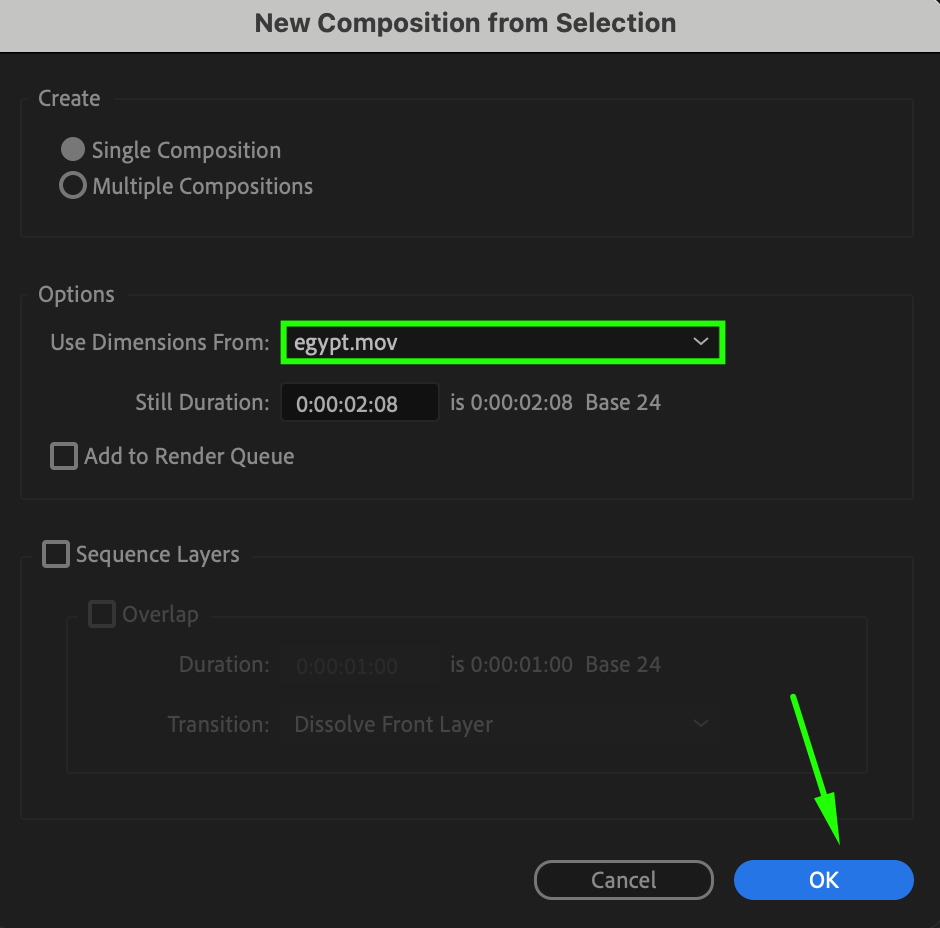
Drag your imported files from the Project Panel onto the timeline. Arrange them in the desired sequence, ensuring they are layered appropriately. Adjust the duration of each layer if needed by dragging the edges of the layers in the timeline to match your intended timing.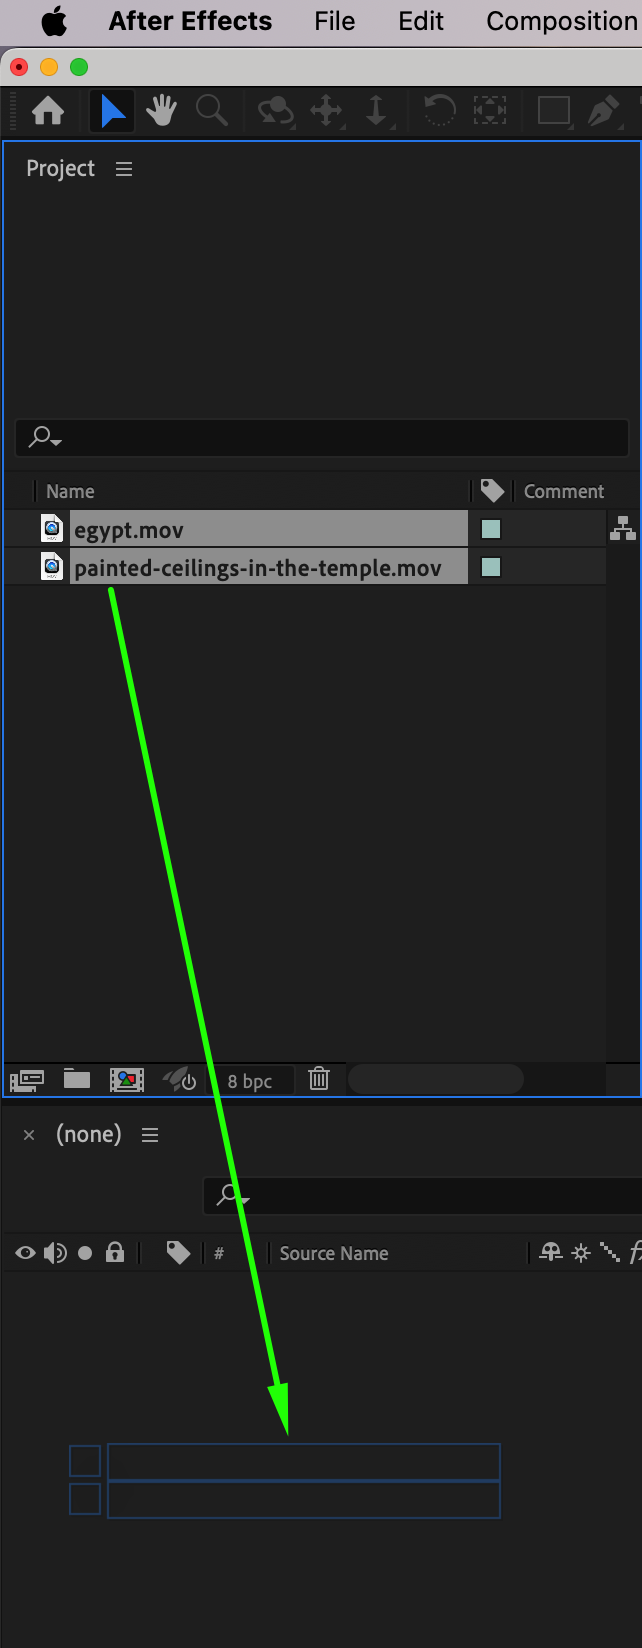
 Step 3: Locate and Apply the Linear Wipe Effect
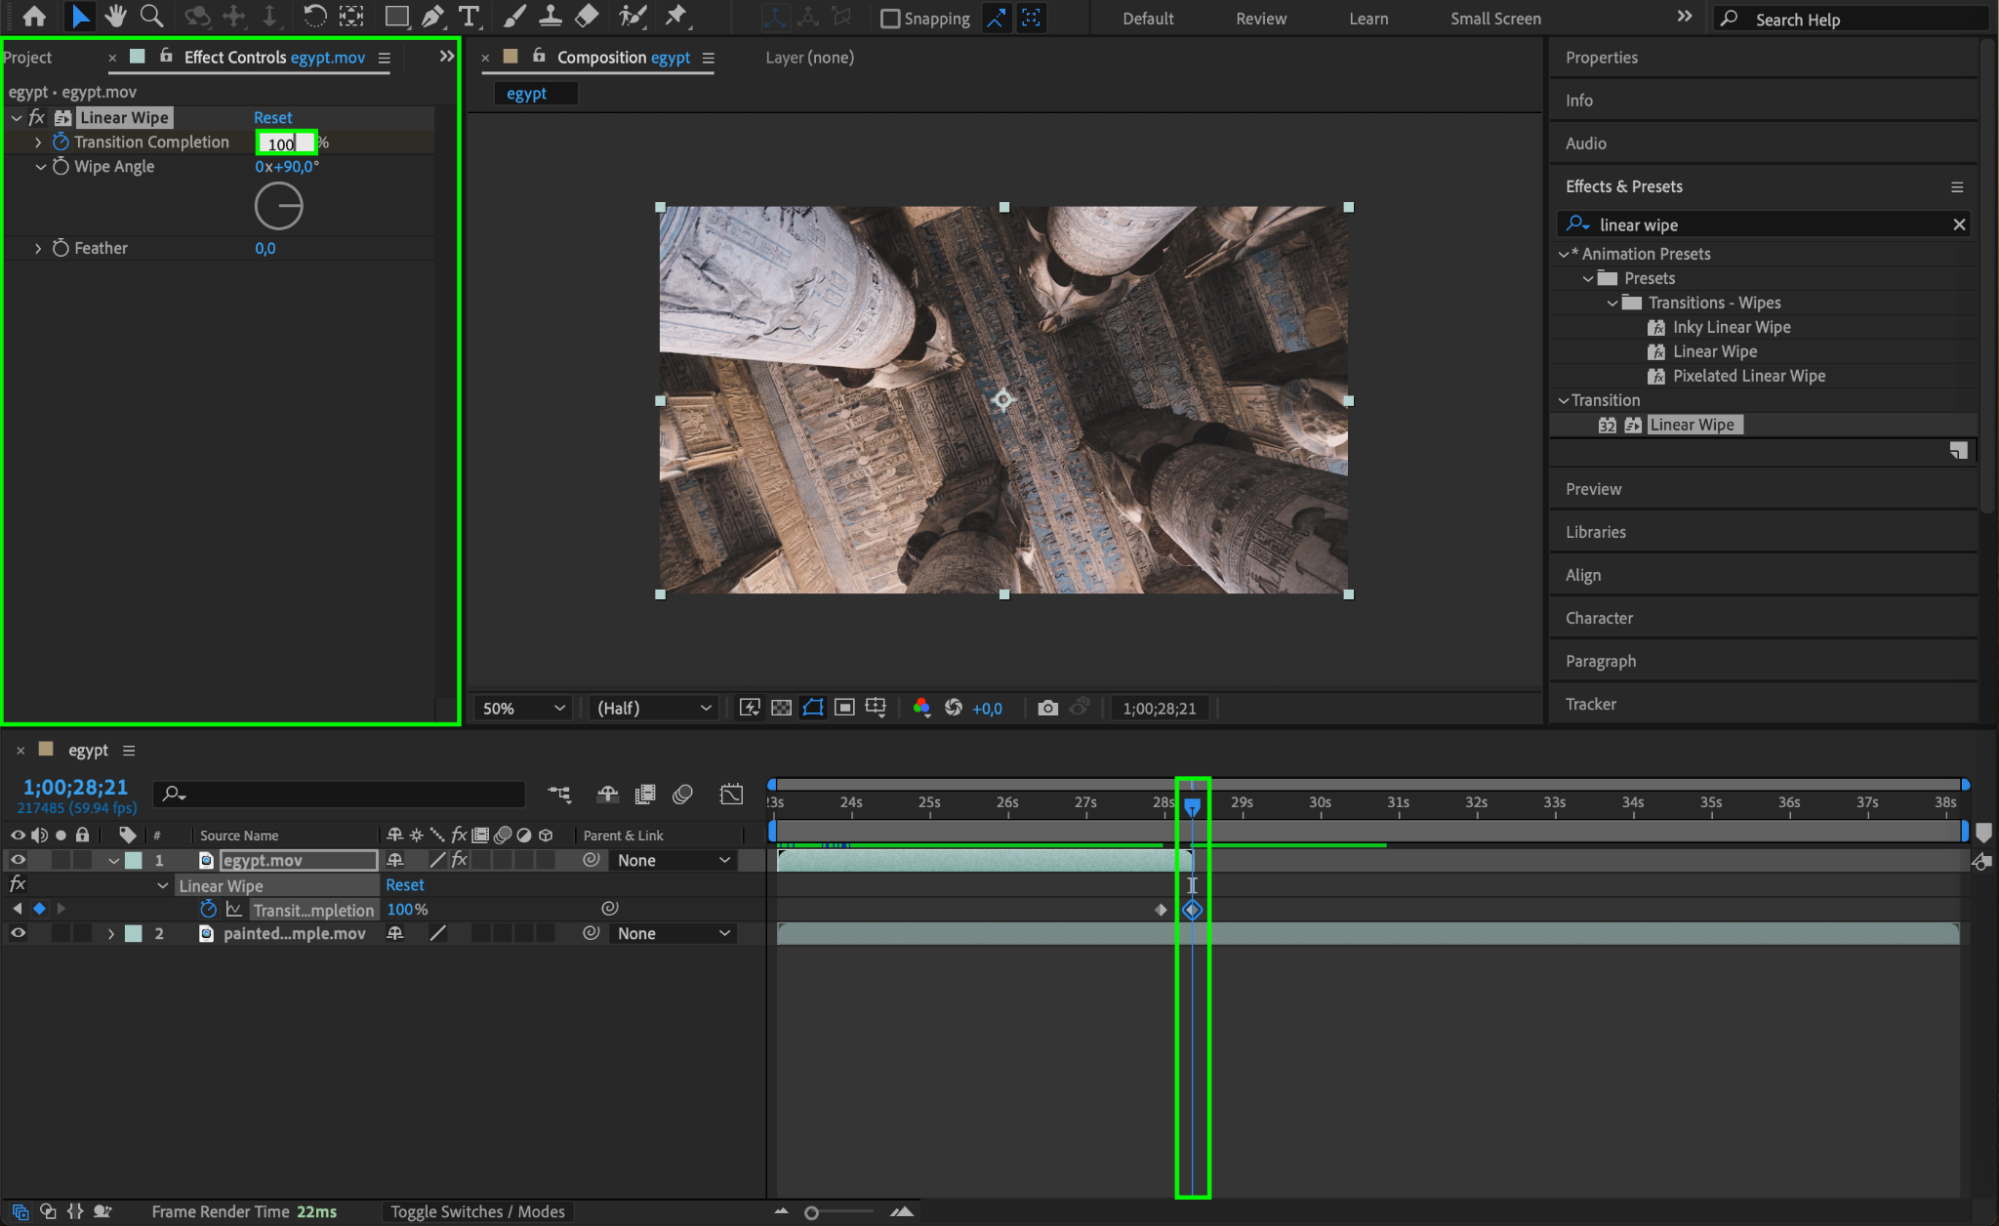
Open the Effects & Presets panel and search for “Linear Wipe” under the Transition category. Drag and drop the effect onto the first layer in your timeline. This action adds the Linear Wipe to the selected layer, and its settings will appear in the Effect Controls panel.

Step 4: Customize the Linear Wipe Effect
In the Effect Controls panel, adjust these parameters to customize the transition:
Wipe Angle: Define the direction of the wipe (e.g., horizontal, vertical, or diagonal).
Feather: Soften the edges of the wipe for a smoother, more seamless look.
Experiment with these settings to match the effect to your desired style.
To animate the transition, use keyframes for the Transition Completion parameter:
Get 10% off when you subscribe to our newsletter
1.Move the Current Time Indicator (CTI) to the point in the timeline where the transition should start. Set Transition Completion to 100%, and click the stopwatch icon to create the first keyframe.
2.Move the CTI to the point where the transition should end and change Transition Completion to 0%.
This creates a smooth animation that reveals or hides the layer over time.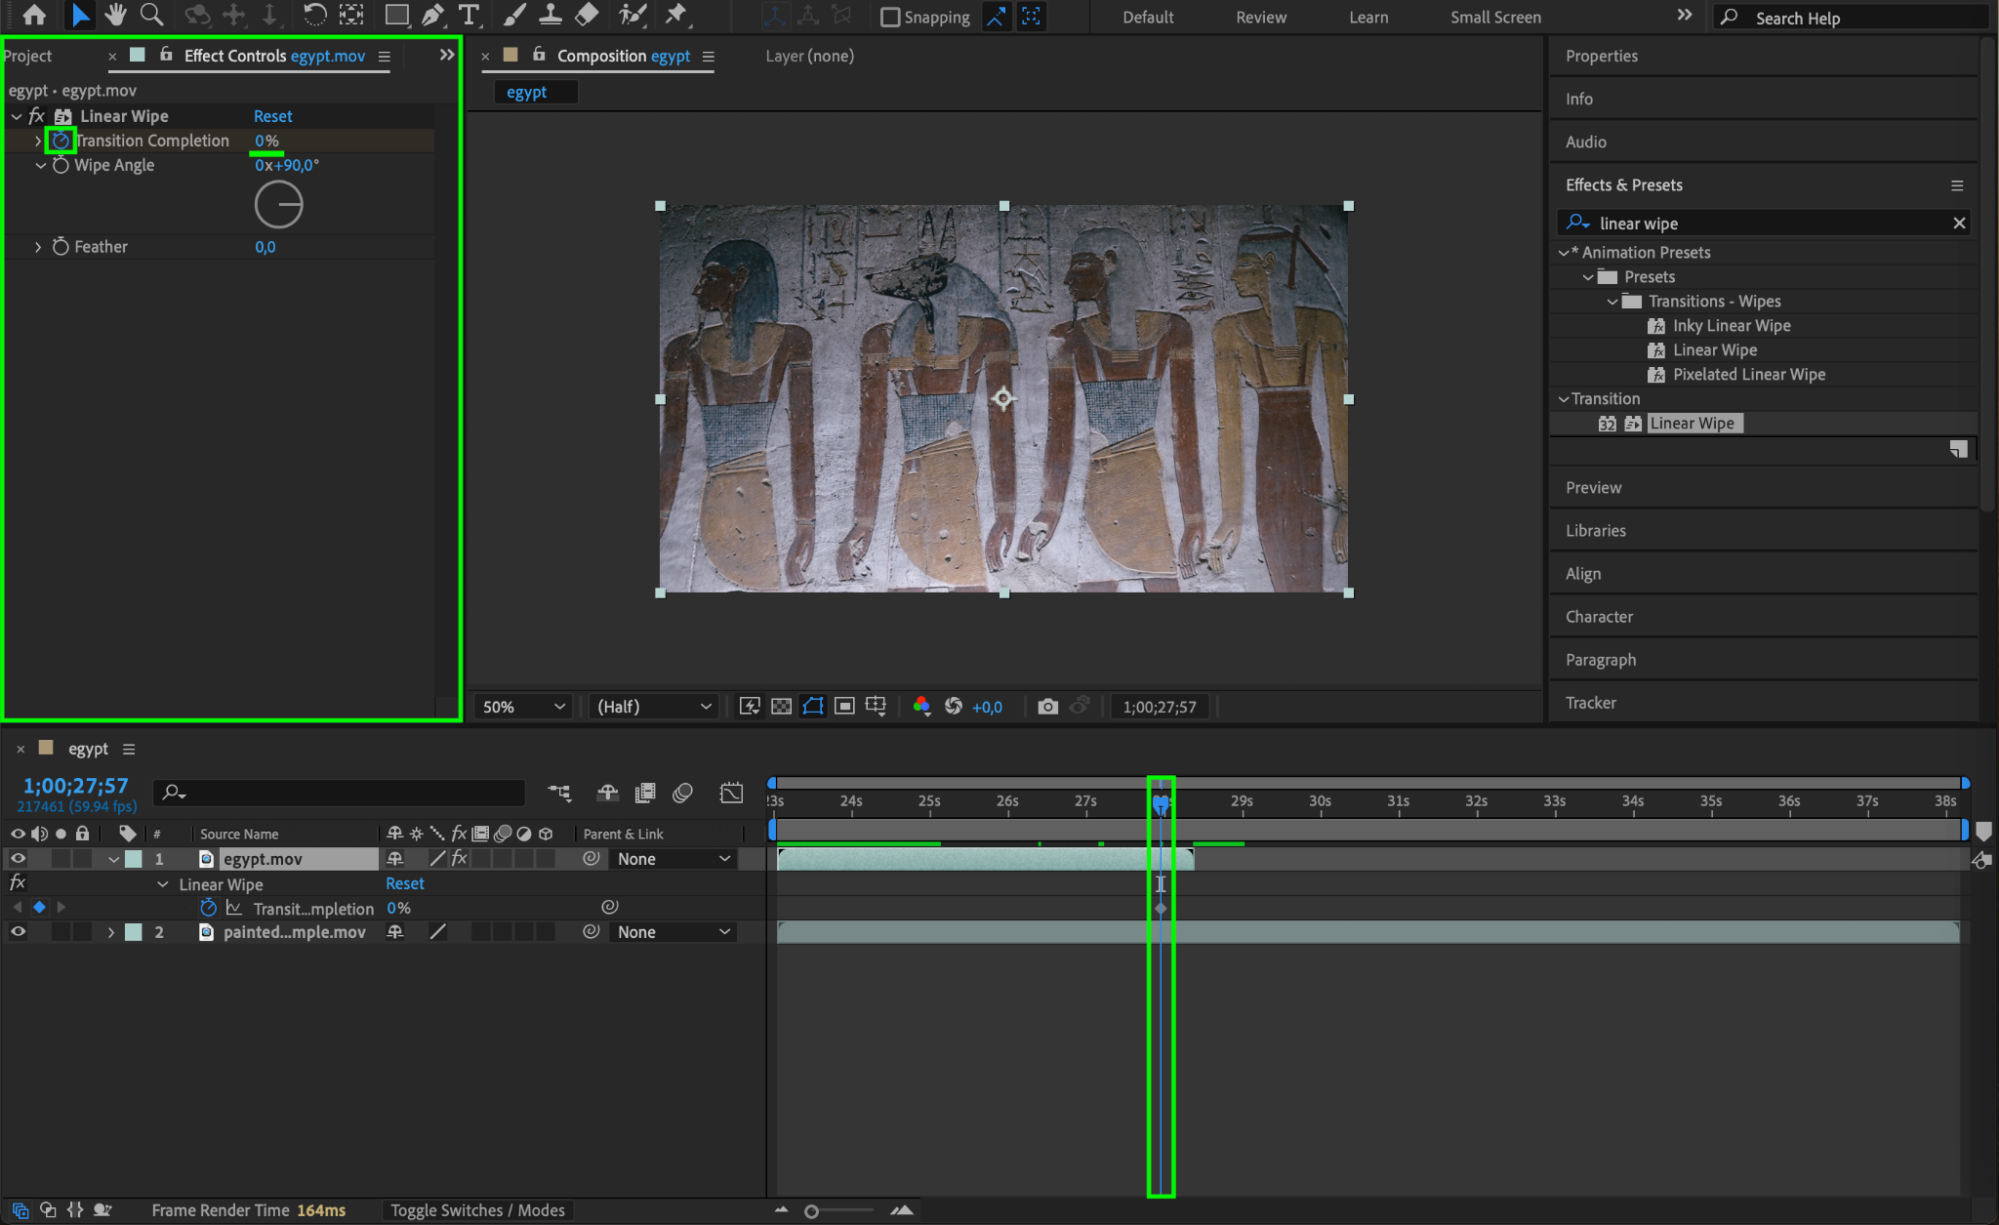
 Step 5: Preview Your Transition
Get 10% off when you subscribe to our newsletter
Press the Spacebar to play back your composition and preview the Linear Wipe effect. Check the timing and appearance, and make any necessary adjustments in the Effect Controls panel or timeline.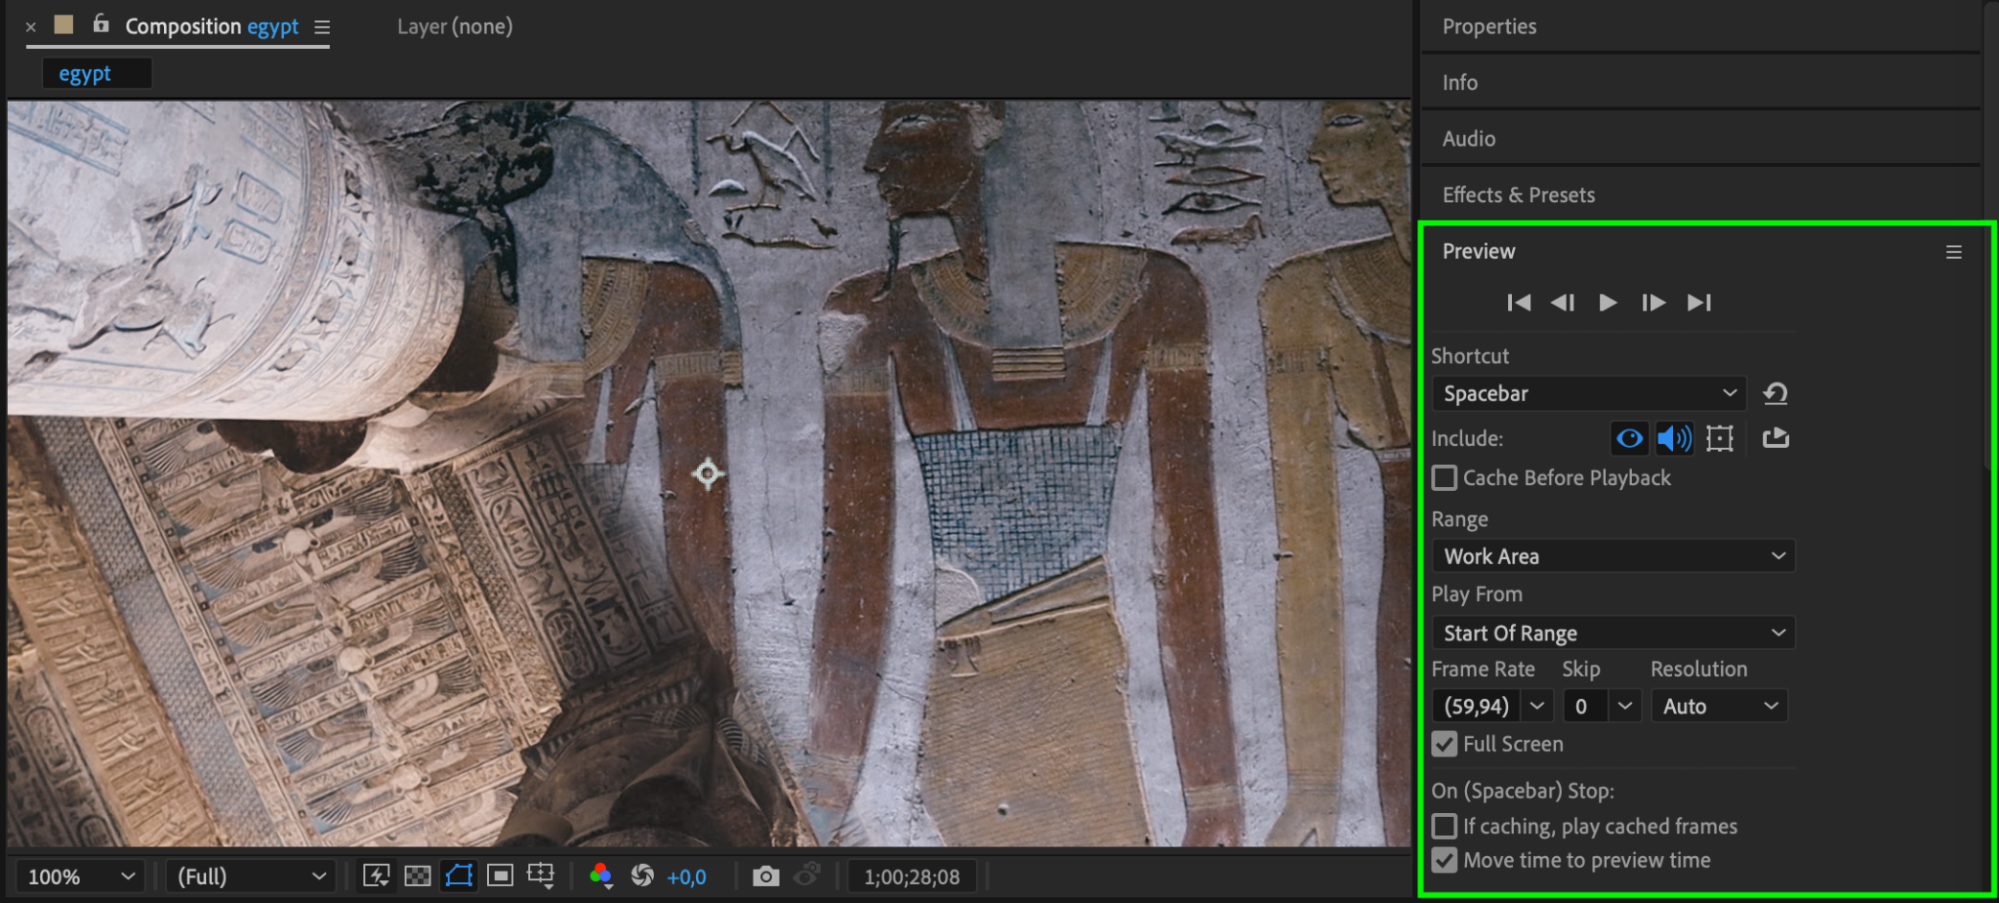
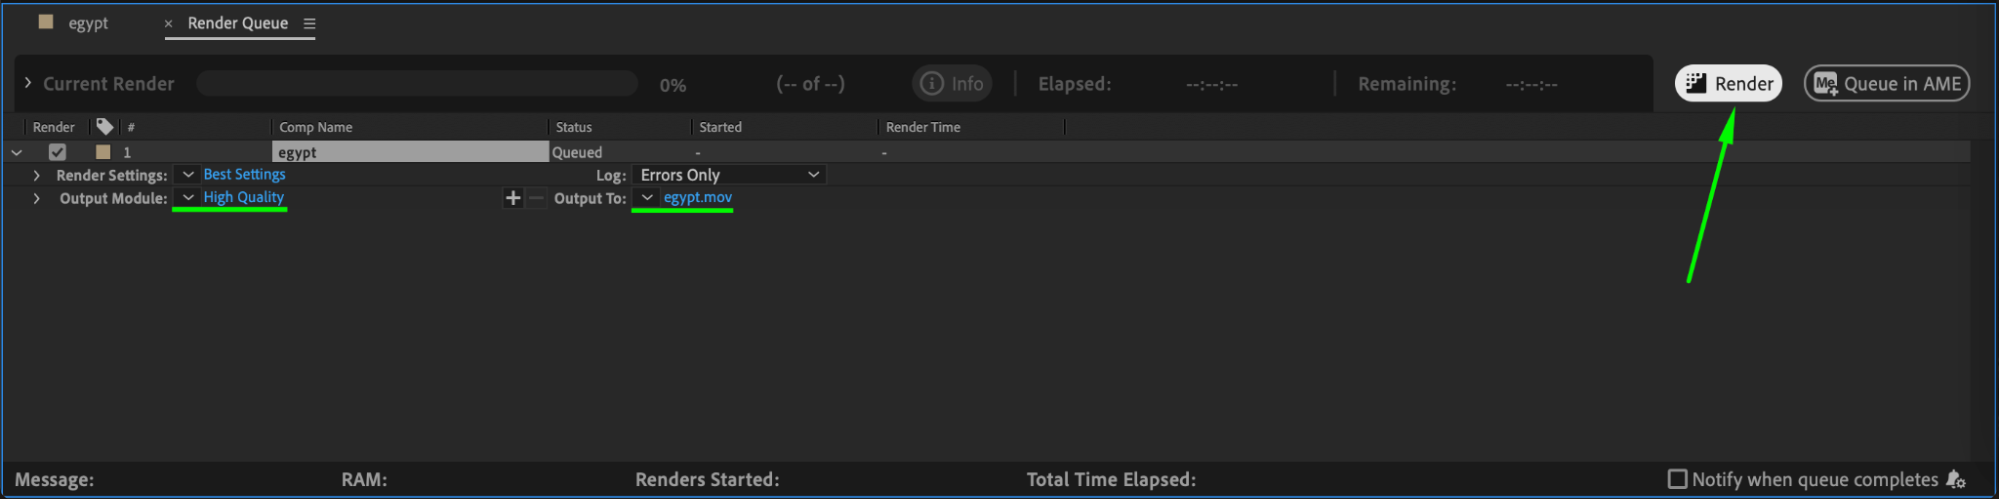
Step 6: Render the Final Output
When you’re satisfied with the result, render your project to finalize it. Go to Composition > Add to Render Queue, configure the output settings, and click Render. Your composition, complete with the Linear Wipe transition, is now ready for use.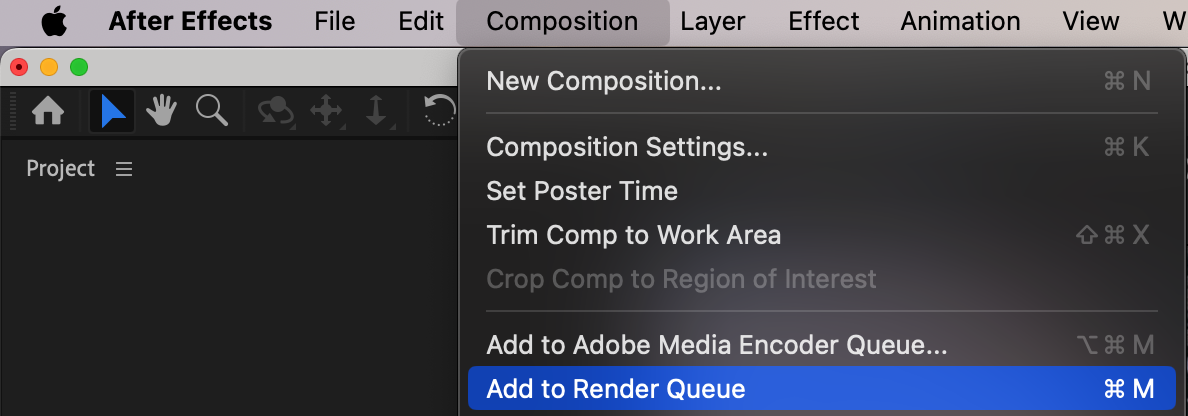
 Conclusion
The Linear Wipe effect in After Effects is an excellent tool for creating clean, professional transitions. By following these steps, you can easily customize and animate this effect to suit your creative needs. Experiment with angles, feathering, and timing to create unique, eye-catching results for your projects.
Our Bestsellers


