How to Create Image Blending Effects in After Effects
Blending Images with Layer Modes and Transparency
Blending images in After Effects allows you to create smooth transitions, double exposures, and artistic overlays. By using Blending Modes, you can mix images in various ways to achieve professional effects. Follow these steps to blend images effectively.
Step 1: Create a New Composition
Get 10% off when you subscribe to our newsletter

Go to Composition > New Composition, set your preferred resolution and duration, and click OK. This will be the workspace for blending your images.
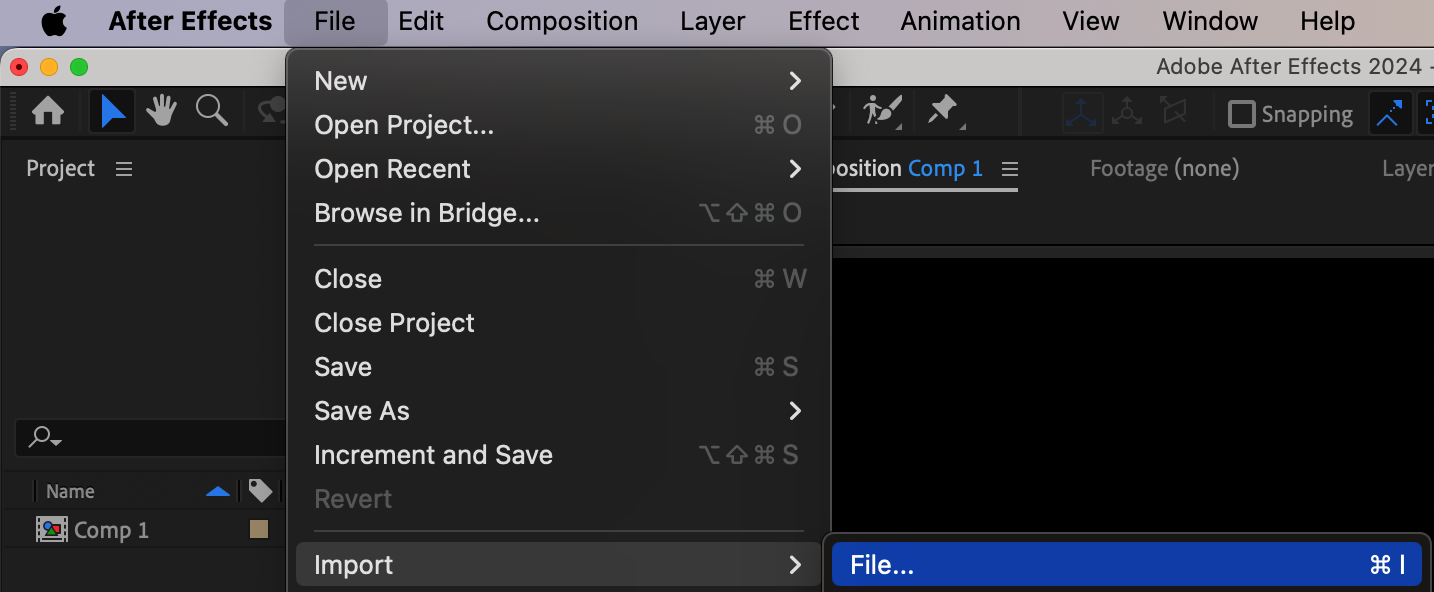
 Step 2: Import Images to the Timeline
Go to File > Import > File, select the images you want to blend, and drag them onto the timeline. Ensure that each image is on a separate layer.
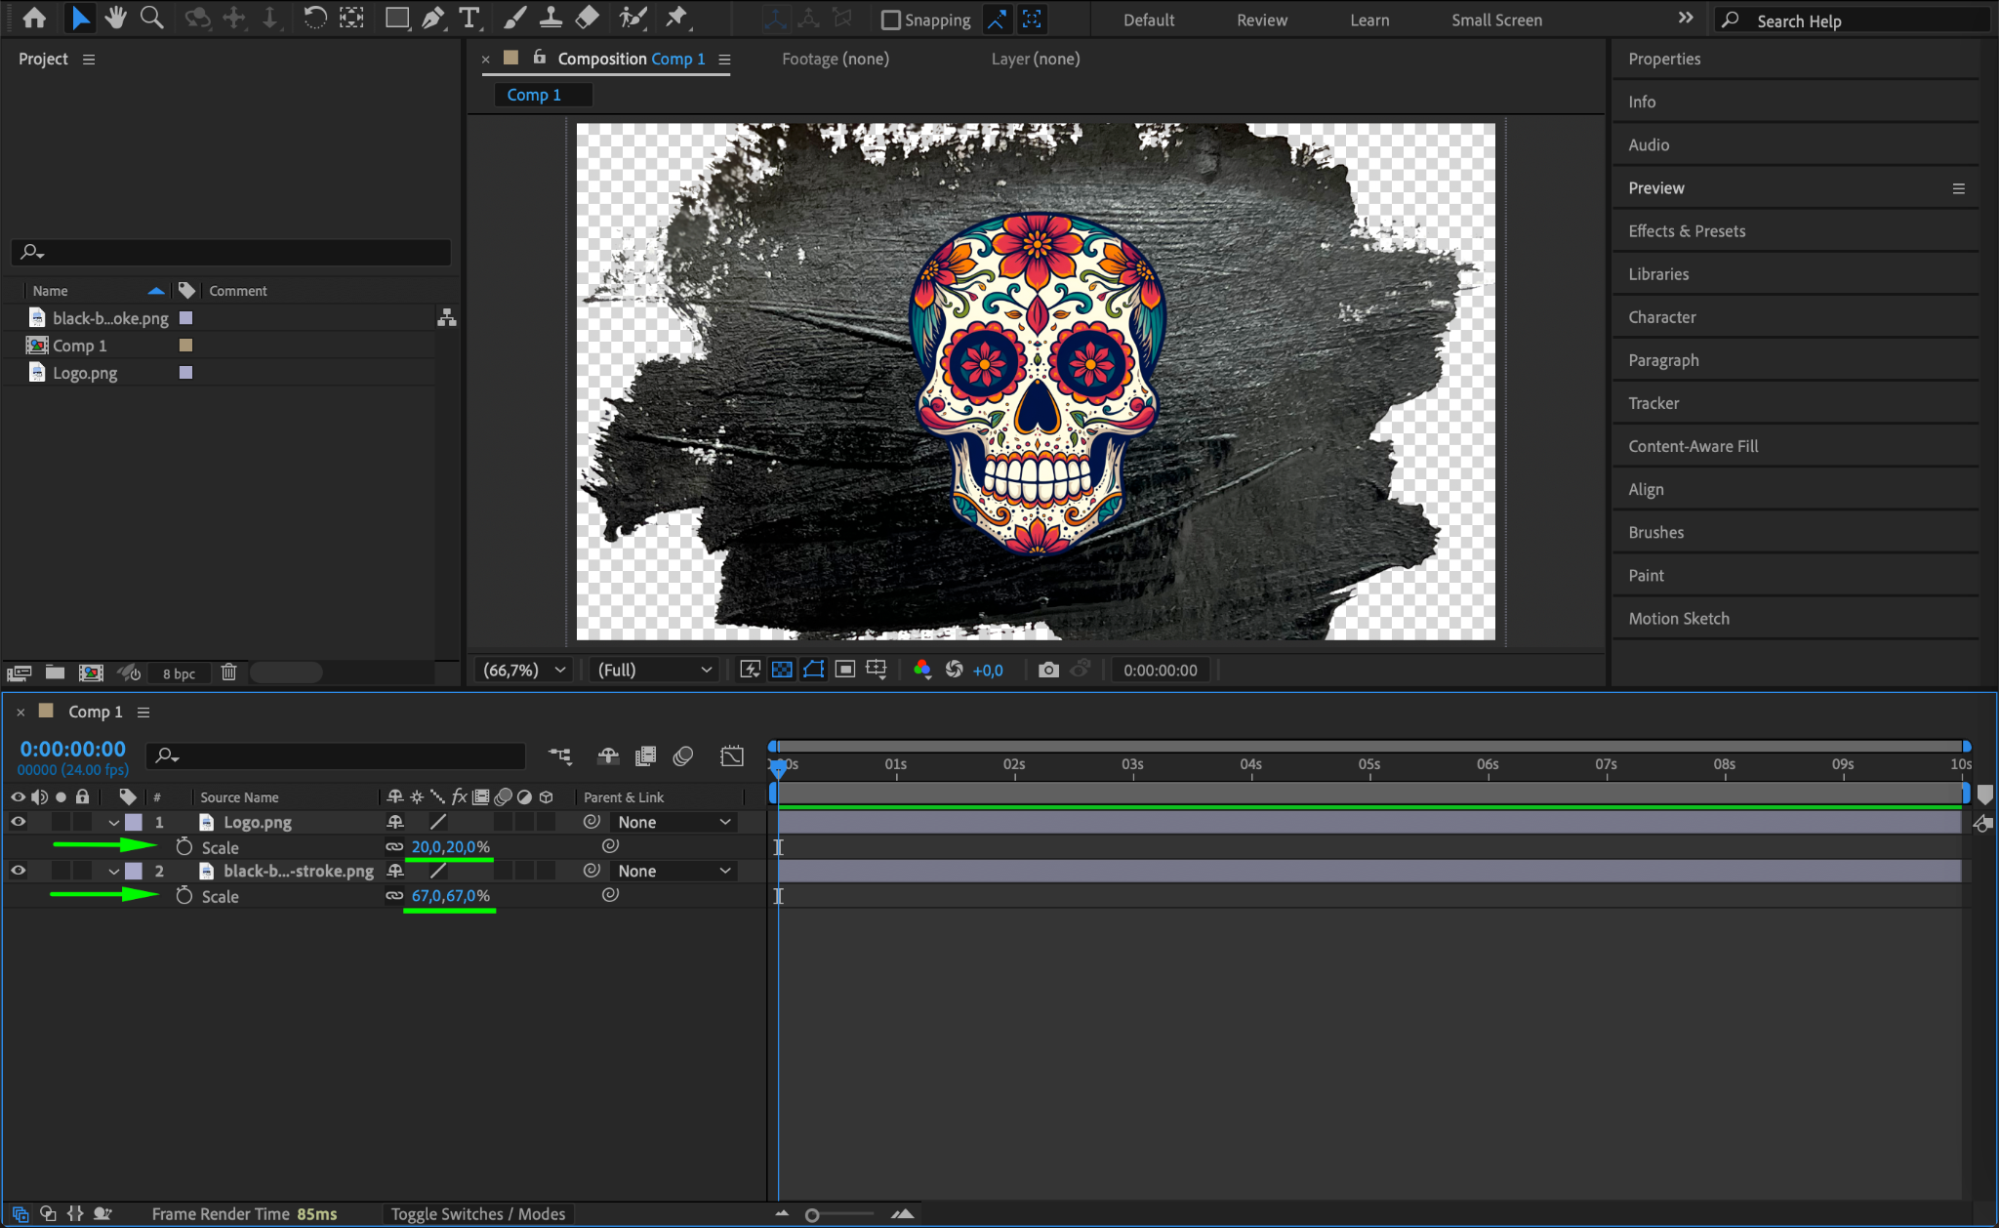
 Step 3: Adjust Scale and Position
Select each image layer and press “S” to scale or “P” to adjust its position. Resize and position the images so they overlap where needed to create a blending effect.
 Step 4: Enable Transparency Grid
Click the Toggle Transparency Grid button at the bottom of the Composition panel. This helps visualize how the images blend, especially when using transparent backgrounds.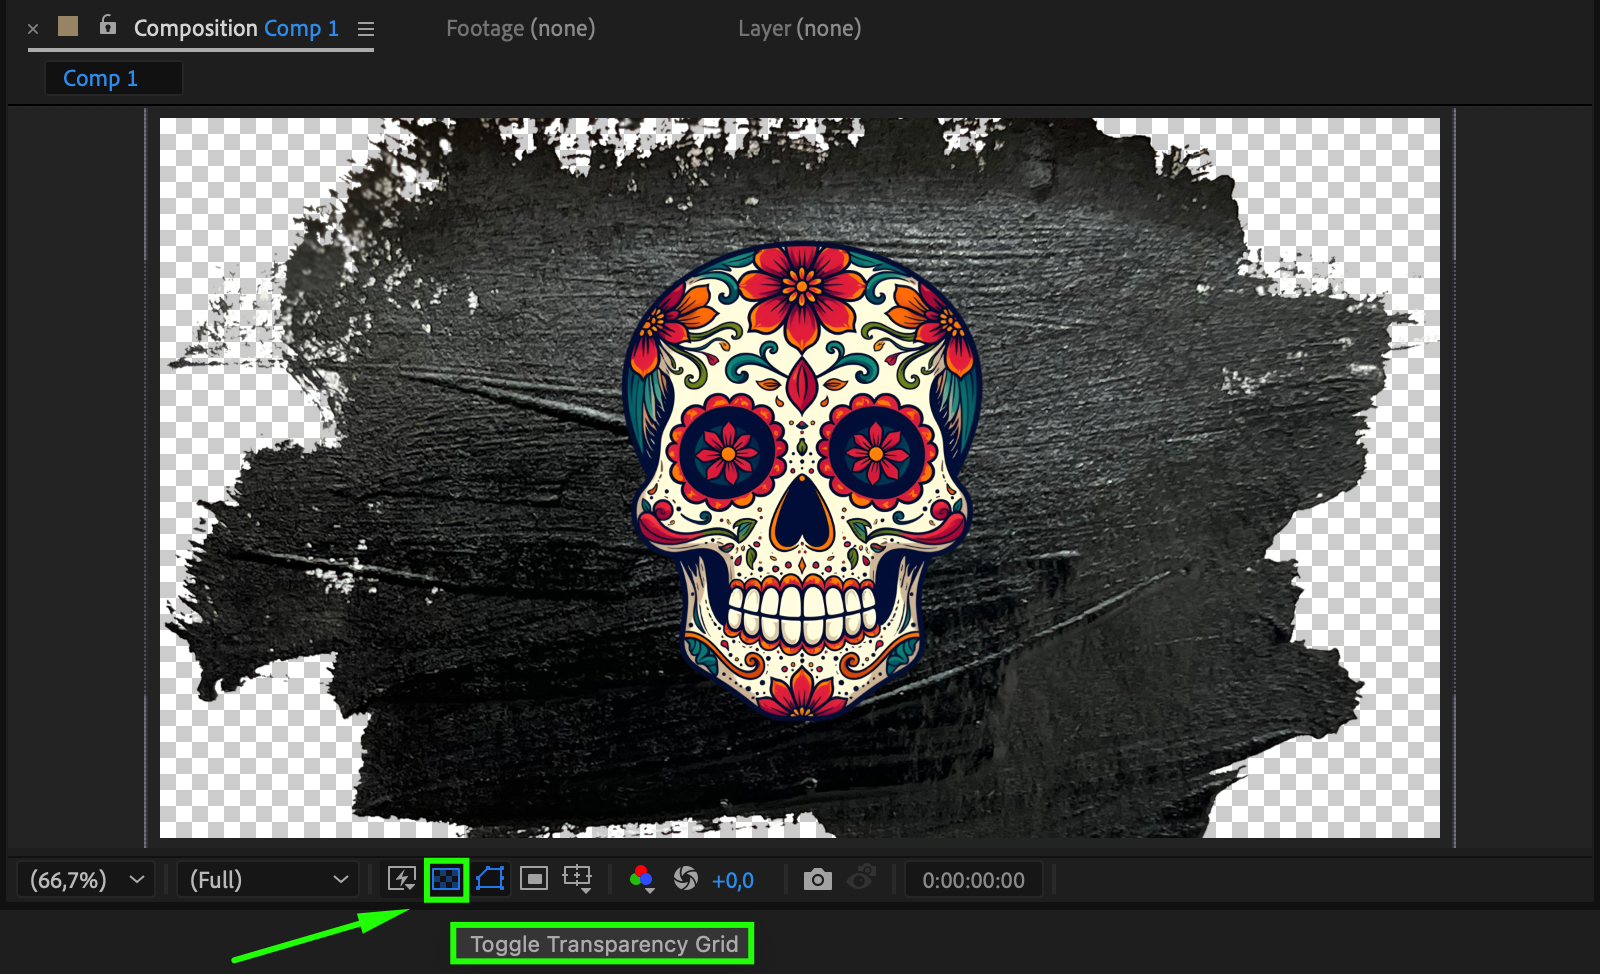 Step 5: Apply Blending Modes
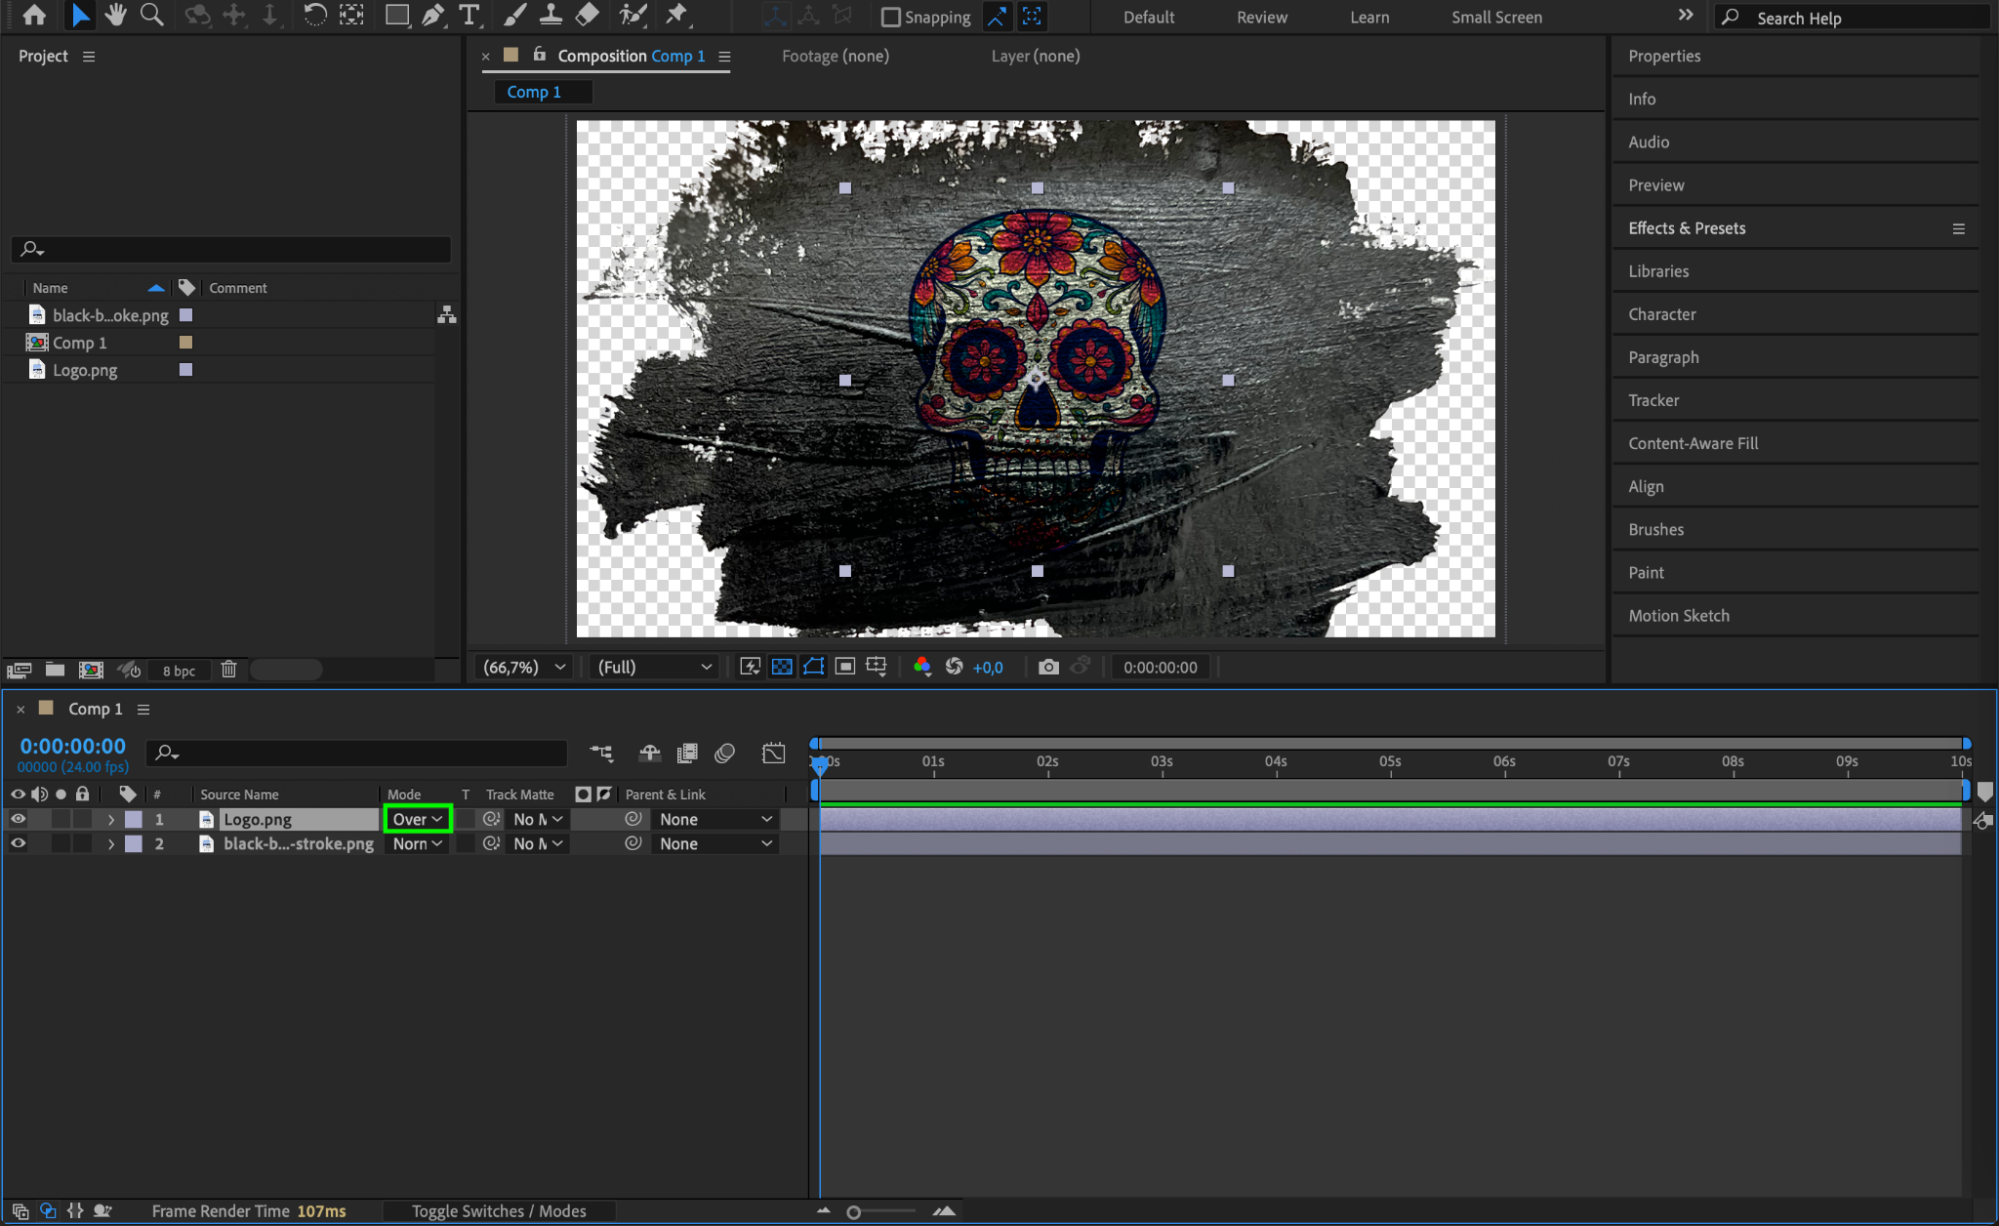
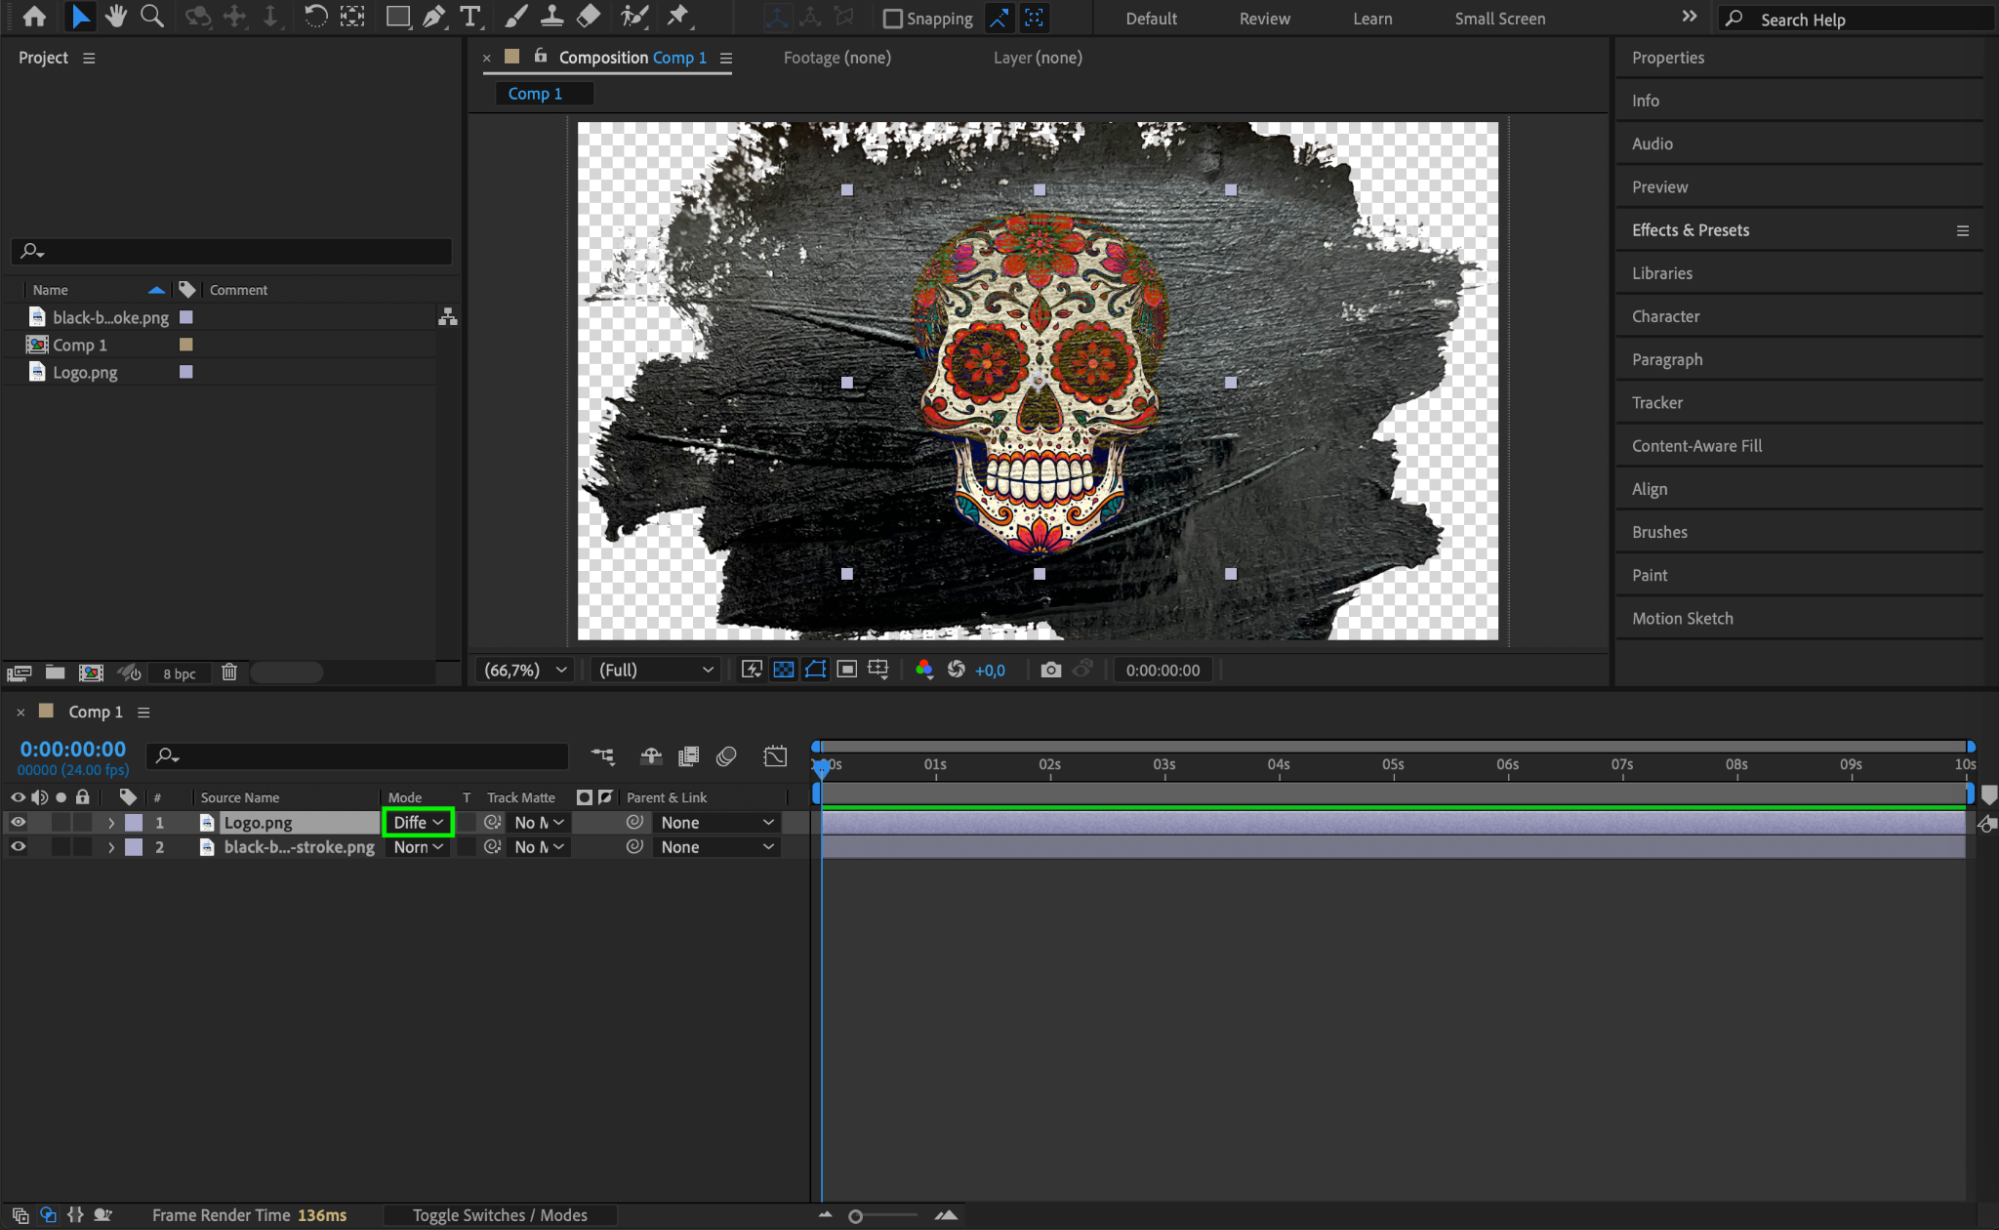
At the bottom of the Timeline panel, click Toggle Switches/Modes if the Mode column is not visible. Select an image layer and experiment with Blending Modes such as Screen, Overlay, or Difference to achieve different blending effects.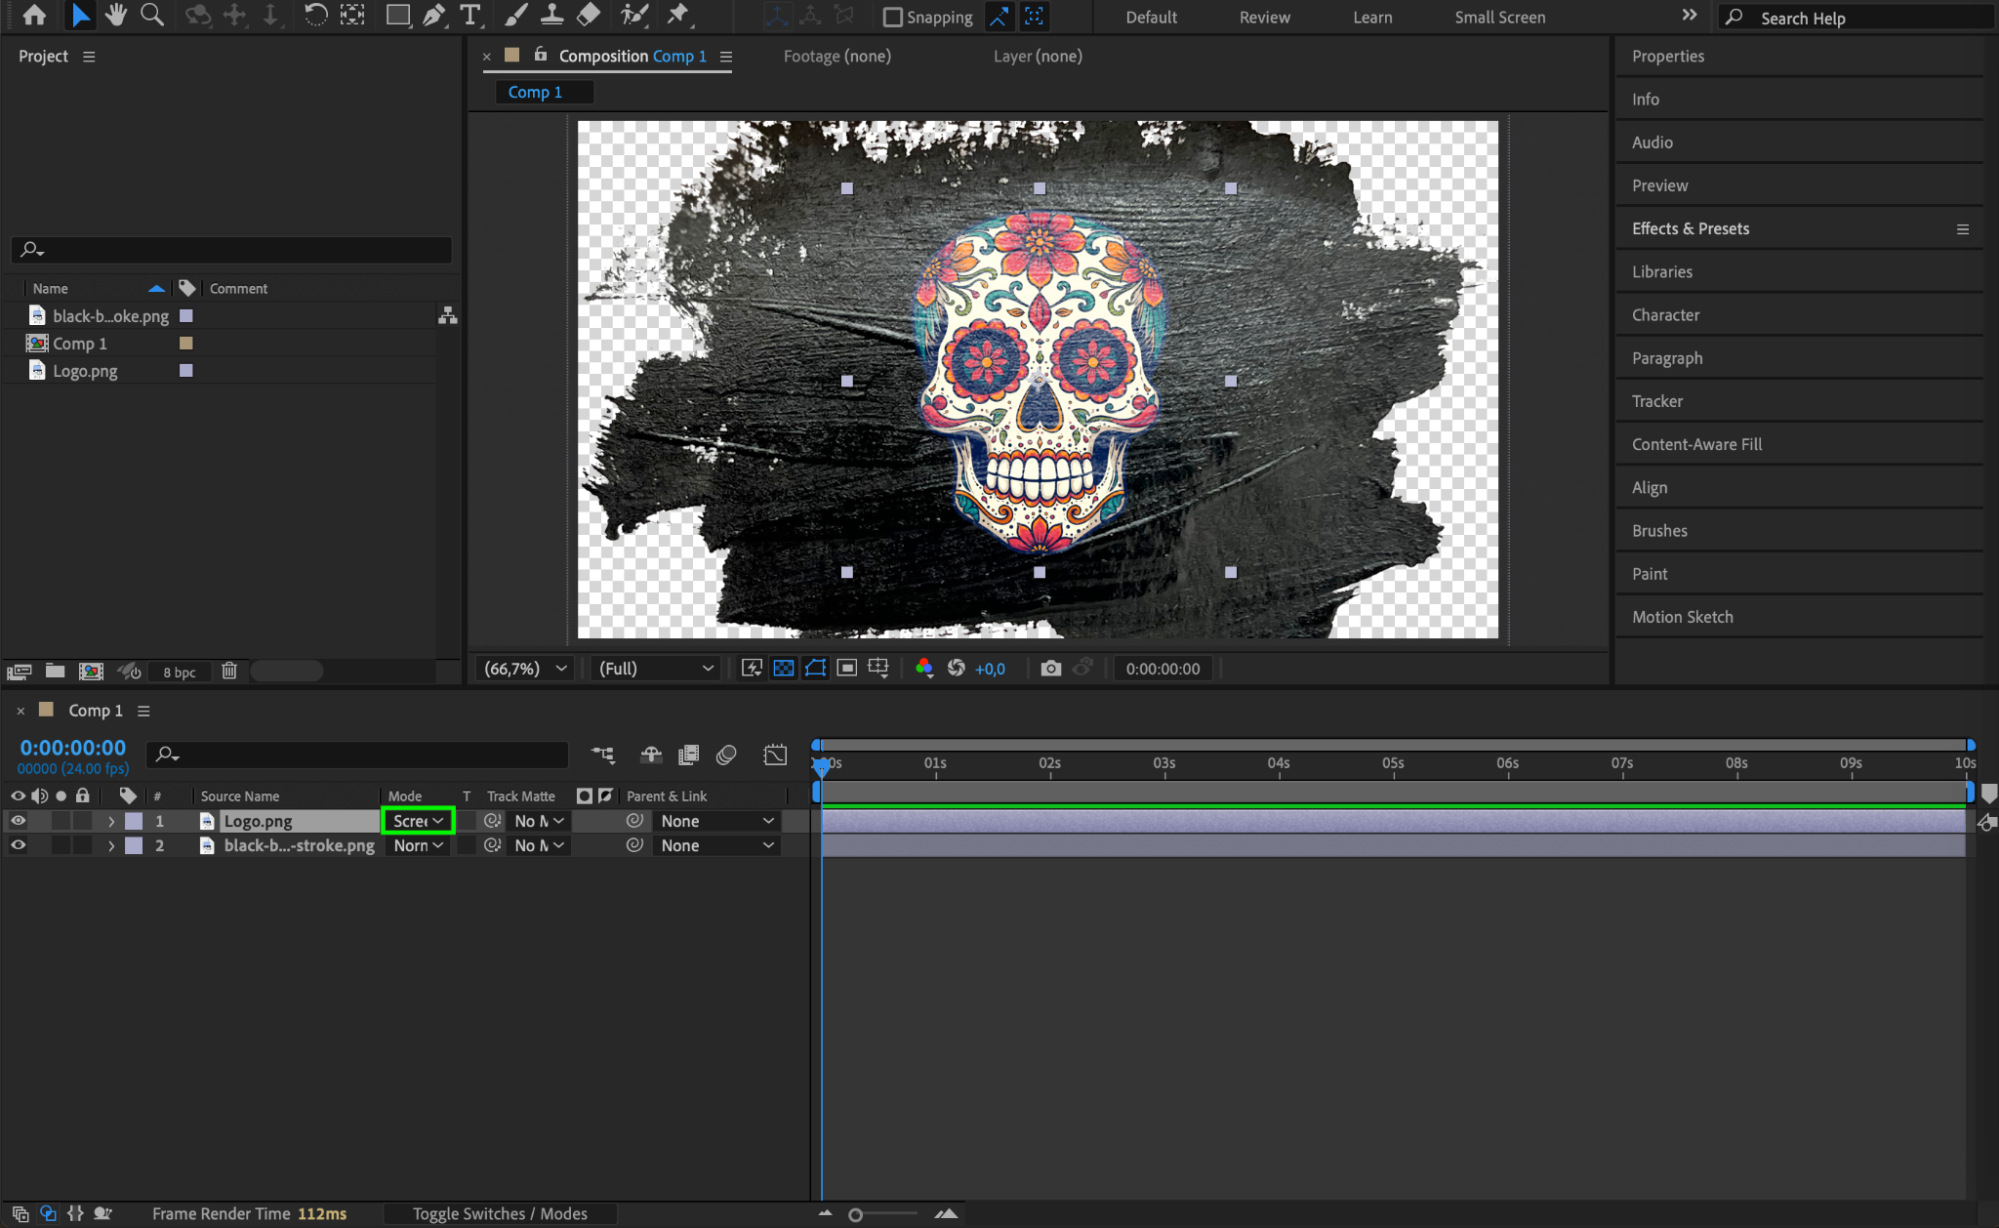
 Step 6: Preview the Result
Press the Spacebar to preview how the images blend together. If needed, fine-tune the opacity (press T) or reposition the images for a smoother effect.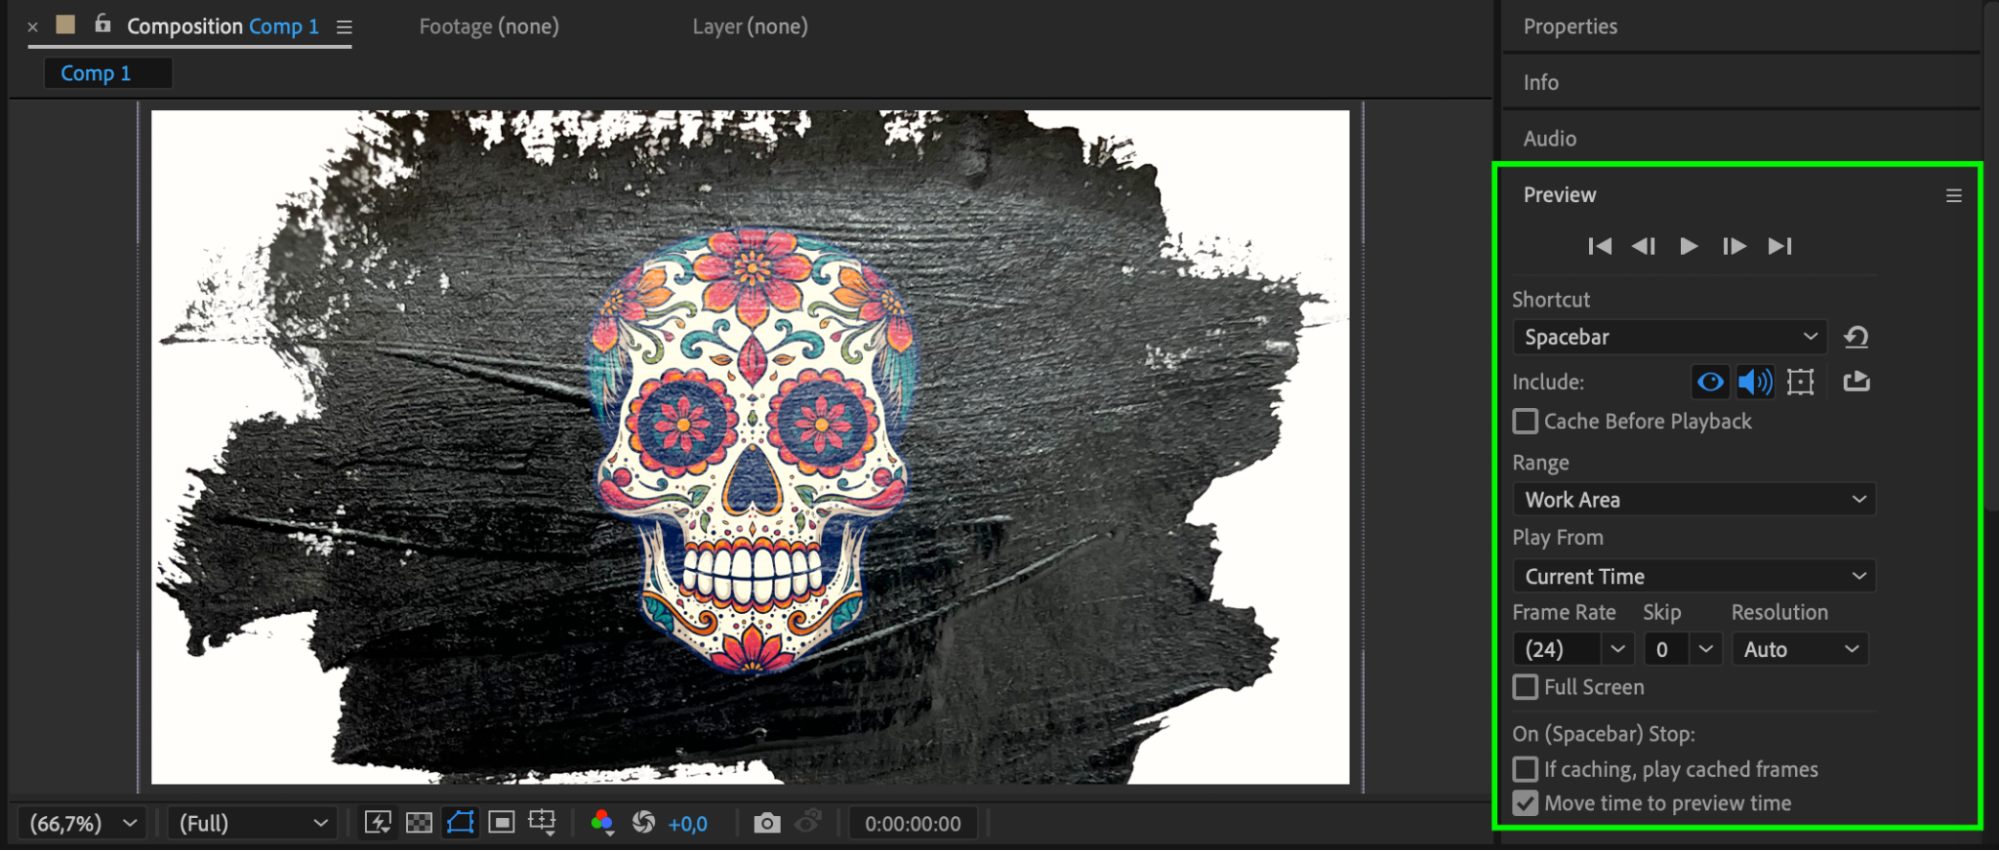 Step 7: Render the Final Composition
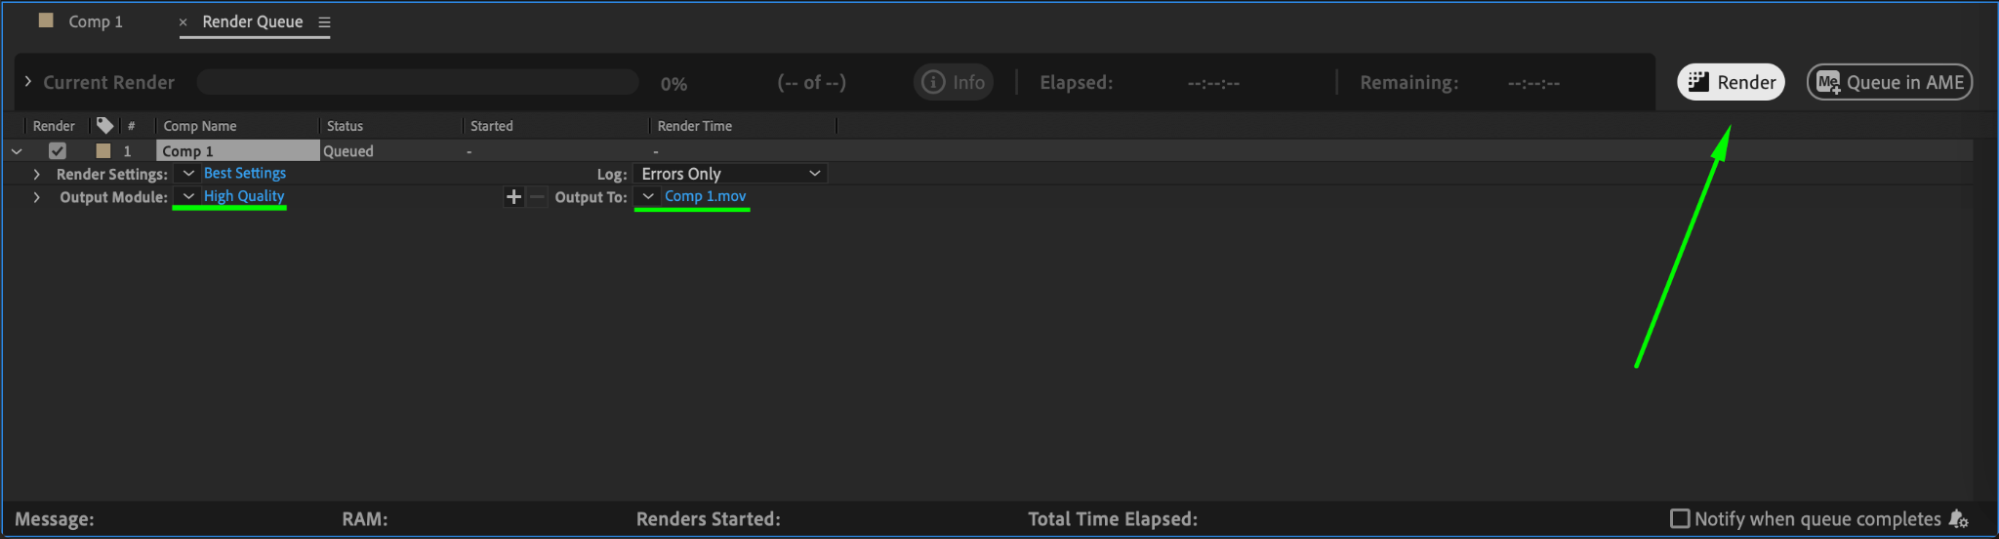
Go to Composition > Add to Render Queue, choose the preferred format, set the output destination, and click Render to export the blended images as a video or sequence.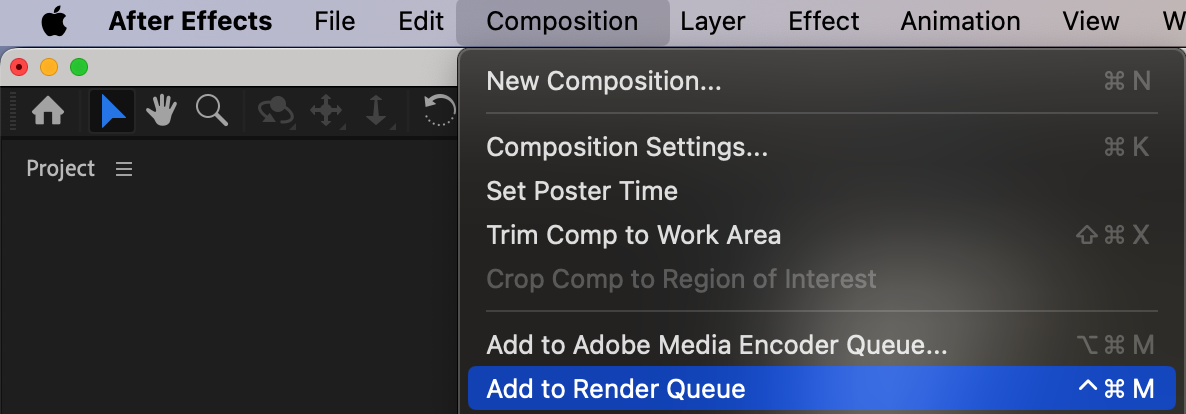
 Conclusion
Using Blending Modes and opacity adjustments, you can merge images seamlessly in After Effects. This technique is useful for artistic compositions, visual effects, and creative transitions.
Our Bestsellers


