How to Censor a License Plate in After Effects
Introduction
Censoring a license plate in After Effects is an important skill, especially when working with videos that contain private or sensitive information. By using the 3D Camera Tracker and the Gaussian Blur effect, you can easily blur or hide elements like license plates in a way that follows their movement in the video. This tutorial will guide you through the process step by step.
Step 1: Import Your Video
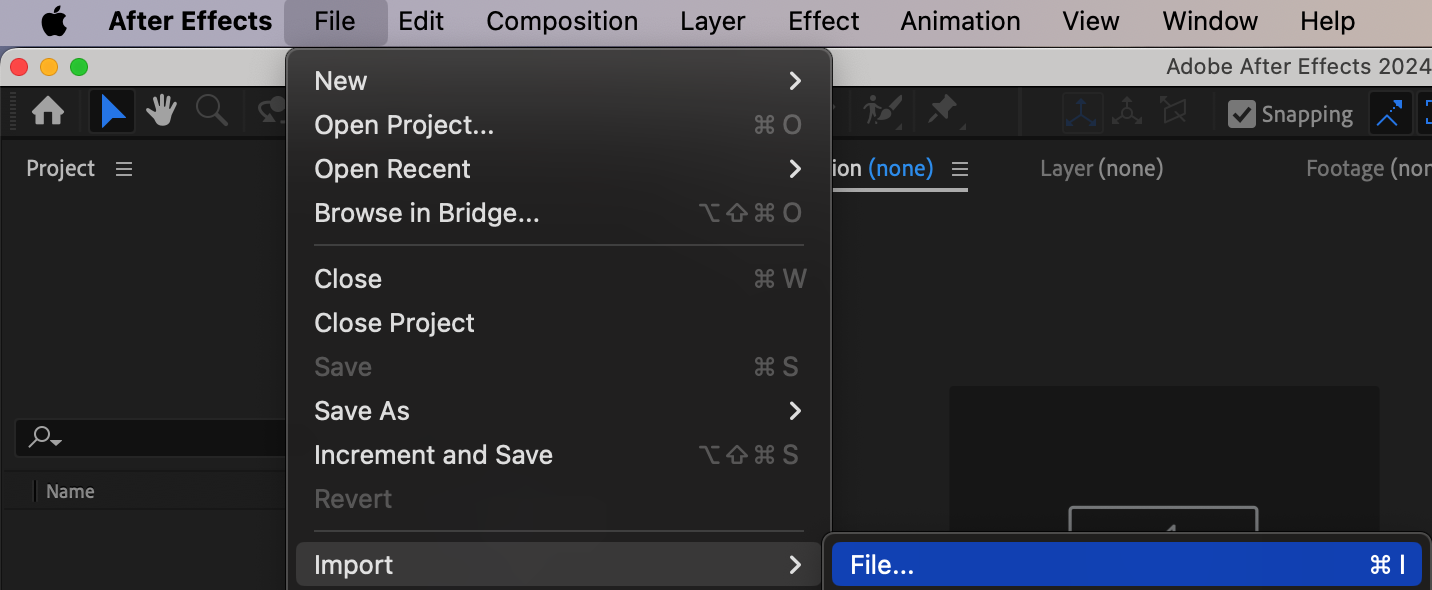
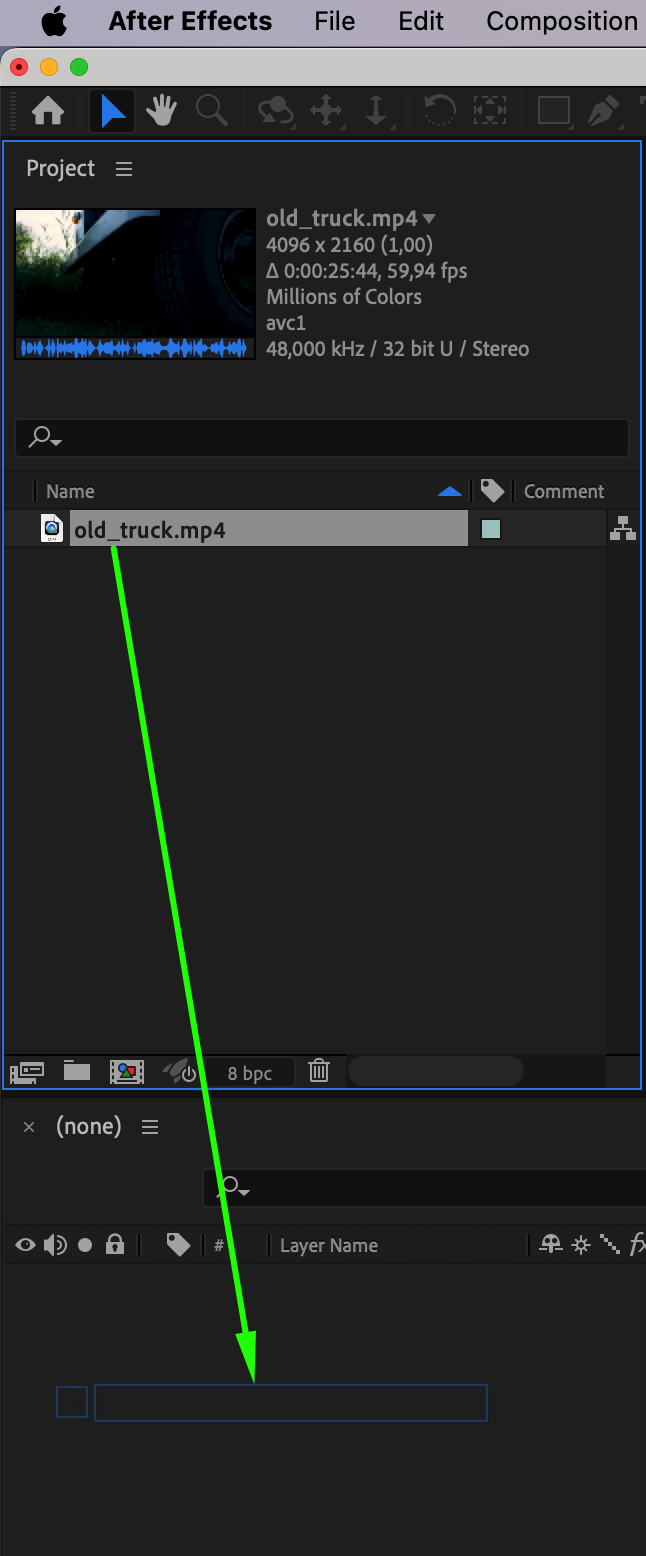
Go to File > Import > File and select the video you want to censor (for example, a video with a car and visible license plate). Once imported, drag it onto the Timeline to start working with it.
Step 2: Apply the 3D Camera Tracker Effect
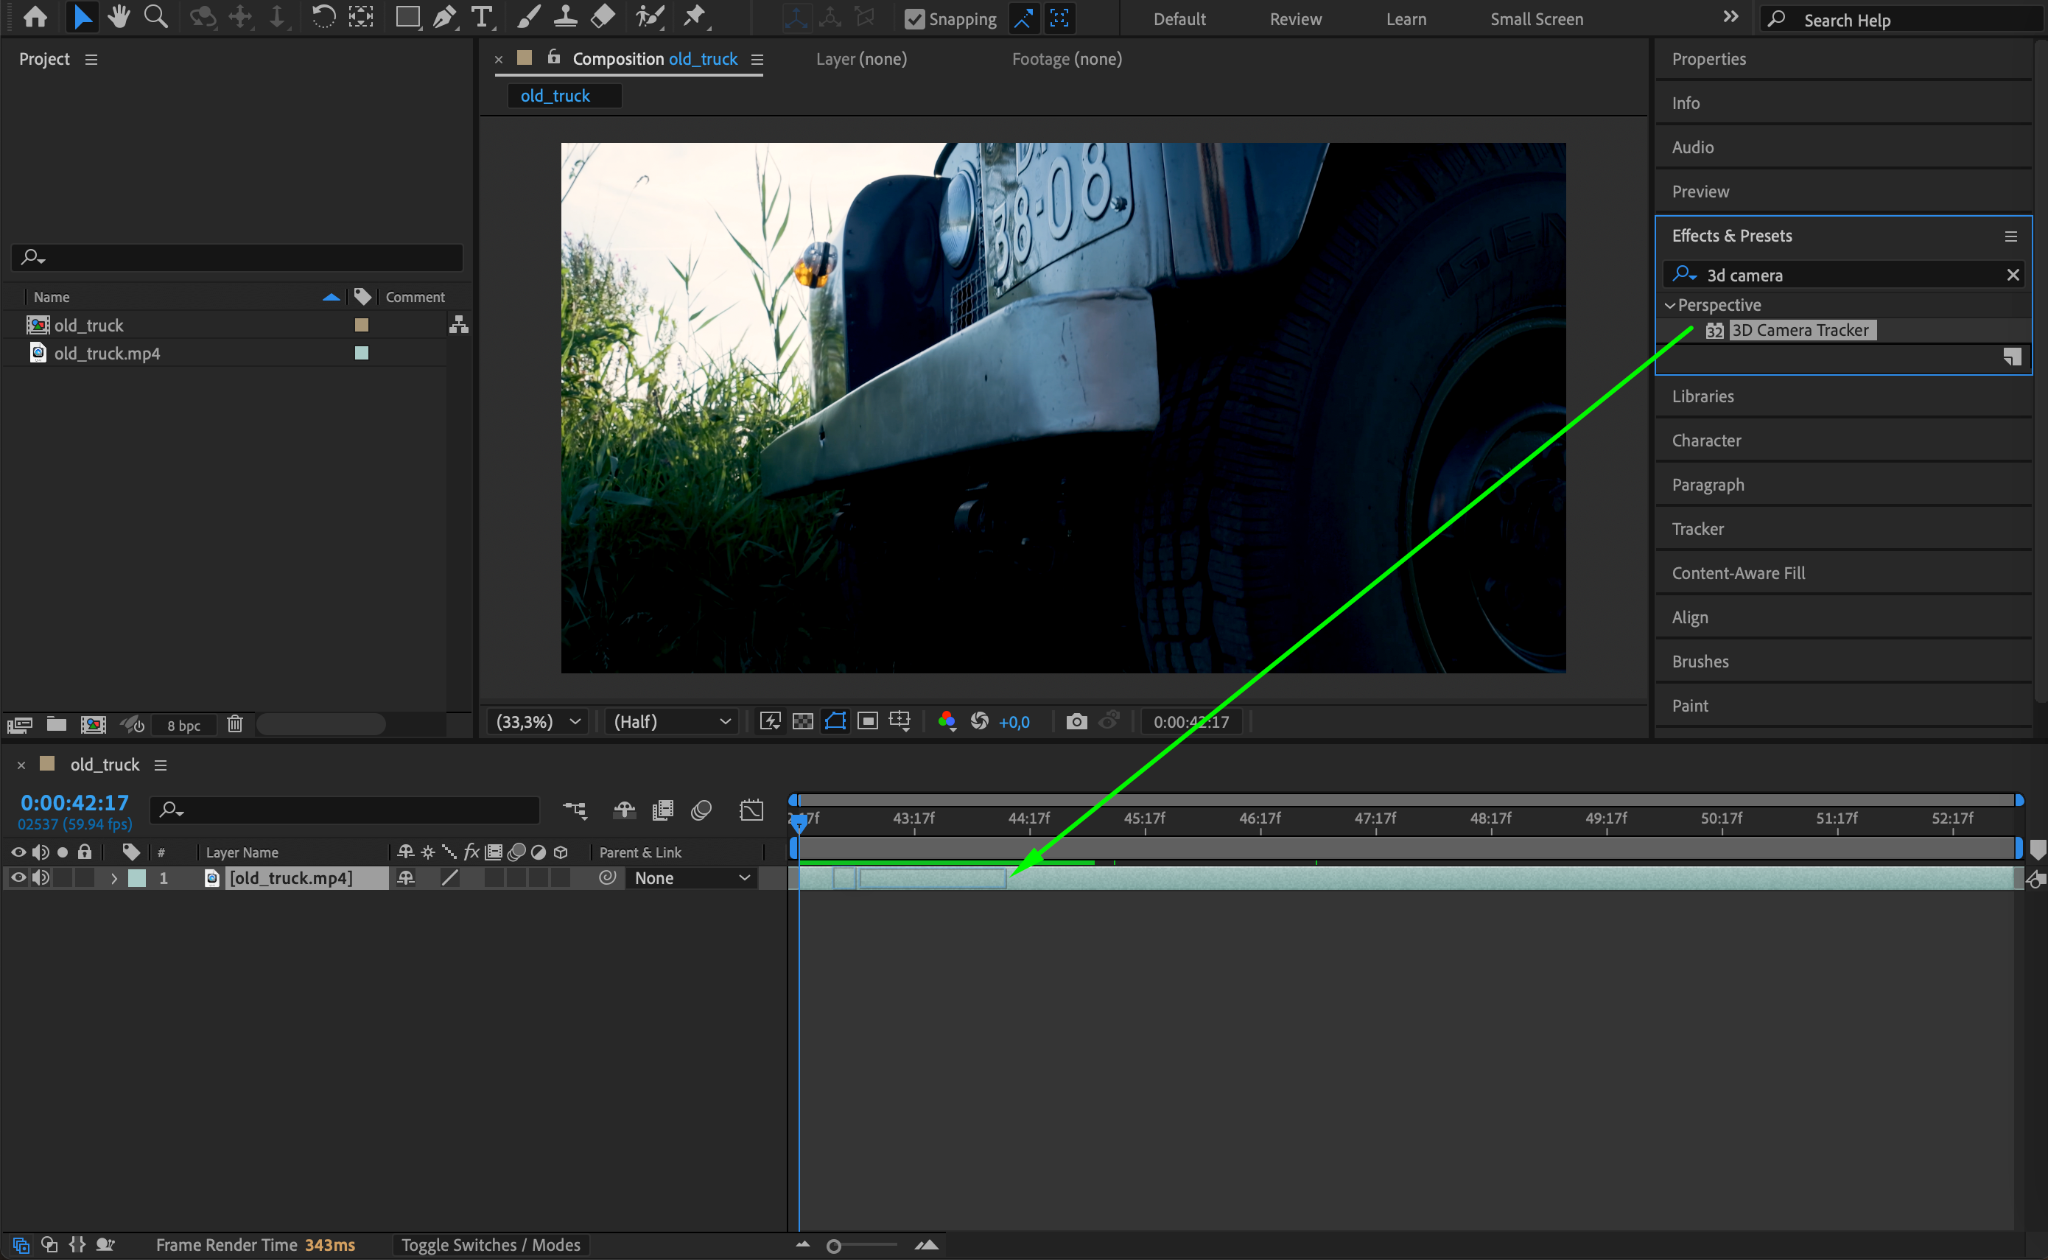
In the Effects & Presets panel, search for the 3D Camera Tracker effect. Drag and drop this effect onto your video layer in the Timeline. This will analyze the video to track the movement of the camera.
Step 3: Create the Camera
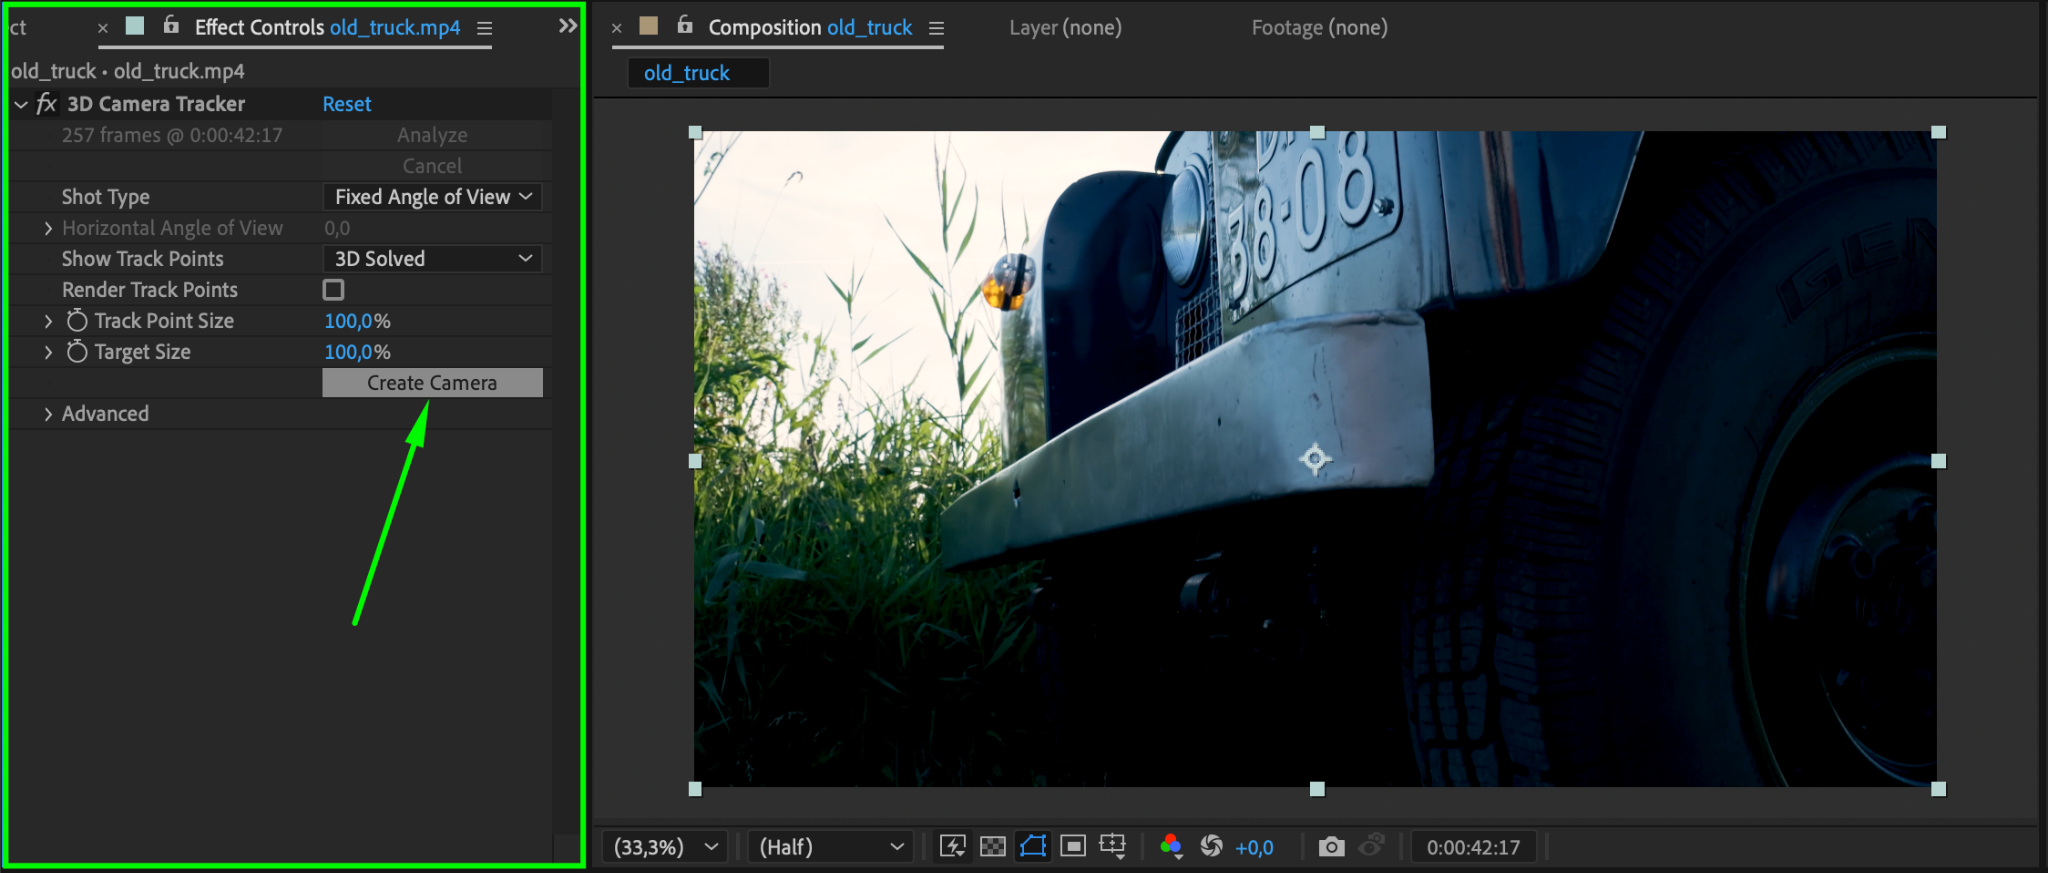
Once the analysis is complete, go to the Effect Controls panel and click the Create Camera button. This creates a camera based on the movement of the footage, allowing you to add objects that move naturally within the scene.
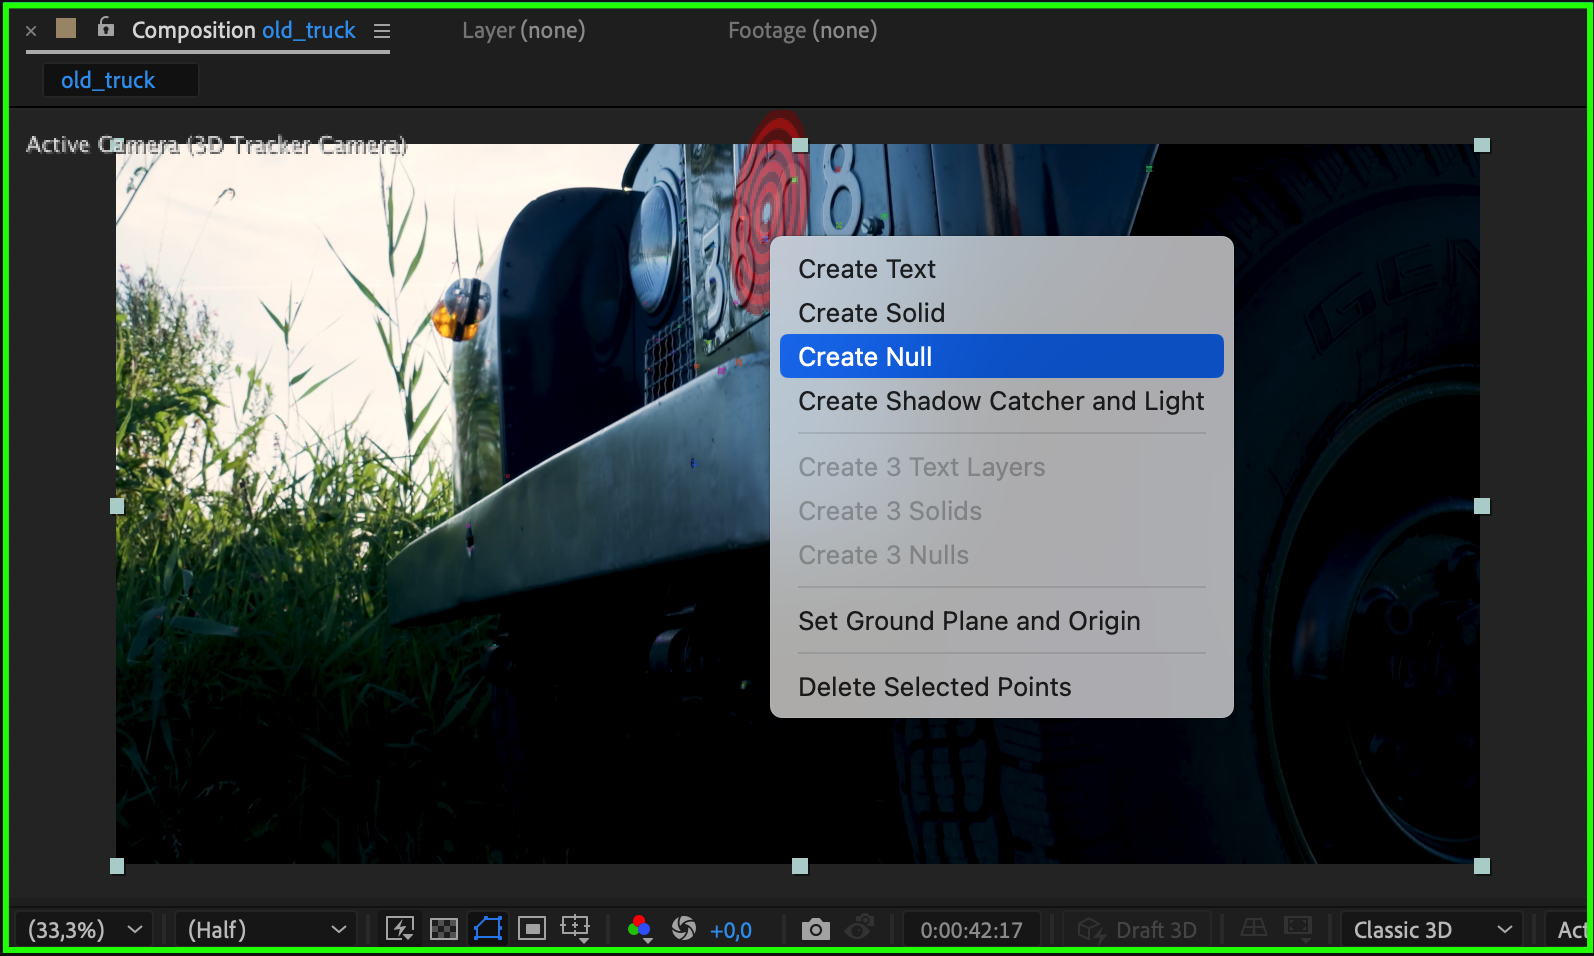
Step 4: Create a Null Object for Tracking
Hover your mouse over the composition panel and find the area of the license plate. Right-click on that area and select Create Null Object. The null object will store the tracking data so it can move with the footage.
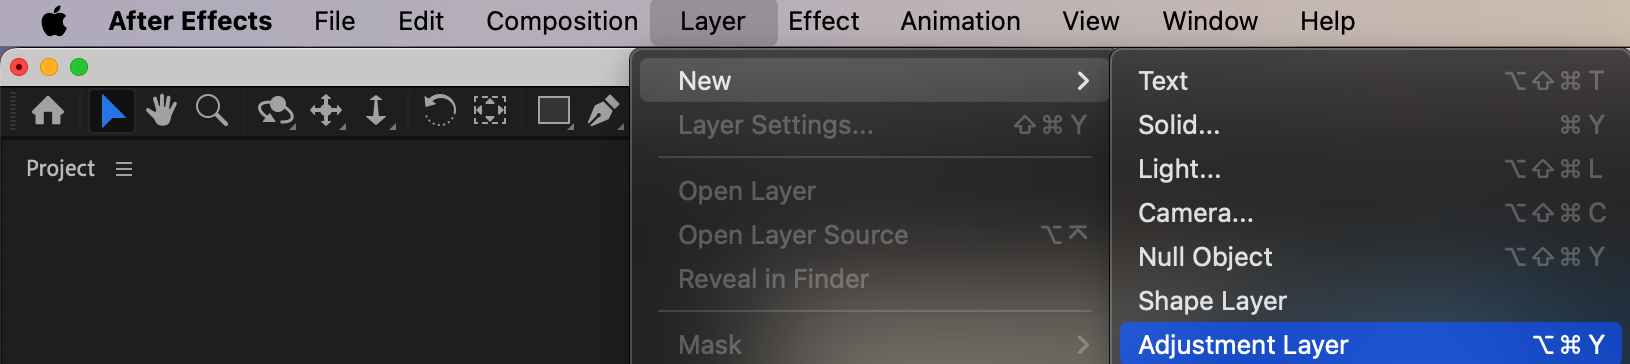
Step 5: Add an Adjustment Layer
Go to Layer > New > Adjustment Layer. This layer will be used to apply effects, such as blurring the license plate, without altering the original footage.
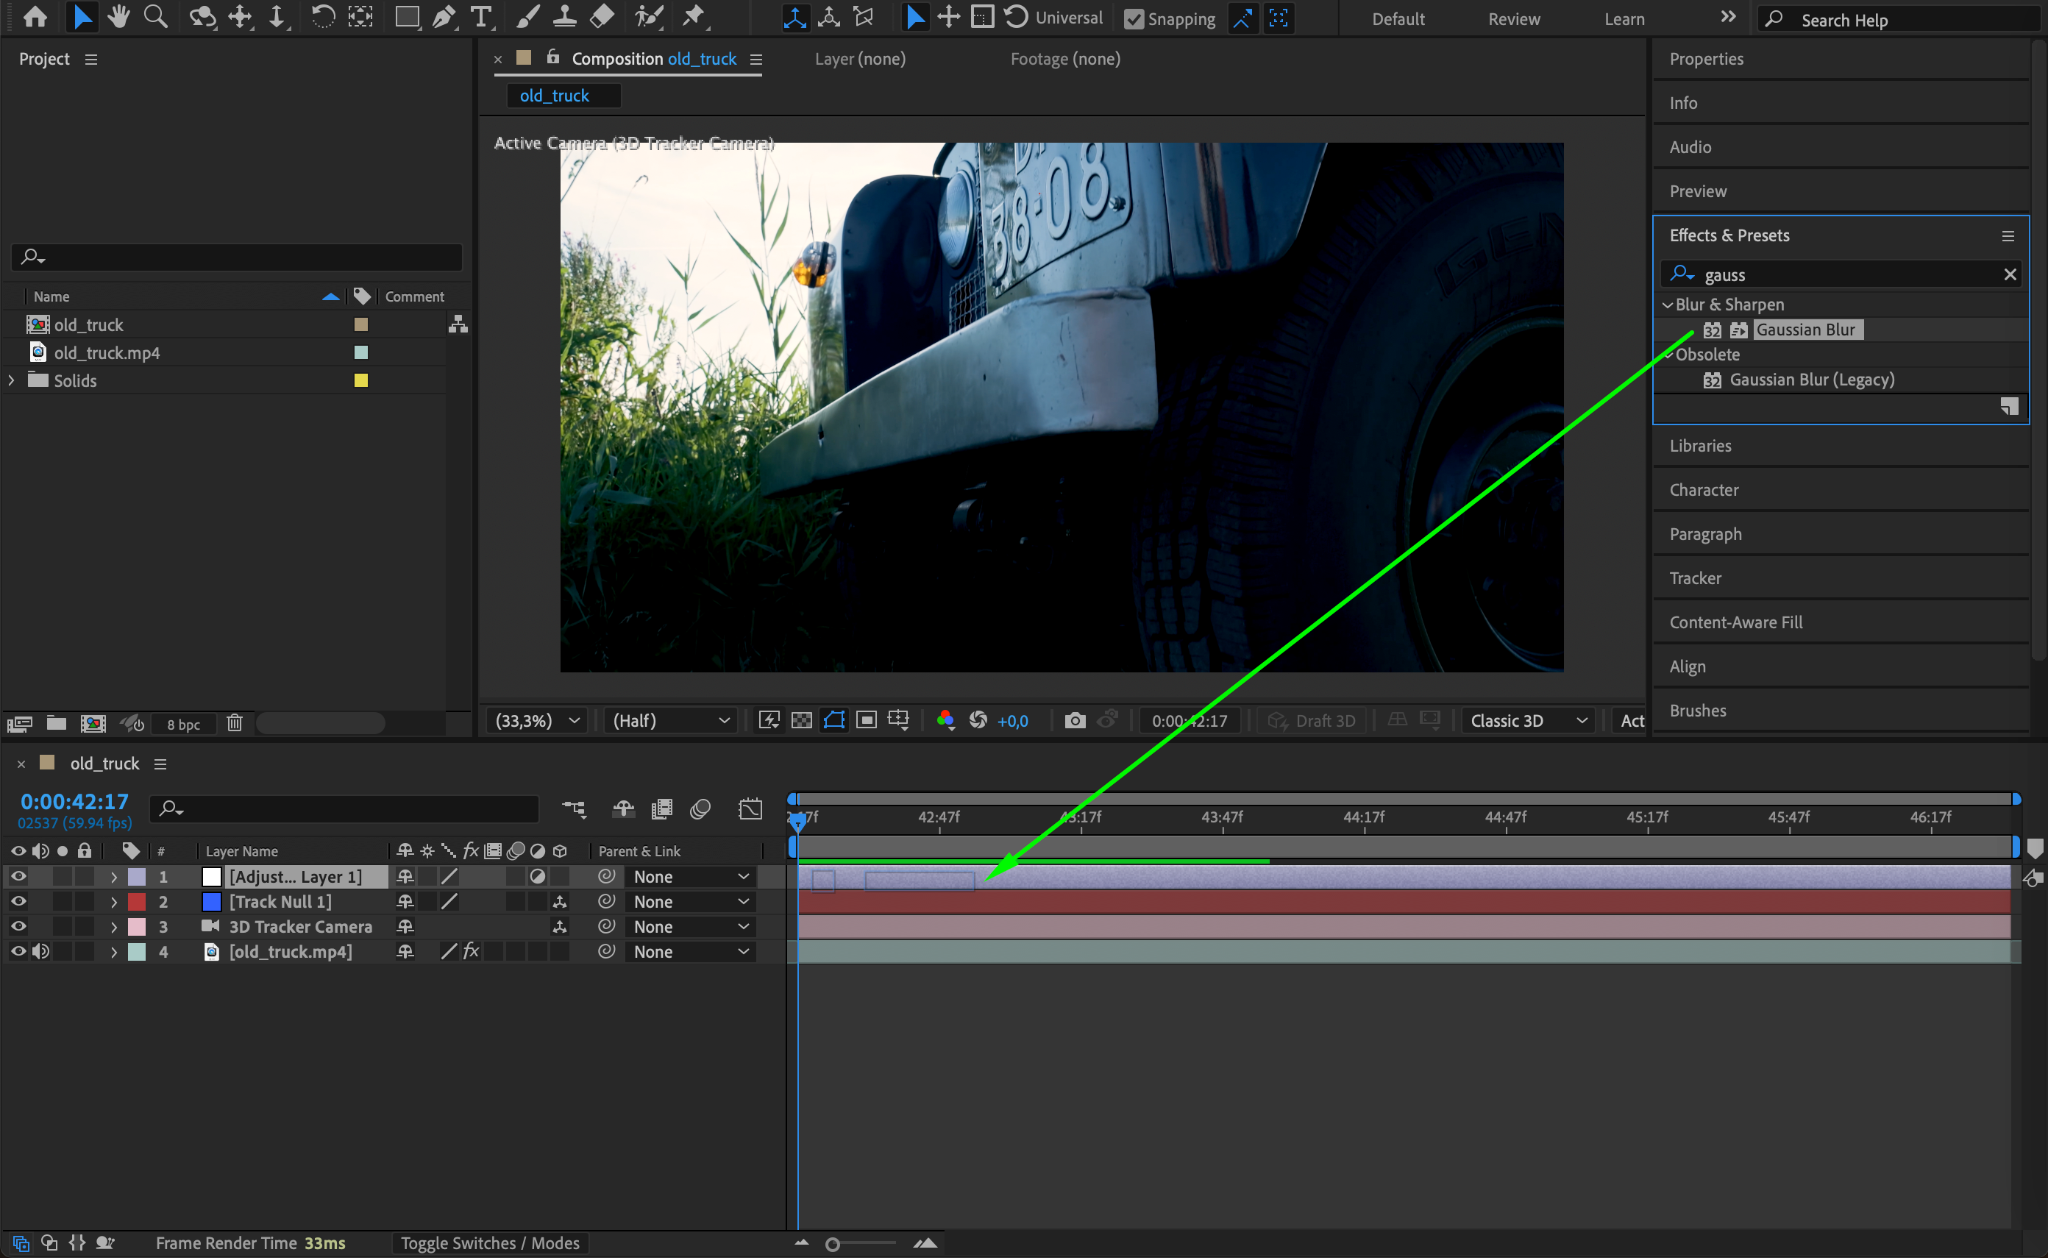
Step 6: Apply Gaussian Blur to the Adjustment Layer
With the adjustment layer selected, apply the Gaussian Blur effect from the Effects & Presets panel. This will allow you to blur the area of the license plate.
Step 7: Set the Blur Amount
In the Effect Controls panel, adjust the Blurriness setting to around 101 (or a value that completely hides the license plate). This will ensure that the number plate is no longer visible.

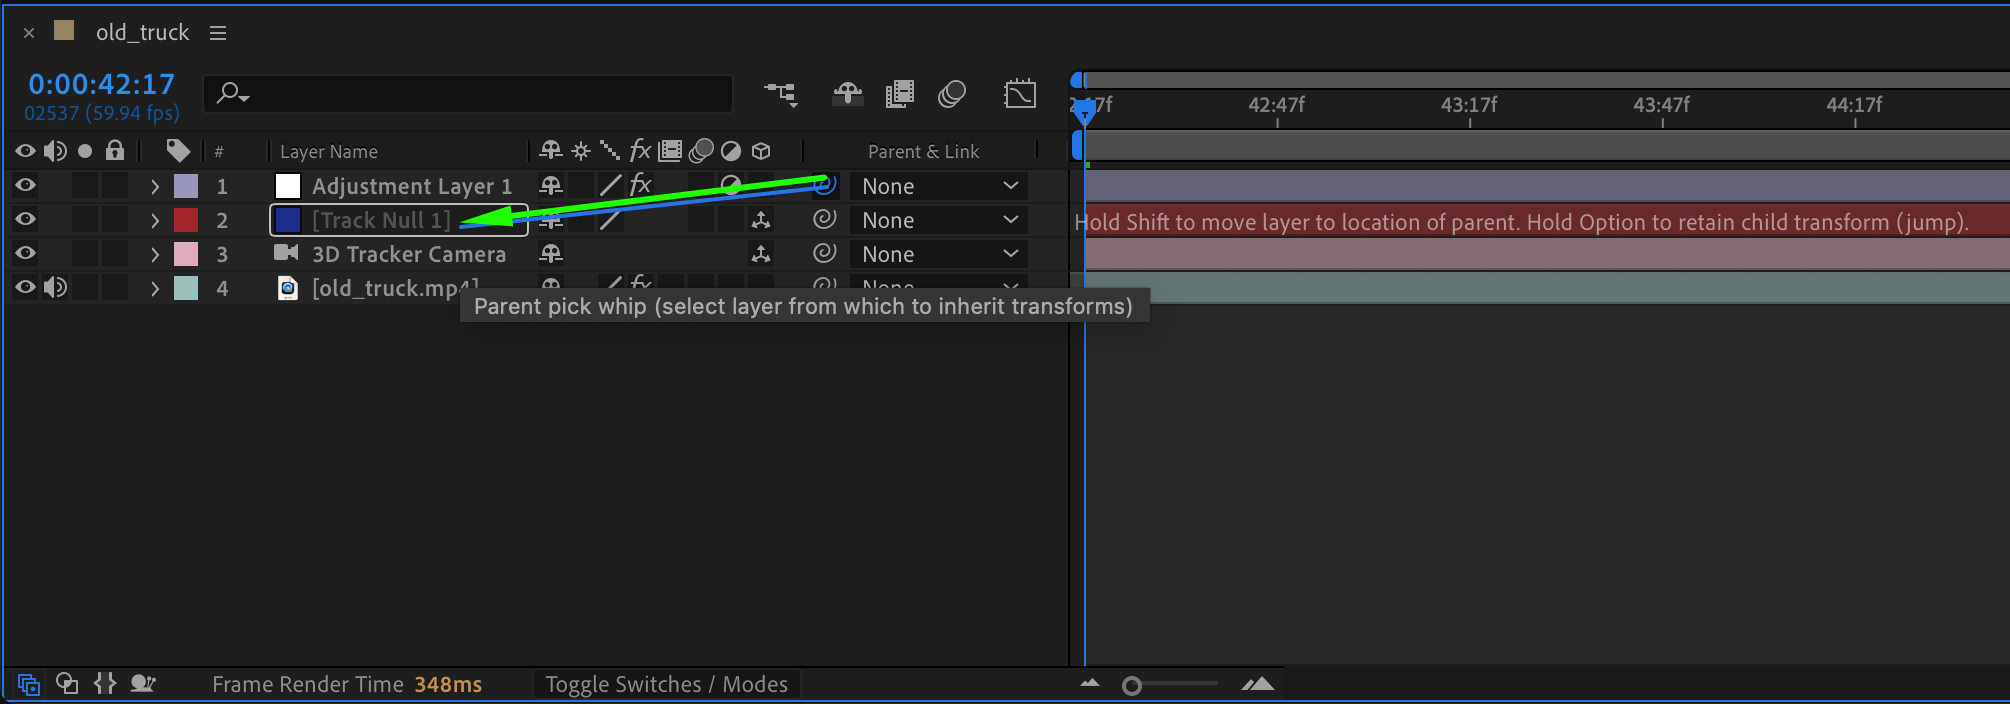
Step 8: Parent the Adjustment Layer to the Null Object
Use the Pick Whip Tool in the Timeline to parent the adjustment layer to the null object you created earlier. This links the adjustment layer to the null object, ensuring that it moves along with the tracked motion in the video.
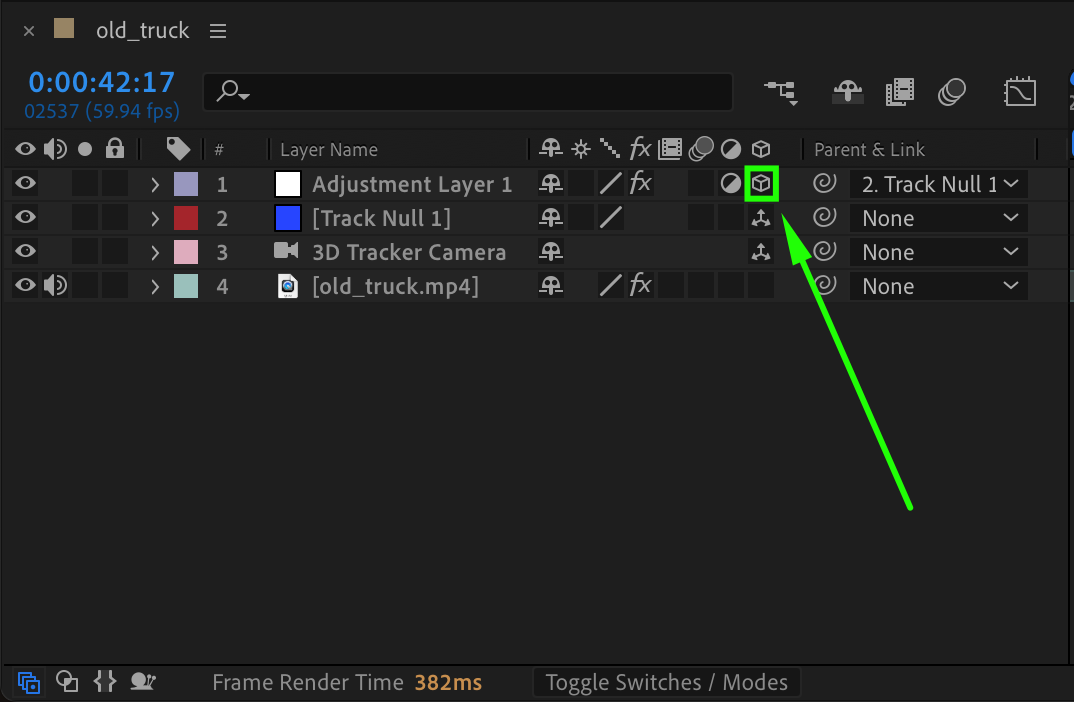
Step 9: Make the Adjustment Layer 3D
Make the adjustment layer a 3D layer by clicking the 3D cube icon next to the layer name in the Timeline. This will allow the blur effect to follow the camera movement in three-dimensional space.
Get 10% off when you subscribe to our newsletter

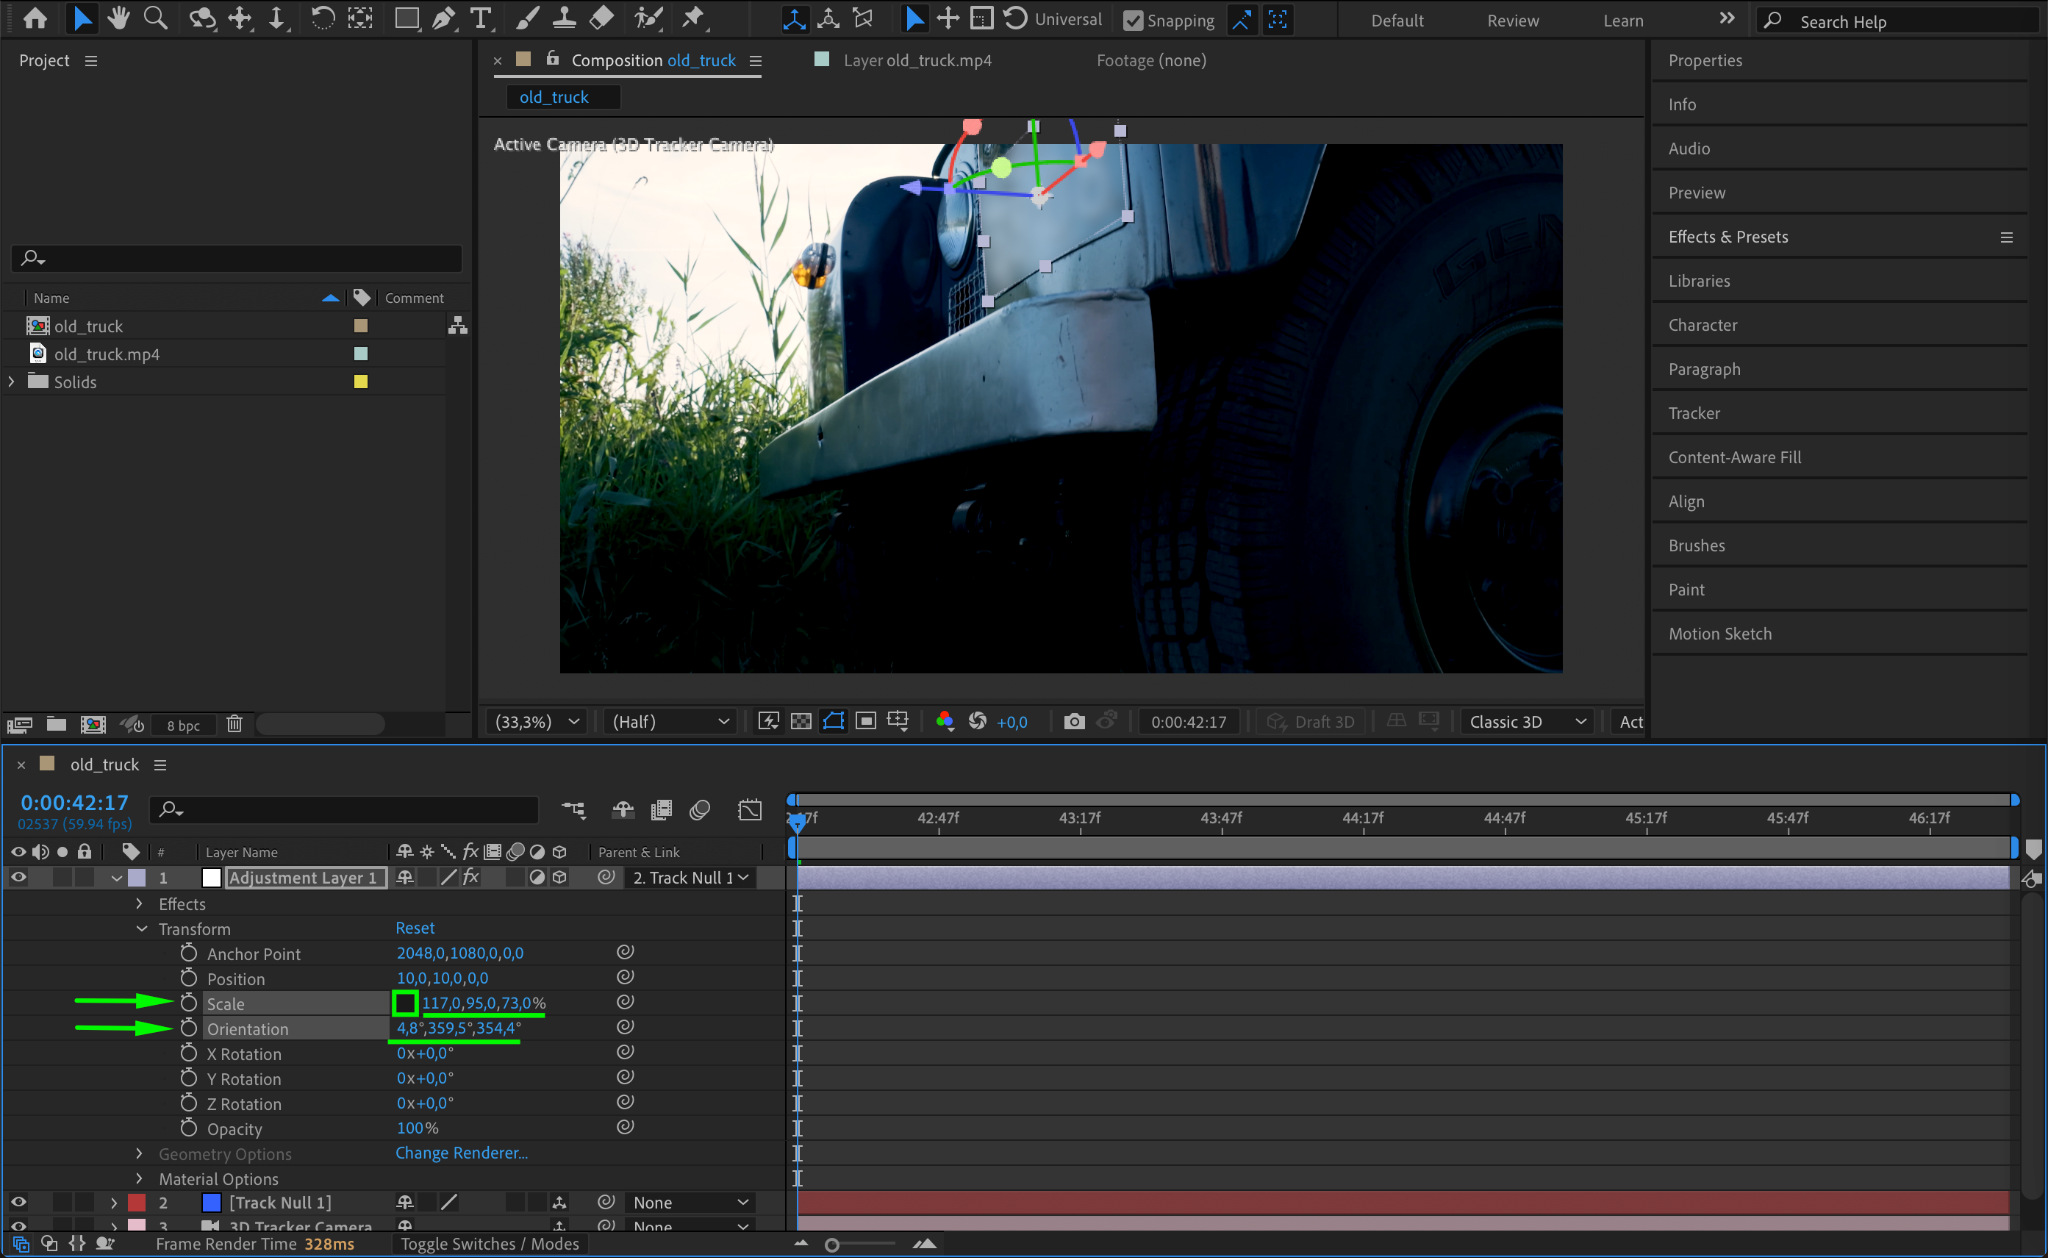
Step 10: Position the Adjustment Layer on the License Plate
Move the adjustment layer over the license plate. Use the Scale and Orientation settings to adjust the size and placement of the blur effect so it covers the license plate on all frames.

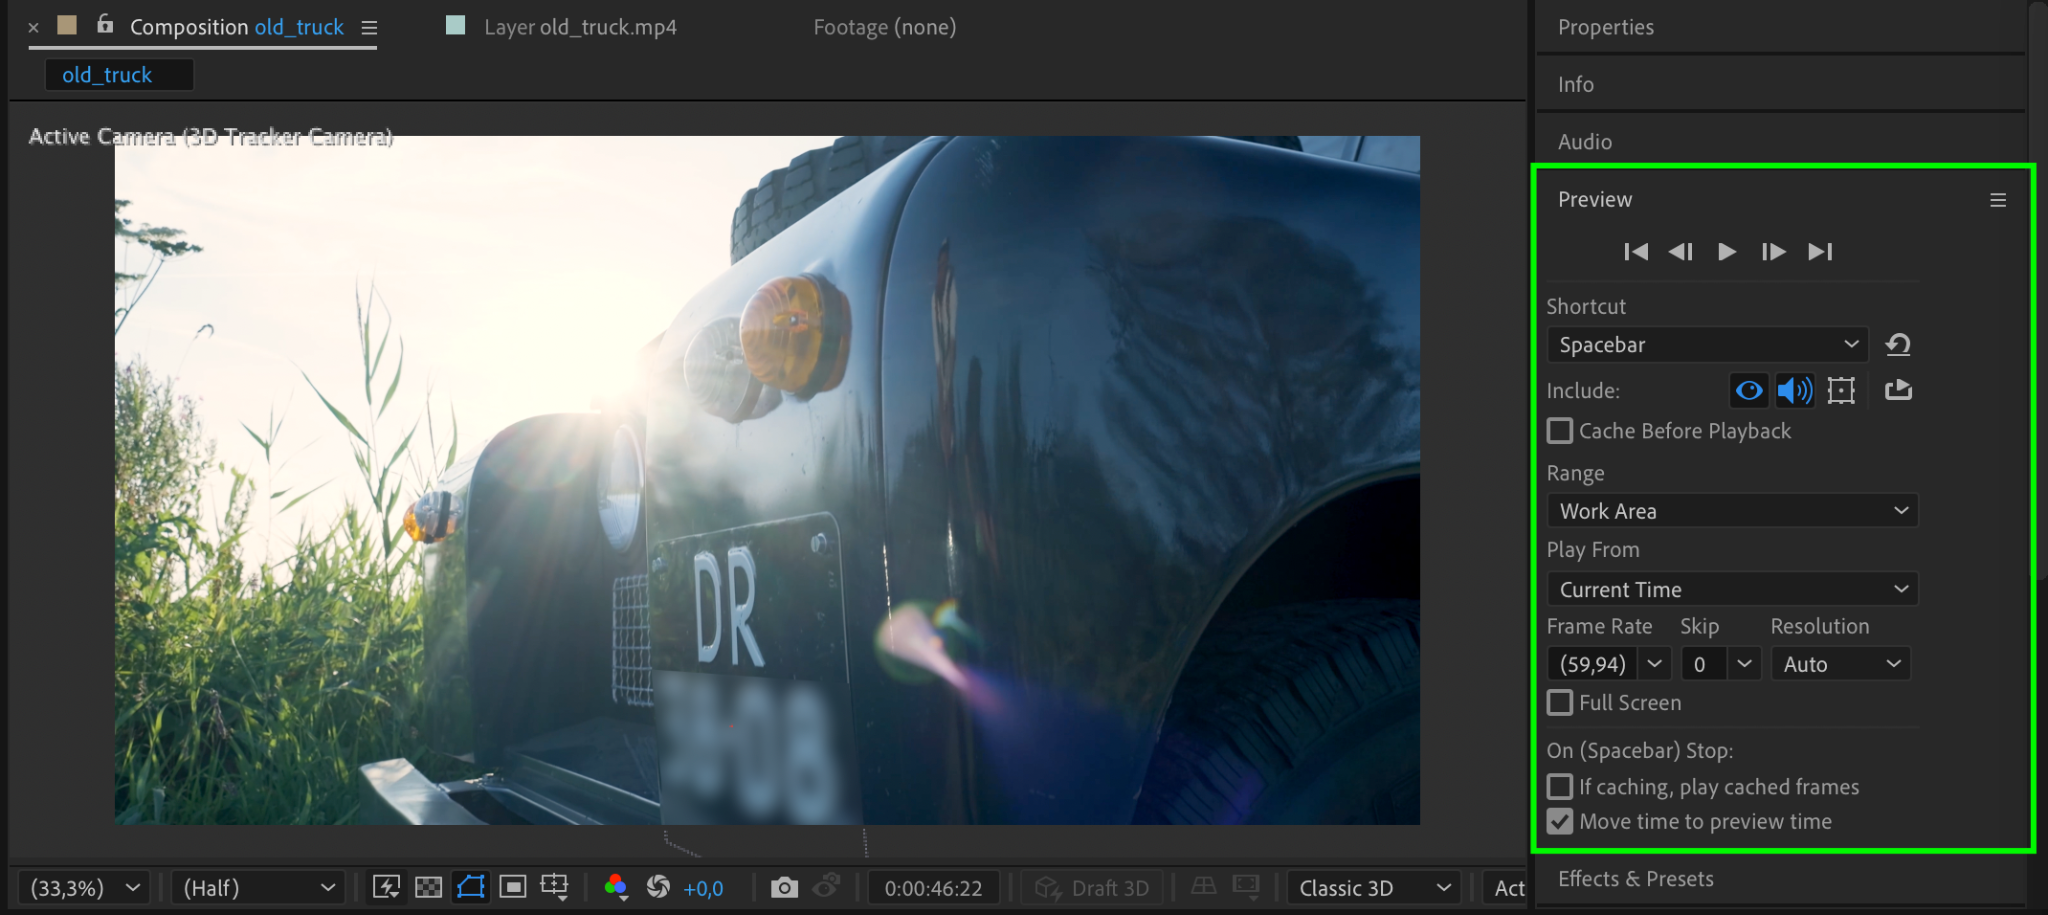
Step 11: Preview the Effect
Press Spacebar to preview the effect in the Composition panel. Check if the blur correctly covers the license plate and moves with the footage. Adjust the layer and keyframe settings if needed.
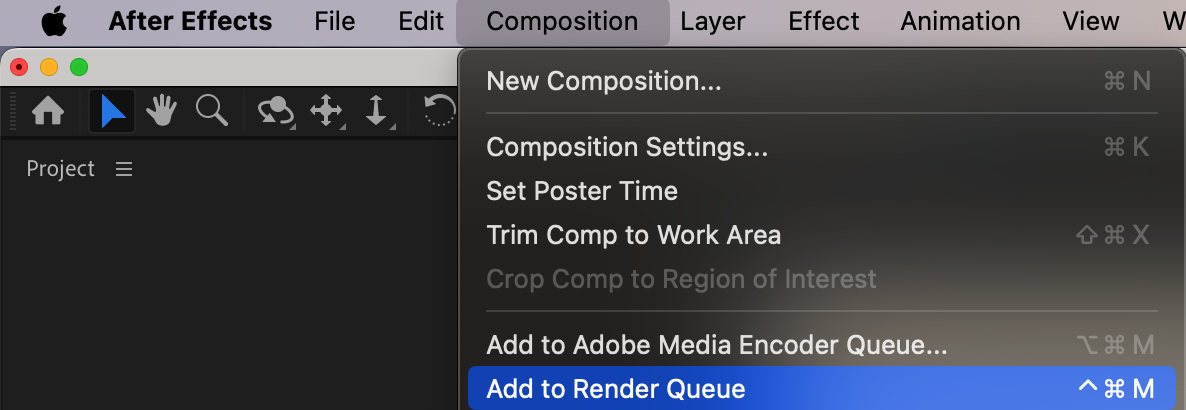
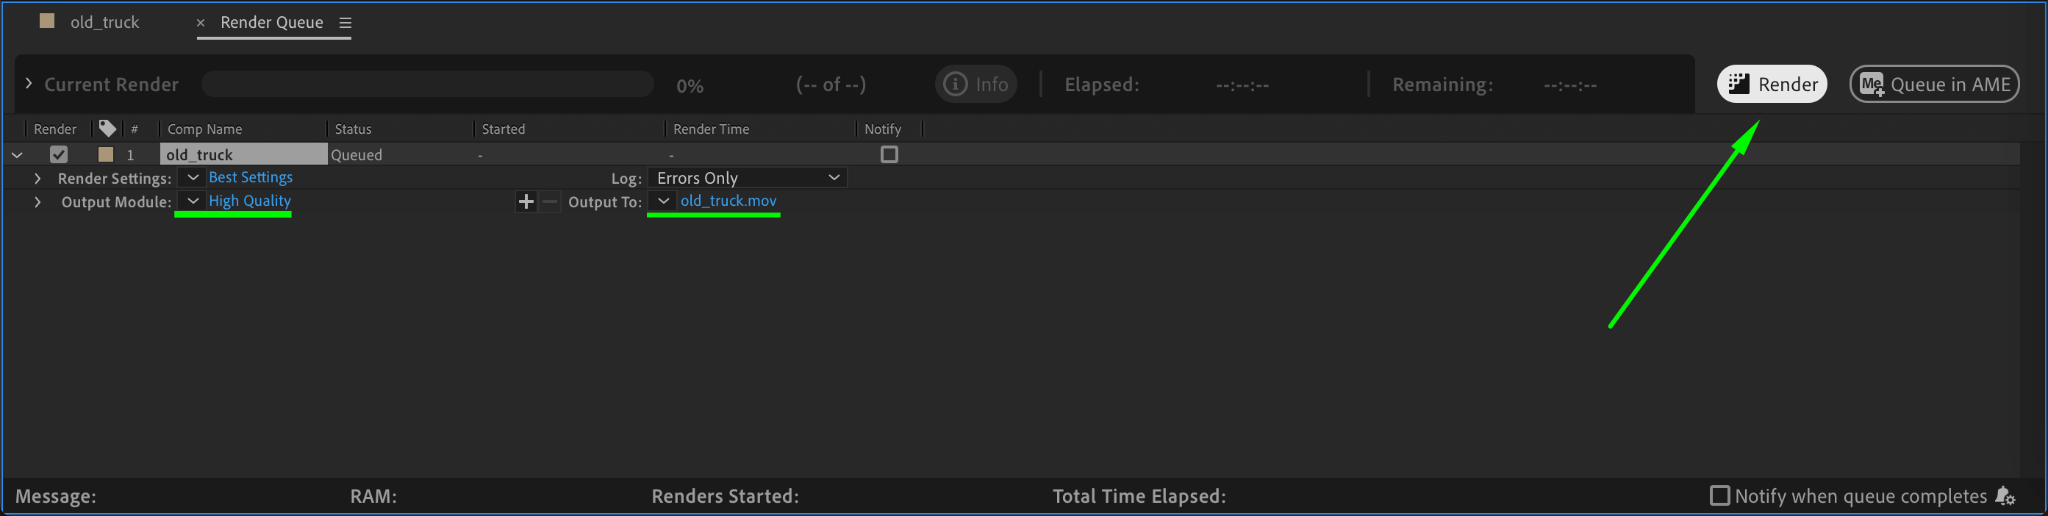
Step 12: Render the Final Video
Once you’re happy with the result, go to Composition > Add to Render Queue. Choose the output settings, and click Render to export your censored video.
Conclusion
By using the 3D Camera Tracker, Gaussian Blur, and a few simple adjustments, you can effectively censor sensitive information like license plates in After Effects. This technique ensures the blurred area follows the movement of the footage, providing a professional and seamless result.
Our Bestsellers


