The anchor point is a vital element in After Effects that determines the point around which a layer will transform.
By understanding how to center and adjust the anchor point, you can achieve the desired animations and special effects in your projects.
It is therefore essential to have a good understanding of how to manipulate anchor points in After Effects.
To guarantee that the anchor point of your layer is precisely positioned at the center in After Effects, you can utilize a few different methods
Get 10% off when you subscribe to our newsletter

1. One possibility is to utilize the built-in function.
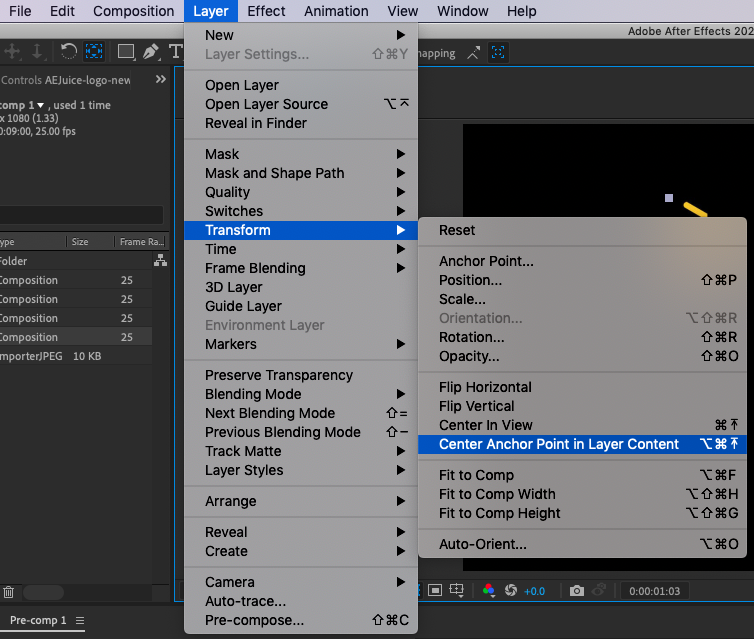
Select the layer, go to Layer >> Transform >> Center Anchor Point in Layer Content.This function will automatically center the anchor point of the selected layer at the center of the layer’s content.

2. As an alternative, you can use a keyboard shortcut to quickly center the anchor point of the selected layer.
To do this, simply select the layer and then use the shortcut:
Mac: CMD + Option + Home
PC: CTRL + Alt + Home
3. If you find that you frequently need to use a center anchor point, you can set your default anchor point to populate in the center of the layer instead of the corner by default.
To do this, go to After Effects >> Preferences >> General.
Get 10% off when you subscribe to our newsletter

In the “General” tab, you will see a checkbox labeled “Center Anchor Point in New Shape Layers”. Simply check this box to set the default anchor point to the center for new shape layers.
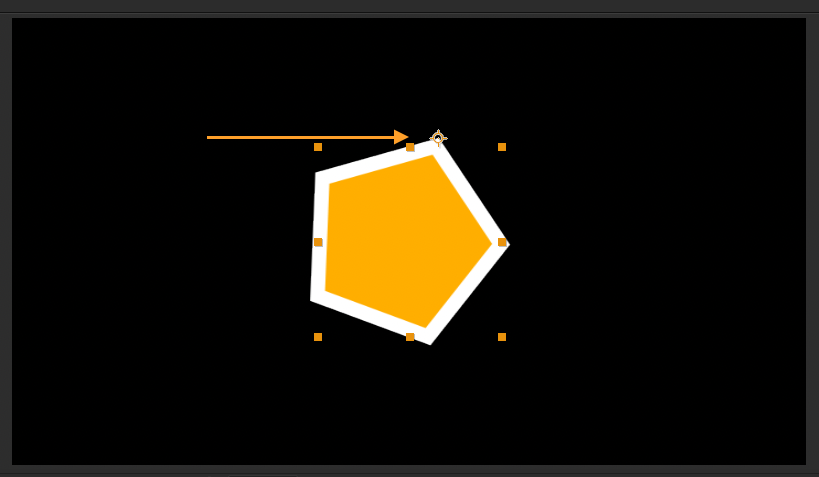
4. In addition to centering the anchor point, you may also need to finely adjust the position of the anchor point to a specific location on the layer
To do this, you can use the “Pan Behind” tool:
To activate the tool, click on the icon in your toolbar or hit Y on the keyboard.
![]()
Once you have activated the “Pan Behind” tool, you can locate the anchor point and click and drag it to the desired position. This allows you to precisely position the anchor point without affecting the position of the rest of the layer.


