“Step-by-Step Guide to Changing the Scratch Disk in After Effects”
“Introduction – Manage Your Storage for Better After Effects Performance”
The scratch disk in After Effects is used to store temporary files, cache, and previews, which can take up significant space on your primary drive. Changing the scratch disk location to a faster or larger storage device can improve performance and free up valuable space. This guide will show you how to easily change the scratch disk location in After Effects.
Step 1: Open After Effects Preferences
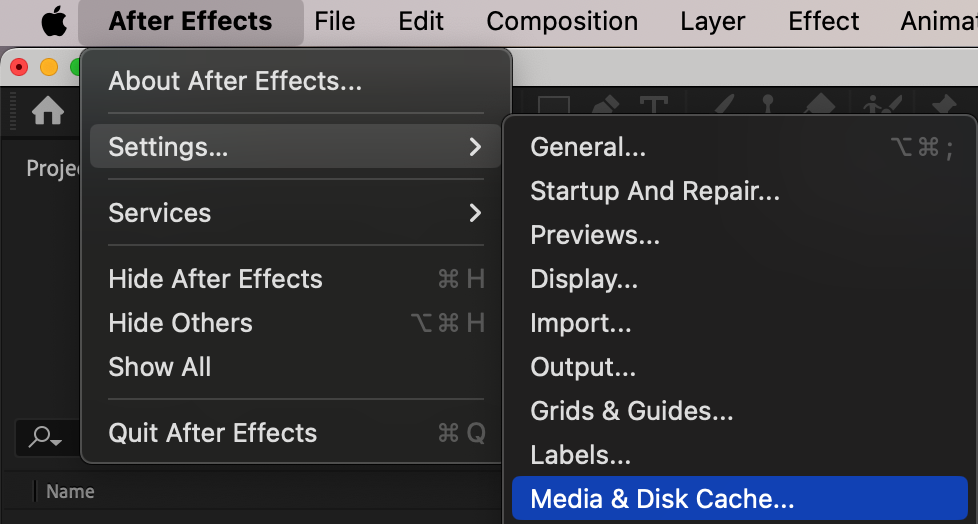
Start by opening After Effects and navigating to Edit > Preferences > Media & Disk Cache on Windows or After Effects > Settings > Media & Disk Cache on macOS. This menu allows you to access settings related to disk caching and temporary files.
Step 2: Locate the Disk Cache Settings
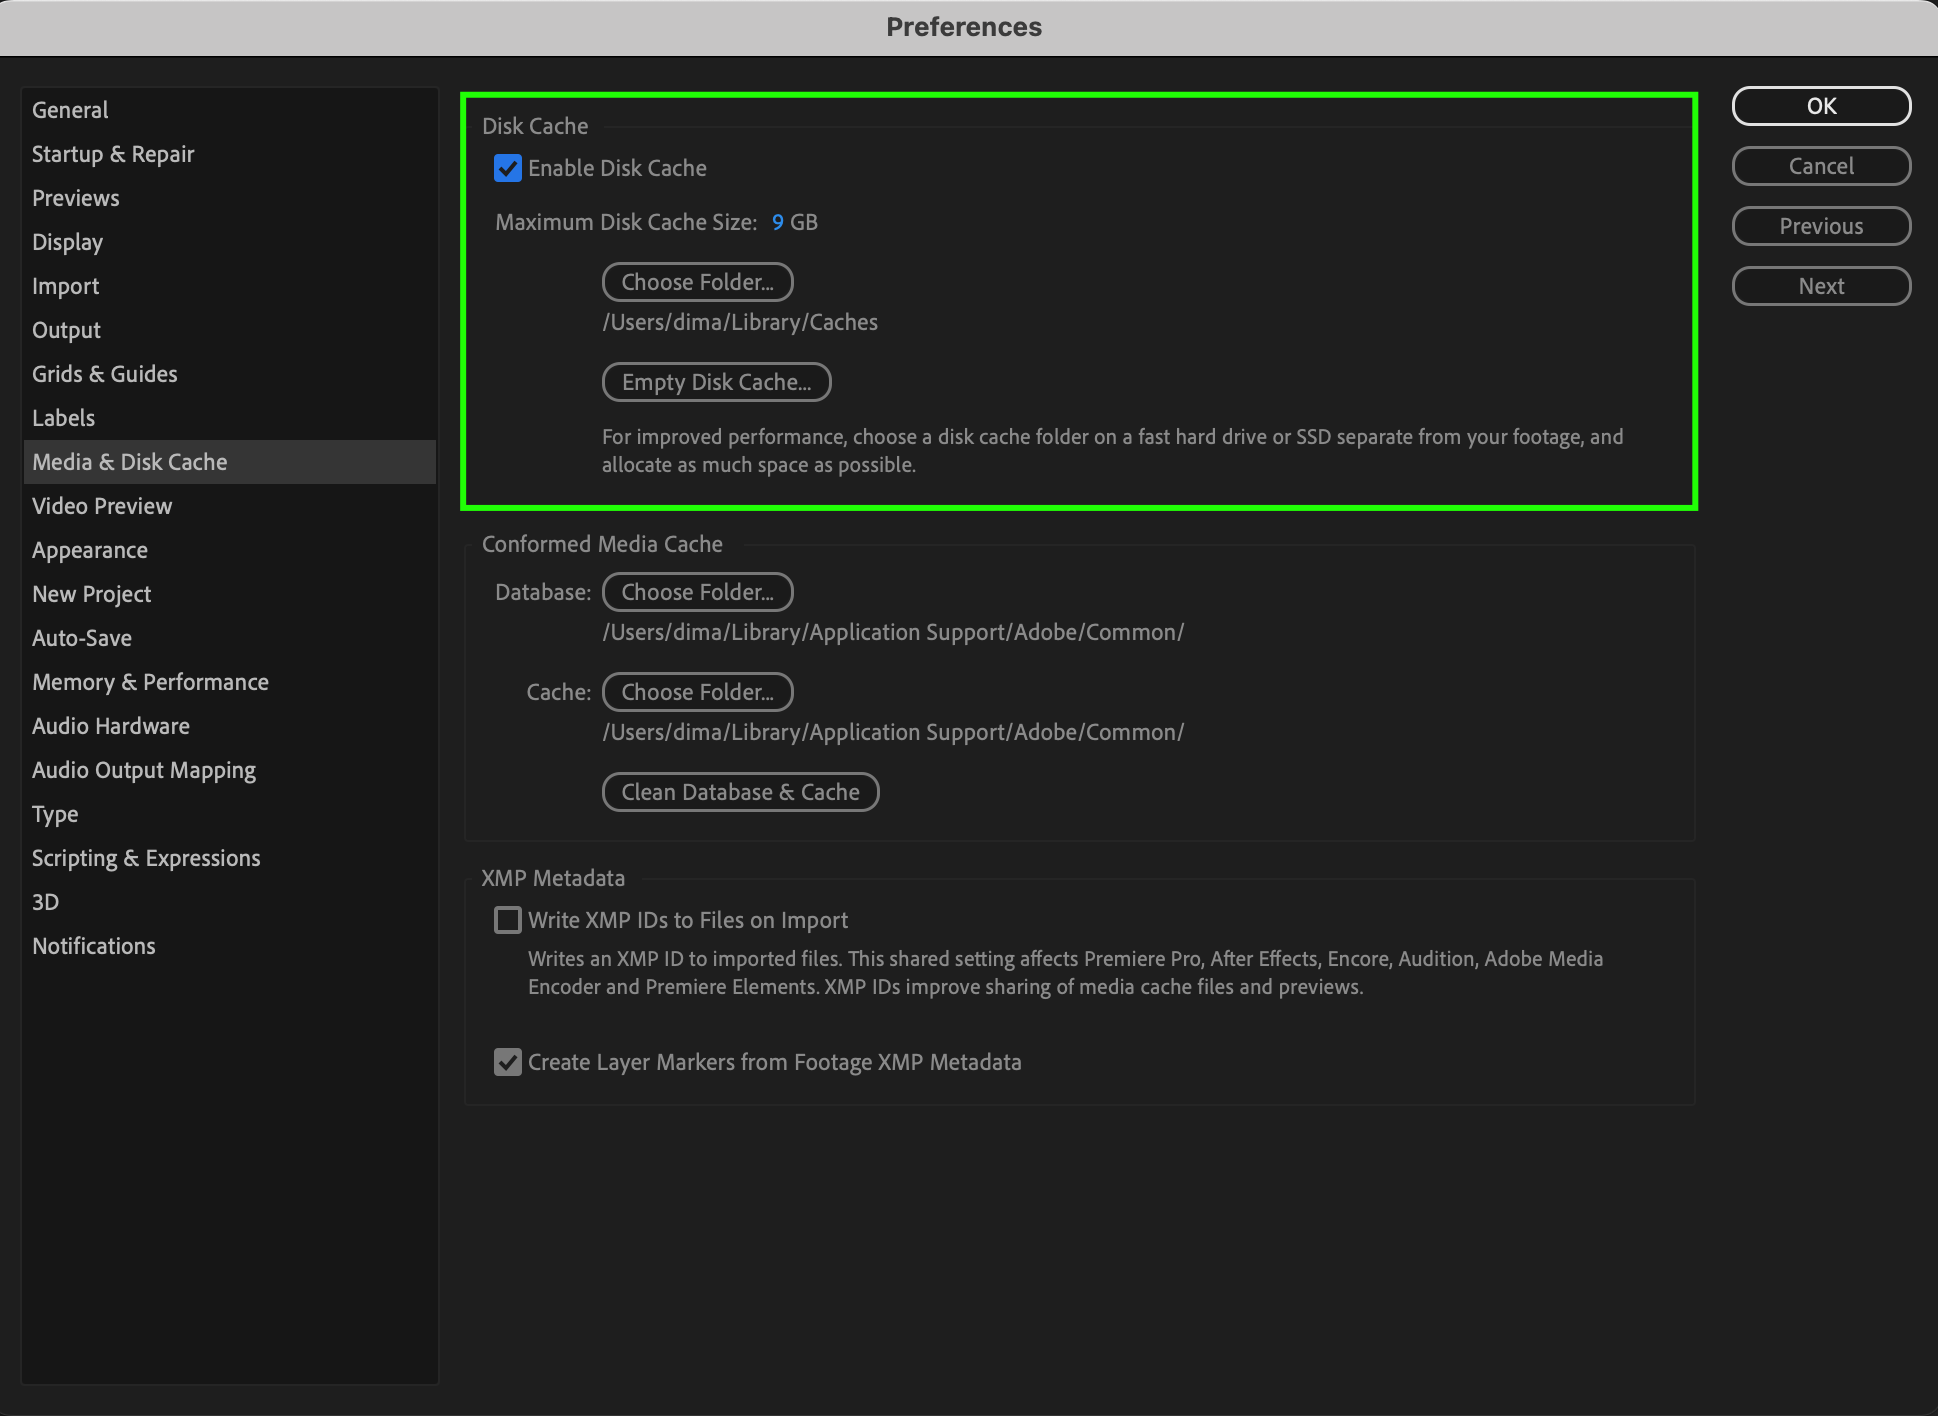
In the Preferences window, go to the Disk Cache section. Here, you’ll see the current location of your disk cache folder and details about its size and usage. This is where After Effects temporarily stores files to optimize performance.
Step 3: Choose a New Scratch Disk Location
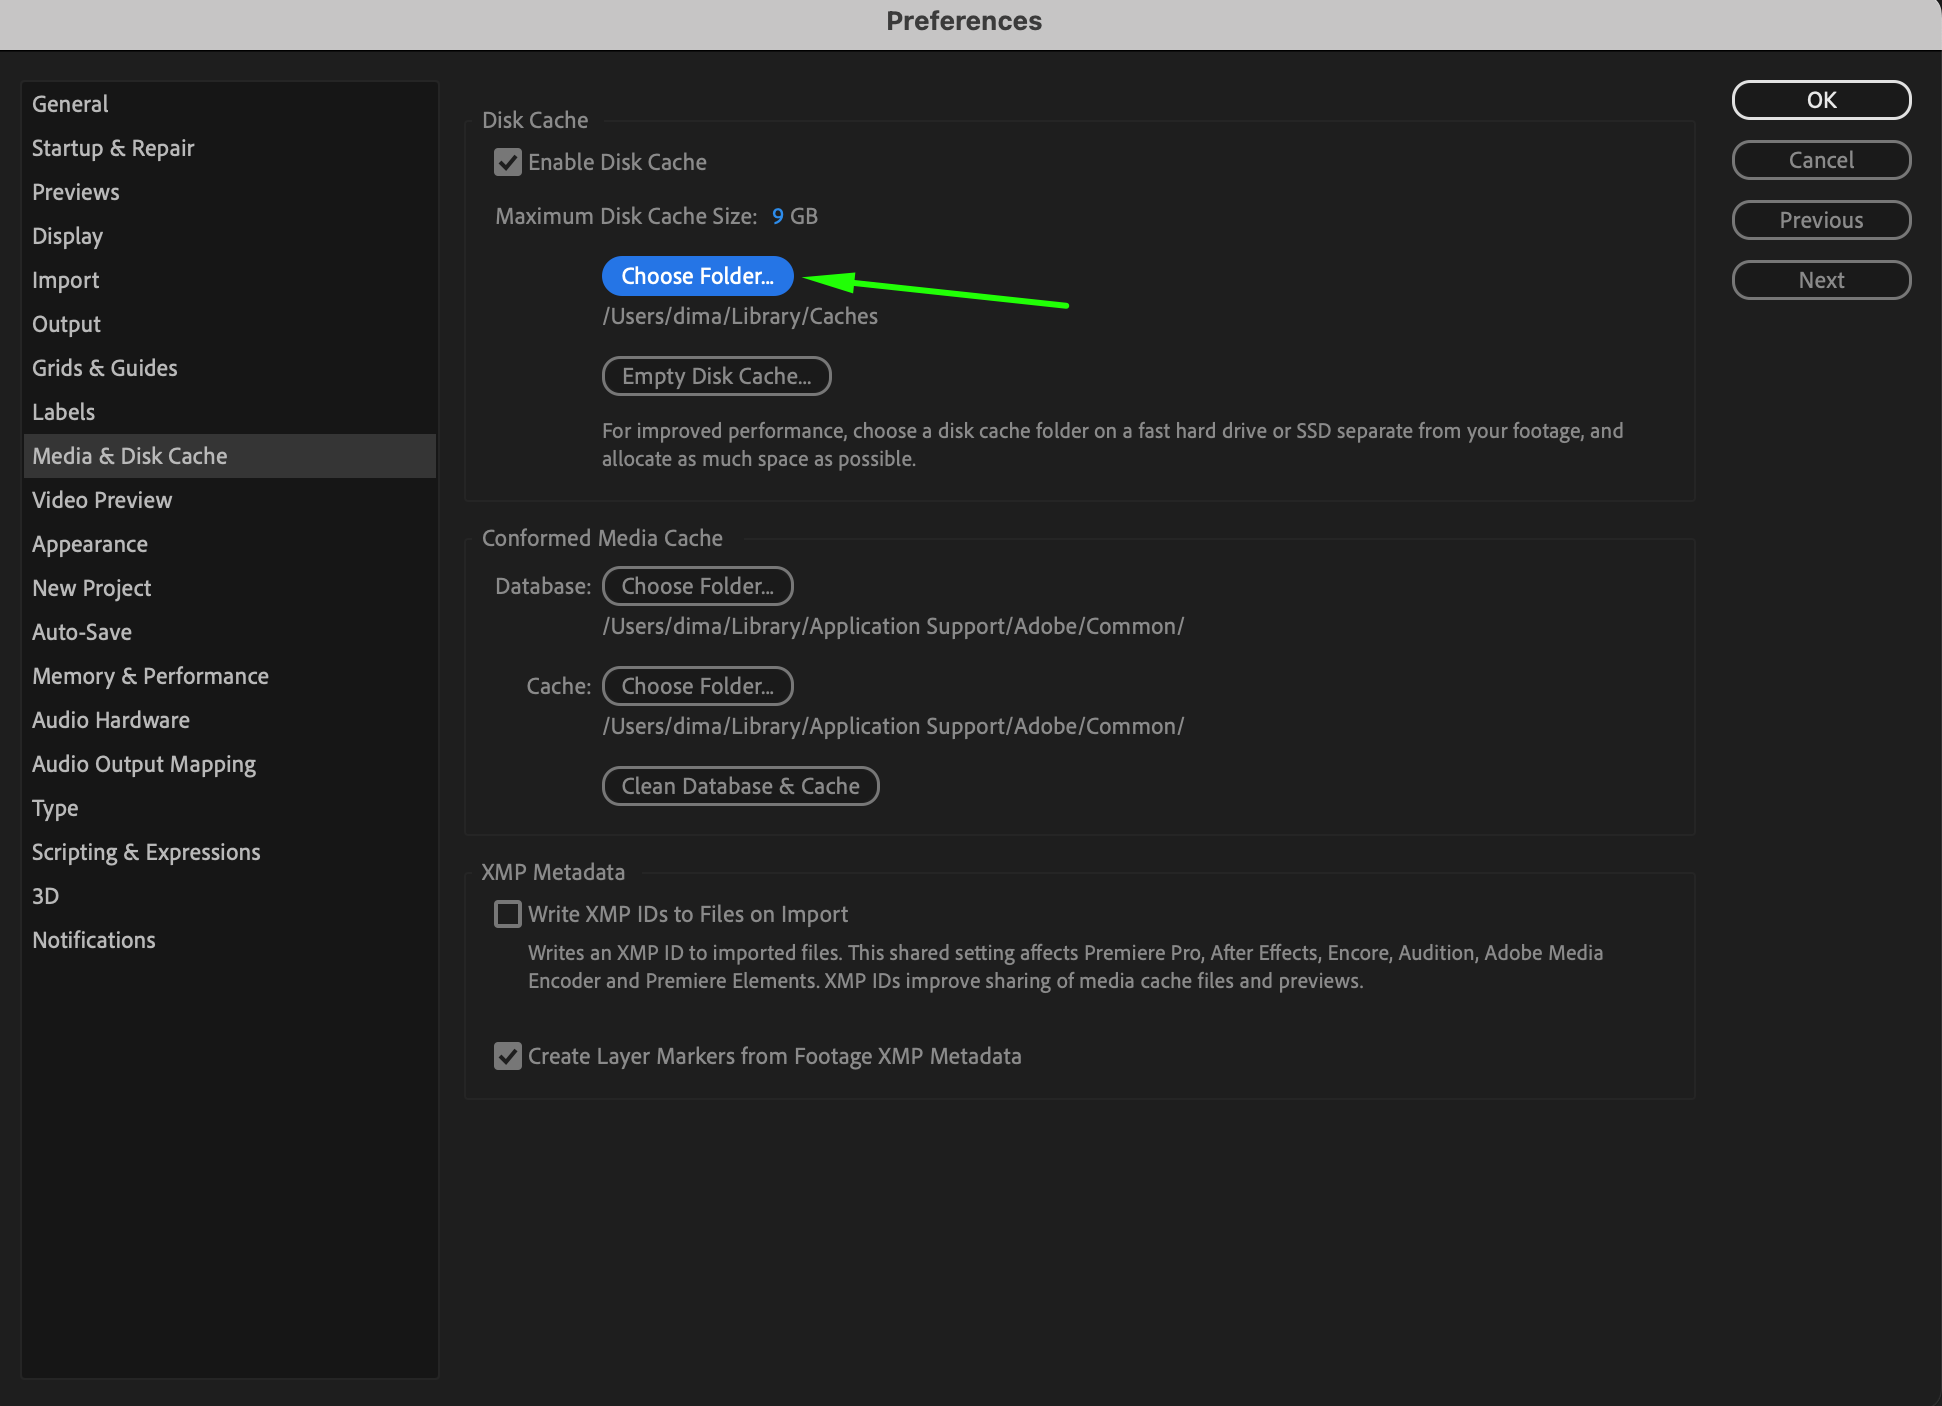
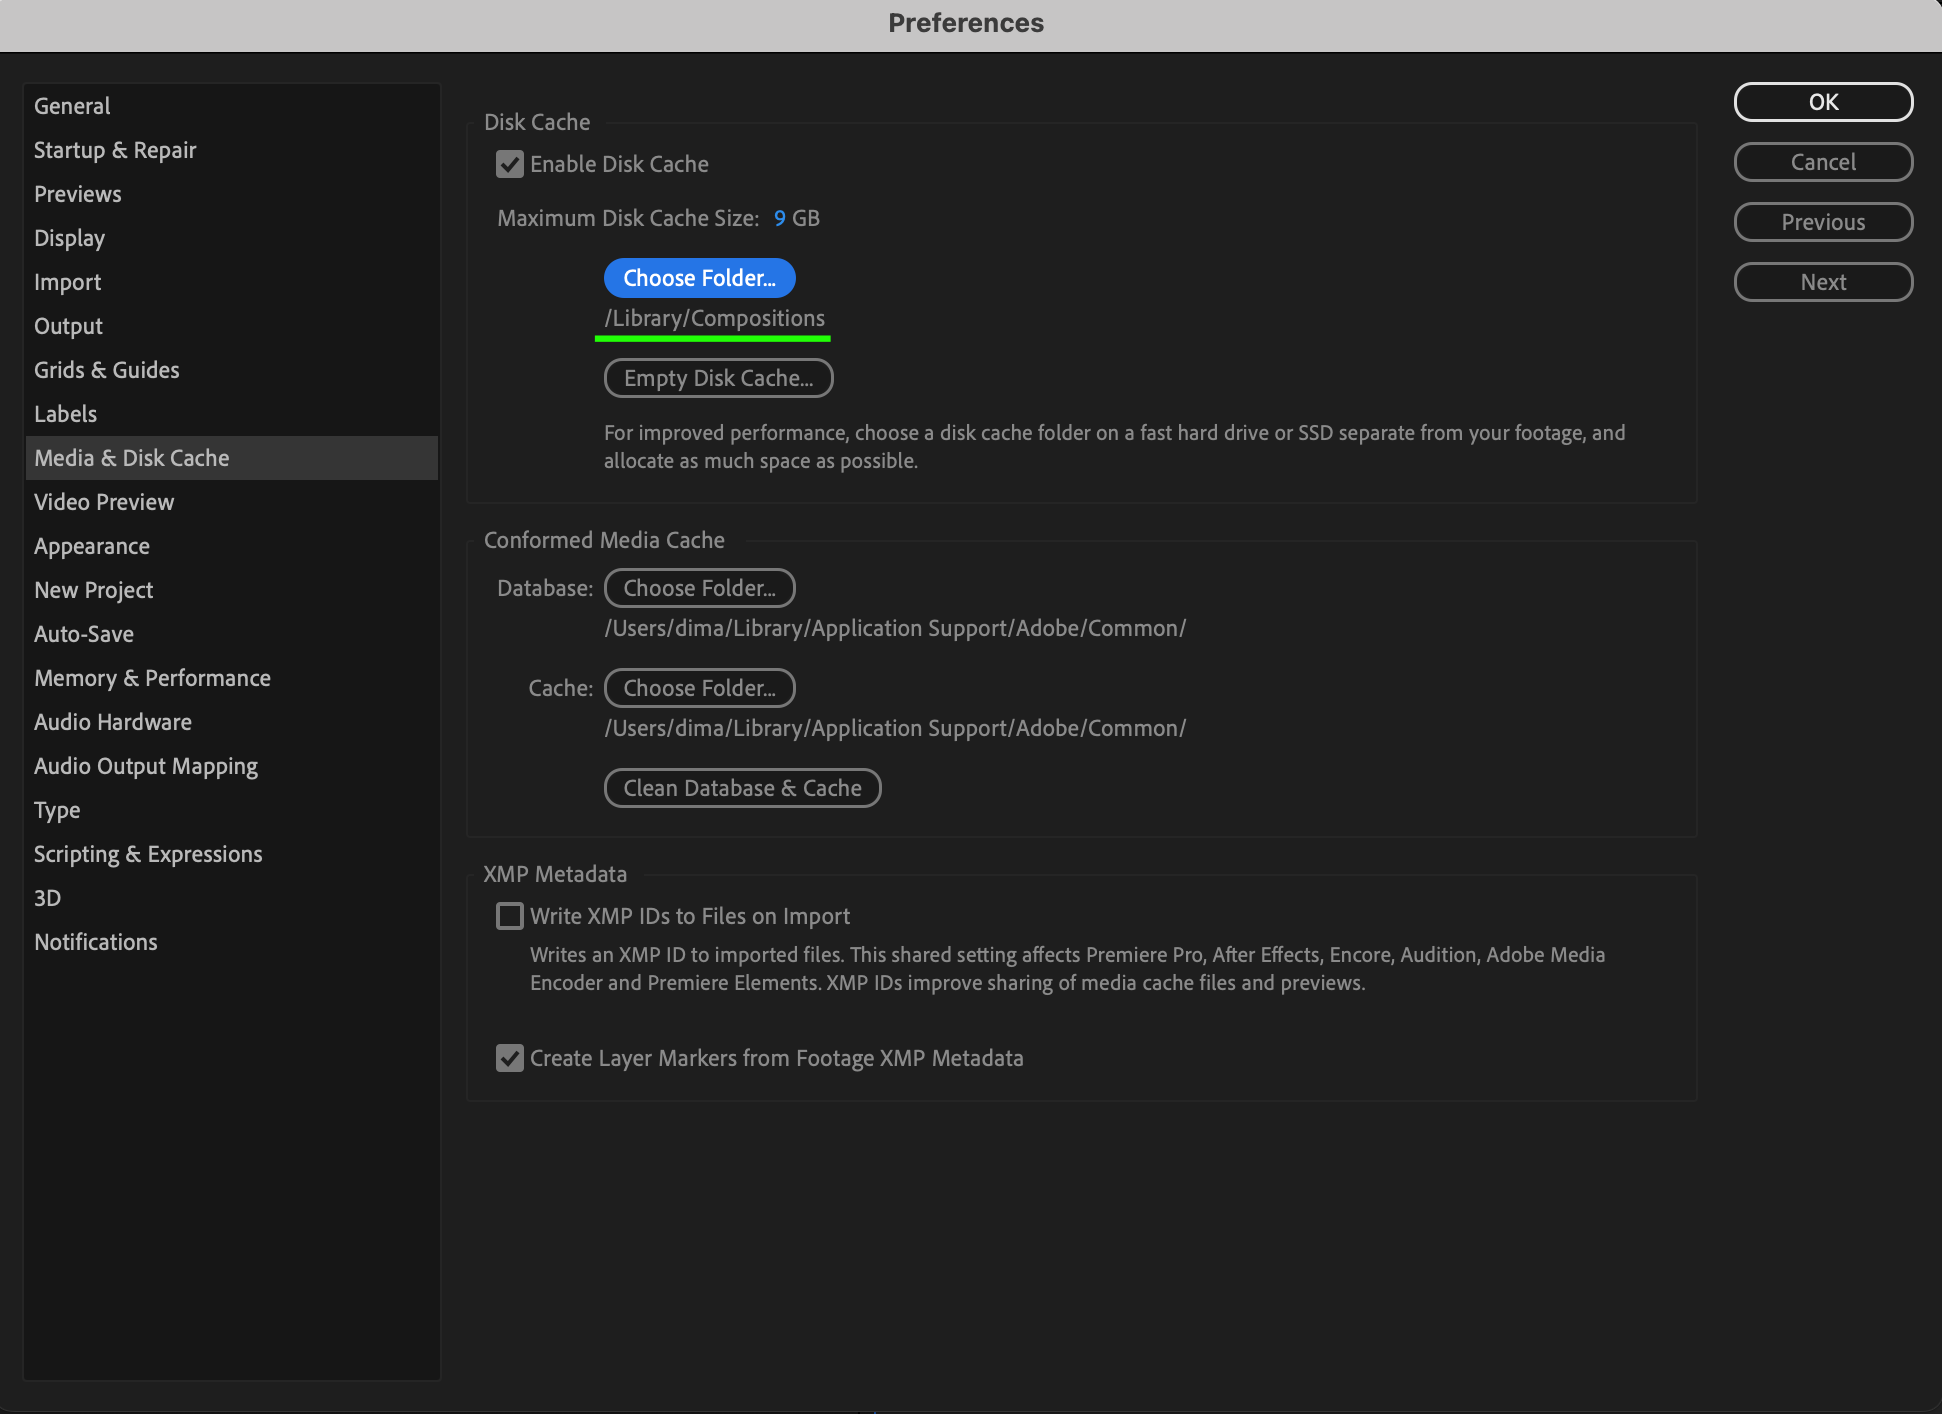
Click the Choose Folder button next to the disk cache location. Select a folder on a different drive with sufficient free space. Ideally, choose an SSD or a fast external drive for better performance. Avoid using system or OS drives if possible, as this can slow down your computer.
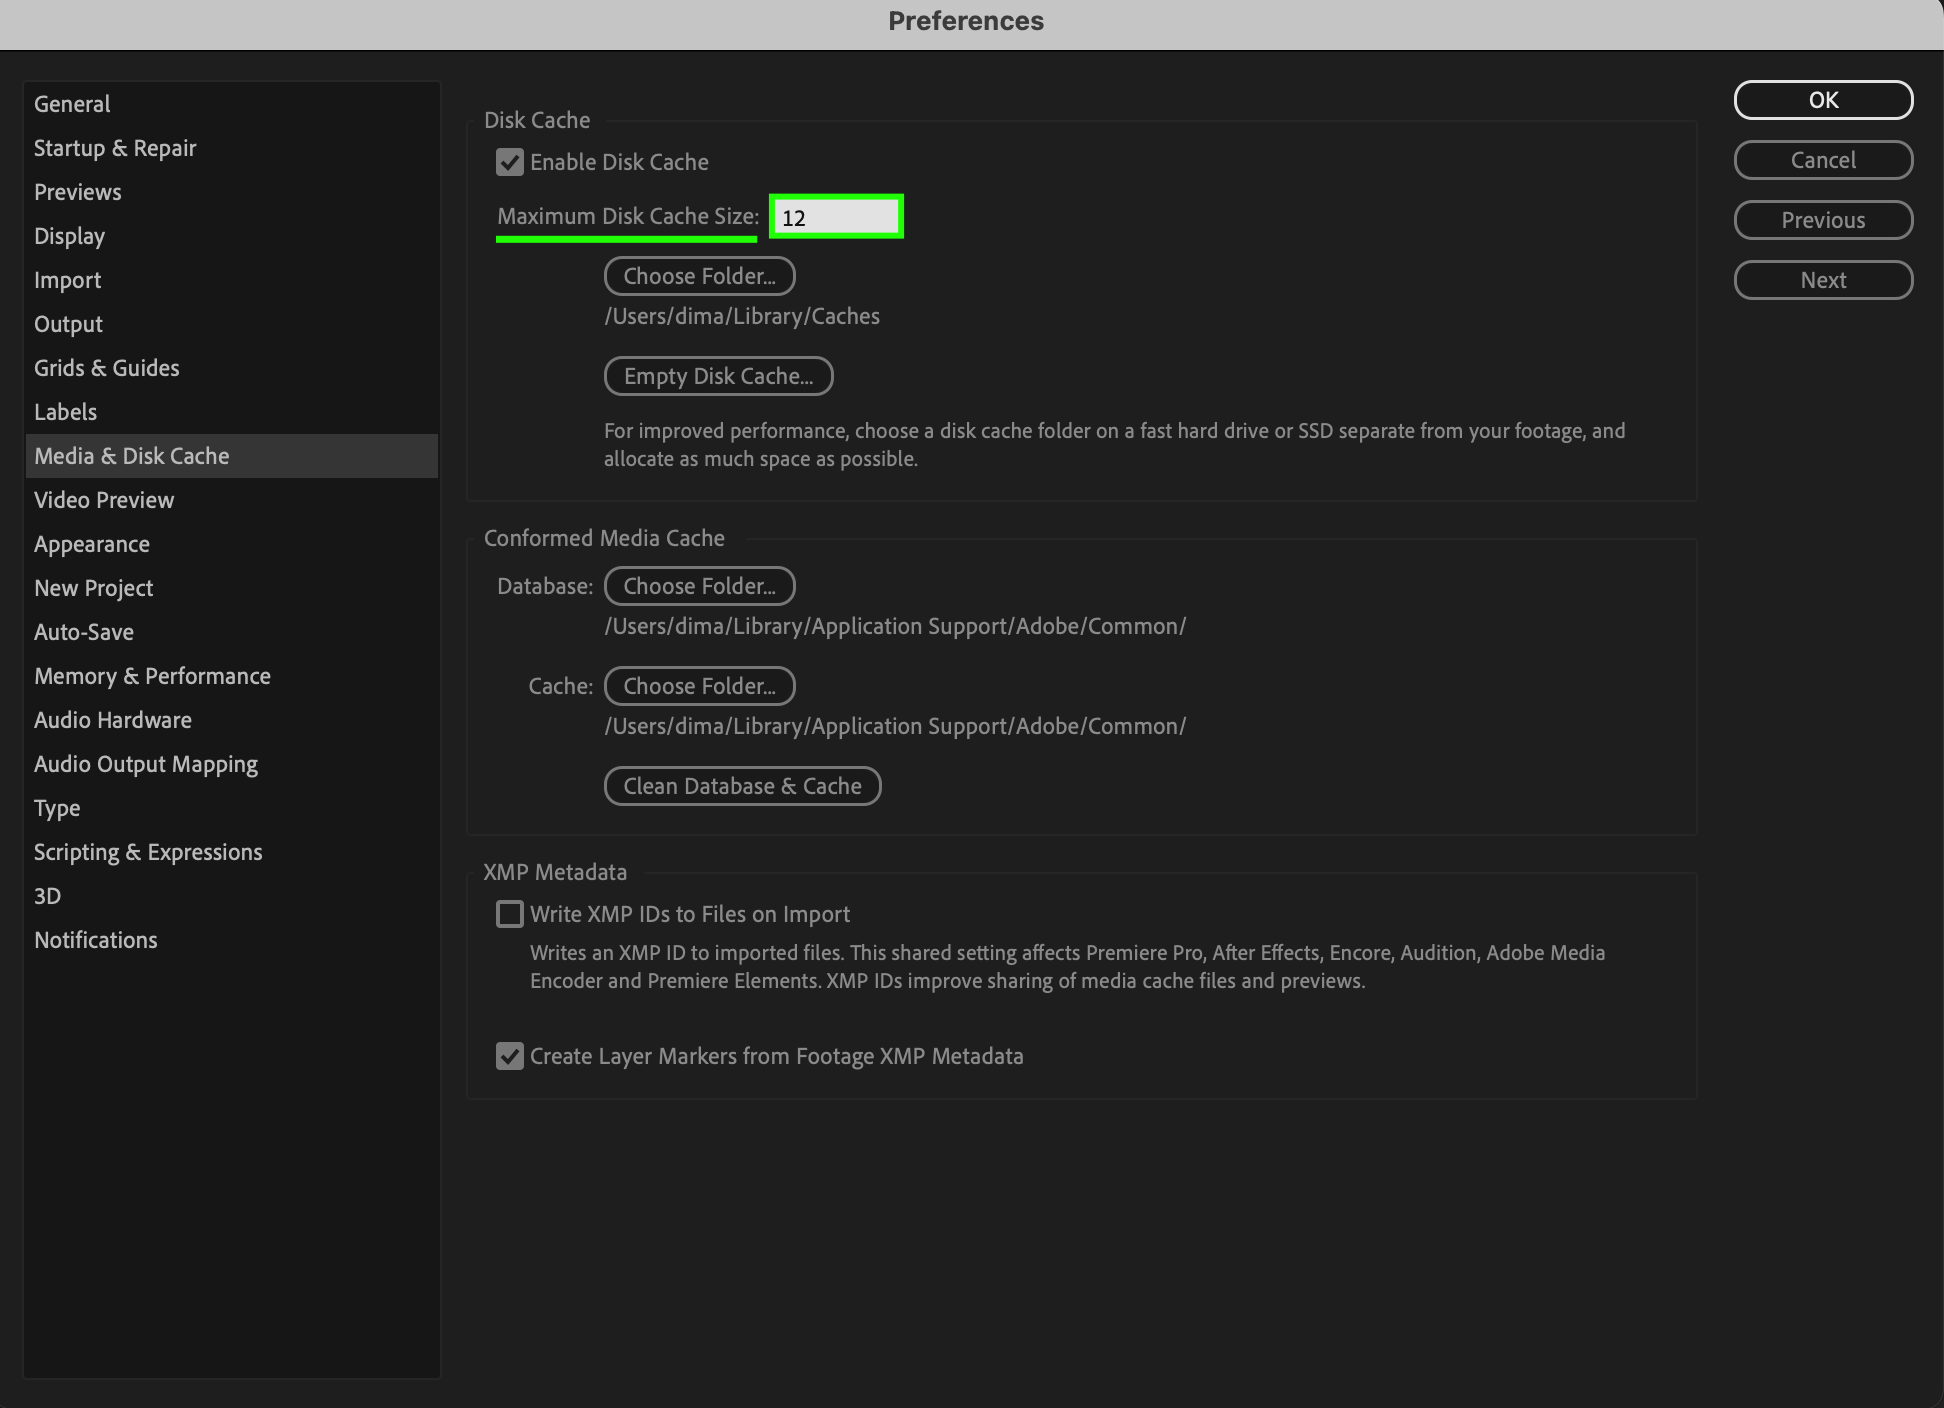
Step 4: Adjust the Maximum Disk Cache Size
While in the same window, you can also adjust the Maximum Disk Cache Size. Depending on your available storage, you can allocate more space for After Effects to use. Increasing this value can improve performance for larger projects but ensure it doesn’t exceed the capacity of the selected drive.
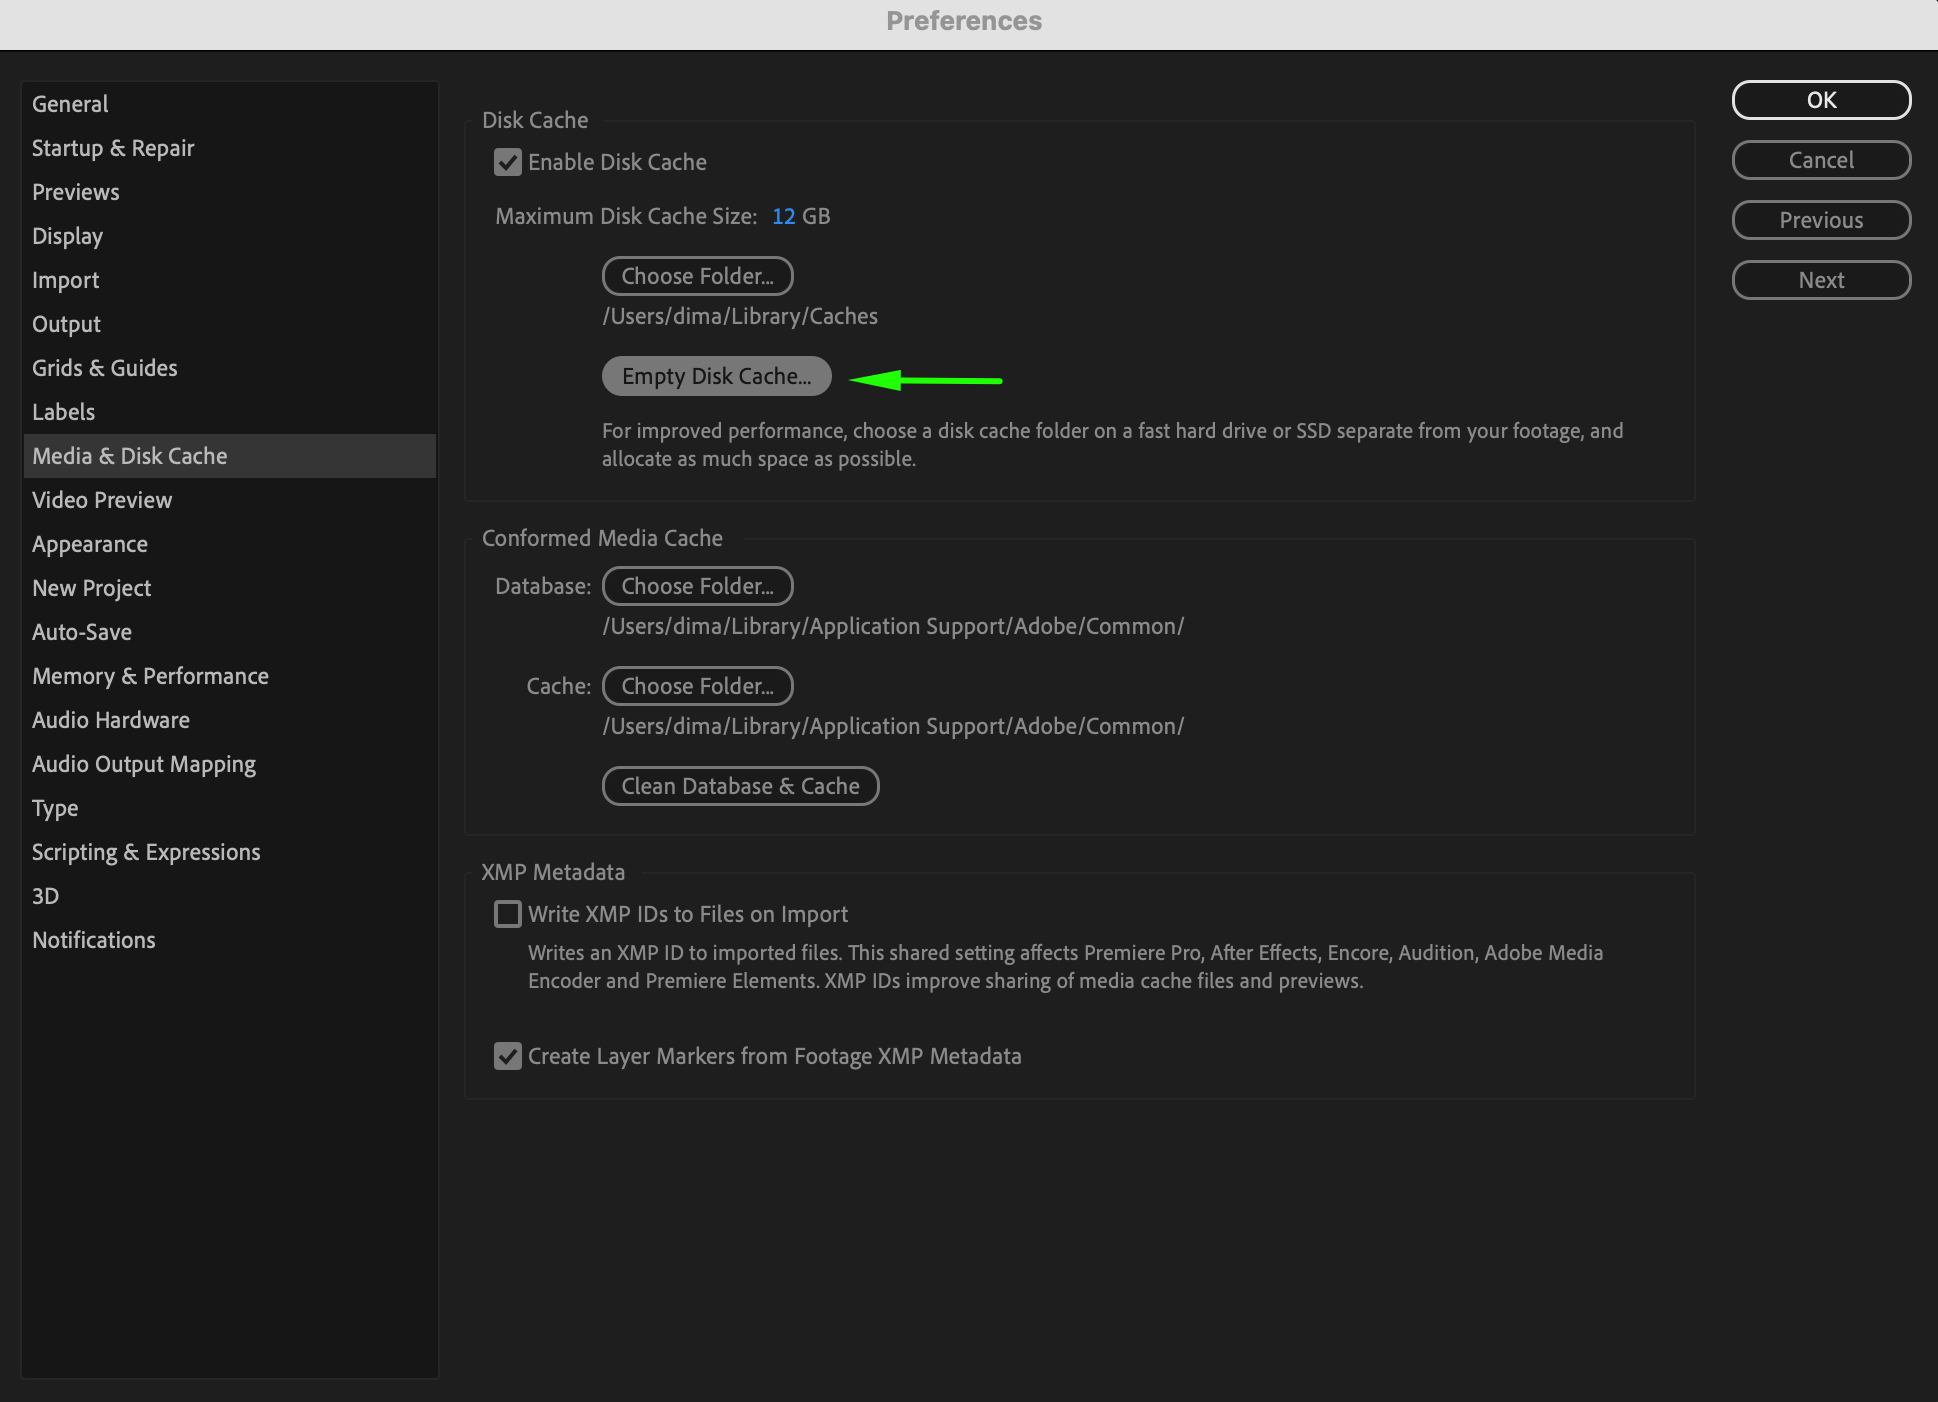
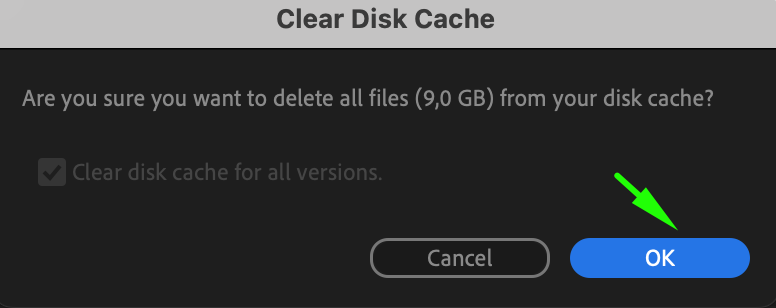
Step 5: Clear the Old Disk Cache (Optional)
If you want to free up space on your previous scratch disk, you can clear the old disk cache. Click the Empty Disk Cache button in the same preferences window. This will delete temporary files stored in the old location, freeing up space without affecting your projects.
Get 10% off when you subscribe to our newsletter

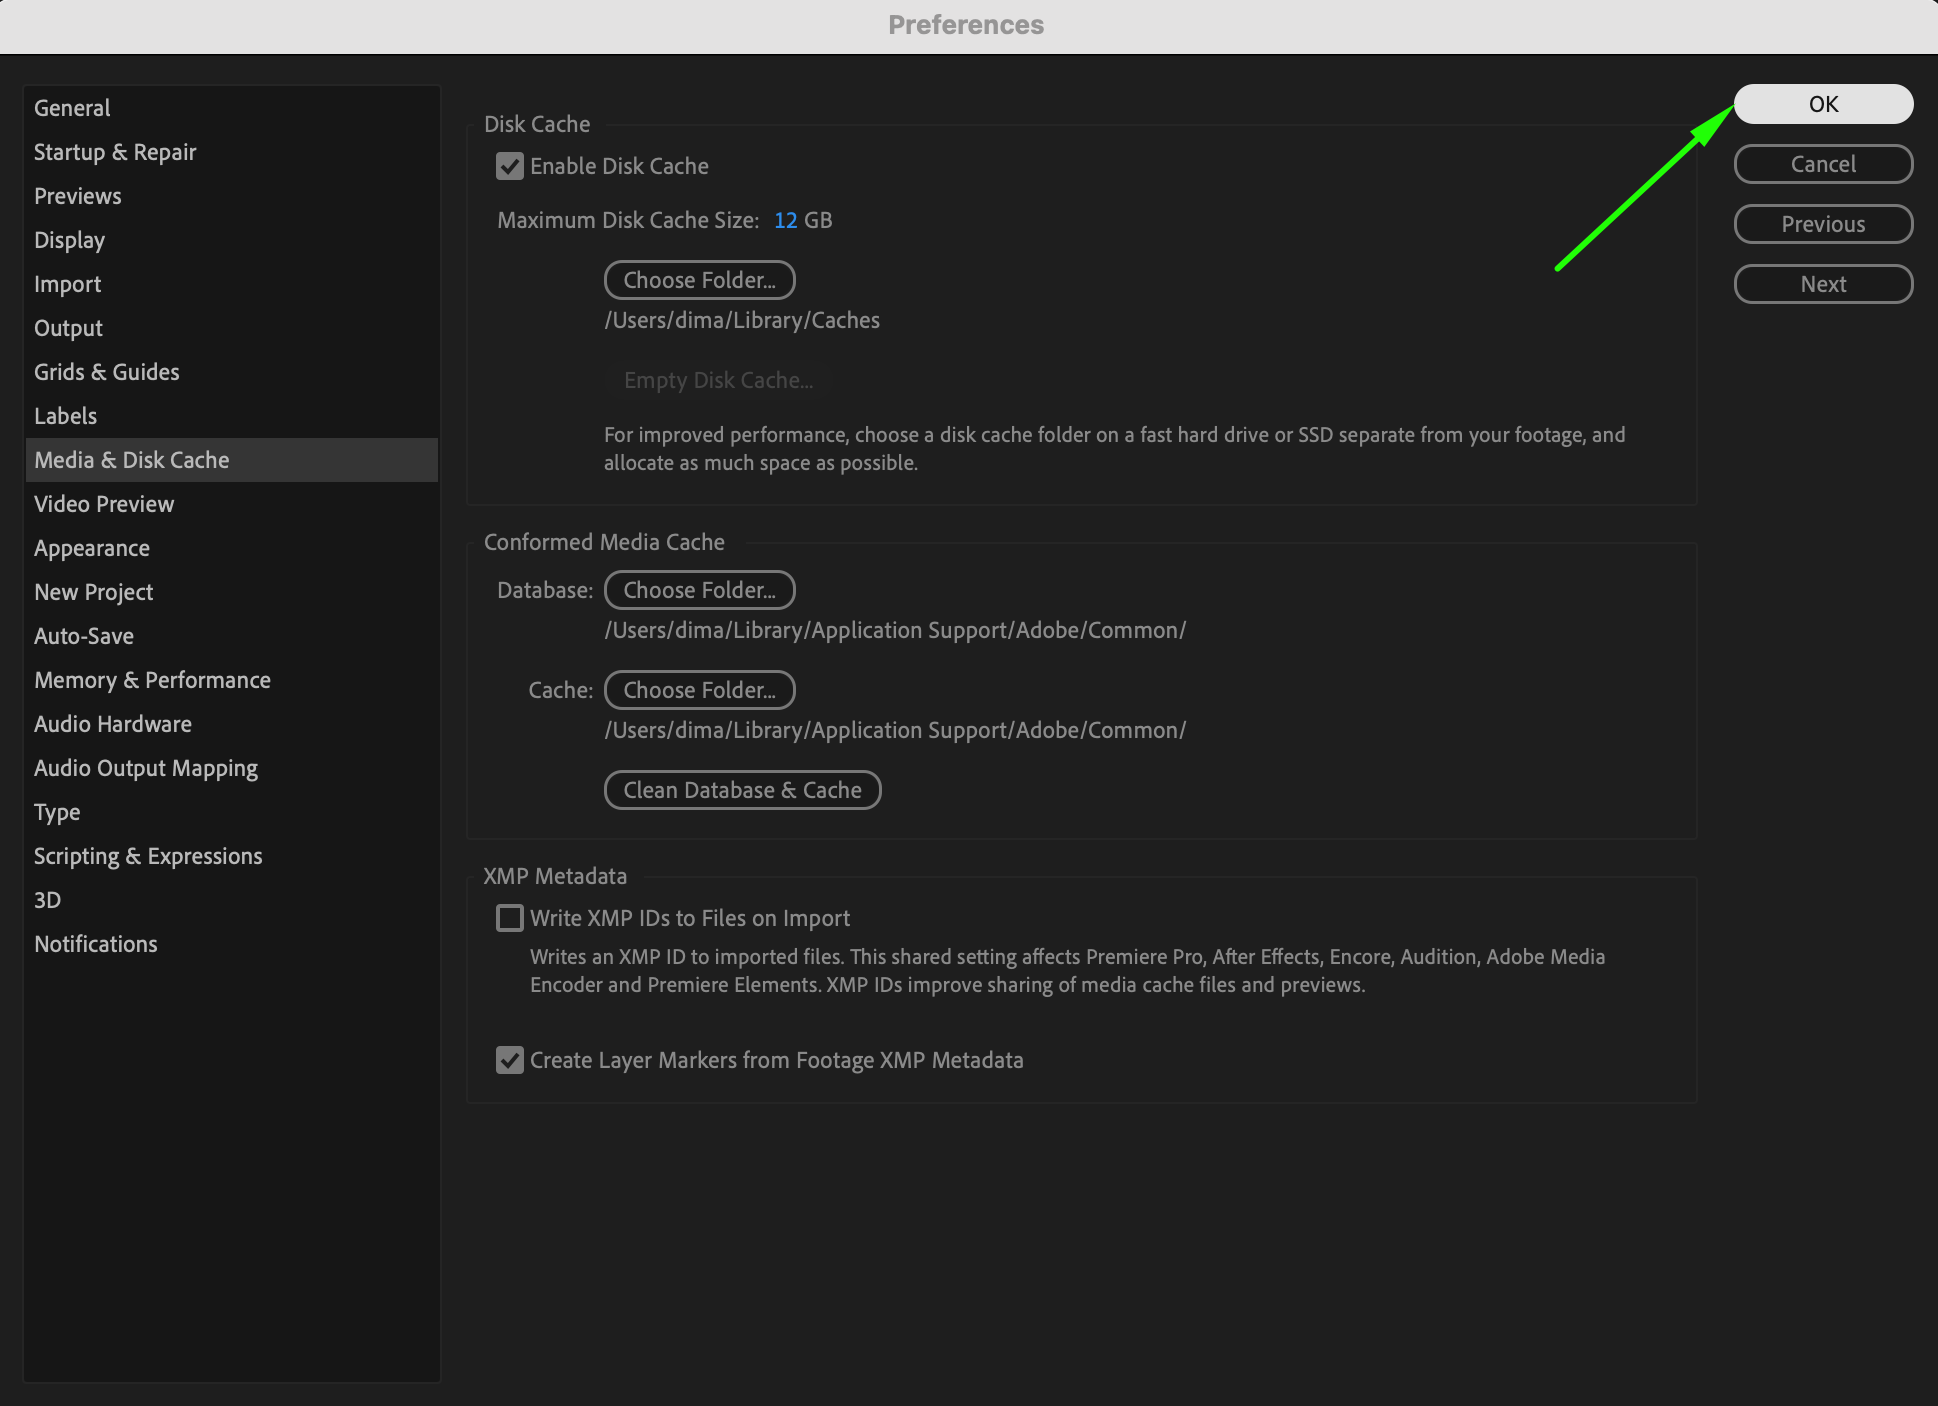
Step 6: Save Your Changes
Once you’ve set the new scratch disk location and adjusted the settings, click OK to save your changes. Restart After Effects to ensure the new settings are applied.
Step 7: Monitor Performance and Space Usage
After changing the scratch disk location, monitor your storage device to ensure it handles the cache efficiently. If you work with large projects frequently, you may need to periodically clear the cache or consider expanding the allocated disk space.
Conclusion
Changing the scratch disk in After Effects is a simple but effective way to manage storage and enhance performance. By following these steps, you can optimize your workflow and avoid storage-related slowdowns. Keep your scratch disk organized and regularly monitor its usage for a smooth editing experience.
Our Bestsellers


