Mastering Shape Manipulation in After Effects
Introduction to Changing Shapes in After Effects
In this comprehensive guide, we will cover various techniques and tips to help you change shapes effectively in After Effects. We will walk you through the process of creating shape layers, modifying their properties, animating shape paths, and using shape layer effects to achieve stunning results. Additionally, we will explore how to morph shapes using keyframes.
Step 1: Creating Shape Layers
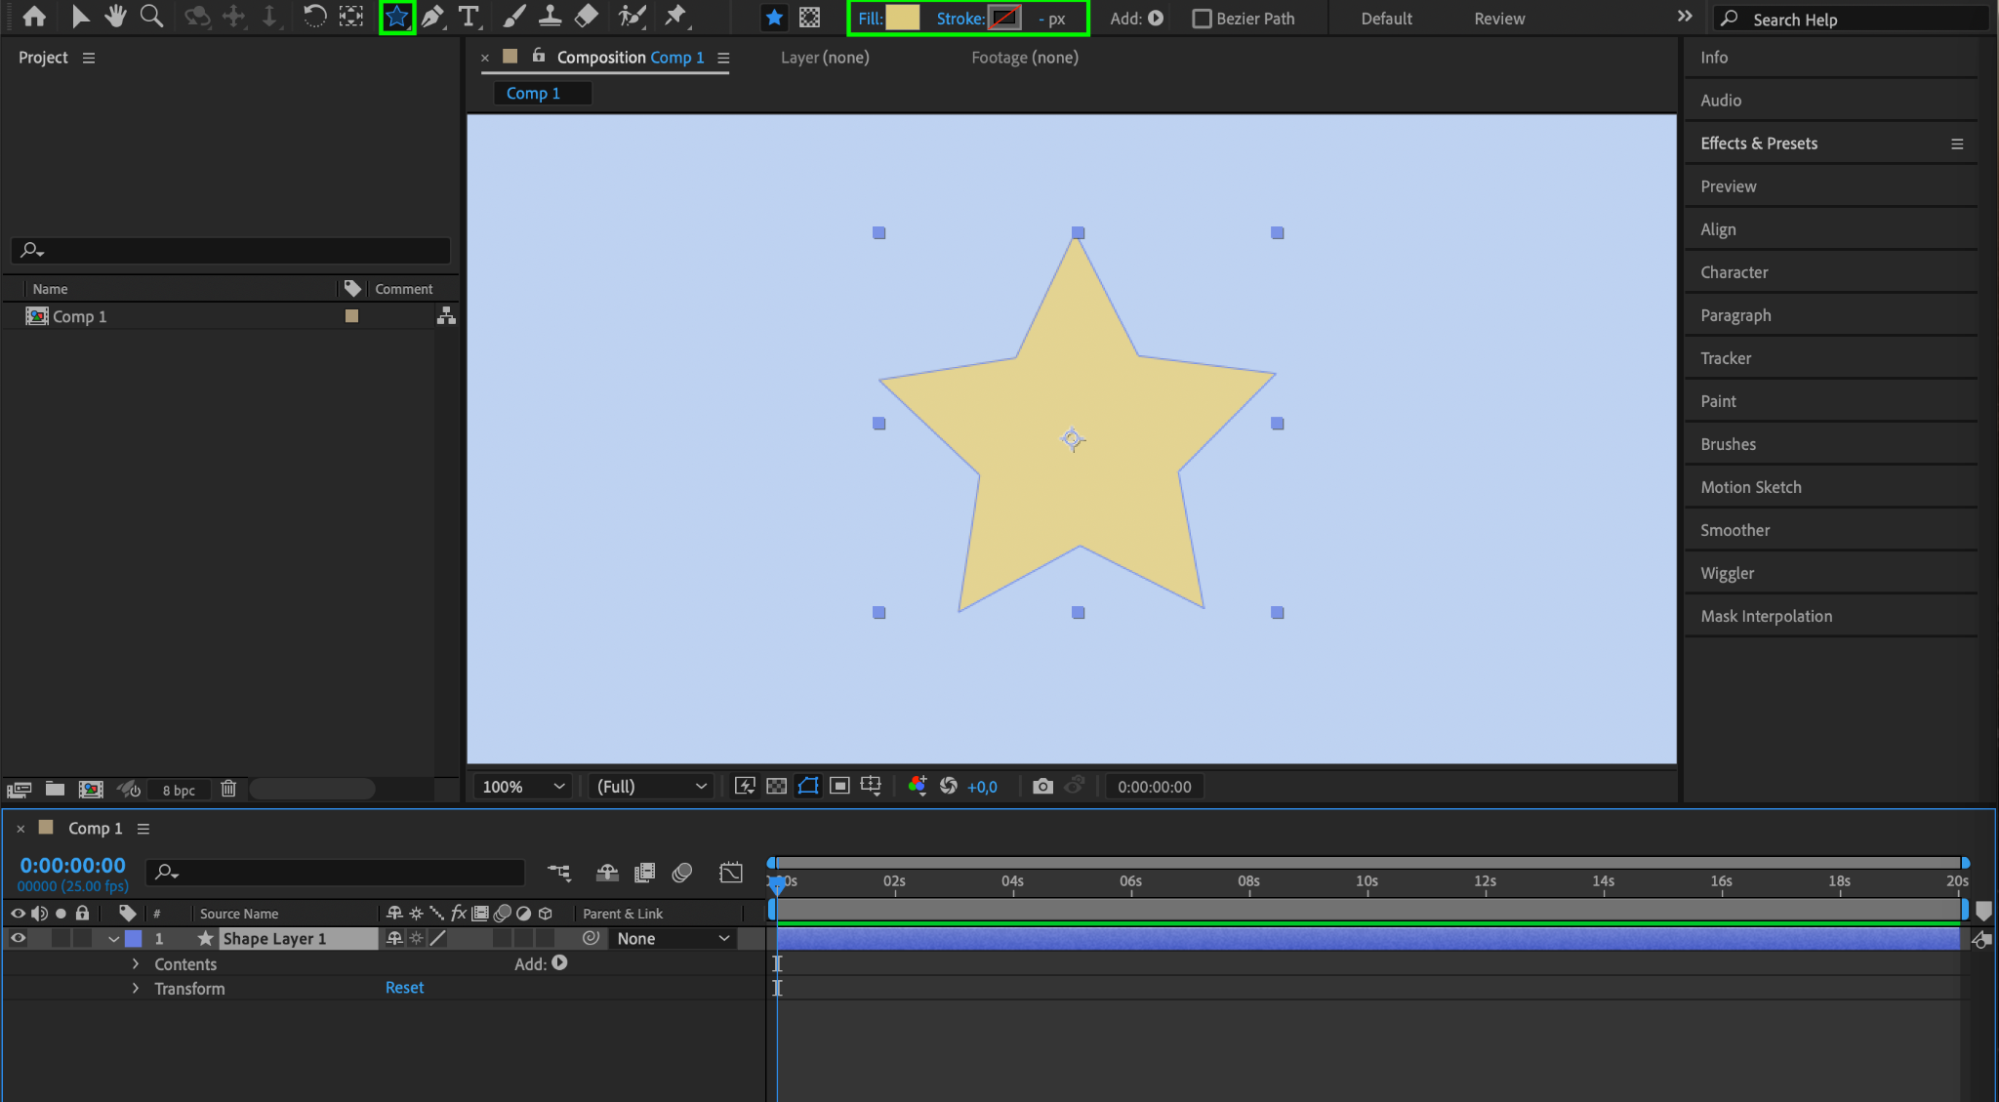
To get started with shapes in After Effects, you need to create a shape layer. Go to the Layer menu, select New, and then choose Shape Layer. You can also use the shape tools (Rectangle, Ellipse, Polygon, Star) found in the toolbar to draw shapes directly onto your composition. Once you’ve drawn a shape, a new shape layer will be created in the timeline panel. You can adjust the shape’s properties by selecting the shape layer and modifying the settings in the Contents and Transform sections.
 Step 2: Modifying Shape Properties
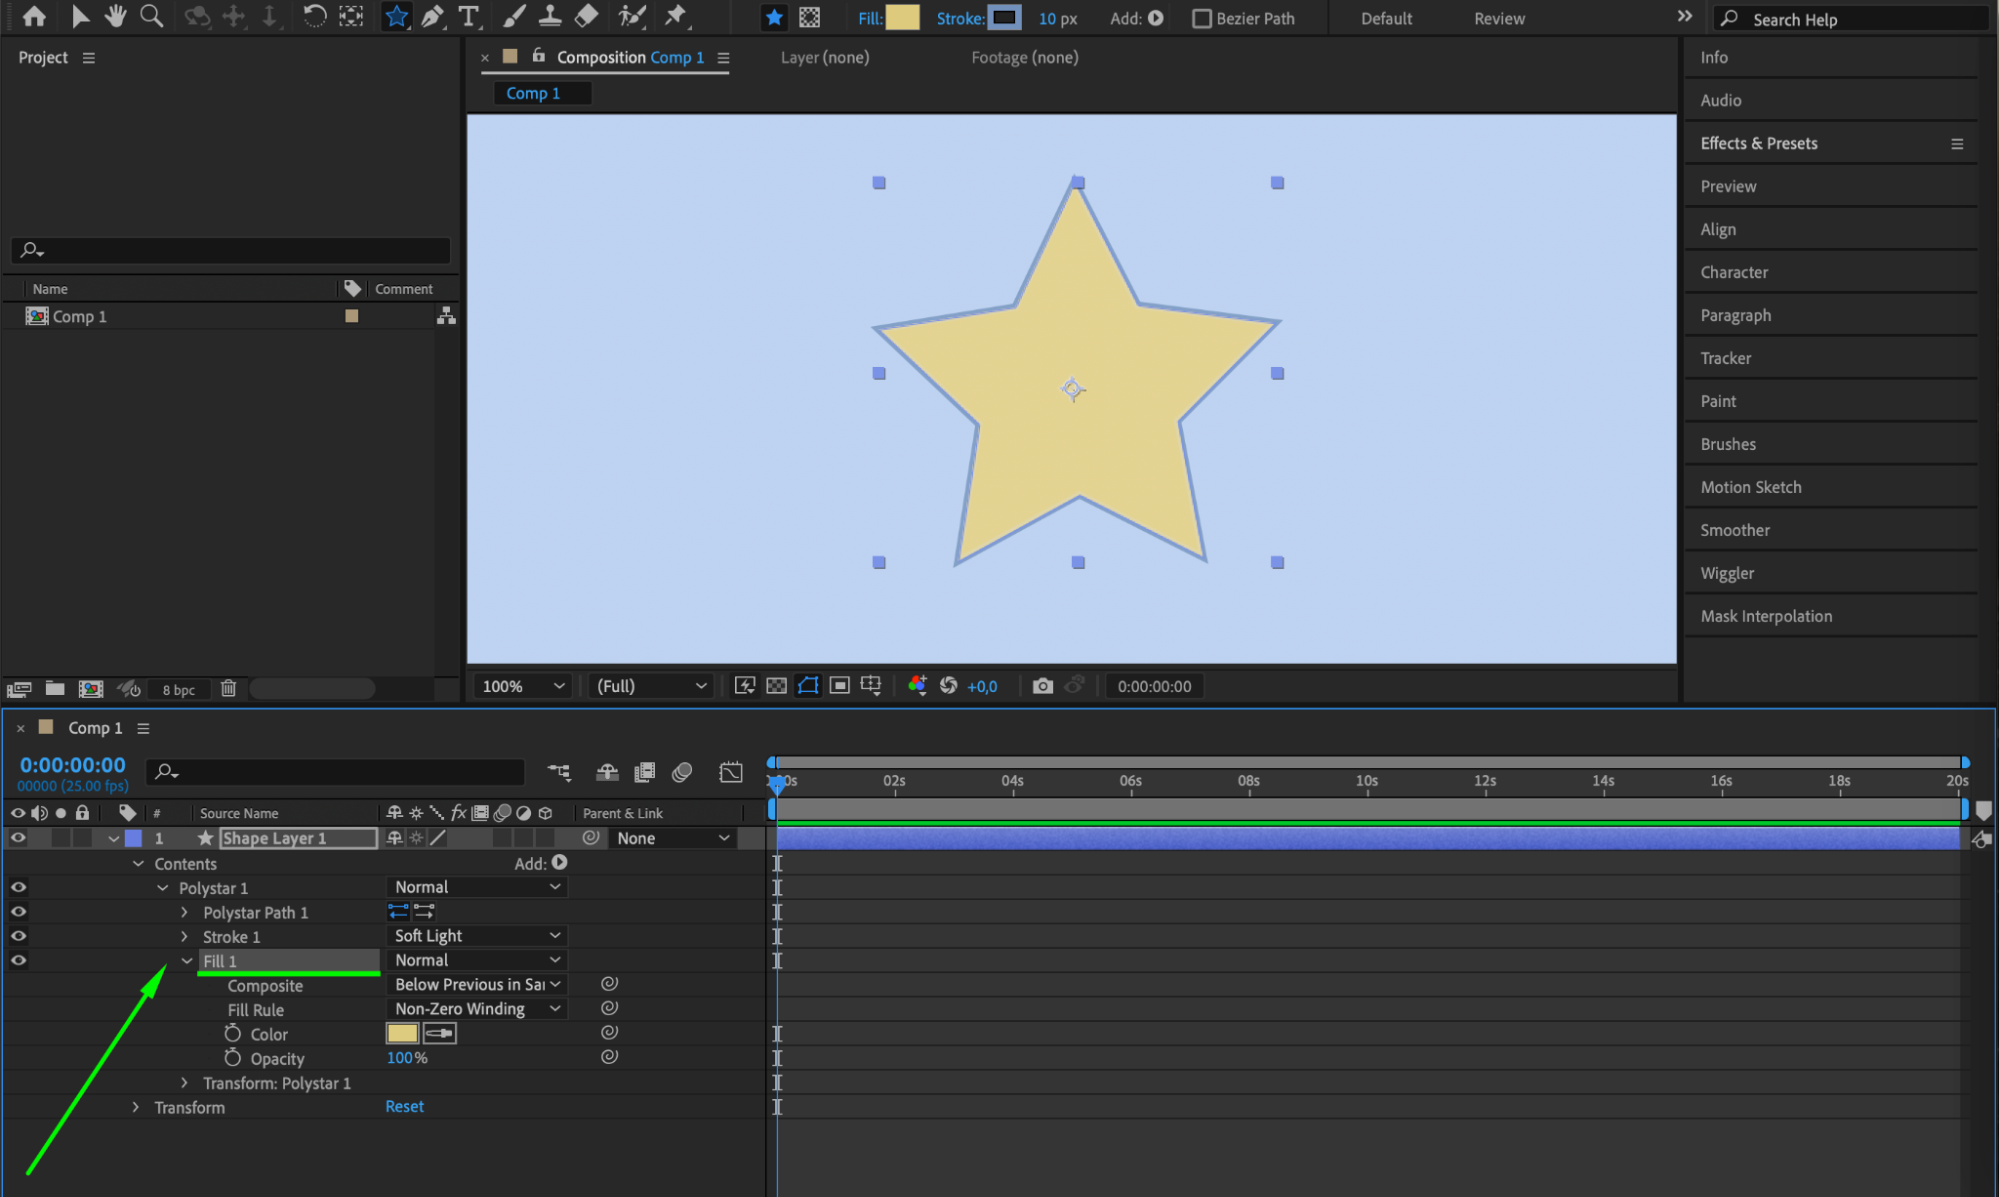
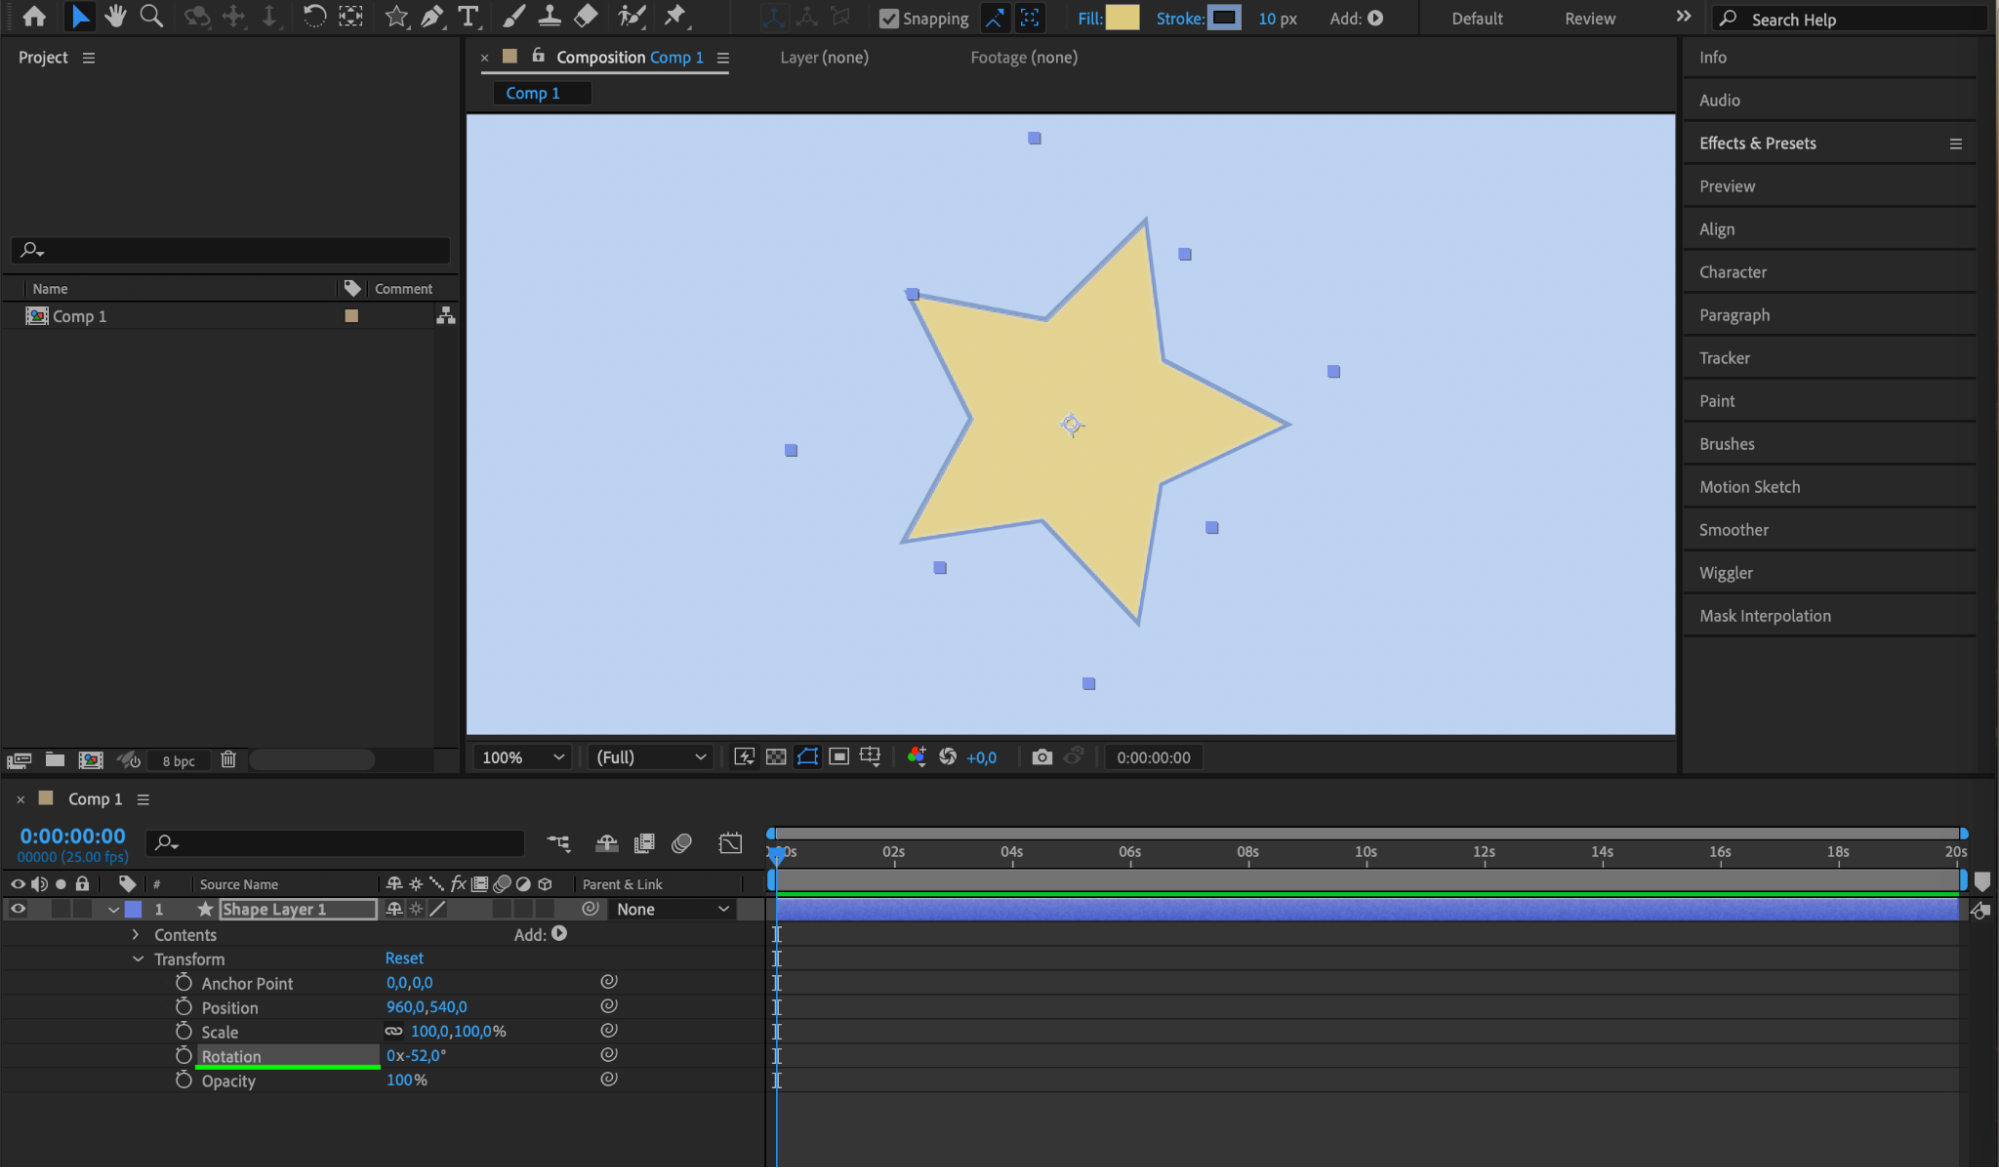
Once you have your shape layer, you can modify its properties to fit your needs. Expand the shape layer in the timeline panel to reveal the Contents section. Here, you can find the Fill, Stroke, and Transform options. Adjust the Fill and Stroke settings to change the color and outline of your shape. Use the Transform options to scale, rotate, and position your shape within the composition. Experiment with these settings to achieve the desired look.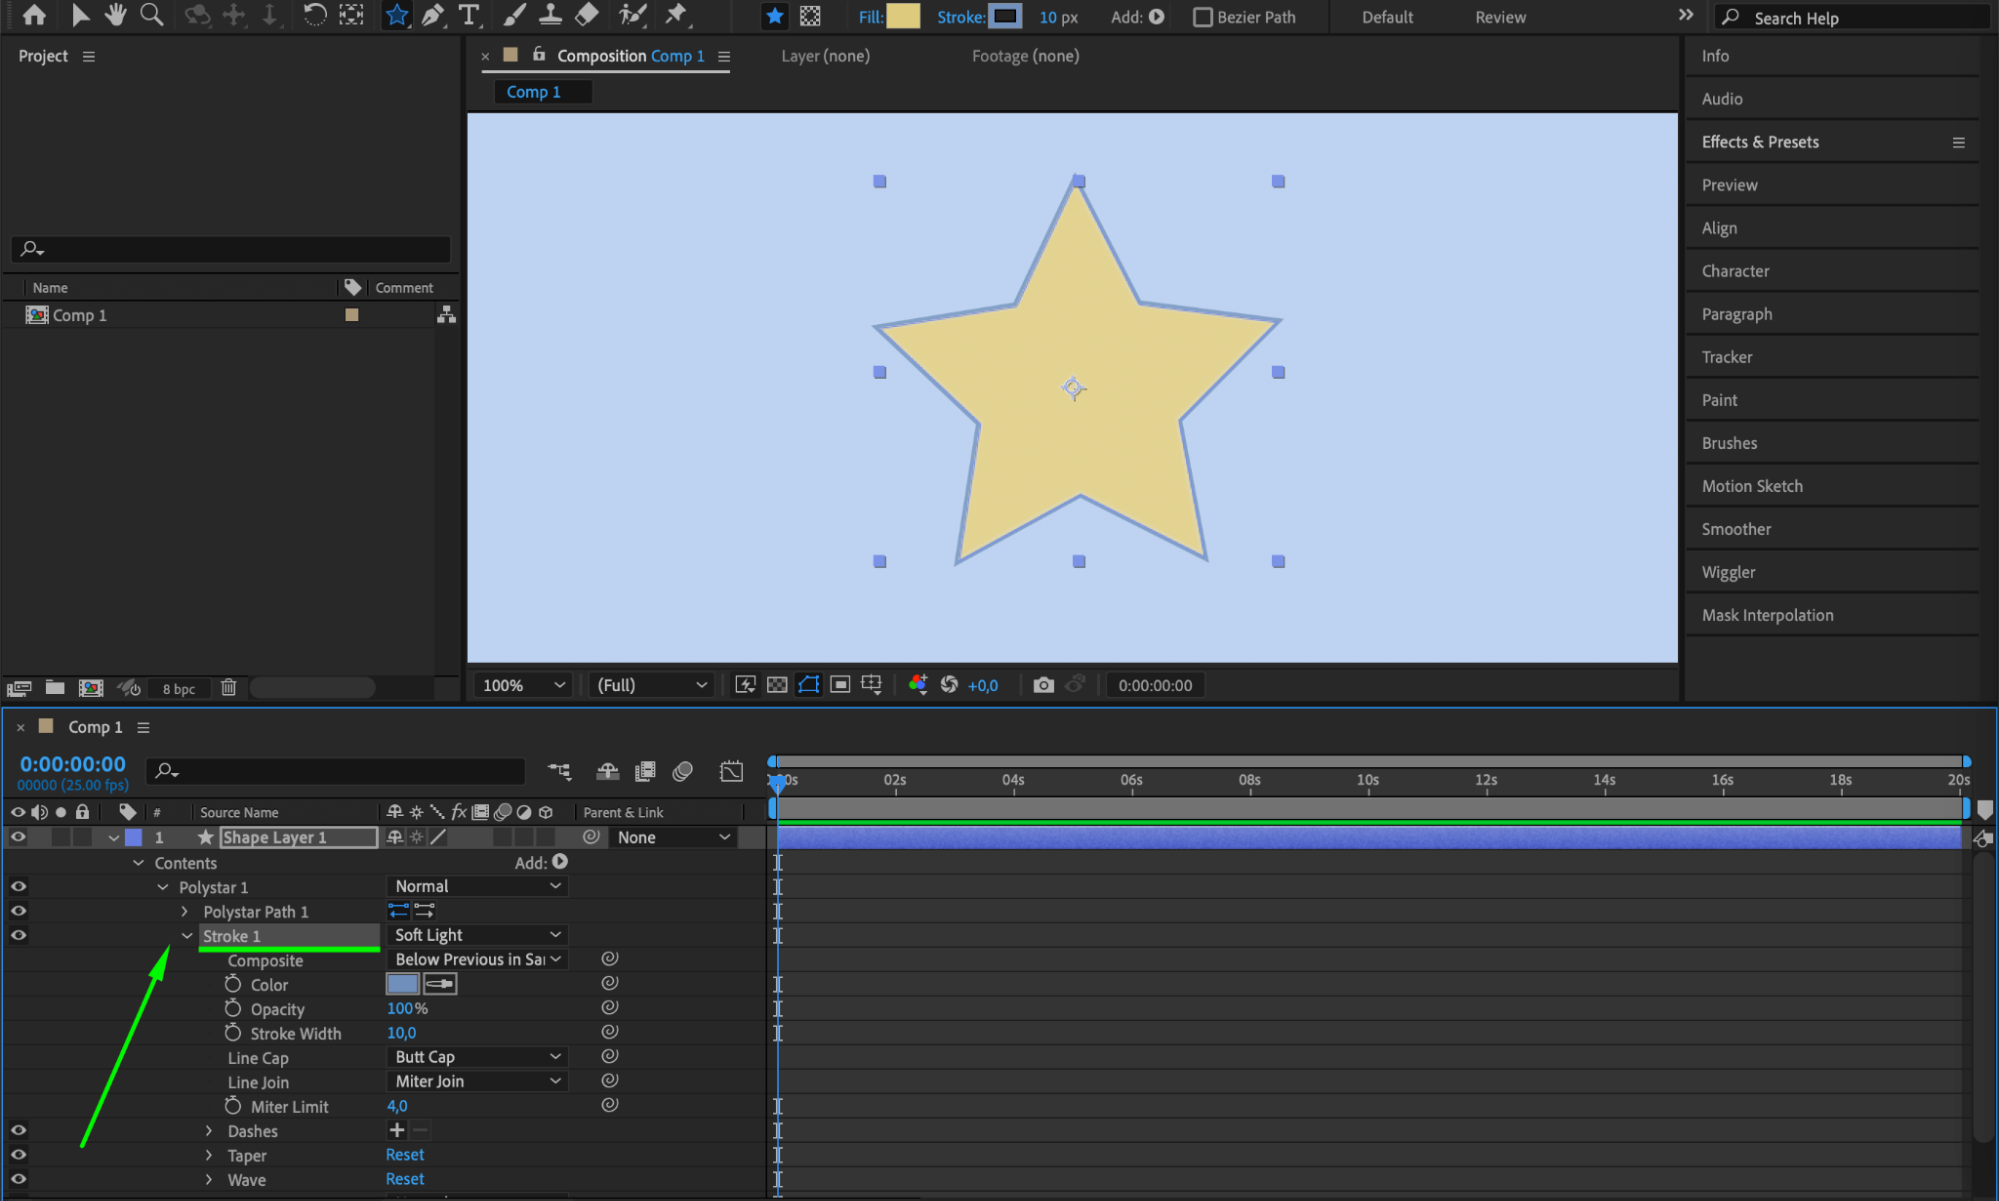
 Step 3: Animating Shape Paths
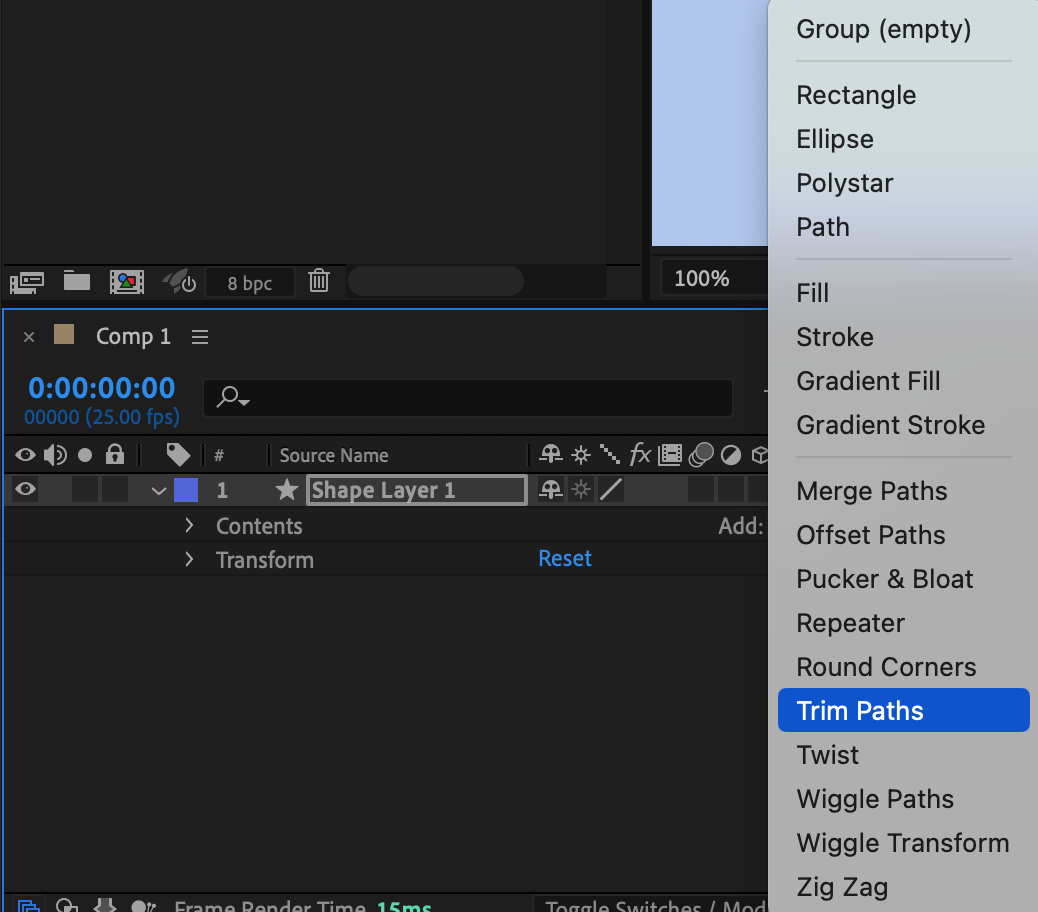
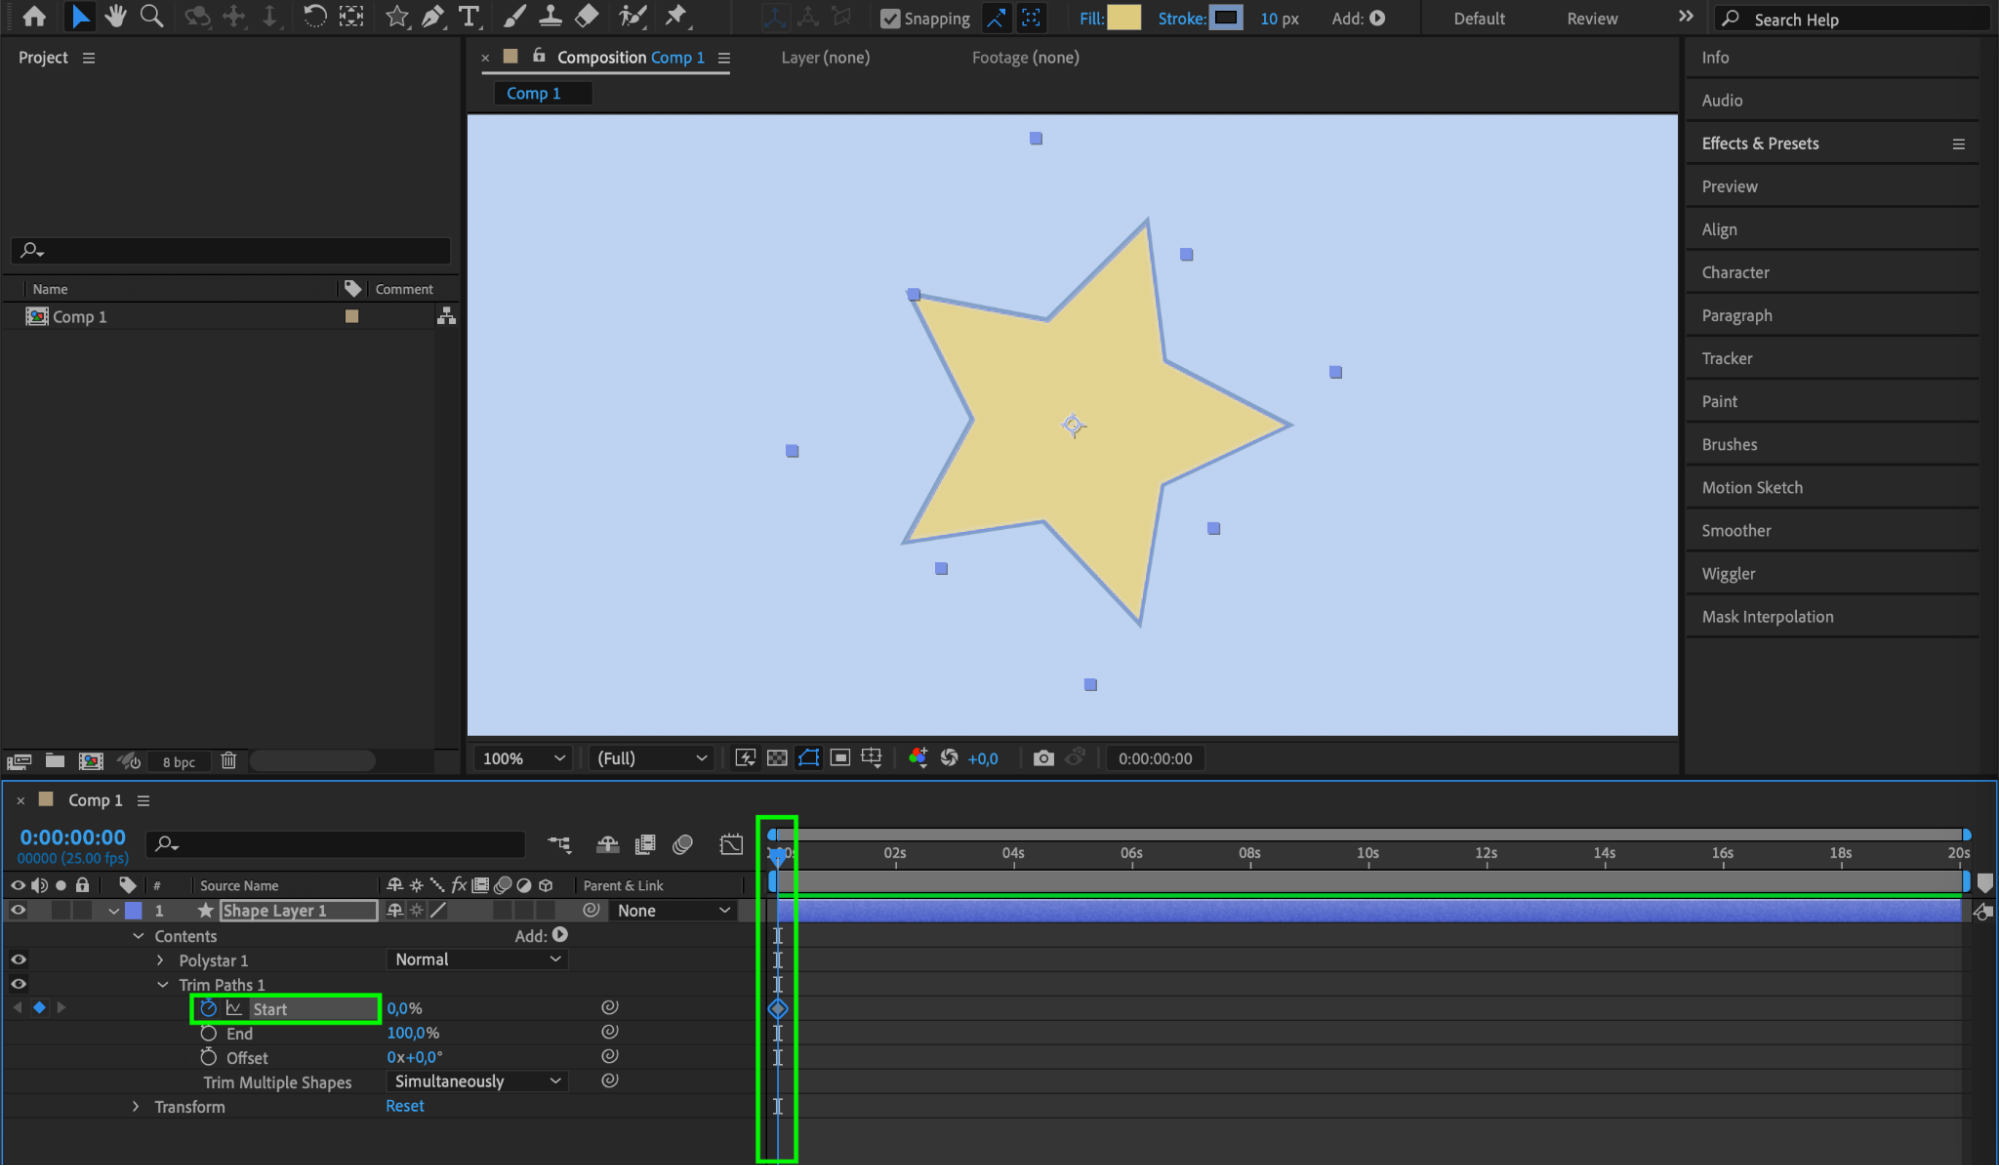
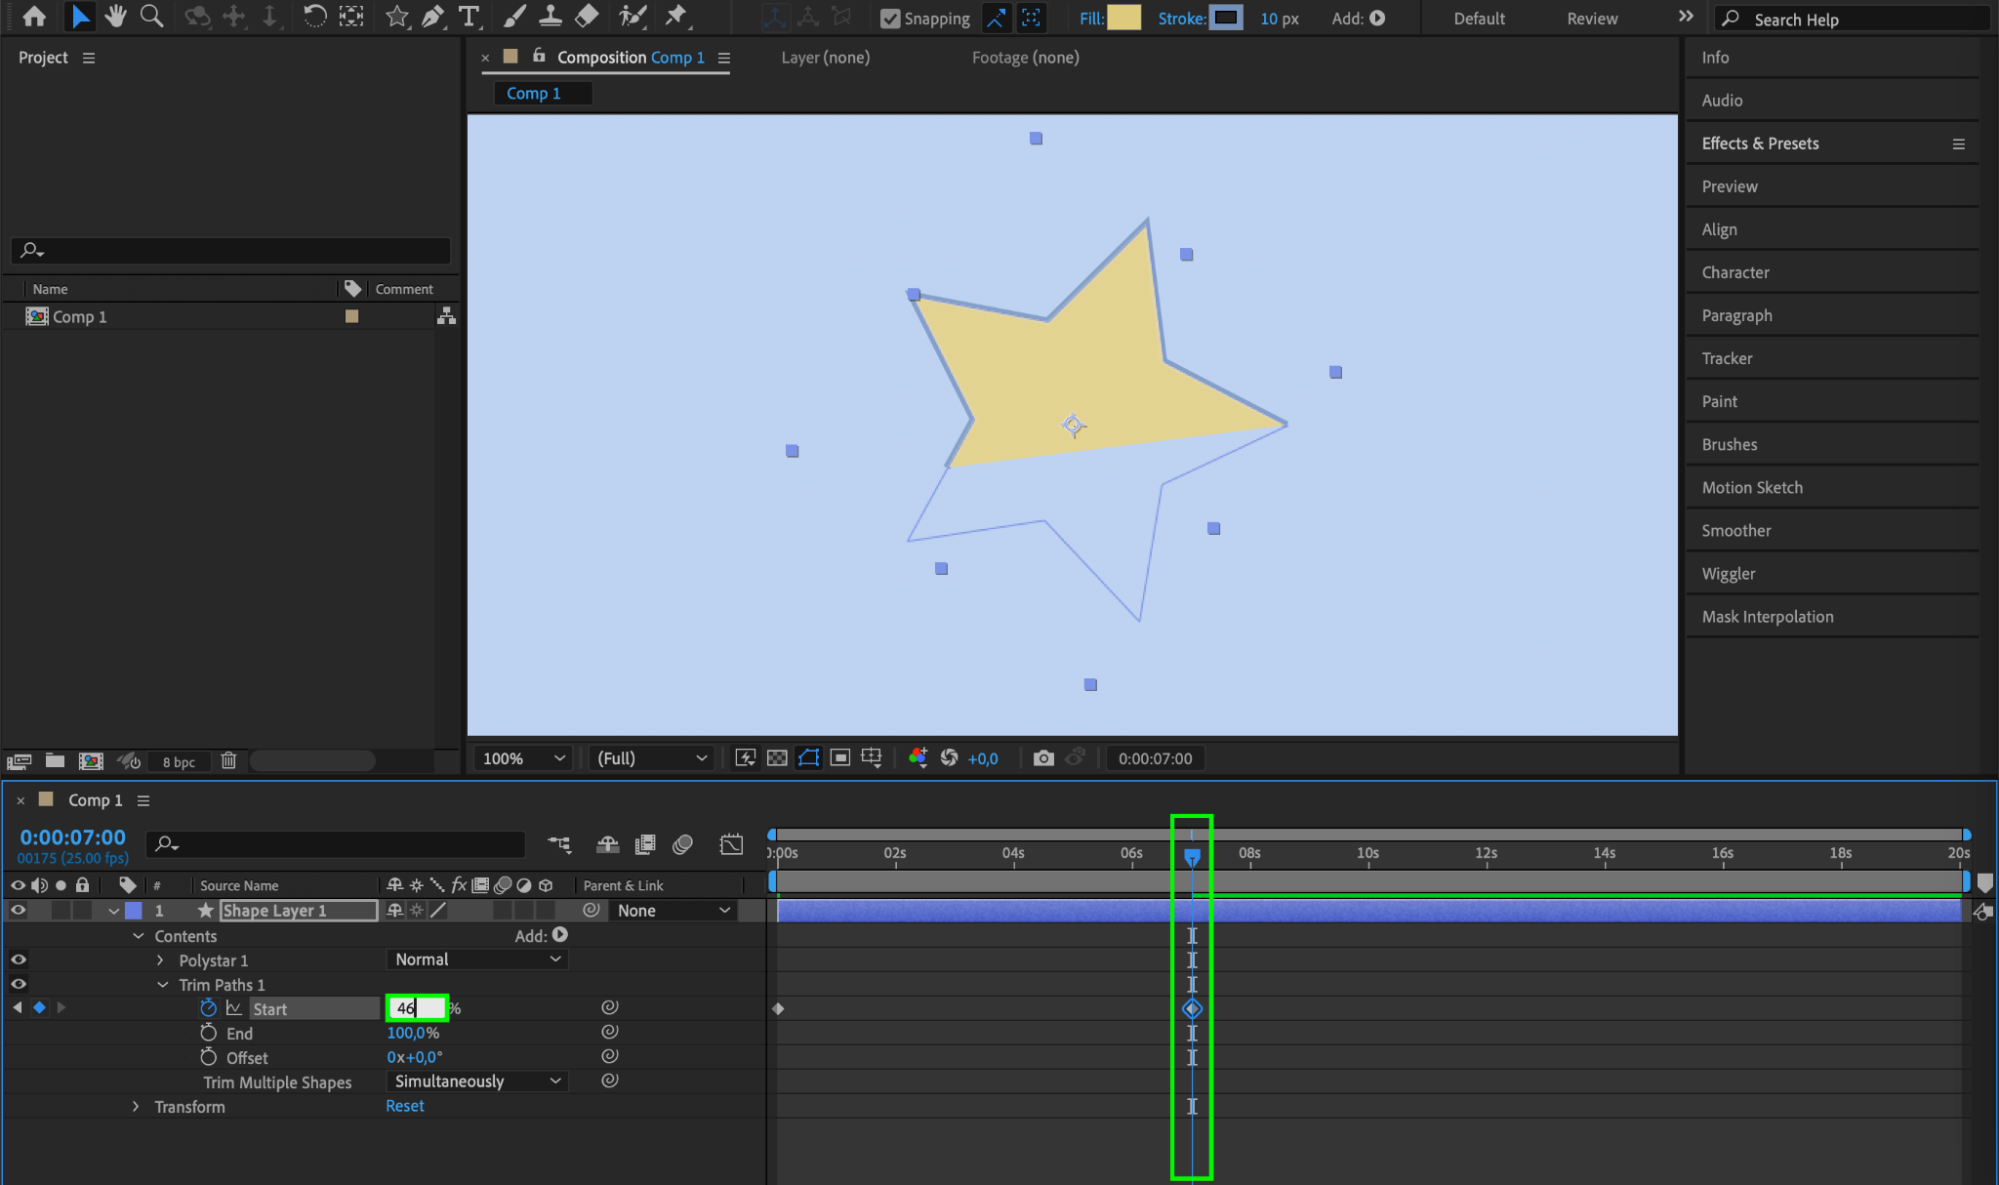
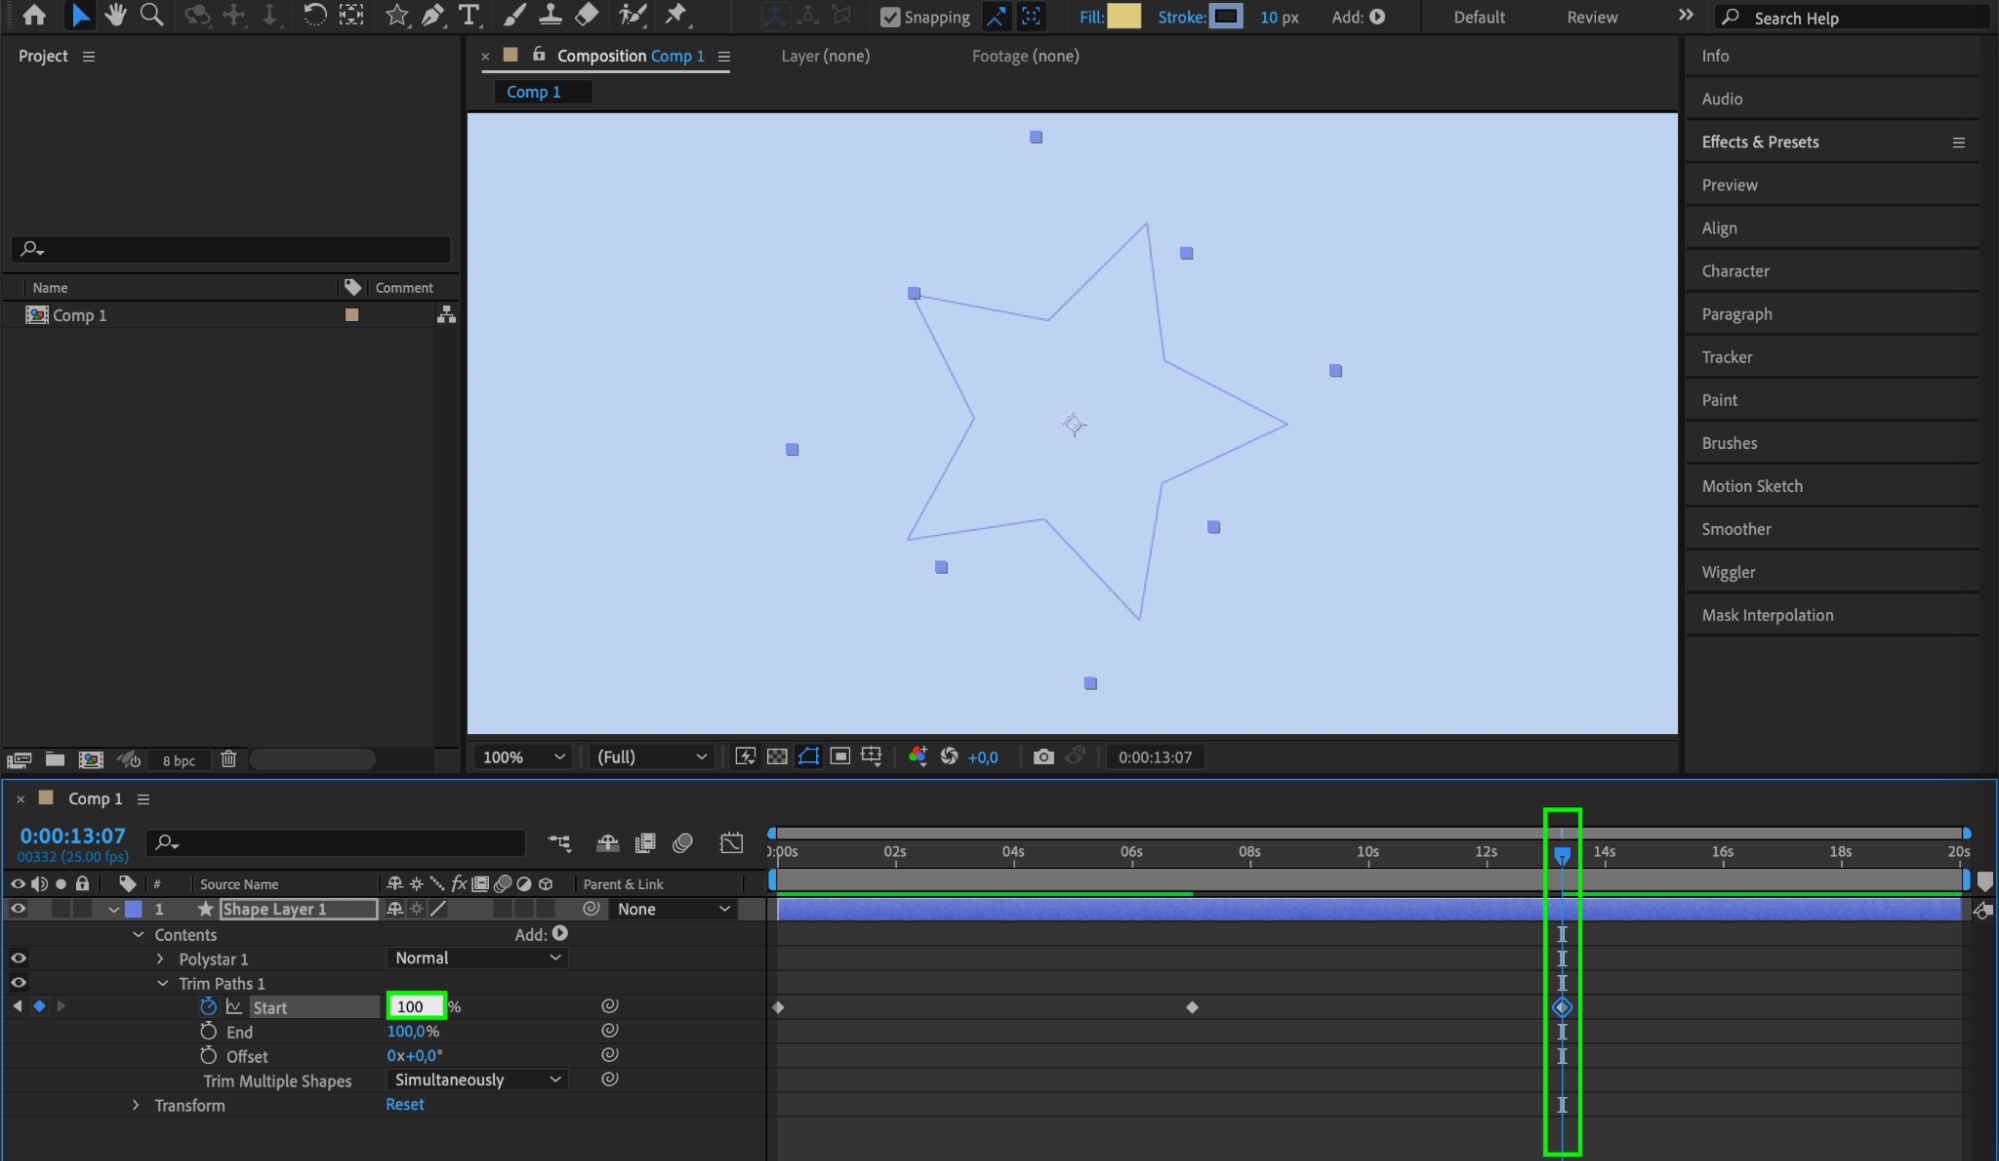
Animating shape paths can bring your designs to life by creating dynamic visual effects. To animate a shape path in After Effects, select the shape layer and expand its “Contents” section. Click the “Add” button and select “Trim Paths” from the dropdown menu. Expand the Trim Paths property and click the stopwatch icon next to the “End” parameter to create an initial keyframe. Move the playhead to a different point in the timeline where you want the animation to end and adjust the End value to 0%, which will automatically create a new keyframe. Finally, press Spacebar to preview the animation and adjust the keyframes as needed to create more complex animations or fine-tune the motion.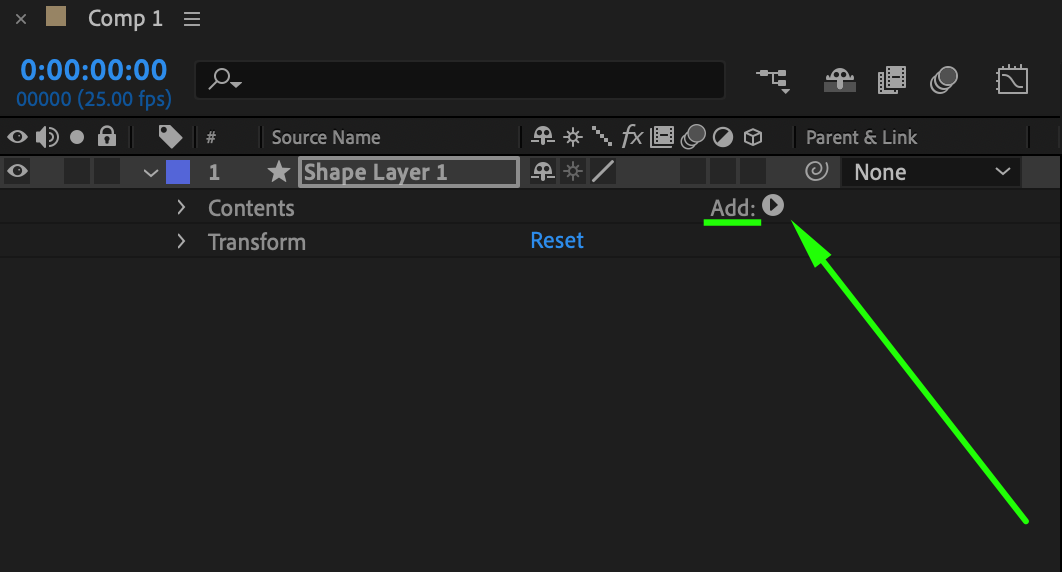
 Step 4: Using Shape Layer Effects
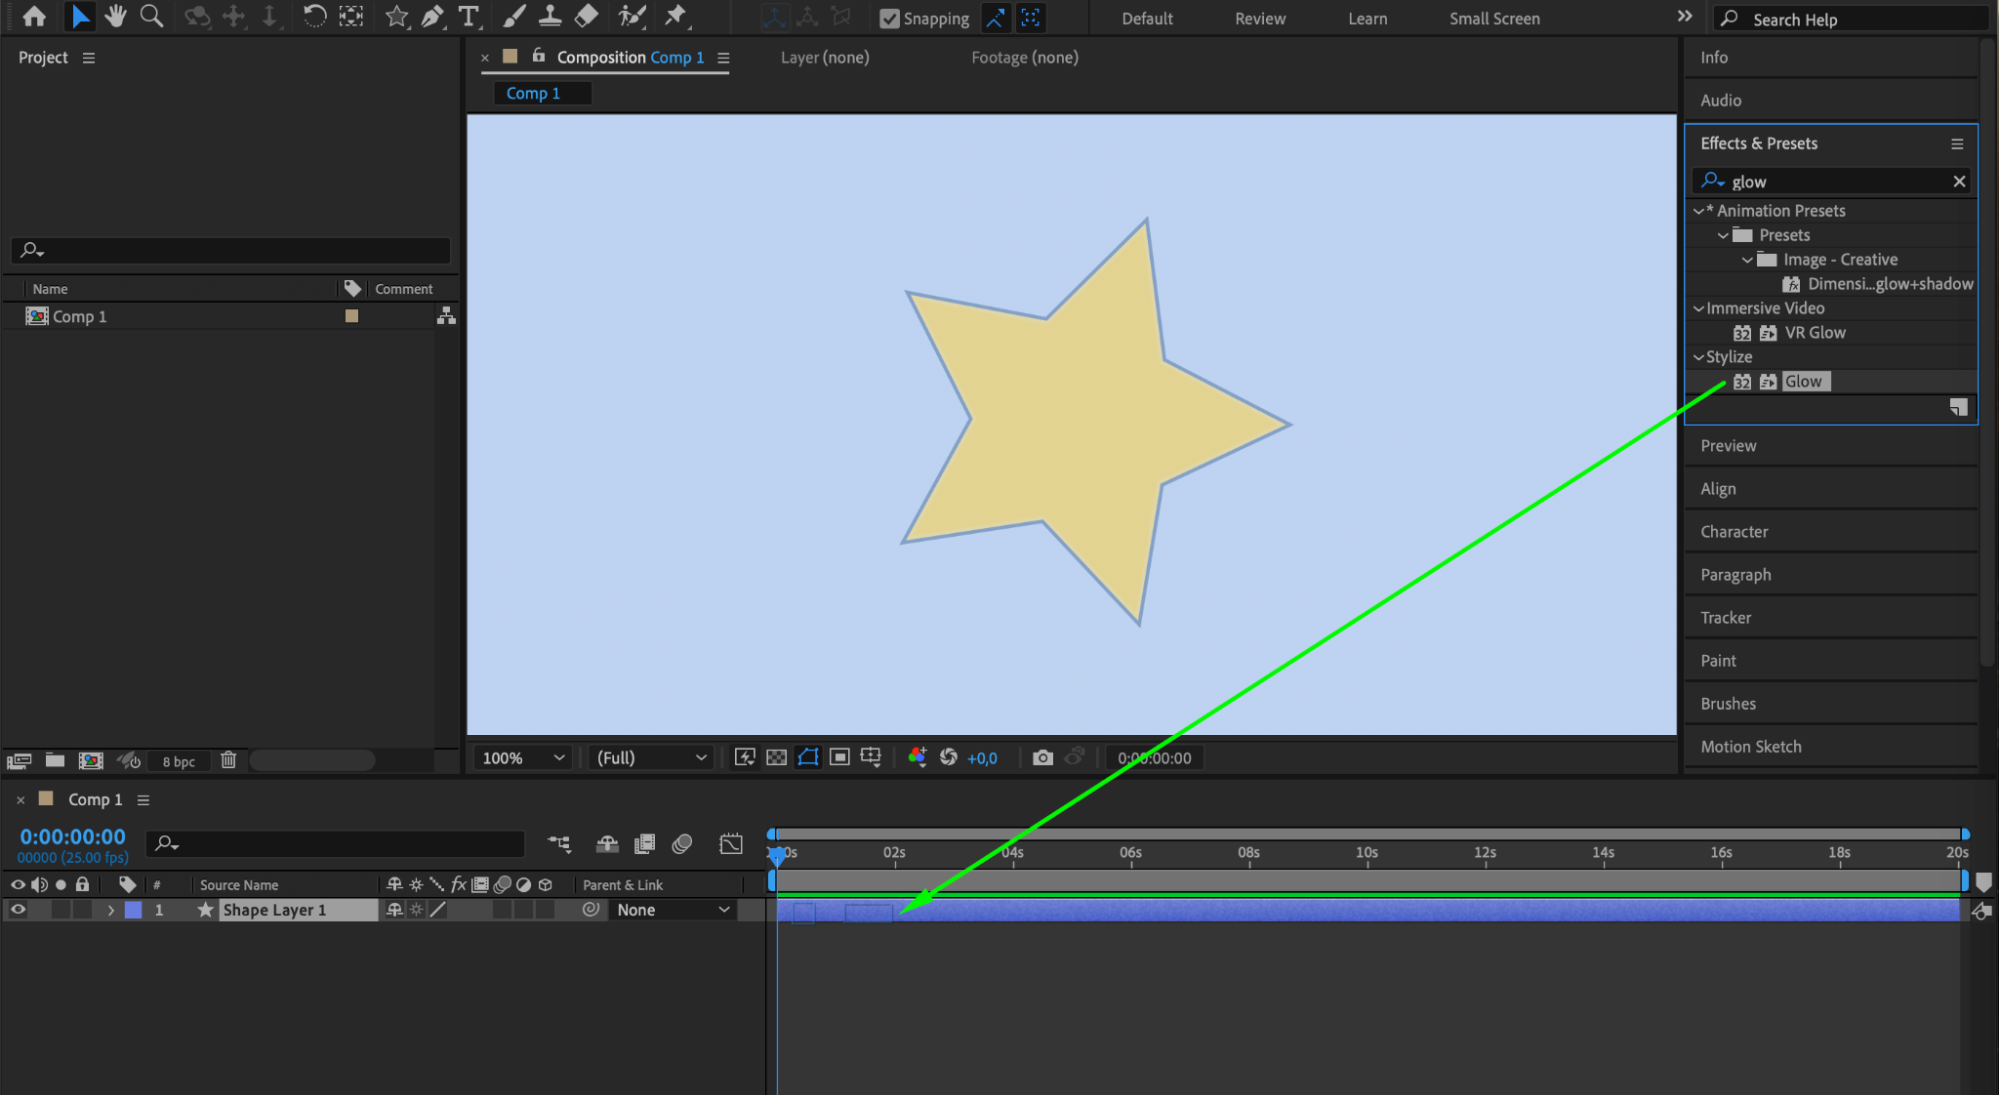
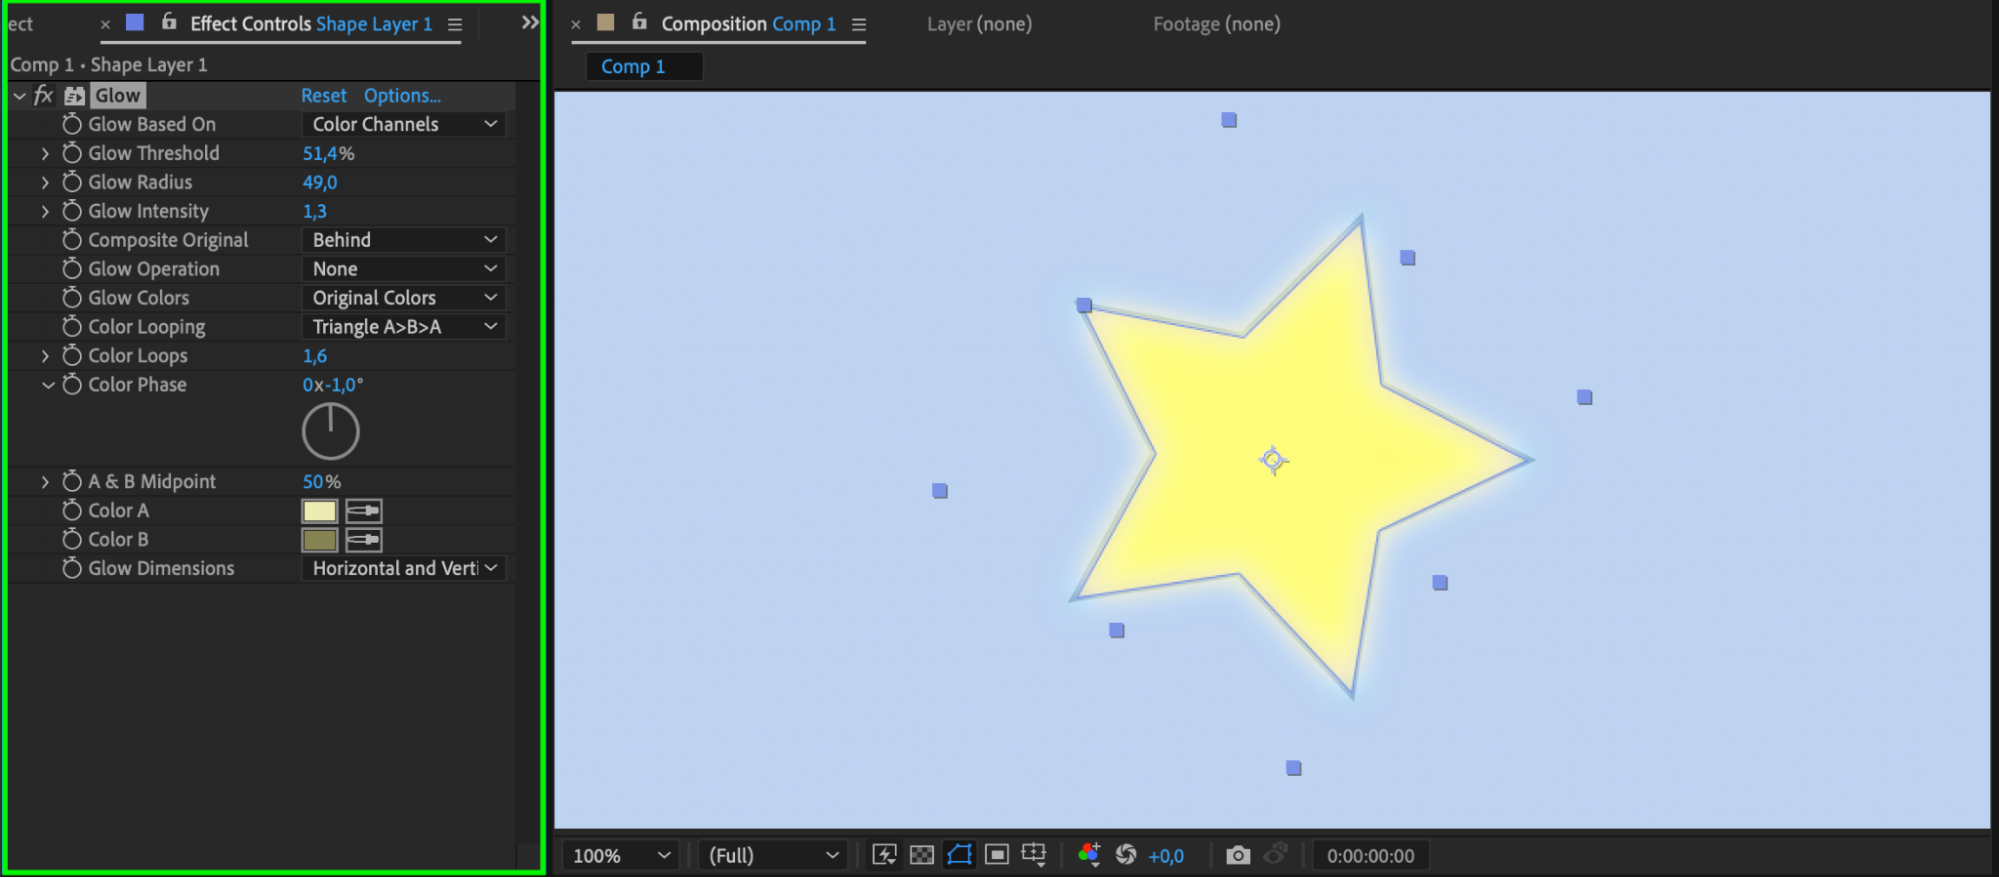
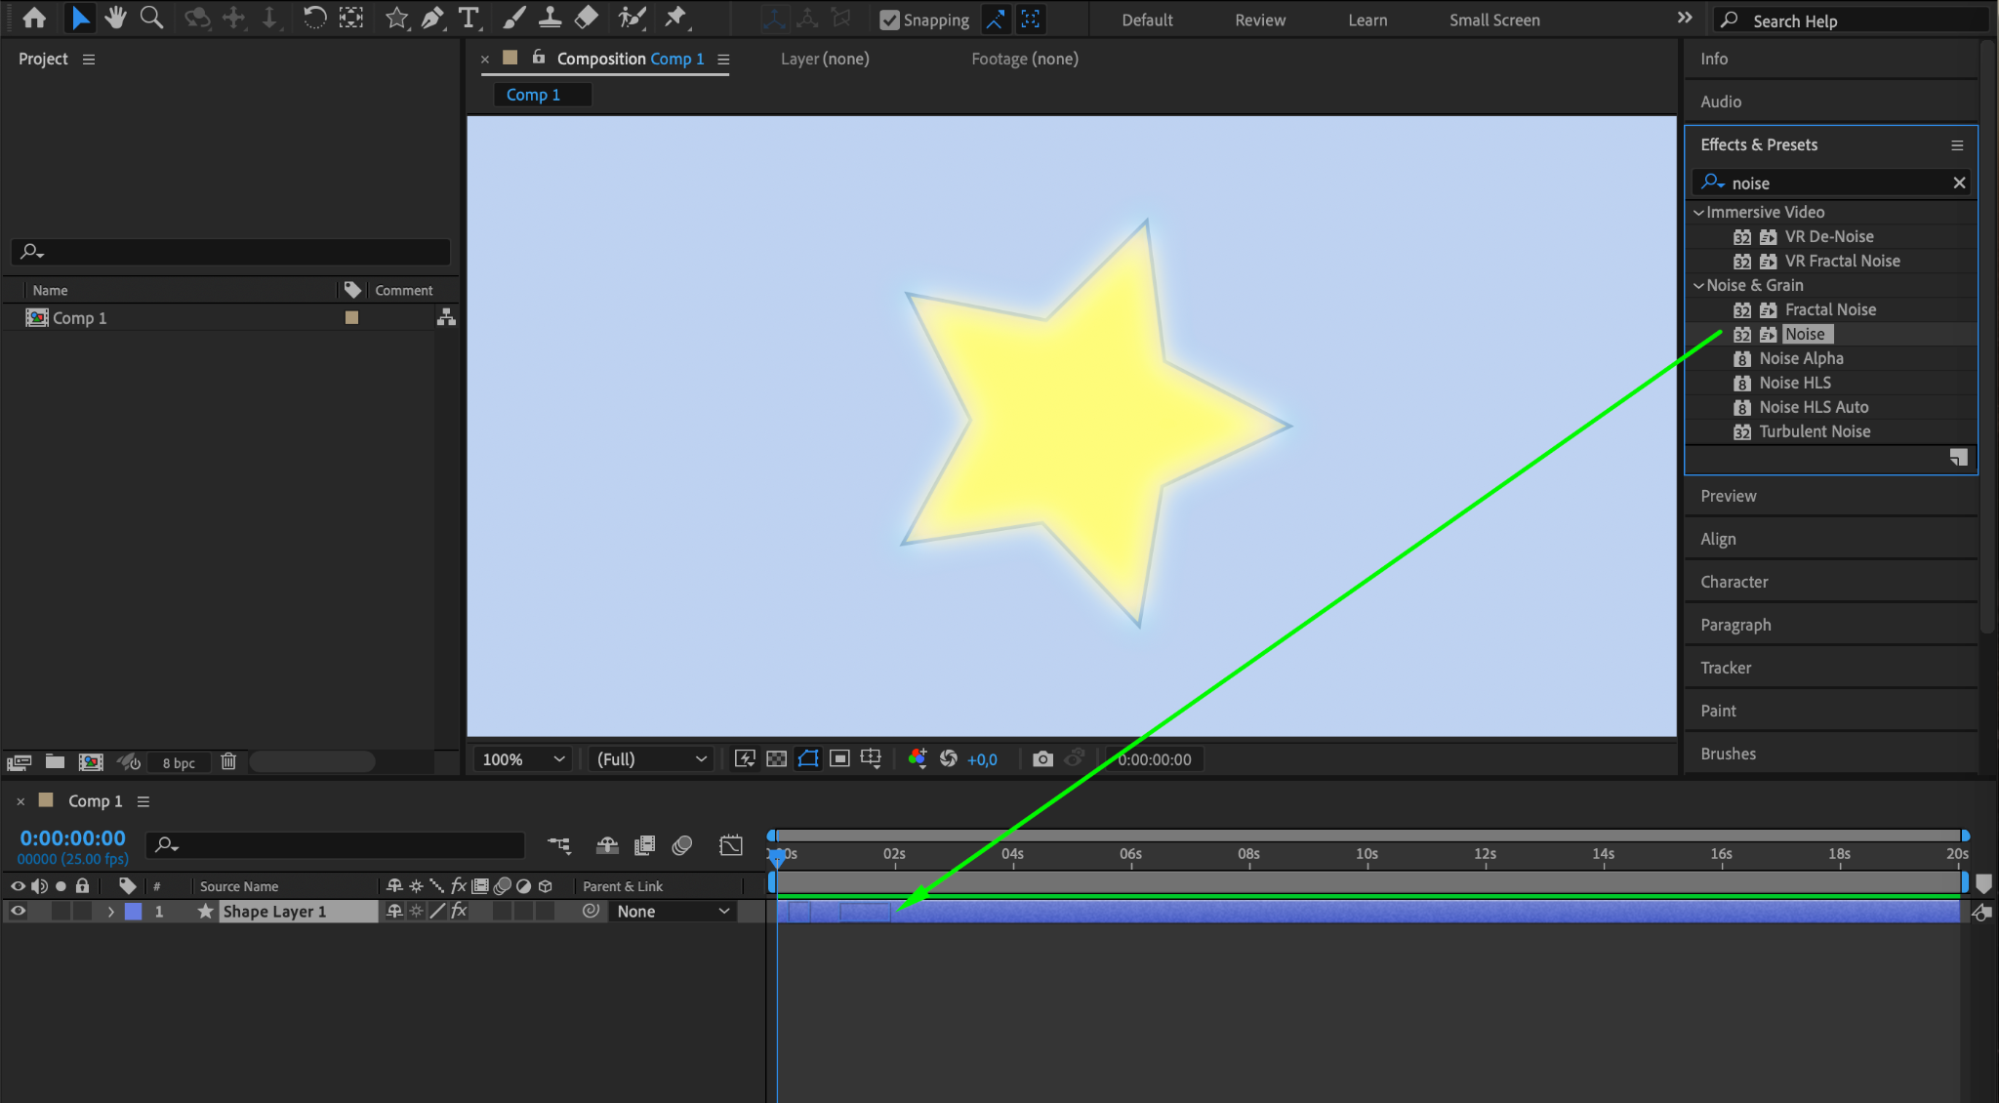
Shape layer effects can enhance your shapes and add more visual interest. With your shape layer selected, go to the Effects & Presets panel and choose from a variety of effects such as Gradient Fill, Drop Shadow, and Glow. Drag the desired effect onto your shape layer and adjust the effect settings in the Effect Controls panel. Combining multiple effects can lead to stunning and unique visual results.
 Step 5: Morphing Shapes with Keyframes
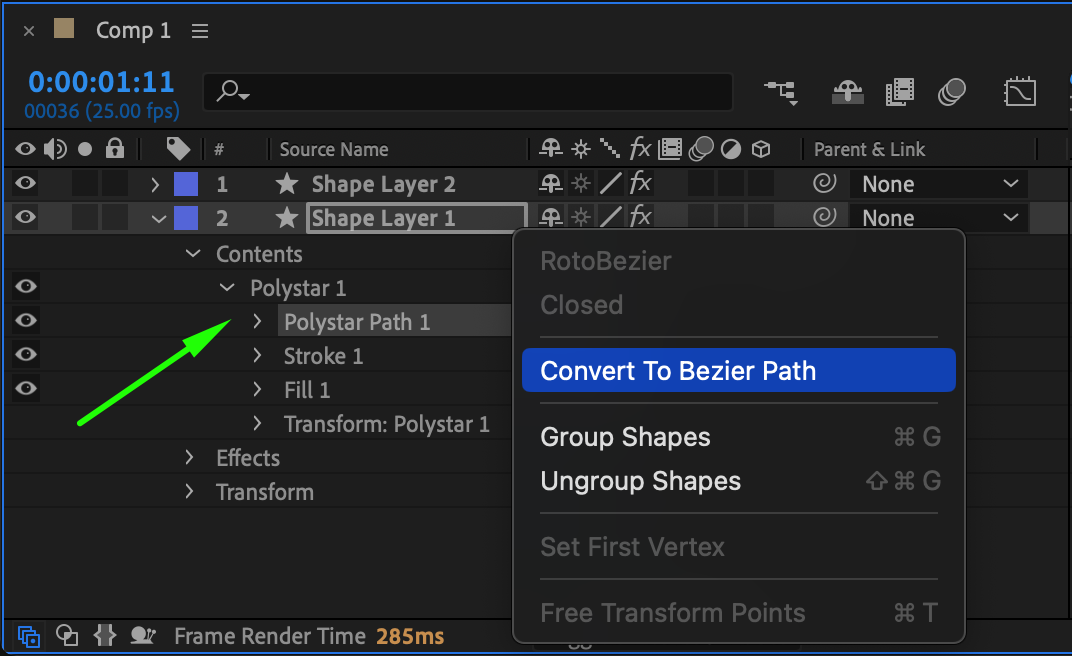
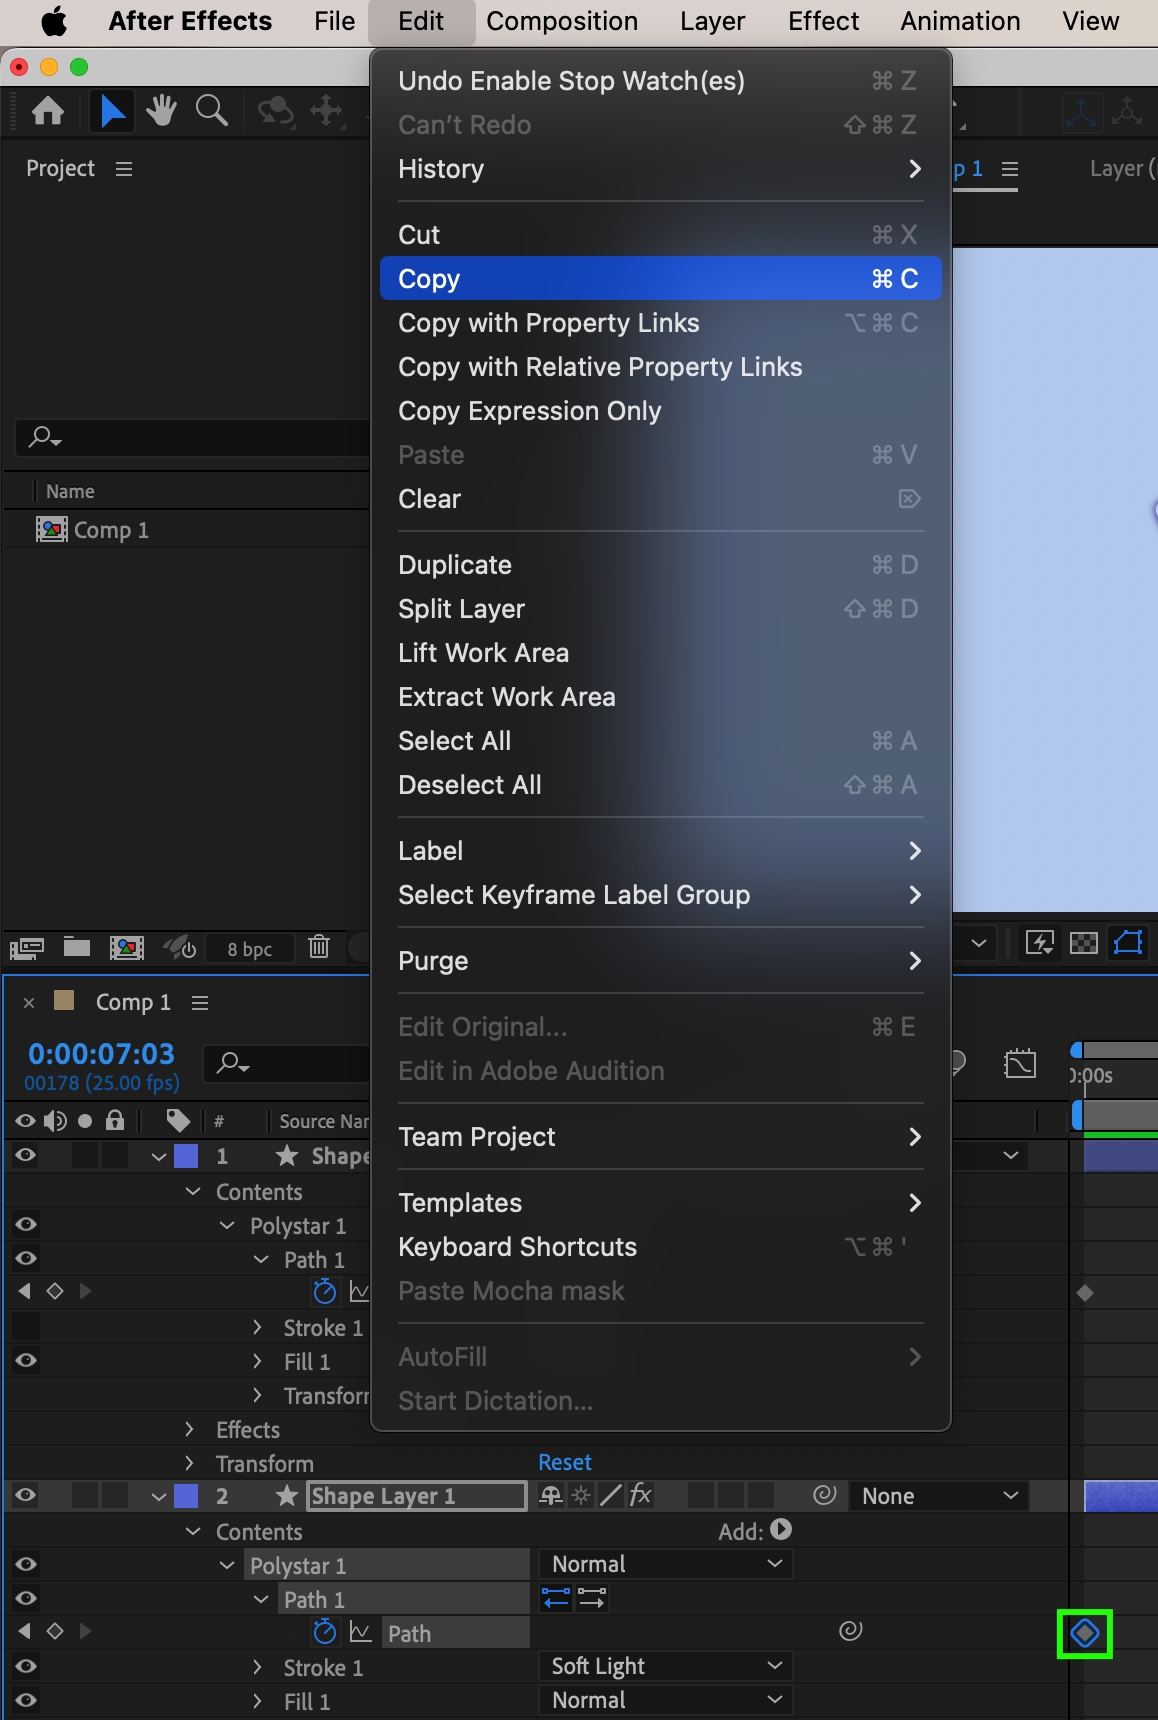
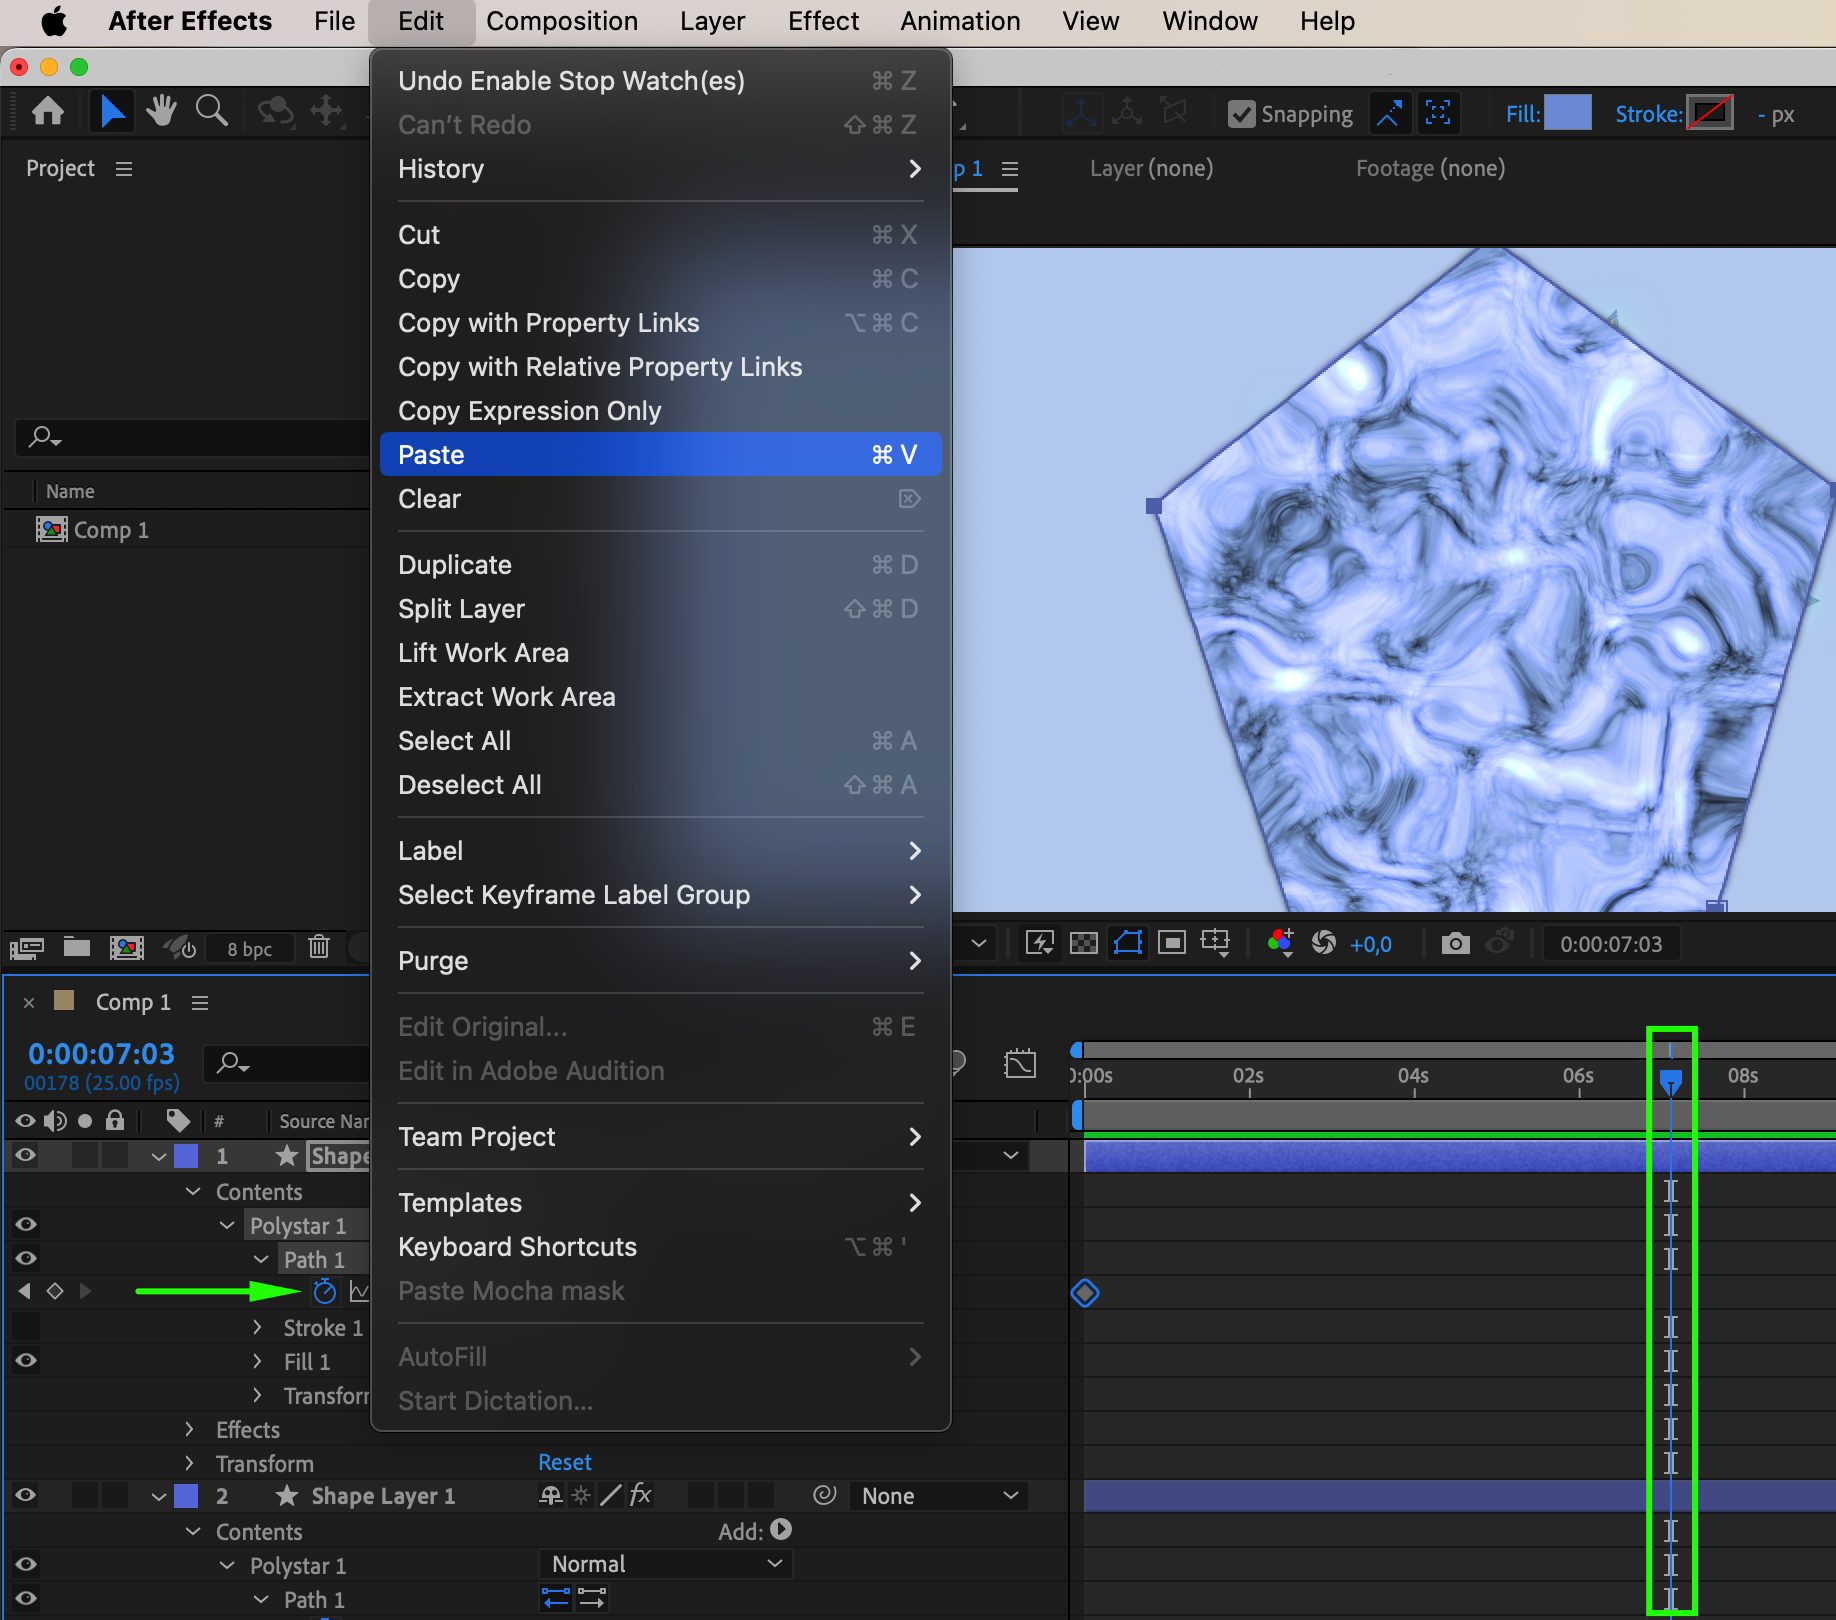
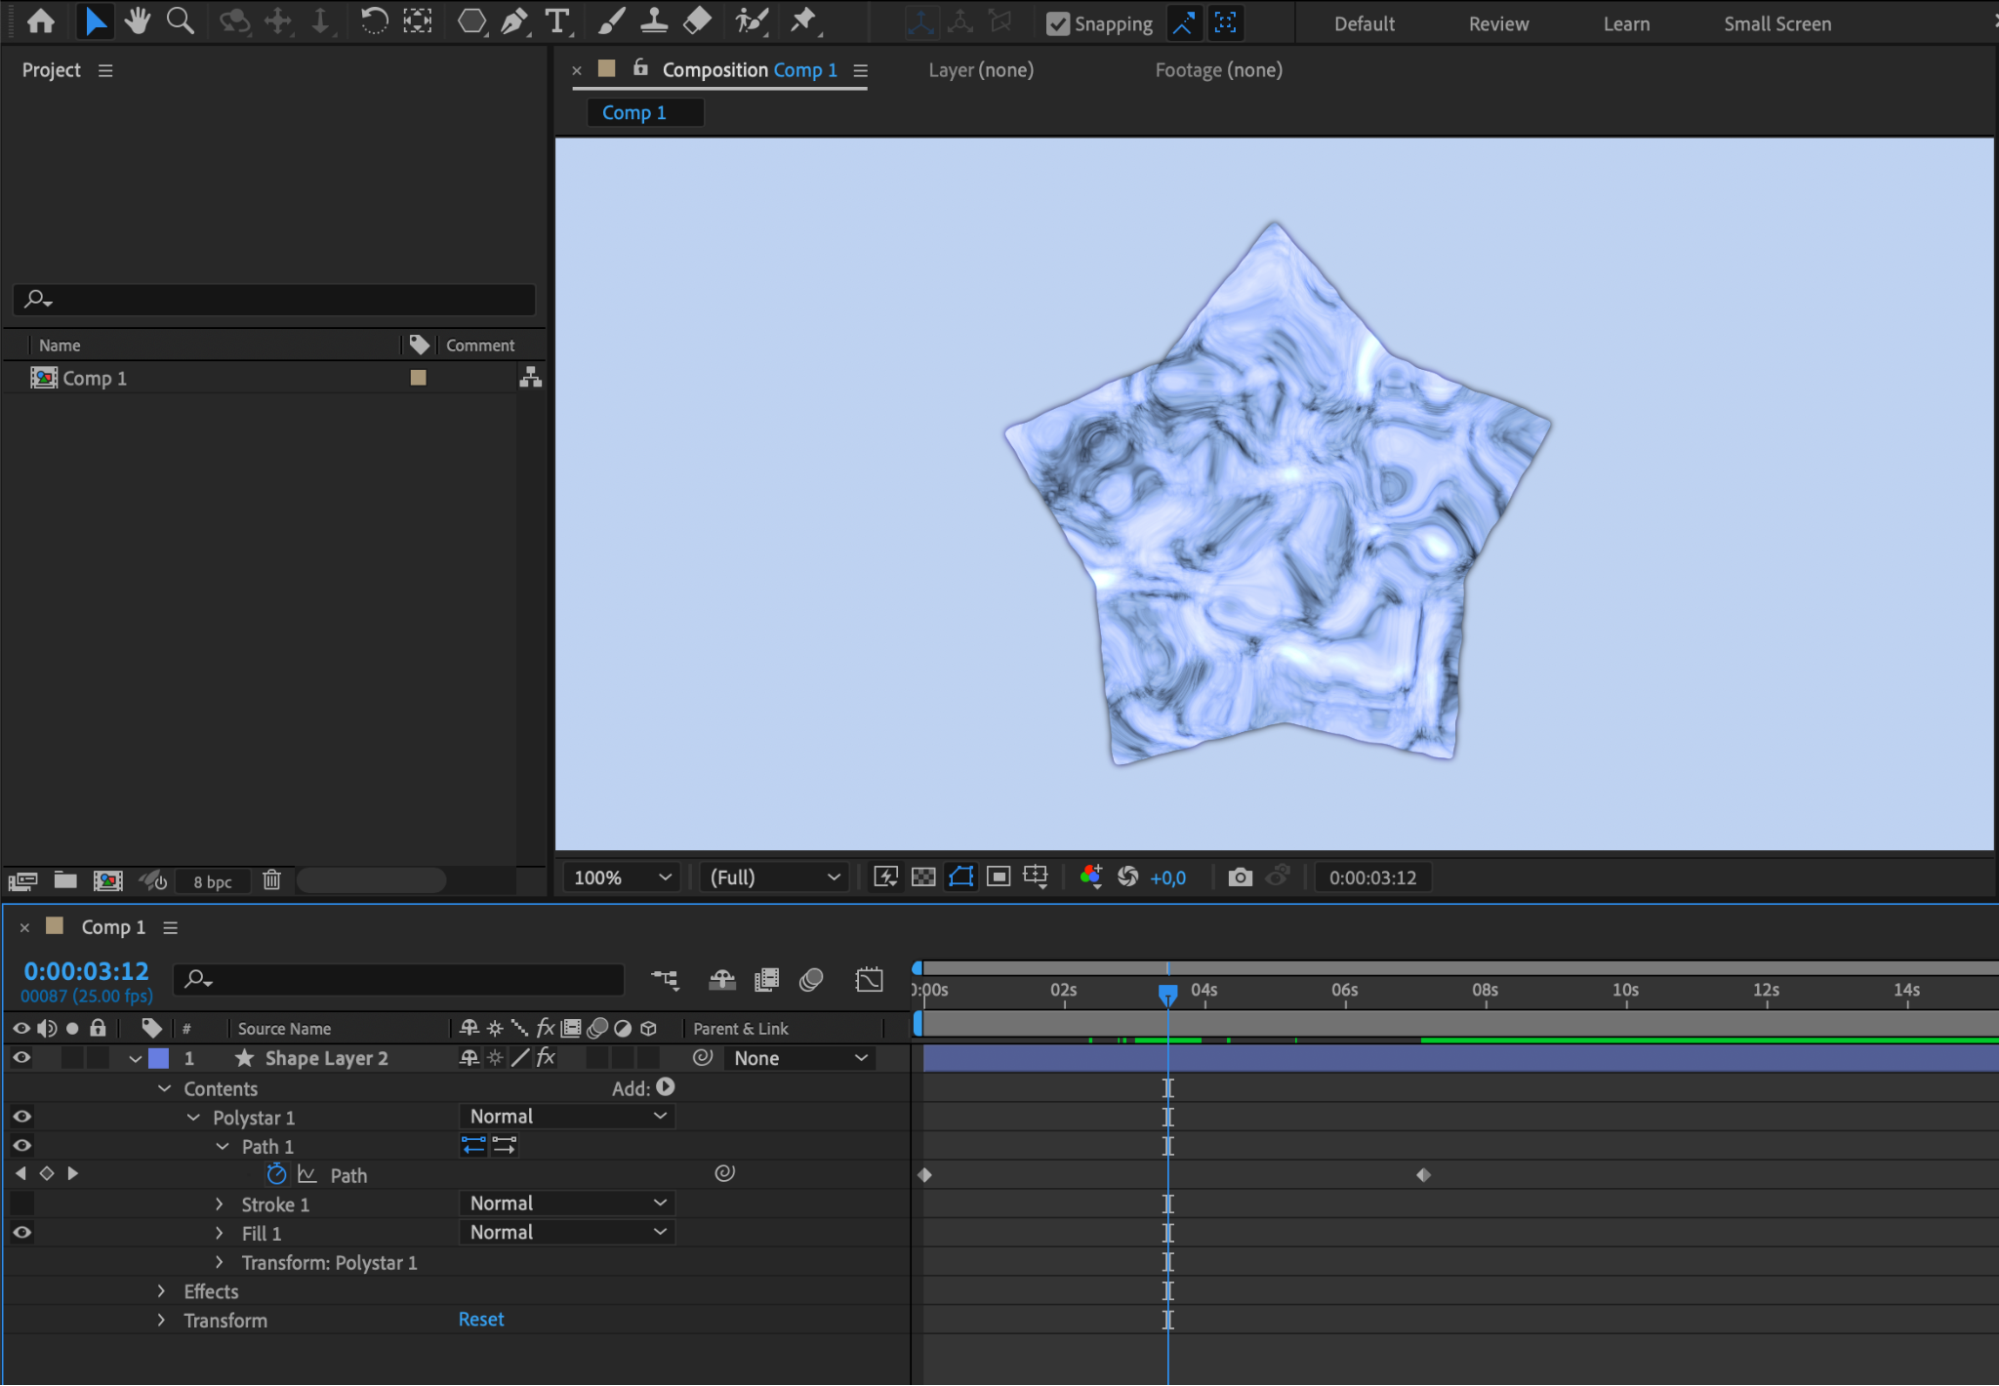
Morphing shapes using keyframes allows you to transform one shape into another over time. To do this, create two different shapes on separate shape layers. Set a keyframe for the Path property of the first shape, then copy and paste this keyframe onto the second shape layer’s Path property. Adjust the timing of the keyframes in the timeline to control the morphing animation. You can fine-tune the transition by adjusting the intermediate keyframes and using easing options. 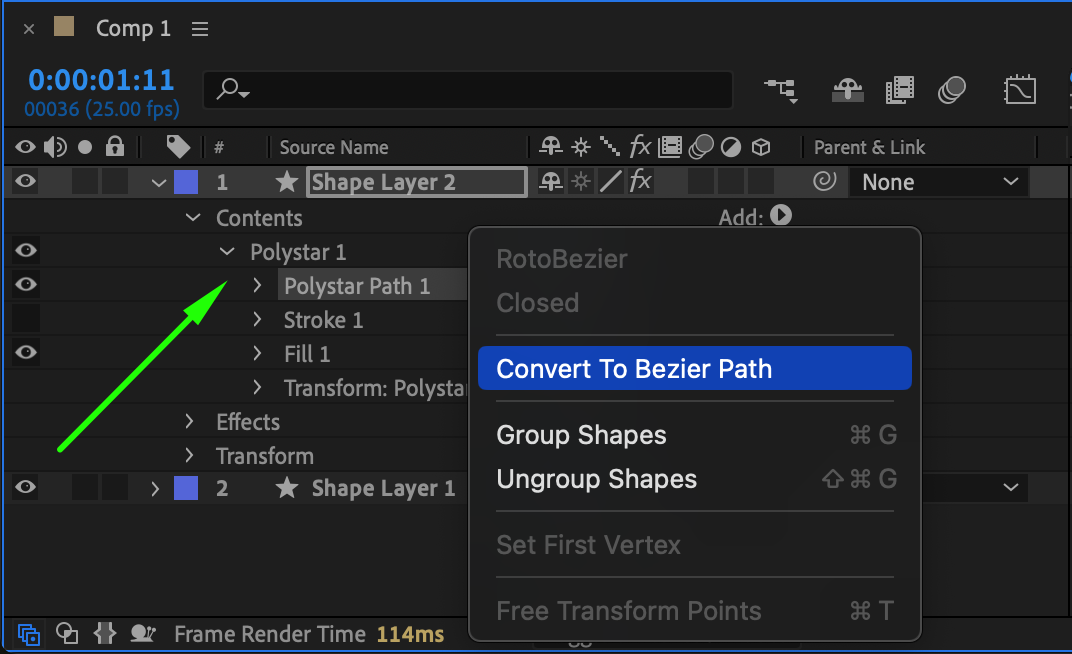

 Conclusion
By mastering these techniques, you’ll be able to change and animate shapes effectively in After Effects, enhancing the visual appeal and dynamism of your projects. Practice creating, modifying, and animating shape layers, and explore the possibilities offered by shape layer effects and morphing animations. With these skills, you’ll have the creative freedom to produce captivating and professional-quality animations that captivate your audience. Happy animating!

