A Beginner’s Guide to Changing Timelines in After Effects: Key Techniques and Tips
Introduction – Unleash the Power of Timeline Manipulation in After Effects
Have you ever wished you could modify the flow of your video project without starting from scratch? Are you looking to create smooth transitions or reorganize your visual elements seamlessly? If so, look no further! Understanding how to change timelines in After Effects will be the key to unlocking a world of creative possibilities.
Adobe After Effects is an industry-leading motion graphics and visual effects software that excels in creating stunning animations, compositing footage, and manipulating timelines. While the default timeline settings might get the job done, knowing how to customize and adjust timelines will enable you to take your projects to the next level.
In this comprehensive guide, we will walk you through the essential techniques and tips to modify timelines in After Effects. Whether you’re a seasoned professional or just getting started, the knowledge gained here will empower you to control the pacing, sequencing, and overall structure of your animations.
Before diving into the intricacies of timeline manipulation, let’s discuss why it is crucial and how it can revolutionize your workflow.
Stay tuned as we explore transformative methods to customize timelines and gain maximum creative control in After Effects. From rearranging the order of layers to creating smooth transitions and time remapping, we’ve got you covered! Let’s embark on a journey where you will master the art of changing timelines in After Effects.
Get 10% off when you subscribe to our newsletter

Essential Advice for Changing Timelines in After Effects
When it comes to altering timelines in After Effects, several key techniques and tips can greatly enhance your workflow. Let’s explore some essential advice to help you navigate through your project’s timeline like a pro.
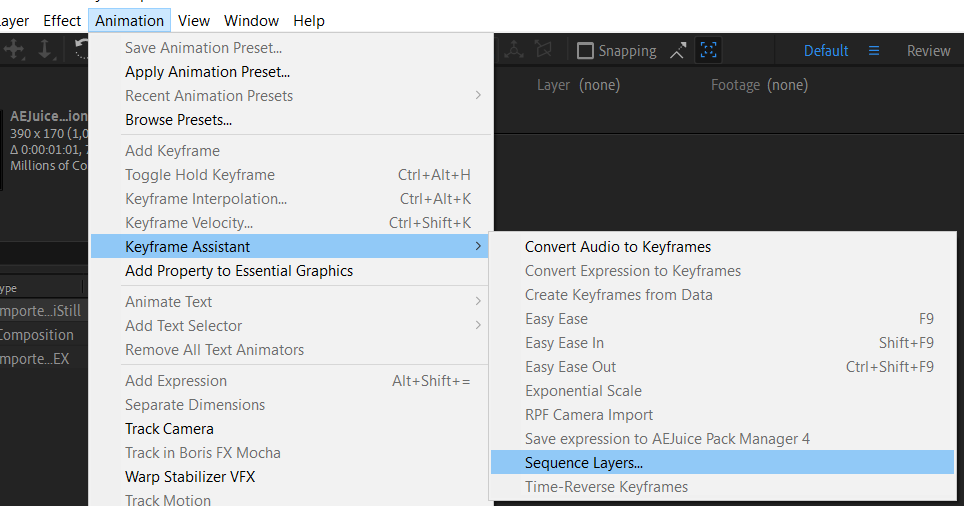
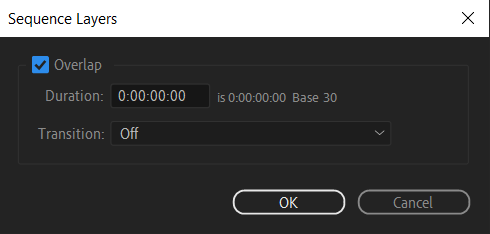
1. Utilize the Sequence Layers feature: it’s a time-saving method for organizing and rearranging layers within your timeline effortlessly. Simply select the layers in the project panel or in the composition that you want to organize, open the “Animation” menu, choose “Keyframe Assistant,” then select “Sequence Layers,” and adjust parameters such as overlap and layer alignment.
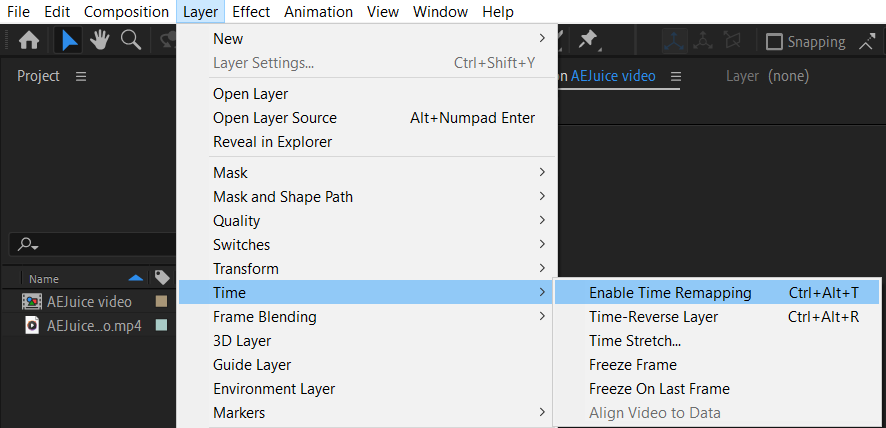
2. Master the art of time remapping (Ctrl/Cmd + Alt/Option + T): Time remapping allows you to manipulate the speed and timing of your footage or animations. By using keyframes, you can create slow-motion effects, speed ramps, or even reverse motion. Experimenting with time remapping will add a dynamic flair to your projects and give you more control over the temporal flow.
3. Take advantage of the “Sequence Layers” option (Ctrl/Cmd + Alt/Option + Bracket) to automatically trim layers: This practical feature trims the layers to the duration of the composition. It’s particularly useful when you want to reduce redundancy and optimize the timing within your project.
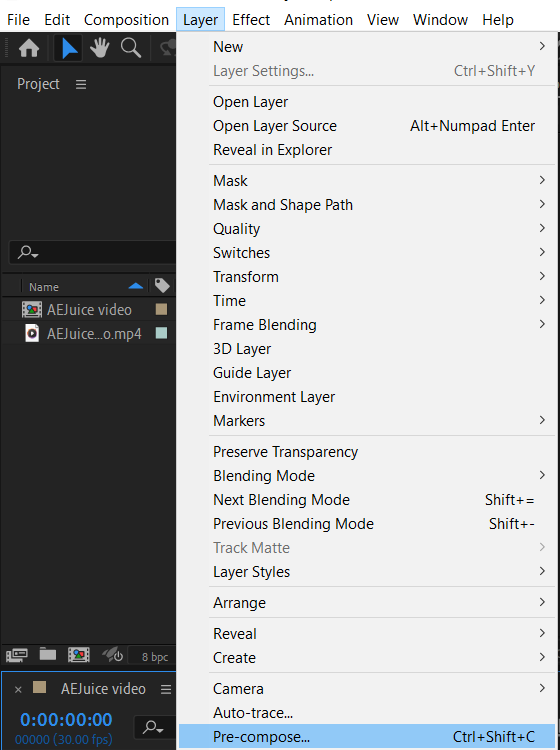
4. Explore the power of nested compositions (Ctrl/Cmd + Shift + C): Nested compositions act as containers for multiple layers and provide a structured approach to organizing complex projects. By creating nested compositions, you can easily modify or apply effects to a group of layers, simplifying the editing process and making your timeline more manageable.
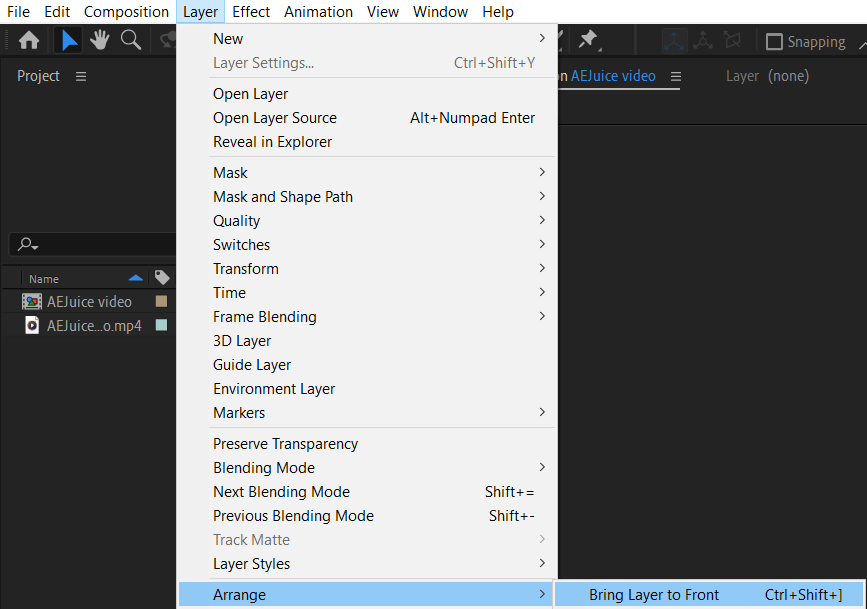
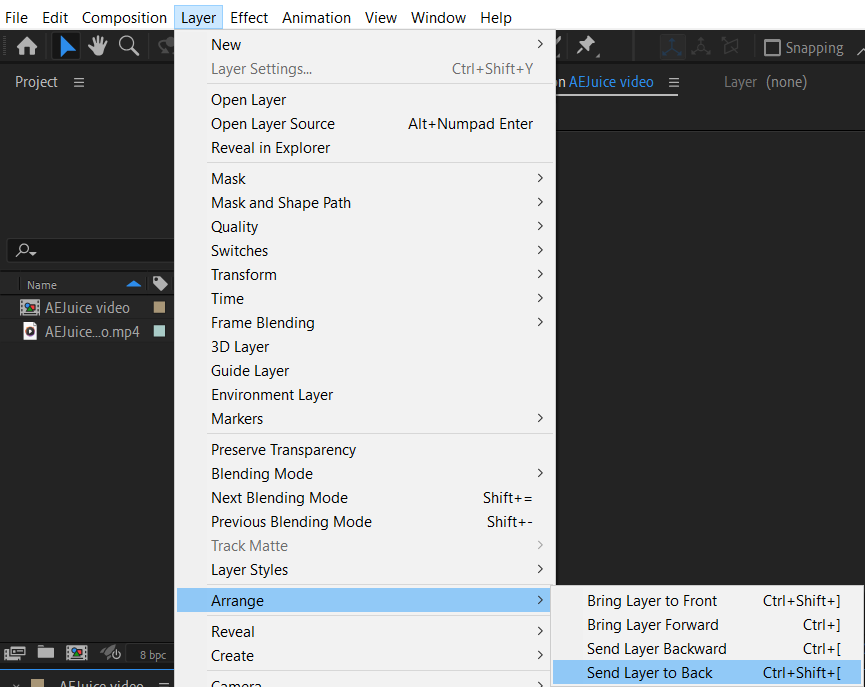
5. Utilize keyboard shortcuts for moving layers in time: Understanding the keyboard shortcuts for moving layers in time will significantly speed up your workflow. Pressing “[” and “]” allows you to move selected layers to the previous or next frame, respectively. Holding down Shift while pressing the brackets will move the layer by 10 frames.

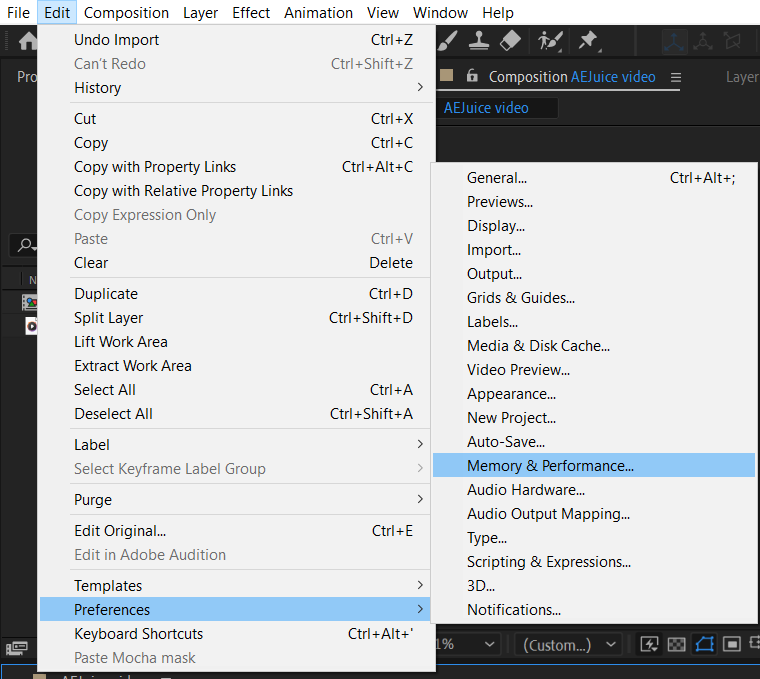
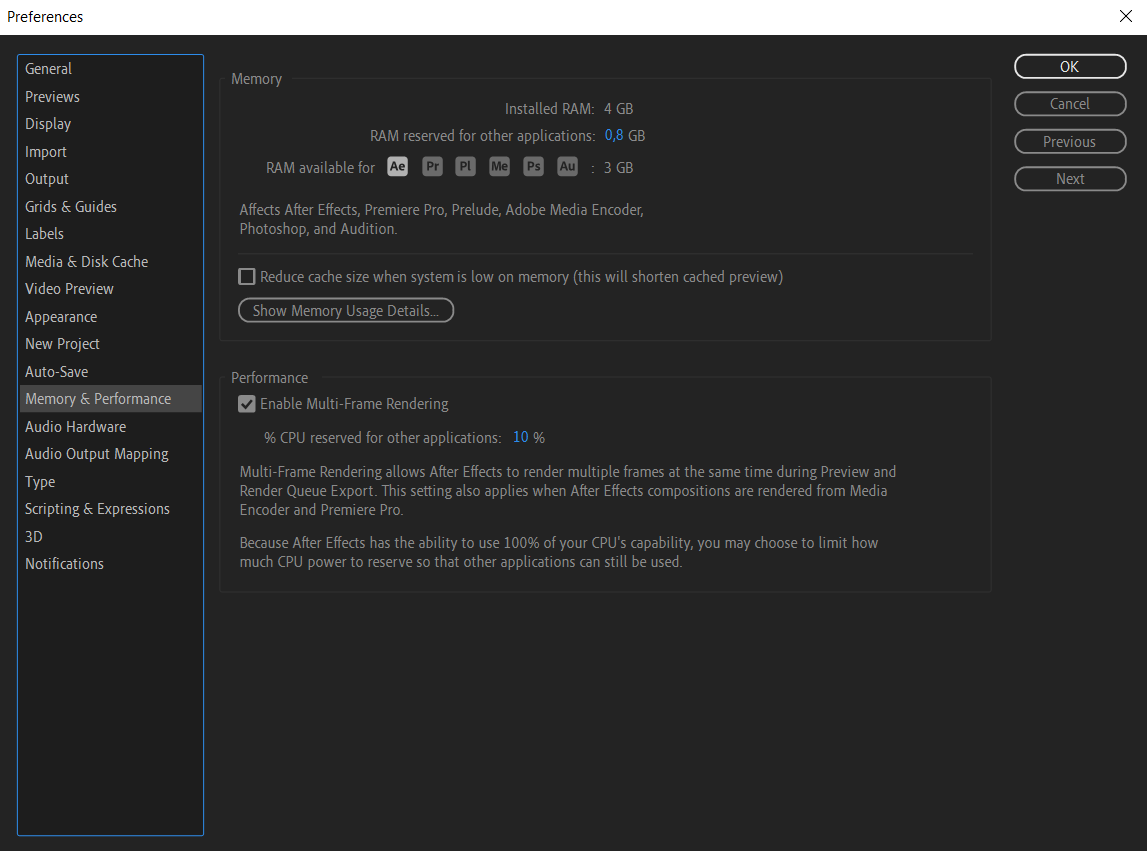
6. Utilize the “Render Multiple Frames Simultaneously” feature: This feature, found in the Preferences menu, allows After Effects to utilize more system resources while rendering, resulting in faster output times. Enabling this option can significantly improve your productivity, especially when working with complex compositions and effects.
By implementing these tips and techniques, you’ll gain a deeper understanding of how to change timelines in After Effects and maximize your creative potential. Remember to experiment, practice, and explore different approaches to find the workflow that works best for you.
Stay tuned for the next section, where we will delve into advanced methods for seamlessly changing timelines and creating smooth transitions in After Effects.
Conclusion: Mastering Timeline Manipulation in After Effects
Congratulations! You have successfully learned how to manipulate timelines in After Effects, unlocking a whole new level of creative control. By incorporating the techniques and tips shared in this guide, you can confidently navigate and manipulate timelines to create stunning animations and visual effects.
We explored essential advice such as utilizing hotkeys for efficient layer organization, mastering time remapping for dynamic effects, and leveraging nested compositions for better project management. Additionally, we highlighted the power of keyboard shortcuts for moving layers in time and the optimization benefits of the “Render Multiple Frames Simultaneously” feature.
As you continue to practice and experiment with these methods, you will discover your unique approach to timeline manipulation that suits your project’s specific needs. Remember to stay curious, explore new features, and push the boundaries of your creativity.
With the knowledge gained from this guide, you are now equipped to confidently tackle any timeline adjustments, whether it’s rearranging layers, creating smooth transitions, or adjusting the timing of your visuals. The ability to change timelines effectively will not only enhance your workflow but also bring your artistic vision to life.
So, go ahead and dive into your After Effects projects with newfound confidence. Master the art of timeline manipulation, and let your creativity flourish. The possibilities are endless, and the only limit is your imagination.
Thank you for joining us on this journey to master timeline changes in After Effects. We hope this guide has been valuable and will continue to support your growth in motion graphics and visual effects. Happy editing!
Our Bestsellers


