In this comprehensive guide, discover the essential steps to effectively change the volume of audio in After Effects. Learn valuable techniques that will empower you to maintain harmonious sound levels and enhance the overall quality and impact of your video projects. Unleash your creative potential as you unravel the art of audio control within this powerful software.
Introduction
Get 10% off when you subscribe to our newsletter

Controlling audio levels in After Effects can transform a good-sounding video into a great-sounding video. As a motion graphics artist, you understand the importance of impeccable audio quality.
From advertising to corporate interviews, having full control over the volume of your audio can make a significant difference in the final result. With After Effects, you can create a professional-level audio product.
Your clients will be impressed by your videos’ audio quality. Moreover, you can charge more for the service because the videos will have remarkable-sounding audio.
Get 10% off when you subscribe to our newsletter

This tutorial will guide you through a step-by-step process on how to change the volume of audio in After Effects. From adjusting audio levels for specific clips to adding keyframes for precise control, you’ll learn essential techniques that will elevate the audio quality of your video projects.
By the end of this guide, you’ll feel confident in your ability to harness the potential of After Effects, ensuring that your audio perfectly complements your visual creations. So, let’s dive in and unravel the secrets of audio control in the world of After Effects!
Get 10% off when you subscribe to our newsletter

Step-by-Step Guide to Change the Volume of Audio in After Effects
Adjusting the volume of audio in After Effects is a vital skill that can significantly enhance the impact of your video projects. To help you understand this process, we have outlined a step-by-step guide below:
1. Import your audio file:
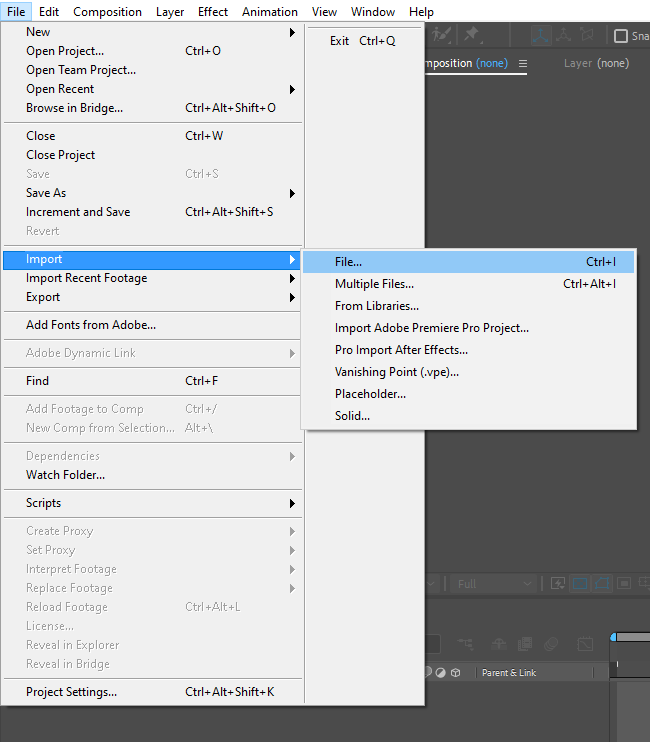
Start by importing your desired audio file into your After Effects project. You can do this by navigating to “File” > “Import” > “File” and selecting the audio file from your computer. 2. Create a new composition:
Get 10% off when you subscribe to our newsletter

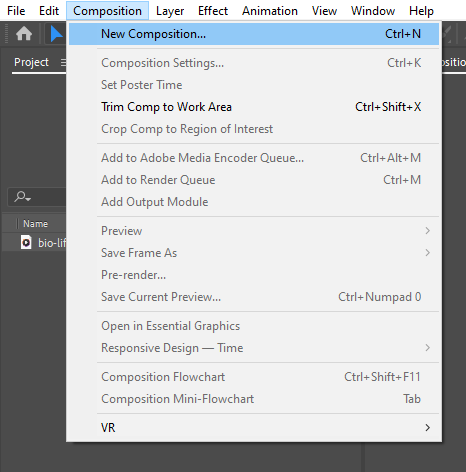
Next, create a new composition by going to “Composition” > “New Composition.” Specify the settings for your composition, including the dimensions, frame rate, and duration. Make sure that the settings match your video project’s requirements.
3. Drag and drop the audio file into the composition:
Simply drag and drop the imported audio file into the composition timeline or project panel. This action will place the audio file onto a new layer within the composition.
4. Access the audio options:
To access the audio options, hit a drop-down menu for the layer.
Get 10% off when you subscribe to our newsletter

5. Adjust the volume using the “Audio Levels” parameter:
By adjusting this parameter, you can increase or decrease the overall volume of the audio. Use the mouse to drag the slider to the desired level. You can also use the hotkey “L” as a shortcut to access the audio options.
6. Fine-tune the volume with keyframes (optional):
If you want to create more dynamic audio changes within your composition, consider using keyframes. To add a keyframe, first, make sure the playhead is positioned at the desired point on the timeline. Then, click the stopwatch icon next to the “Audio Levels” property in the audio options dialog box. Move the playhead to a different point in your composition, and adjust the level accordingly. After that, a new keyframe will be automatically added. Repeat this process to create multiple keyframes and control the volume changes over time.
7. Preview your audio changes:
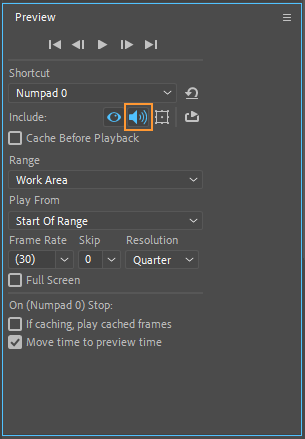
To ensure that your audio changes are seamless, use the RAM Preview function in After Effects. Press Space or “0” on the numeric keypad to start the preview. This will allow you to hear and see the changes in real-time so you can make adjustments if necessary.
Get 10% off when you subscribe to our newsletter

8. Save and export your composition:
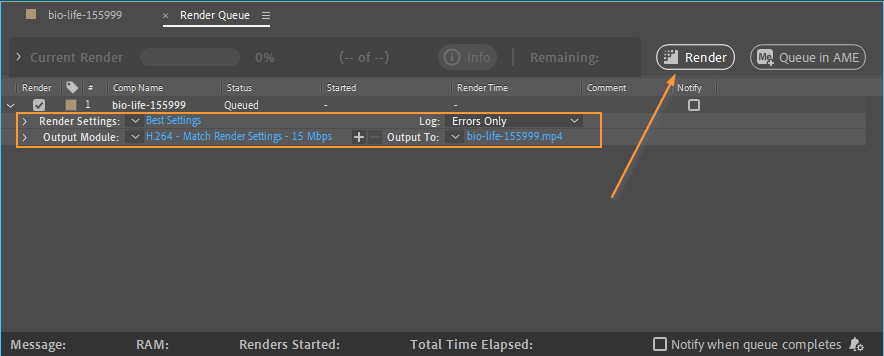
Once you are satisfied with the volume adjustments, save your composition and export it as the desired file format for your project. With these simple steps, you can easily change the volume of audio in After Effects, unleashing your creativity and adding a professional touch to your videos. Take advantage of these techniques to create captivating visual and auditory experiences that will engage and captivate your audience.
Get 10% off when you subscribe to our newsletter

Conclusion:
Mastering the art of audio control in After Effects opens up a world of possibilities for your video projects. Through the step-by-step guide outlined above, you’ve learned how to effortlessly change the volume of audio, ensuring a harmonious and impactful audiovisual experience.
Remember, the ability to adjust audio levels for specific clips, add keyframes for precise control, and preview your changes in real-time allows you to truly bring your creative vision to life. Whether you’re working on a promotional video, a short film, or an advertisement, incorporating well-balanced audio will elevate the quality and emotional impact of your content.
Get 10% off when you subscribe to our newsletter

By leveraging the power of After Effects, you possess the tools to transform your projects into immersive and engaging experiences. So, go ahead, dive into the world of audio control, and let your creativity soar.
Take the knowledge and skills you’ve acquired in this guide and continue to explore the endless possibilities of audio manipulation in After Effects. Experiment with different techniques, combine them with your visual elements, and don’t be afraid to push the boundaries of creative expression.
With dedication, practice, and a keen sense of audio control, your videos will reach new heights, captivating audiences and leaving a lasting impression. Get started today and unleash the full potential of audio control in After Effects. Happy editing!


