Adjusting and Visualizing Waveforms in After Effects
Modifying Audio Waveforms for Better Editing and Effects
Waveforms in After Effects help visualize audio levels and make precise adjustments to sound. By modifying the waveform display and applying effects, you can enhance audio quality and sync sound with visuals. Follow these steps to change and adjust the waveform in After Effects.
Get 10% off when you subscribe to our newsletter

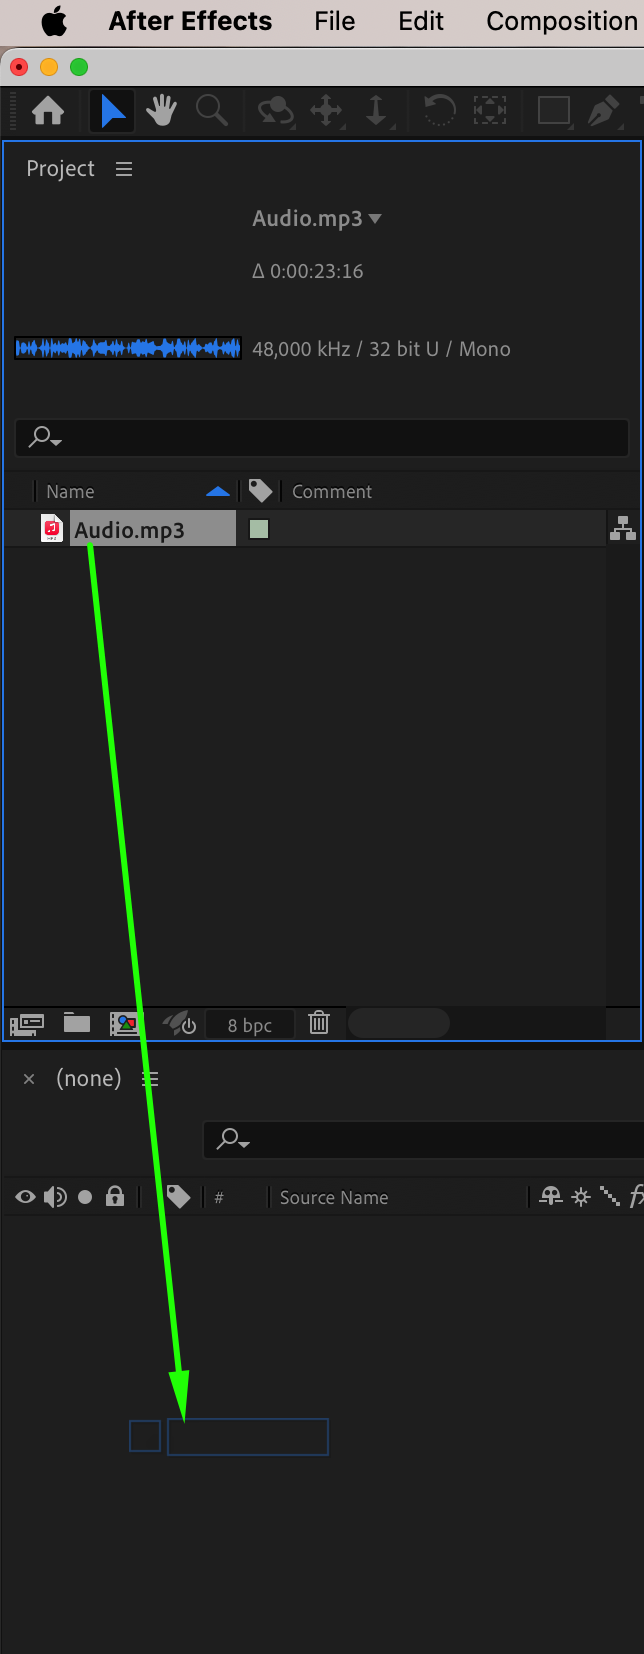
Step 1: Import Your Audio File
Go to File > Import > File, select your audio file, and drag it onto the timeline. This will allow you to edit and visualize the waveform.

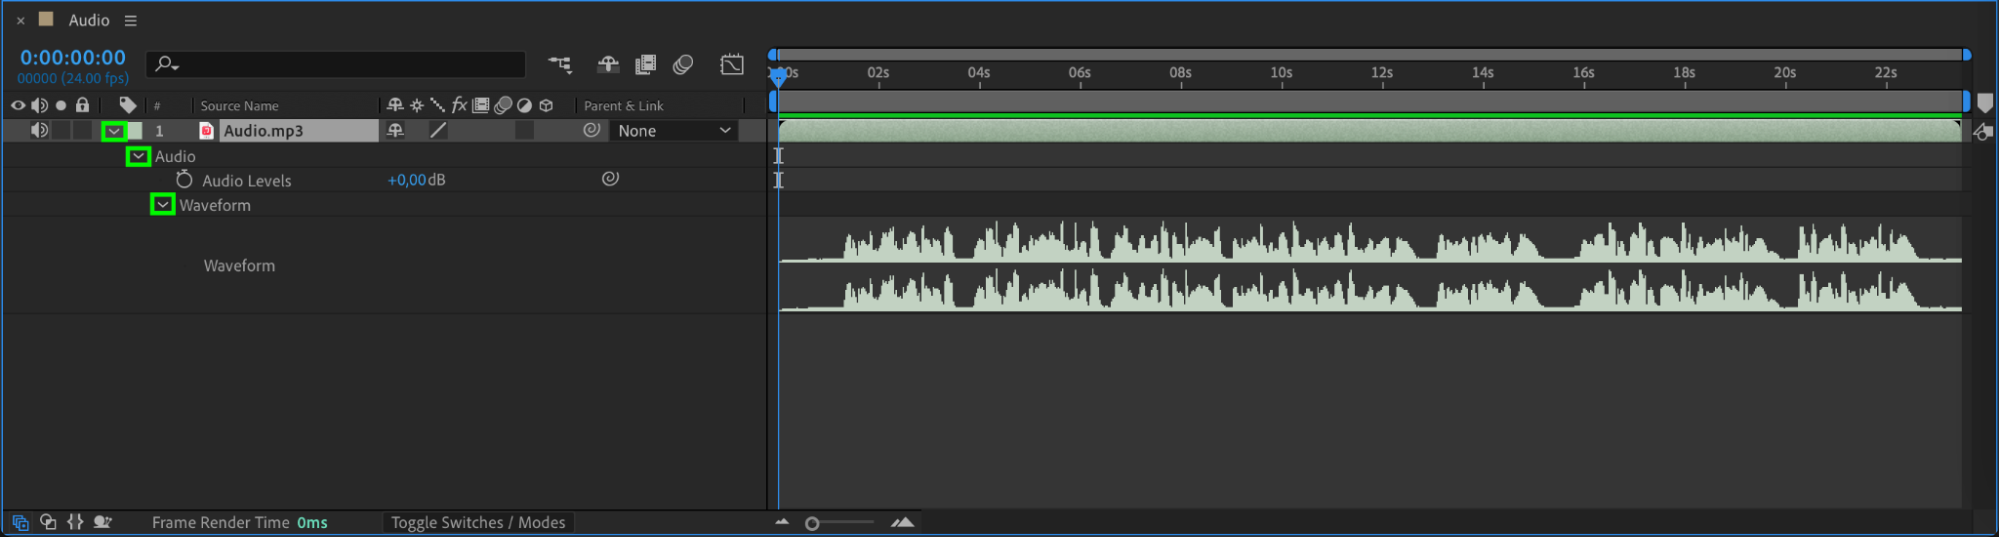
 Step 2: Expand the Waveform Display
Click the drop-down arrow next to your audio layer to expand its properties. Open the Audio section, then click on Waveform to display the visual representation of the sound.
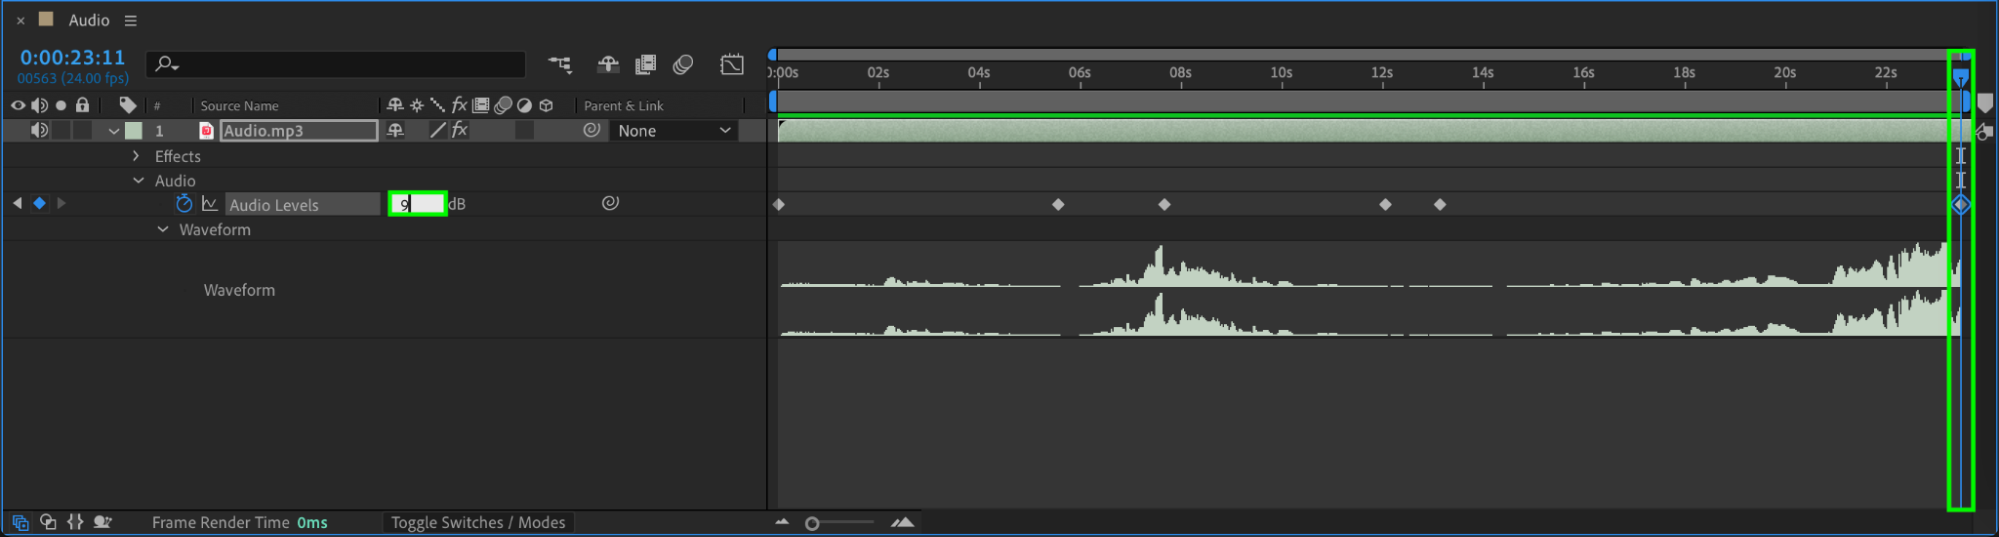
 Step 3: Adjust Audio Levels
Select the audio layer and press “L” twice (LL) to quickly open the waveform. Use the Audio Levels property to increase or decrease the volume by adjusting the dB value.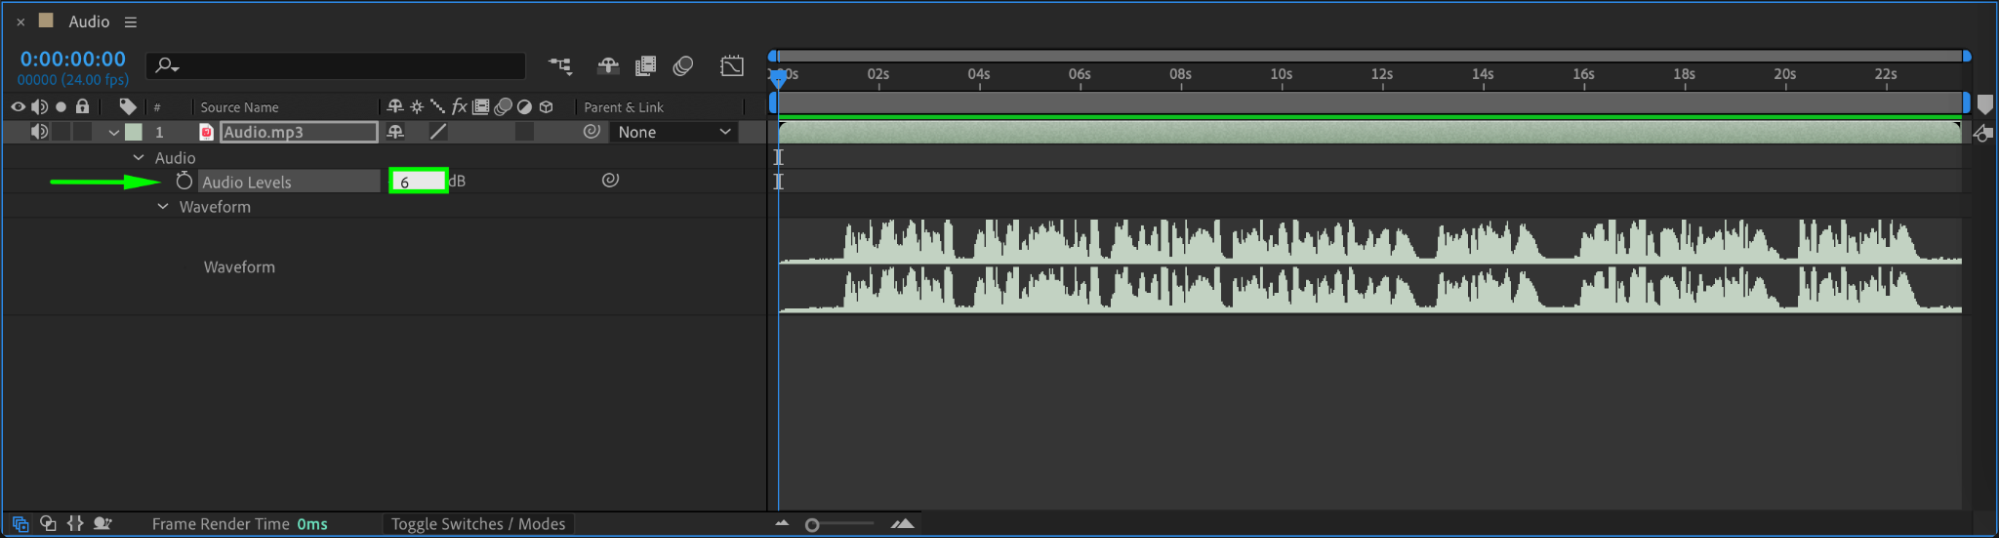
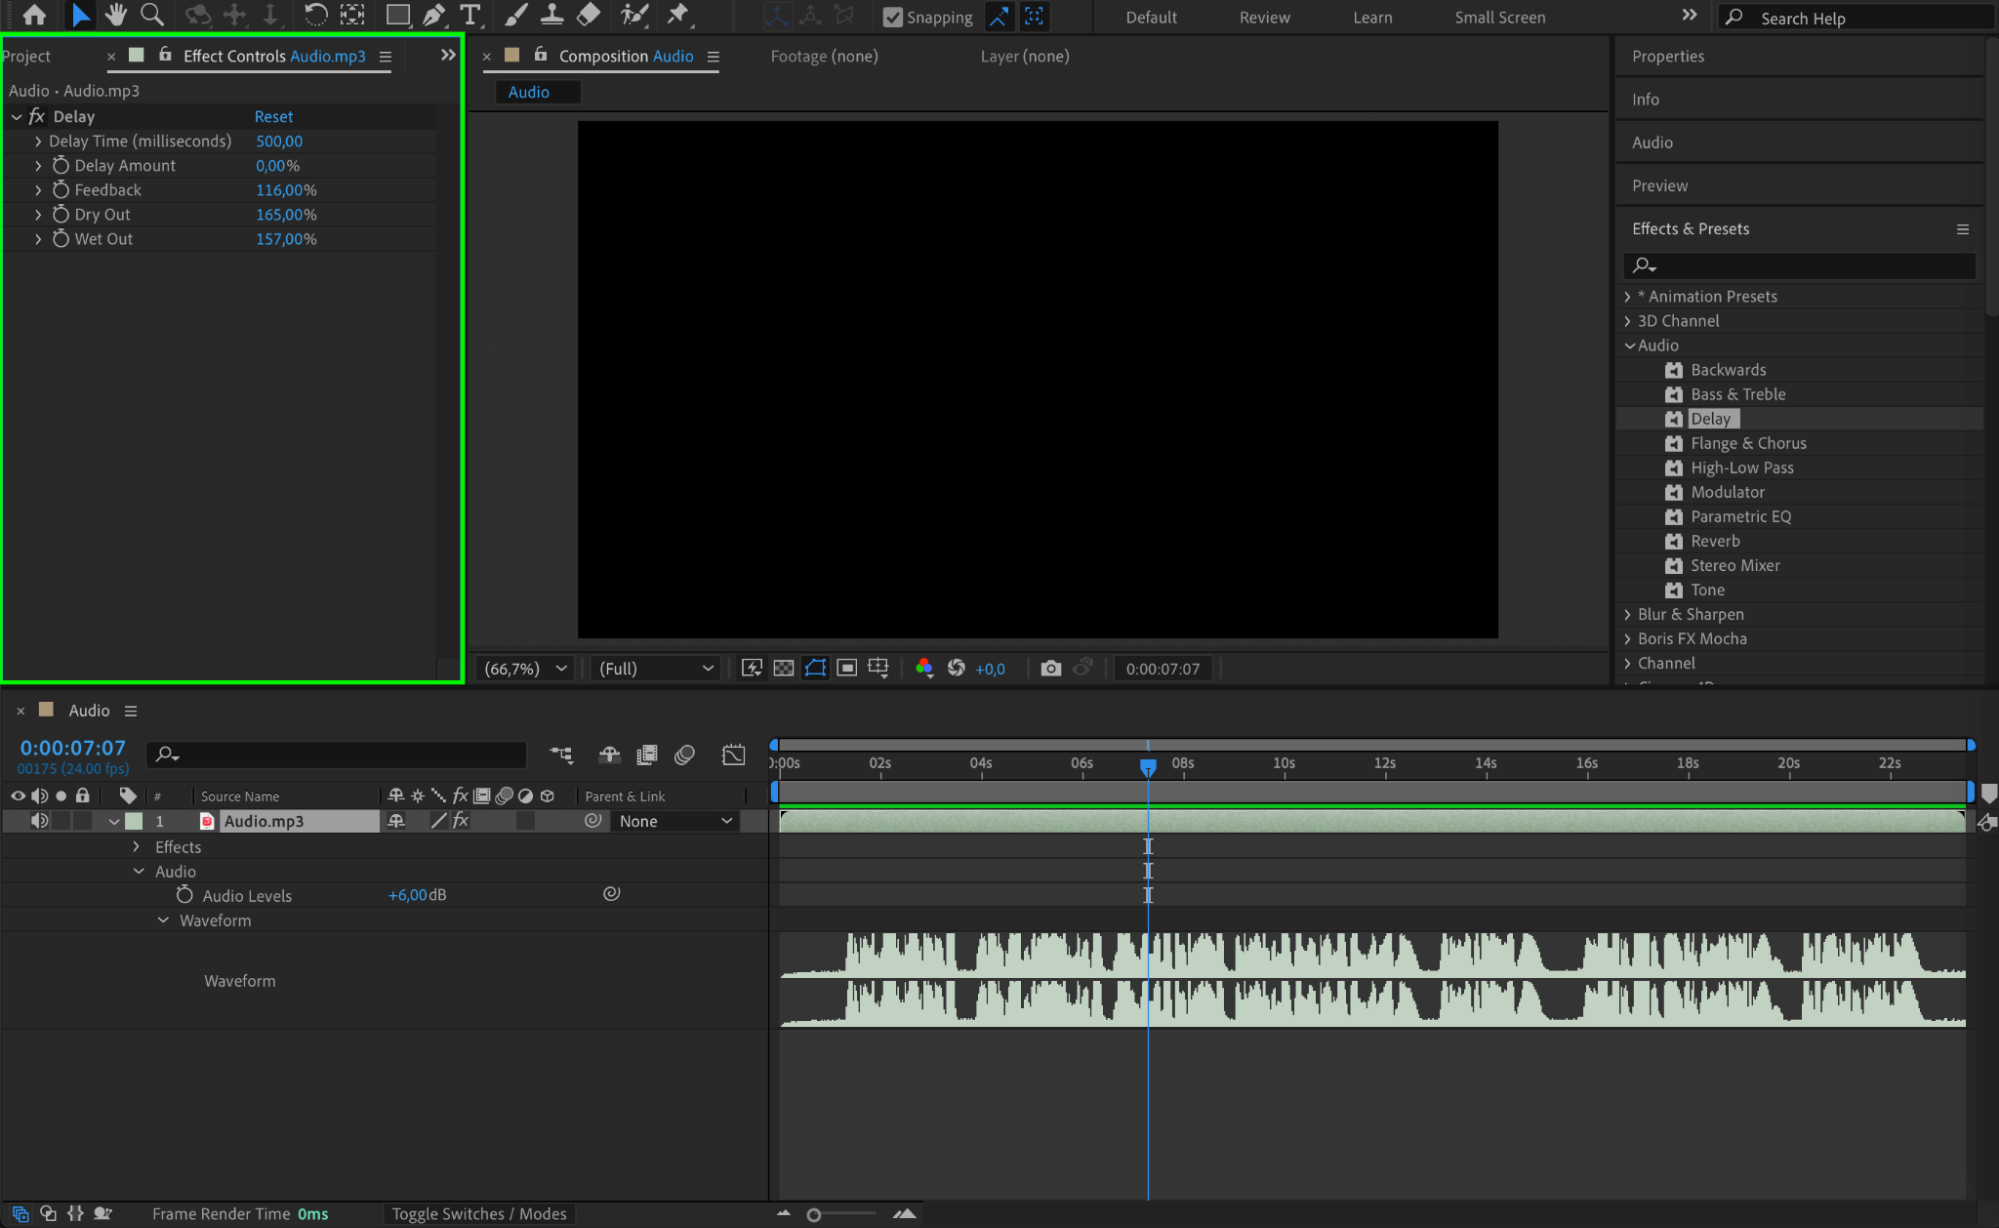
Step 4: Apply Audio Effects
Open the Effects & Presets panel and search for audio effects such as Delay, Reverb, or Parametric EQ. Drag an effect onto the audio layer, then adjust its settings in the Effect Controls panel. These effects can modify the waveform by changing the sound’s delay, echo, or frequency balance.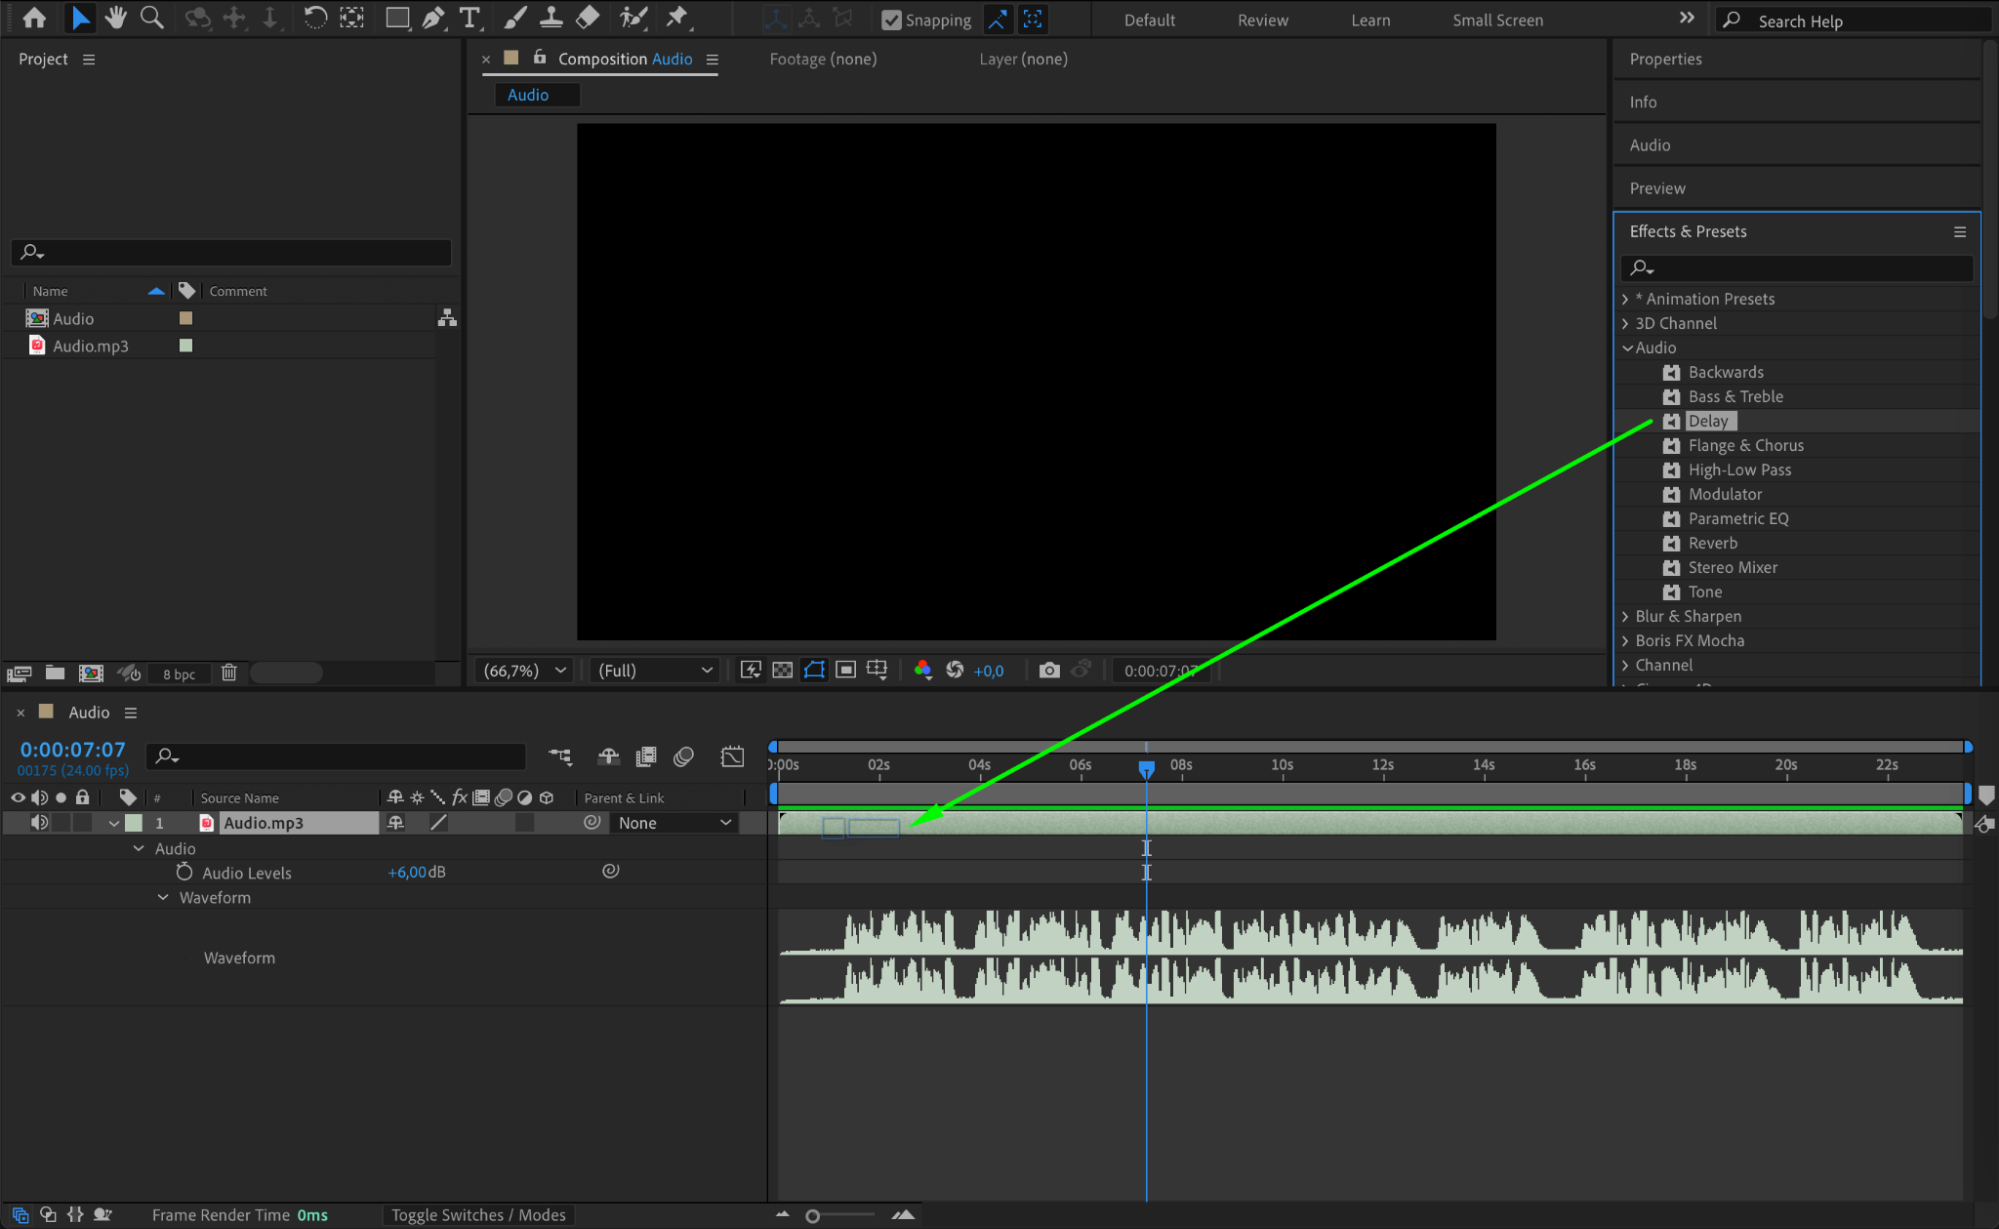
 Step 5: Change Playback Speed to Alter the Waveform
Get 10% off when you subscribe to our newsletter
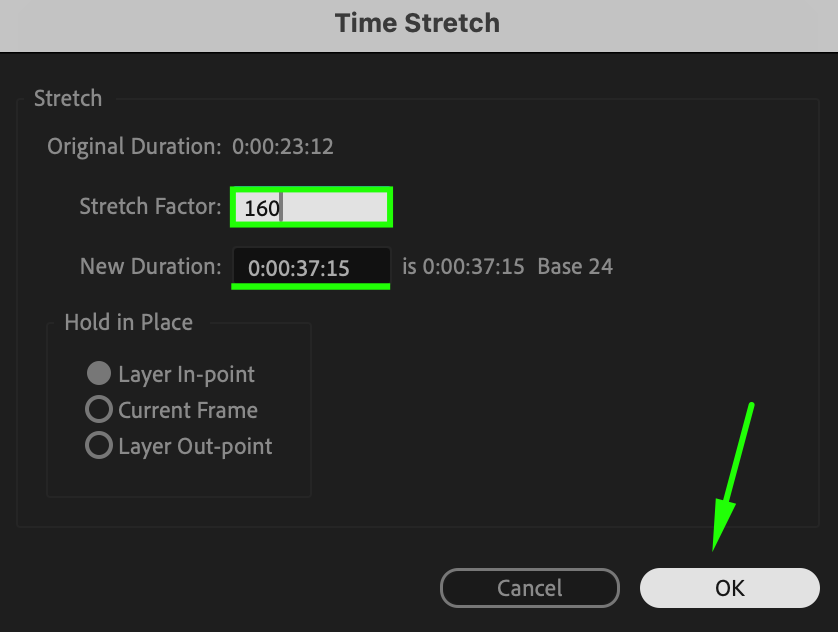
Right-click on the audio layer and select Time > Time Stretch. In the Time Stretch window, adjust the Stretch Factor – increasing it slows down the audio (expanding the waveform), while decreasing it speeds up the audio (compressing the waveform). This change alters how the waveform appears and how the audio plays back.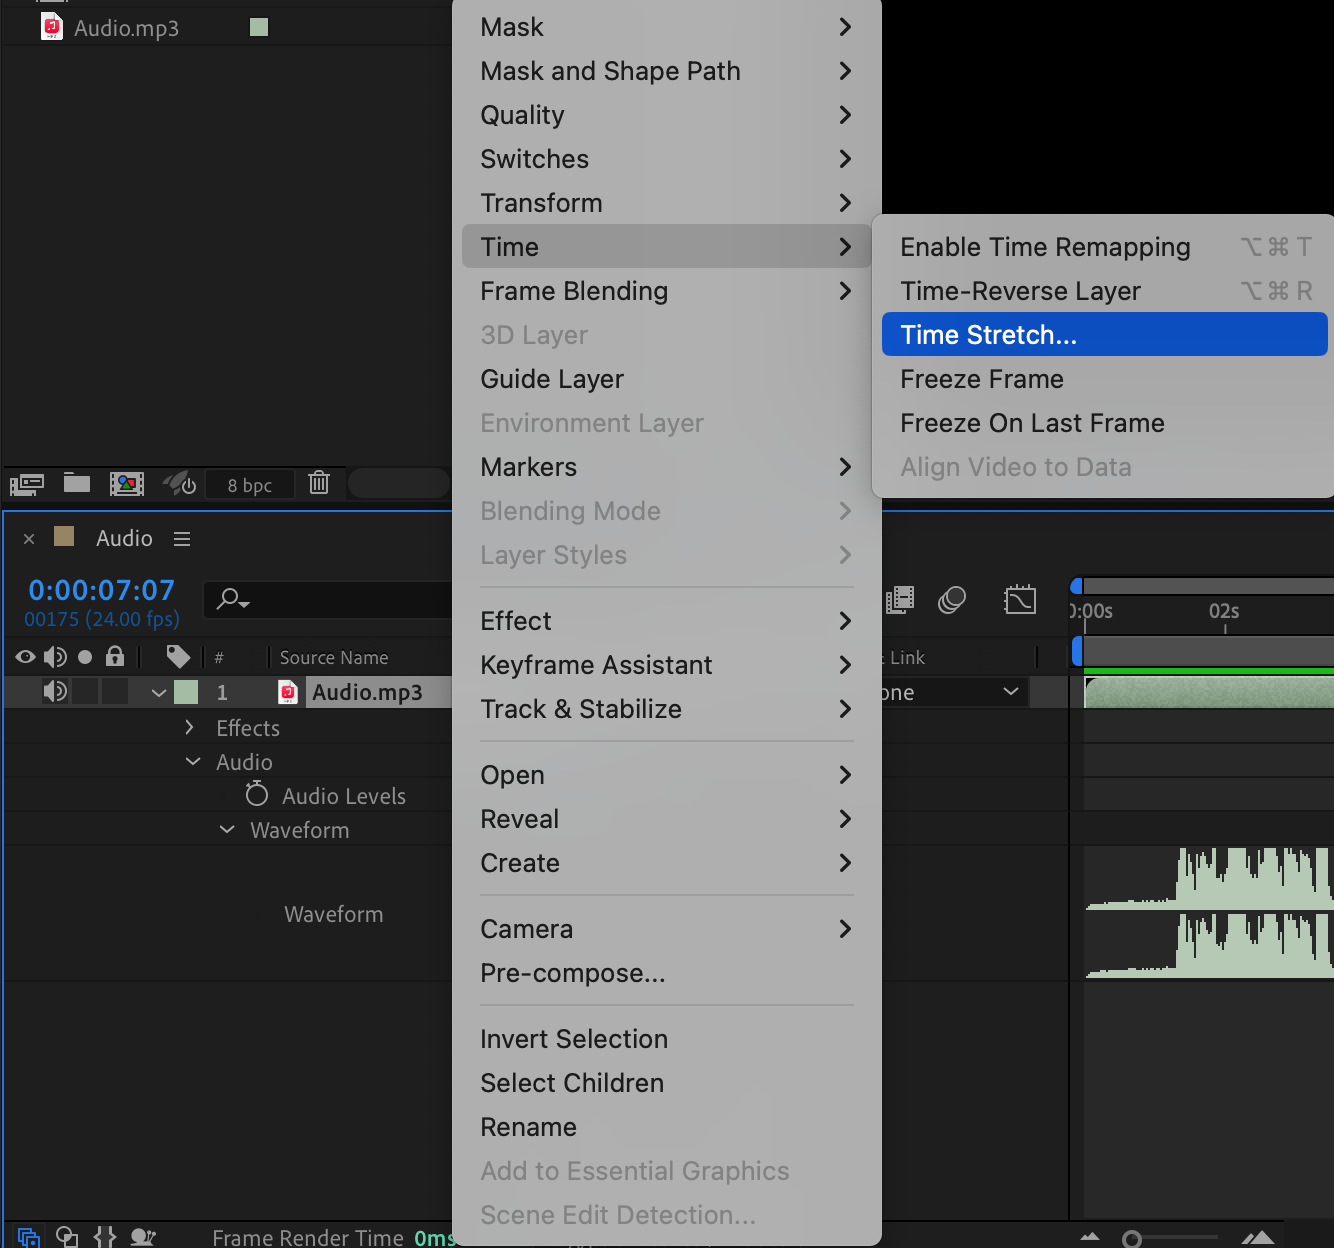
 Step 6: Animate Audio Levels for Smooth Transitions
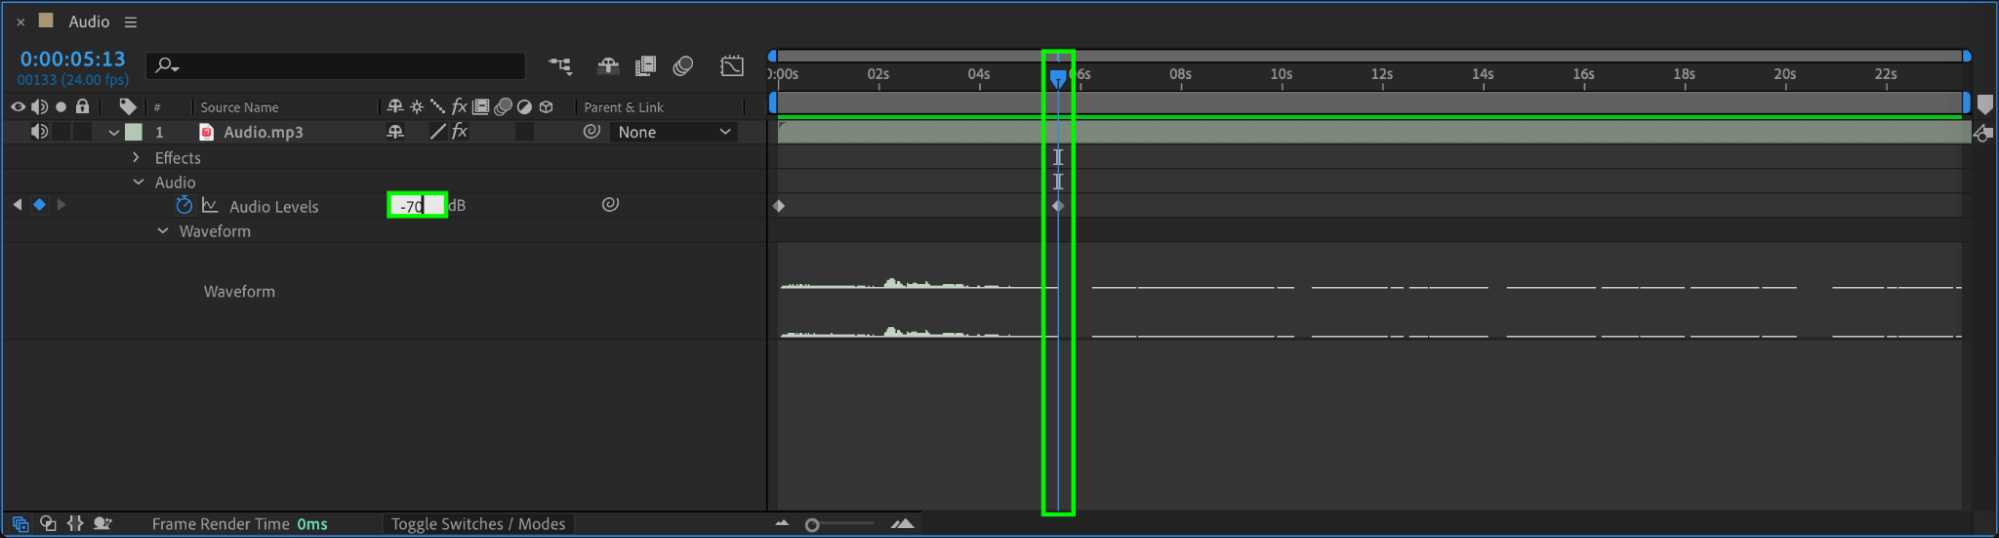
To create a smooth fade-in and fade-out effect, animate the Audio Levels parameter. Expand the Audio section in your Timeline, then click the stopwatch next to Audio Levels to add keyframes. Set the starting value to -70 dB (silent) and gradually increase it to 12 dB for a fade-in. For a fade-out, add another keyframe and decrease the value back to -70 dB. This technique ensures a natural and professional audio transition.
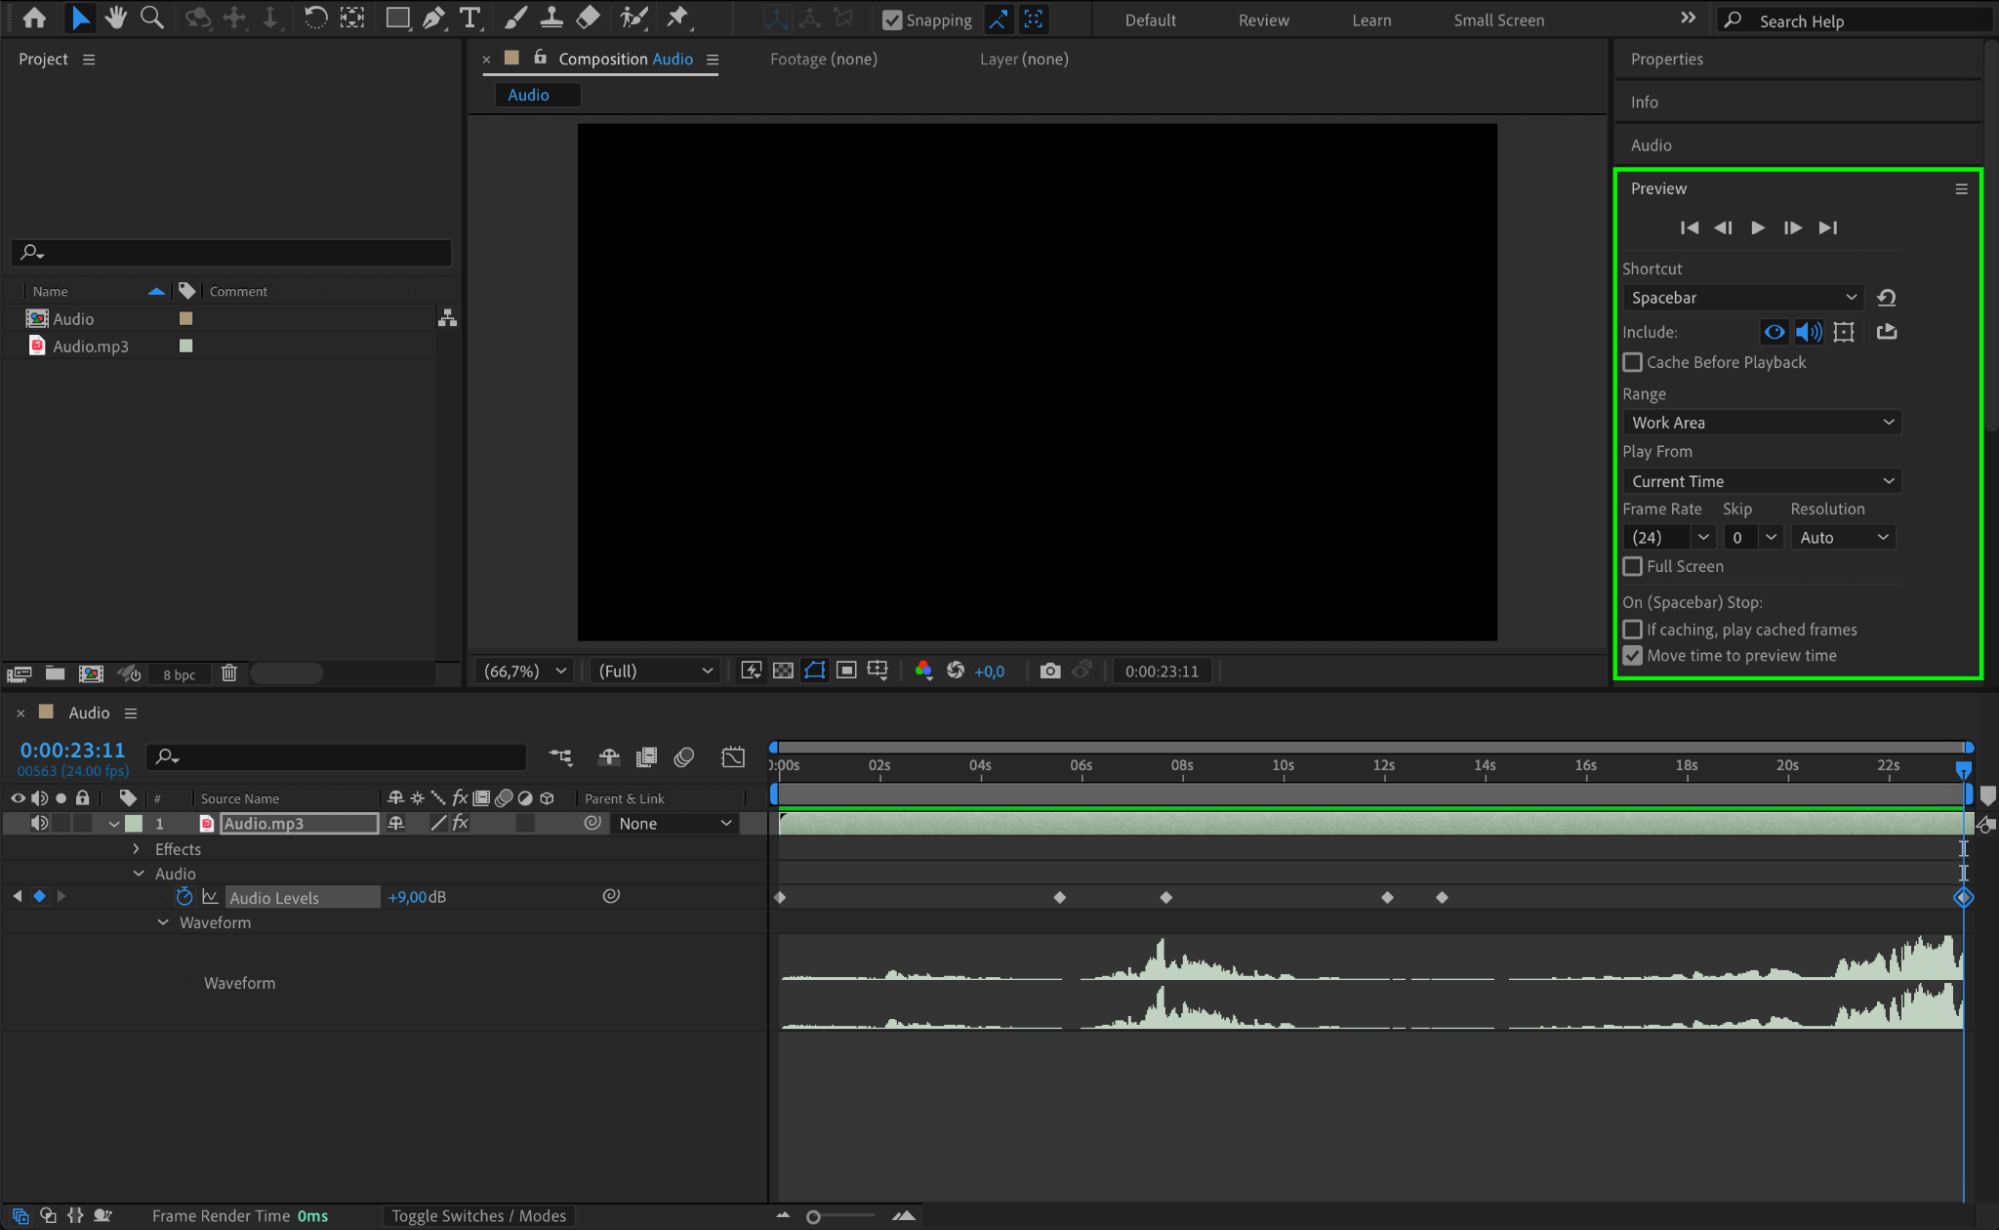
 Step 7: Preview the Changes
Get 10% off when you subscribe to our newsletter
Press the Spacebar to play the composition and check how the waveform and audio sound after adjustments. Make further changes if necessary.
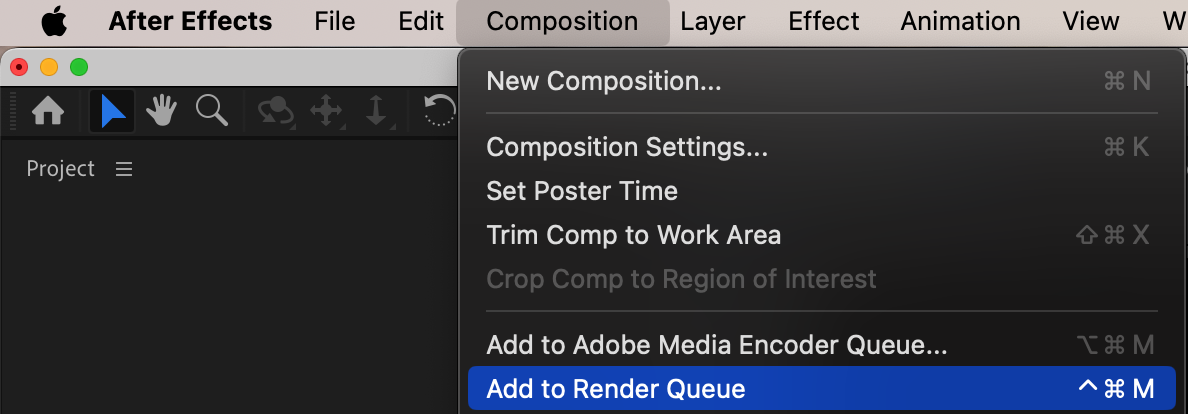
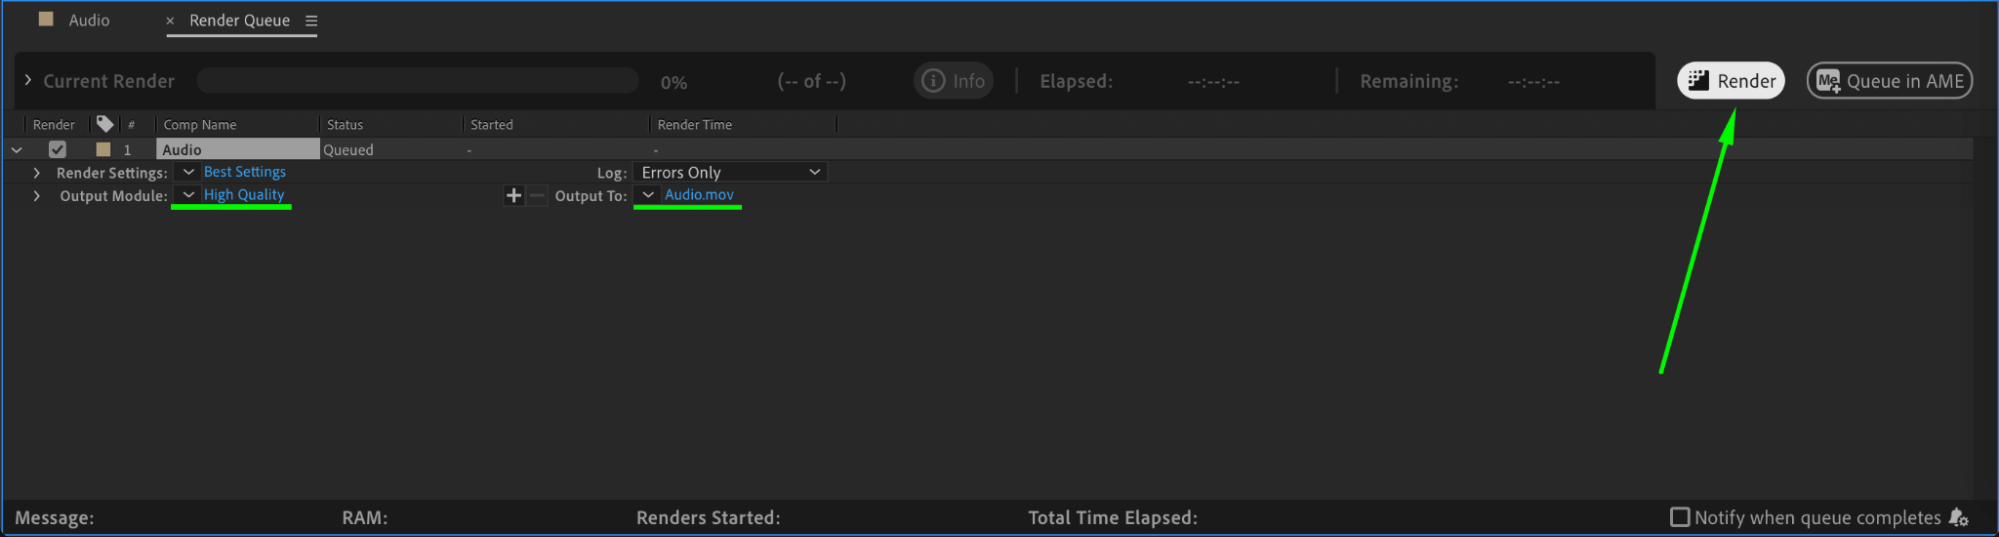
 Step 8: Render the Final Audio
Go to Composition > Add to Render Queue, choose the preferred format, set the output location, and click Render to export your project with the modified waveform.
Get 10% off when you subscribe to our newsletter
Conclusion
Modifying the waveform in After Effects allows you to fine-tune audio for better synchronization and enhanced sound quality. By adjusting audio levels, applying effects, stretching time, and animating volume, you can create dynamic and polished audio for your projects.
Our Bestsellers


