Why Clearing Disk Cache in After Effects is Important
After Effects is powerful software used by visual artists, animators, and video editors around the world to create motion graphics and visual effects. However, After Effects may start to lag or crash when it is used to do complex and resource-intensive projects. Then it will affect productivity and workflow.
One common culprit behind this performance issue is the disk cache. After Effects stores temporary data, such as pre-rendered frames, previews, and audio files, in the disk cache to speed up future rendering processes. This feature helps improve performance, but the cache will quickly fill up and take up valuable storage space on your computer’s hard drive.
Get 10% off when you subscribe to our newsletter

To keep After Effects running smoothly and efficiently, сlearing the disk cache regularly is crucial. In this article, we will provide you with a step-by-step guide on how to clear the disk cache in After Effects which can ensure that you can optimize your workflow. So, let’s learn how to reclaim that valuable disk space!
Step-by-Step Guide: How to Clear Disk Cache in After Effects
1. Open After Effects Preferences
To begin, open After Effects and navigate to the “Edit” tab in the top menu. From there, click on “Preferences” and select “Media & Disk Cache.”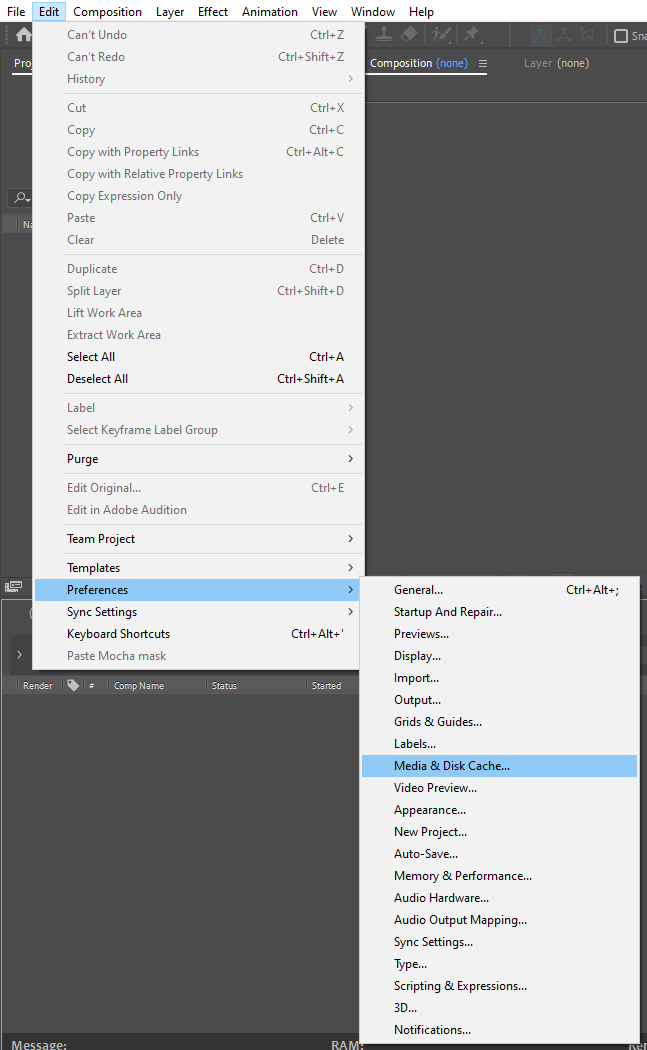
2. Locate the Disk Cache Folder
In the Media & Disk Cache preferences window, you will see a section labeled “Disk Cache.” Here, you can find the location of the disk cache folder on your computer. Take note of this folder as you will need to access it later.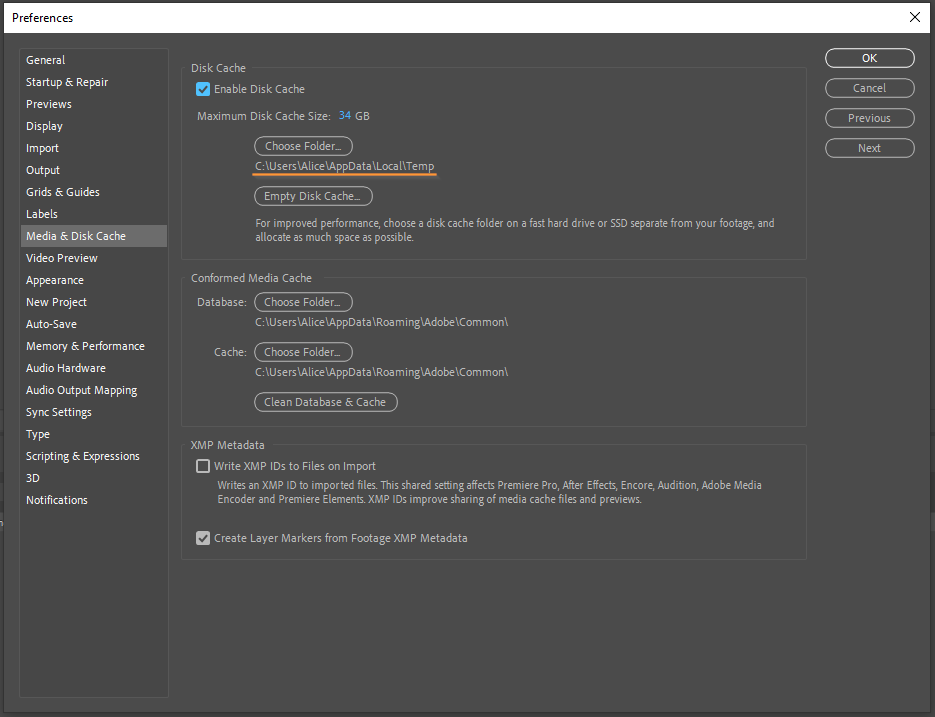
3. Close After Effects
Before clearing the disk cache, it’s essential to close After Effects to ensure that all cache files are released and not in use.
4. Open the Disk Cache Folder
Now that After Effects is closed, navigate to the disk cache folder location that you noted earlier. You can do this by opening a Finder or Explorer window and entering the folder path in the address bar.
5. Delete the Contents of the Disk Cache Folder
Once you’re inside the disk cache folder, select all the files and folders contained within it. You can do this by pressing “Ctrl+A” (Windows) or “Command+A” (Mac). After selecting everything, simply hit the “Delete” key to remove all the cache files from your system.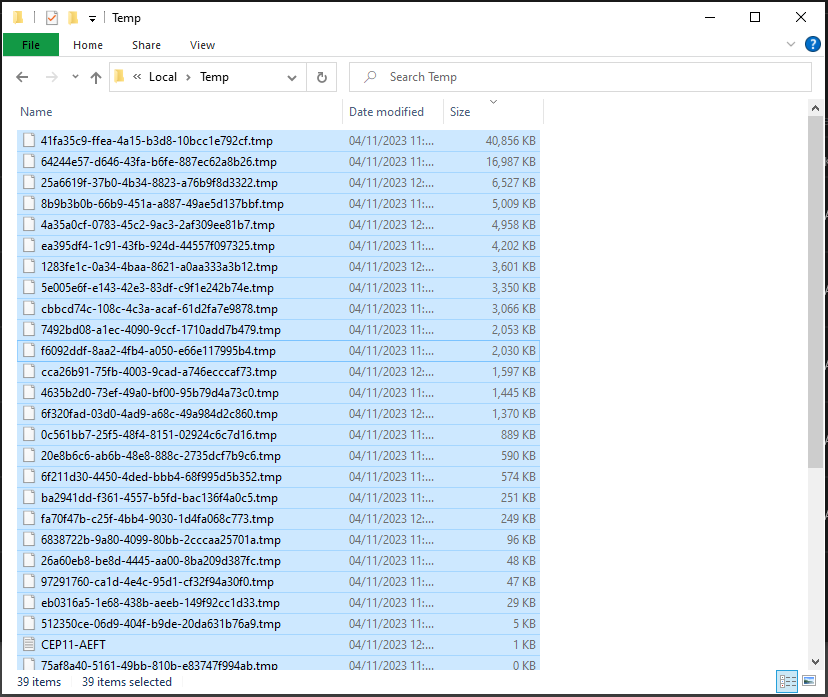
6. Empty the Trash (Mac) or Recycle Bin (Windows)
After deleting the cache files, it’s important to empty the Trash (on Mac) or Recycle Bin (on Windows) to permanently remove them from your computer and free up disk space.
7. Open After Effects and Adjust Disk Cache Settings
Now that the cache has been cleared, open After Effects again and return to the “Media & Disk Cache” preferences window. Here, you can adjust your preferred settings for the disk cache, such as its size and location. It’s recommended to keep the cache on a separate and dedicated drive, ideally an SSD, for optimal performance.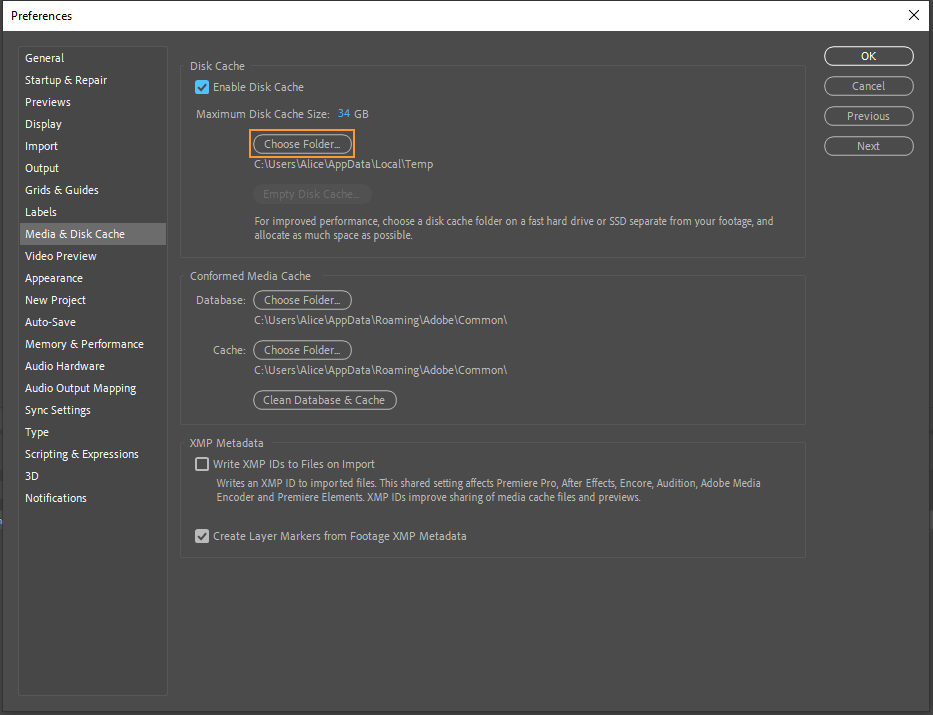
8. Clear RAM Cache (Optional)
In addition to the disk cache, After Effects also has a RAM cache that stores frequently used data in your computer’s memory. To clear the RAM cache, simply go to Edit > Purge > All Memory or press “Ctrl + Alt + / (on numeric keypad)” (Windows) or “Shift + Command + Numpad / ” (Mac) while After Effects is open.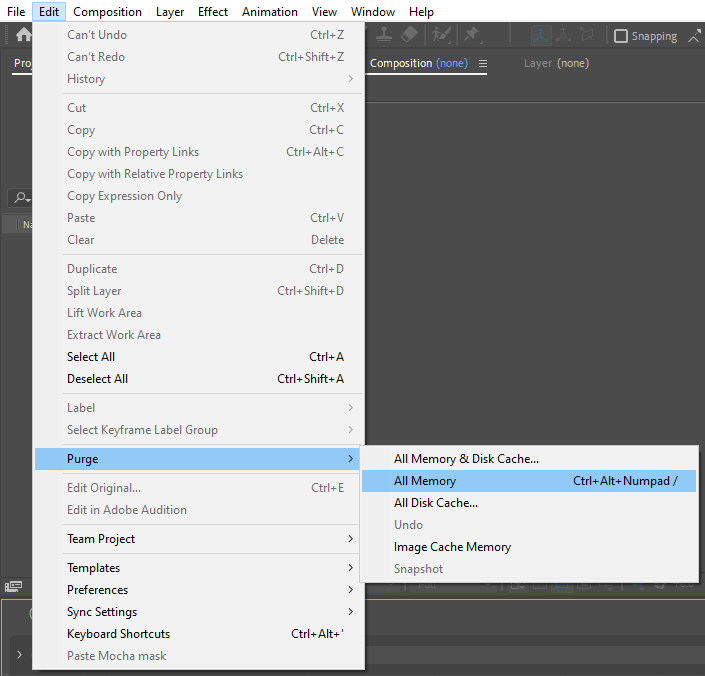
9. Regularly Clear the Disk Cache
To ensure smooth performance, it’s advisable to clear the disk cache on a regular basis. This can be done weekly or monthly, depending on the amount of work you do in After Effects and the available disk space on your computer.
By following these steps, you can easily clear the disk cache in After Effects, optimize your workflow, and prevent performance issues. Remember, keeping your disk cache clean and regularly maintaining it will contribute to a smoother and more efficient After Effects experience.
Conclusion:
Clearing your disk cache in After Effects is an essential step to ensure smooth and efficient performance, especially when working on resource-intensive projects. By regularly clearing the cache, you can prevent lagging, crashes, and other performance issues that can hinder your workflow.
In this article, we provide you with a step-by-step guide on how to clear the disk cache in After Effects. By following these instructions, you can reclaim valuable disk space and optimize the performance of your software.
Remember to adjust your disk cache settings and consider keeping it on a separate, dedicated drive for maximum efficiency. Additionally, clearing the RAM cache can further enhance your editing experience.
Make it a habit to regularly clear your disk cache, perhaps weekly or monthly, depending on your usage and available disk space. This proactive approach will help maintain consistent performance and prevent potential bottlenecks in your workflow.
Now that you’re equipped with this knowledge, take the time to clear your disk cache and keep your After Effects running smoothly. Enjoy the benefits of a faster, more efficient editing experience, and let your creativity thrive without interruptions.


