Color Correction Techniques in After Effects
Enhancing Footage with Color Correction Tools
Color correction is an essential step in video editing that helps balance exposure, adjust white balance, and improve overall color tones. After Effects provides powerful tools for color correction, allowing you to enhance your footage for a polished and cinematic look. Follow these steps to color correct your video effectively.
Get 10% off when you subscribe to our newsletter

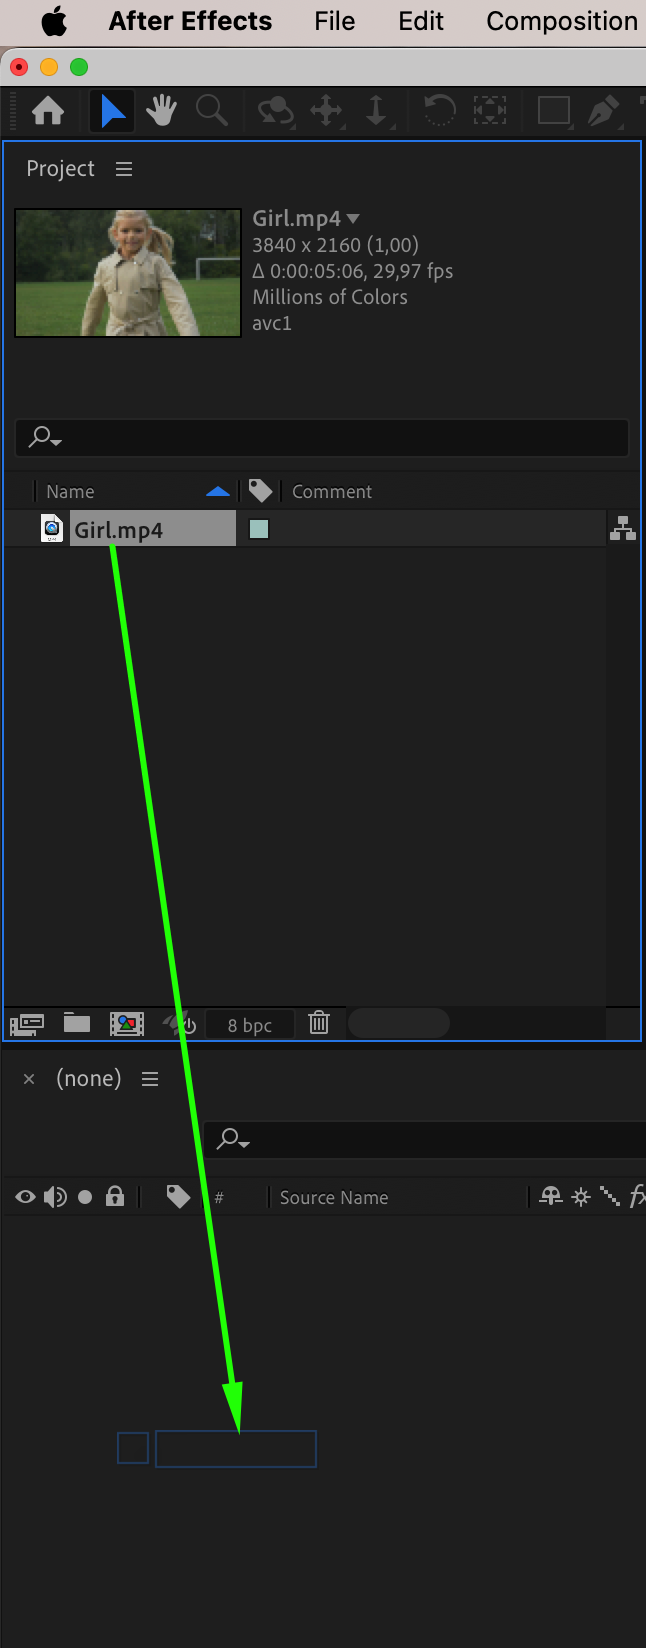
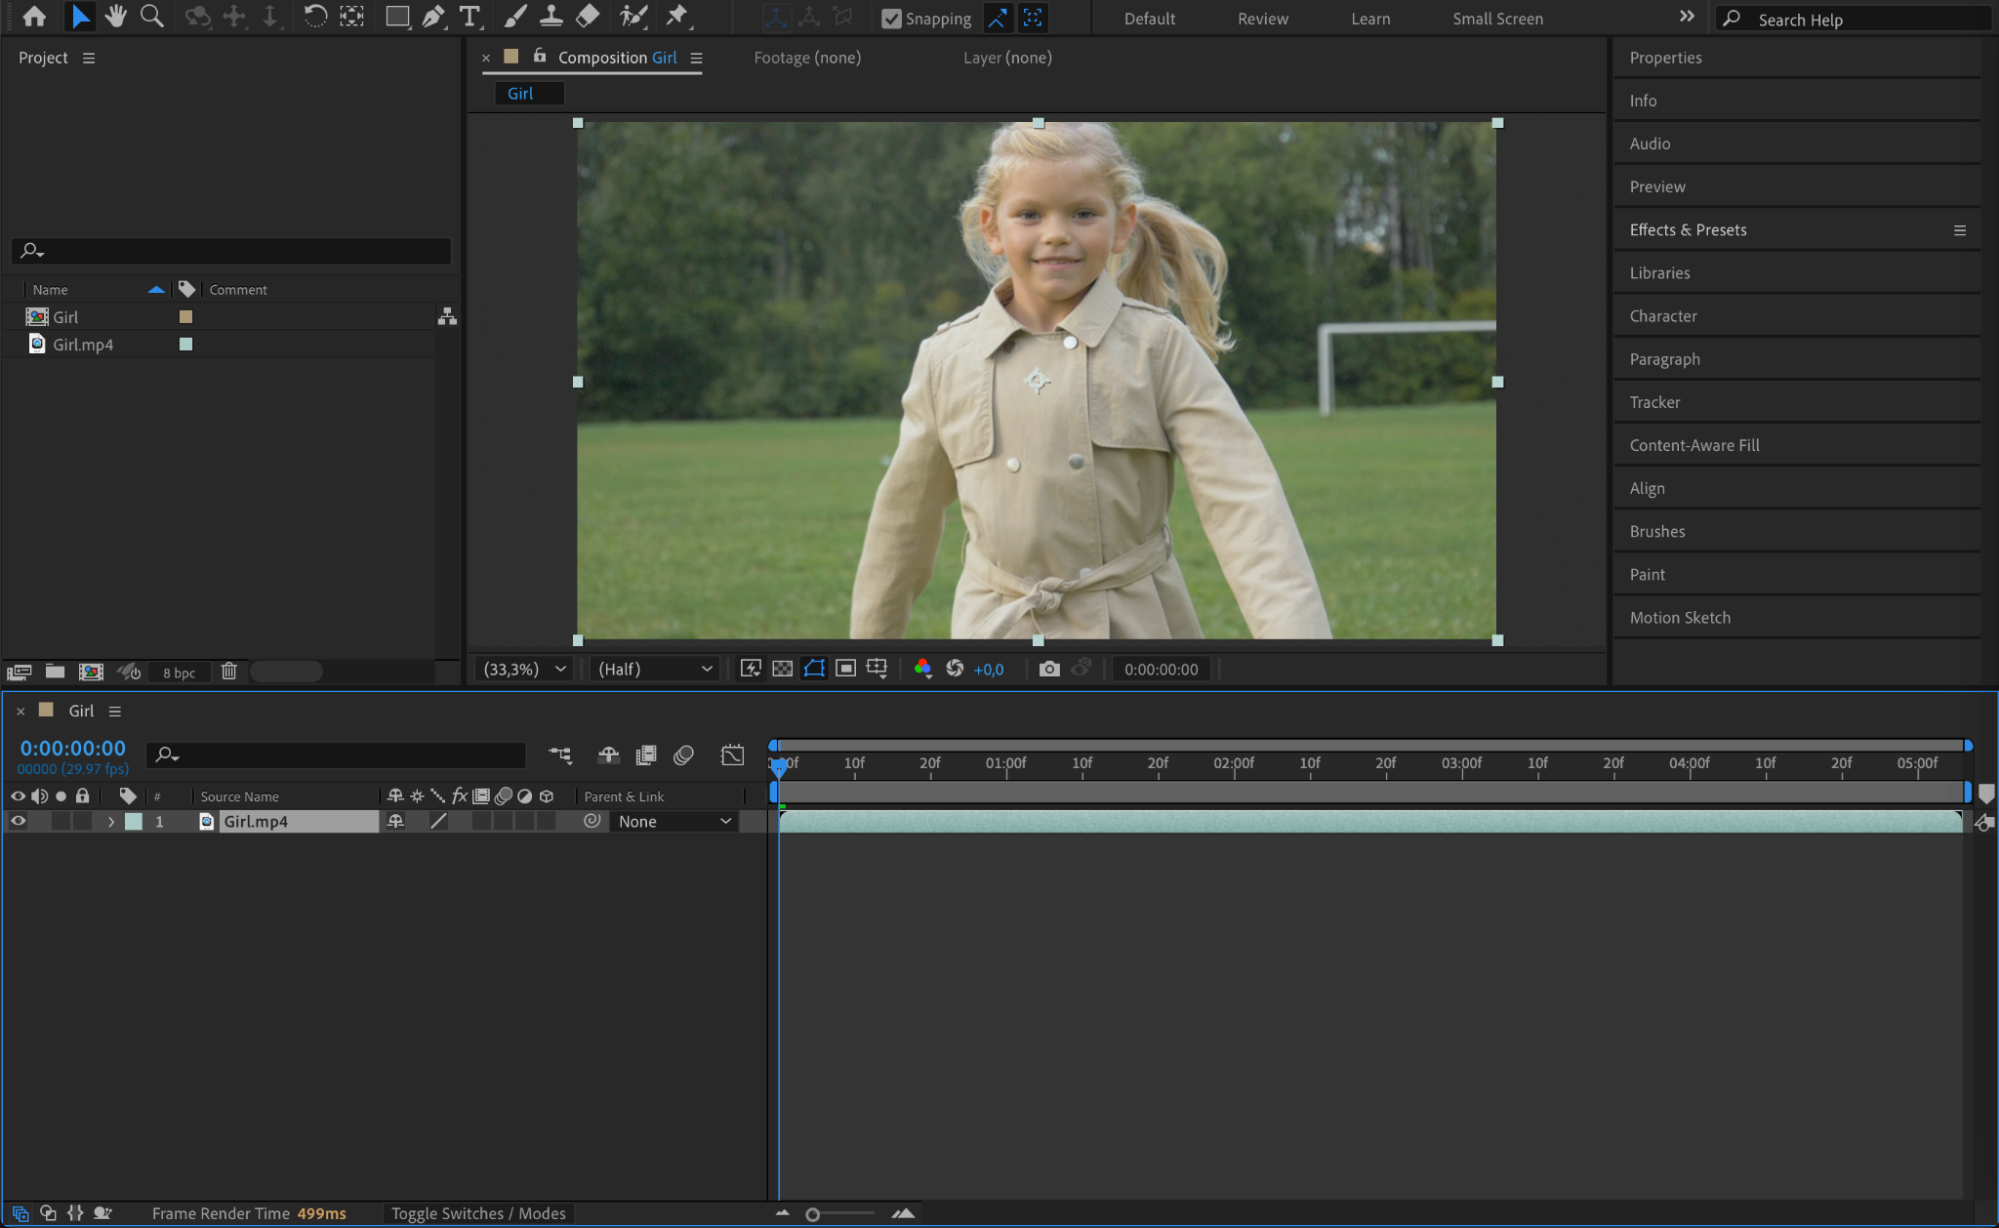
Step 1: Import Your Footage
Go to File > Import > File, select your video, and drag it onto the timeline. This will be your base layer for color correction.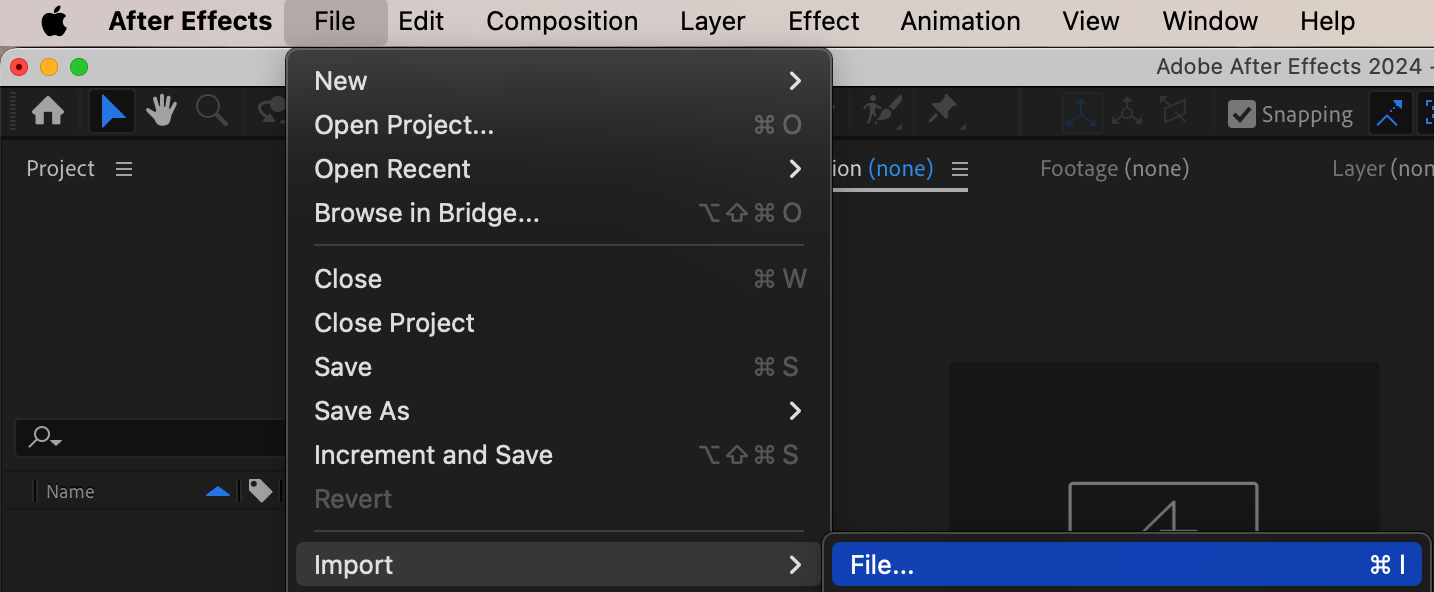
Step 2: Add an Adjustment Layer
Go to Layer > New > Adjustment Layer. Applying color correction effects to an adjustment layer allows you to edit colors non-destructively and apply consistent changes across multiple clips.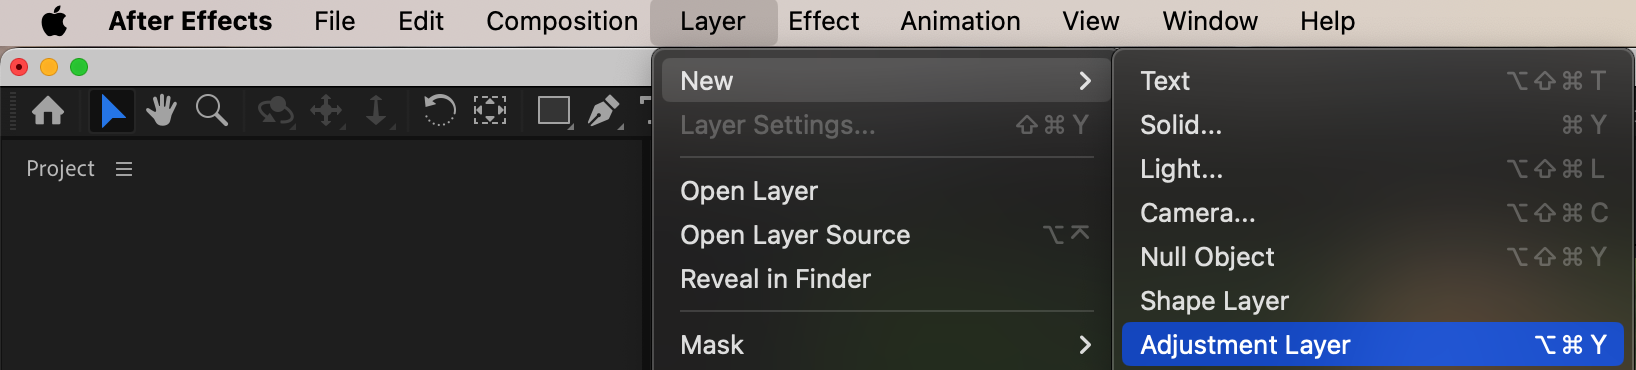
Step 3: Apply the Lumetri Color Effect
Open the Effects & Presets panel, search for Lumetri Color, and drag it onto the Adjustment Layer. This tool provides an all-in-one solution for color correction.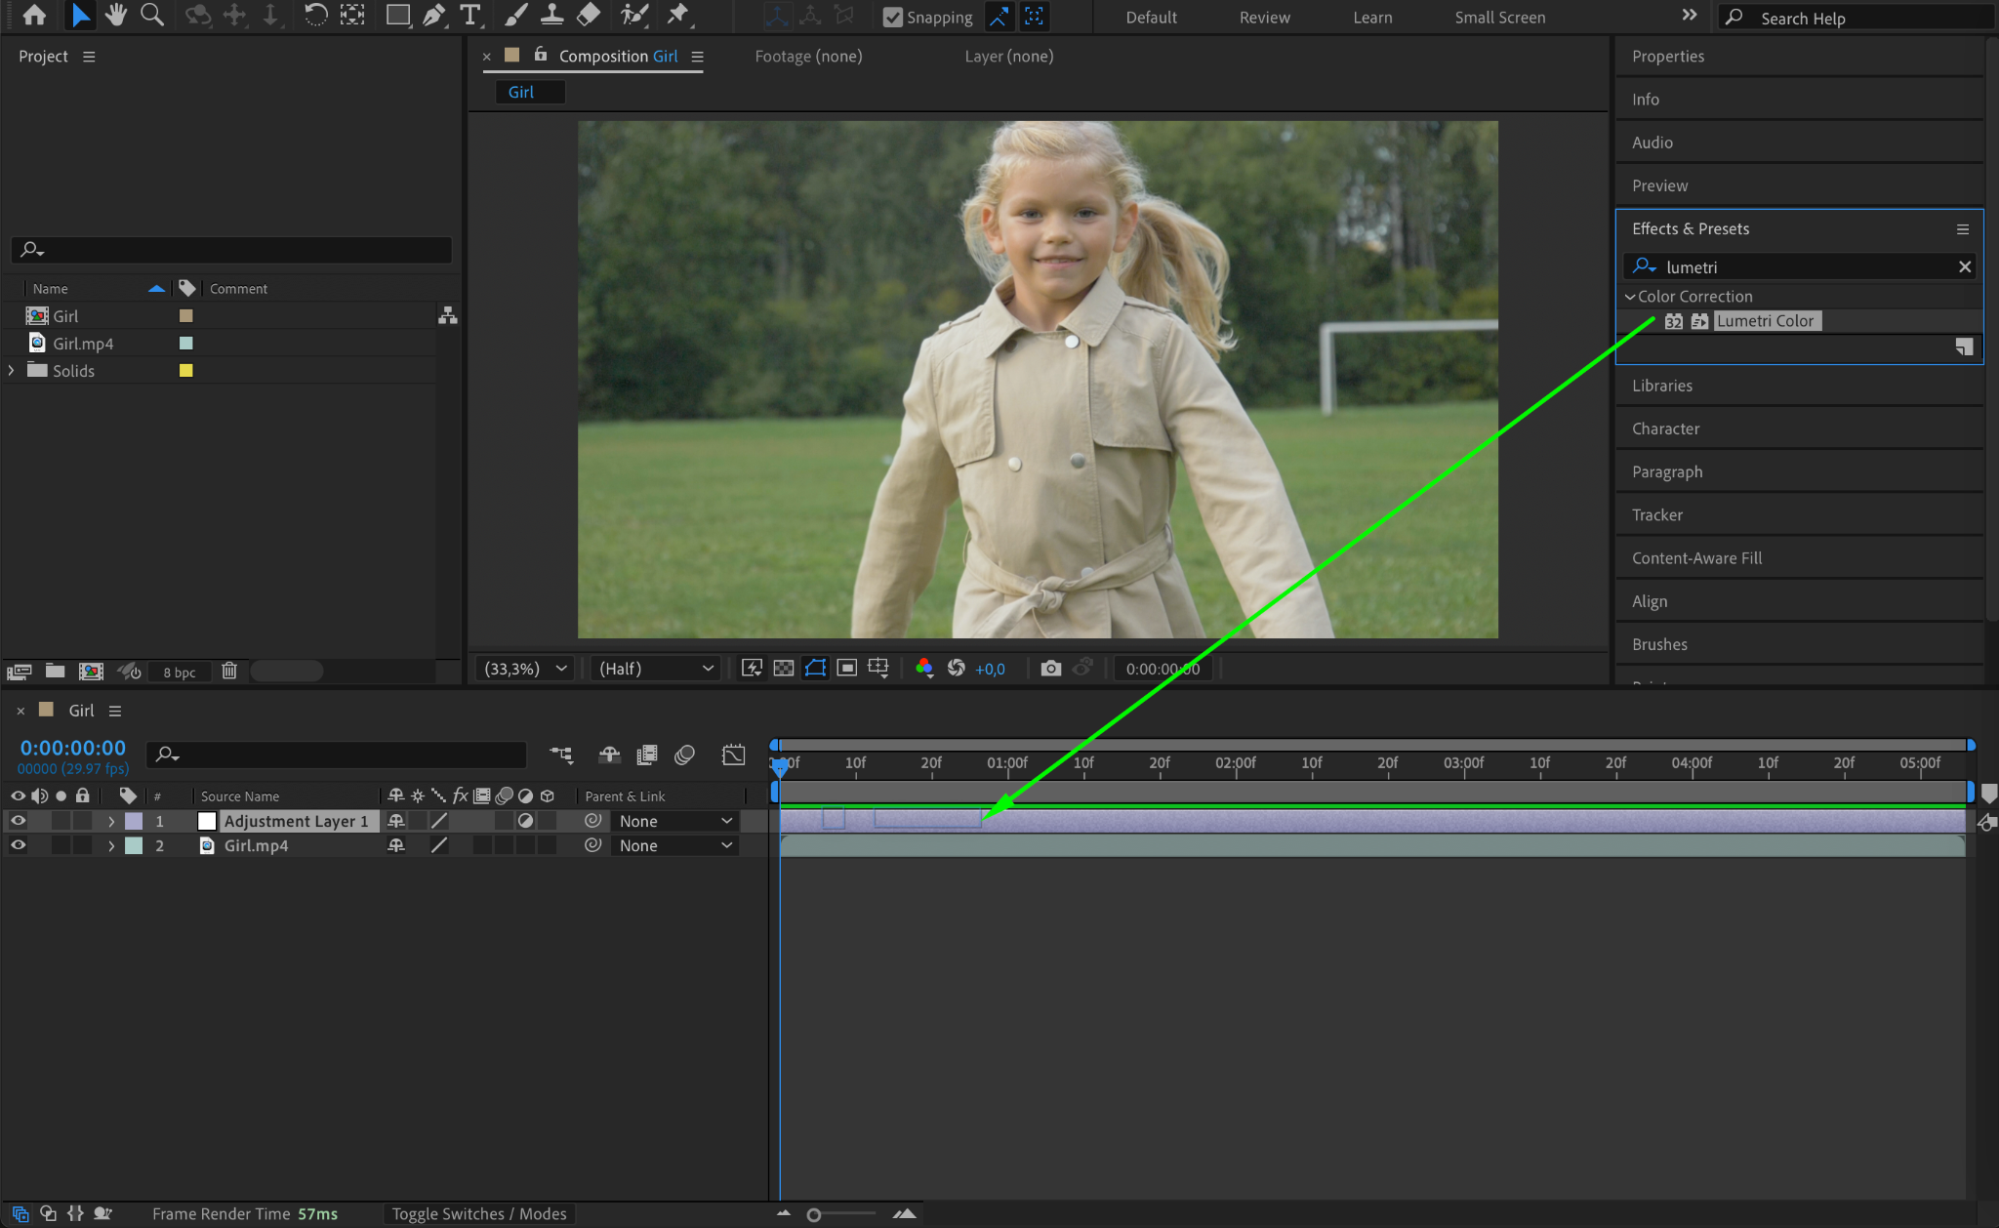 Step 4: Adjust the Basic Color Settings
In the Effect Controls panel, expand the Basic Correction section. Adjust the White Balance sliders (Temperature and Tint) to correct any color cast. Use Exposure, Contrast, Highlights, Shadows, Whites, and Blacks to balance brightness and contrast.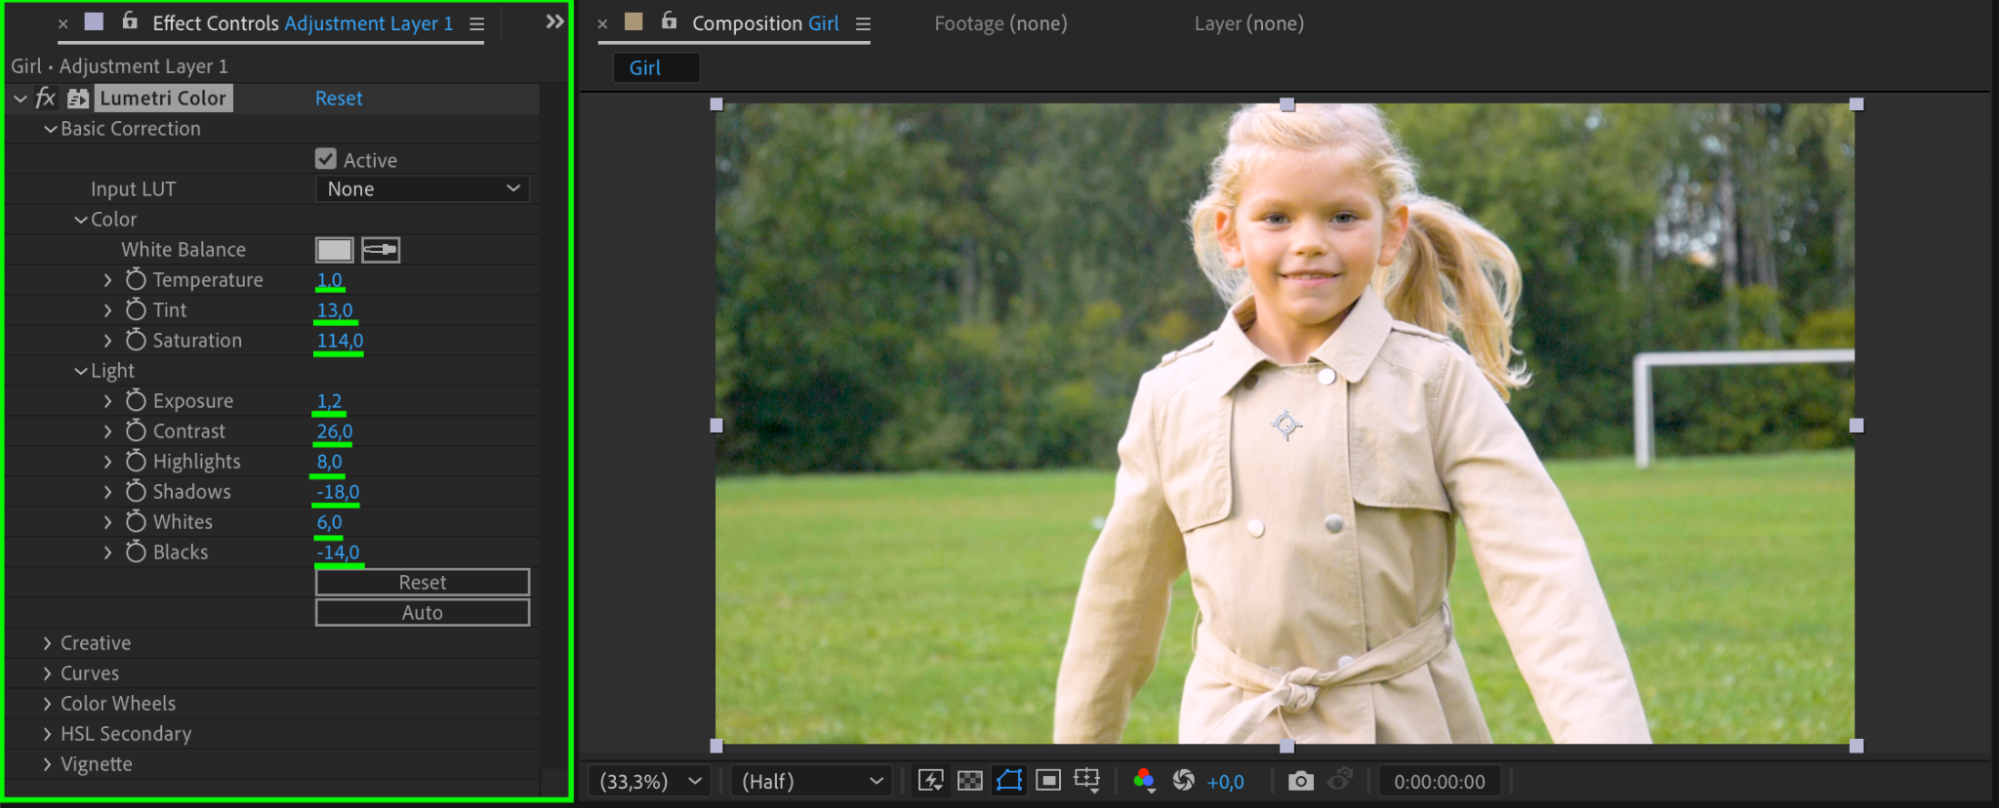 Step 5: Refine Colors with Curves
Scroll down to the Curves section in Lumetri Color or apply a separate Curves effect. Adjust the RGB curve for overall brightness and contrast, and use the Red, Green, and Blue curves to fine-tune color balance.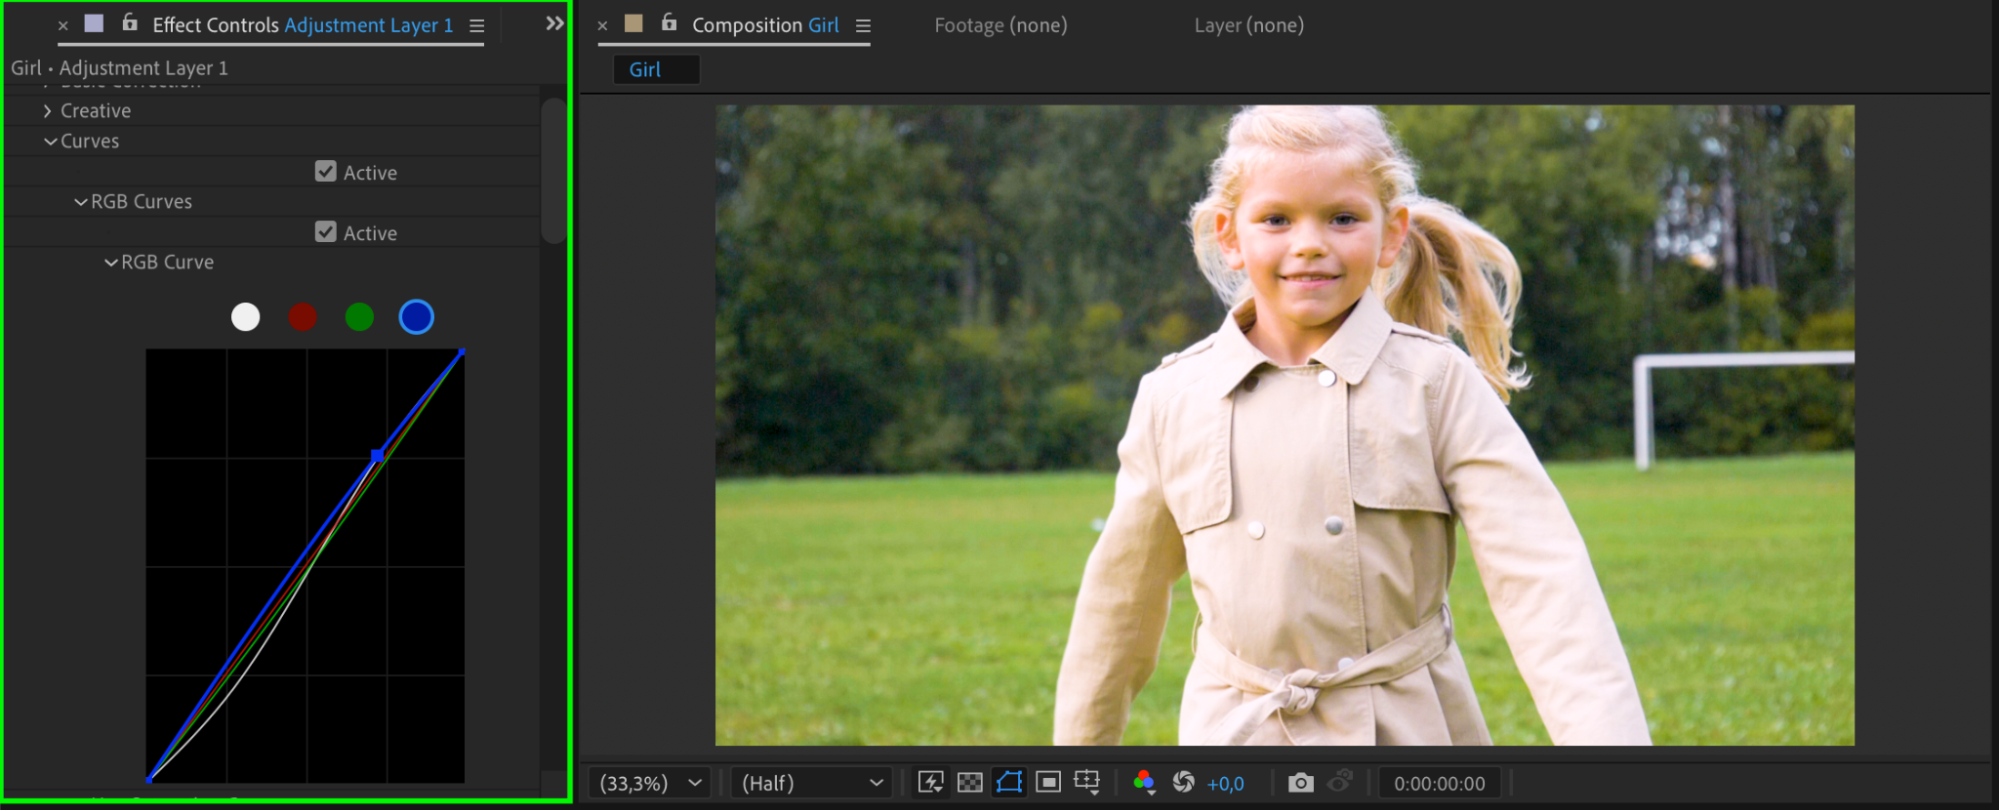
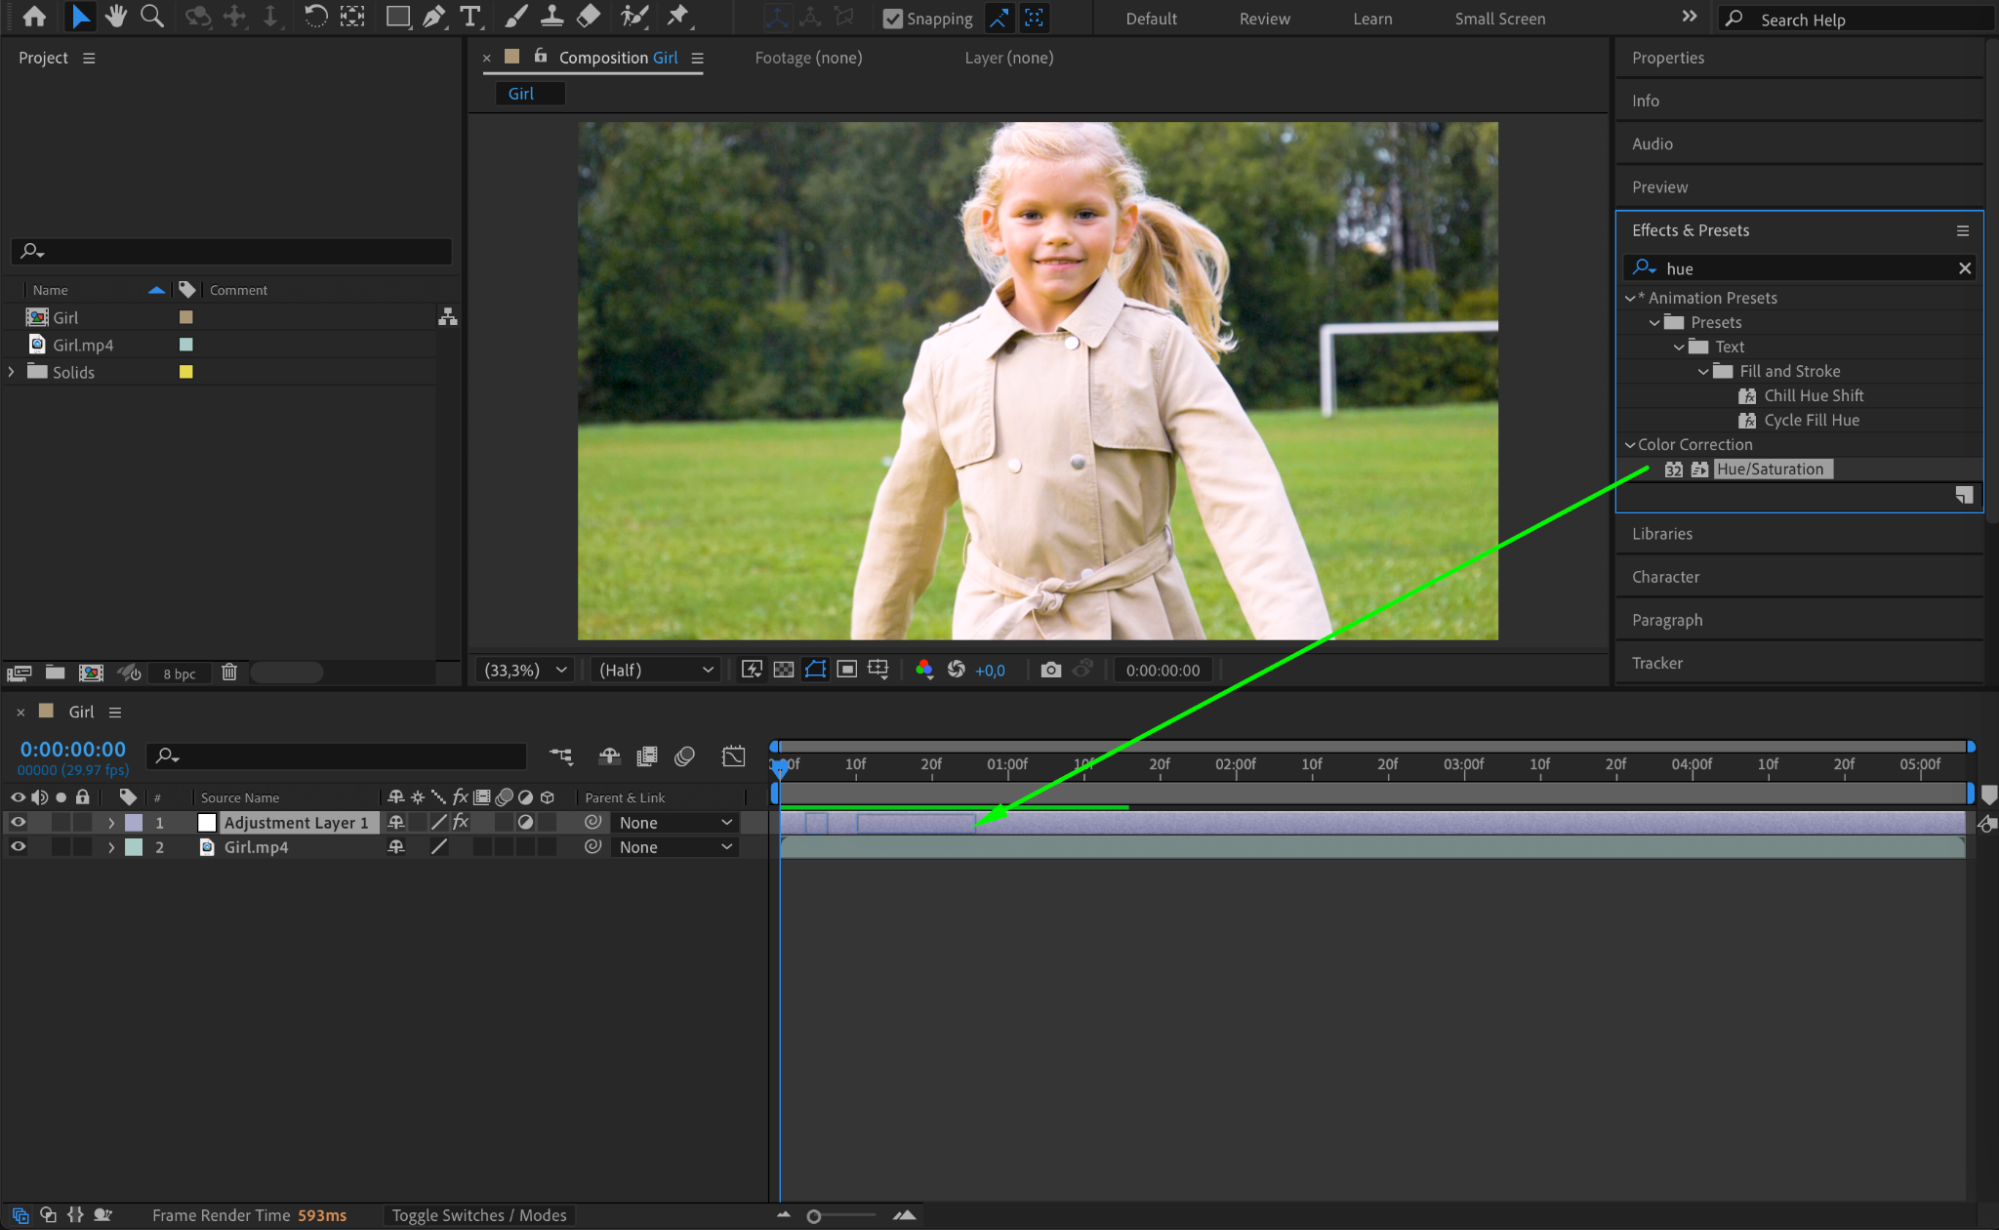
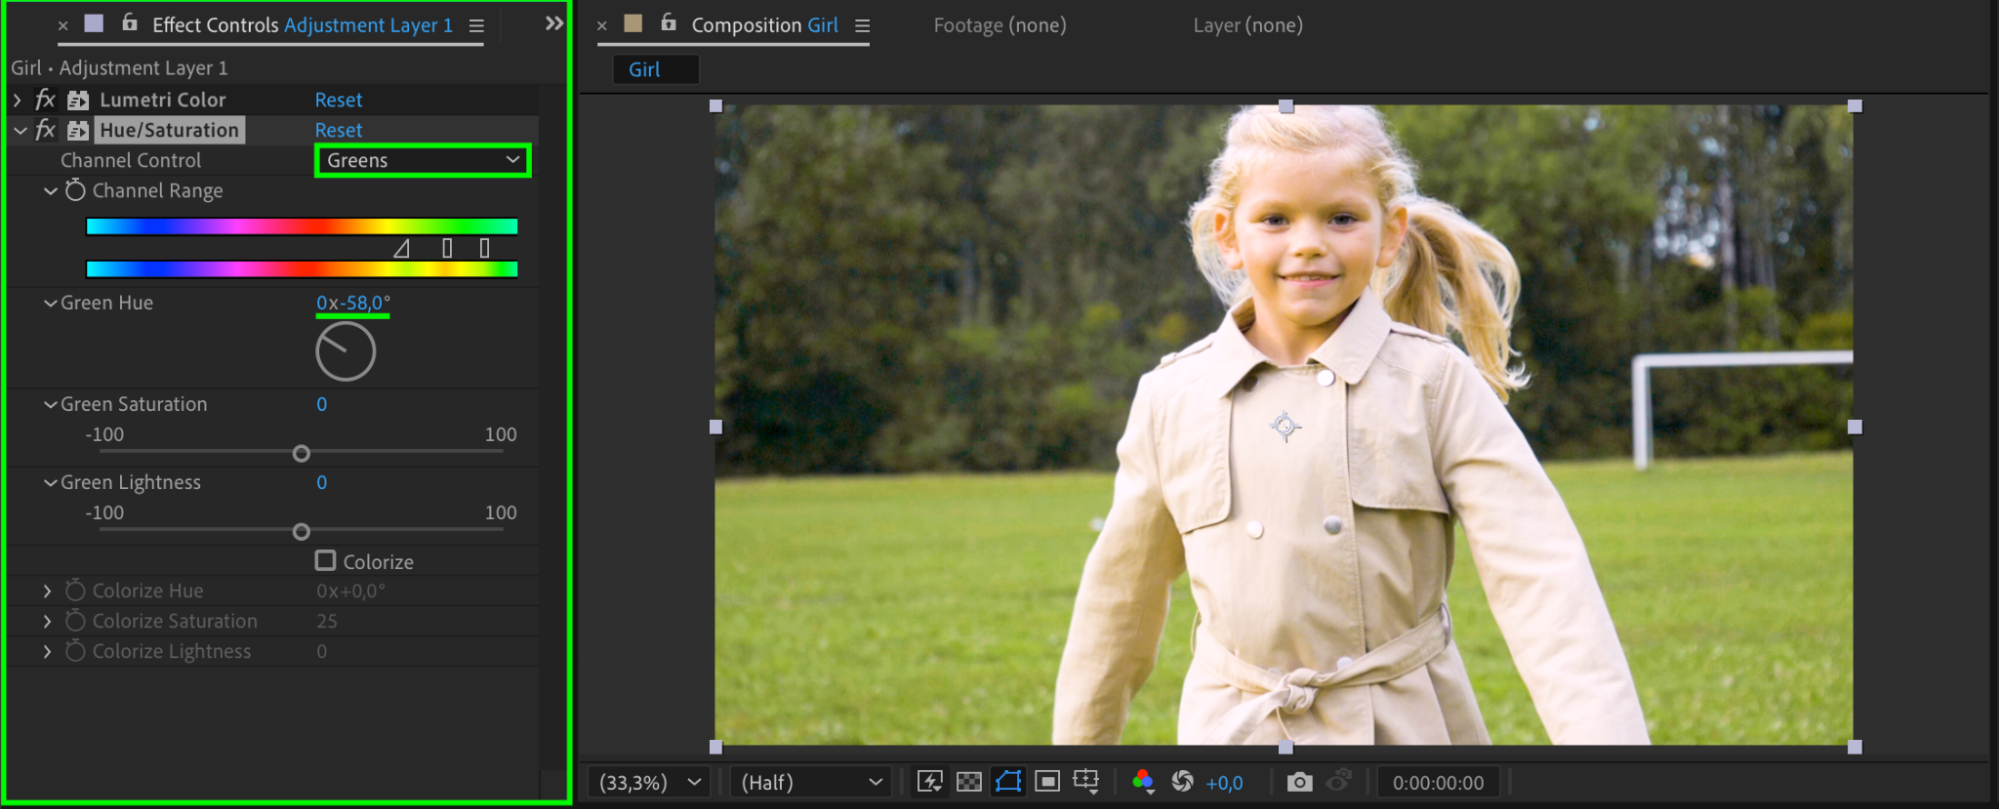
Step 6: Use Hue/Saturation for Color Adjustments
Apply the Hue/Saturation effect from the Effects & Presets panel. Increase or decrease the Saturation slider to enhance or mute colors. You can also use the Color Range selector to target and adjust specific colors.
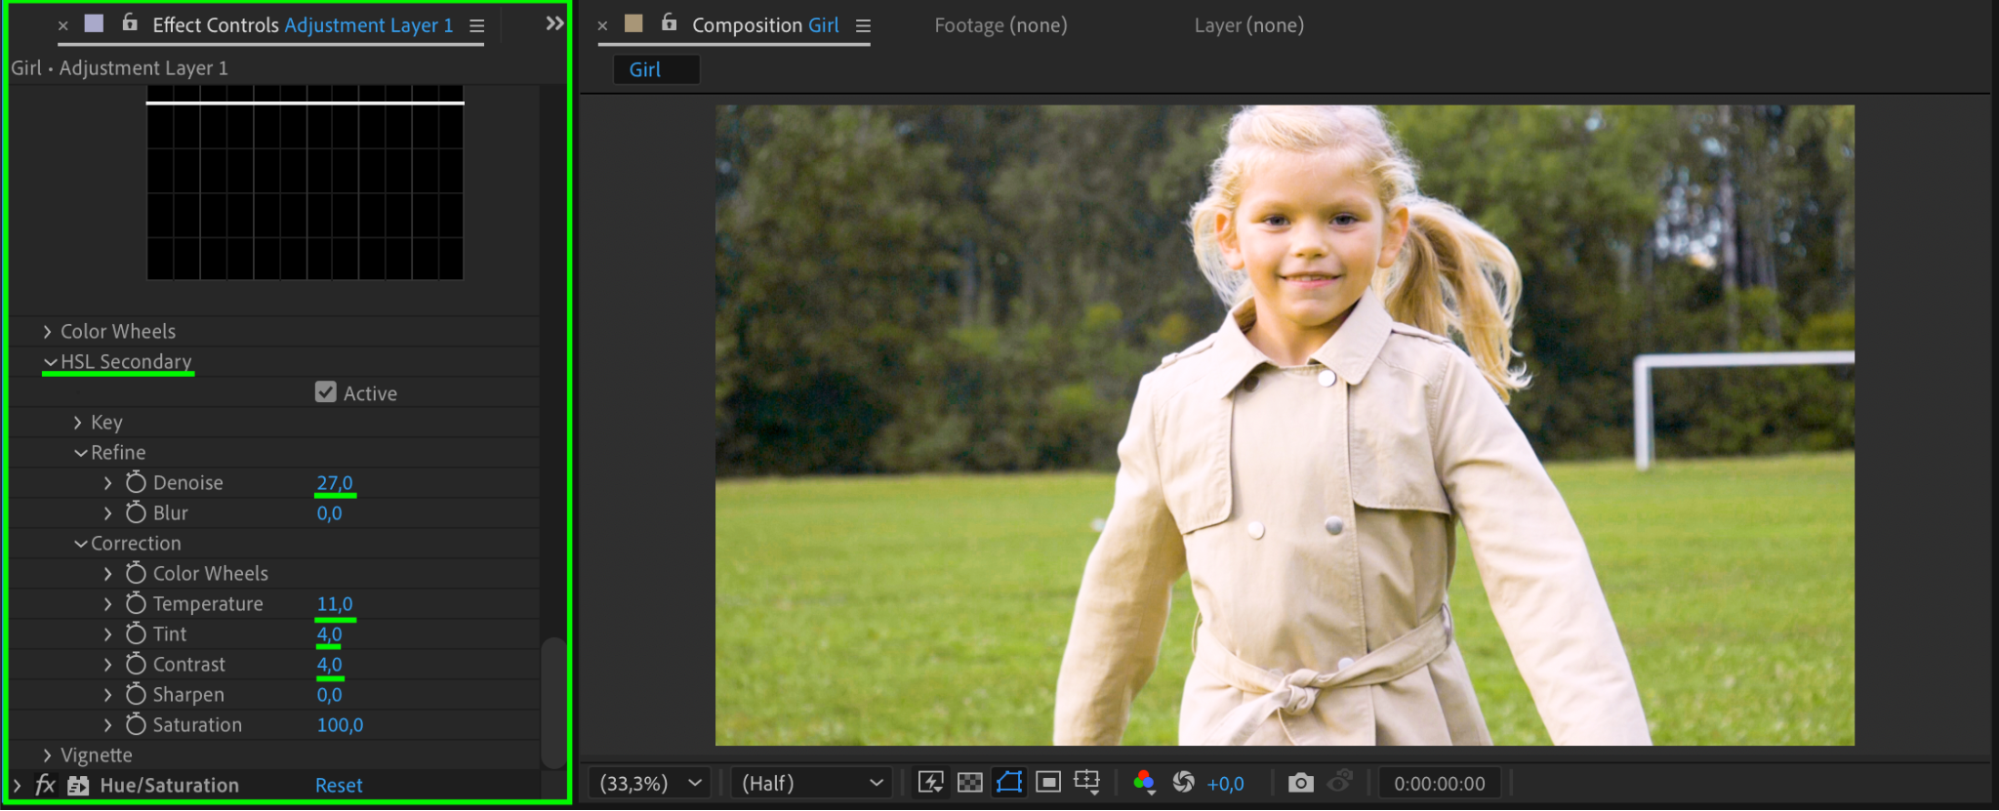
Step 7: Apply Secondary Color Correction (Optional)
For more precise adjustments, use the HSL Secondary section in Lumetri Color. Select a specific color range, adjust its hue, saturation, and lightness, and apply subtle corrections to match your desired look.
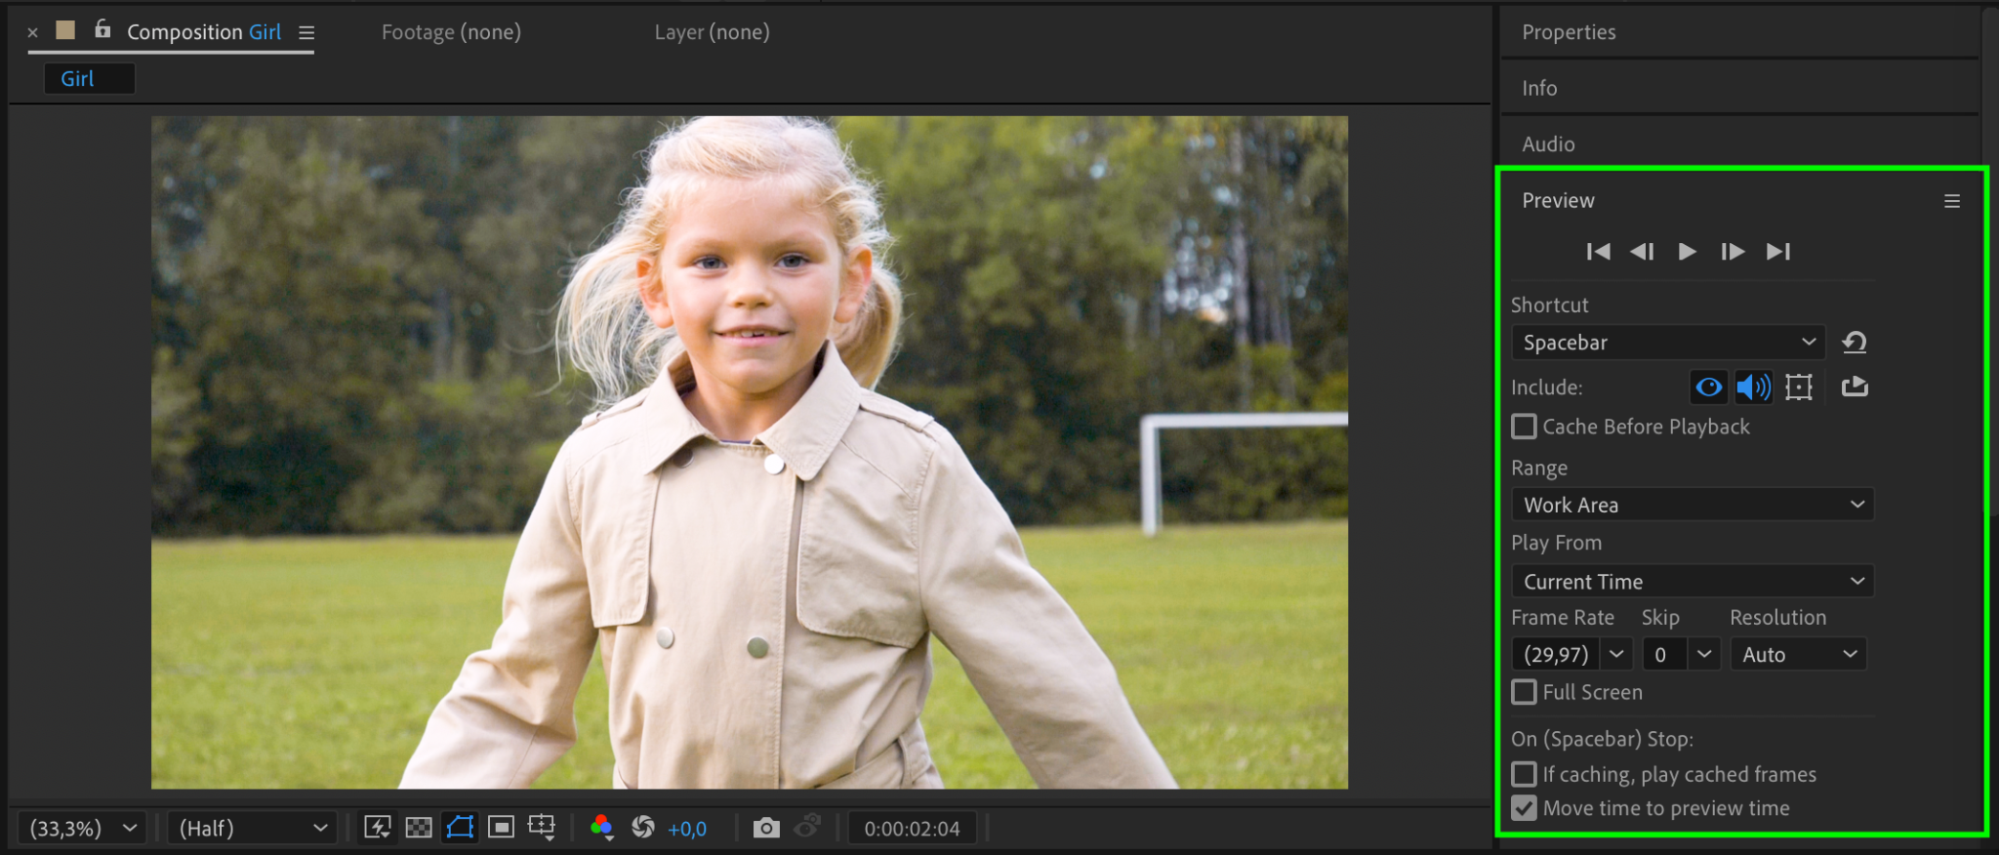
Step 8: Preview Your Adjustments
Press the Spacebar to play the composition and check how the color corrections appear in motion. Toggle the Effects switch to compare the original and corrected versions. Adjust settings if needed.
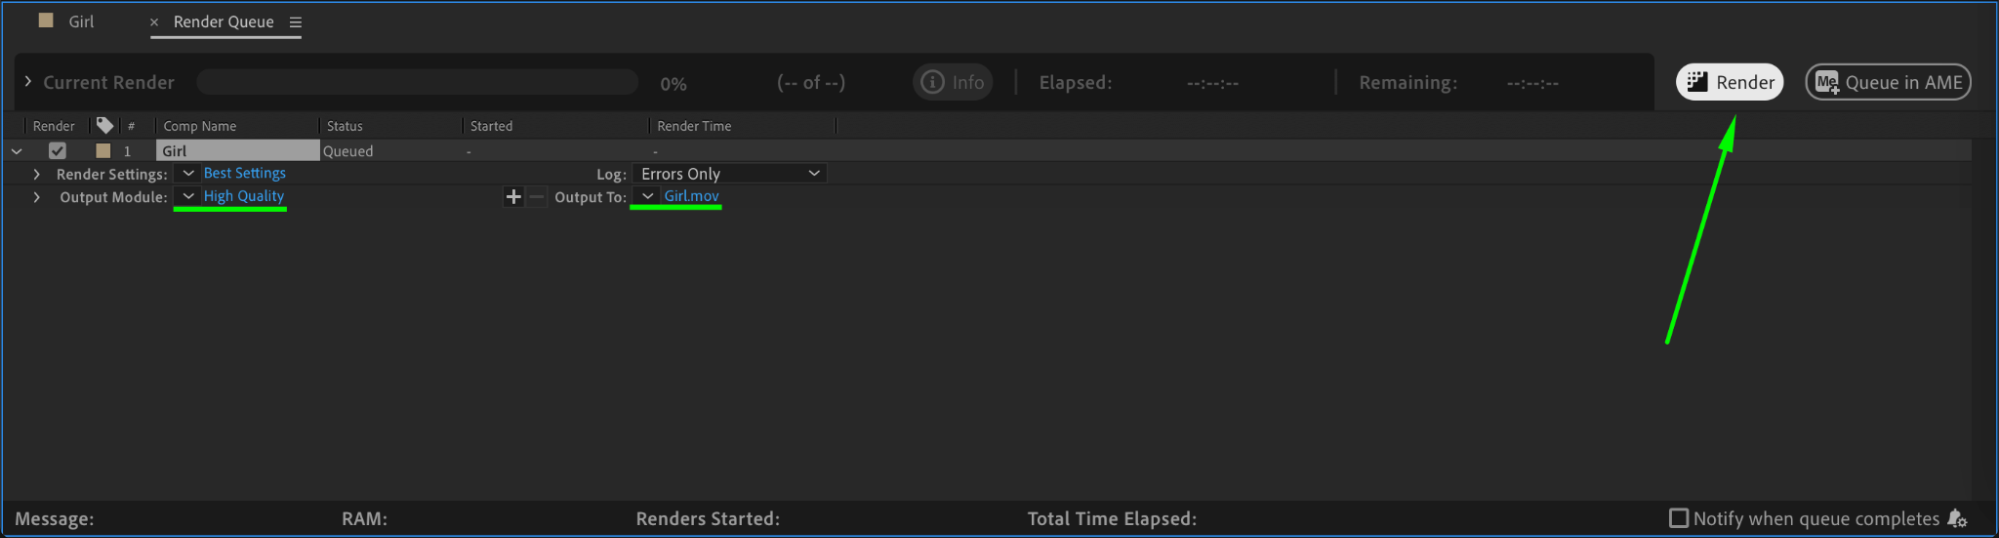
Step 9: Render the Final Composition
Go to Composition > Add to Render Queue, select the preferred format and output location, and click Render to export your color-corrected video.
Conclusion
Color correction in After Effects helps improve video quality by balancing exposure, adjusting white balance, and enhancing colors. By using Lumetri Color, Curves, and Hue/Saturation, you can achieve a natural and professional look for your footage.
Our Bestsellers


