Converting After Effects Projects to Video: A Comprehensive Guide
Introduction
Are you a video designer looking to convert your After Effects project into a video file? You’re in luck! Converting After Effects projects to video can sometimes be challenging, but with the right knowledge and tools, it can be a smooth process.
In this tutorial, we will guide you step-by-step on how to convert your After Effects project to video. Whether you’re a beginner or an experienced professional, this guide will help you achieve your desired outcome. Let’s dive in and bring your creative vision to life!
As a video designer, you may have created stunning motion graphics and effects using After Effects. But what if you need to convert your masterpiece into a more widely accessible video file format? Converting After Effects projects to video is an essential step in sharing your work with clients, colleagues, or uploading it to social media platforms.
Step 1: Open Your Project in After Effects
Start by opening your After Effects project. Make sure all the elements are in place and your project is ready for export. Ensure all media files (images, videos, audio) are imported and organized. 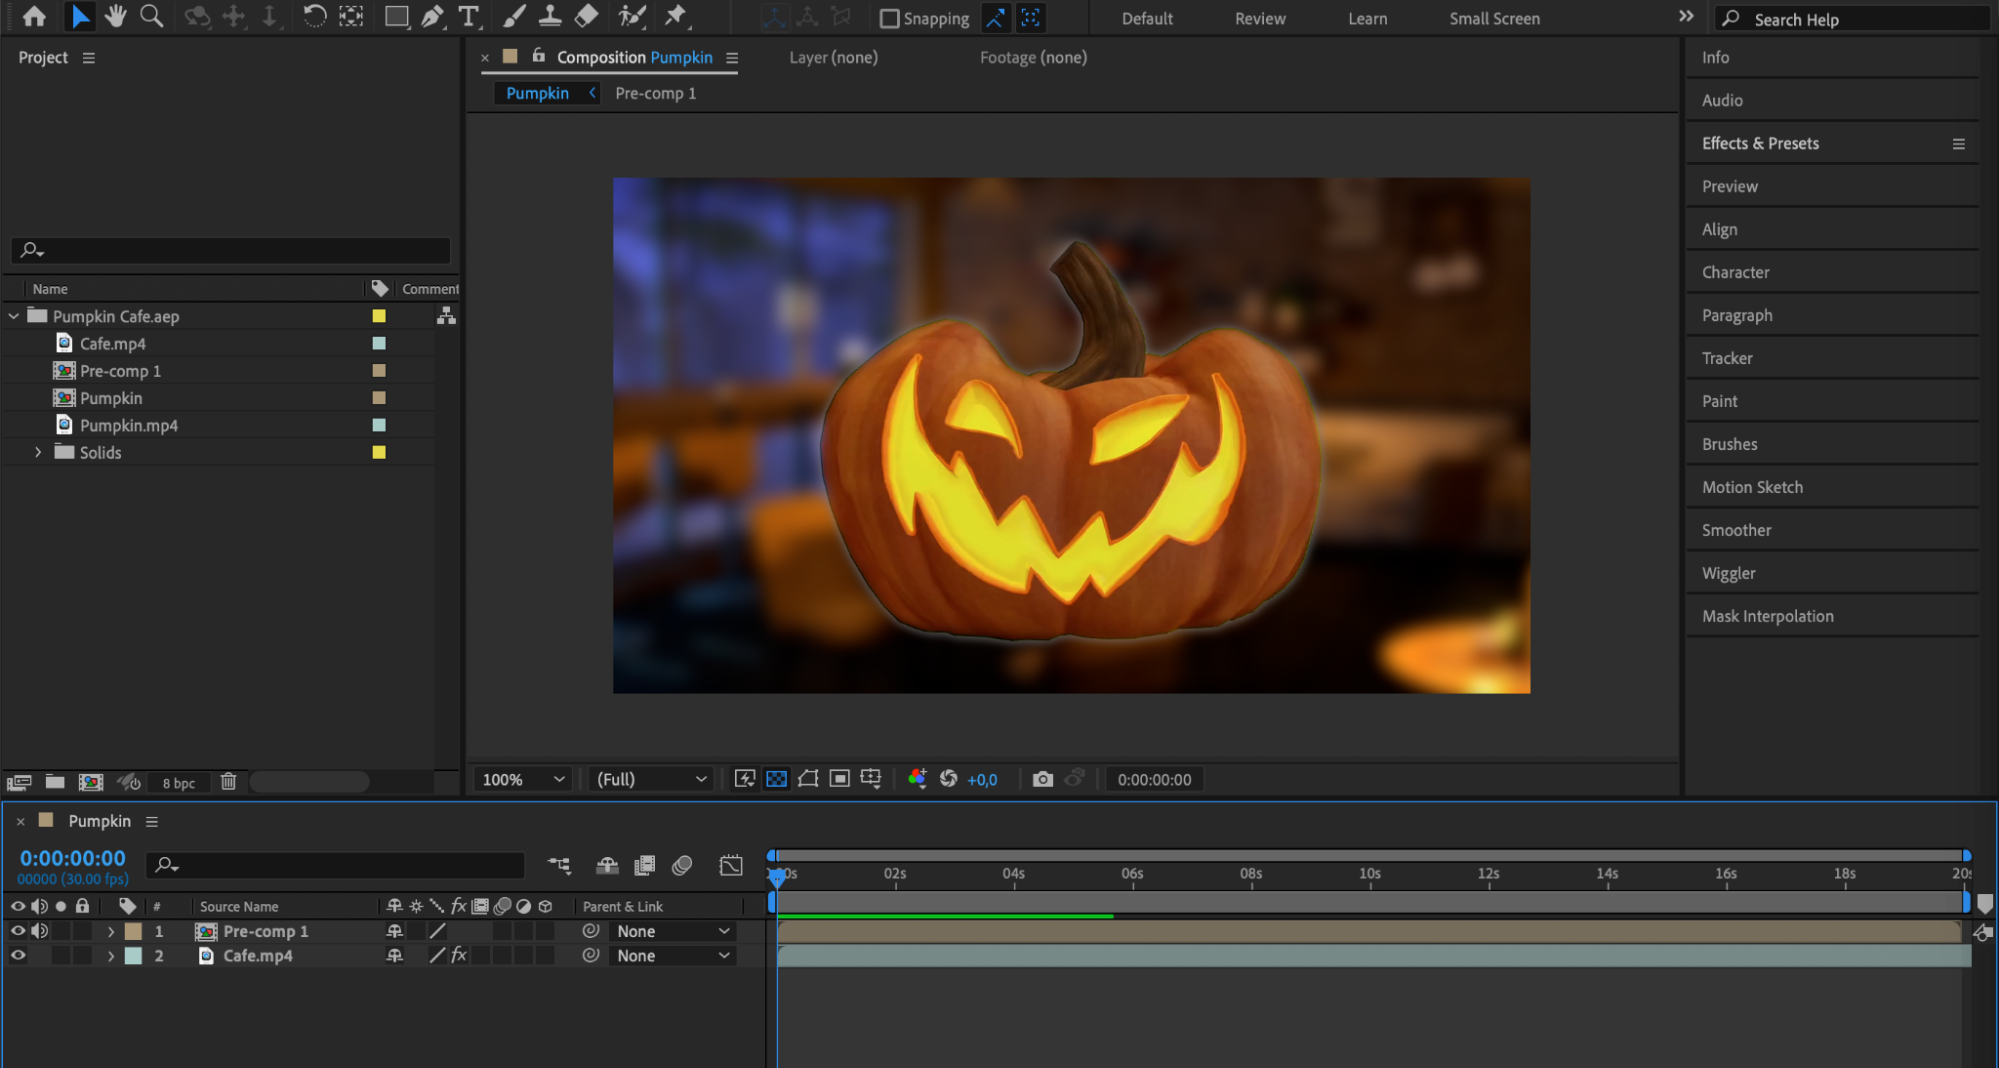 Step 2: Ensure Correct Project Setup
Get 10% off when you subscribe to our newsletter

Before you begin the conversion process, verify that your project is correctly set up. Check that the composition settings match the desired output format, including frame rate and resolution.
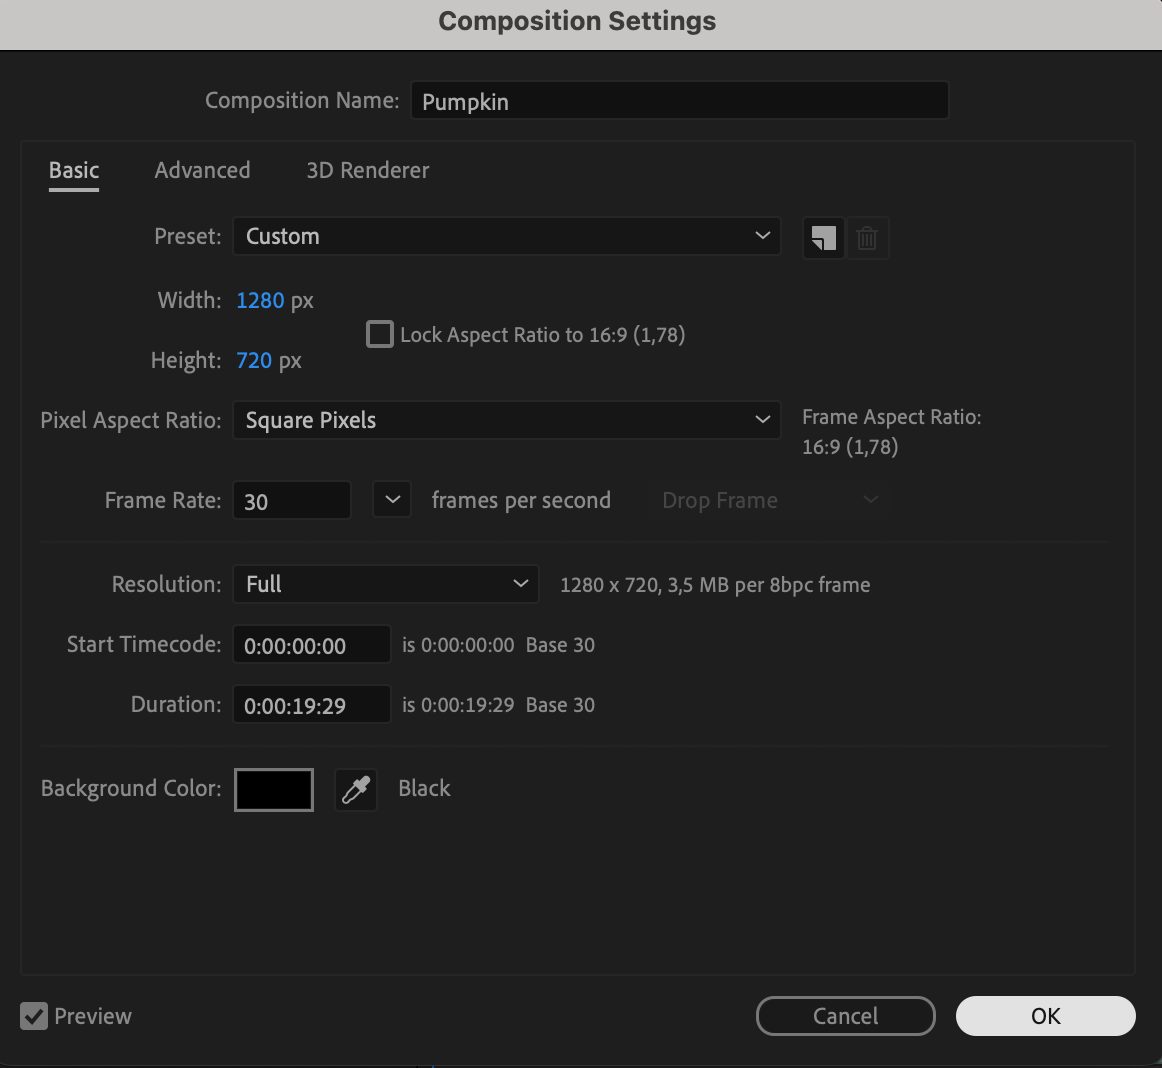 Step 3: Preview Your Project
Use the preview feature to review your project and ensure everything works as expected. This is your chance to make any final adjustments before rendering.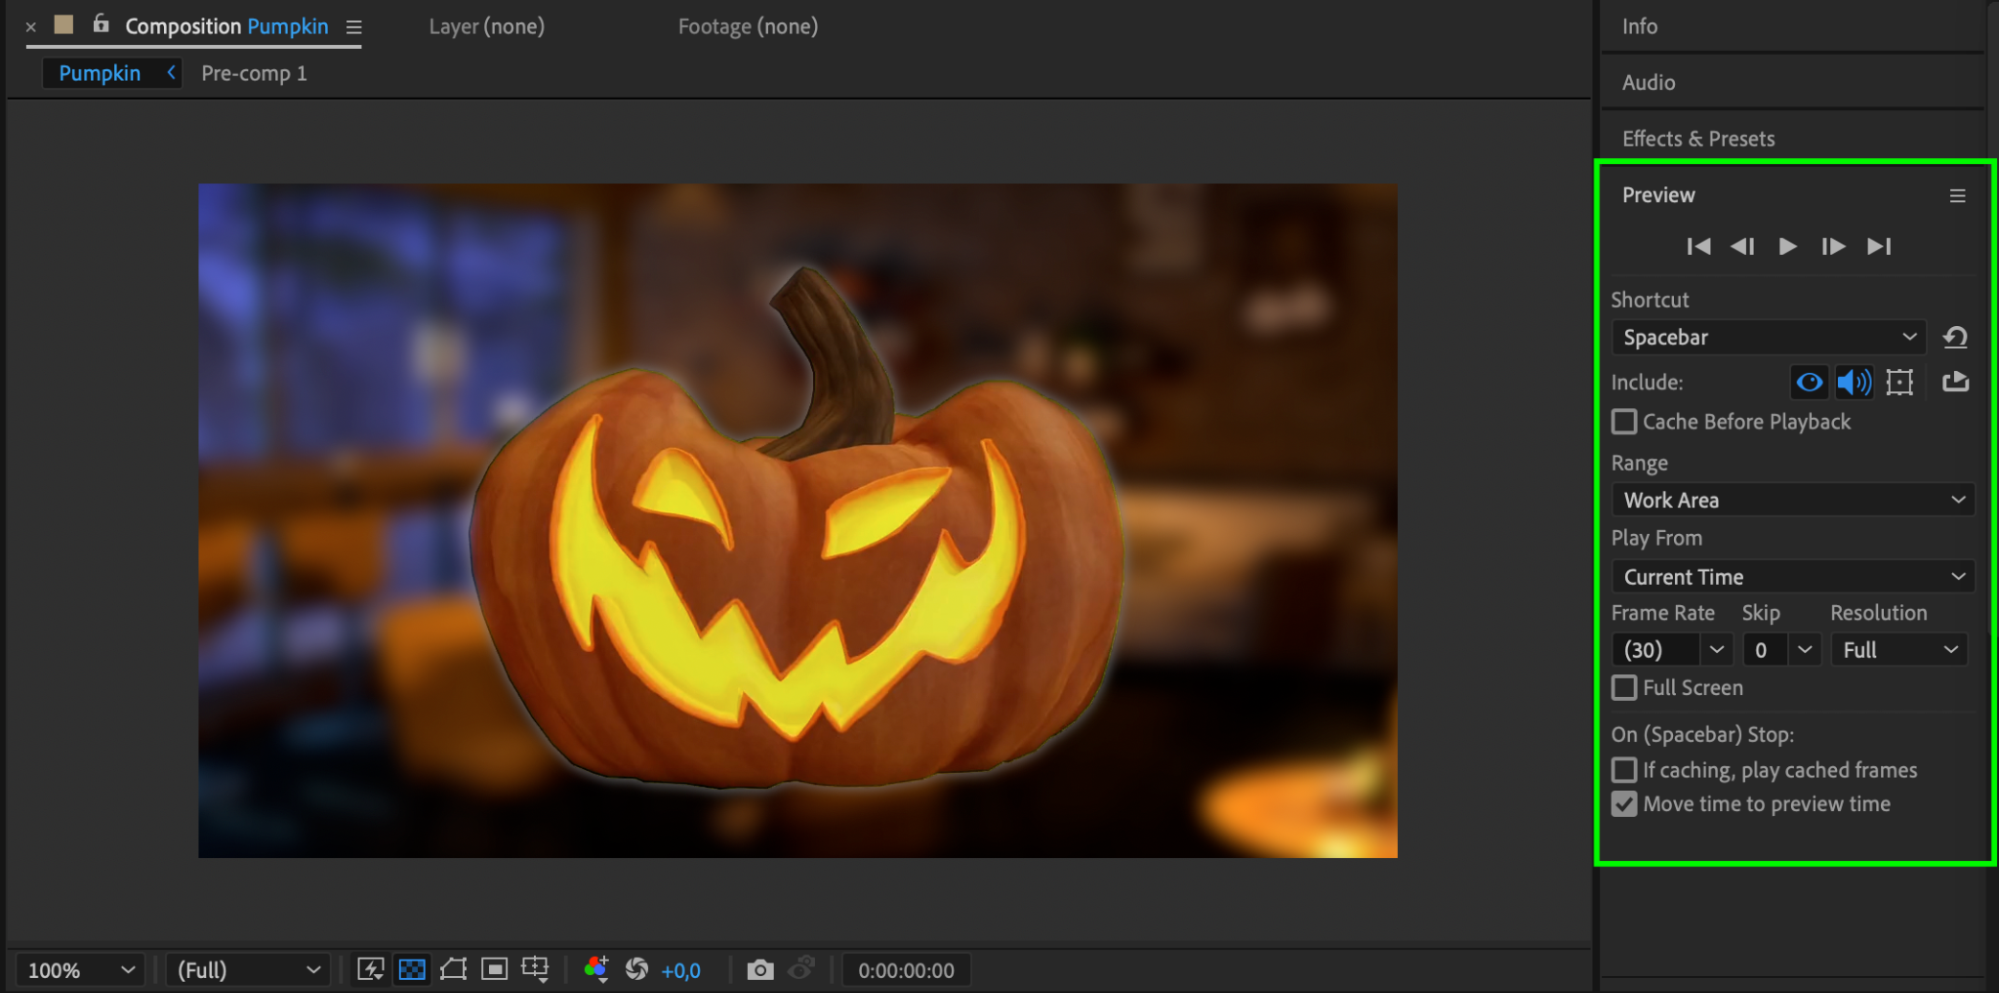 Step 4: Access the Render Queue
To start the rendering process, go to the “Composition” menu and select “Add to Render Queue” or use the shortcut “Ctrl/Cmd + Control + M”.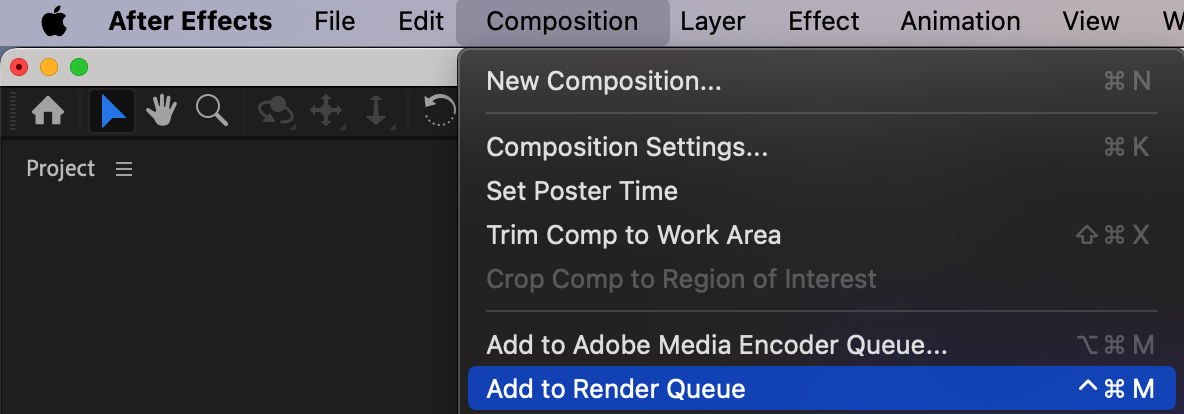 Step 5: Configure Output Module Settings
In the Render Queue panel, fine-tune the settings for your video file. Click on the Output Module to open the settings dialog box. Choose your desired output format, such as MP4, MOV, or AVI. Configure compression settings, video codec, audio settings, and file location. You can select a preset or manually adjust the settings based on your requirements. Consult the delivery specifications of the platform or client you’re targeting if you’re unsure about the ideal settings.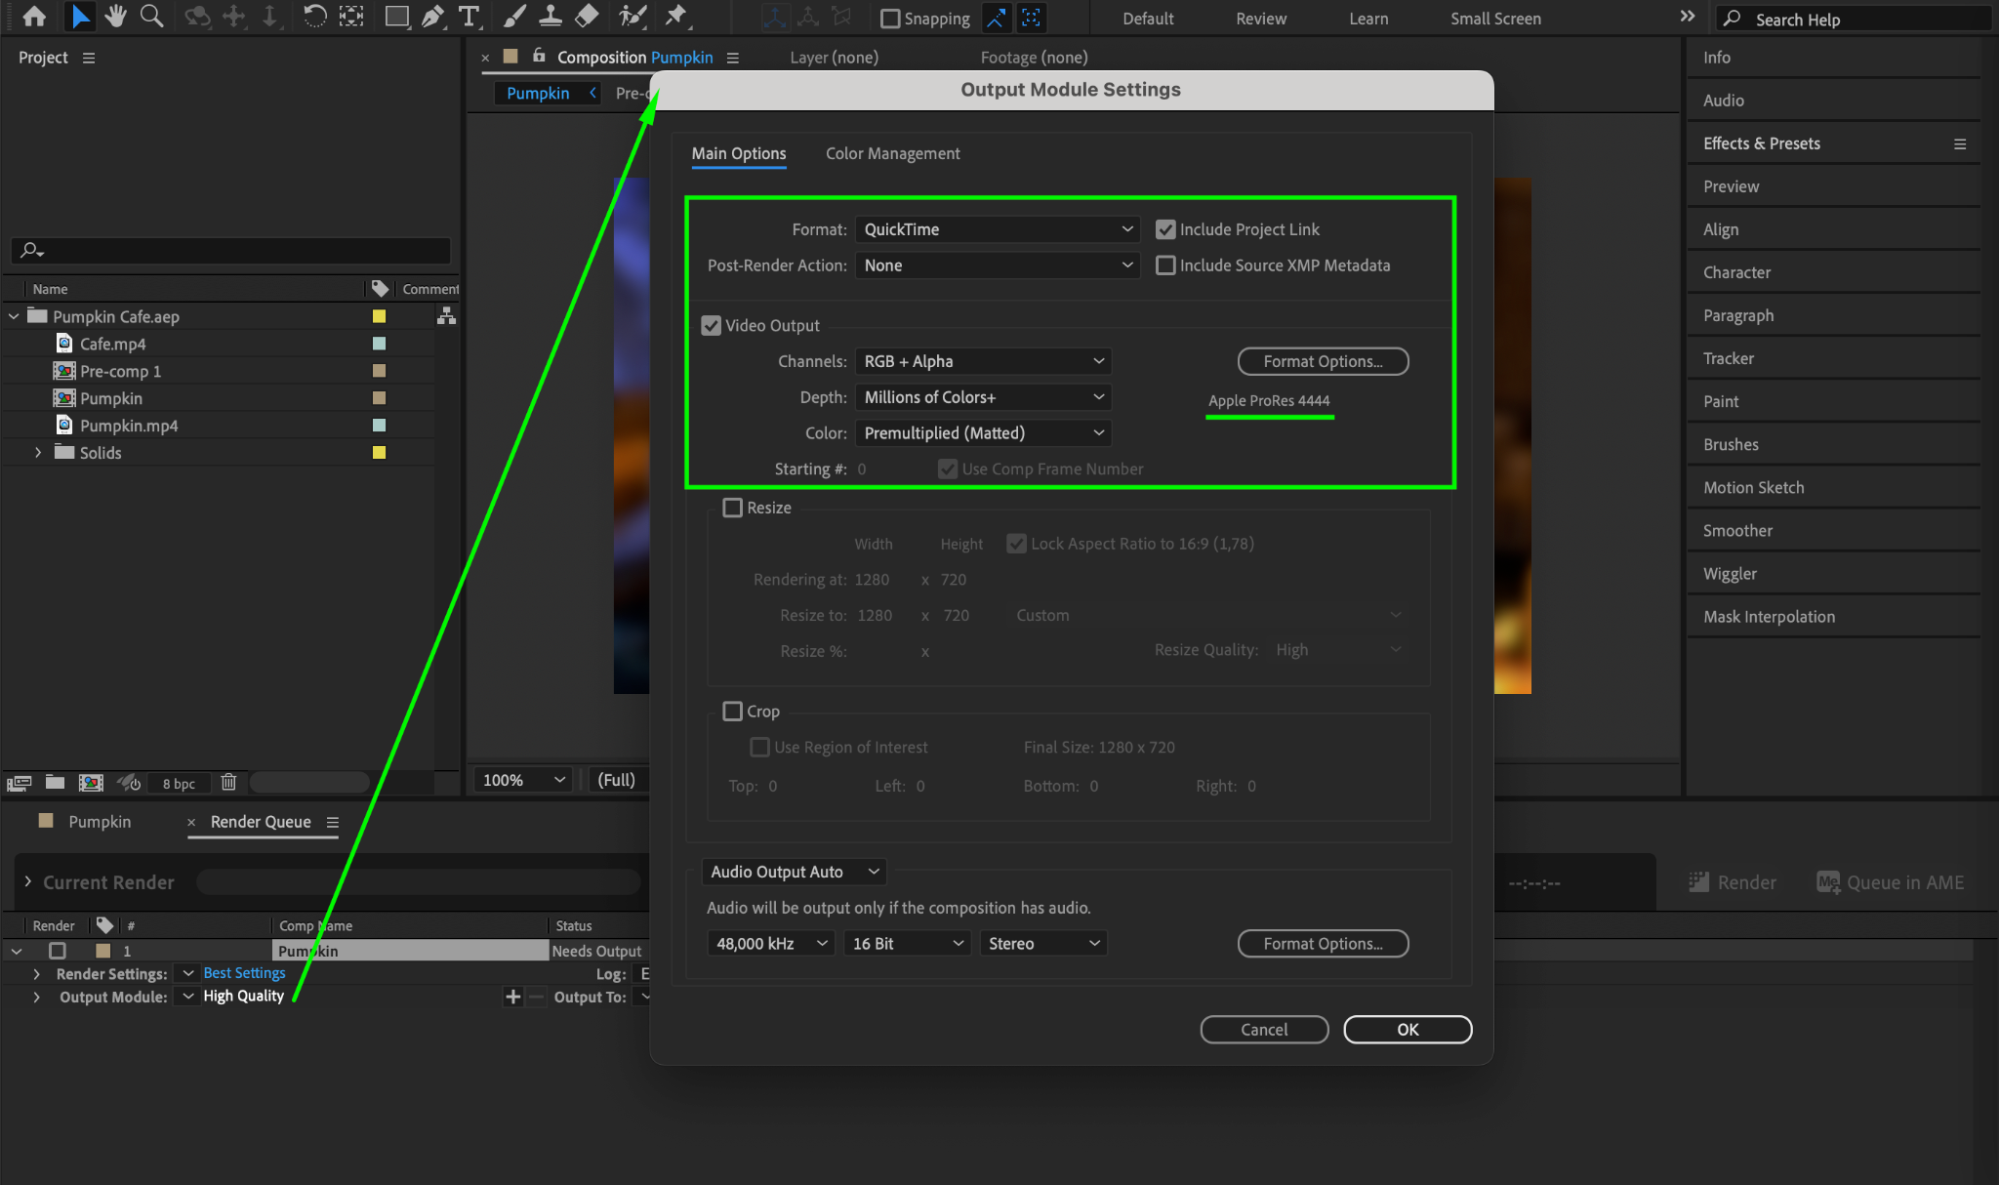 Step 6: Specify Output File Name and Location
In the Output To section, specify the file name and location for your rendered video. Ensure you have enough disk space to save the file. Step 7: Render Your Project
Once everything is set, click on the “Render” button in the Render Queue panel to begin the rendering process. The rendering time will depend on the complexity and length of your project and your computer’s processing power. Step 8: Review the Exported Video
After the rendering process is complete, review the exported video file for any quality issues or discrepancies. Watch the rendered video from start to finish, ensuring that all effects, transitions, and timings are accurately represented. If you detect any issues, make the necessary adjustments in After Effects and re-render the project. Iterate and fine-tune until you are satisfied with the final video output.
Conclusion
Converting an After Effects project to a video file is an essential skill for video designers. By following this step-by-step guide, you can ensure your project is properly set up, rendered, and reviewed for the best possible output. Whether you’re sharing your work with clients or posting it online, mastering this process will help you bring your creative vision to life and deliver high-quality video content.


