Converting Video to Image Sequence in After Effects: A Step-by-Step Guide
Introduction: How to Convert Video to Image Sequence
Converting a video into an image sequence can be really handy in many situations. You might want to create a time-lapse video, edit specific frames individually, or create high-quality still images. Luckily, Adobe After Effects can help you convert your videos into image sequences in a few simple steps. Whether you’re a seasoned video designer or just starting out, this guide will show you how to easily extract frames from your video files. Let’s jump right in and discover how to convert video to image sequence in After Effects!
Step 1: Import Your Video
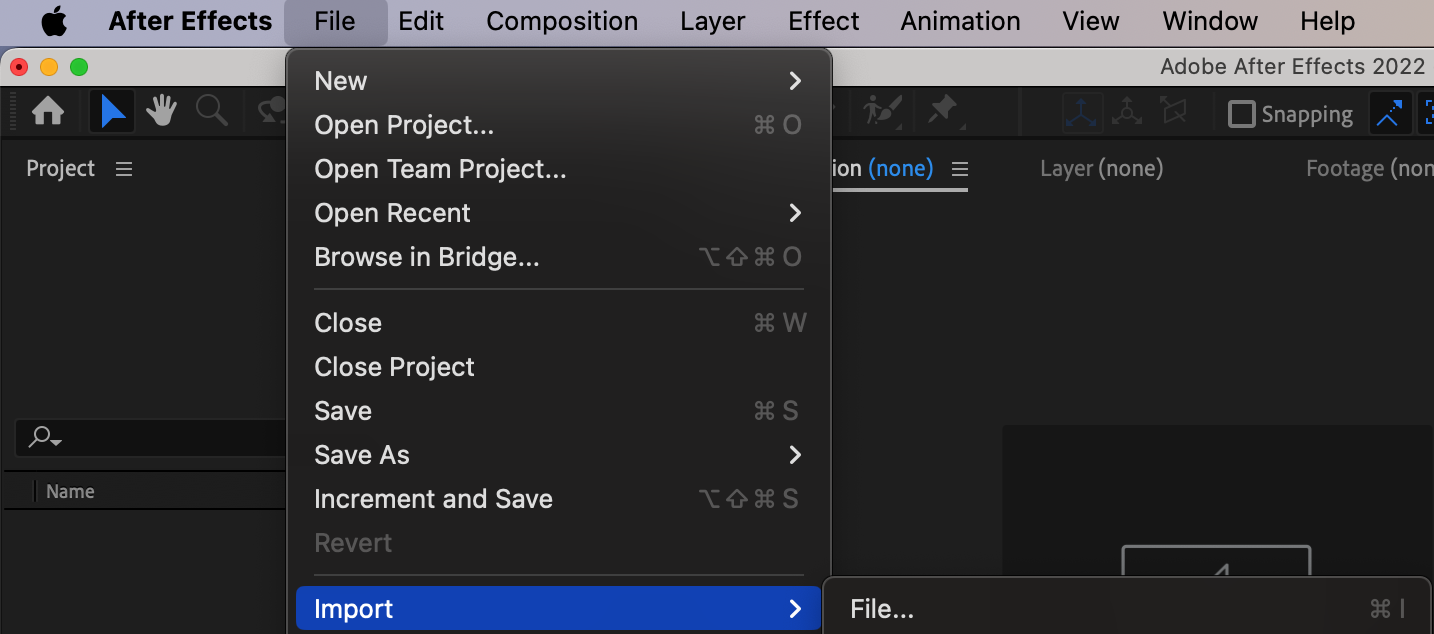
First, open After Effects and import your video file by going to File > Import > File. Browse through your computer and select the video you want to convert.
 Step 2: Create a New Composition
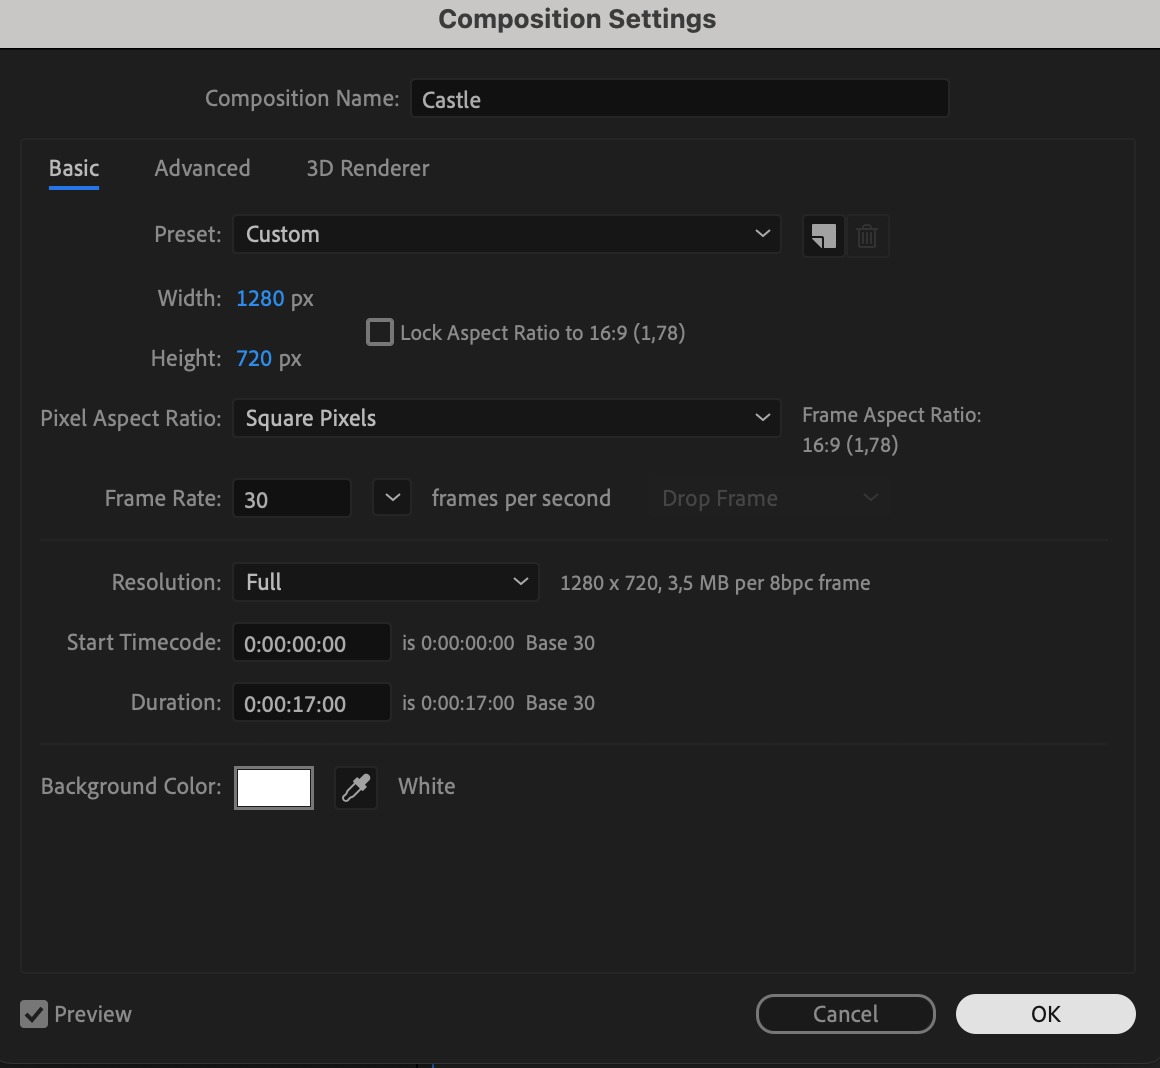
Now, it’s time to create a new composition. Go to Composition > New Composition, or simply press “Ctrl/Cmd + N”. Customize the composition settings, such as frame rate, duration, and resolution, according to your project needs.
Get 10% off when you subscribe to our newsletter


 Step 3: Add Your Video to the Timeline
Next, locate your video file in the Project panel and drag it onto the timeline panel. This action will create a new layer with your video.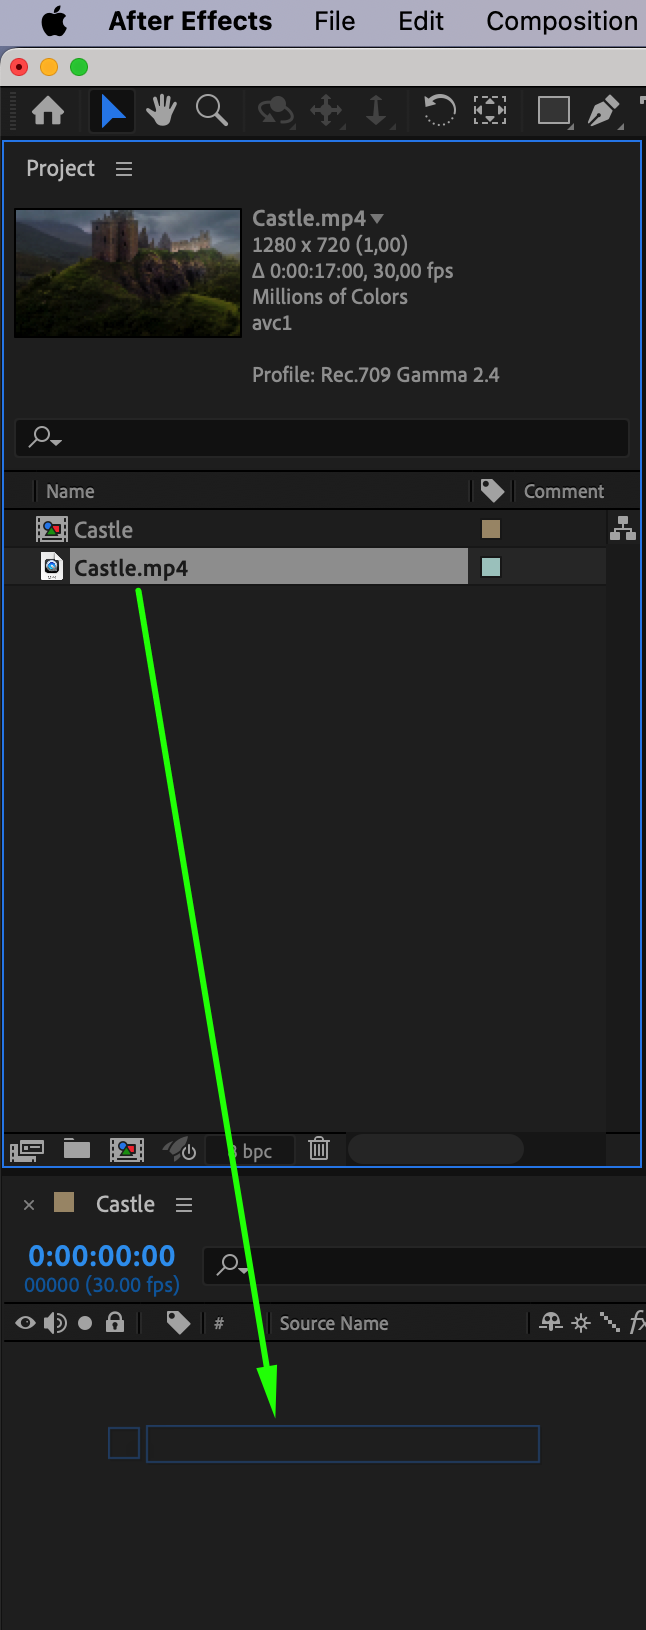 Step 4: Choose the Specific Range of Frames
To choose the specific range of frames you want to extract, move the playhead to the starting point on the composition timeline. Use the Current Time Indicator and shortcuts “Alt/Option + [“ and “Alt/Option + ]” to set the beginning and end of the segment you want to convert into an image sequence. This will determine the range of frames you want to export. Step 5: Export the Image Sequence
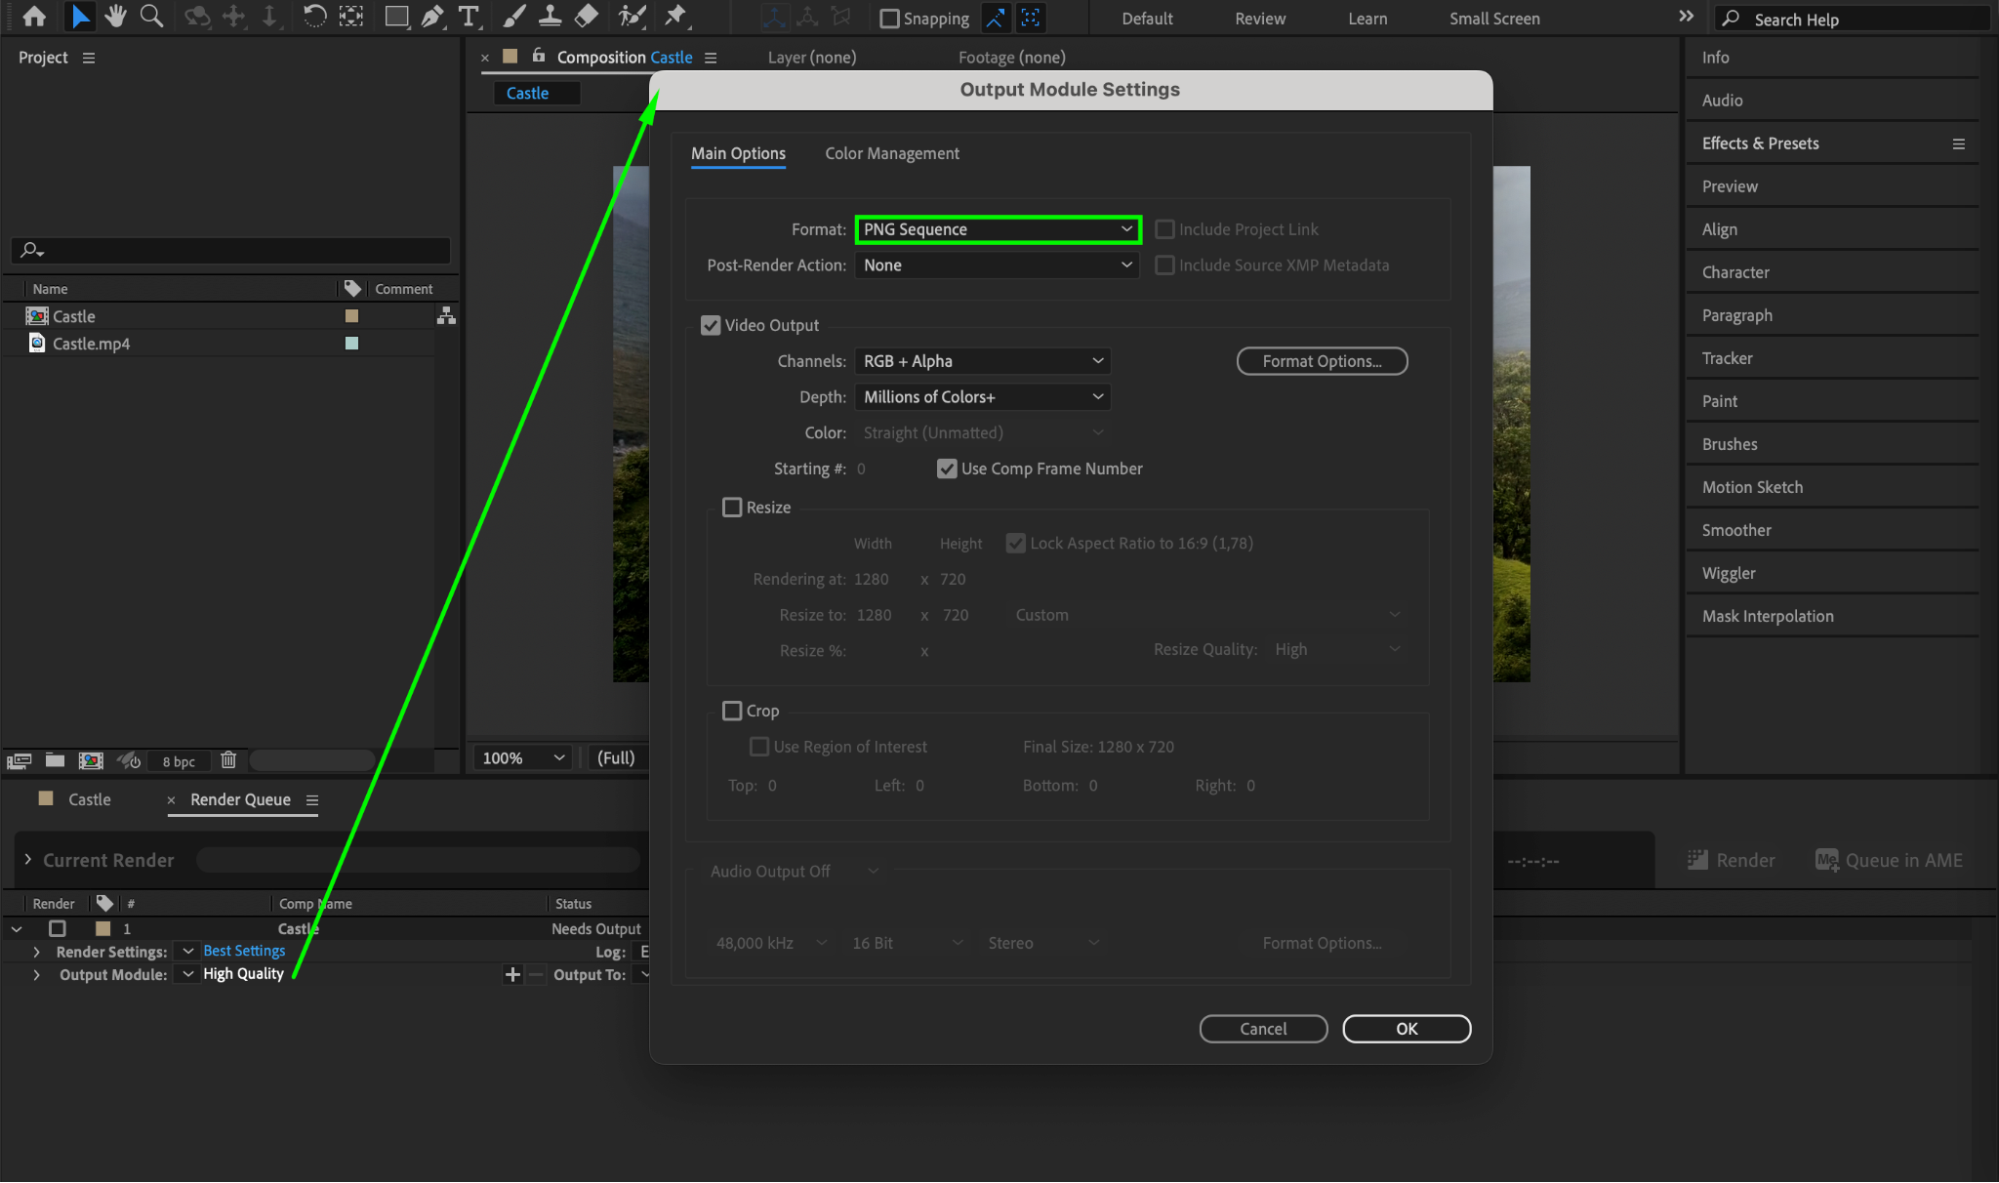
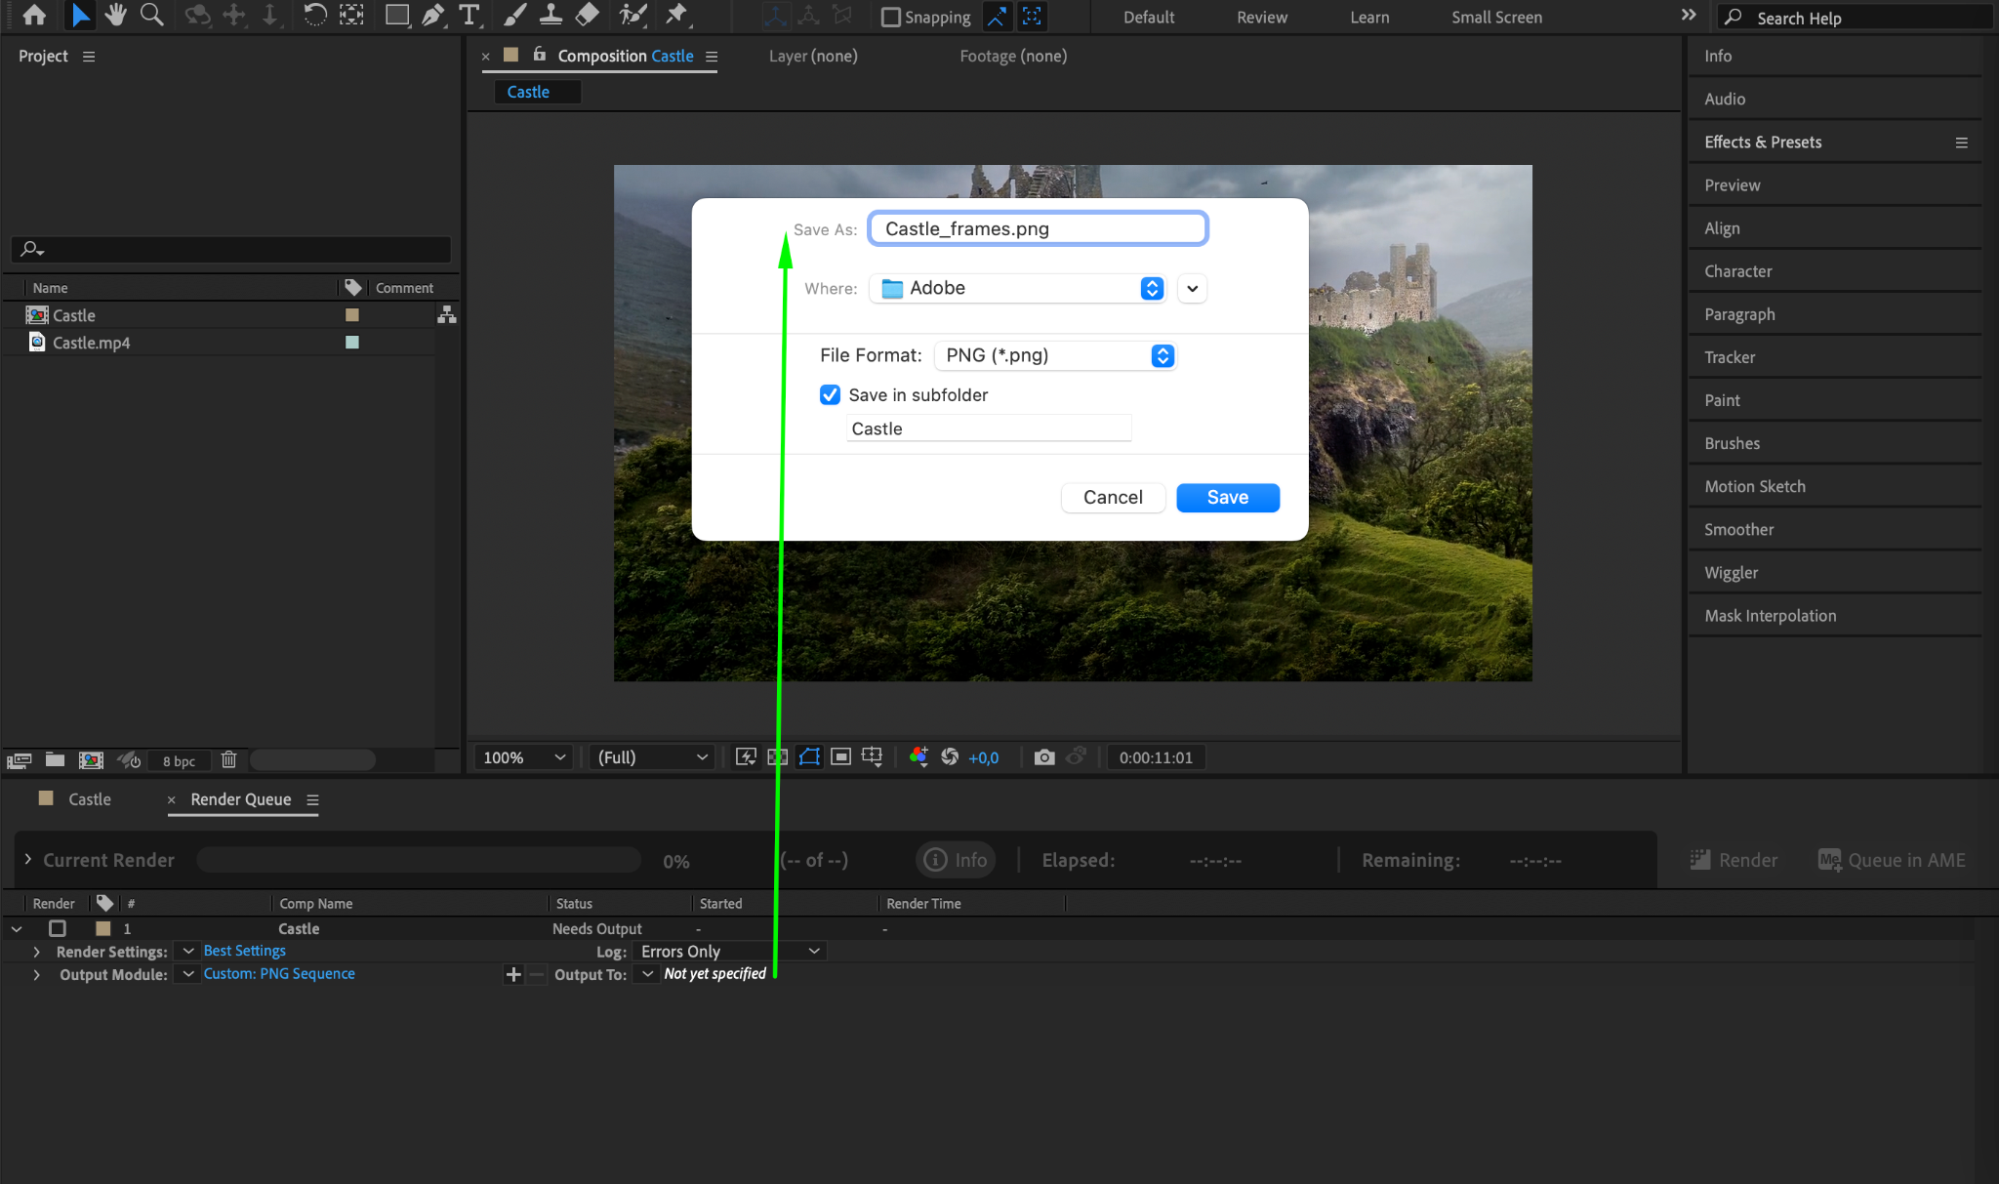
To export the image sequence, go to Composition > Add to Render Queue. In the Render Queue panel, select the desired output format from the Output Module dropdown menu. PNG or JPEG formats are commonly used for image sequences. Adjust the settings like output path, quality, and compression if necessary. Also, specify the location and name for the file in the “Output To” settings. When you’re ready, click on the Render button to start the export process.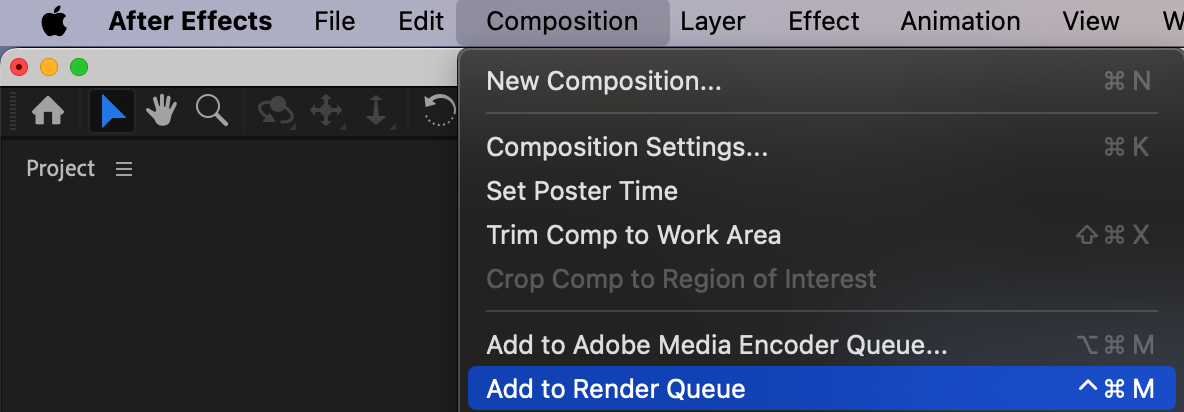
 Once After Effects finishes rendering the image sequence, you’ll have a series of individual frames saved as images. Now you can use these images for various purposes, like creating a time-lapse video, further editing, or graphic design projects.
Conclusion
Converting a video to an image sequence in After Effects opens up a world of creative possibilities. By following these simple steps, you can effortlessly extract frames from your videos and save them as image sequences. Feel free to experiment with different settings, formats, and ranges to achieve the desired results. So go ahead, let your creativity soar, and explore the endless possibilities of video to image conversion with After Effects!


