A Guide to Copying and Pasting Brush Strokes in After Effects
Introduction – Save Time and Achieve Consistency with Brush Strokes
Brush strokes in After Effects are a versatile tool for adding hand-drawn effects to your animations. Copying and pasting brush strokes allows you to reuse designs or replicate effects across multiple layers, saving time and maintaining consistency. In this guide, we’ll walk you through the process step by step.
Get 10% off when you subscribe to our newsletter

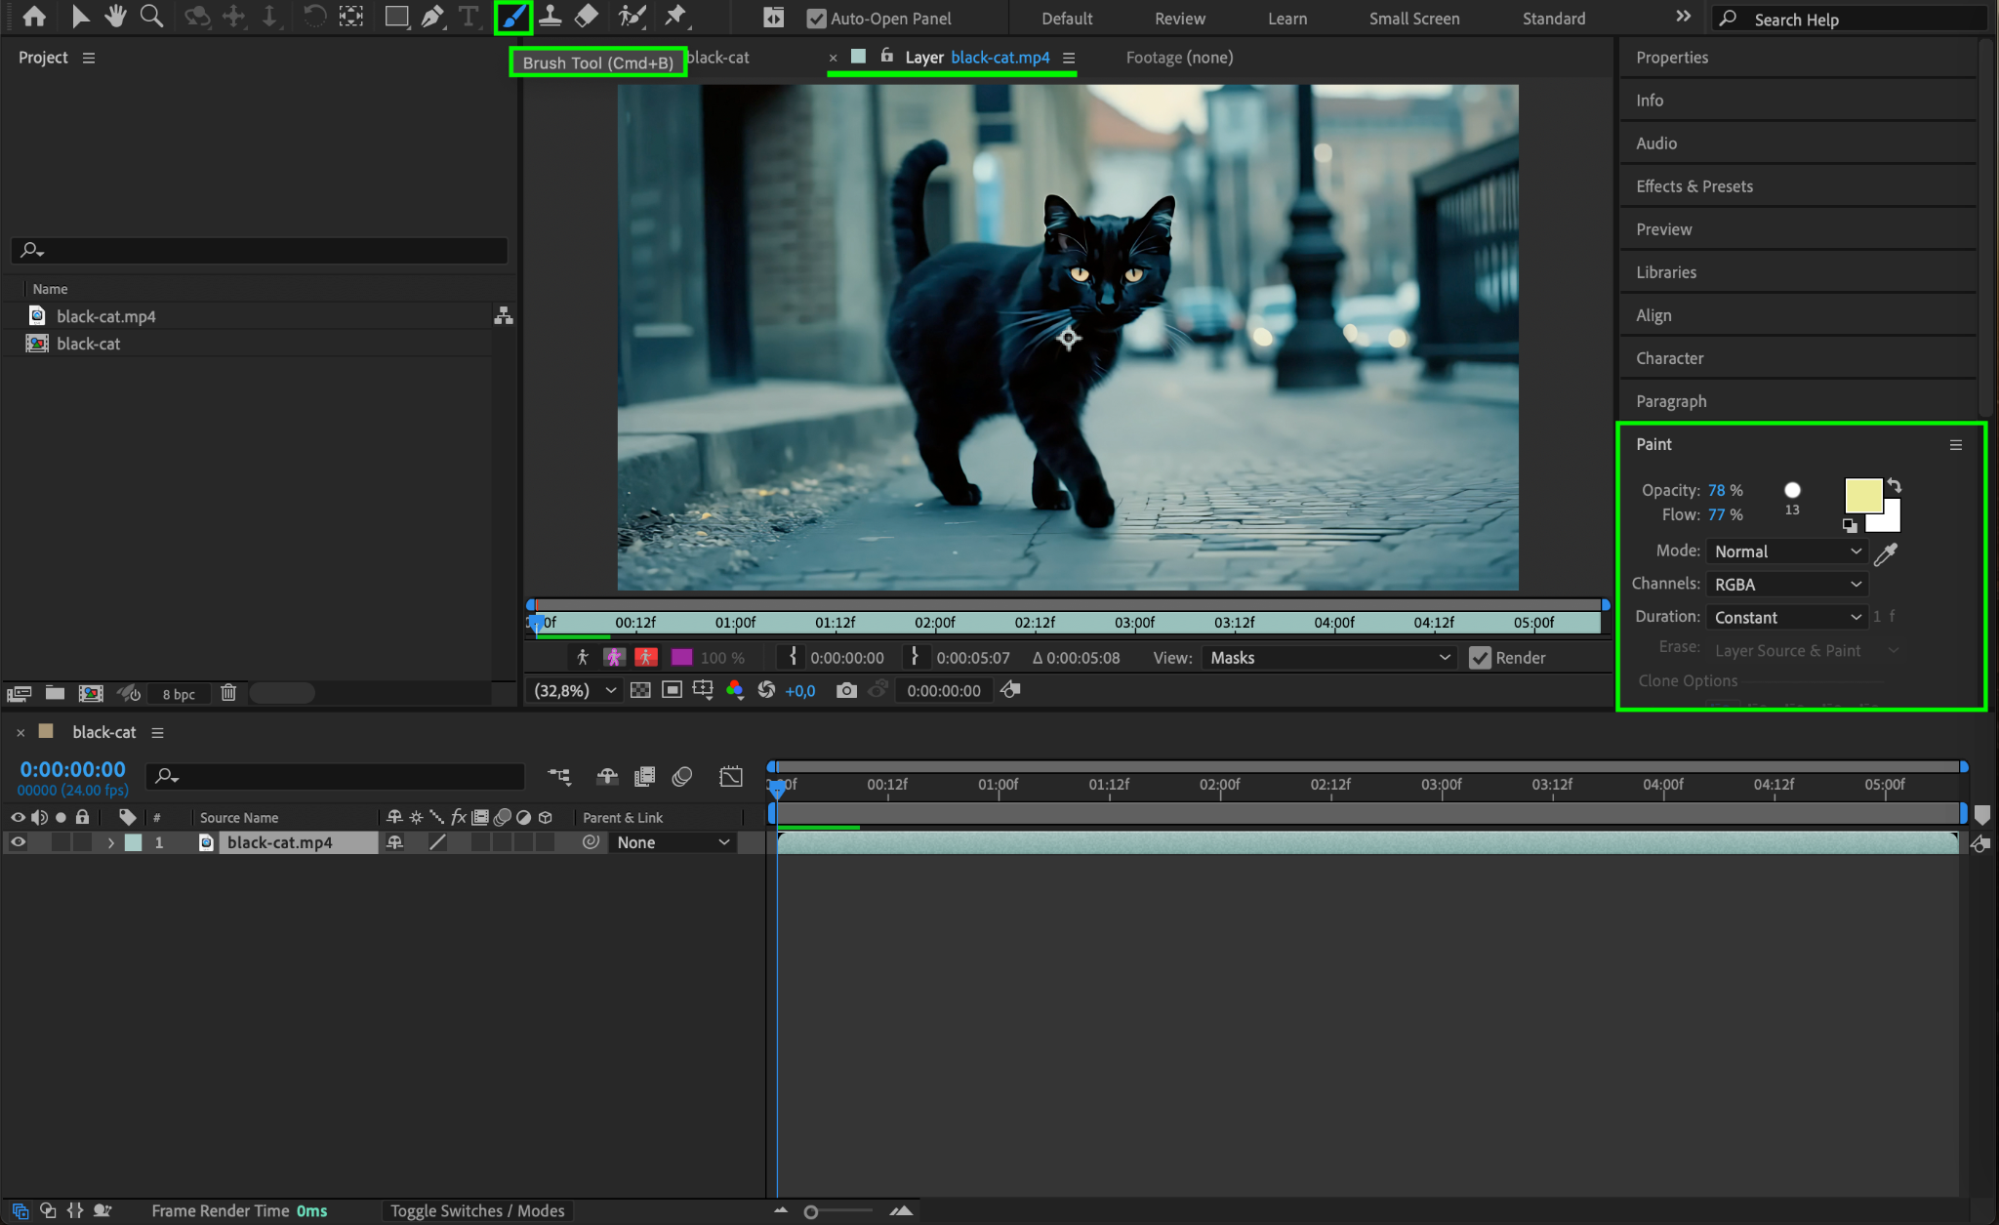
Step 1: Enable the Brush Tool
Begin by selecting the Brush Tool from the toolbar or by pressing “Ctrl/Cmd + B”. Ensure you’re working in a Layer Panel (not the Composition Panel), as the brush tool is only active in the Layer view. Open the layer where you want to create or edit brush strokes.
 Step 2: Create Your Brush Strokes
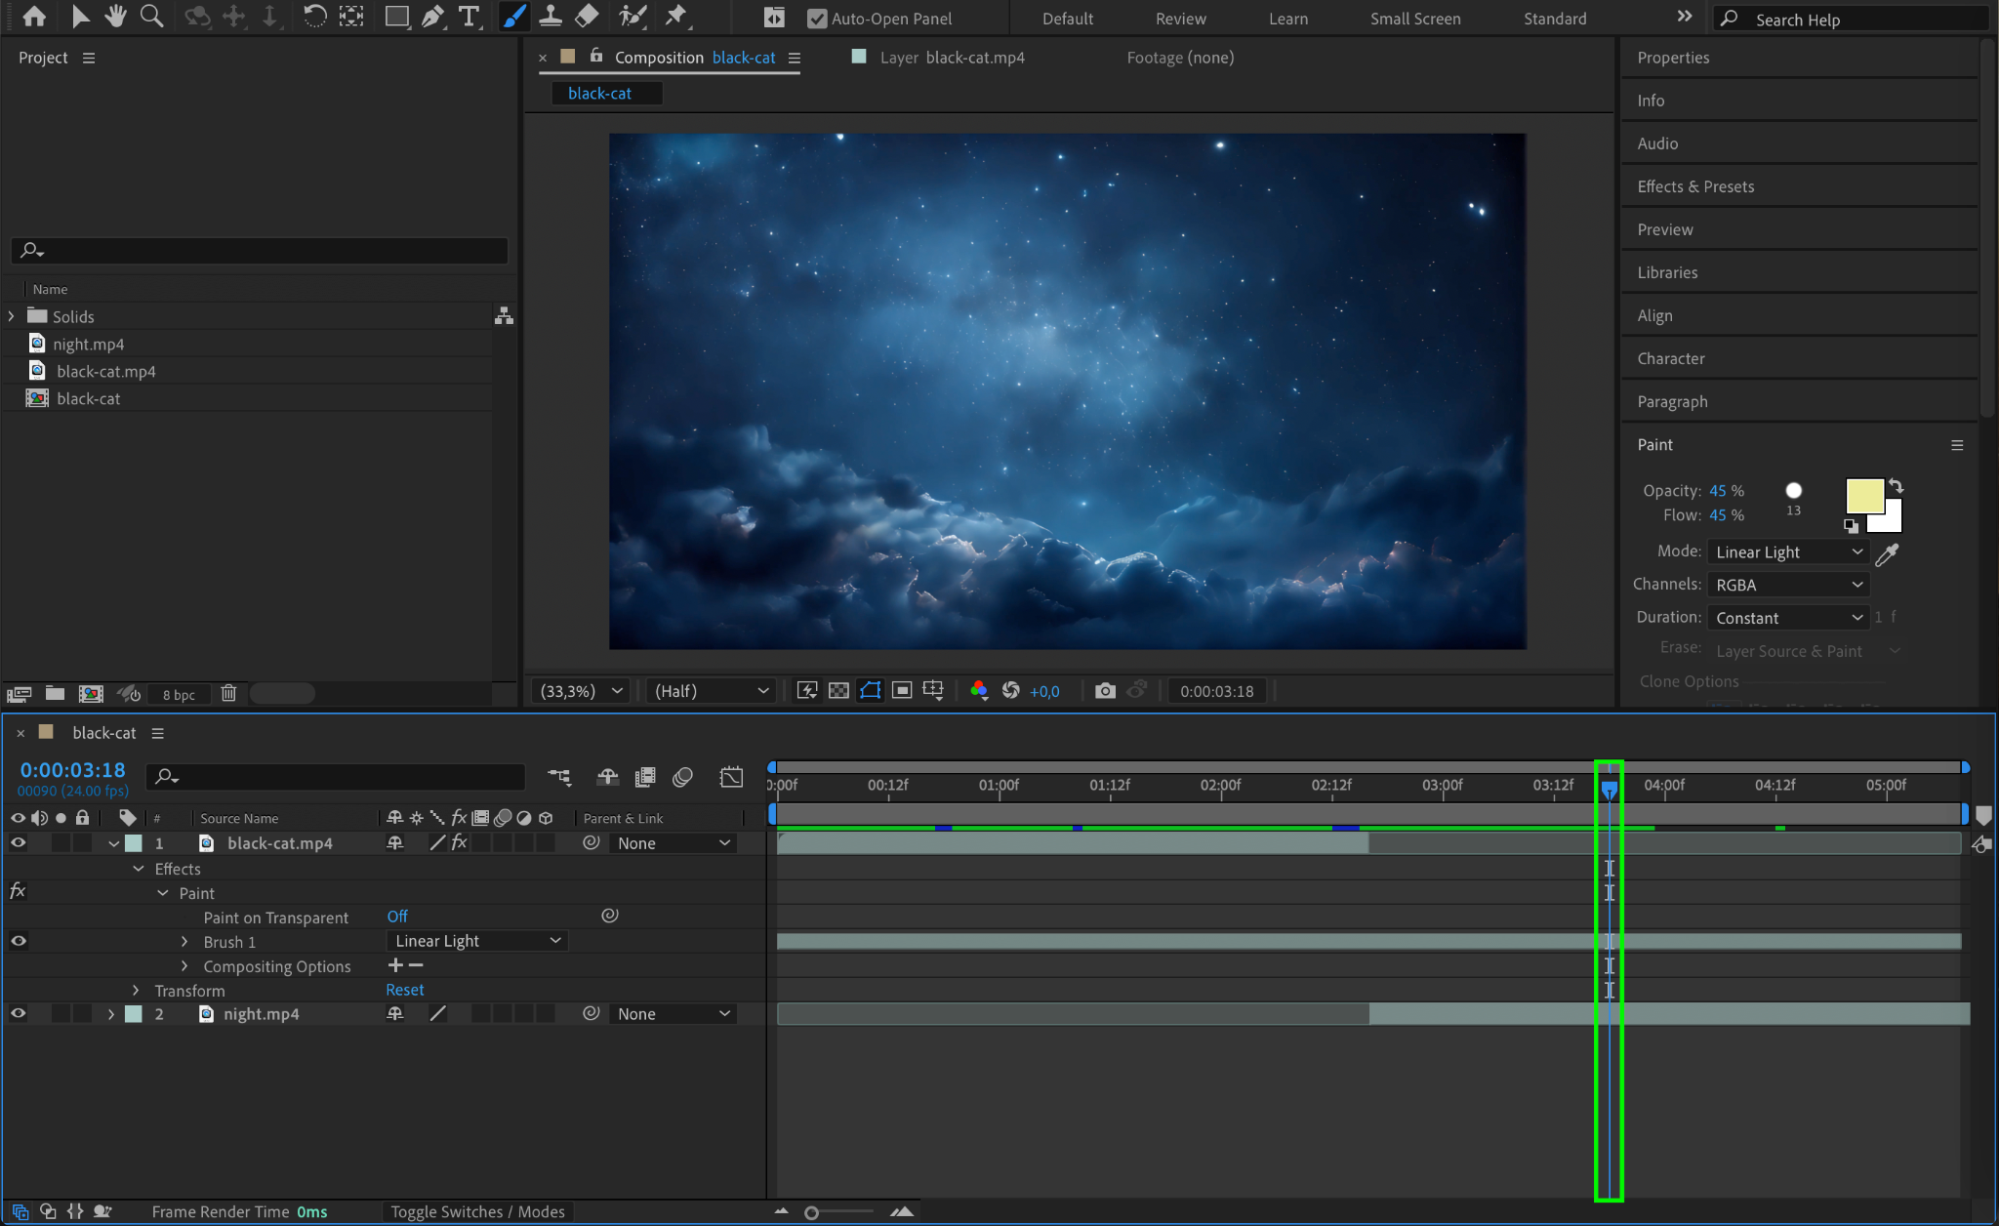
Draw your desired brush strokes directly on the layer. Customize the brush size, color, and other settings in the Paint Panel. Once you’ve completed your strokes, ensure they are visible and properly aligned within the layer.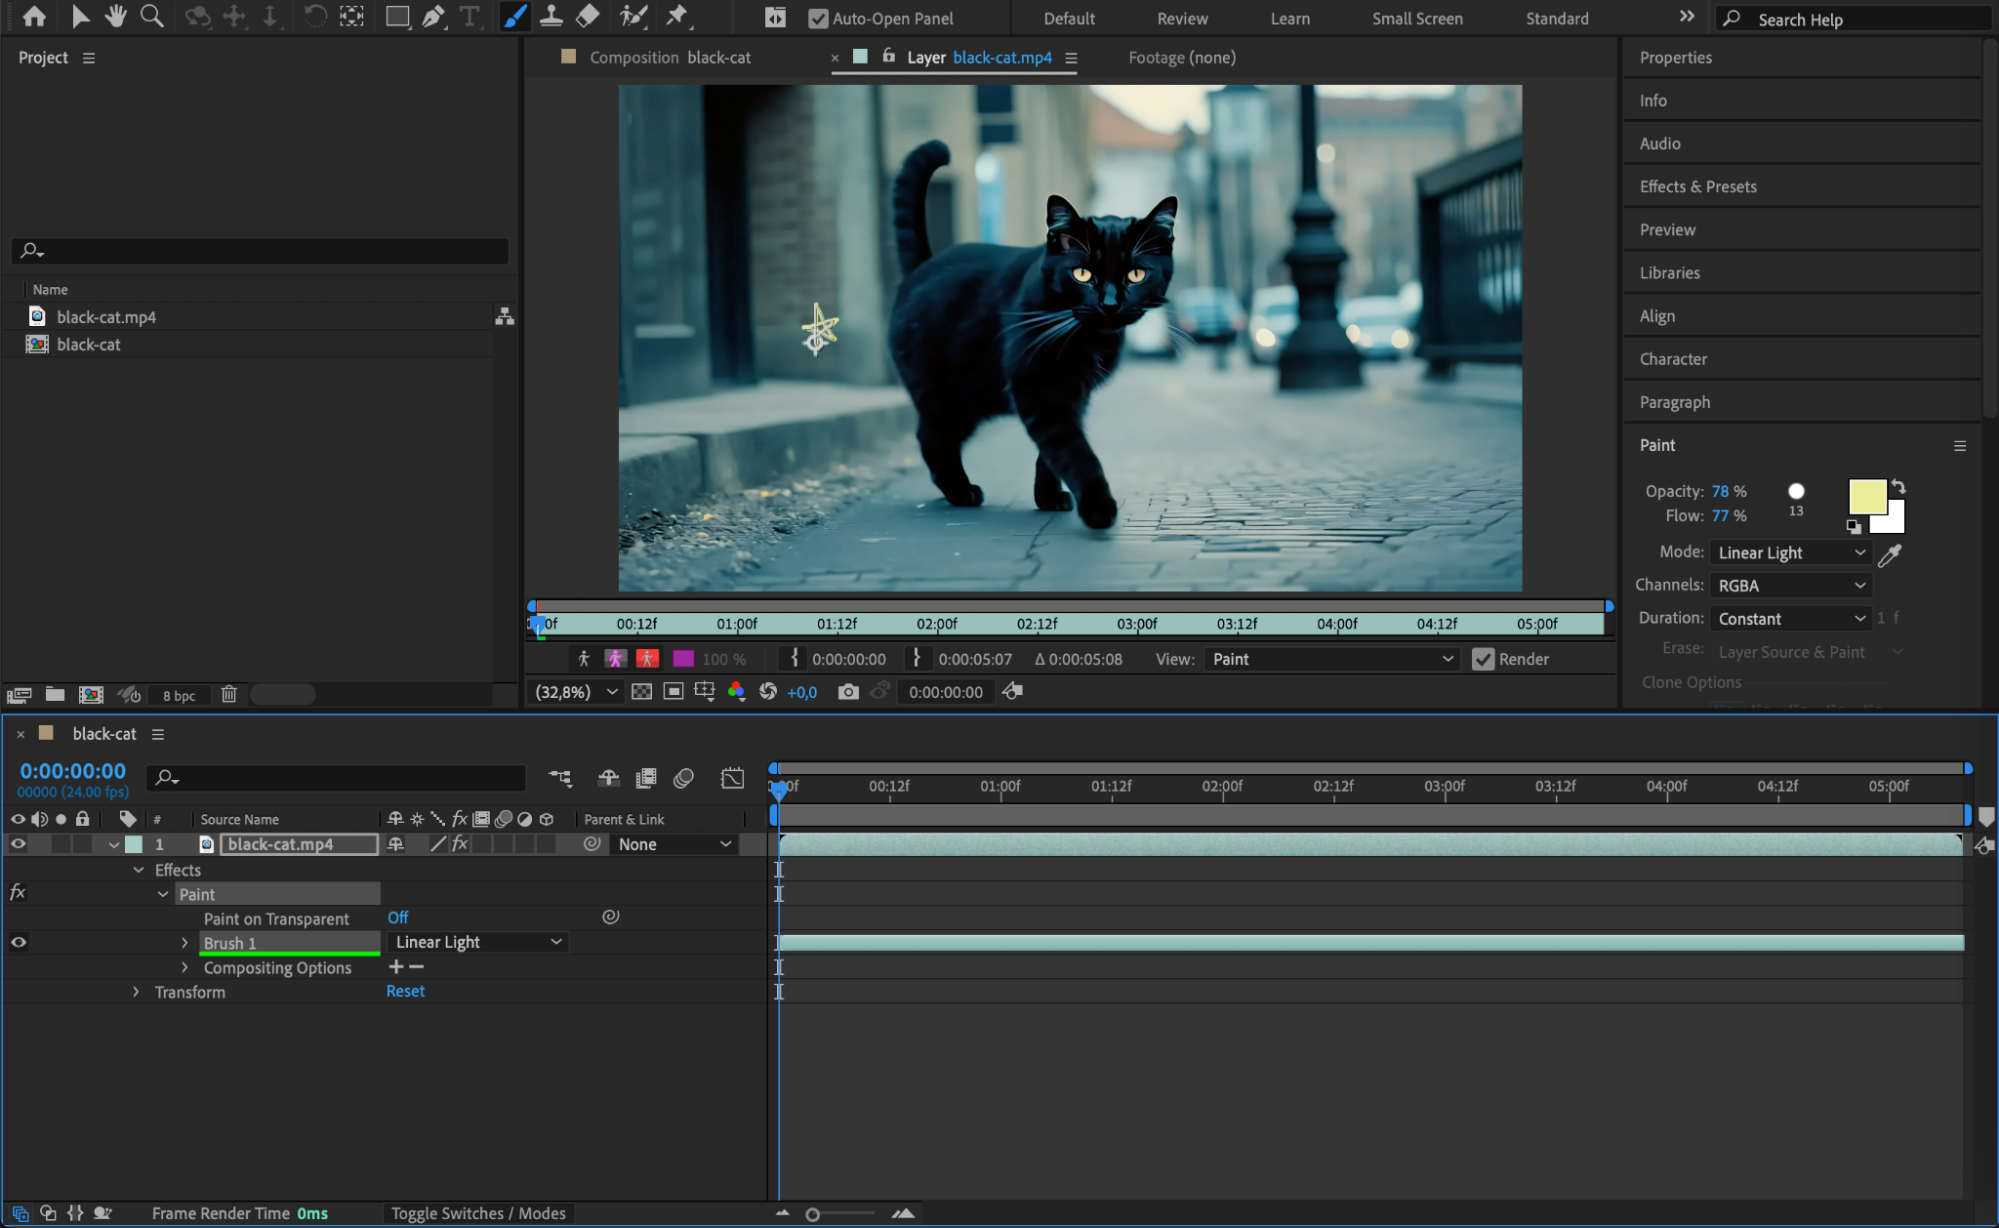 Step 3: Select and Copy Brush Strokes
To copy brush strokes, you need to select them first. In the Timeline Panel, expand the layer’s properties by clicking the arrow next to the layer name. Navigate to Effects > Paint, where your brush strokes will be listed as individual entries. Select the strokes you want to copy by clicking on them. With the desired strokes selected, press “Ctrl/Cmd + C” to copy them. The strokes and their associated properties, such as timing and color, are now stored in the clipboard.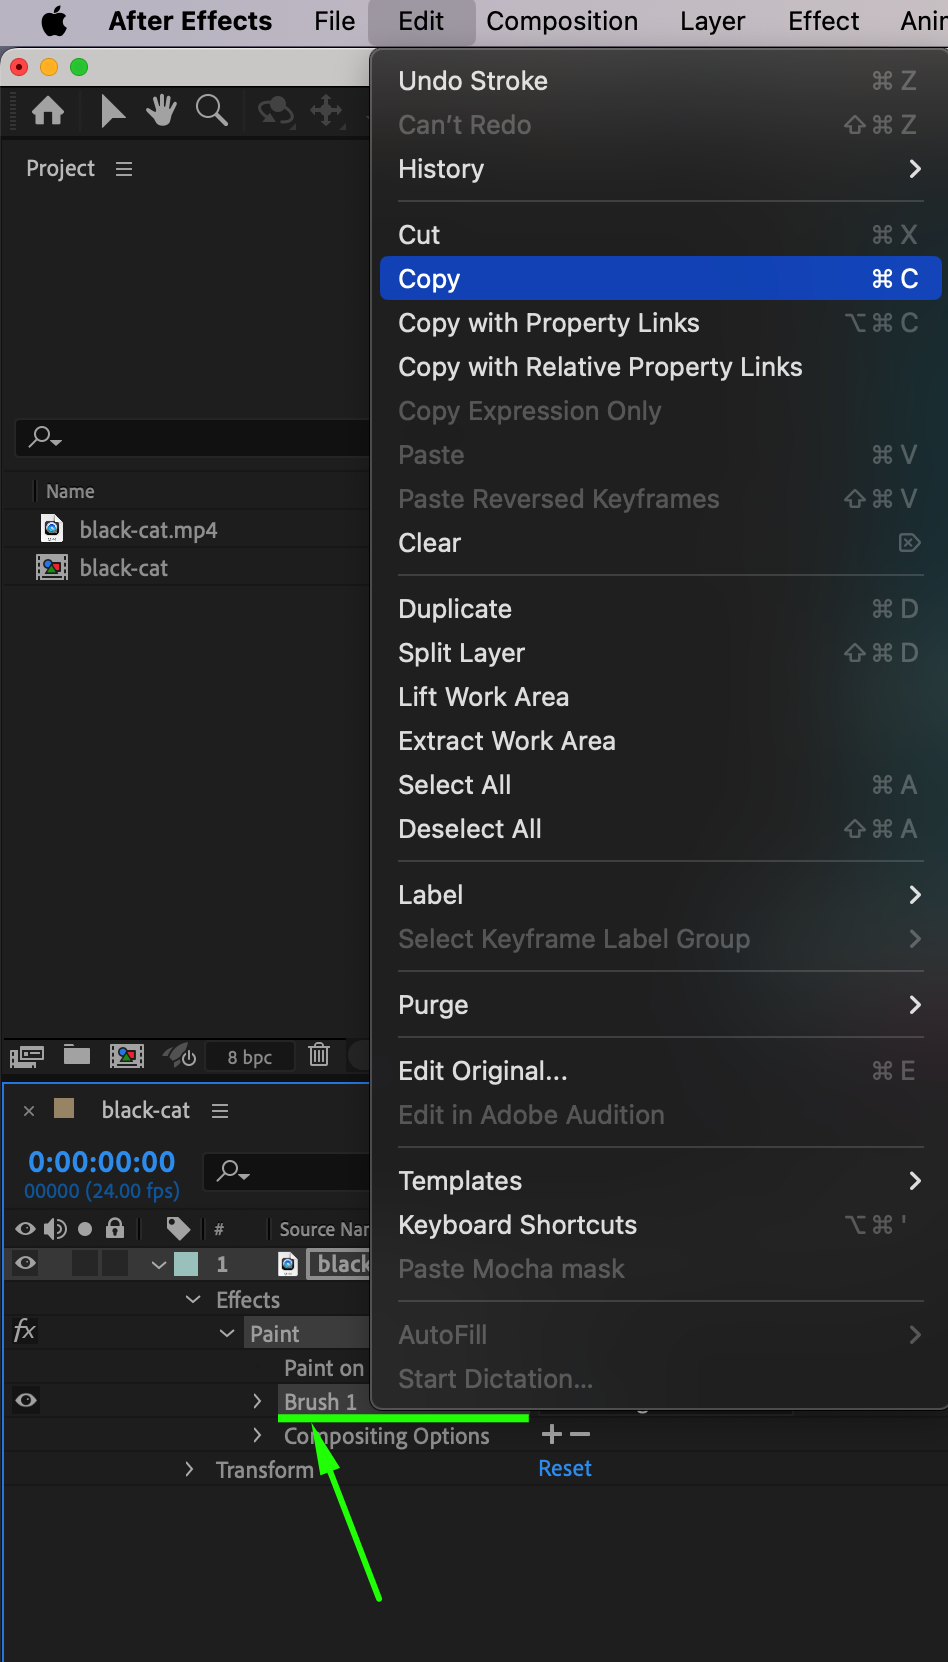 Step 4: Add the Target Layer for Copying Strokes
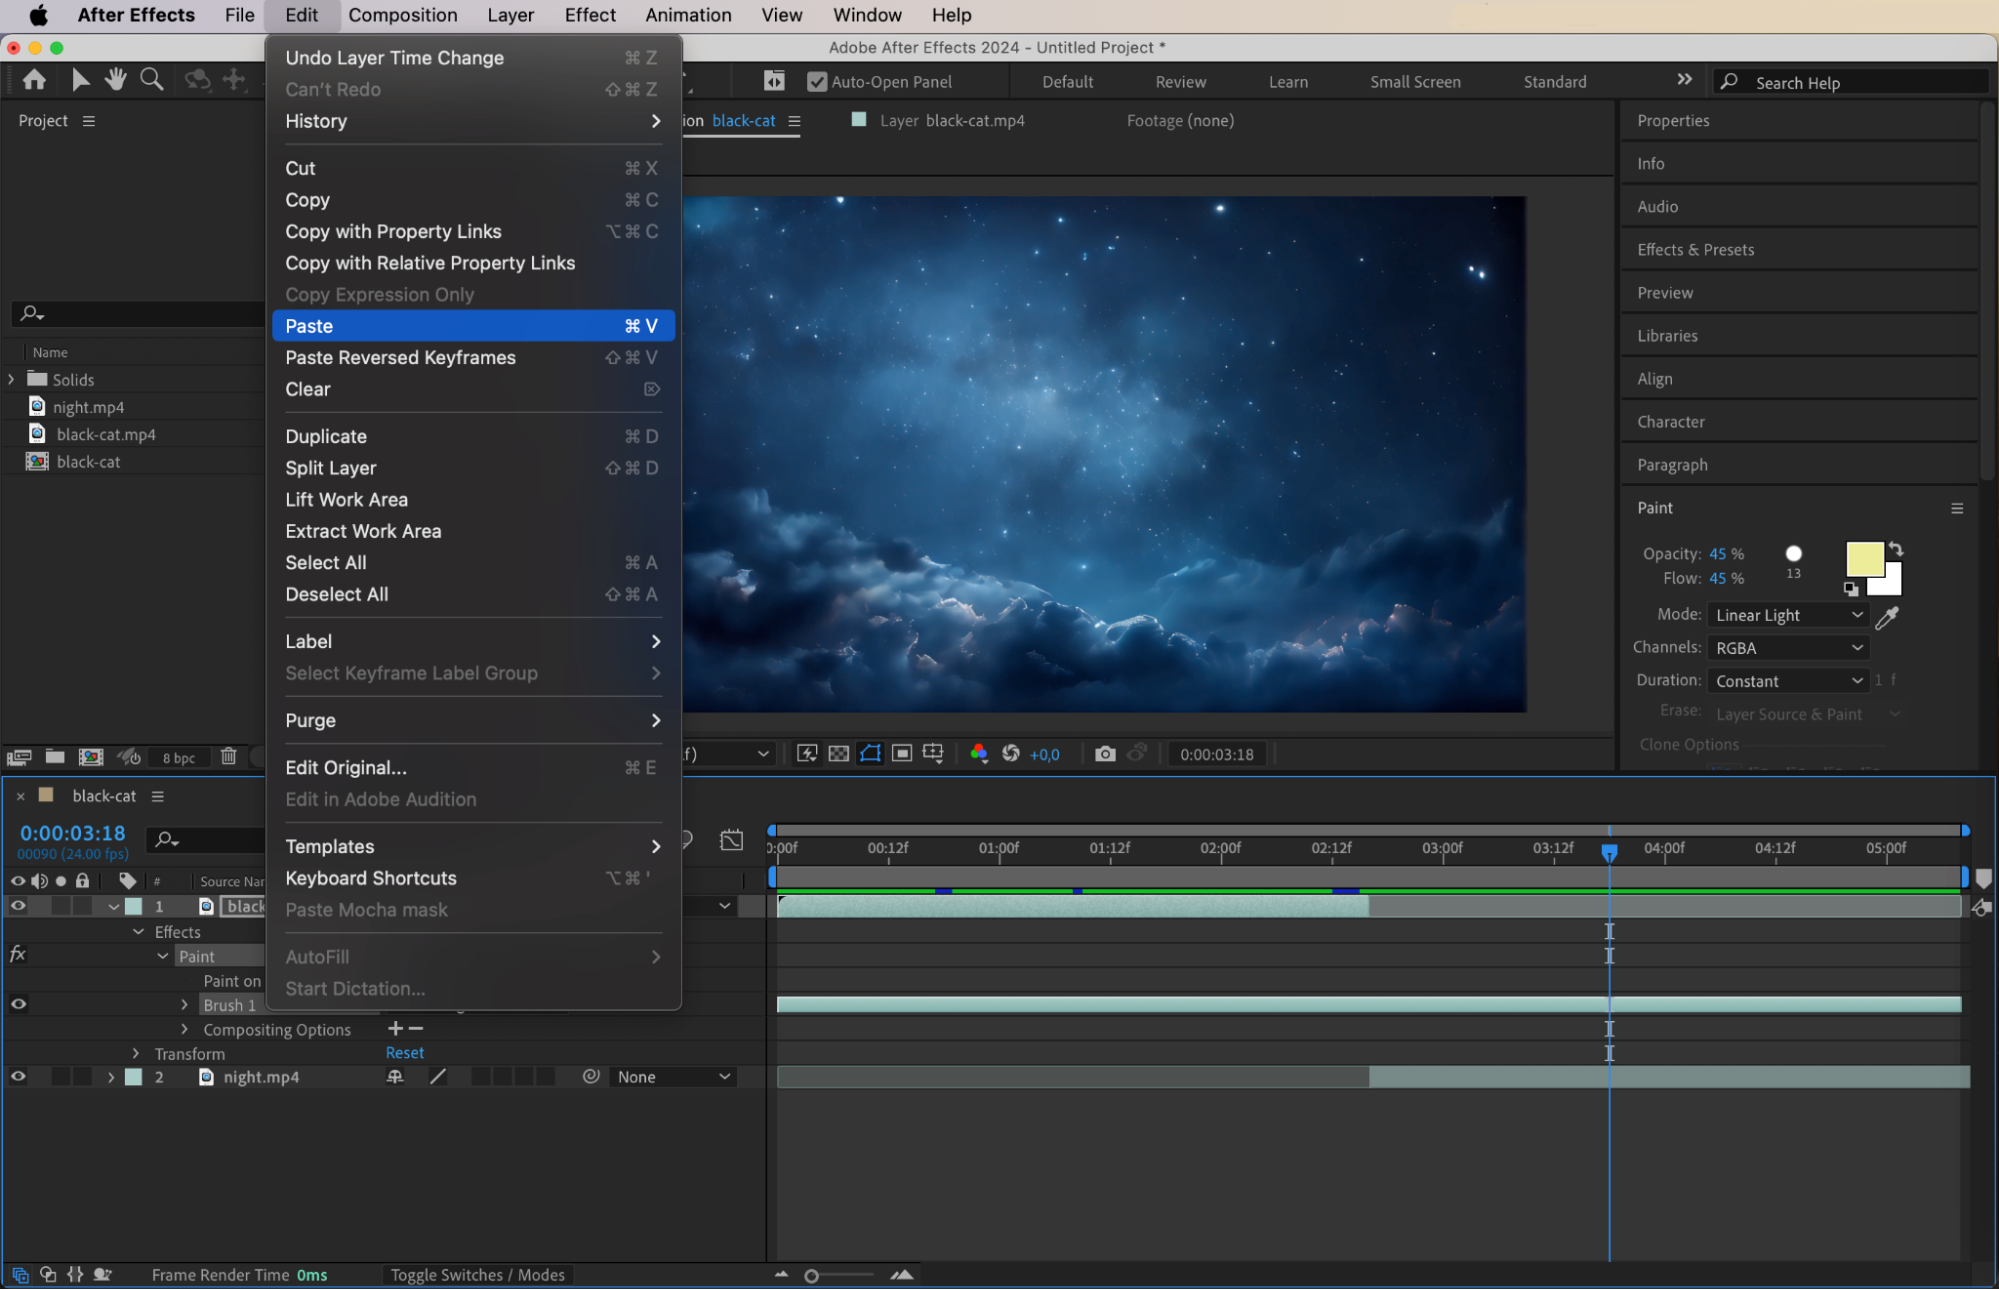
To paste the copied brush strokes, add the second video or target layer to the timeline. Ensure that the resolution of the target layer matches the original layer where the strokes were created. 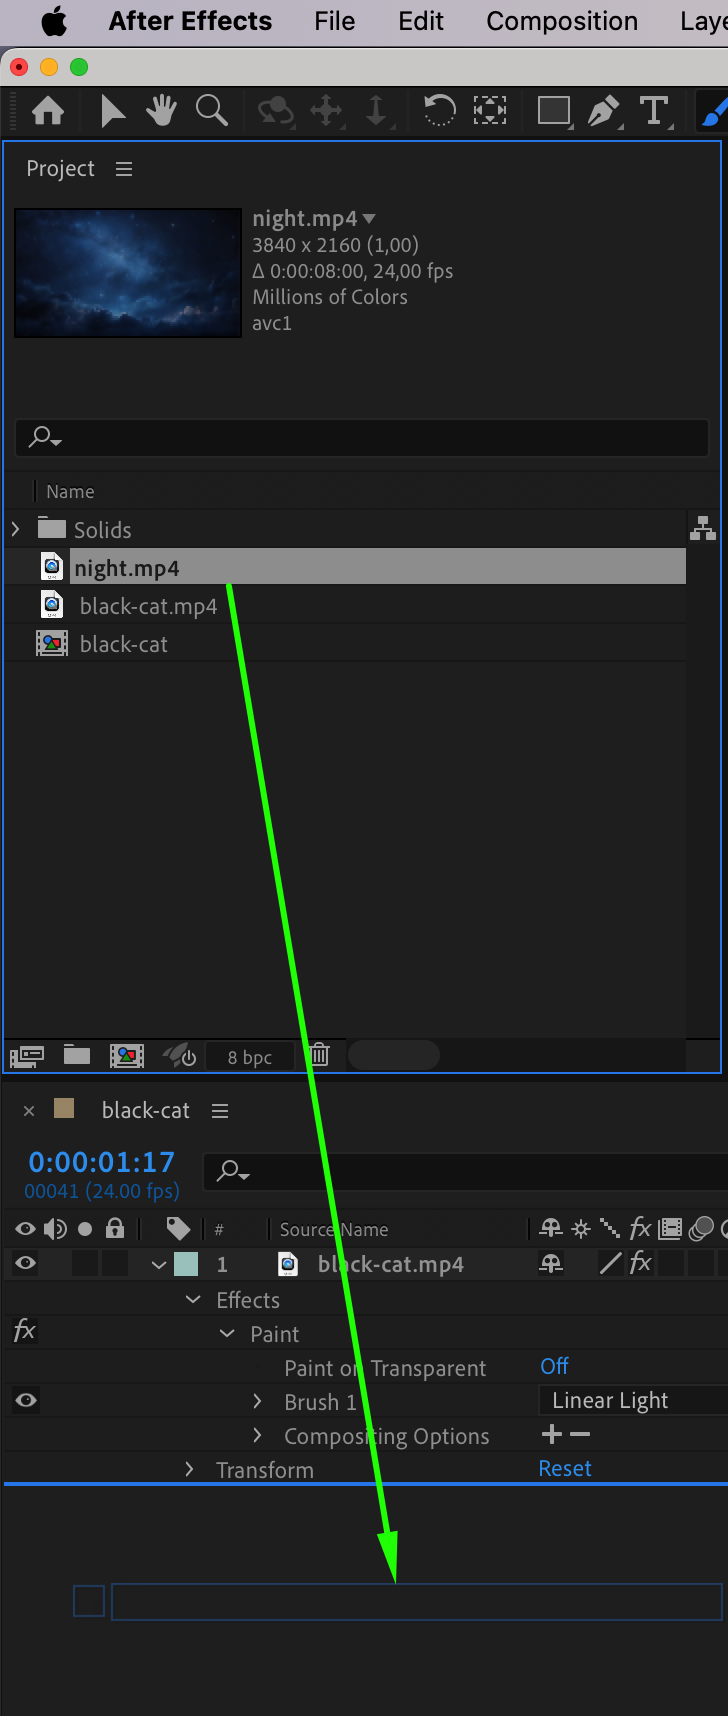 Step 5: Paste Brush Strokes
To paste the brush strokes onto another layer, select the target layer and ensure you are in the Layer Panel. Move the CTI (Current Time Indicator) to the position where you want the strokes to appear, then press “Ctrl/Cmd + V”.
 Step 6: Adjust and Refine
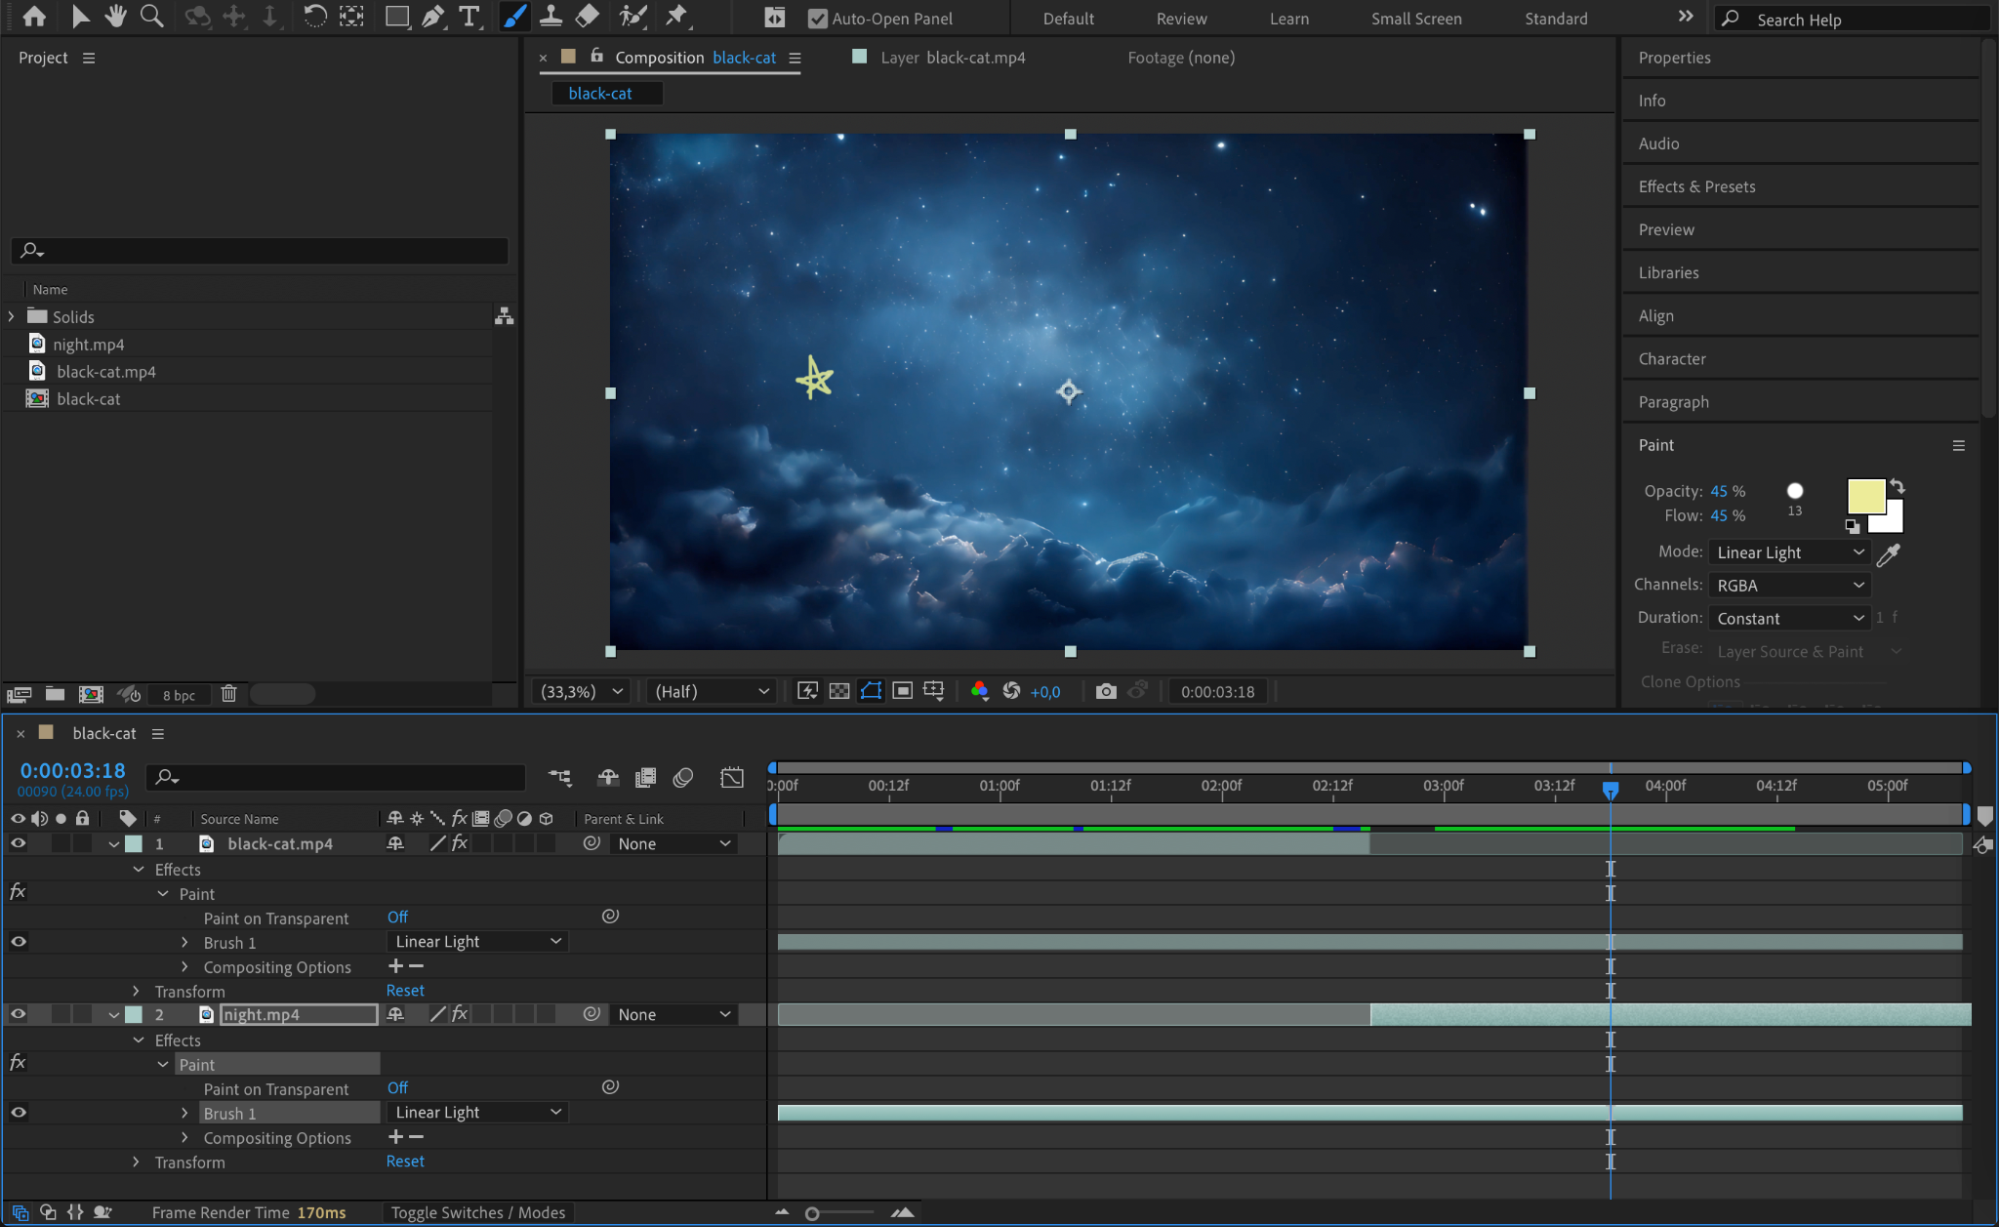
Once pasted, you can modify the brush strokes if needed. Adjust their position, color, or rotation in the Paint Panel. This flexibility allows you to customize the copied strokes without starting from scratch.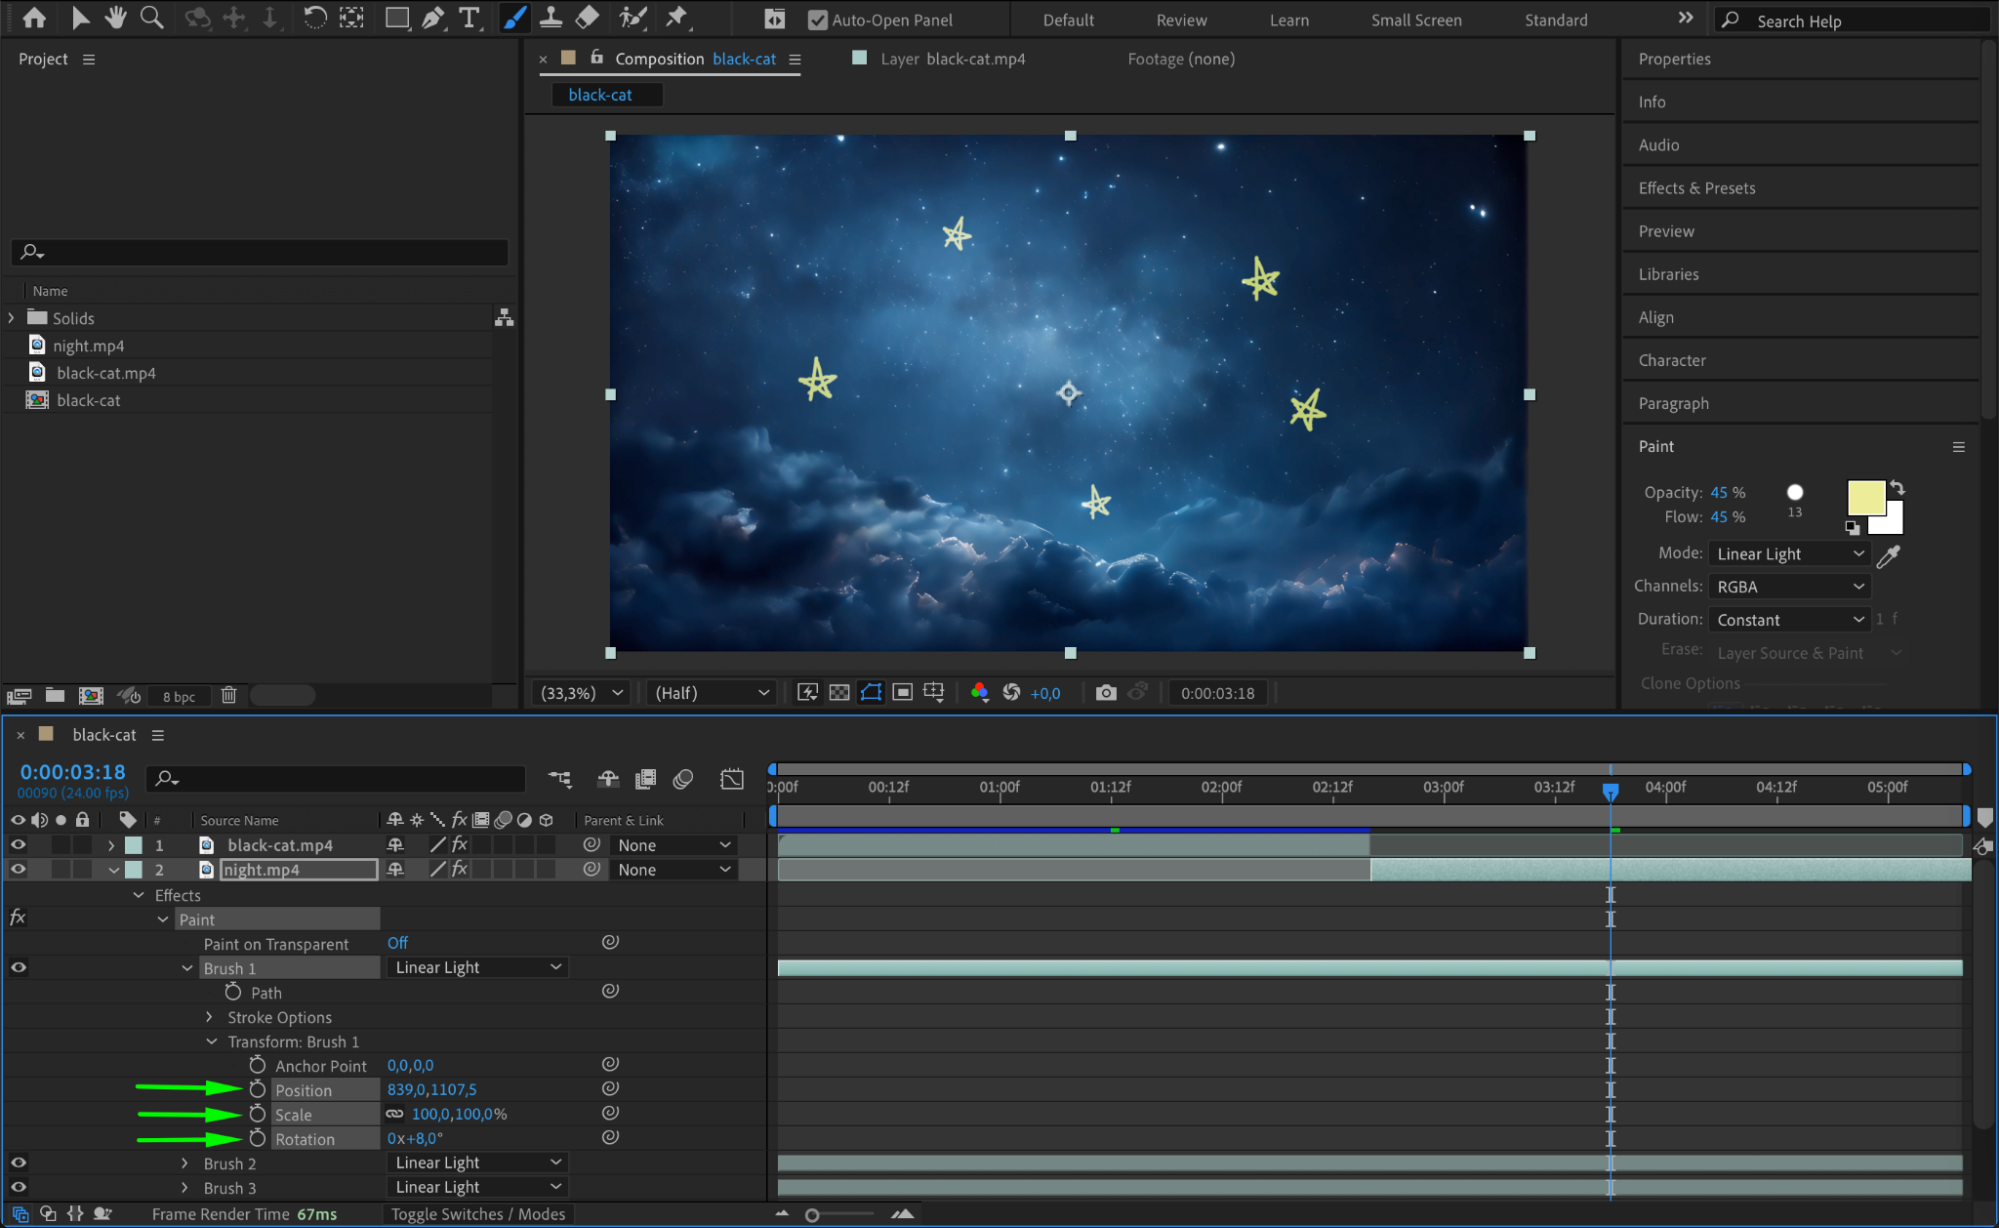 Step 7: Preview Your Animation
Press the spacebar to preview your animation. Ensure that the brush strokes are properly placed and synchronized with the rest of your composition.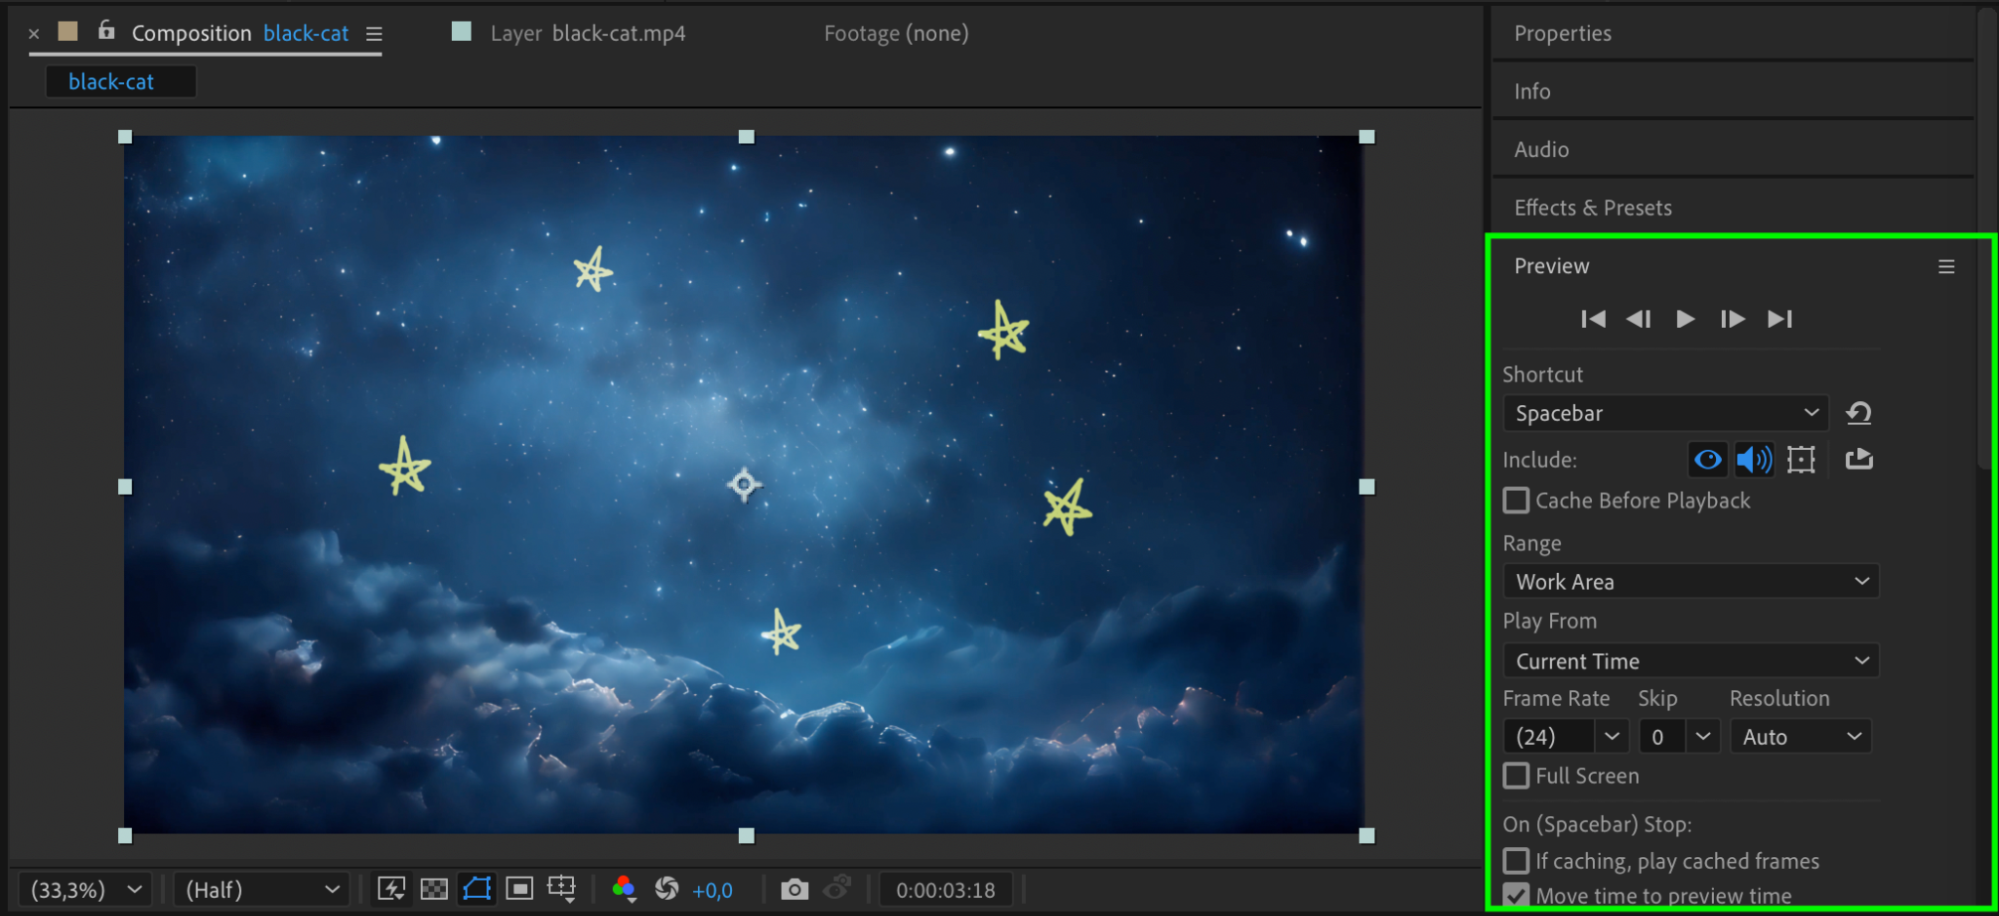 Step 8: Render Your Project
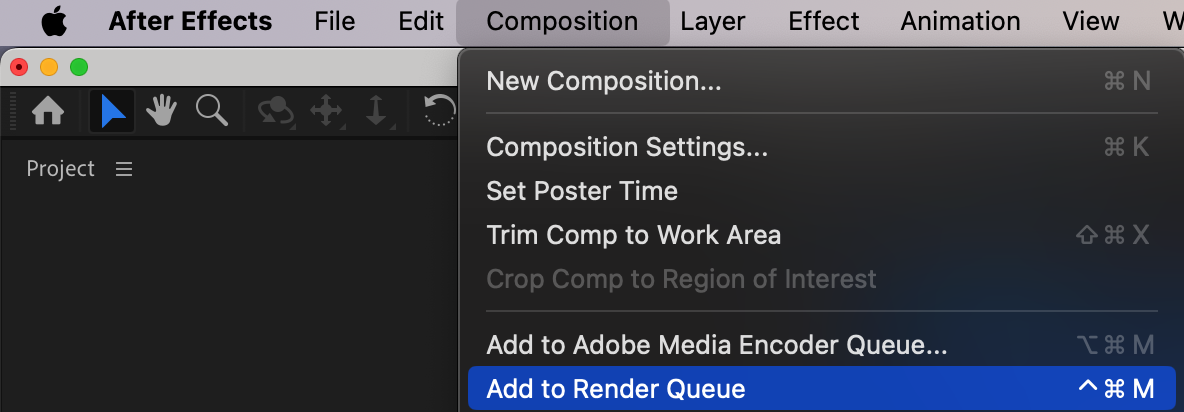
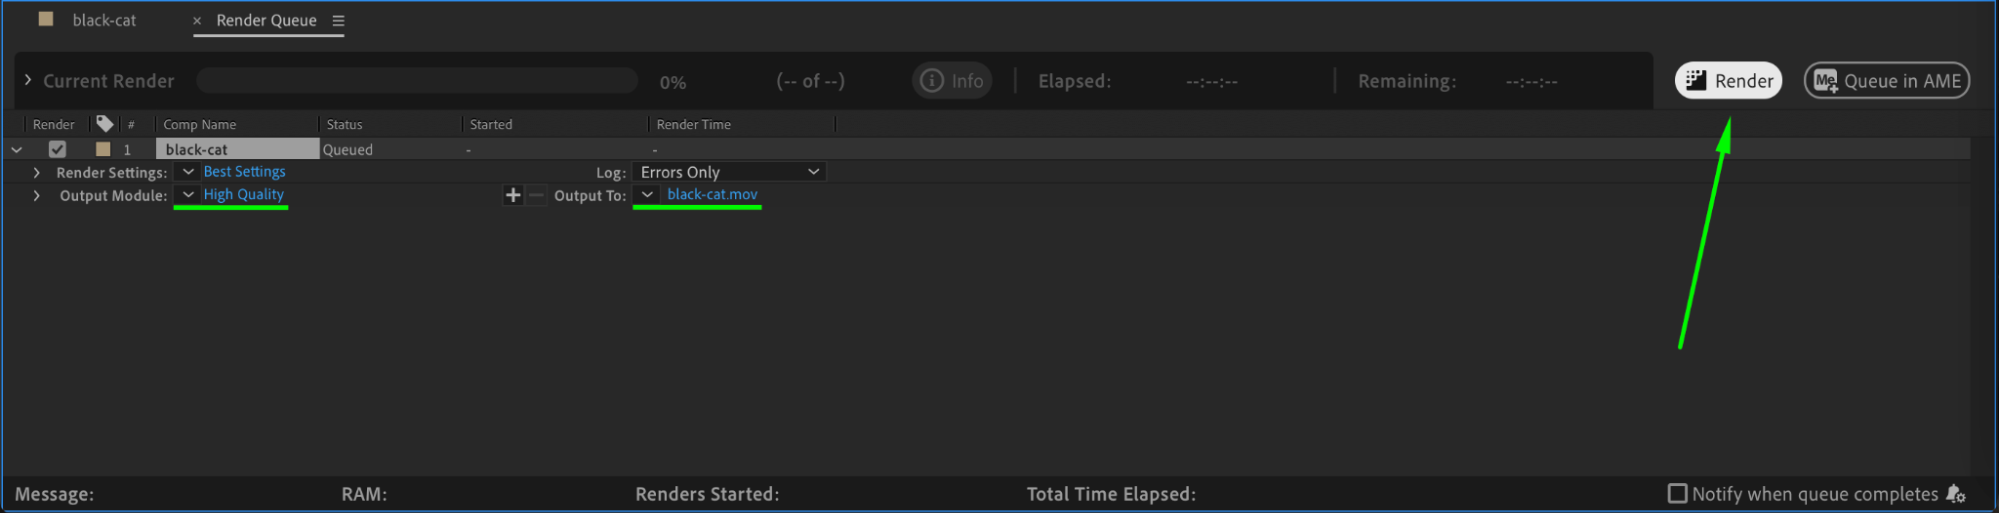
When satisfied with your animation, render your composition. Go to Composition > Add to Render Queue, configure your output settings, and click Render to export your project.
 Conclusion
Copying and pasting brush strokes in After Effects is a simple yet powerful technique to streamline your workflow. By following these steps, you can replicate and reuse brush effects efficiently, saving time while maintaining a cohesive look in your animations.


