A Step-by-Step Guide to Creating 3D Fog in After Effects
Introduction – Why Add 3D Fog to Your Scenes?
3D fog is a powerful visual element that enhances the atmosphere and depth of your scenes. Whether you’re working on a cinematic project, a spooky setting, or simply adding a touch of realism, fog can elevate your visuals. In this guide, you’ll learn how to create and animate 3D fog in After Effects step by step.
Get 10% off when you subscribe to our newsletter

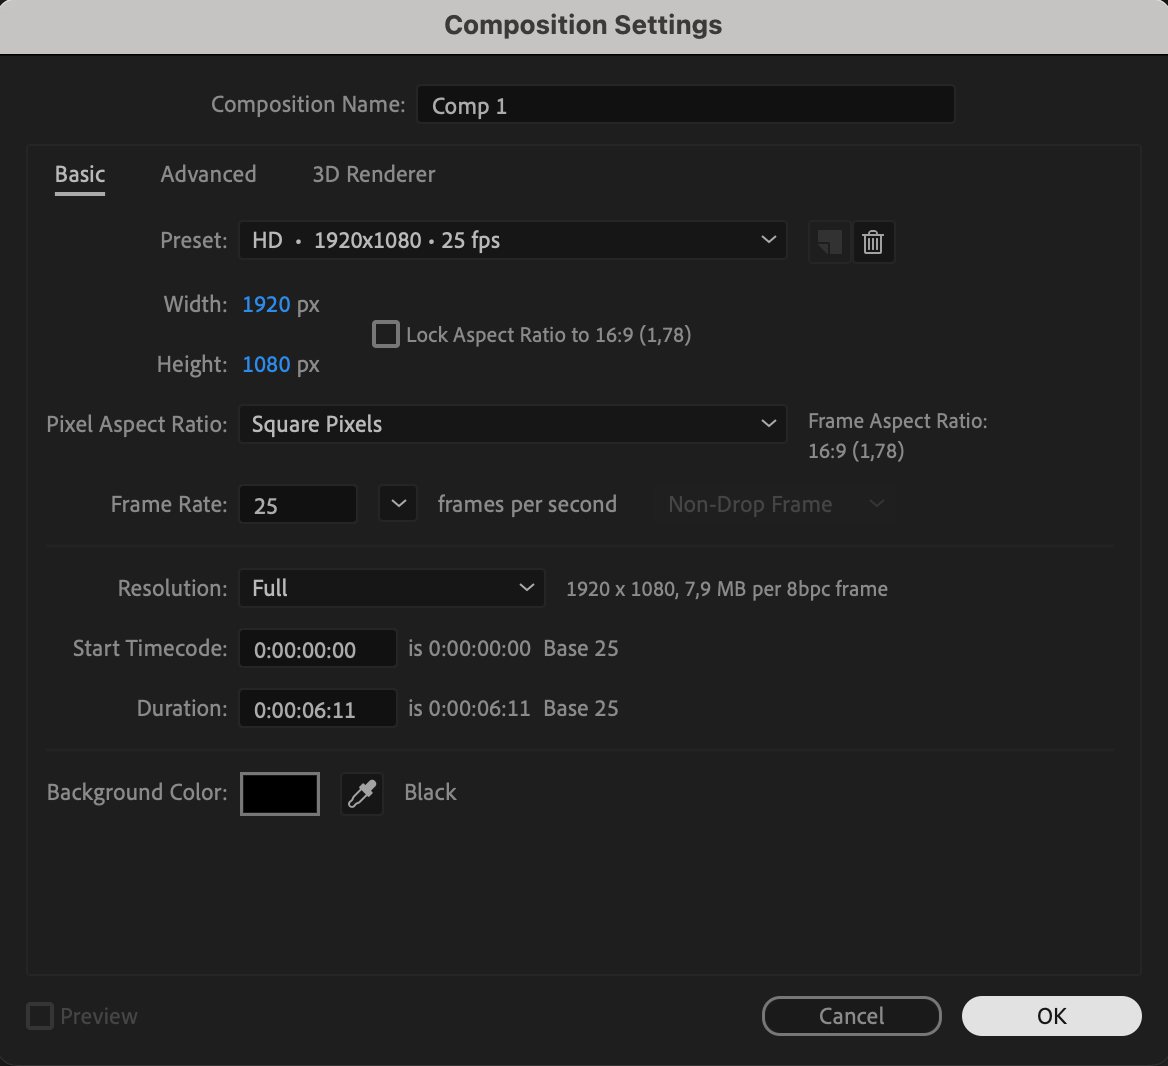
Step 1: Create a New Composition
Start by creating a new composition. Go to Composition > New Composition, set your resolution (e.g., 1920×1080), frame rate (e.g., 25fps), and duration based on your project requirements. This will serve as the base for your fog effect.
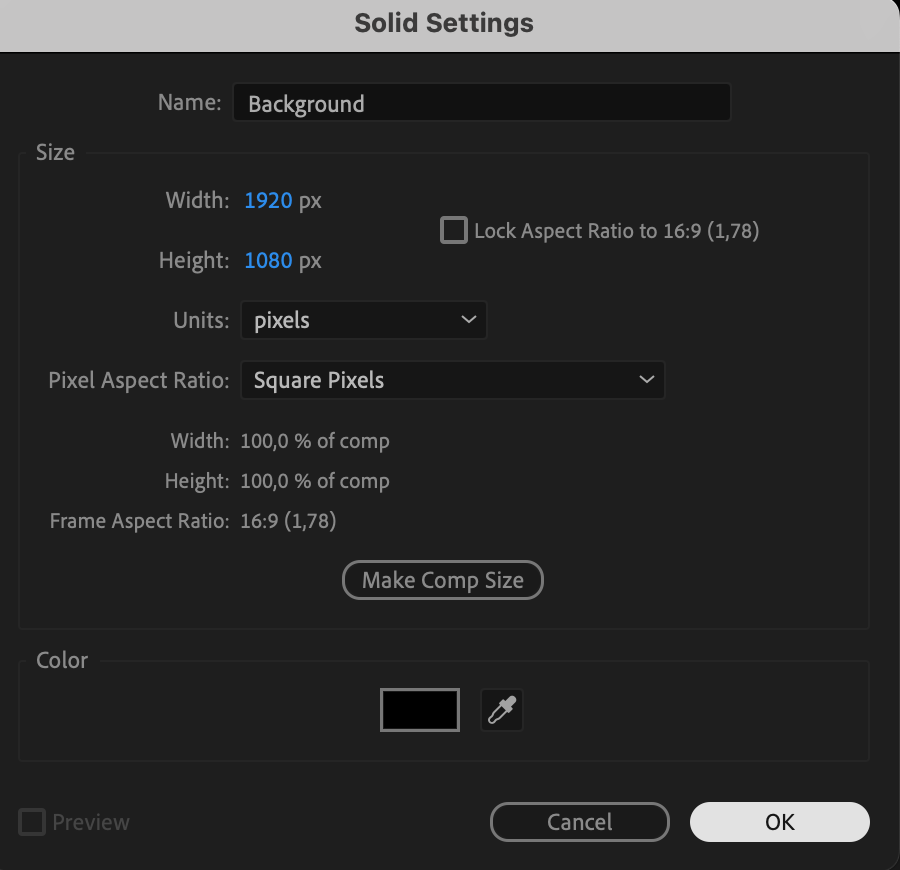
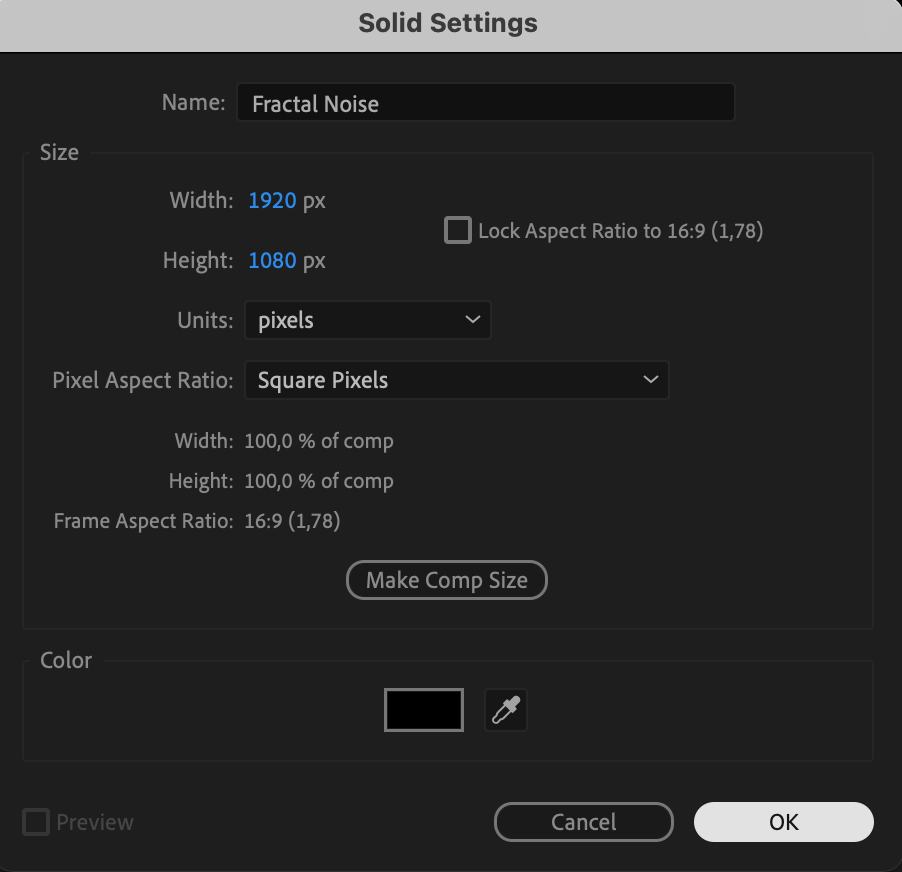
 Step 2: Create Background and Fractal Noise Layers
Go to Layer > New > Solid and create two solid layers:
Background Layer – Name this layer “Background” and set its color to black or any base color for your scene.
Fractal Noise Layer – Name this layer “Fractal Noise” to build the fog effect.
 Step 3: Apply the Fractal Noise Effect
Get 10% off when you subscribe to our newsletter
Select the “Fractal Noise” layer. In the Effects & Presets panel, search for Fractal Noise and drag it onto the layer. This effect will create the texture for your fog.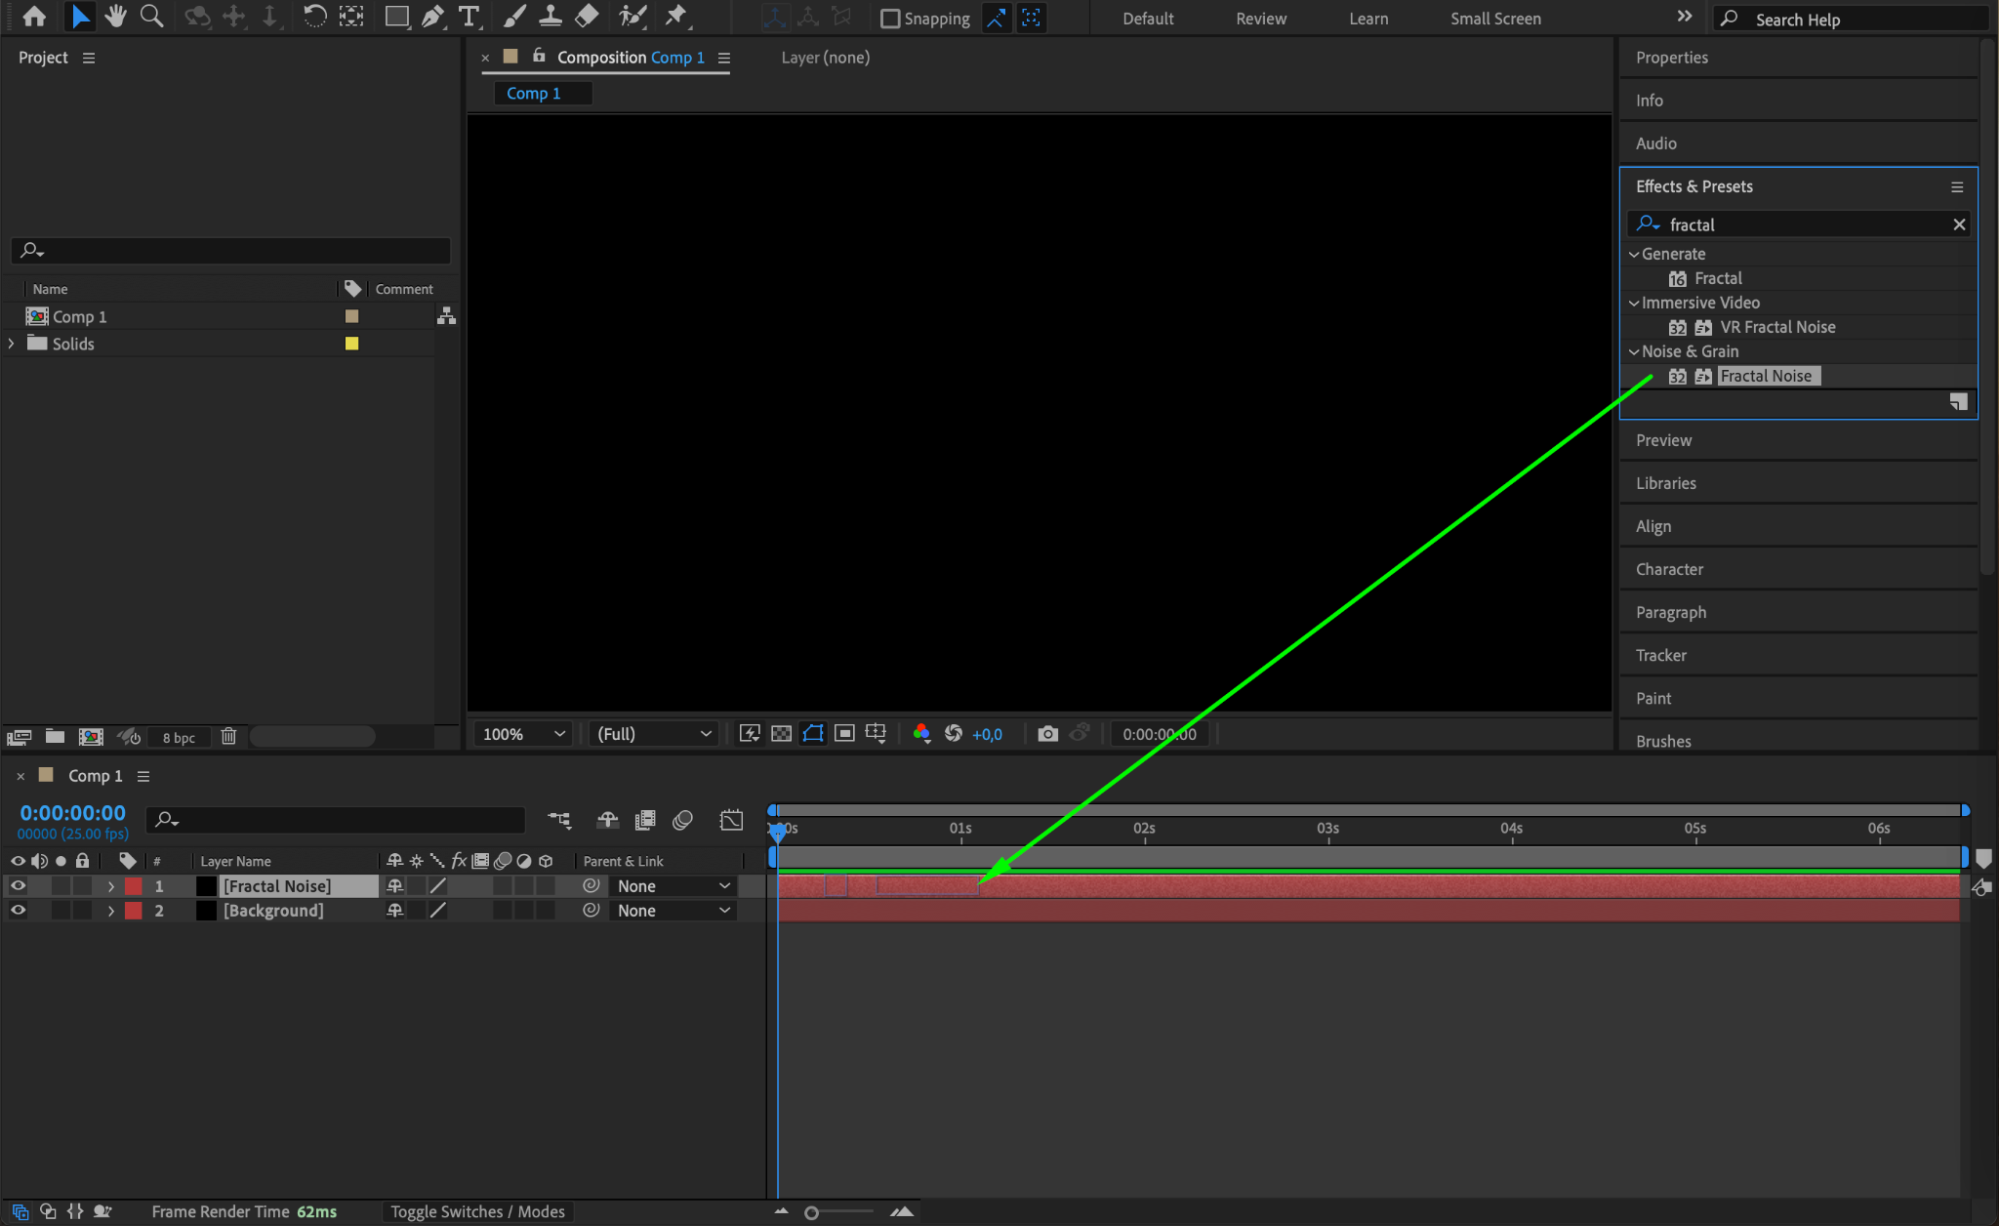 Step 4: Adjust Fractal Noise Settings
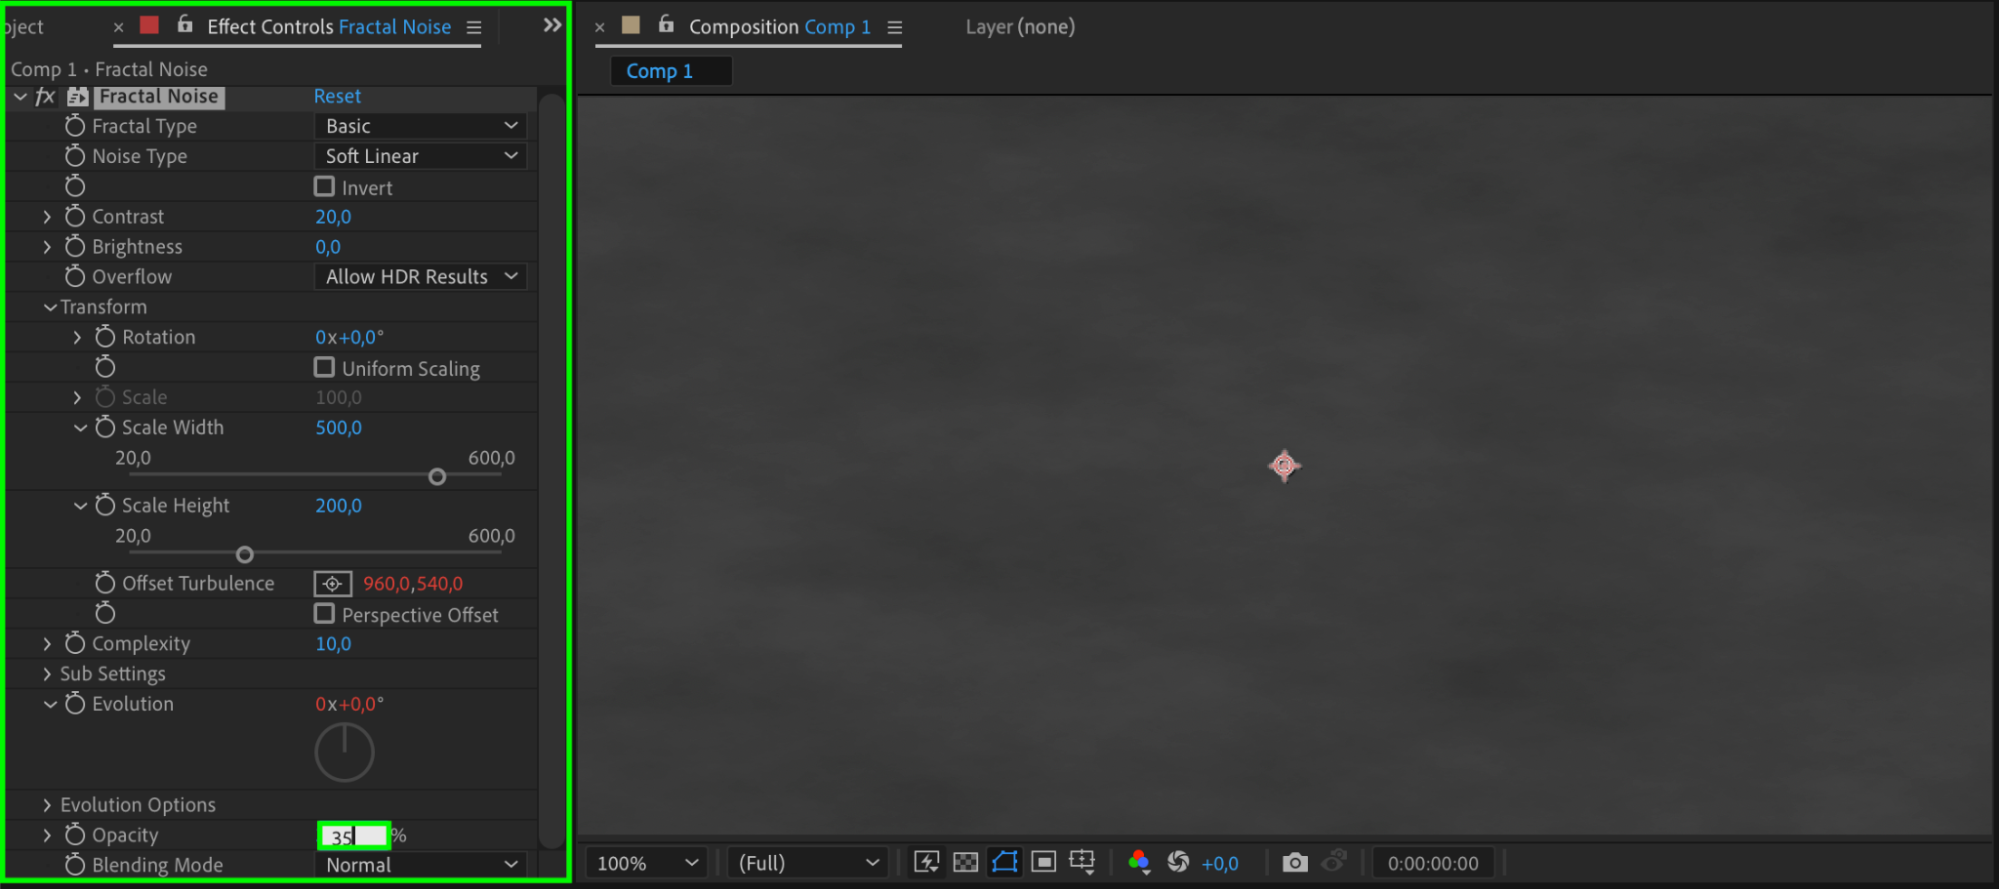
In the Effect Controls panel, adjust the following parameters:
Get 10% off when you subscribe to our newsletter
Contrast: 20 (creates softer gradients).
Scale Width: 500 (stretches the noise horizontally).
Scale Height: 200 (compresses the noise vertically).
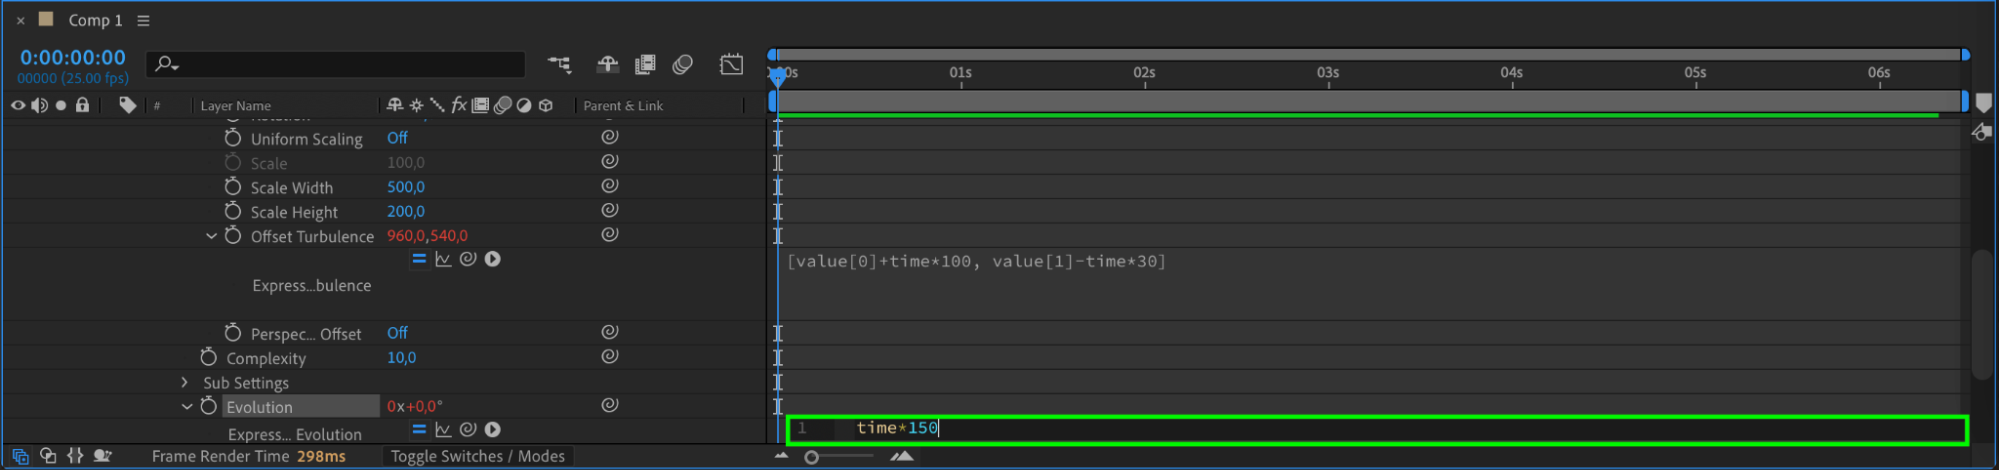
Complexity: 10 (adds more detail to the fog).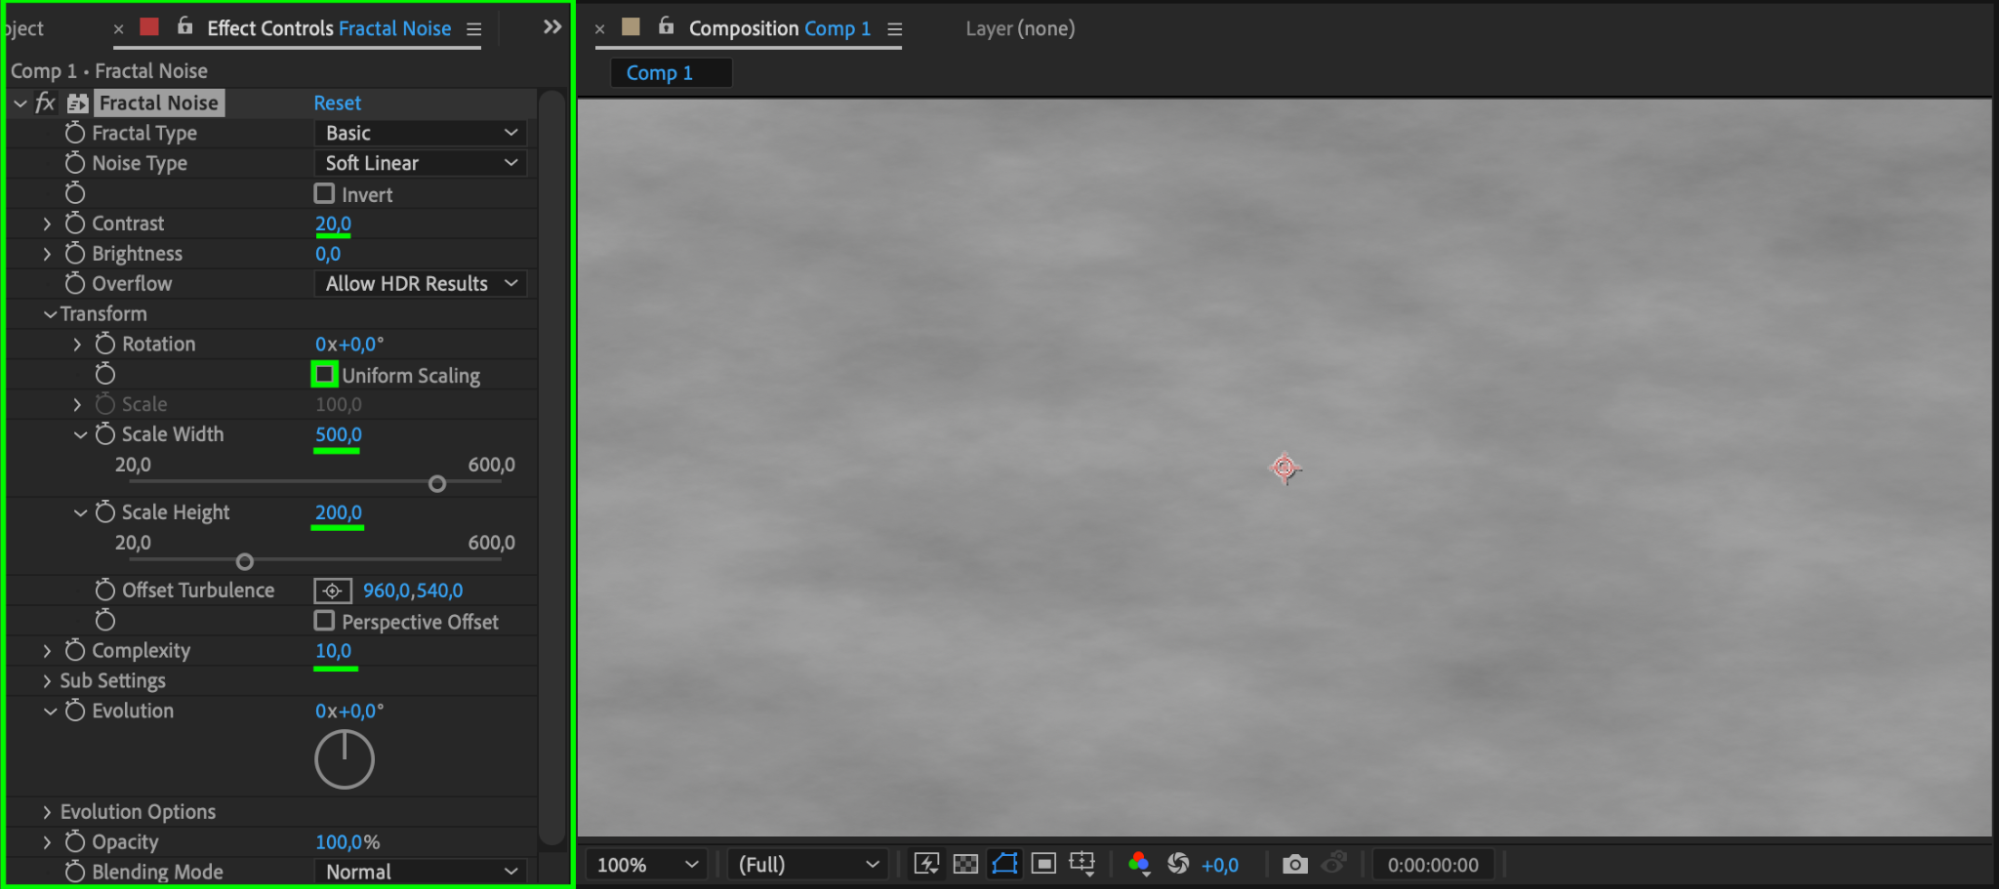 Step 5: Add Expressions and Set Opacity
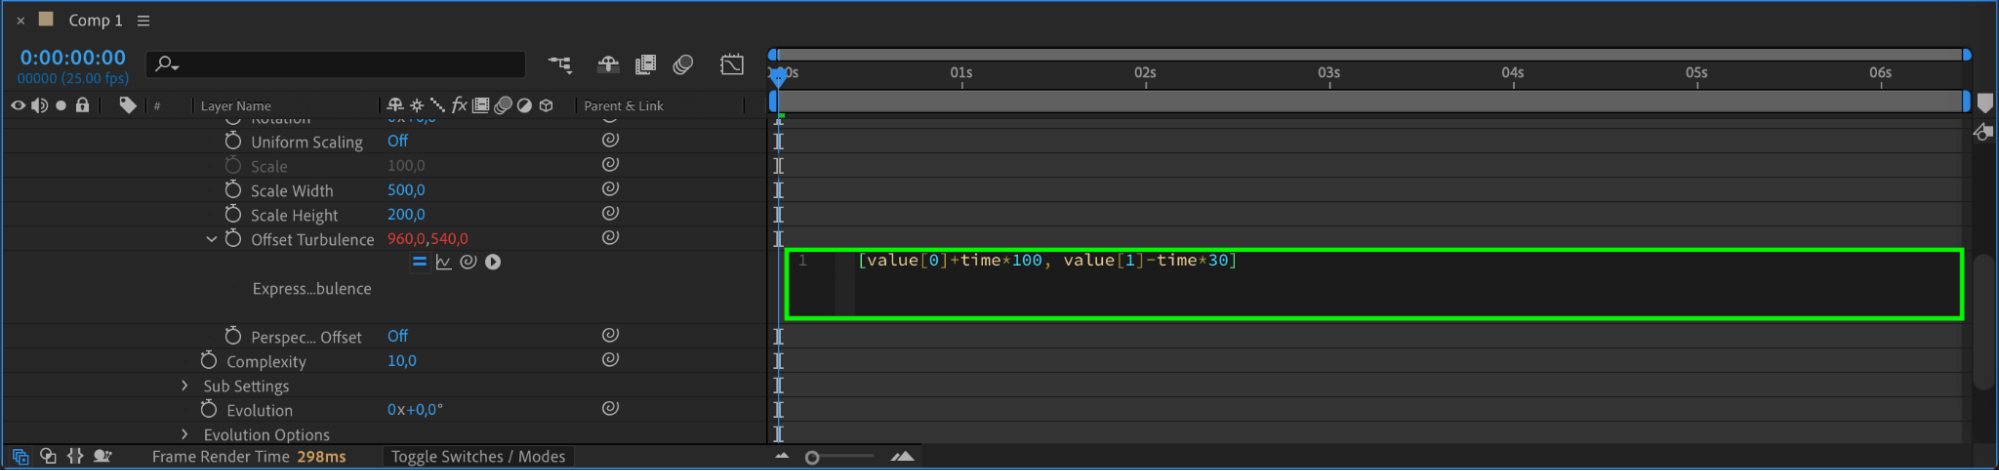
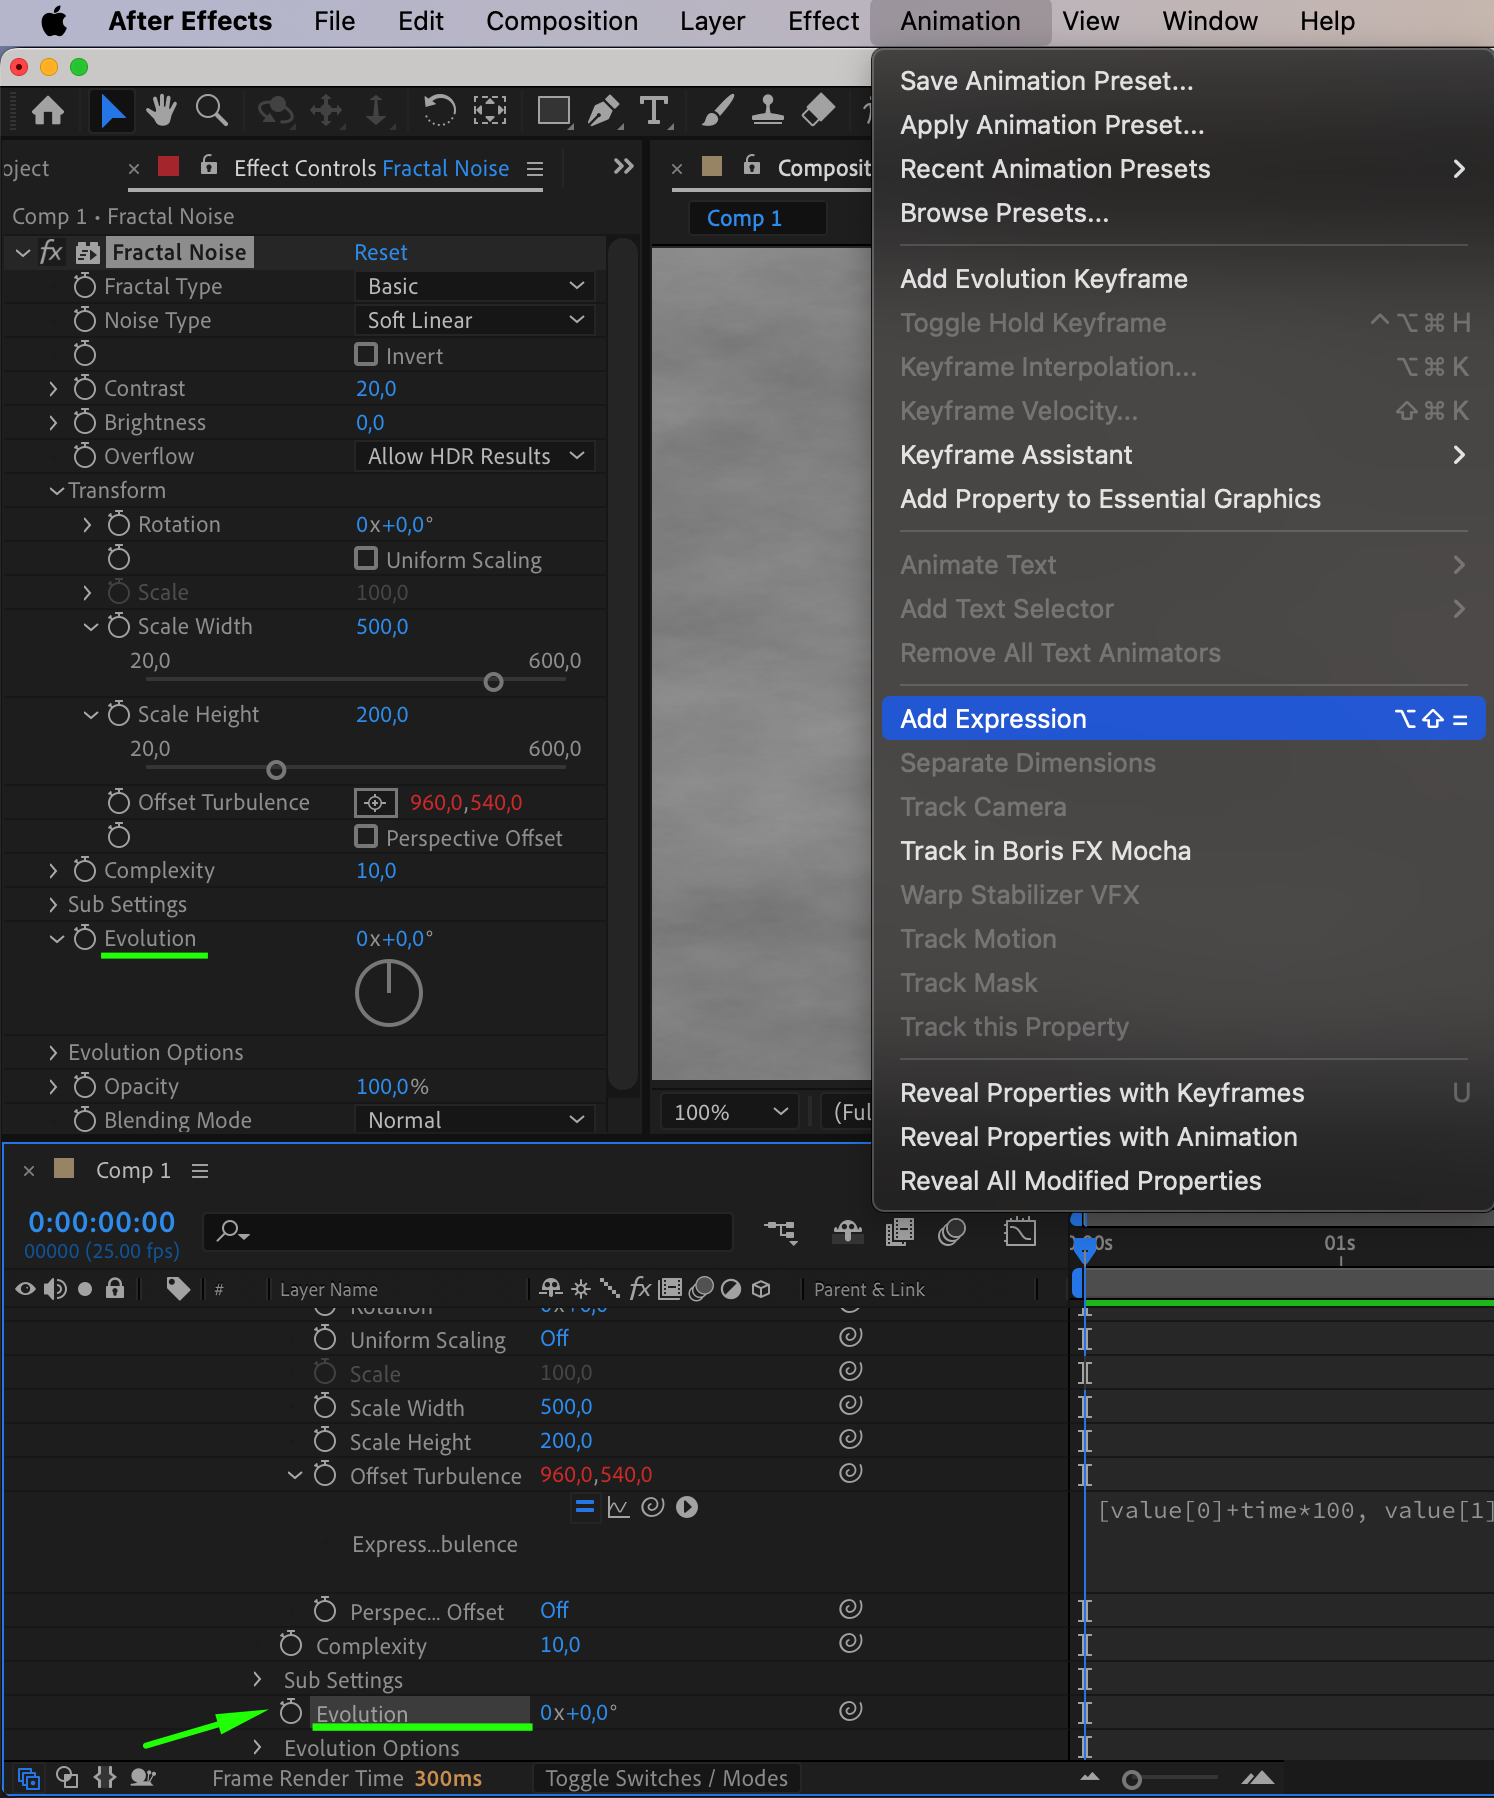
To animate the fog dynamically, add expressions to the following properties:
Offset Turbulence: Alt+Click the stopwatch and type: [value[0]+time*100, value[1]-time*30]
Evolution: Alt+Click the stopwatch and type: time*150
Finally, set the Opacity of the “Fractal Noise” layer to 35% for a subtle effect.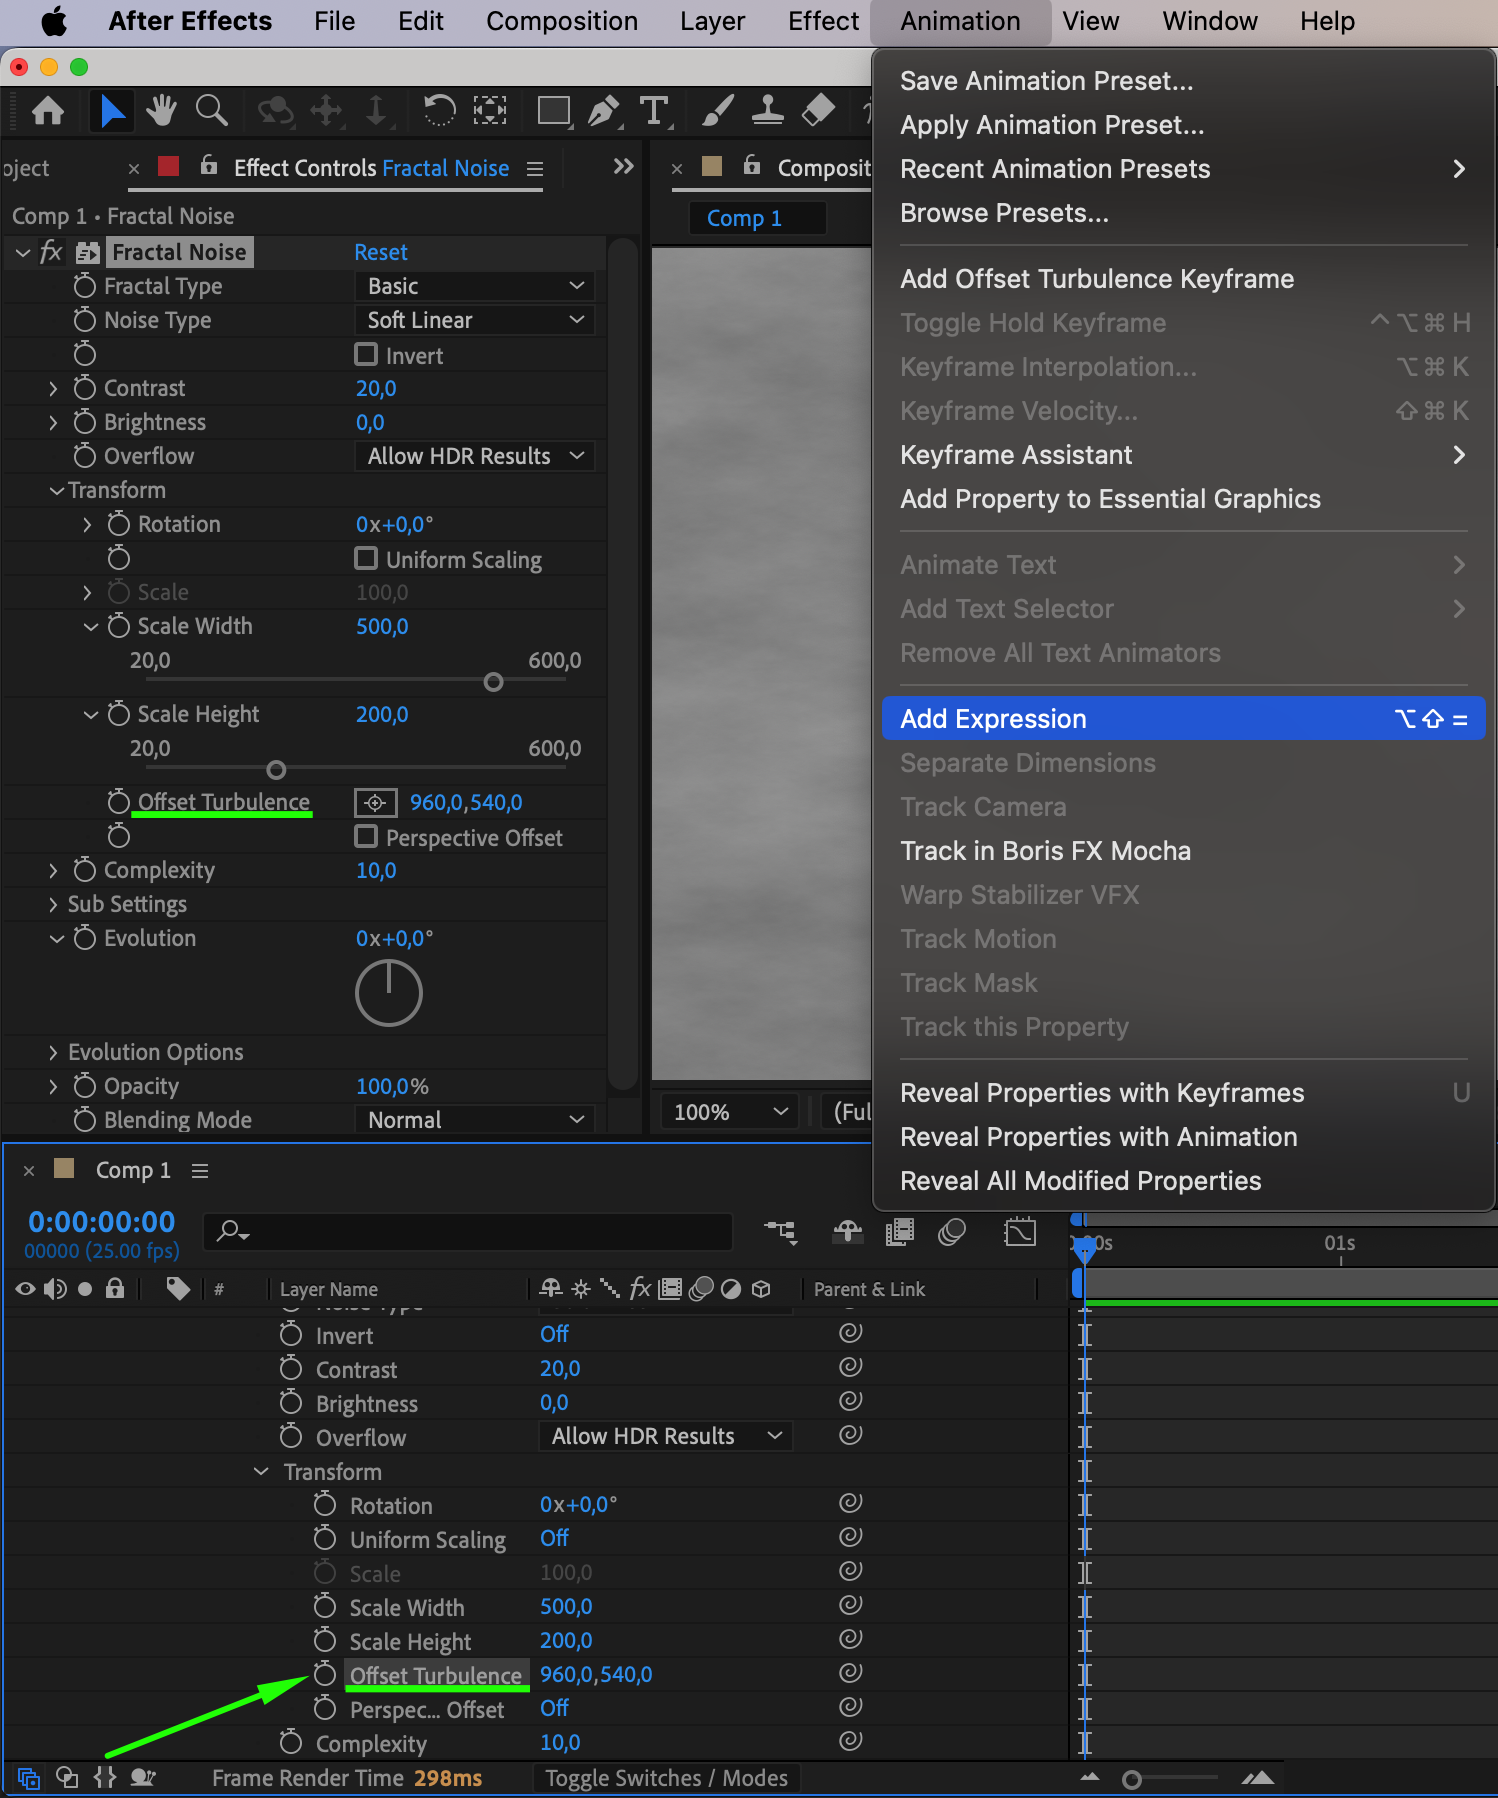
 Step 6: Create a Mask for Fog Placement
Using the Pen Tool(G), draw a mask on the “Fractal Noise” layer to limit the fog to specific areas in your scene. Adjust the Mask Feather to 500 pixels to blend the fog seamlessly with the environment.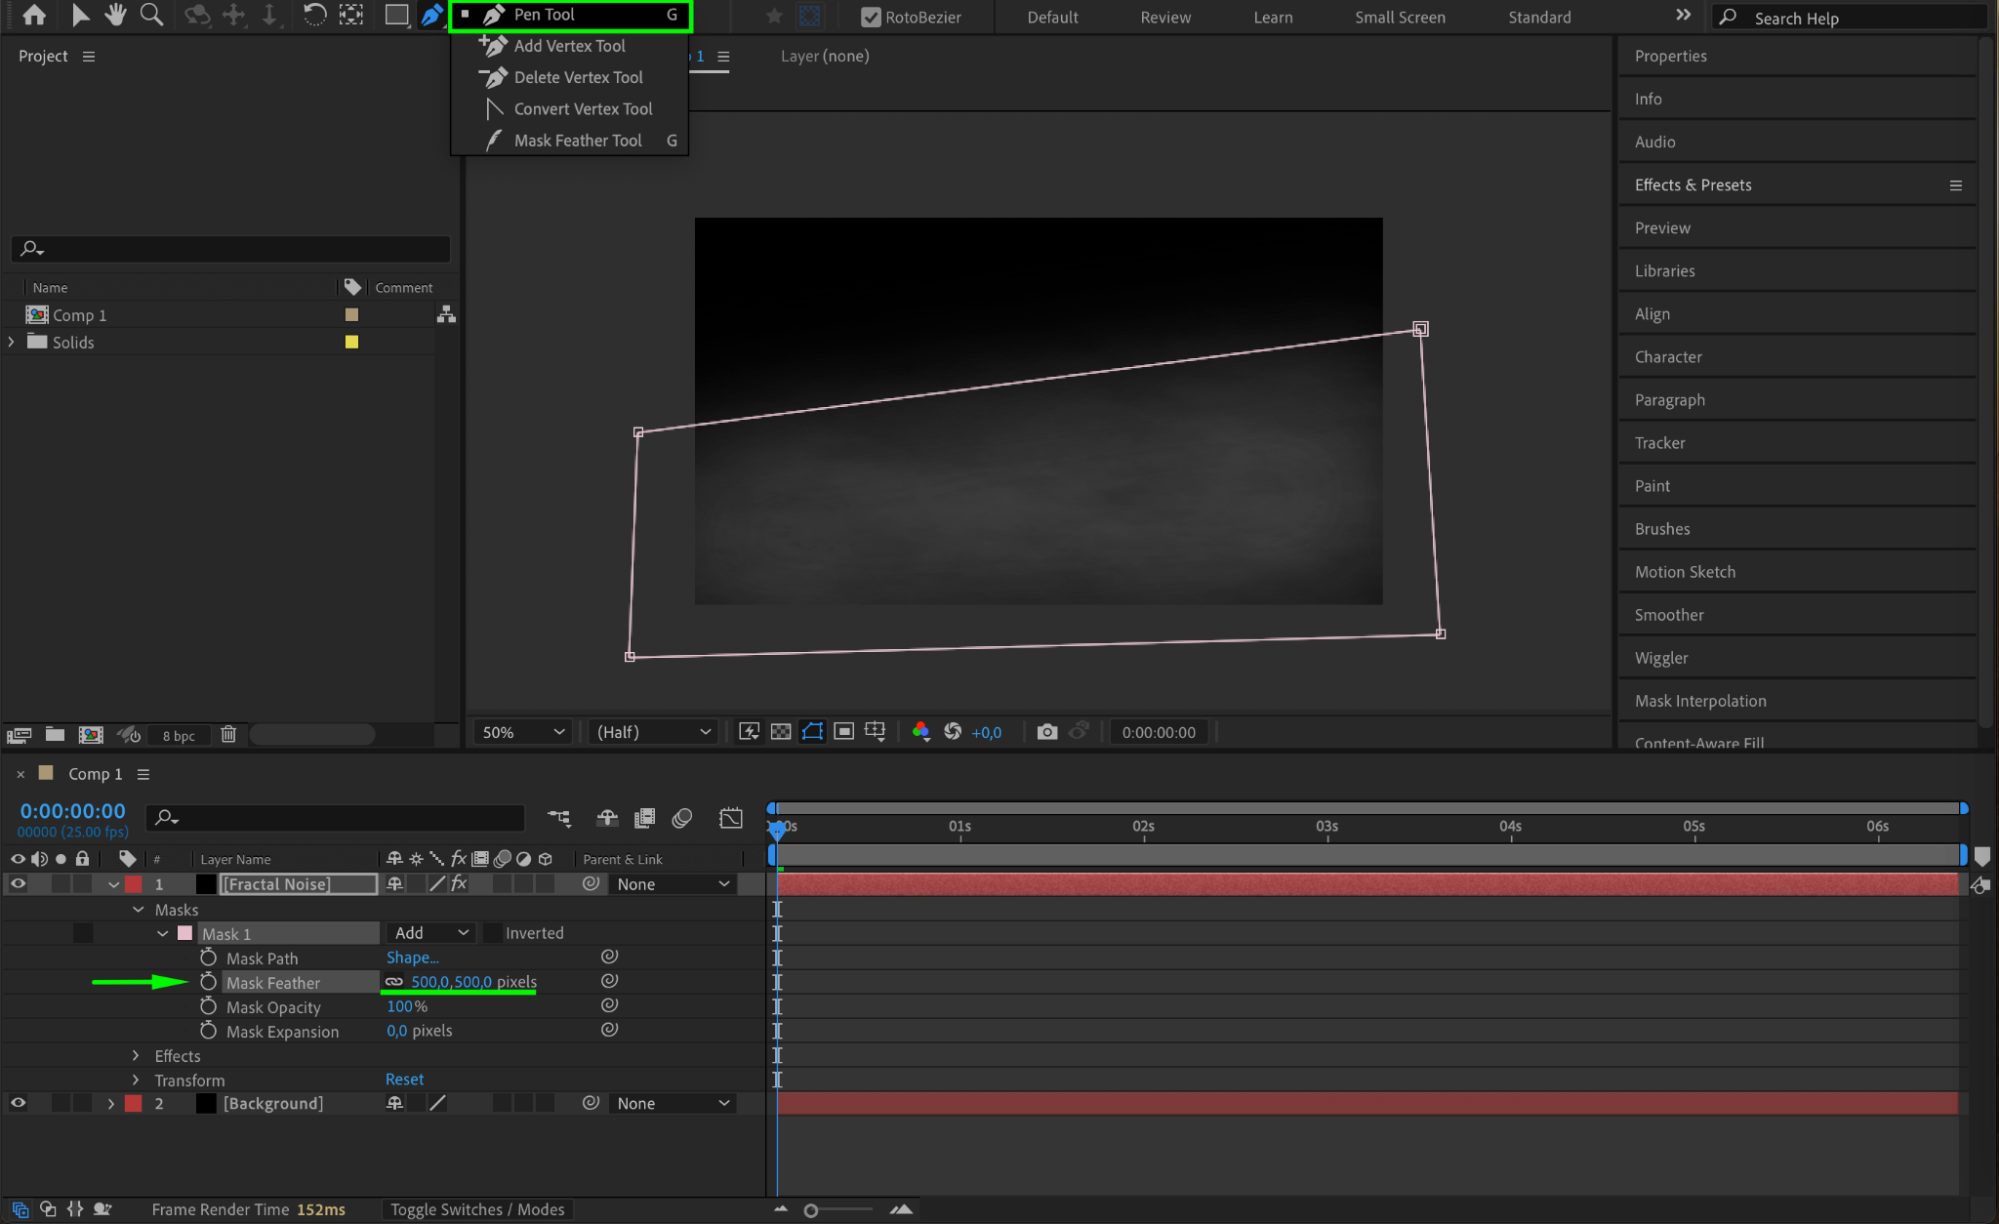 Step 7: Import Your Video and Blend the Fog
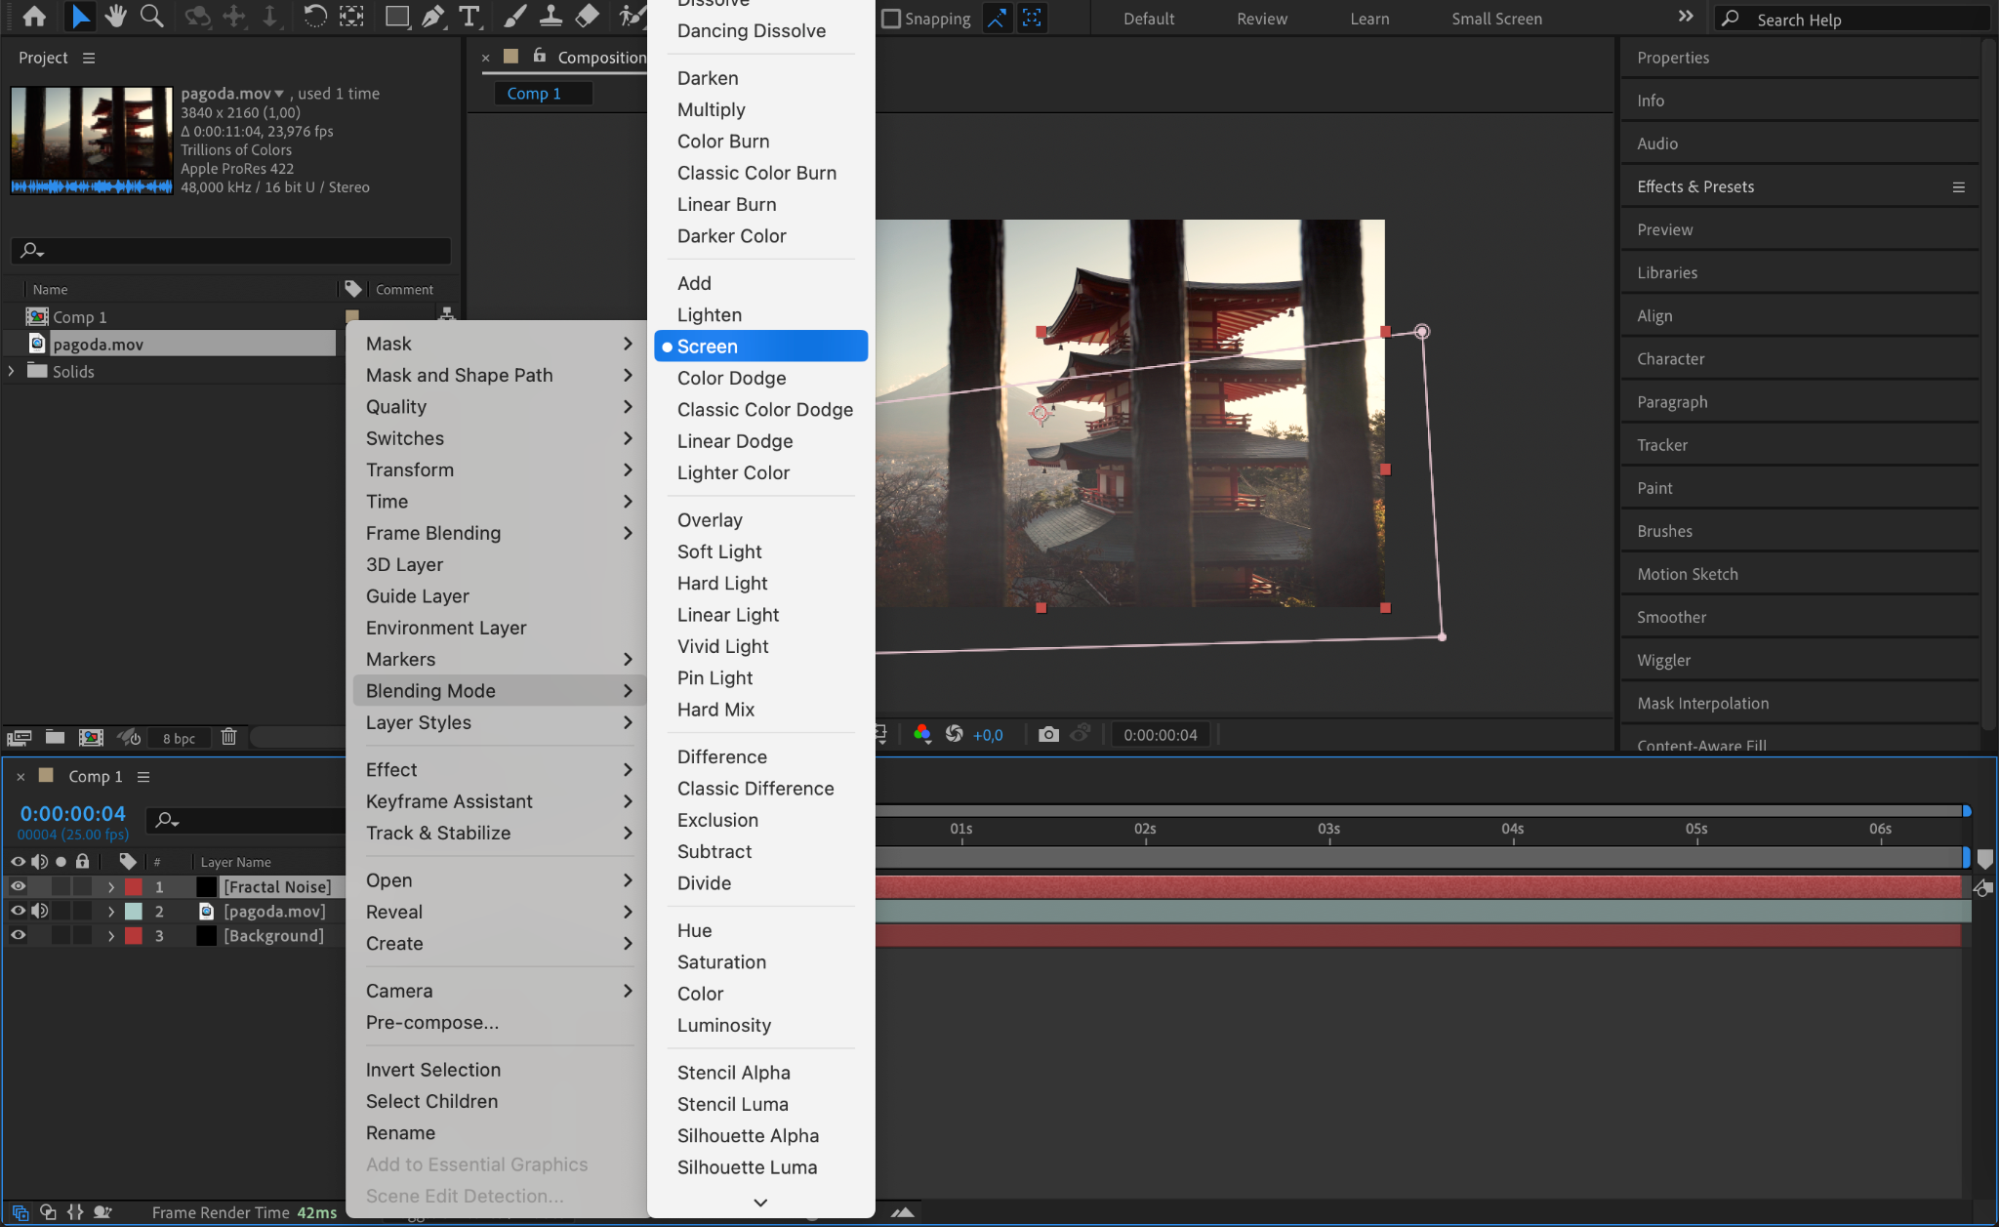
Import the video file you want to enhance with fog and place it below the “Fractal Noise” layer in the timeline. Set the Blending Mode of the “Fractal Noise” layer to Screen to integrate the fog naturally into the footage.
 Step 8: Enable 3D Layer for the Fog
Get 10% off when you subscribe to our newsletter
Enable the 3D Layer option for the “Fractal Noise” layer in the timeline. This allows the fog to interact with the 3D space in your scene.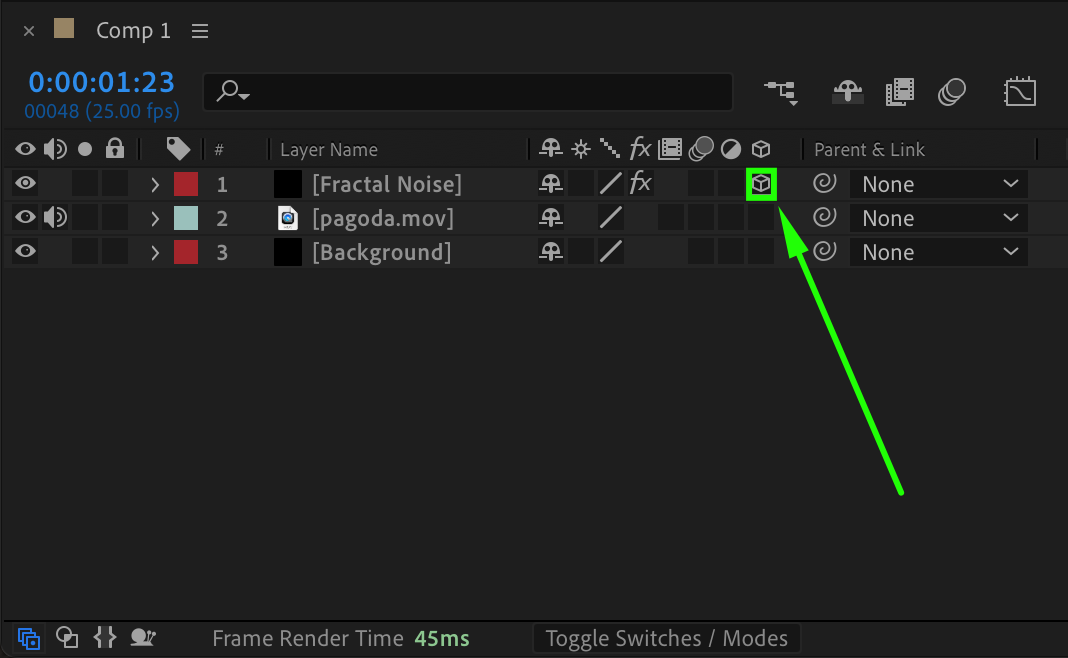 Step 9: Add a Camera for Dynamic Movement
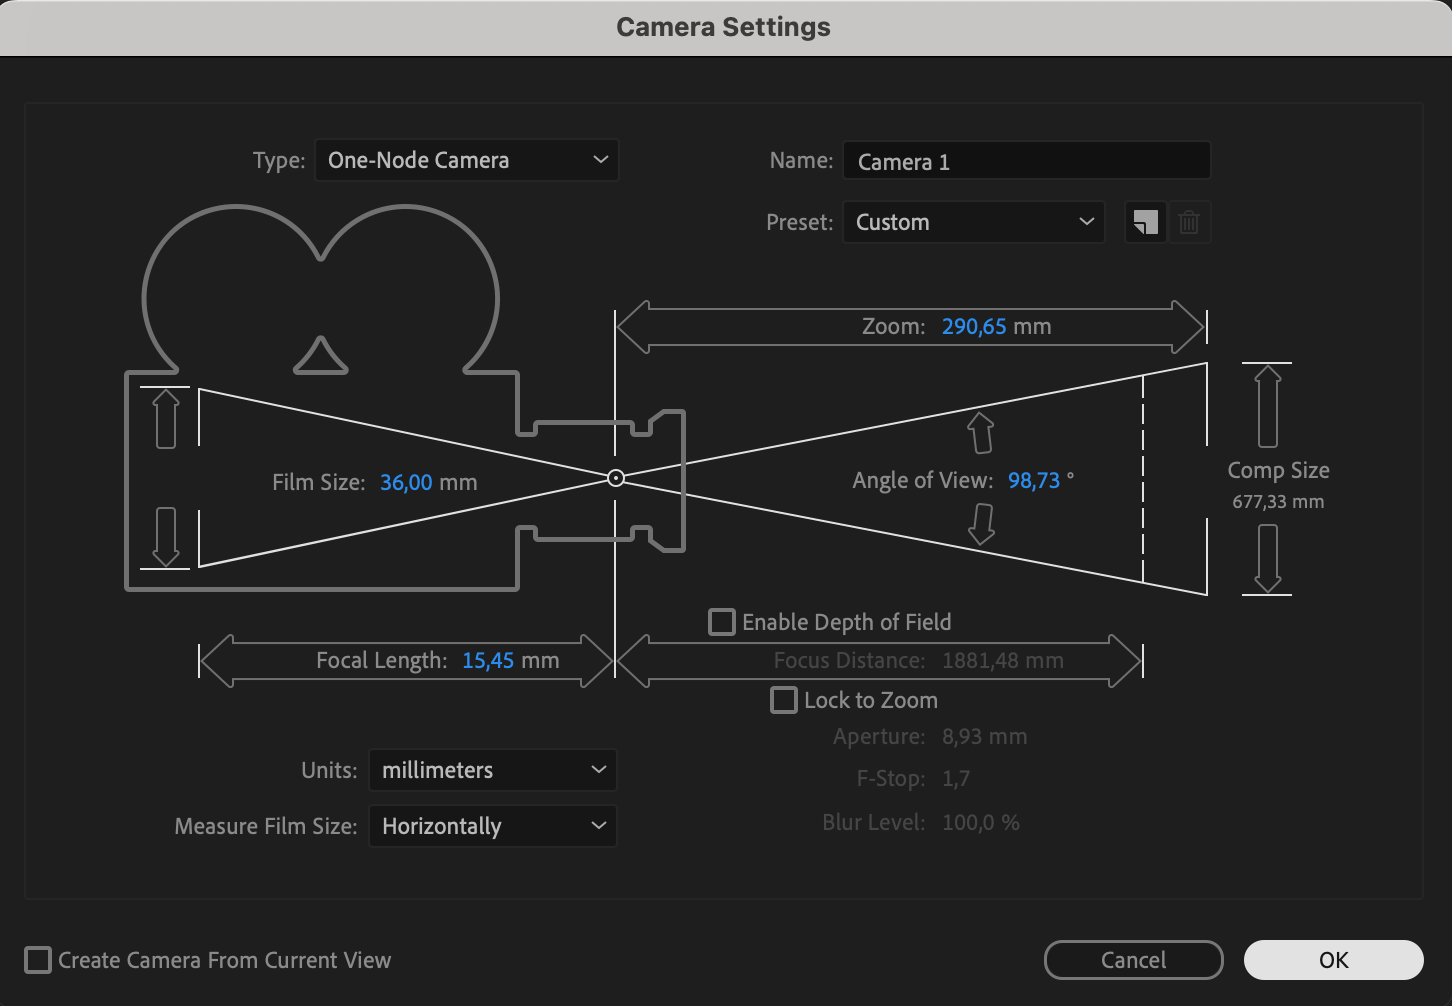
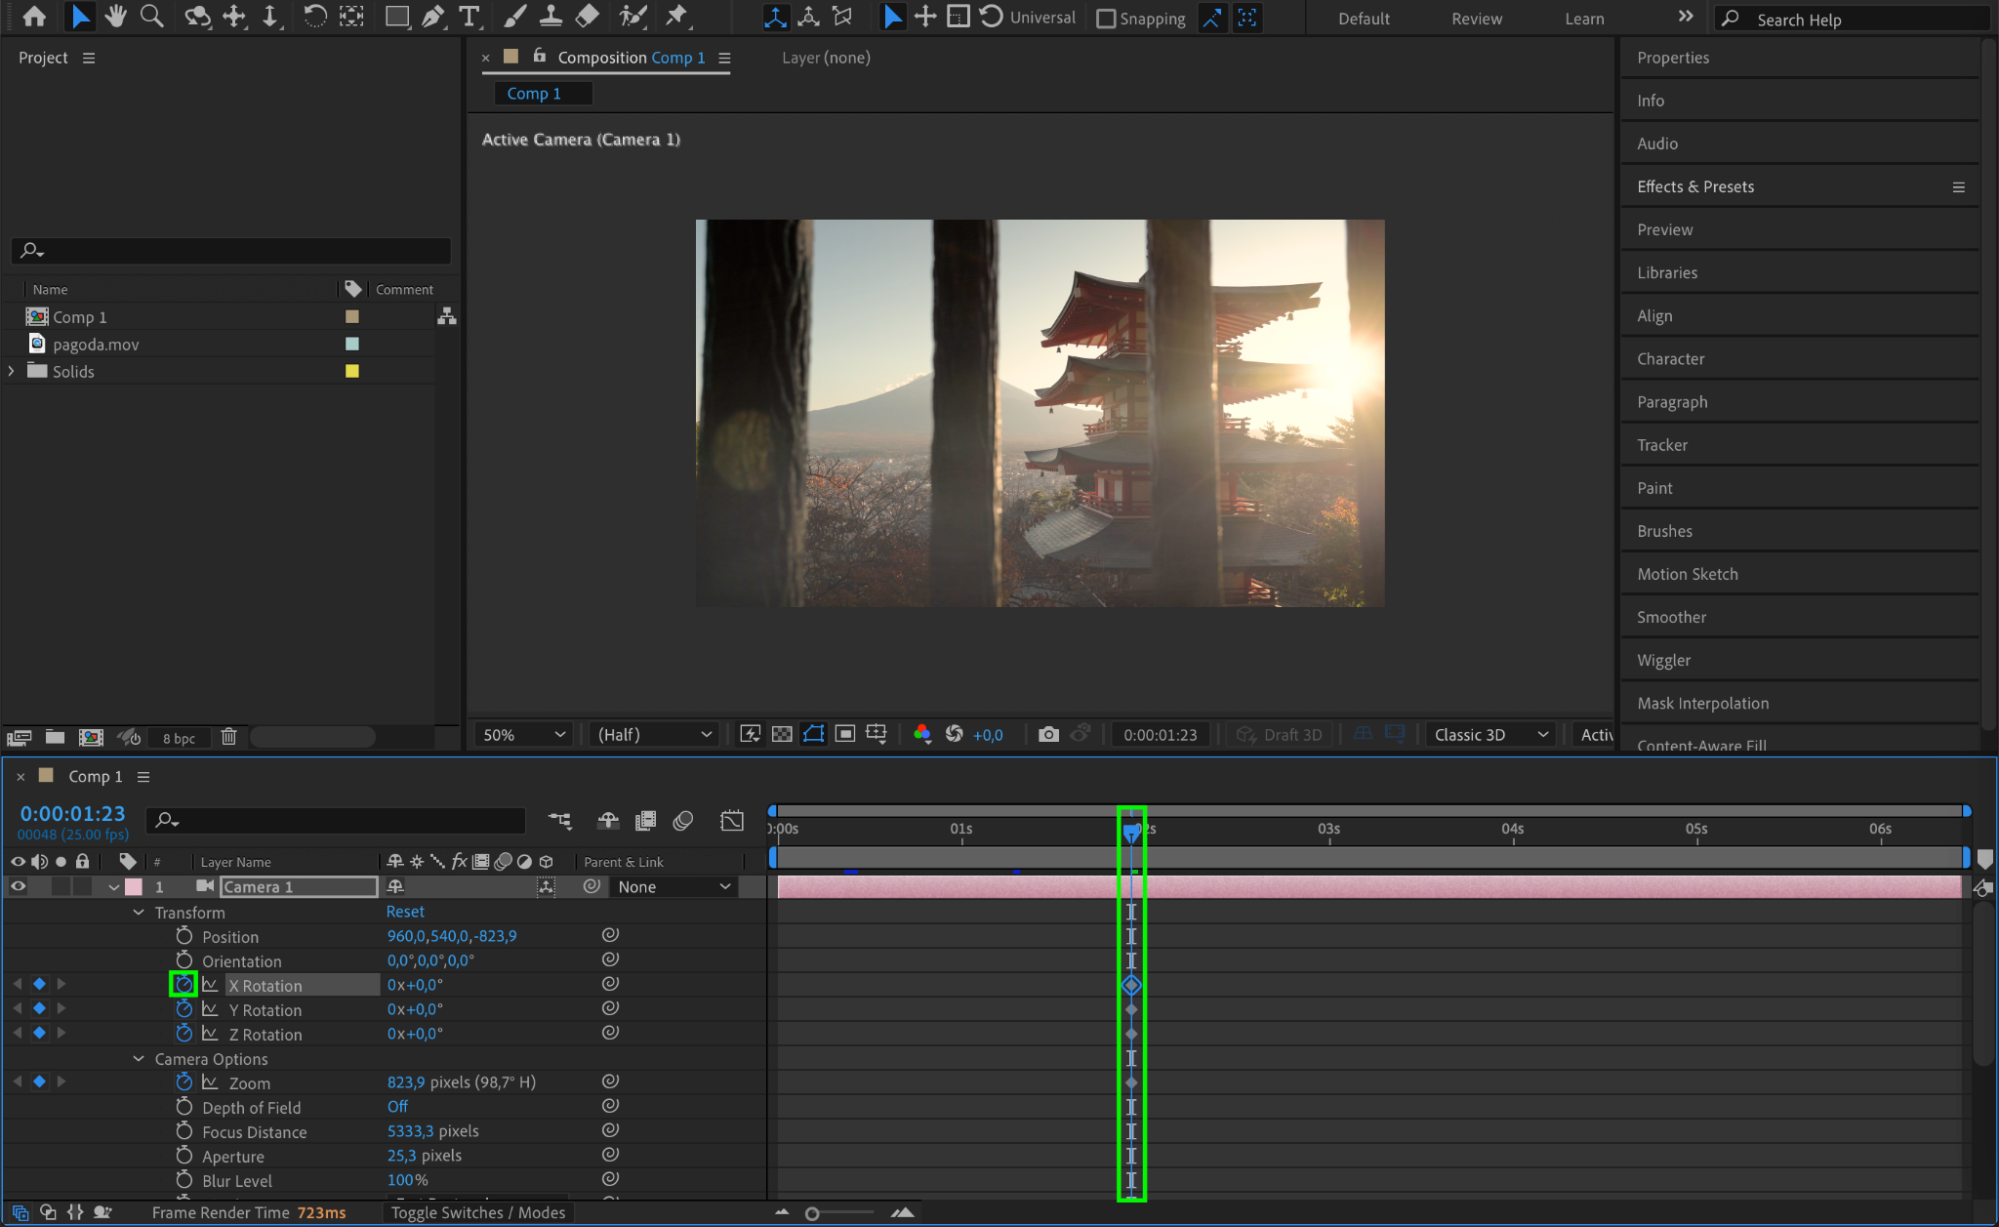
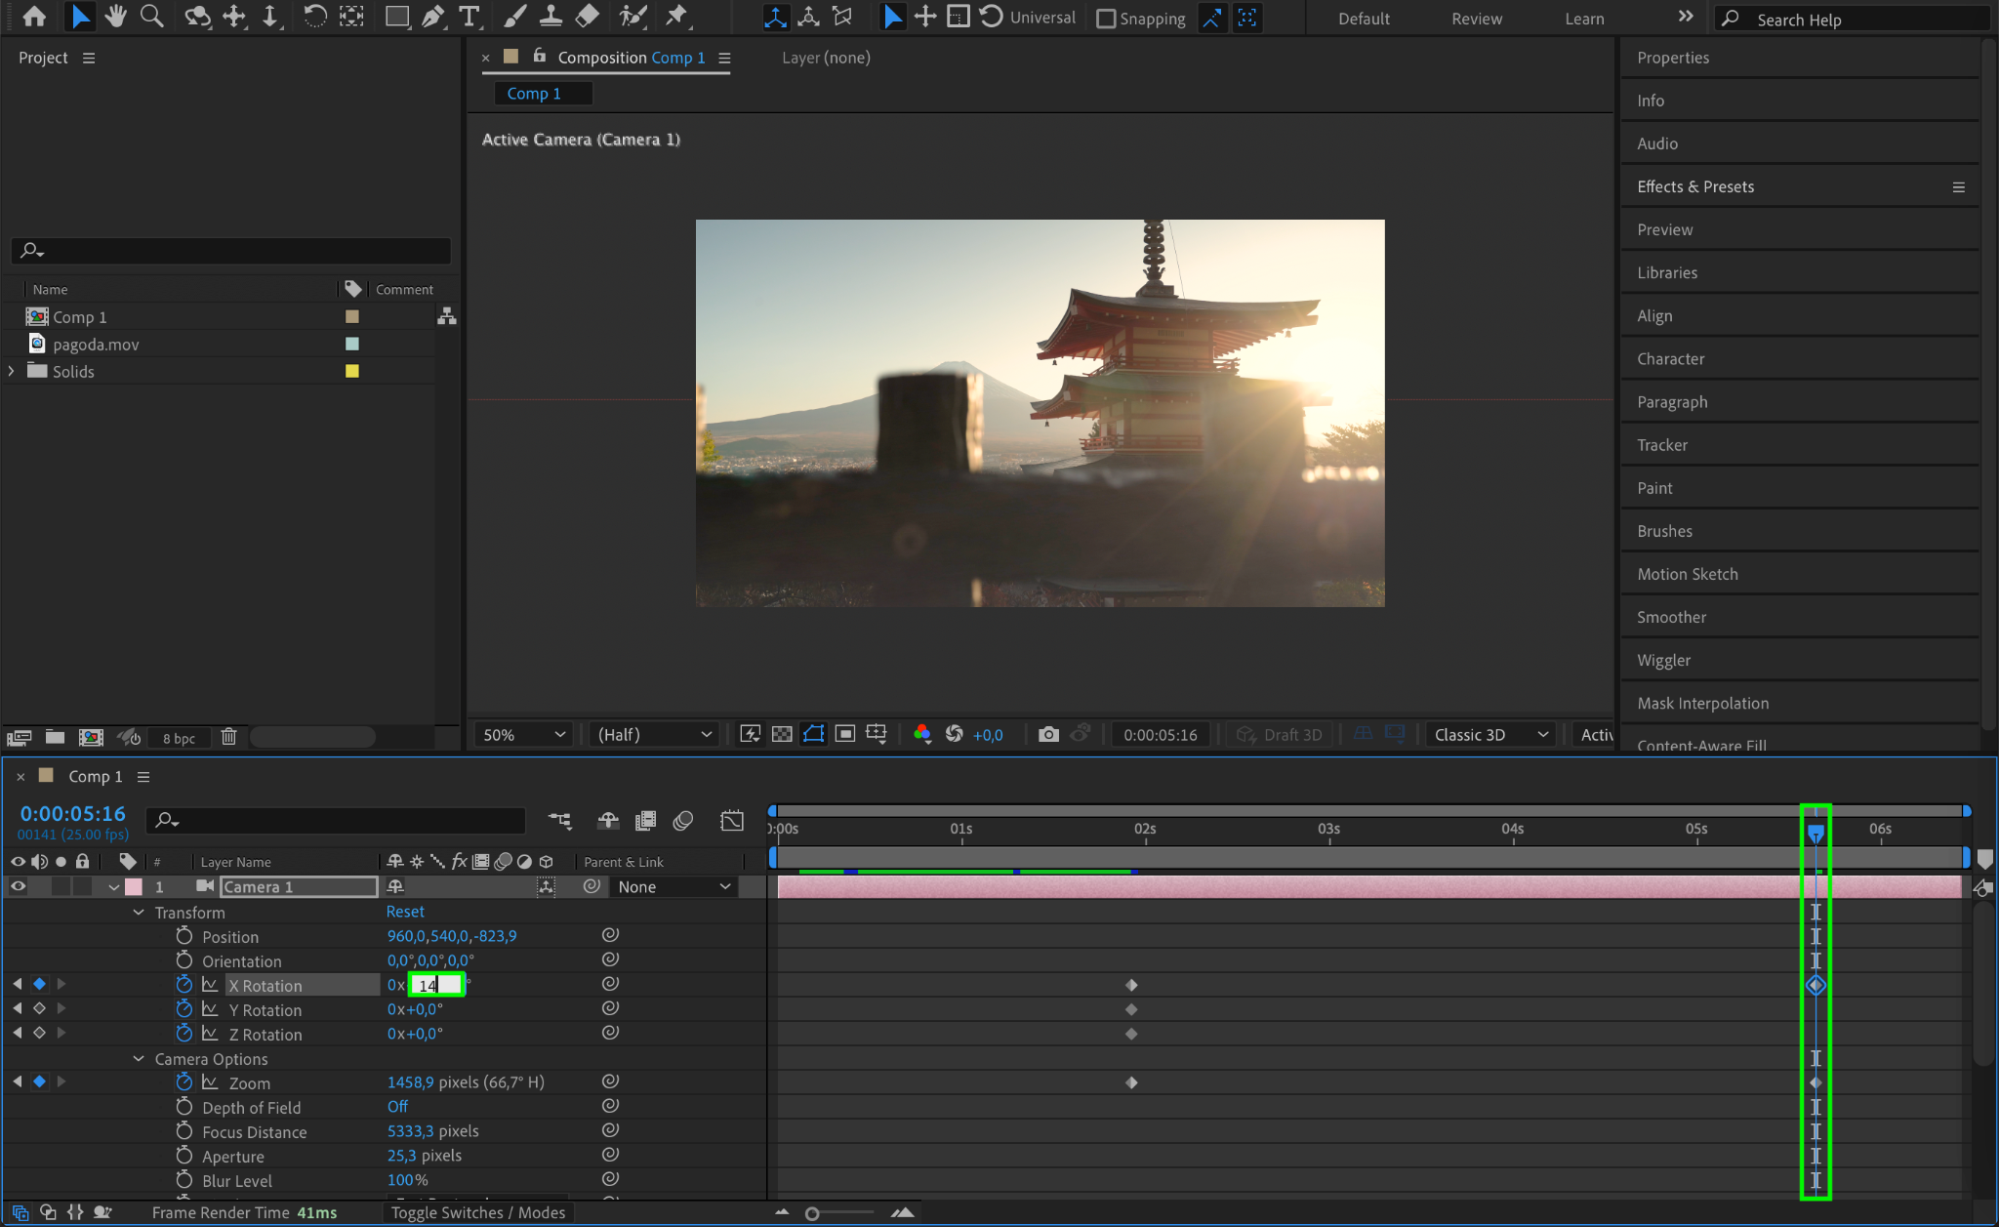
Go to Layer > New > Camera to add a camera. Adjust the camera settings (e.g., focal length) to fit your scene. Expand the camera layer’s properties and animate Zoom and Rotation with keyframes to create smooth camera movements that align with the fog and video.
Get 10% off when you subscribe to our newsletter

 Step 10: Preview and Fine-Tune
Preview your animation by pressing the Spacebar. Make adjustments to the mask, opacity, camera movement, or fractal noise settings for a polished effect.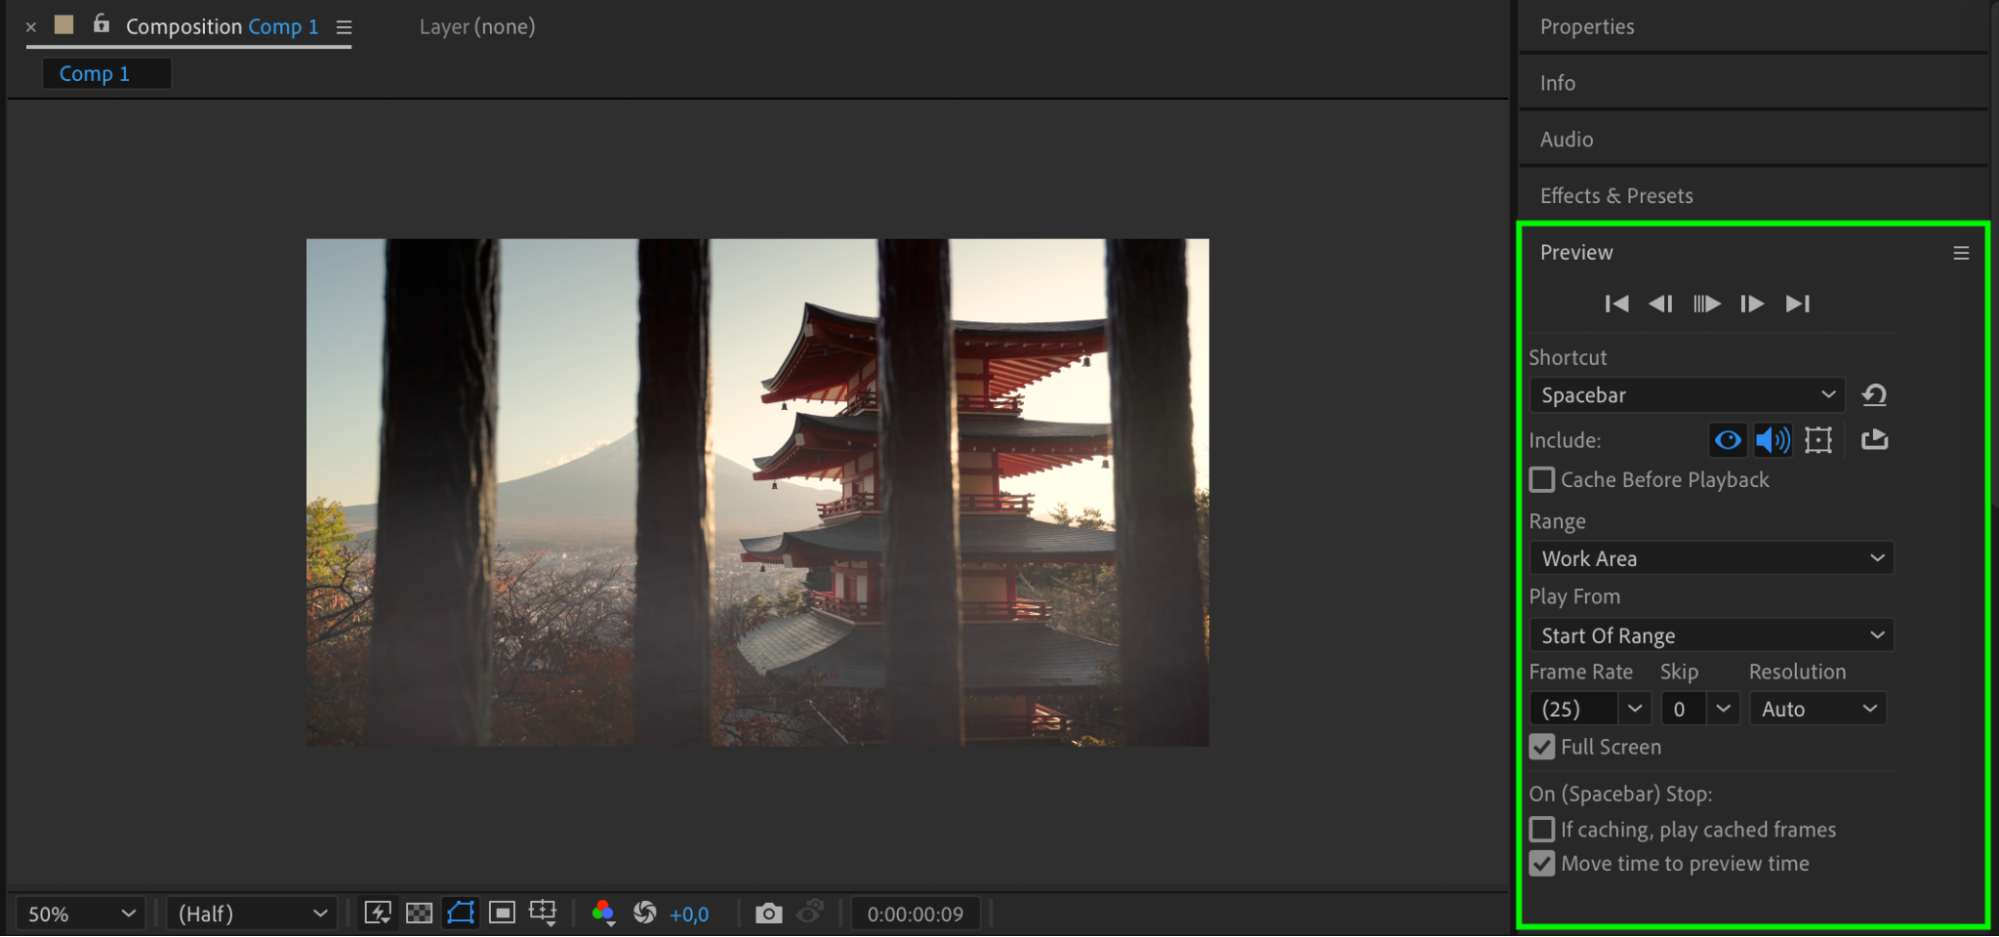 Step 11: Render Your Scene
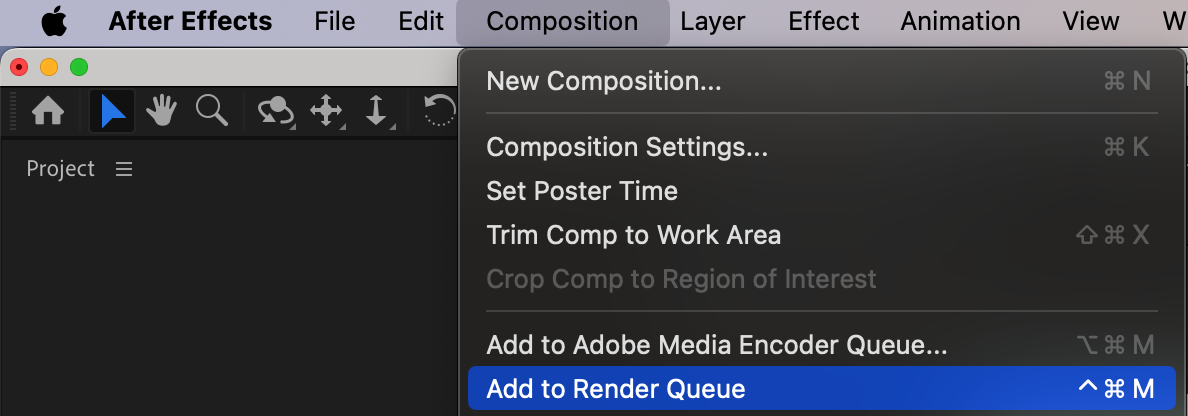
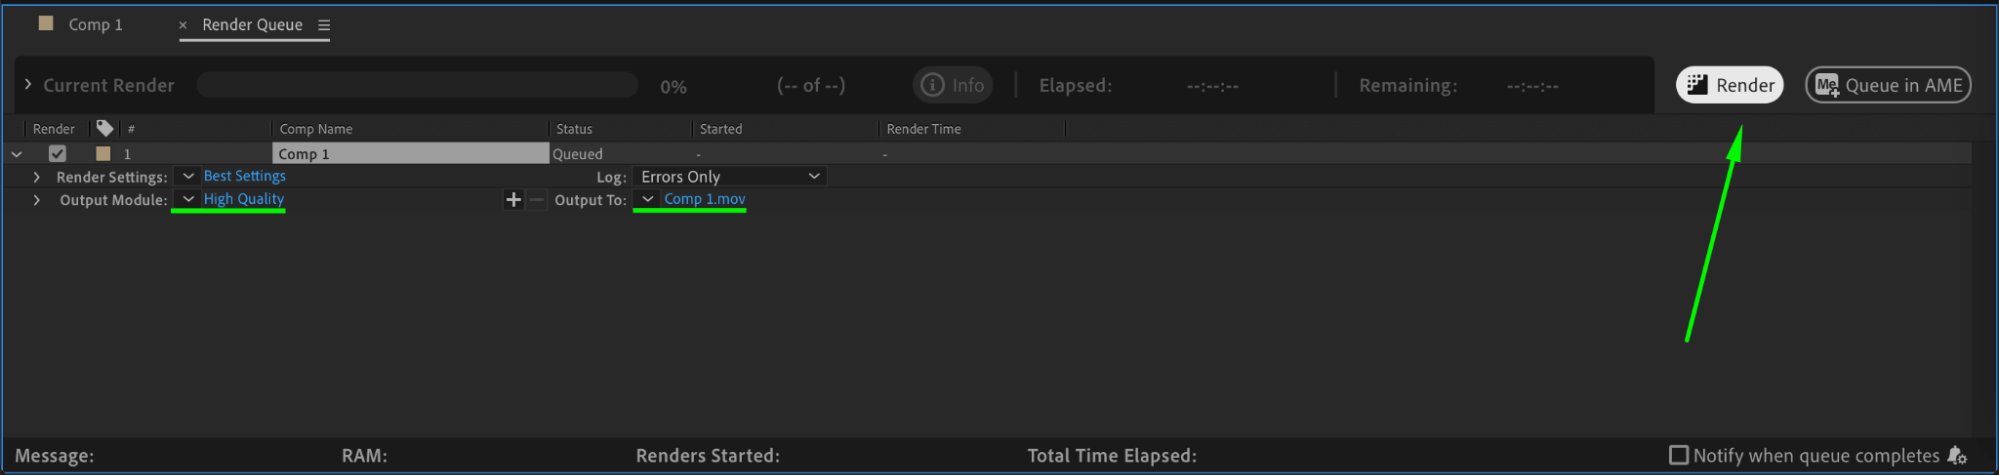
Go to Composition > Add to Render Queue. Choose your output settings and click Render to finalize your 3D fog animation.
Get 10% off when you subscribe to our newsletter
 Conclusion
Creating 3D fog in After Effects is a straightforward yet impactful way to enhance your videos. By following these steps, you can design a realistic and dynamic fog effect that blends seamlessly with your scenes, adding depth and atmosphere to your project. Experiment with settings to match the mood and tone of your visuals.
Our Bestsellers


