Creating 8D Audio in After Effects
Introduction to 8D Audio Effect
8D audio is a sound effect that creates the illusion of audio moving around the listener’s head, typically achieved by panning between left and right channels. While After Effects is mainly a visual tool, it allows basic audio adjustments using effects like Stereo Mixer and Echo. By following these steps, you can simulate an 8D effect for your project.
Get 10% off when you subscribe to our newsletter

Step 1: Create a New Composition
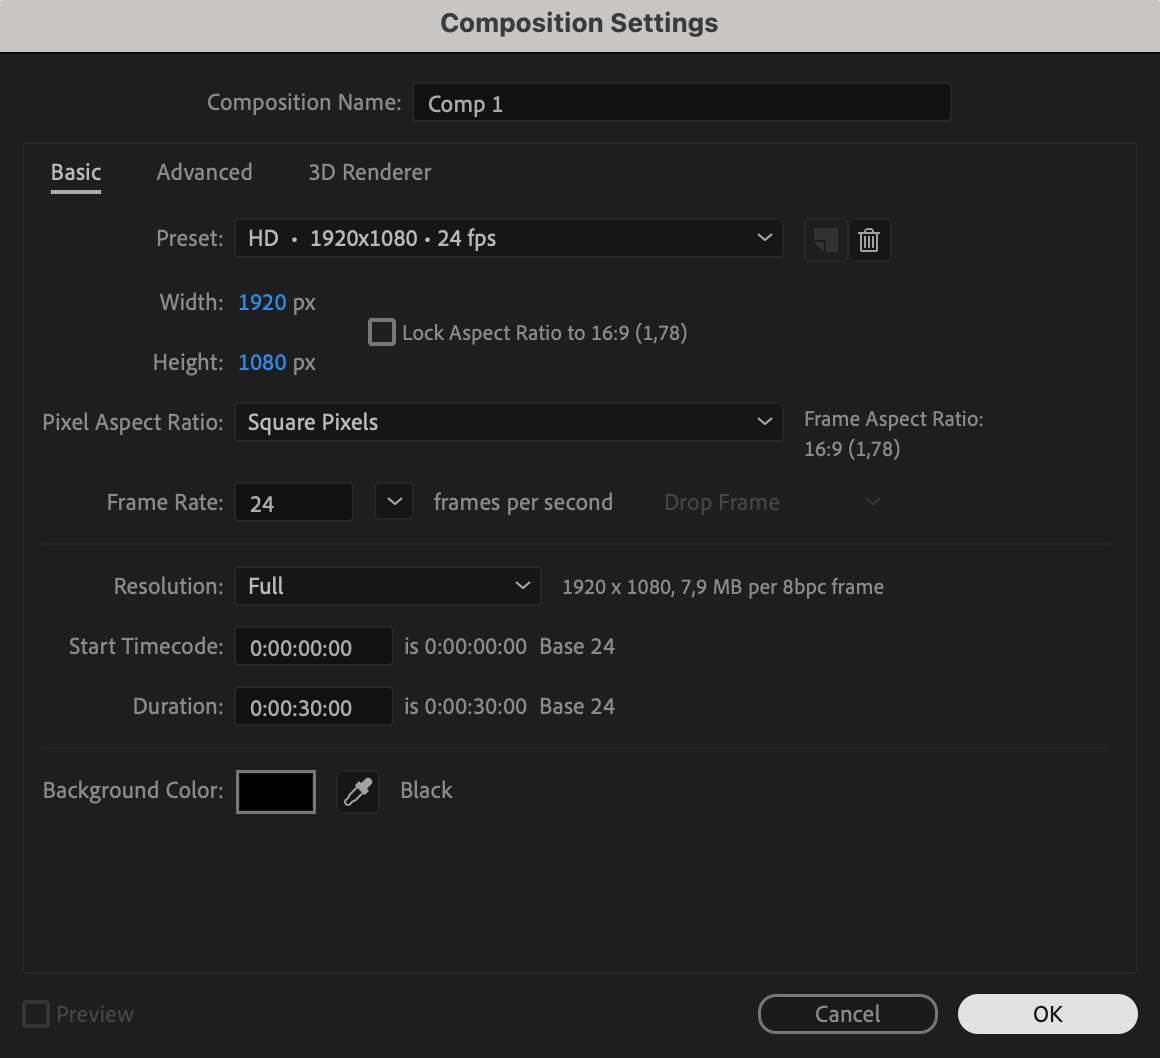
Open After Effects and create a new composition with suitable settings for your project. Ensure that the duration matches the length of your audio track.
 Step 2: Import Your Audio File
Go to File > Import > File, select your audio track, and drag it onto the timeline. Make sure the audio layer is visible and ready for editing.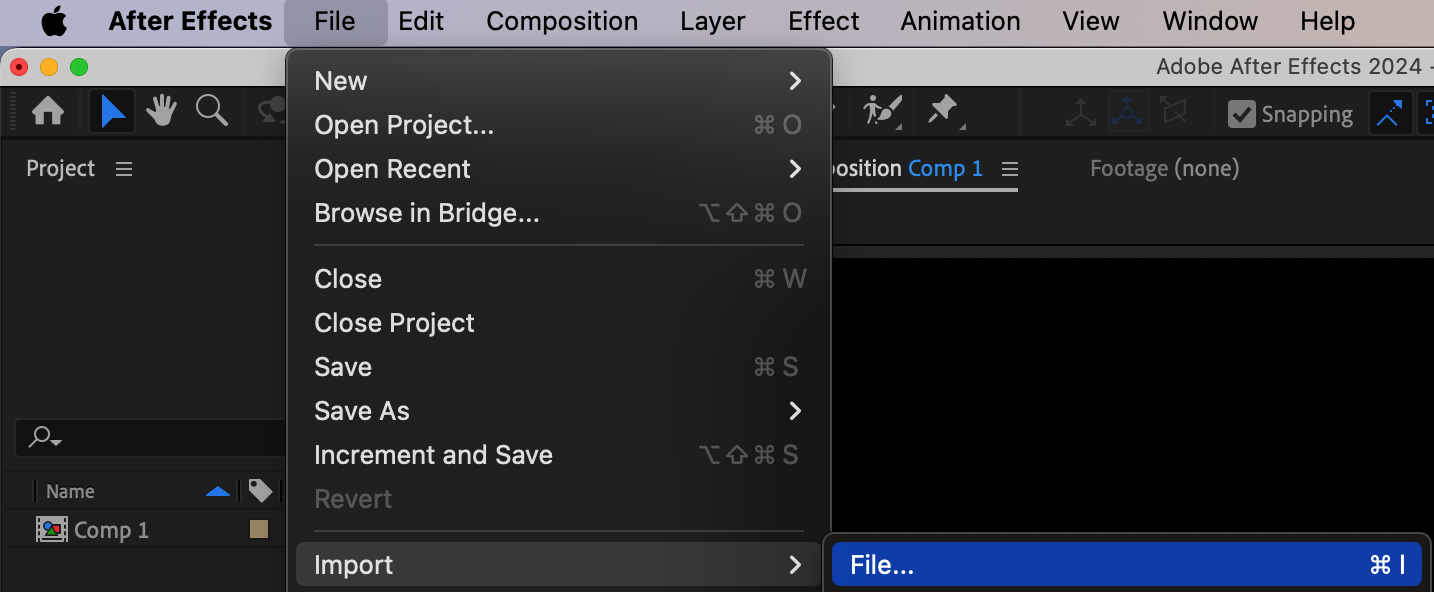
 Step 3: Add Markers for Panning Points
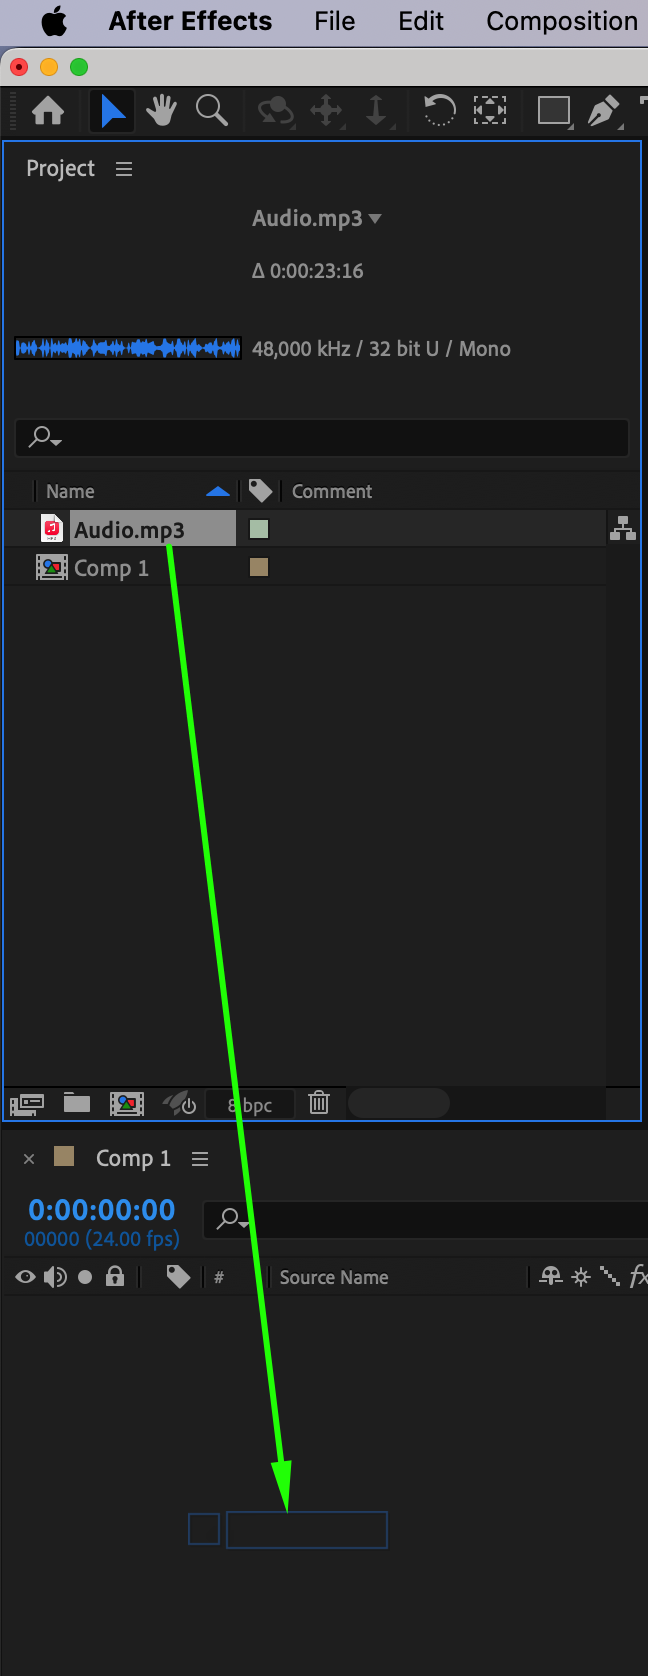
To define where the sound will shift between left and right channels, add markers at equal intervals. Select the audio layer, then go to Layer > Marker > Add Marker and place markers at four points throughout the composition. Step 4: Apply Echo and Stereo Mixer Effects
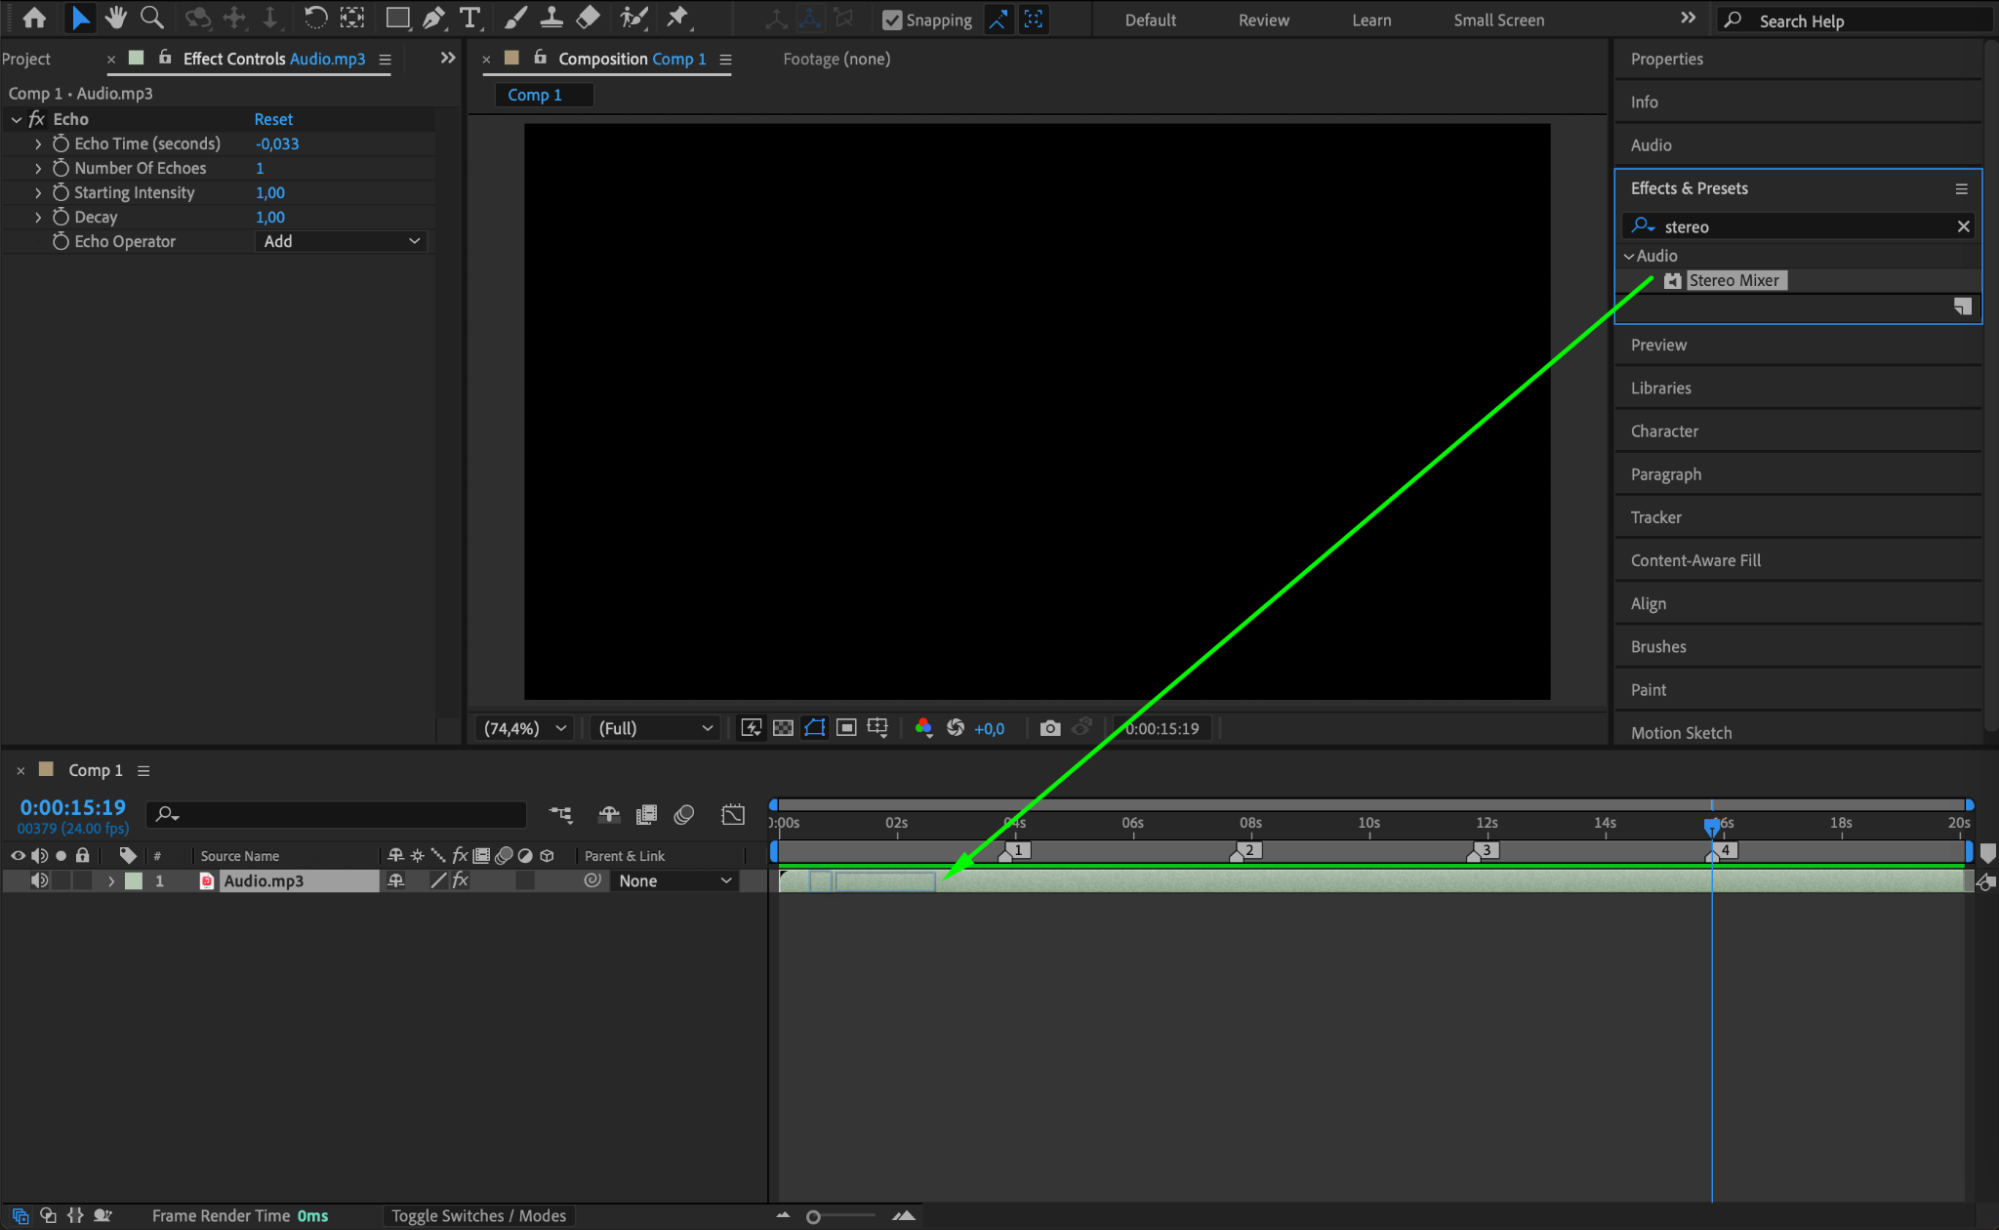
Search for Echo and Stereo Mixer effects in the Effects & Presets panel and apply them to the audio layer. The Echo effect adds depth, while Stereo Mixer controls the panning.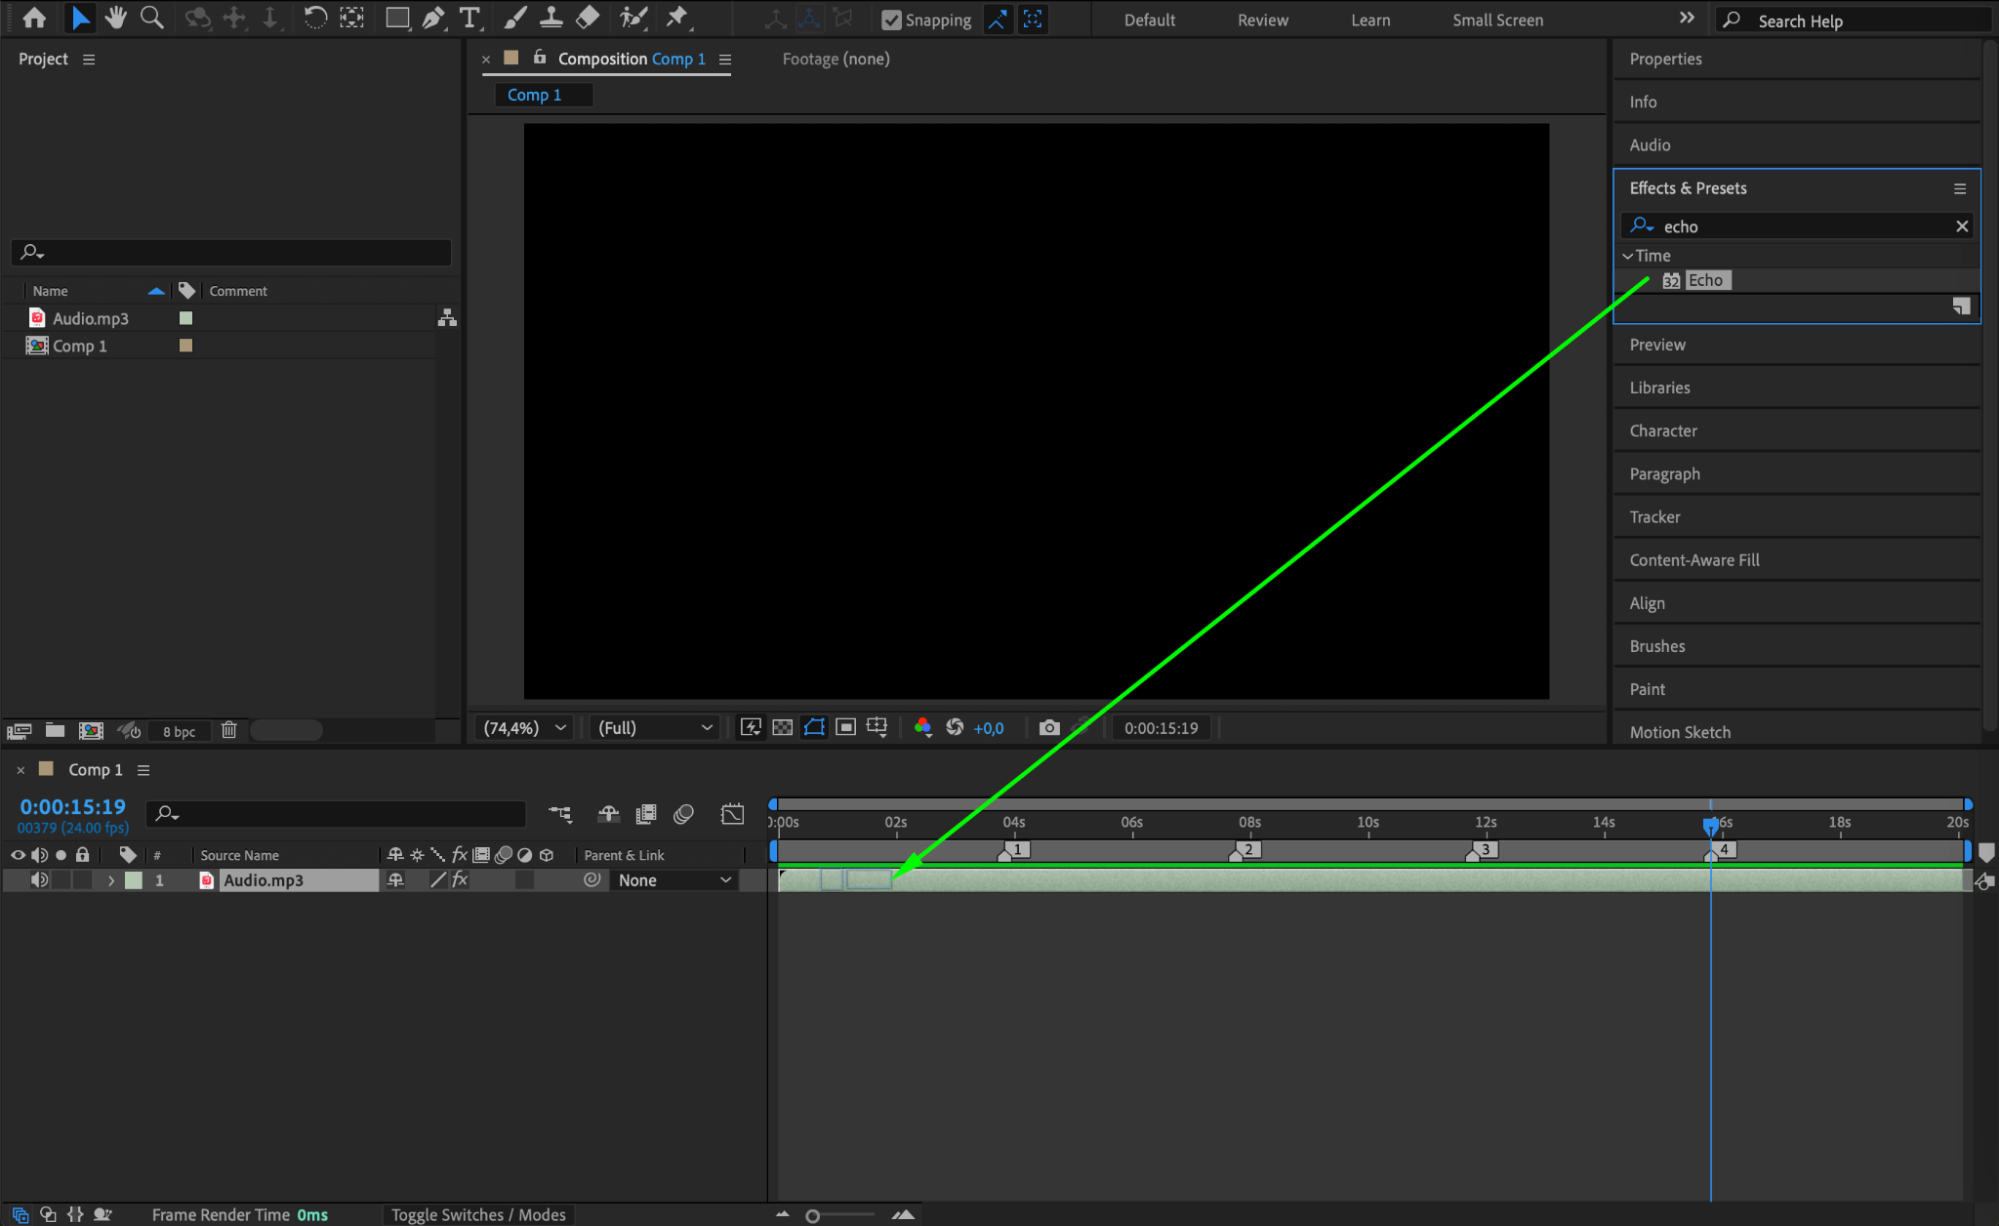
 Step 5: Set Keyframes for Stereo Mixer Parameters
Open the Effects Control panel, then click the stopwatch icon next to Left Level, Right Level, Left Pan, and Right Pan to enable keyframes. Ensure the CTI (Current Time Indicator) is at the beginning of the composition before adding keyframes. Step 6: Adjust Panning for the First and Third Markers
Position the CTI at the first marker, then at the third marker, and finally at the end of the composition. Set Left Level to 100, Right Level to 30, Left Pan to -100, and Right Pan to 30. This shifts the sound primarily to the left at these points.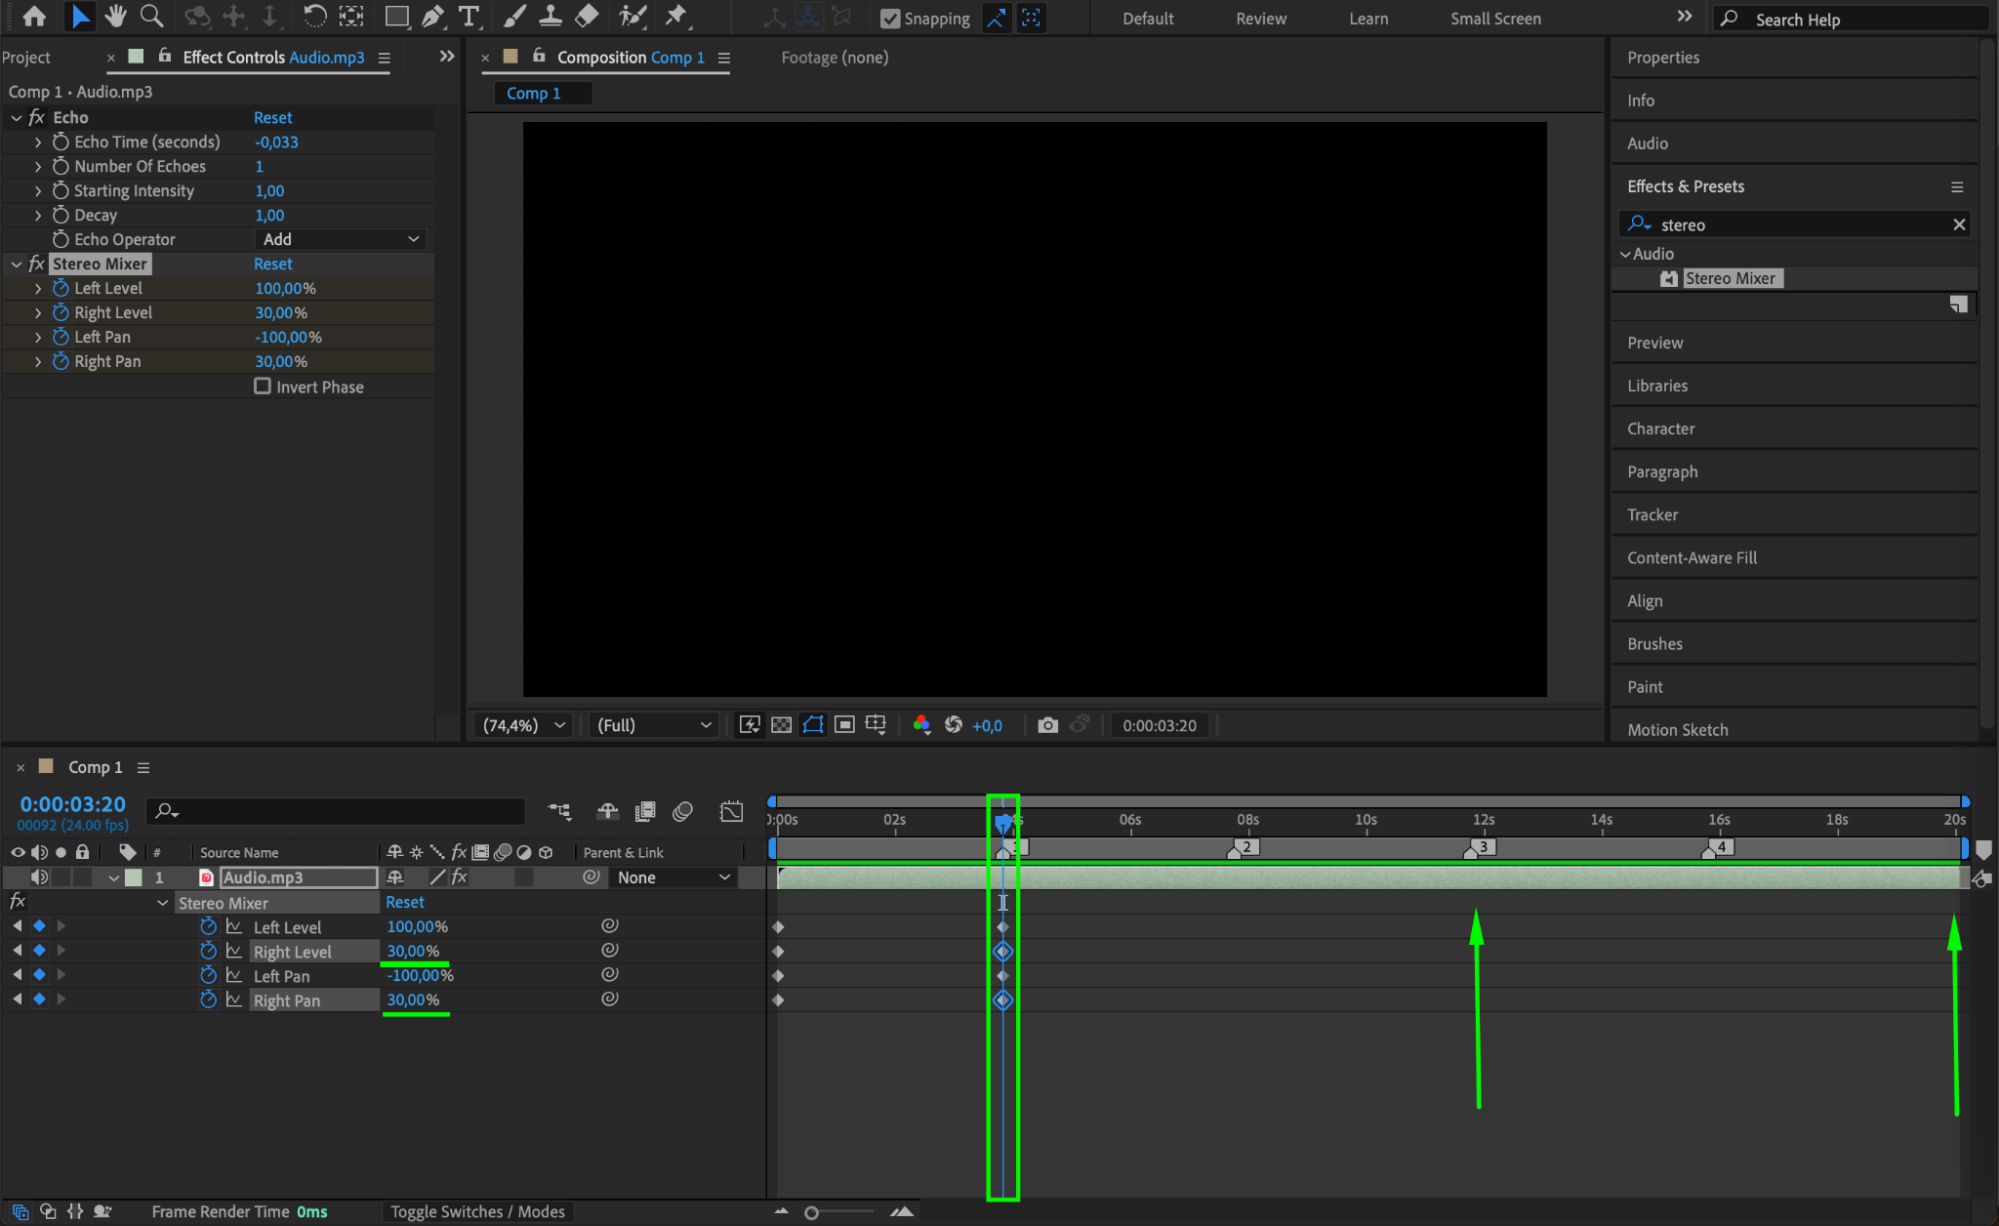 Step 7: Adjust Panning for the Second and Fourth Markers
Move the CTI to the second and fourth markers. Set Left Level to 30, Right Level to 100, Left Pan to -30, and Right Pan to 100. This shifts the sound primarily to the right at these points.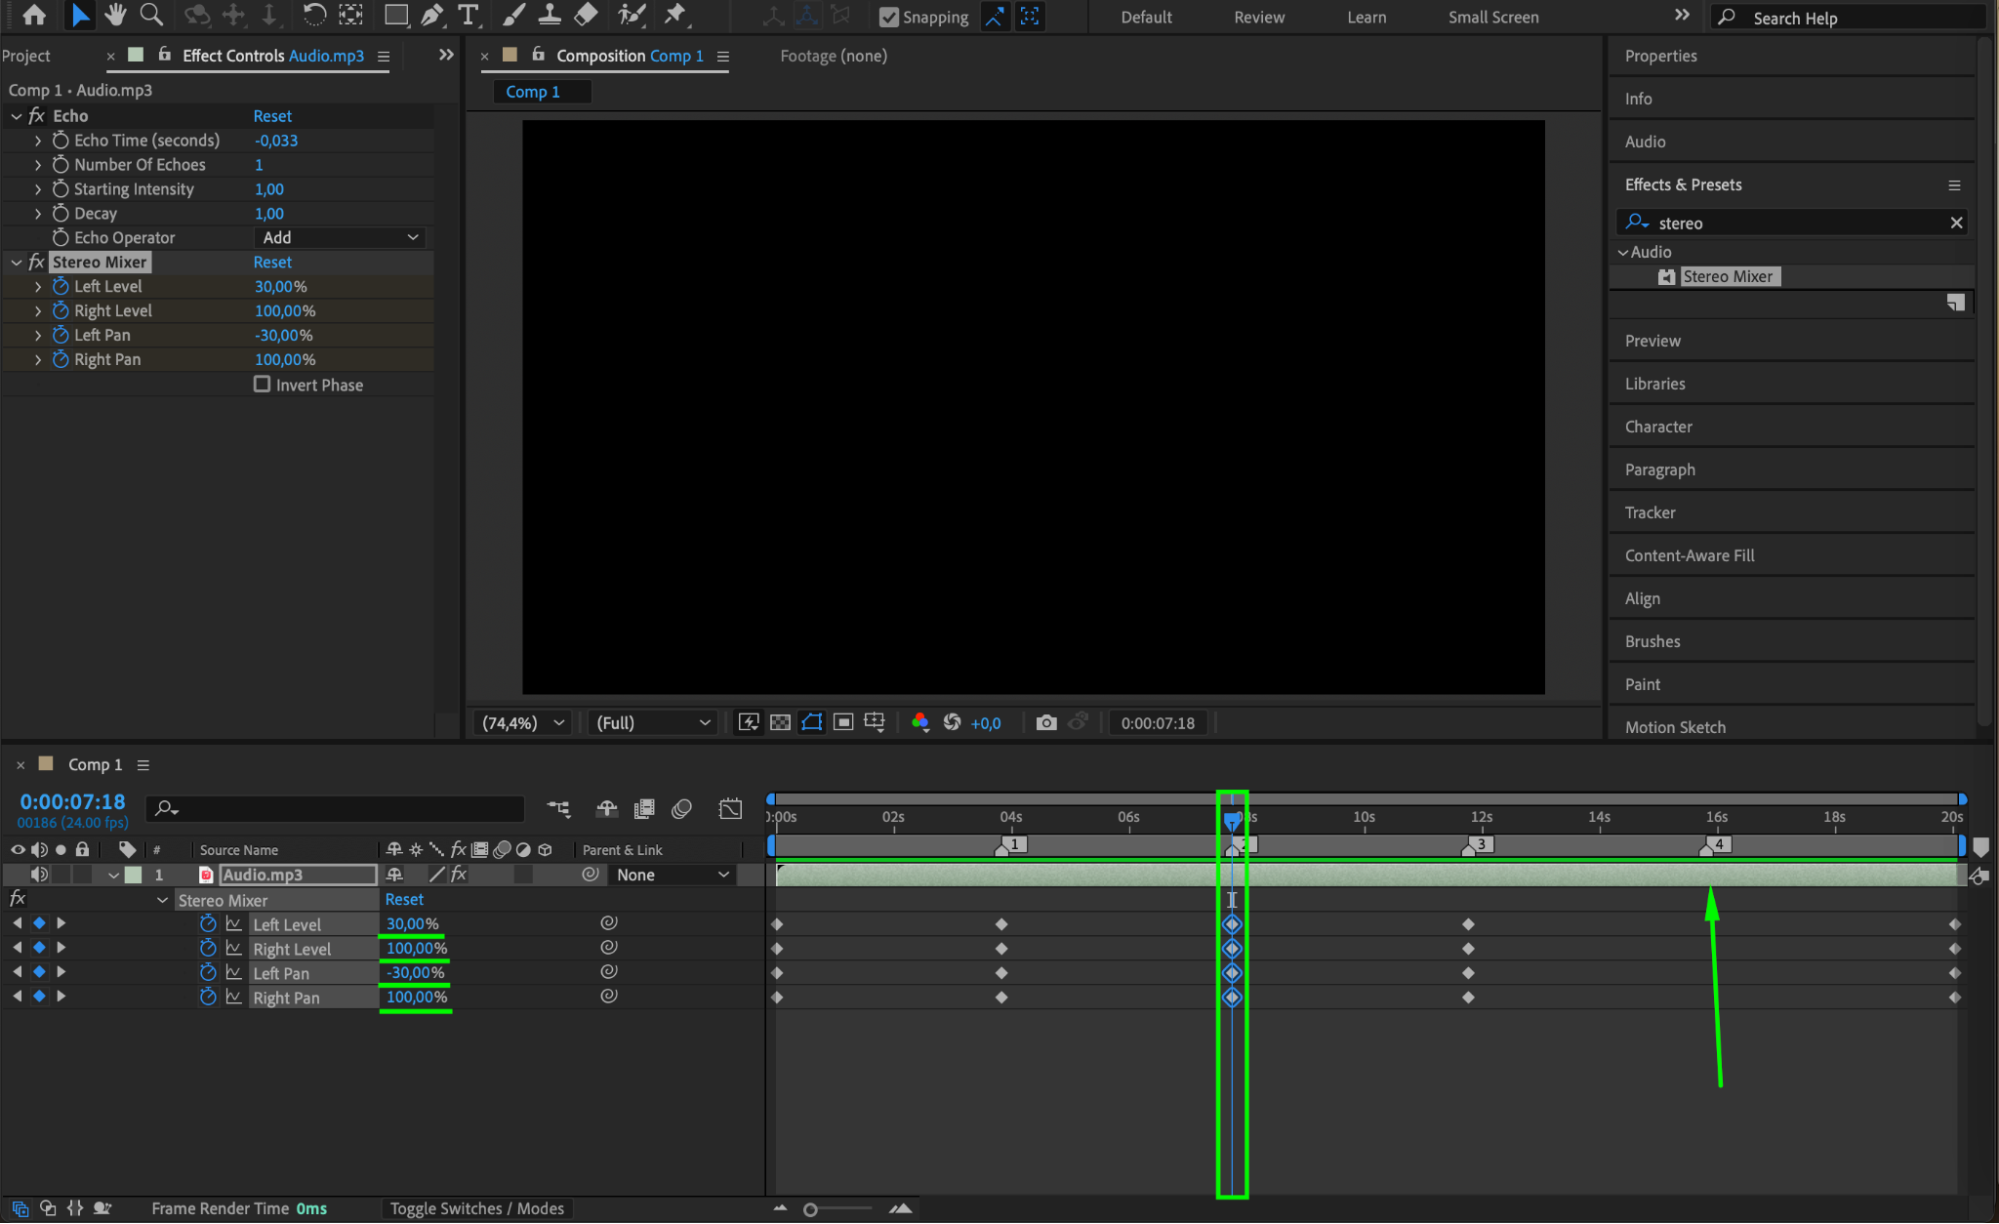 Step 8: Smooth the Transitions
Select all keyframes, right-click, and choose Keyframe Assistant > Easy Ease to create a smooth and natural transition between audio movements.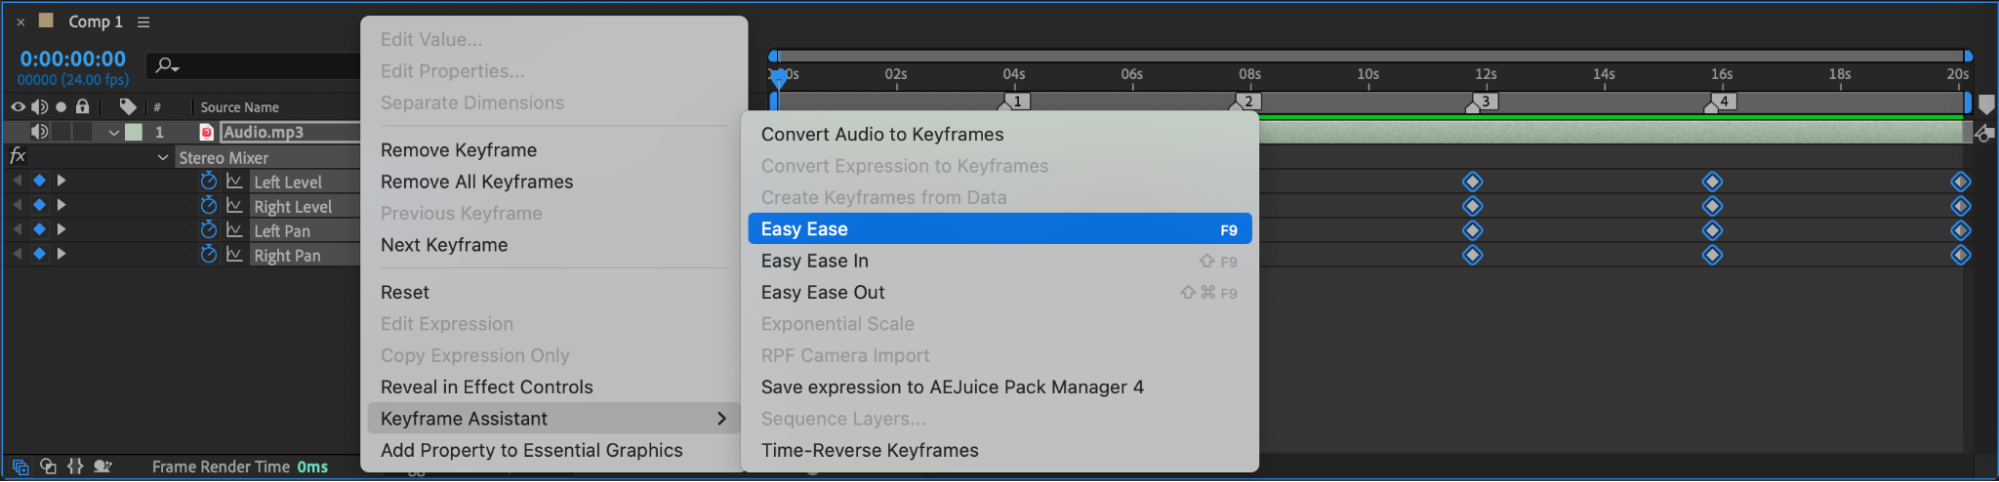
Step 9: Preview the 8D Effect
Play the composition to check how the audio moves between the left and right channels. Adjust keyframes if needed to refine the effect.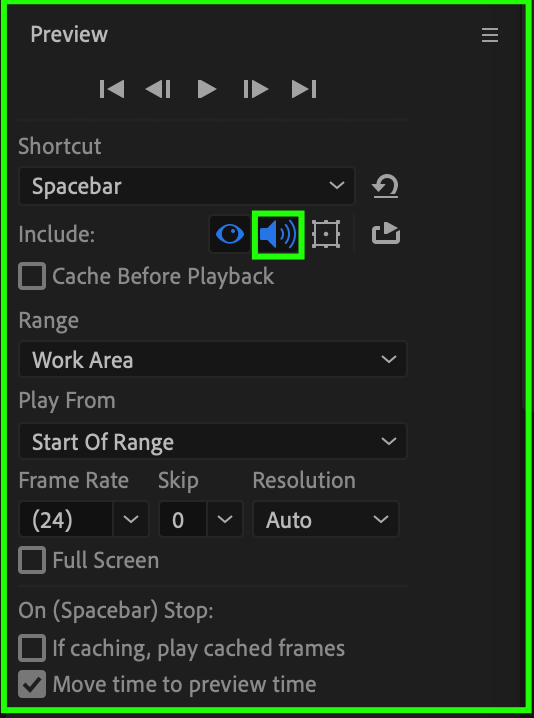 Step 10: Render the Final Audio
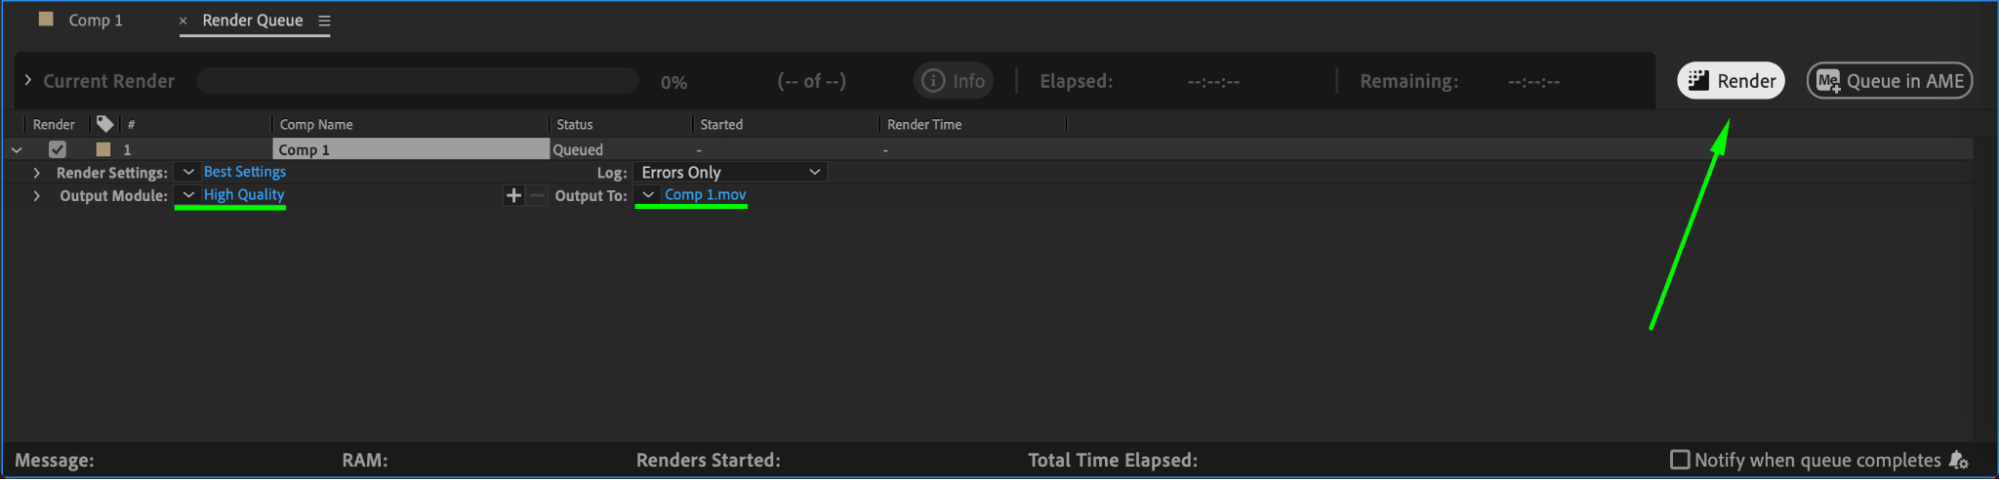
Once satisfied, go to Composition > Add to Render Queue, select your desired audio settings, and export the file.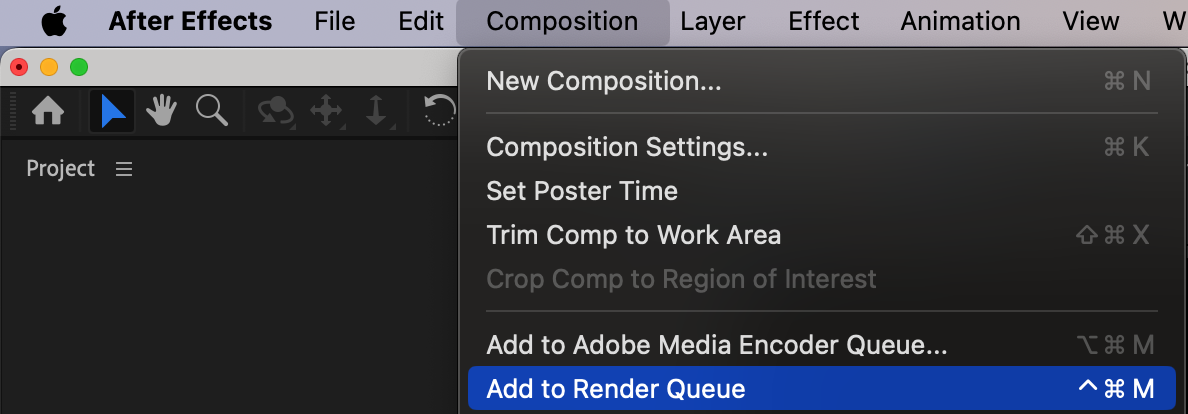
 Conclusion
Creating an 8D audio effect in After Effects is simple with the right tools. By adjusting panning and stereo mixing, you can achieve a dynamic sound that moves around the listener. While After Effects has limited audio capabilities, this method provides a basic way to simulate 8D sound for your projects.
Our Bestsellers


