Are you looking to add depth and dimension to your motion graphics projects in After Effects? One essential tool that can make a world of difference is the camera. With a camera, you can establish dynamic perspectives, create smooth movements, and breathe life into your visual storytelling.
In this comprehensive guide, we will walk you through the step-by-step process of creating a camera in After Effects. Whether you’re a beginner or an experienced motion designer looking to enhance your skills, this tutorial will equip you with the knowledge and techniques needed to take your projects to the next level.
By learning how to manipulate camera settings, apply realistic movements, and use camera tools effectively, you’ll be able to transform your static designs into captivating, immersive experiences. So, let’s dive in and uncover the secrets to mastering camera creation in After Effects. Get ready to unleash your creativity and make your visuals truly shine!
Essential Tips for Creating a Camera in After Effects
Before we delve into the step-by-step process, let’s cover some essential tips that will help you create a camera in After Effects efficiently:
Shortcut to Success: Utilize Hotkeys
Press “Ctrl + Alt + Shift + C” (or “Cmd + Opt + Shift + C” for Mac users) to create a new camera.
Use “Ctrl Alt + Shift + \“ (“Cmd + Opt + Shift + \” on Mac) to move the camera and its point of interest to look at selected 3D layers.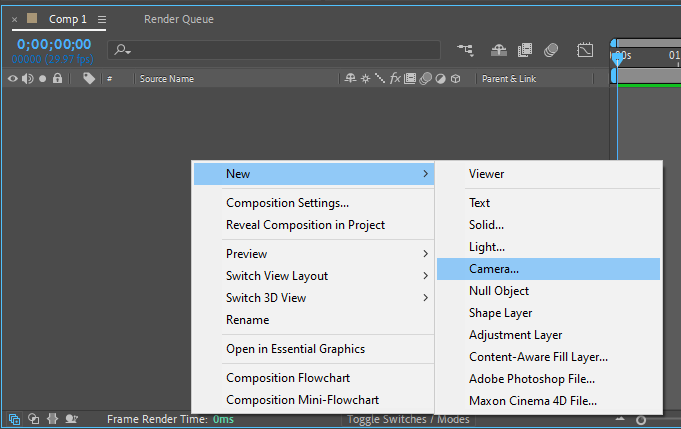 Plan Your Shots
Get 10% off when you subscribe to our newsletter

Just like in cinematography, planning is key. Before diving into camera creation, make a rough sketch or storyboard of your desired shots. Determine the camera angles, movements, and points of interest you want to incorporate. This will help you maintain a clear vision and guide your camera settings accordingly.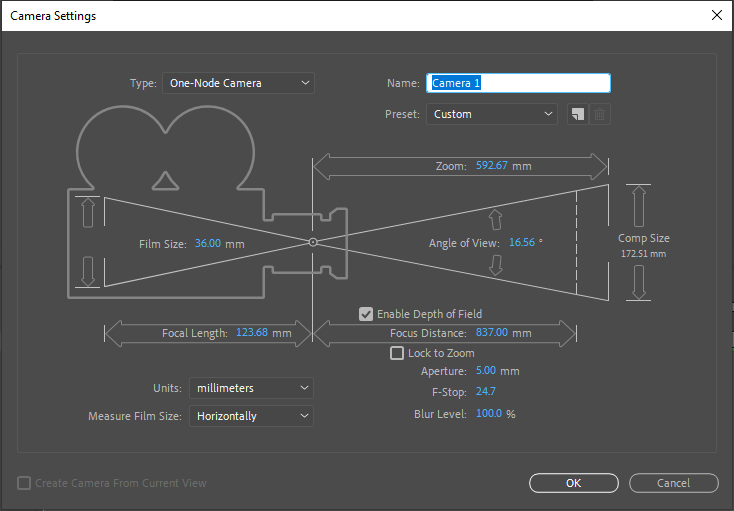 Camera Settings: Position, Rotation, and Point of Interest
Once you’ve created a new camera, you can adjust its position, rotation, and Point of Interest. Use the “P” key to access Position, “R” for Rotation, and “A” for Point of Interest. Experiment with different values to achieve the desired camera movement and framing.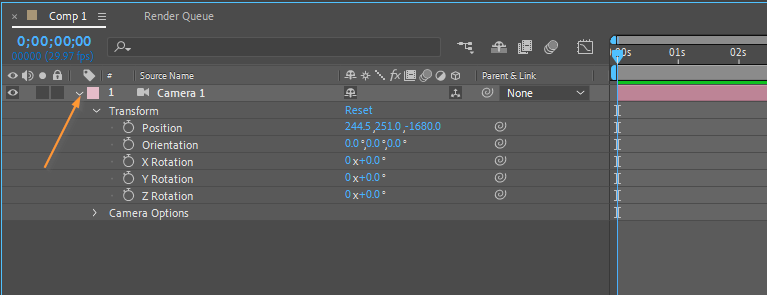 Smooth transitions: ease in and out
To ensure smooth camera transitions, consider adding easing to your camera movements. Select your camera layer, go to the Graph Editor (press “Shift + F3”), and adjust the keyframes’ velocity by dragging the handles to create a gradual acceleration and deceleration. This will add a natural and polished touch to your camera movements.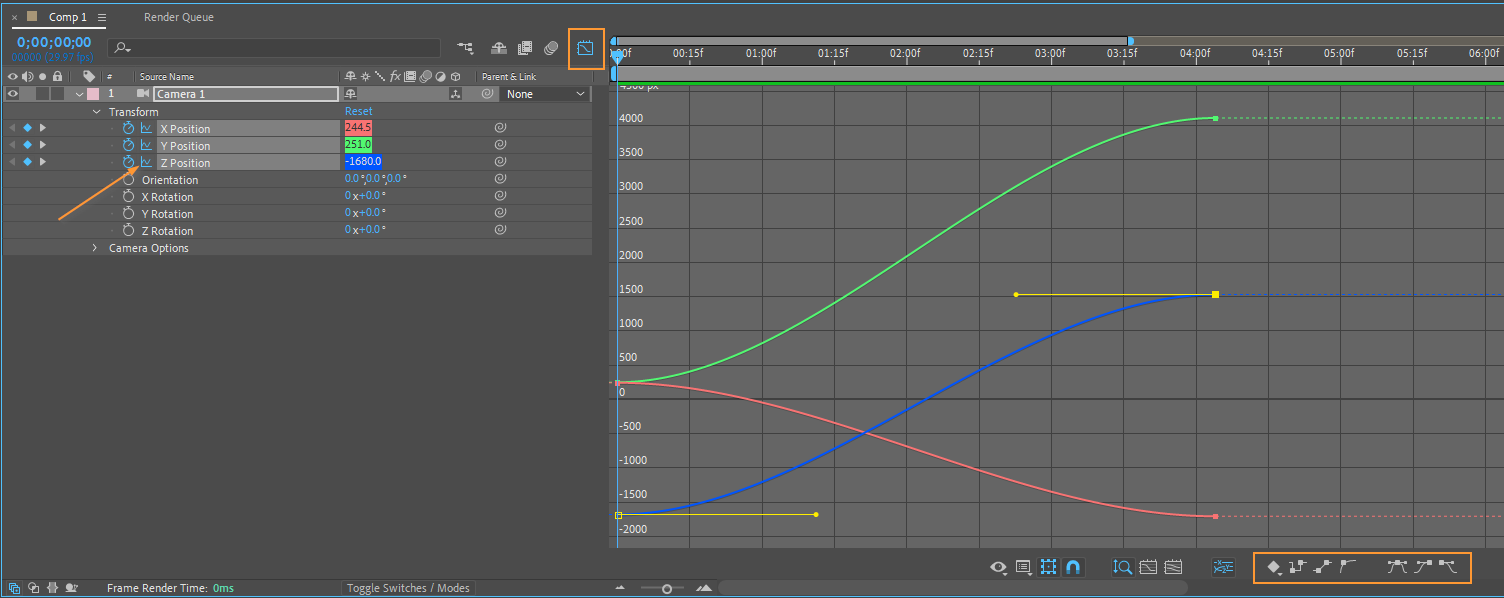 Realistic Depth with Depth of Field
To mimic real-world camera effects, add depth of field to your composition. Enable the Depth of Field option in the camera setting. Adjust the Focus Distance and Aperture settings to control the depth of field effect. This technique can enhance the realism and visual impact of your compositions.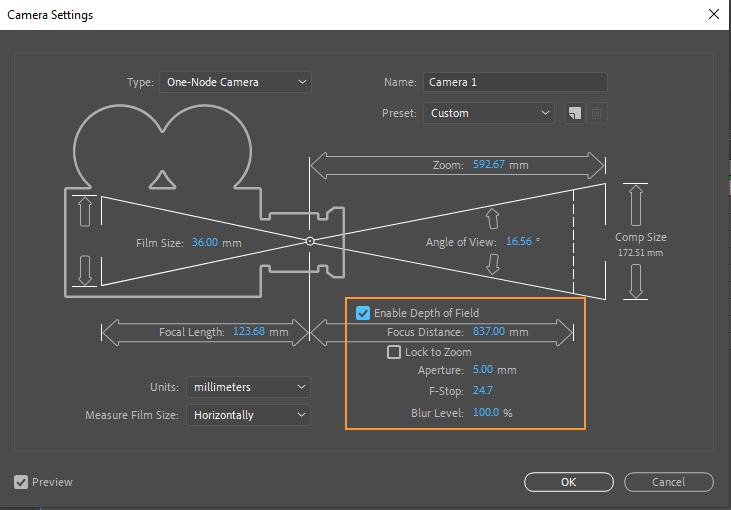
Experiment with Camera Tools
After Effects offers various camera tools that you can use to enhance your camera movements. Experiment with tools like the Orbit Camera Tool (“C” key switch between these tools), Track XY Camera Tool, and Track Z Camera Tool to achieve different camera movements and perspectives. These tools provide flexibility in manipulating the camera position and rotation.![]()
Get 10% off when you subscribe to our newsletter

Remember, practice makes perfect. Don’t hesitate to experiment with different camera settings, angles, and movements to find the perfect composition for your project. With time and experience, you’ll become more comfortable and proficient in creating cameras in After Effects.
Now that we’ve covered the essential tips, let’s dive into the step-by-step process of creating a camera in After Effects. Follow along and unlock the potential of your motion graphics projects!
Creating a camera in Adobe After Effects is a crucial step when working with 3D compositions or motion graphics. Here are step-by-step instructions on how to create a camera:
1. Open After Effects: Launch Adobe After Effects on your computer.
2. Create a New Composition:
– Click on “Composition” in the menu bar.
– Select “New Composition” or use “Ctrl + N”.
Get 10% off when you subscribe to our newsletter

– Set the composition settings, such as resolution, duration, and frame rate.
– Click “OK” to create the new composition.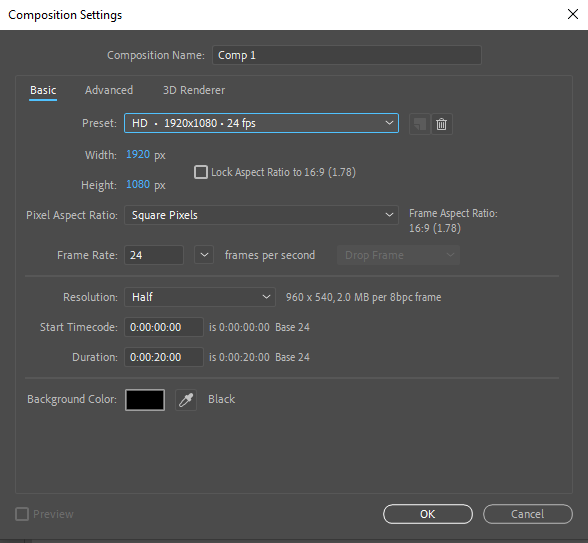 3. Import Your Footage or Create a Scene:
– You can either import existing footage or create your own scene using shapes, text, and other elements.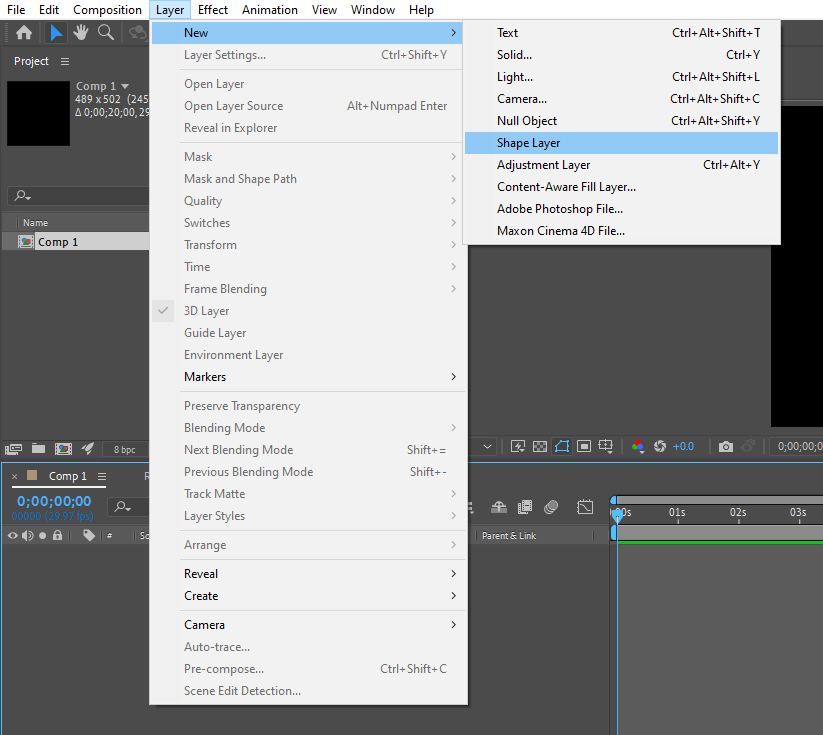 4. Select the Composition and Create a New Camera:
– In the Project panel on the left, select your composition.
– Go to the “Layer” menu.
– Select “New” and then “Camera.”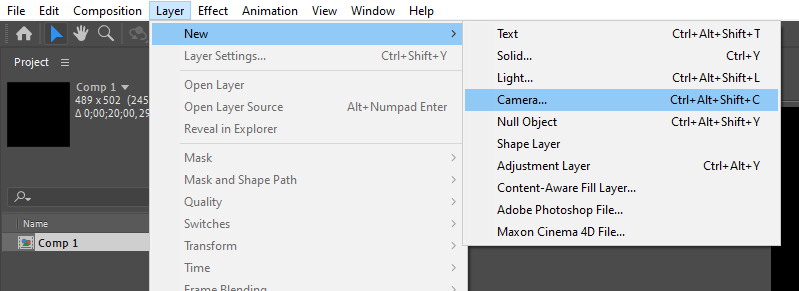 5. Camera Settings:
– In the “New Camera” dialog box that appears, you can customize your camera settings:
– Choose a camera preset if desired (e.g., 35mm, 50mm).
– Set the camera name, which is helpful for organization.
– Adjust the camera’s position, orientation, and depth of field settings.
– Choose whether you want a One-Node or Two-Node camera. One-Node cameras are simpler and are often used for 2D animations, while Two-Node cameras provide more control and are used in 3D scenes.
– Click “OK” when you’re satisfied with your camera settings.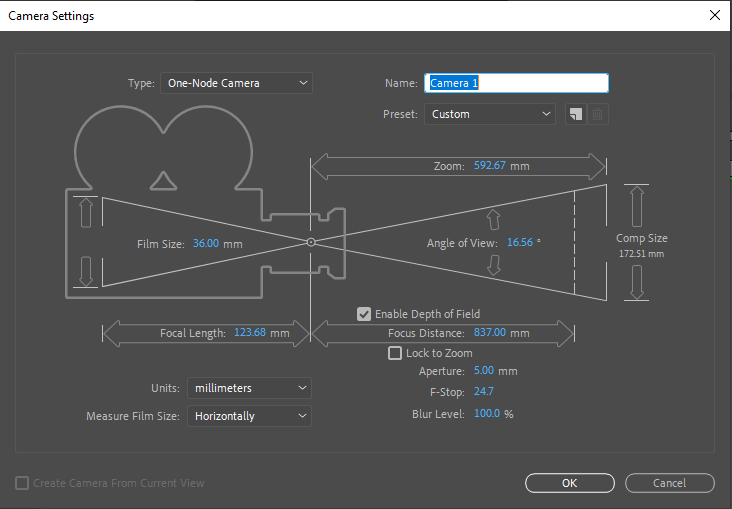 6. Viewing Through the Camera:
– To view your composition through the camera, click on the “3D View Pop-up” in the Composition panel.
– Select your newly created camera from the list.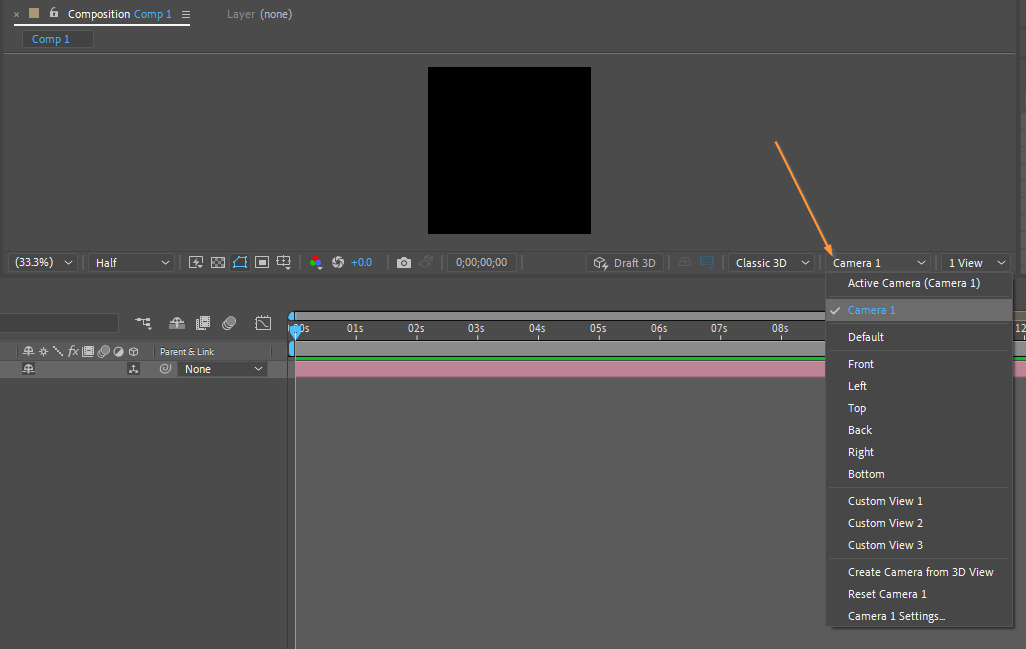
7. Animate the Camera:
– You can add keyframes to animate the camera’s position, orientation, and other properties over time. To do this, click the stopwatch icon next to the property you want to animate, move to a different point in time, and adjust the property value. After Effects will create keyframes automatically.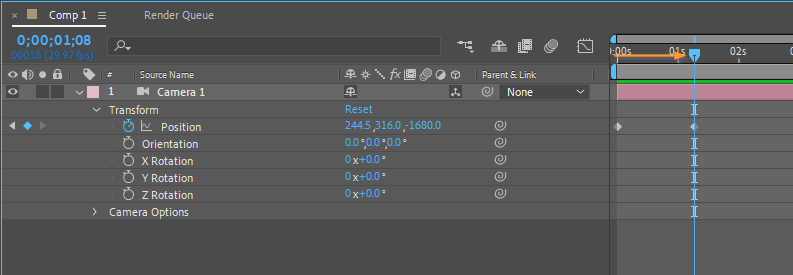
8. Preview Your Composition:
– To see how your camera animation looks, press the spacebar or click the “RAM Preview” button to create a real-time preview of your composition.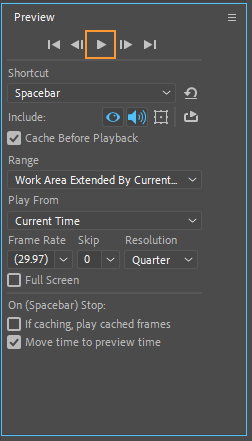
9. Adjust Camera Settings as Needed:
– You can always go back to your camera layer in the timeline to adjust settings or add more keyframes to fine-tune the animation.
Get 10% off when you subscribe to our newsletter

10. Render Your Composition:
– Once you’re satisfied with your composition, go to “Composition” in the menu and select “Add to Render Queue.
– Configure your render settings, and click the “Render” button to export your video with the camera animation.
That’s it! You’ve successfully created a camera in Adobe After Effects and animated it for your composition. Remember that creating and animating cameras can be complex, so practice and experimentation are key to mastering this skill.
Conclusion
Congratulations! You have now mastered the art of creating a camera in After Effects. By following this comprehensive guide, you have learned the essential steps, tips, and techniques to bring your motion graphics to life with dynamic camera movements and perspectives.
Remember, creating a camera in After Effects is not just about technical settings and tools; it’s about storytelling and capturing the viewer’s attention. By planning your shots, experimenting with camera movements, and utilizing tools like depth of field, you can elevate your visuals and create captivating compositions.
Continue to practice and explore different camera techniques to expand your creative horizons. Don’t be afraid to push the boundaries and experiment with unconventional camera angles and movements to make your projects truly stand out.
Get 10% off when you subscribe to our newsletter

With your newfound knowledge and skills, you are now equipped to tackle complex motion graphics projects with confidence. So, go ahead and apply what you’ve learned, ignite your imagination, and create stunning visuals that leave a lasting impression.
Keep exploring, keep learning, and keep pushing the limits of what you can achieve with a camera in After Effects. Happy creating!


