Creating a Datamosh Transition in After Effects
Introduction to Datamoshing in After Effects
Datamoshing is a popular glitch effect that creates a distorted, melting transition between two video clips. While traditional datamoshing is done by manipulating video compression, you can achieve a similar look in After Effects using masking, Content-Aware Fill, and adjustment layers. Follow these steps to create a smooth datamosh transition.
Step 1: Arrange Your Video Clips
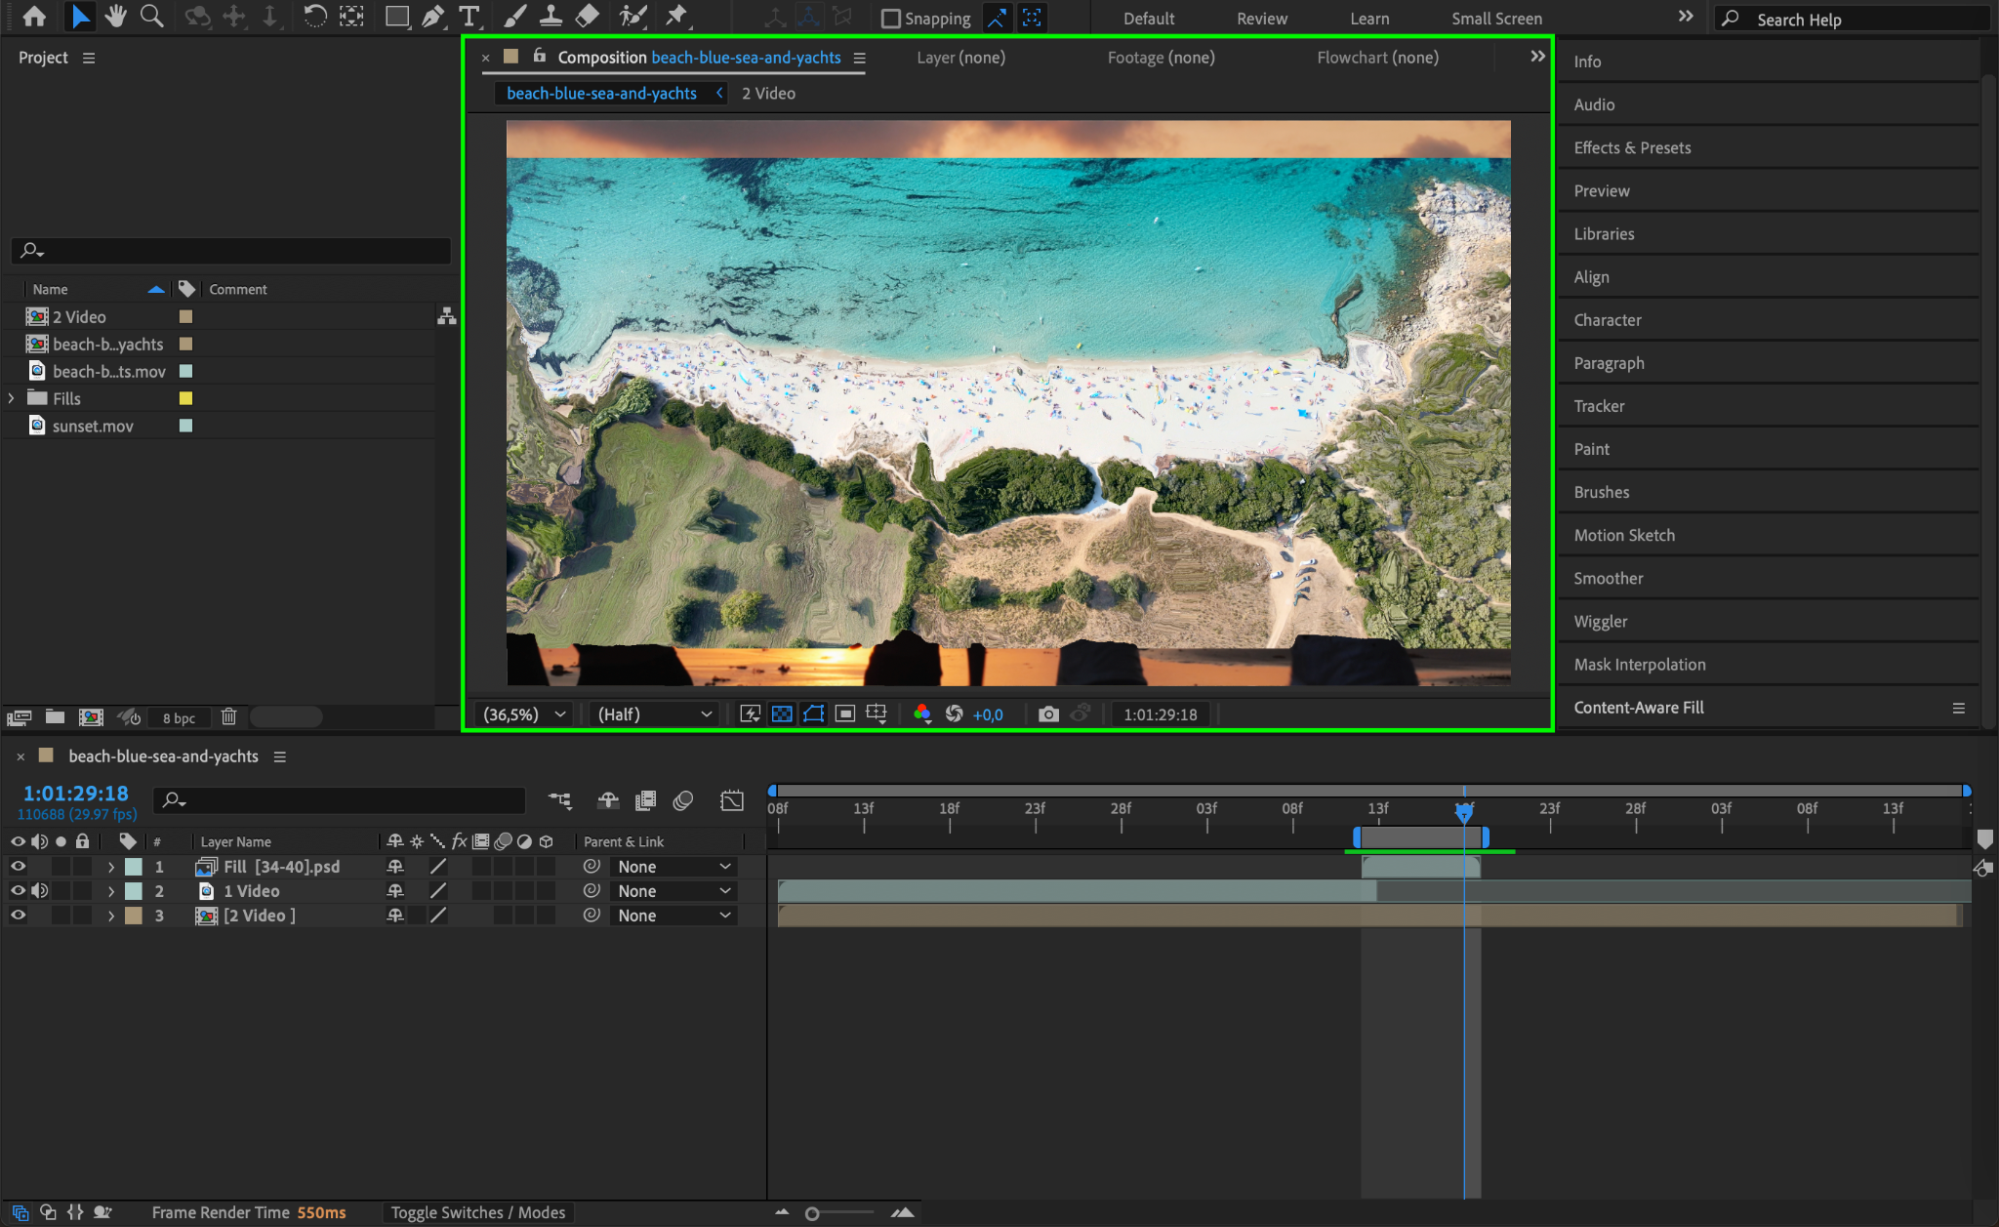
Import two video clips and place them on the timeline. Position the first video on top, covering the first half of the composition, and place the second video underneath it, ensuring both clips overlap at the transition point.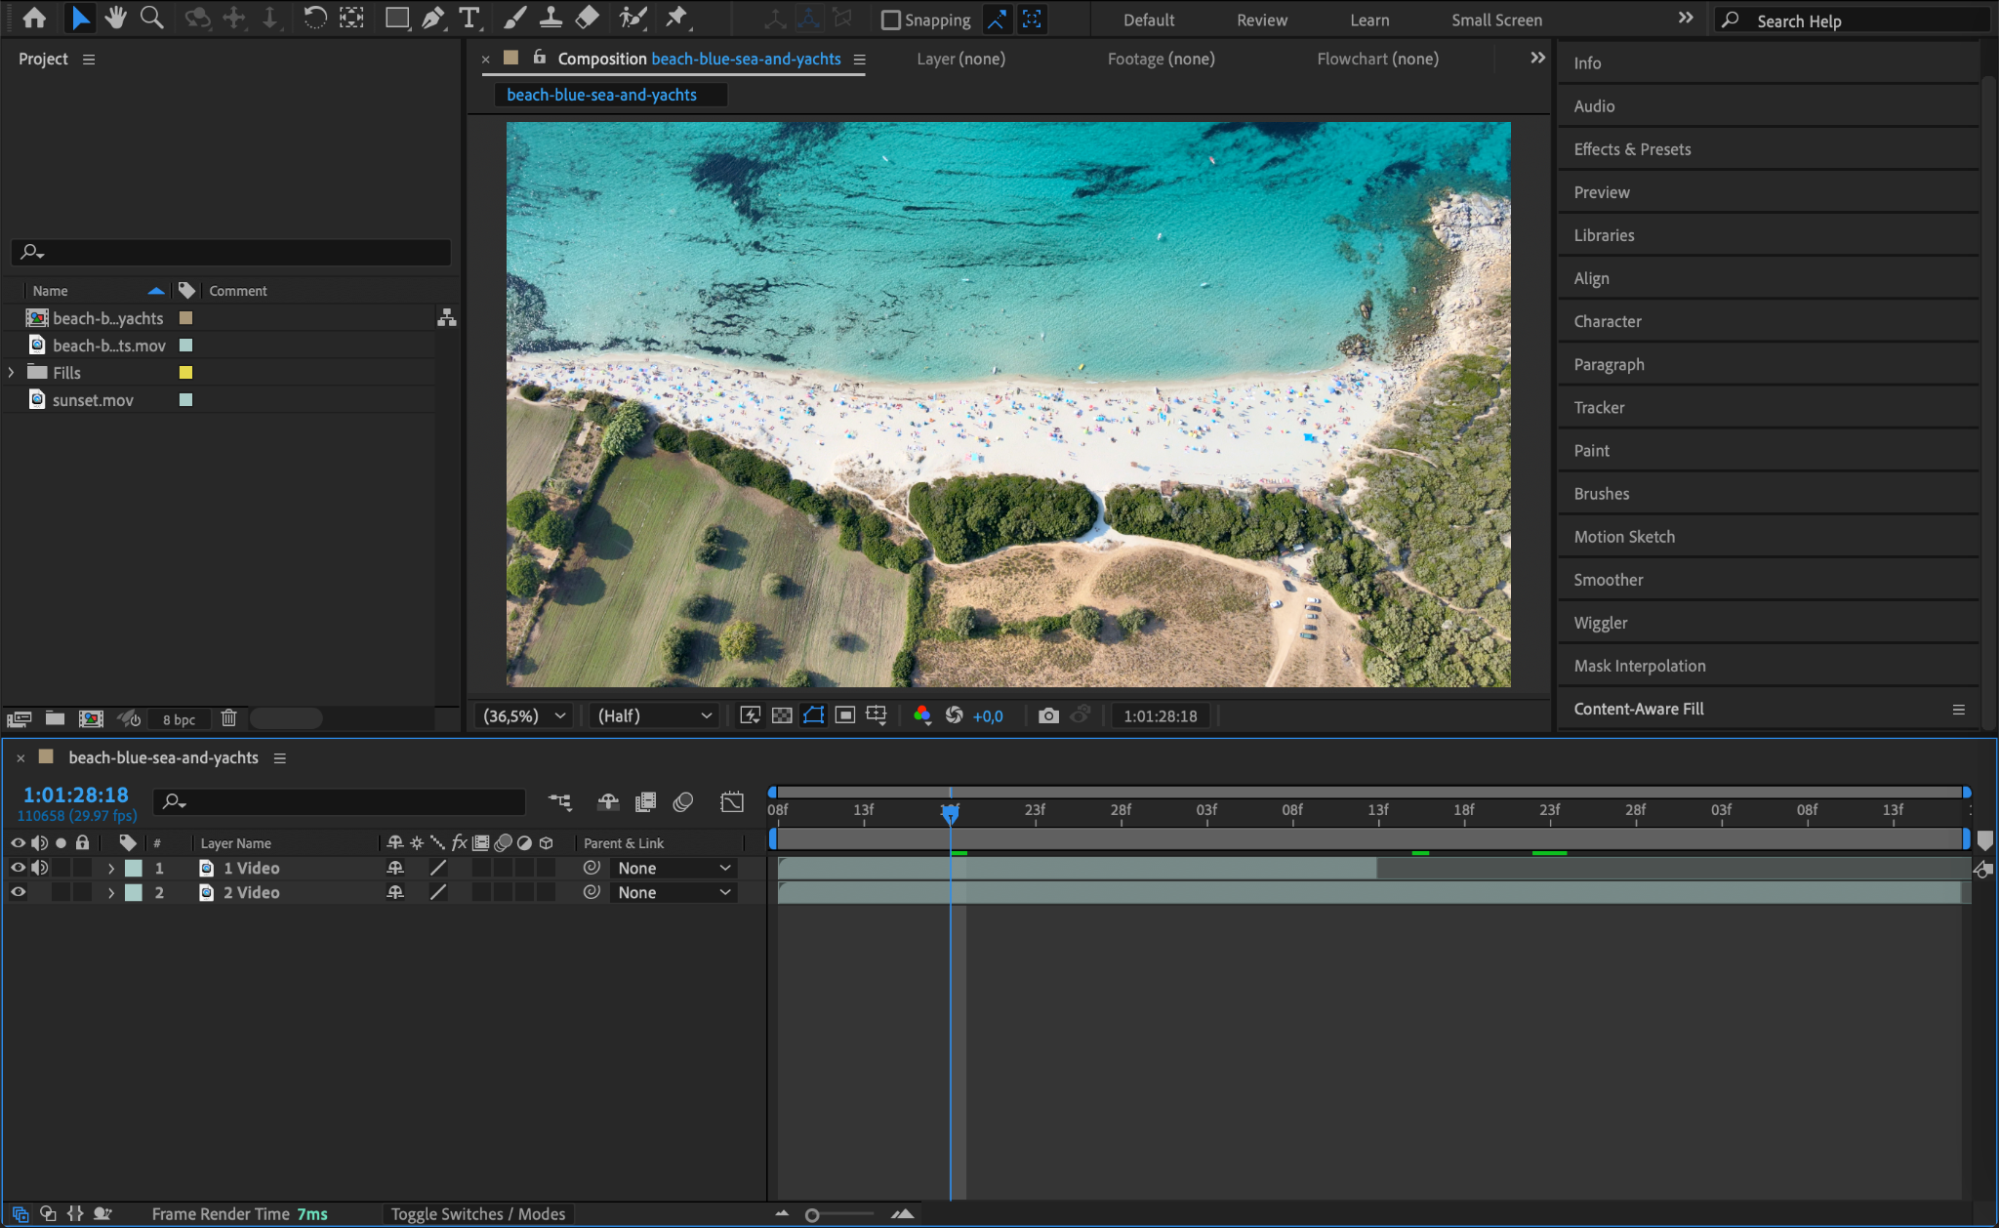 Step 2: Pre-Compose the Video Layer (Optional)
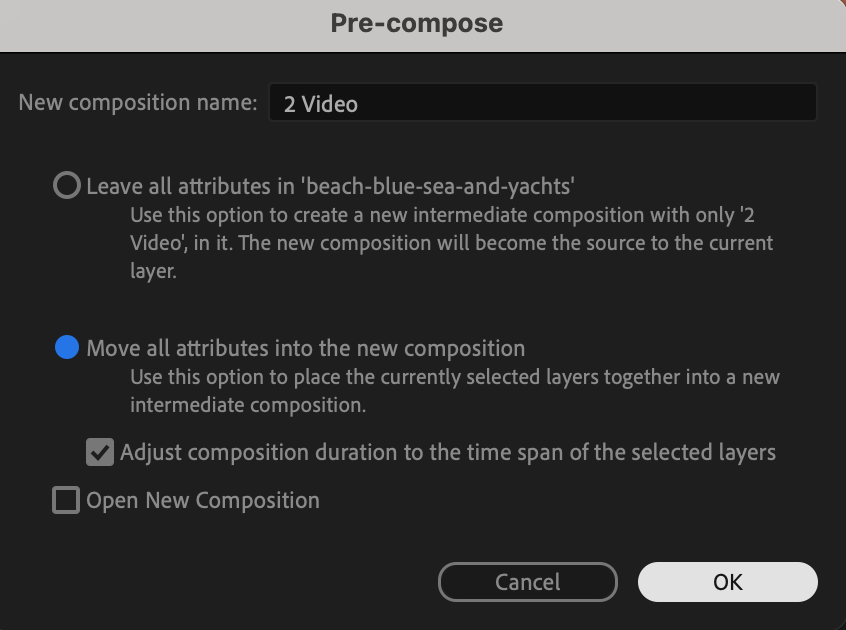
Right-click on the top video layer and select Pre-Compose. If you have changed any properties in the Transform section, such as scale or position, make sure to Move All Attributes into the new composition. This ensures a clean transition without unwanted distortions.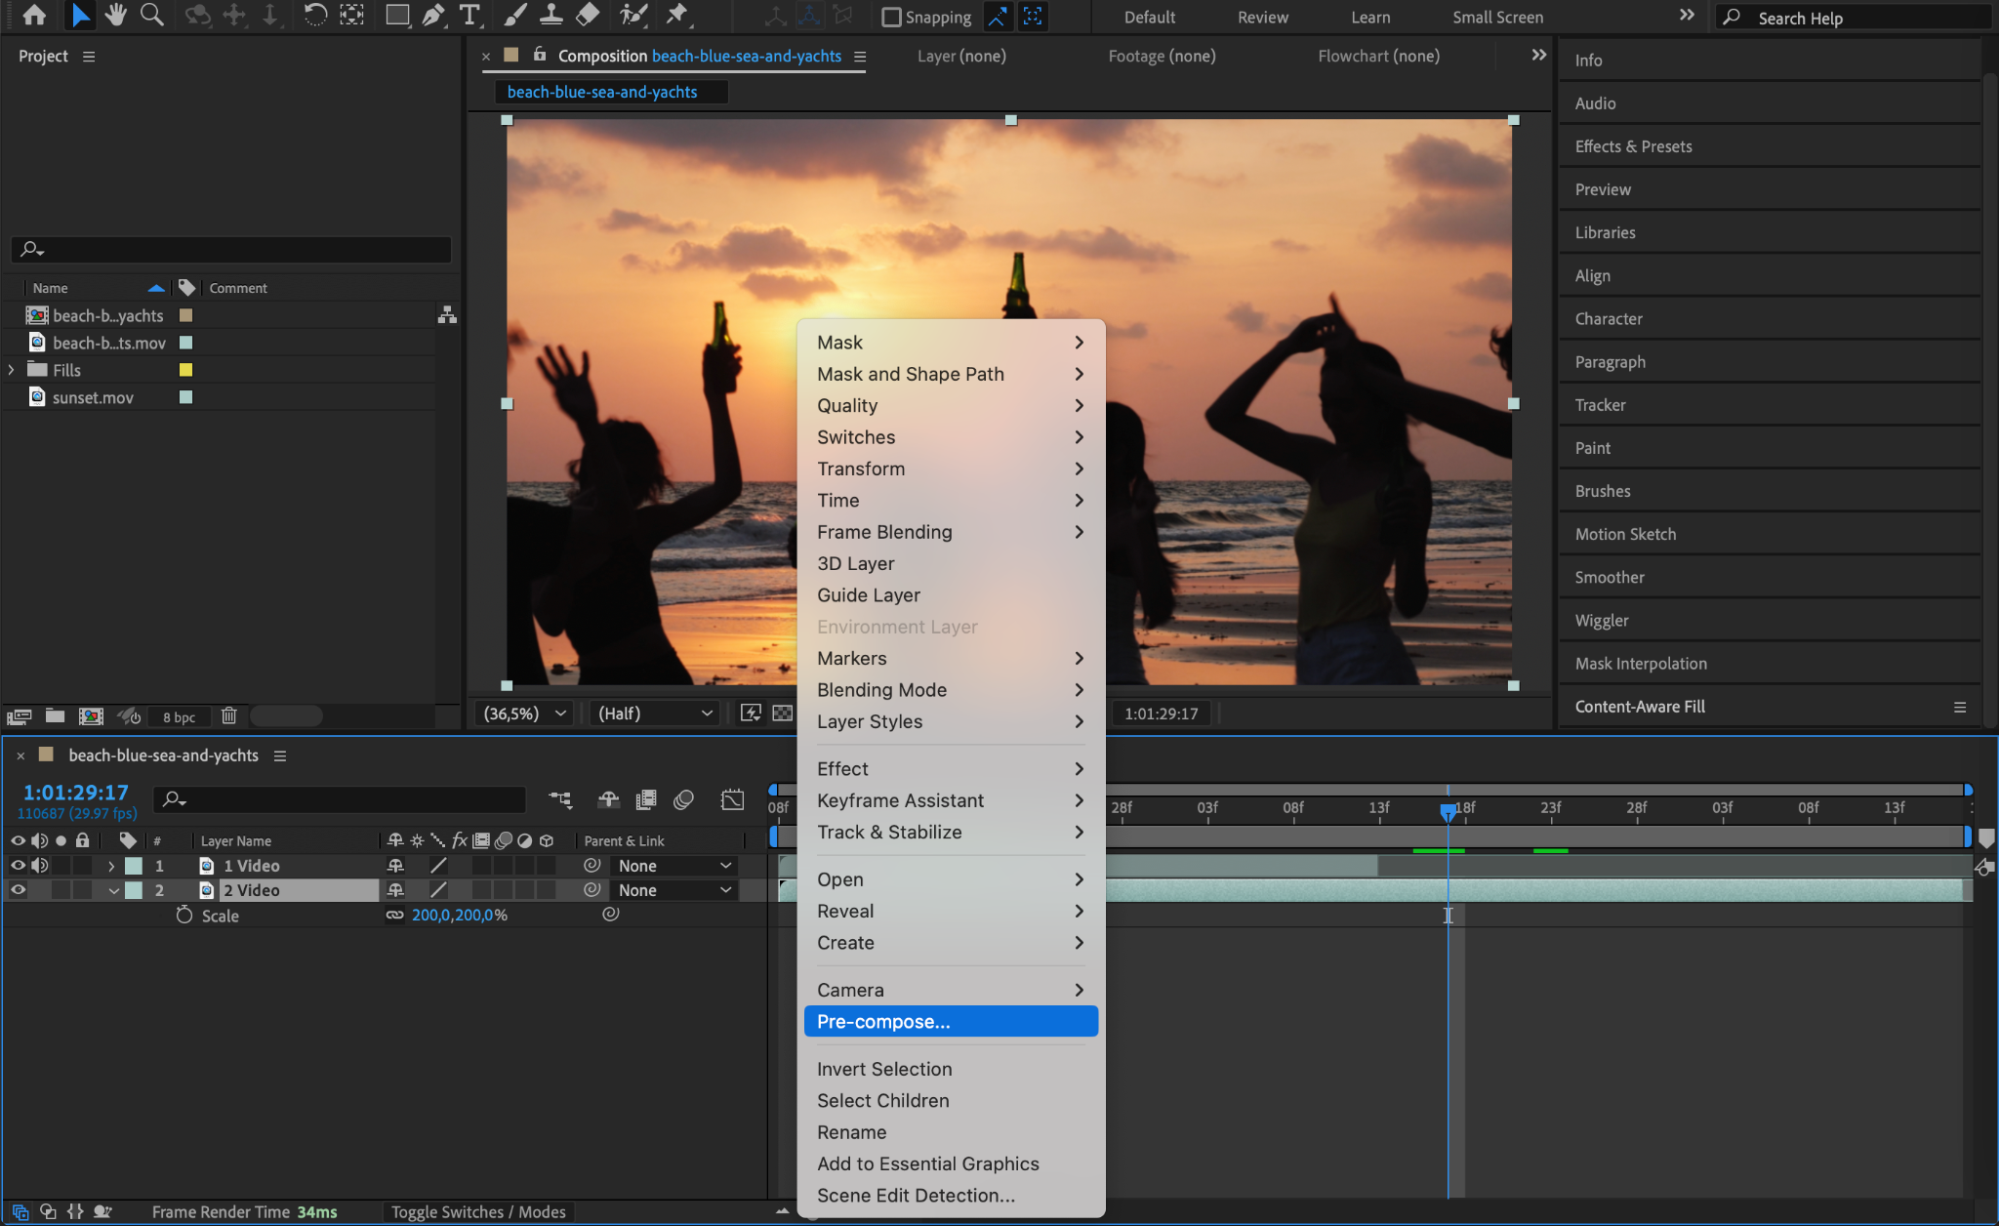
 Step 3: Adjust the Start and End Comp Sliders
Get 10% off when you subscribe to our newsletter

Move the Start and End Comp Sliders to align with the point where the two videos intersect. The length of this adjustment will determine how long the transition effect lasts.
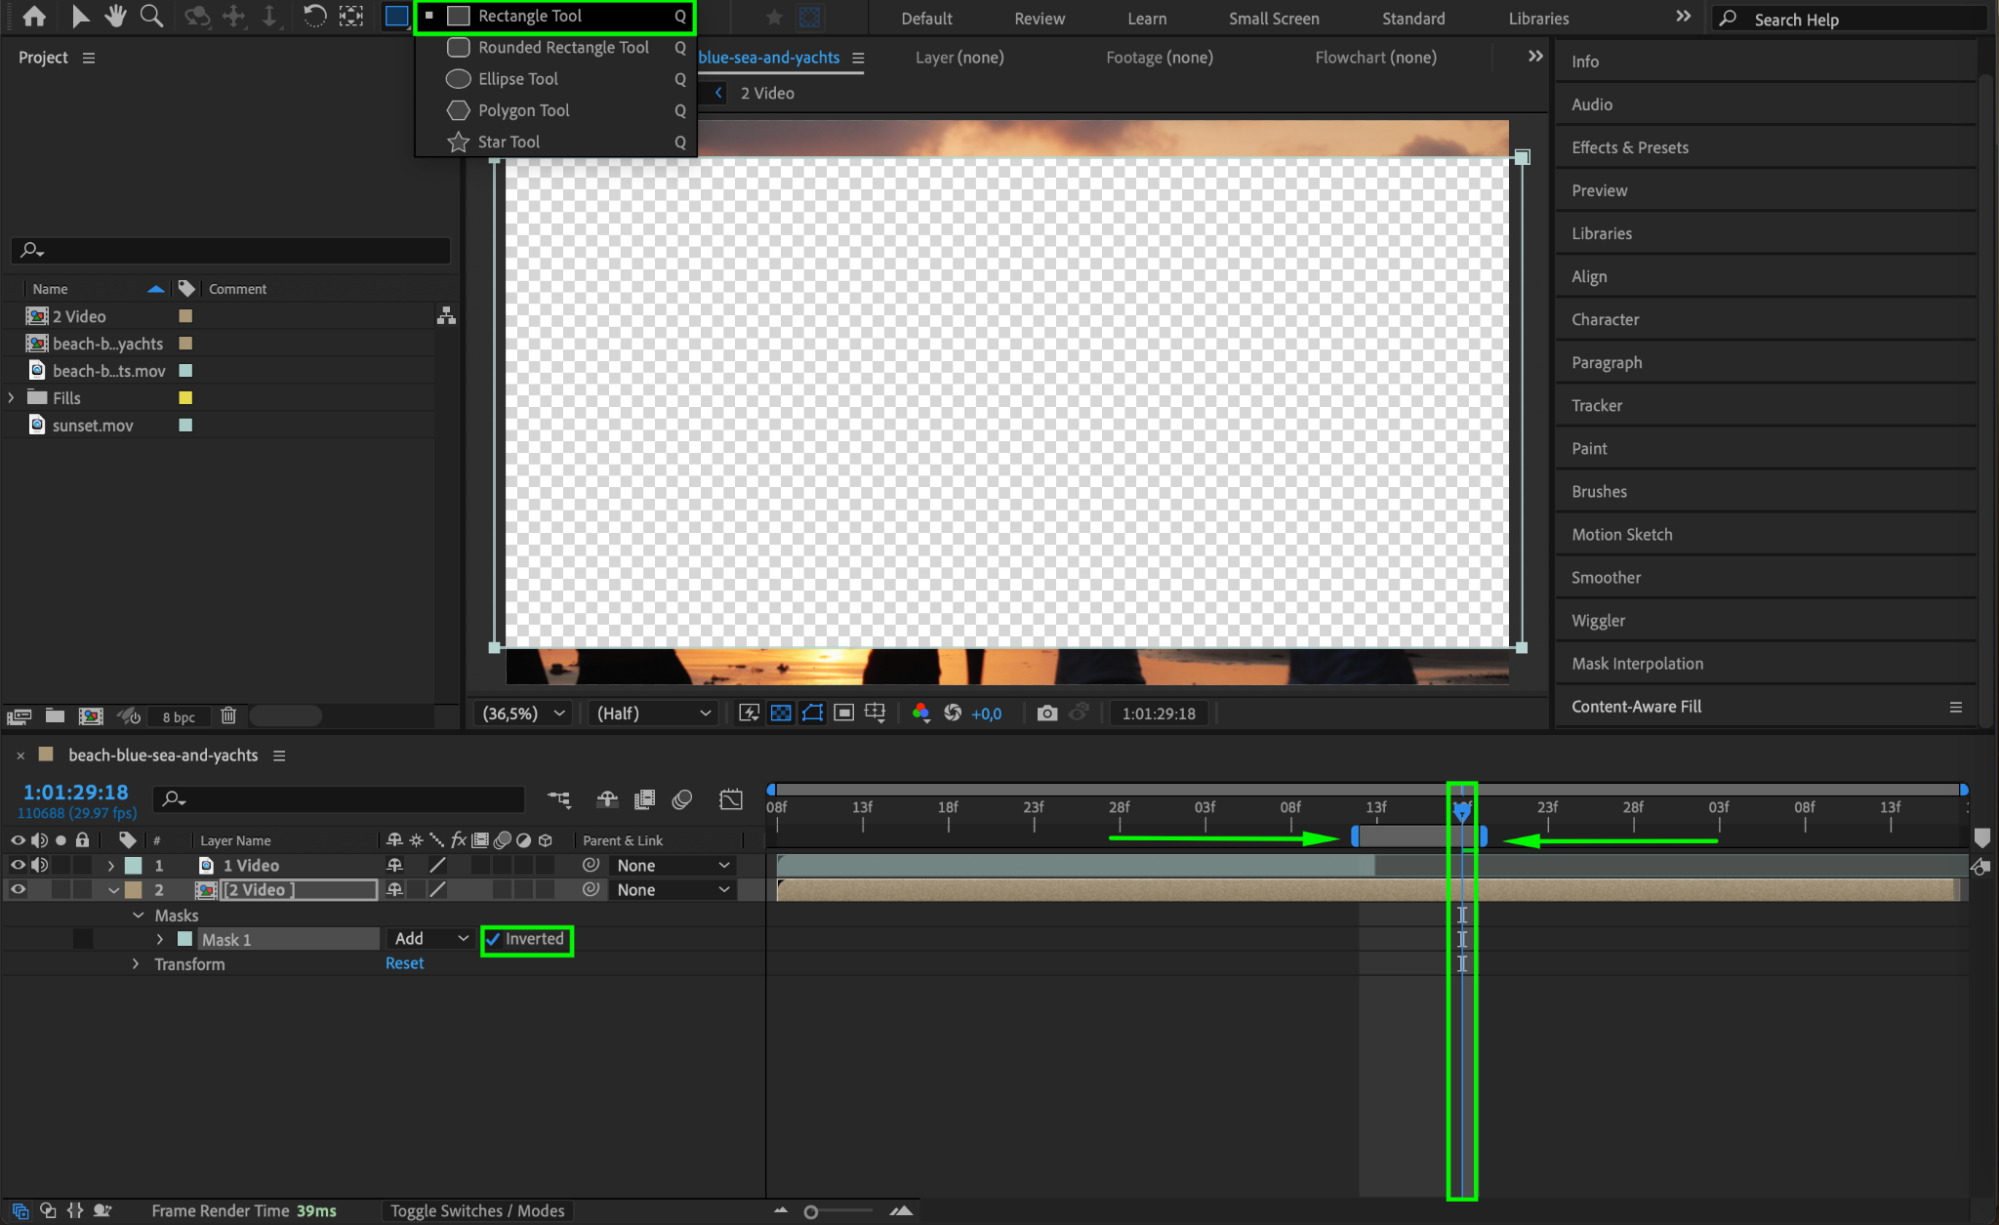
Step 4: Create a Mask on the Second Video
Select the second video layer and move the CTI (Current Time Indicator) to its position. Choose the Rectangle Tool (Q) and create a mask around the area where you want the glitch effect to occur. Then, check the Inverted box next to the mask settings to reveal only the selected portion.
 Step 5: Open the Content-Aware Fill Panel
Go to Window > Content-Aware Fill to open the panel. This tool will help generate missing details and create a smooth transition between the two clips.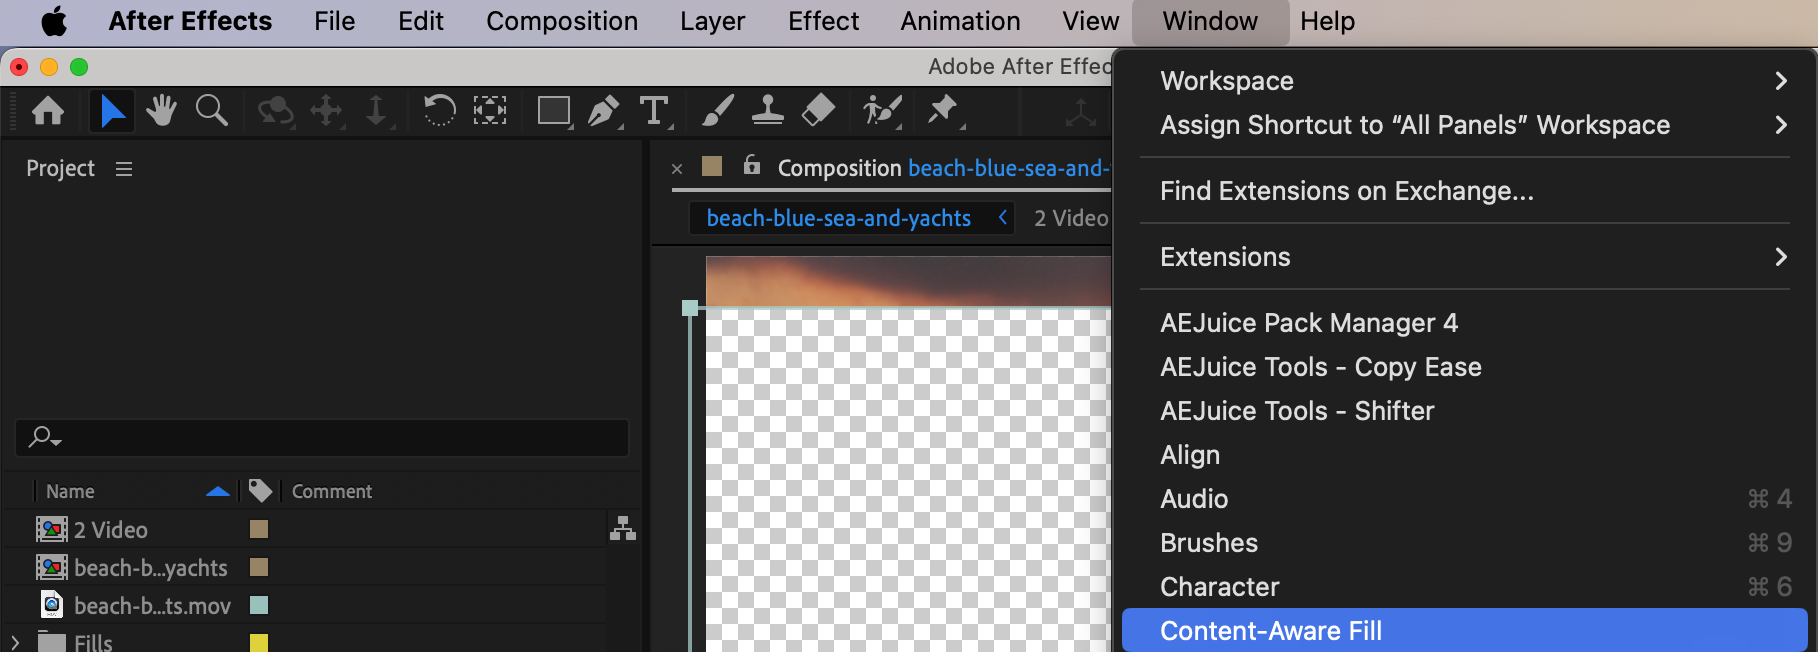 Step 6: Adjust Content-Aware Fill Settings
In the Content-Aware Fill panel, set Alpha Expansion to 0 and Fill Method to Surface. Then, click on the three-line menu in the upper-right corner of the panel and select Content-Aware Fill Settings.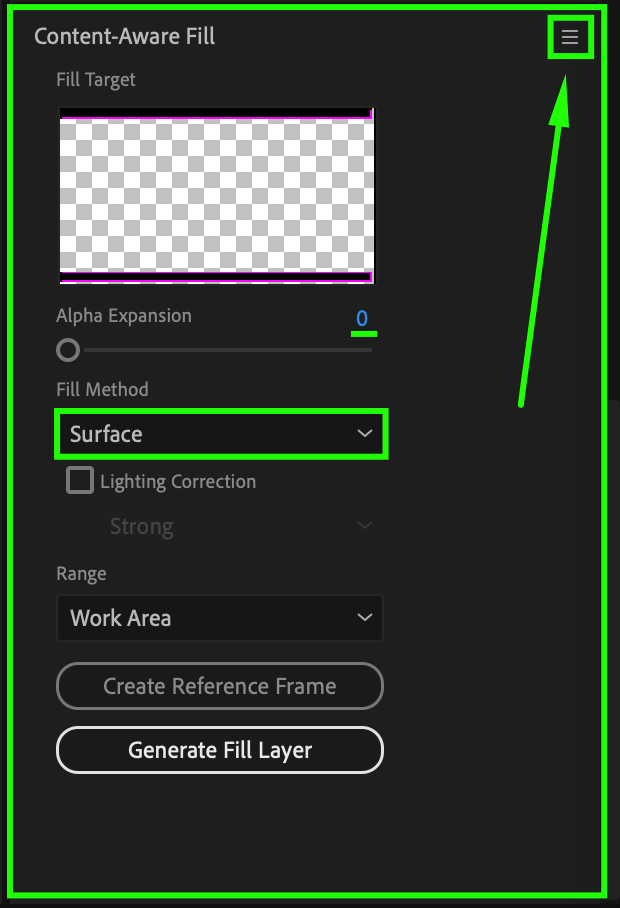 Step 7: Configure Fill Settings
In the Content-Aware Fill Settings window, enable Create Photoshop Sequence for Output and Auto-Manage Unused Fill Footage, then click OK. These settings ensure that the fill process runs smoothly and removes unwanted elements.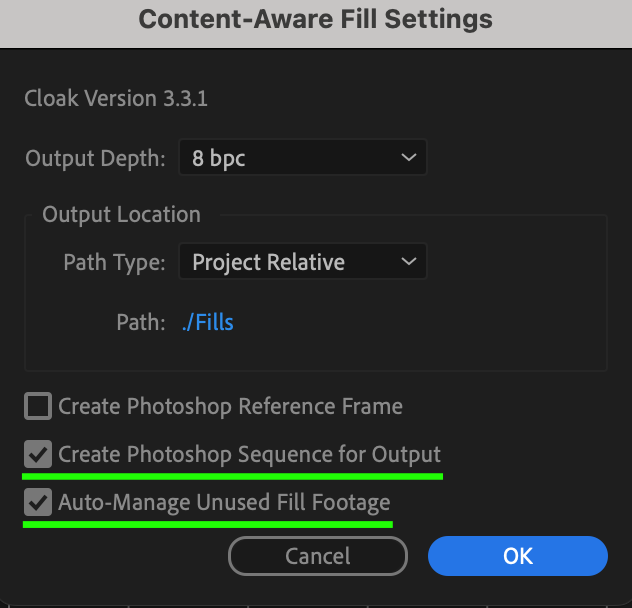 Step 8: Generate the Fill Layer
Back in the Content-Aware Fill panel, click Generate Fill Layer to process and apply the effect. After Effects will analyze the footage and fill in the masked area to create a glitchy transition.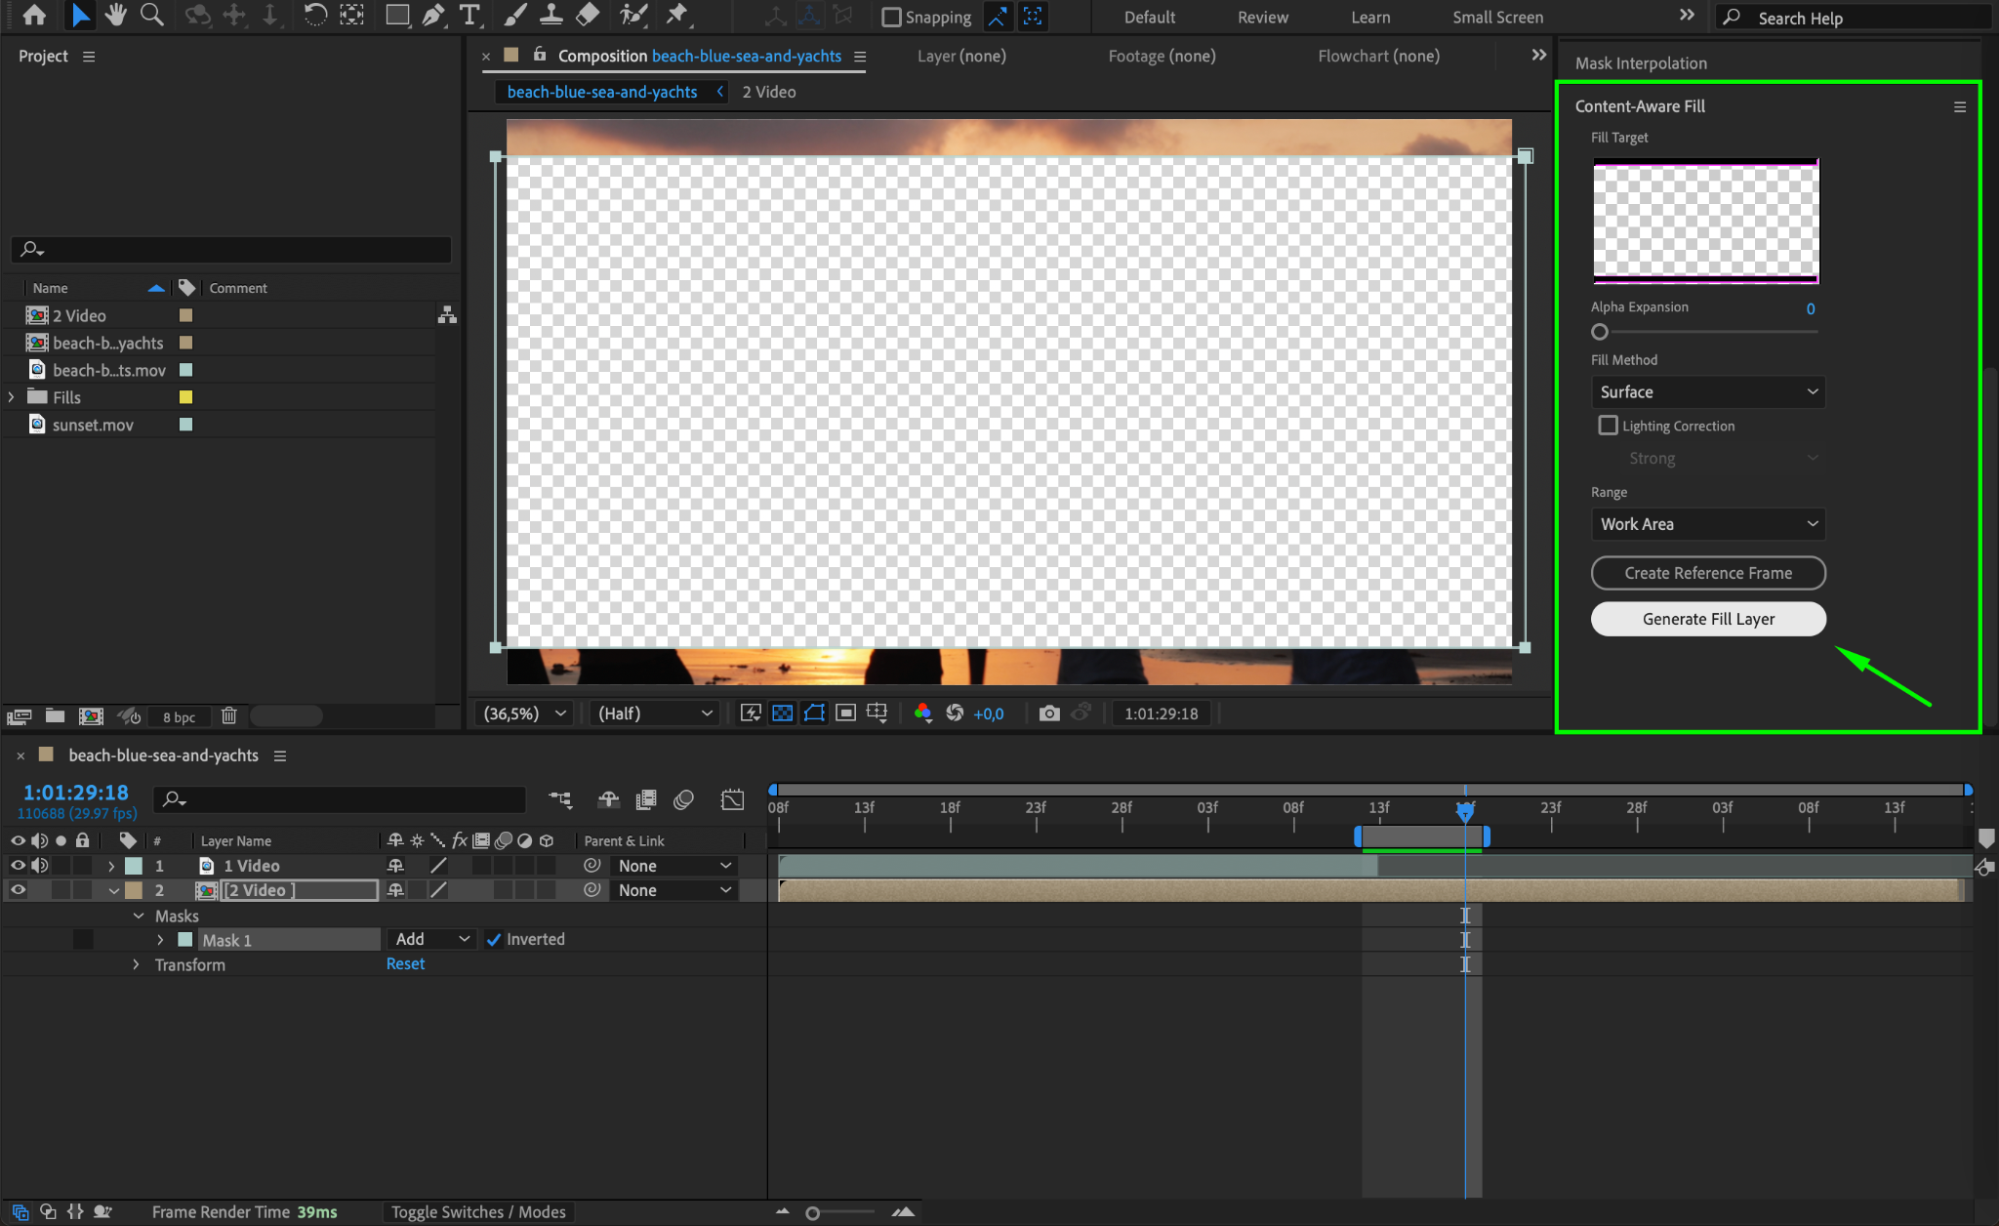
 Step 9: Add an Adjustment Layer
Go to Layer > New > Adjustment Layer and place it above all video layers. This will allow for further transformation and fine-tuning of the effect.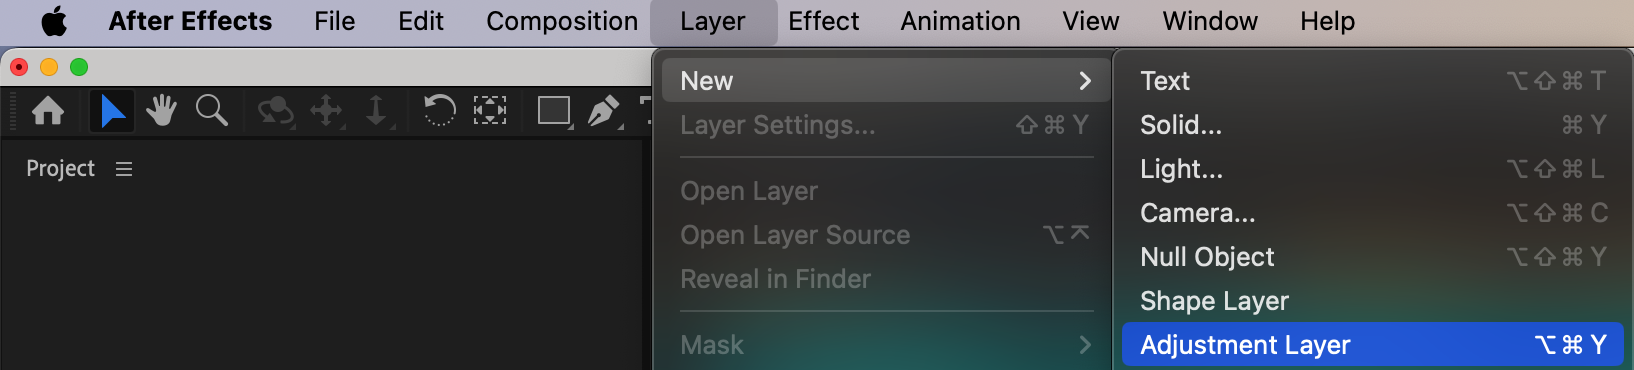 Step 10: Apply the Transform Effect
With the adjustment layer selected, go to Effects & Presets, search for Transform, and apply it.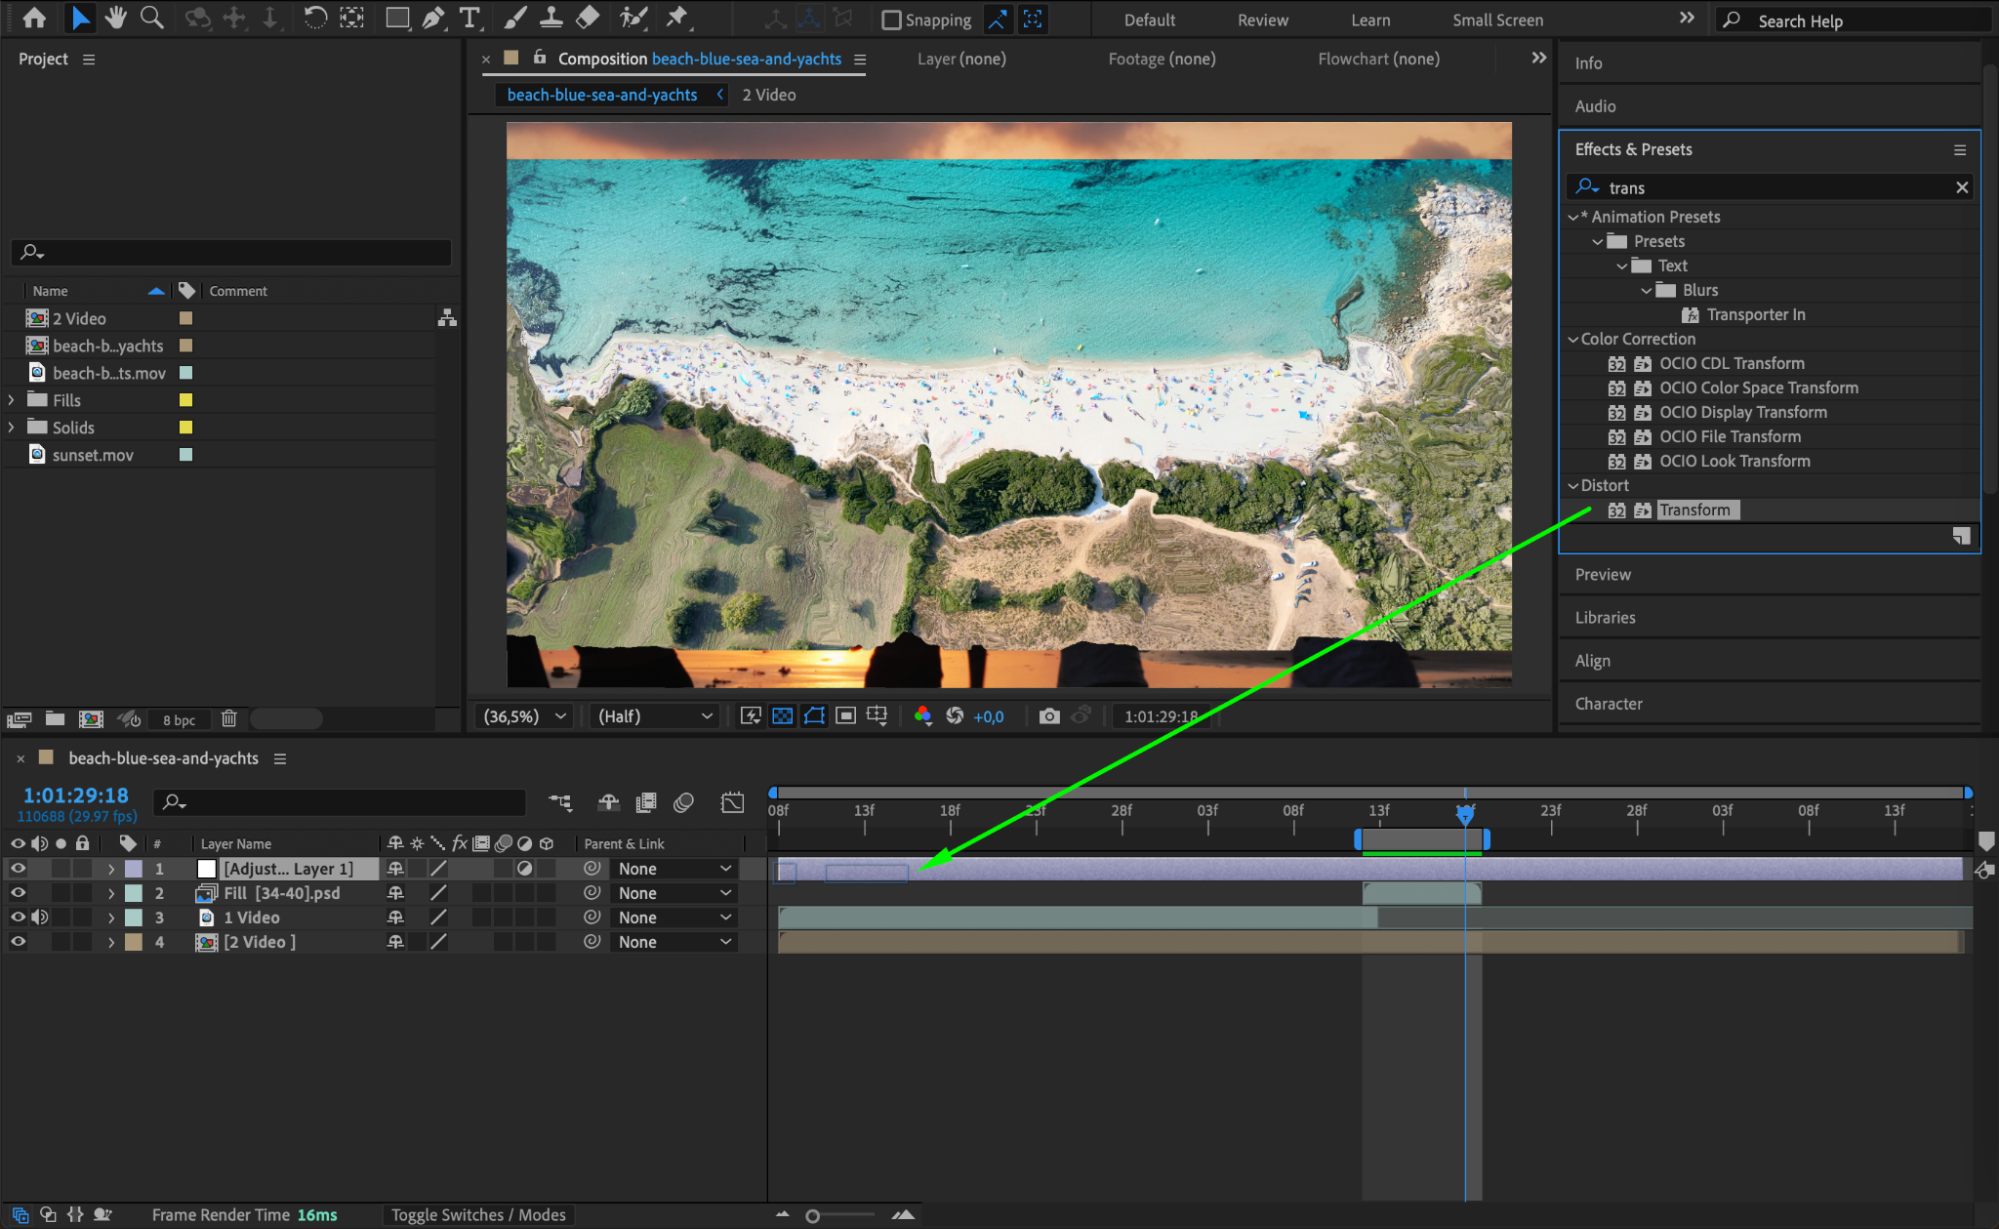 Step 11: Adjust Scale to Hide Edges
In the Effect Controls panel, increase the Scale value to ensure that no unwanted edges from the masked area are visible. This will create a seamless transition effect.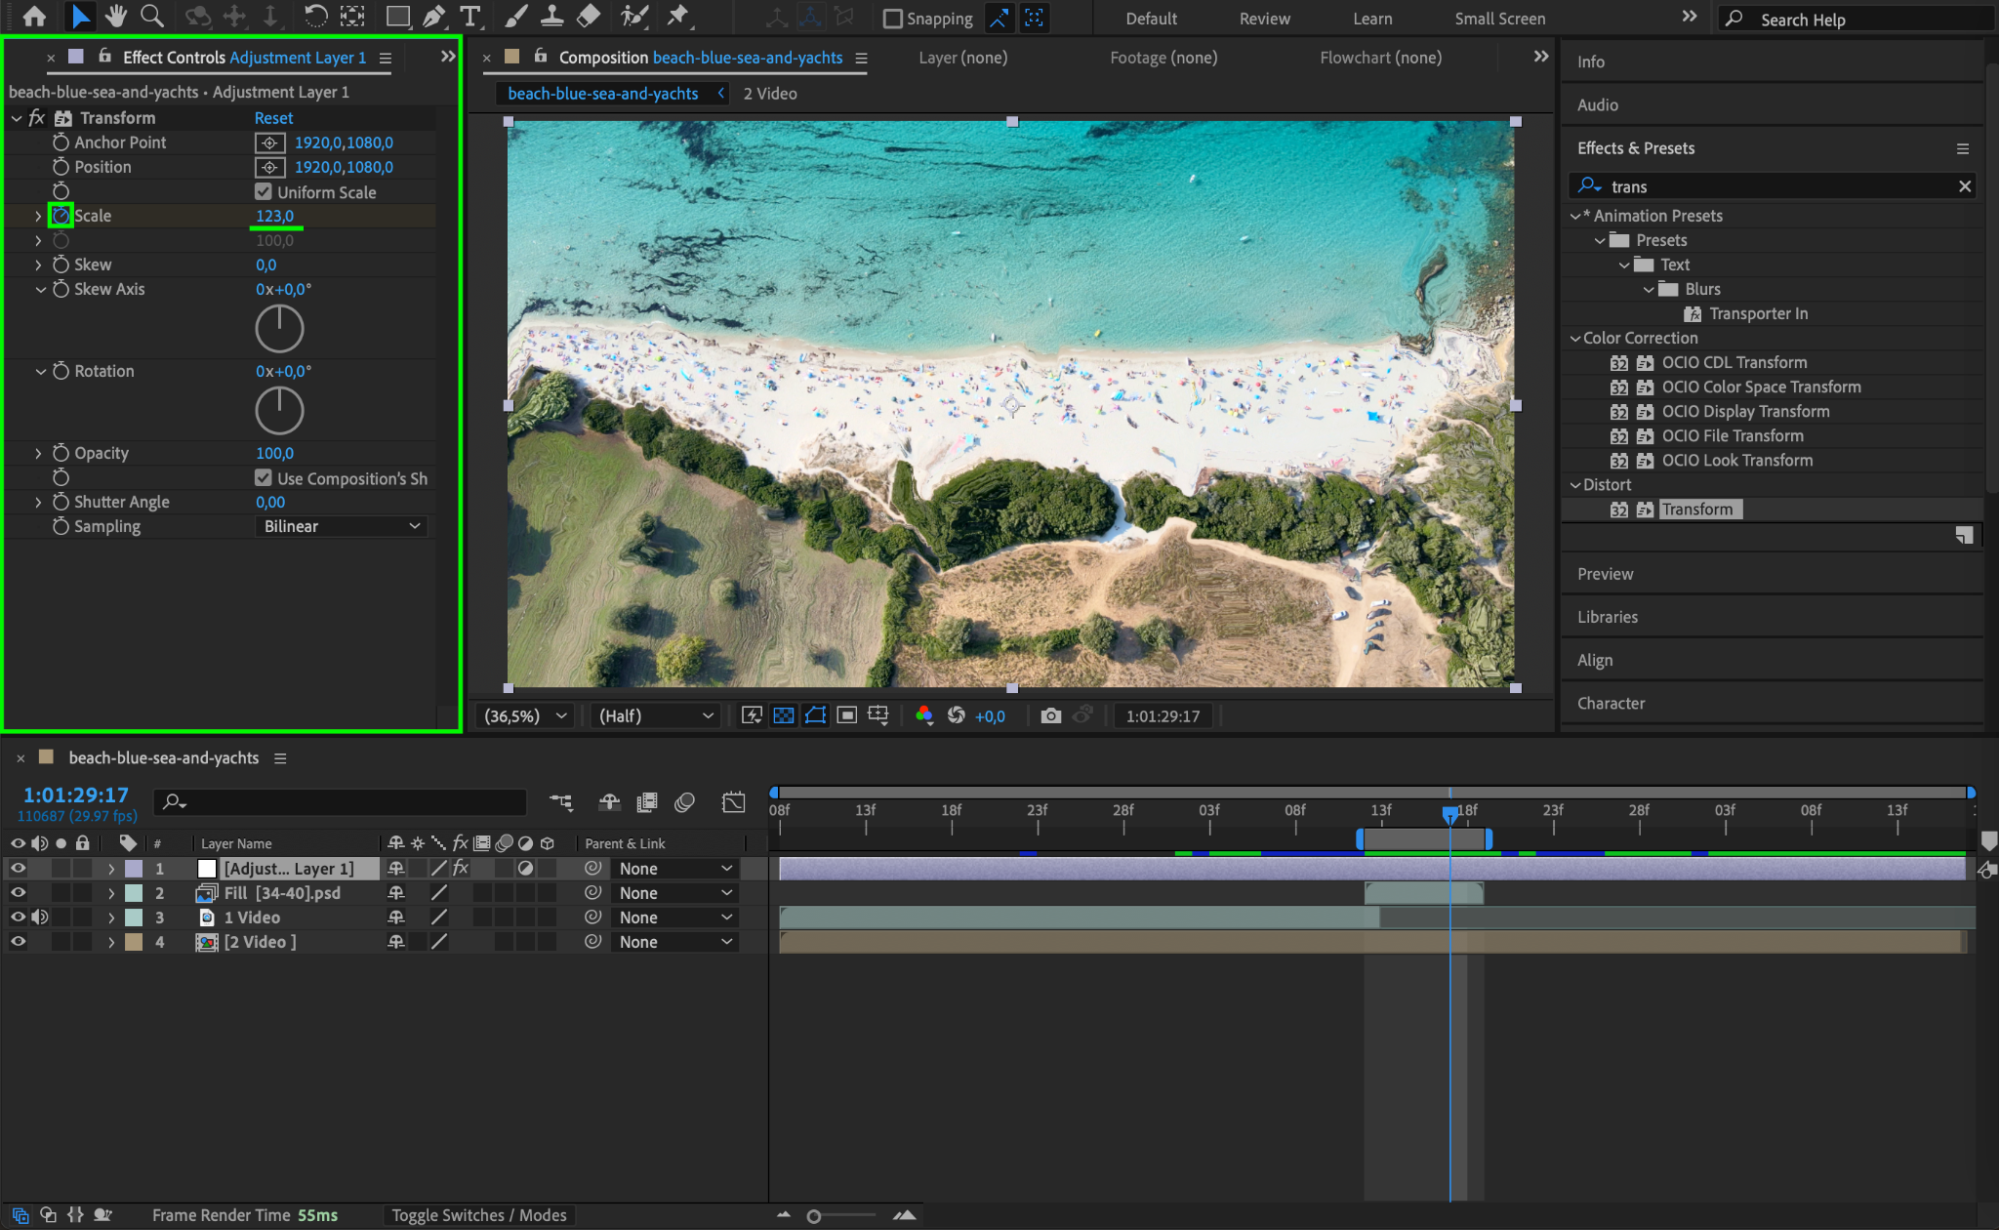 Step 12: Restore Start and End Comp Sliders
Move the Start and End Comp Sliders back to their original positions. Then, drag the second video from the Project Panel and place it below all layers to finalize the composition.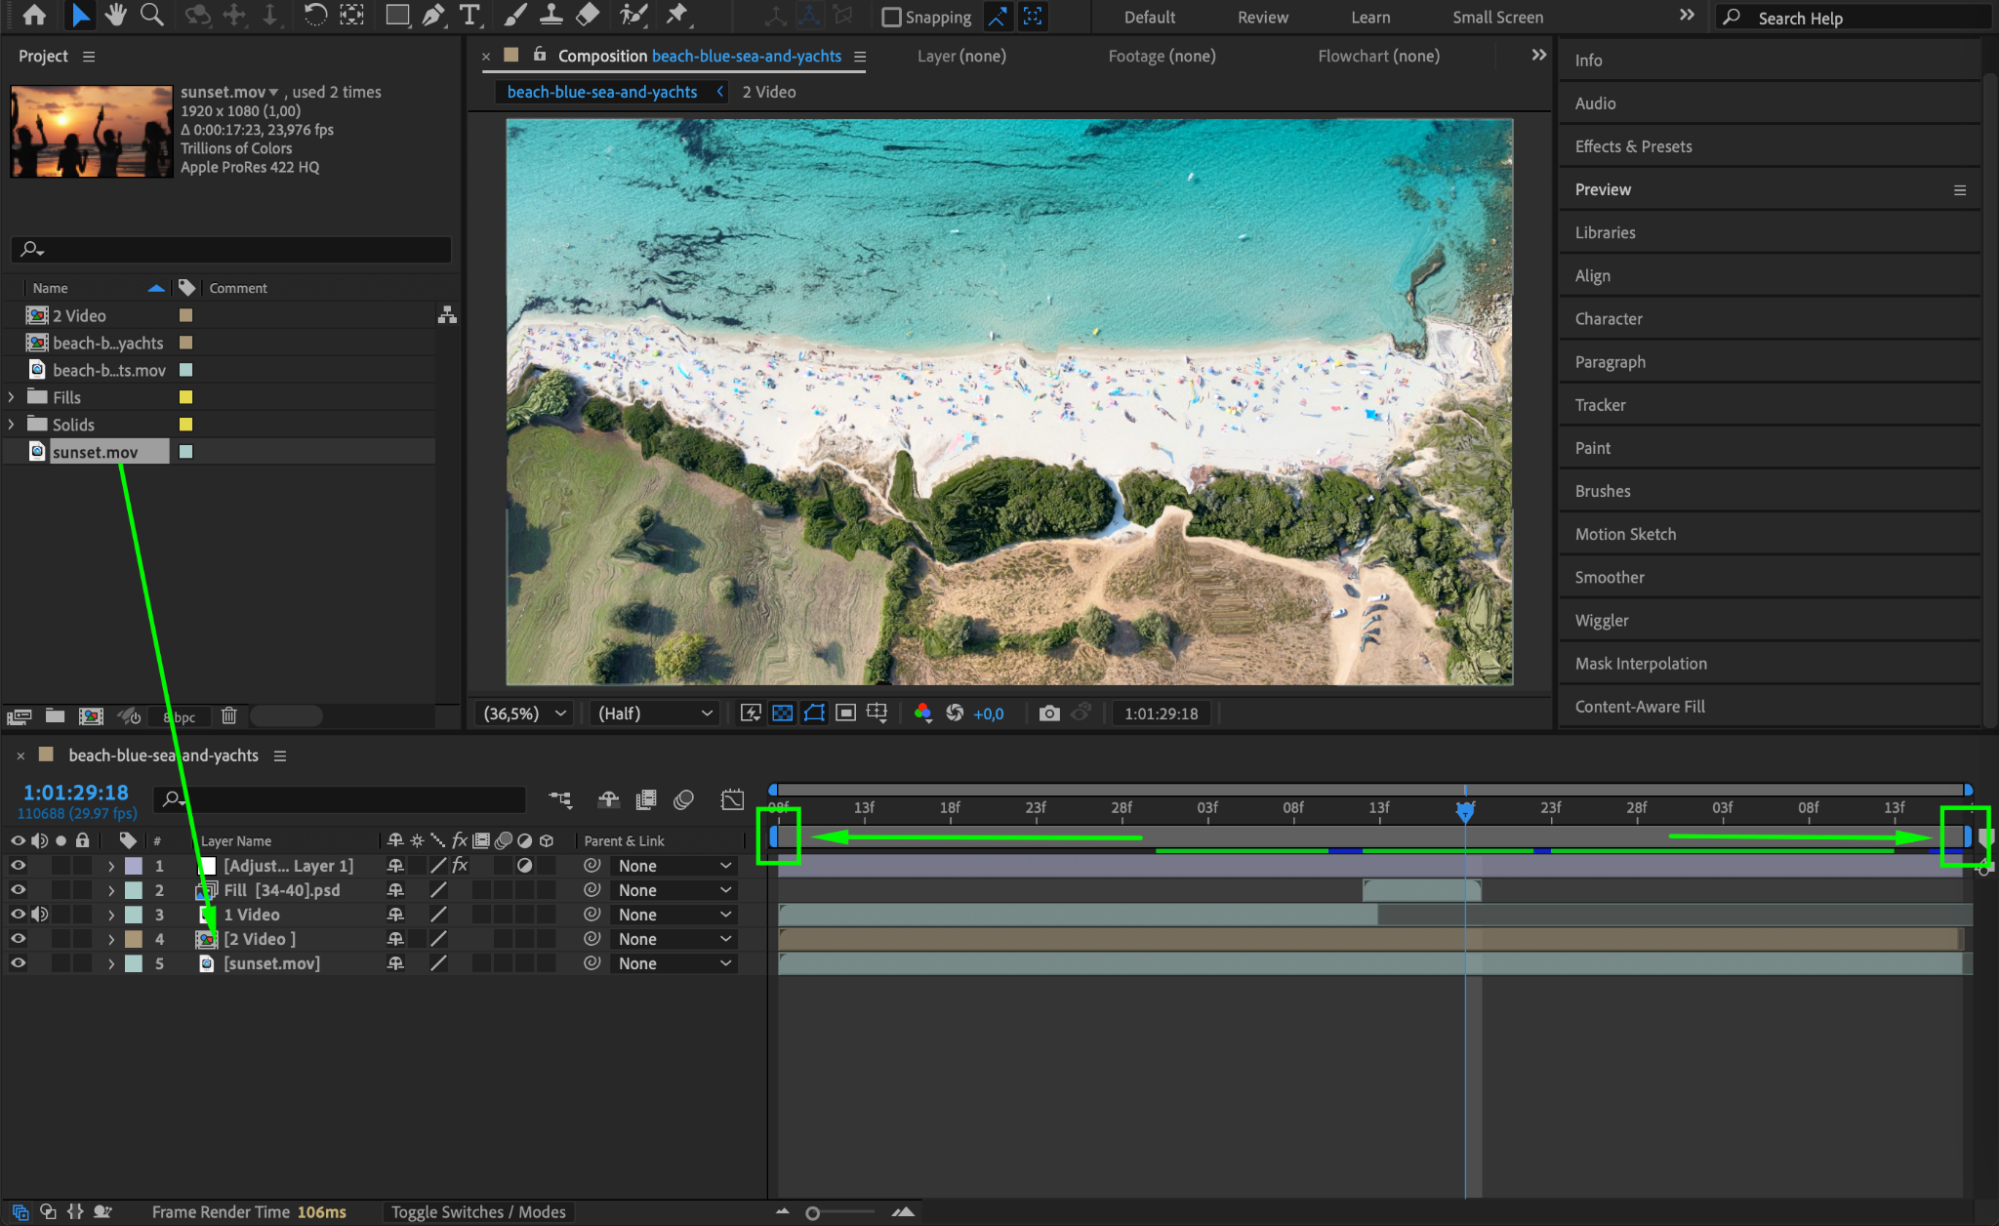 Step 13: Preview the Transition
Press the Spacebar to play the composition and check how the datamosh transition looks. Adjust any settings if needed to refine the effect.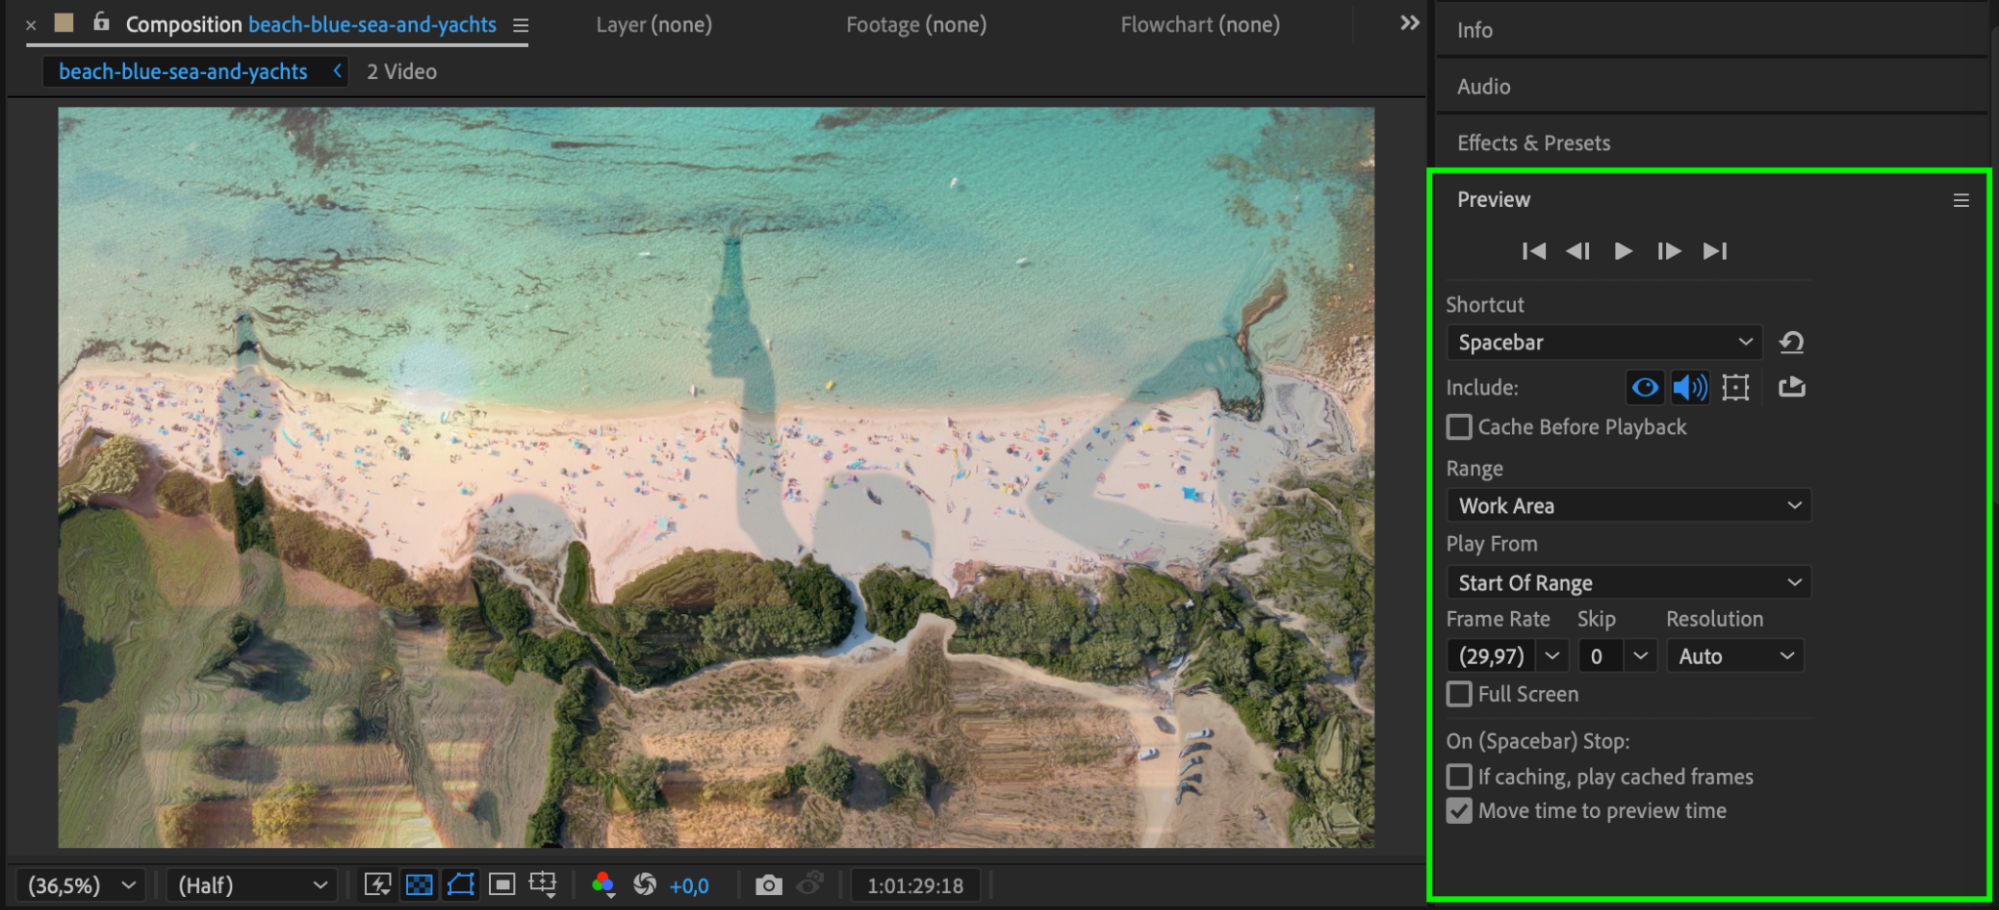 Step 14: Render the Final Video
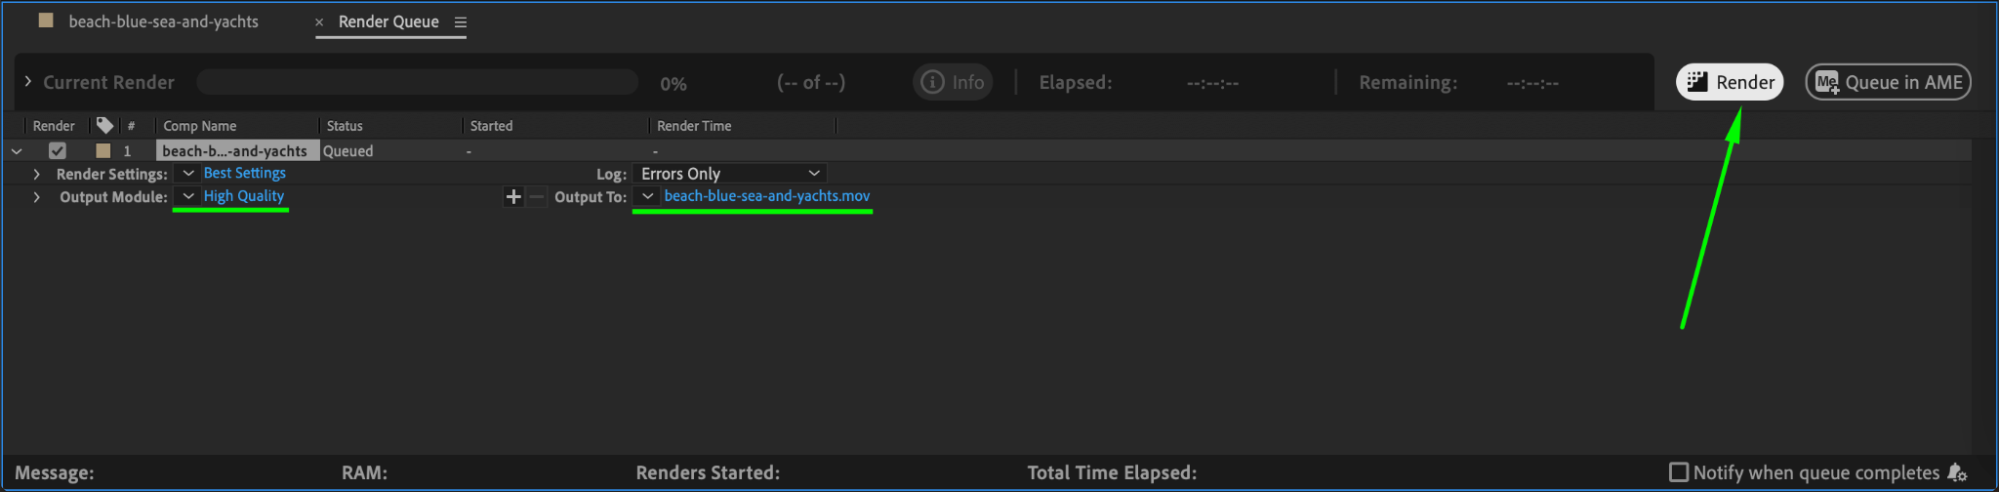
Go to Composition > Add to Render Queue, choose your preferred format and output location, then click Render to export the completed datamosh transition.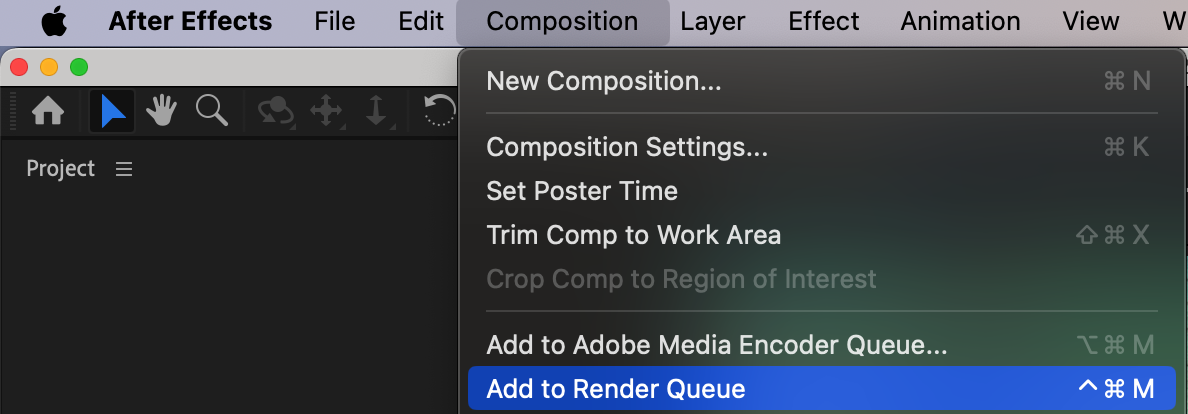
 Conclusion
By using masking, Content-Aware Fill, and transformation effects, you can create a dynamic datamosh transition in After Effects. This effect is great for music videos, creative edits, and glitch-style animations. Experiment with different mask shapes and settings to achieve a unique look.
Our Bestsellers


