Creating a Dissolve Effect for Text in After Effects: A Step-by-Step Guide
Introduction: Mastering Text Animations with Dissolve Effects in After Effects
If you’re looking to add a touch of magic to your text animations, the dissolve effect is a popular and visually stunning choice. By creating a seamless and fluid transition, you can elevate the impact and aesthetics of your video projects. In this tutorial, we will guide you through the steps to make your text dissolve in After Effects. No matter your skill level, this tutorial will equip you with the knowledge and techniques to bring your text to life.
So, let’s explore the process and unleash the full creative potential of After Effects to create captivating text dissolve effects!
To achieve a dissolve effect animation in After Effects, you’ll need to use keyframing and select the appropriate effects. Follow these steps to create a mesmerizing dissolve effect for your text:
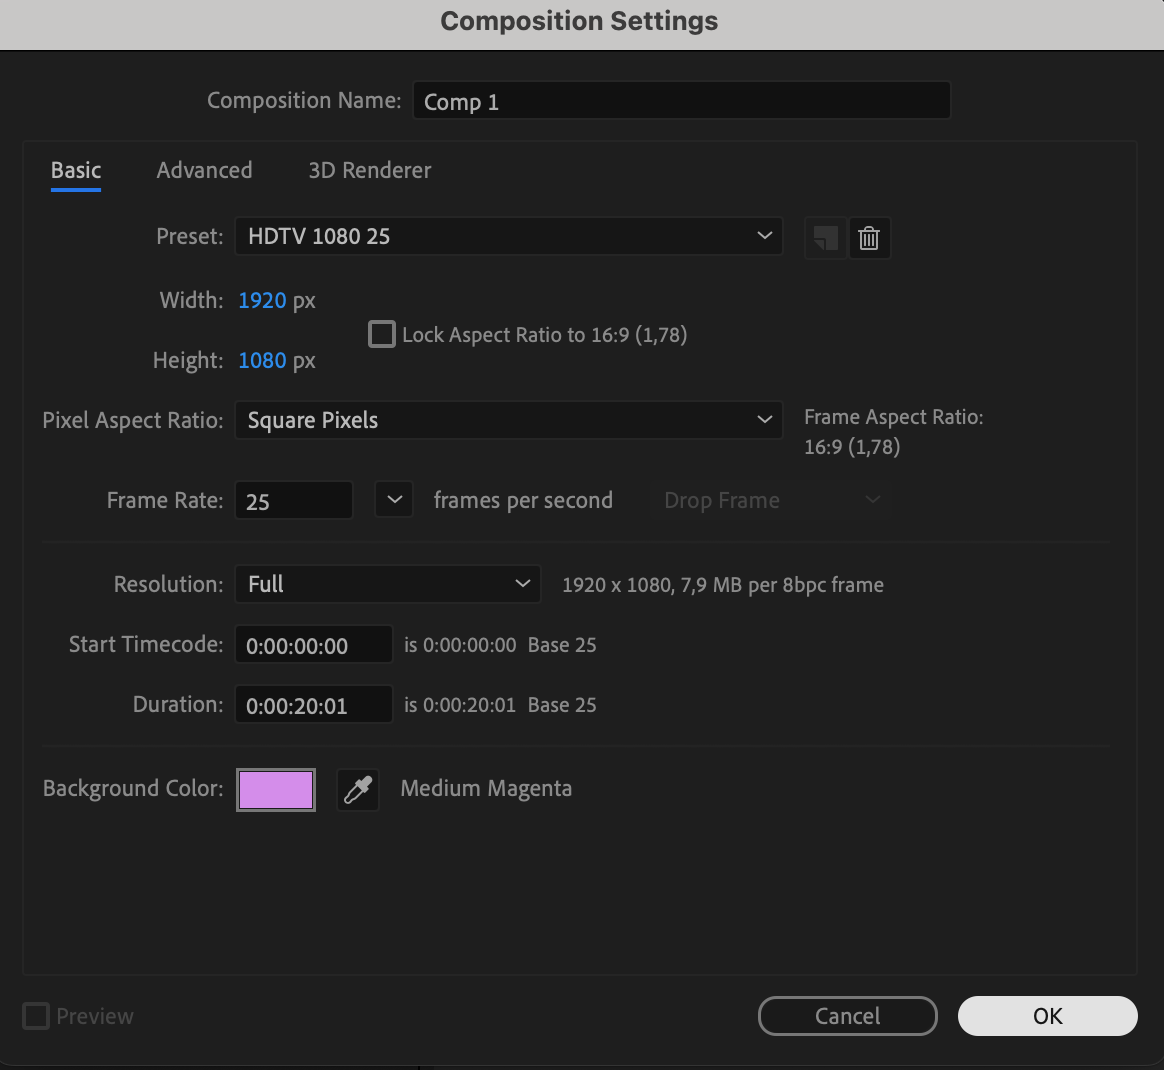
Step 1: Start a New Composition
Begin by creating a new composition in After Effects. Set the desired duration and dimensions for your project.
Get 10% off when you subscribe to our newsletter

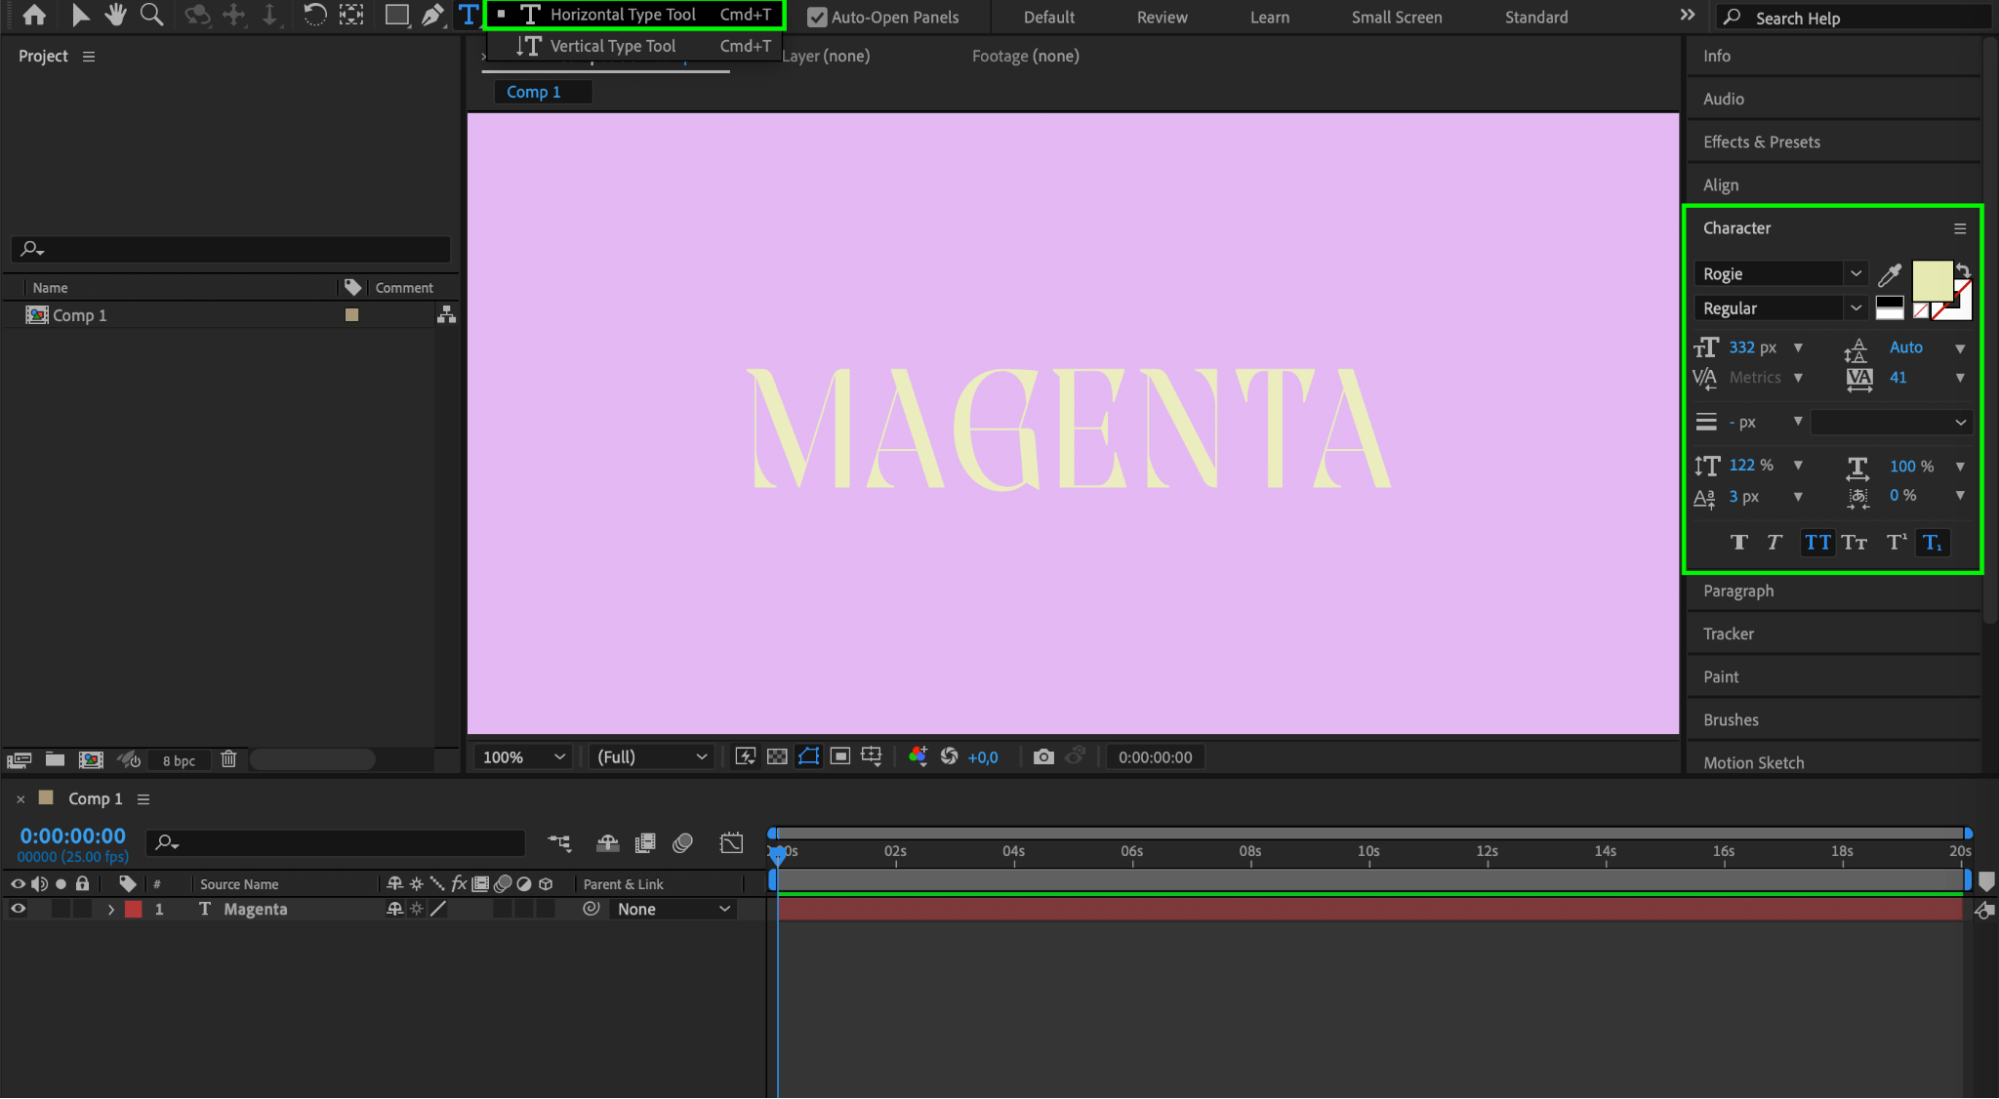
 Step 2: Add Text
Use the Text Tool (Ctrl/Cmd + T) to add the desired text to your composition. Customize the font, size, and other properties according to your creative vision.
 Step 3: Apply the Displacement Map Effect
Select your text layer and navigate to Effects > Distort > Displacement Map. Apply the Displacement Map effect to your text layer.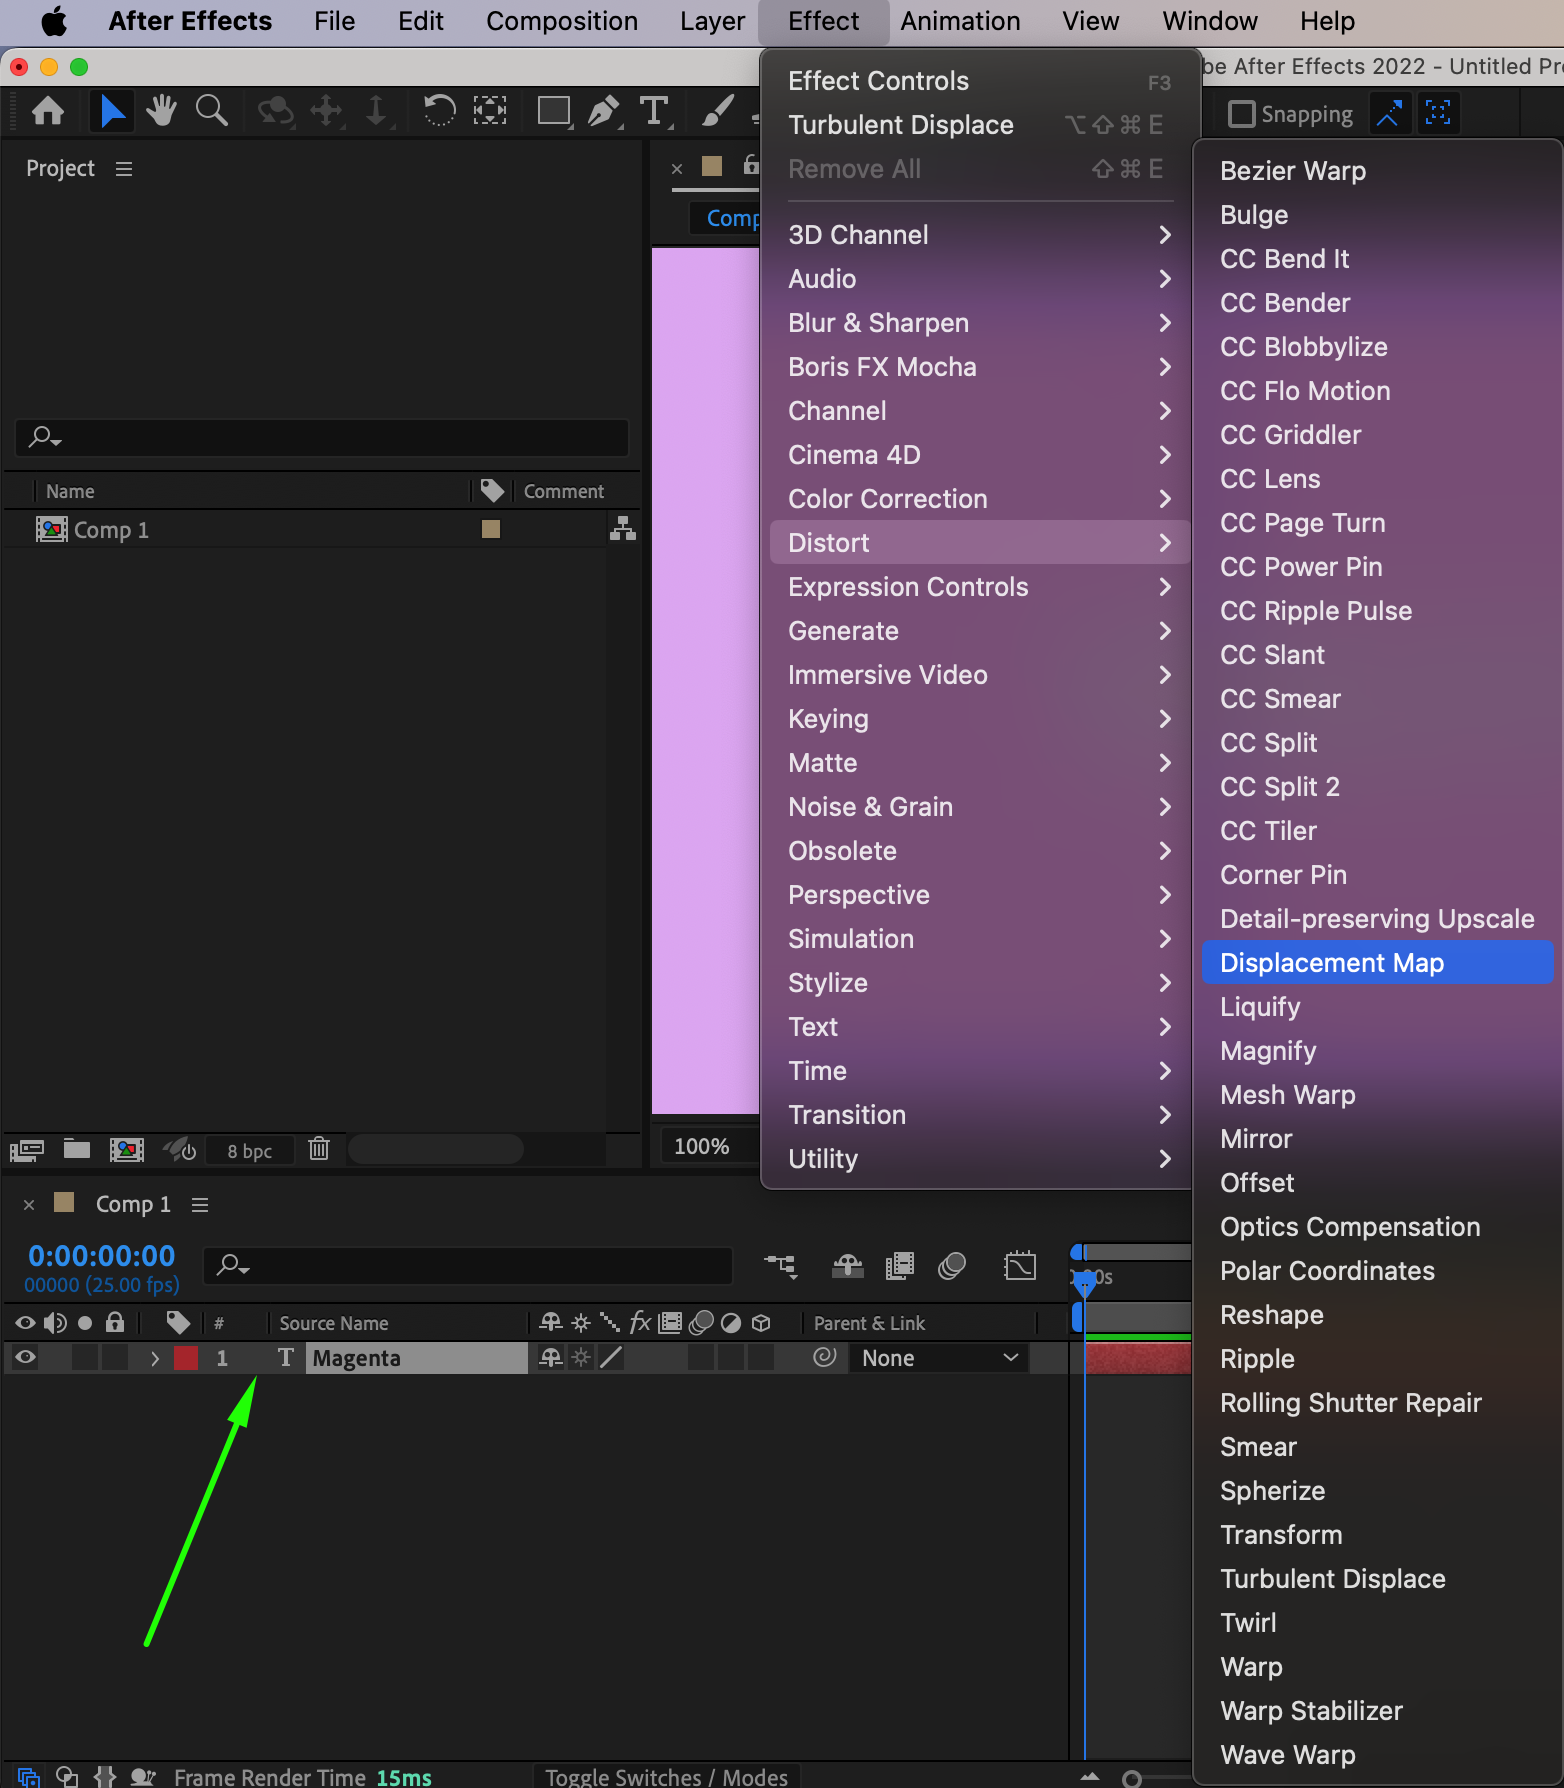 Step 4: Adjust Displacement Map Settings
In the Effects Control panel, you’ll find various parameters to customize the Dissolve effect. Experiment with the values of the Displacement Map settings such as Max Horizontal Displace and Max Vertical Displaceme to achieve the desired dissolve effect.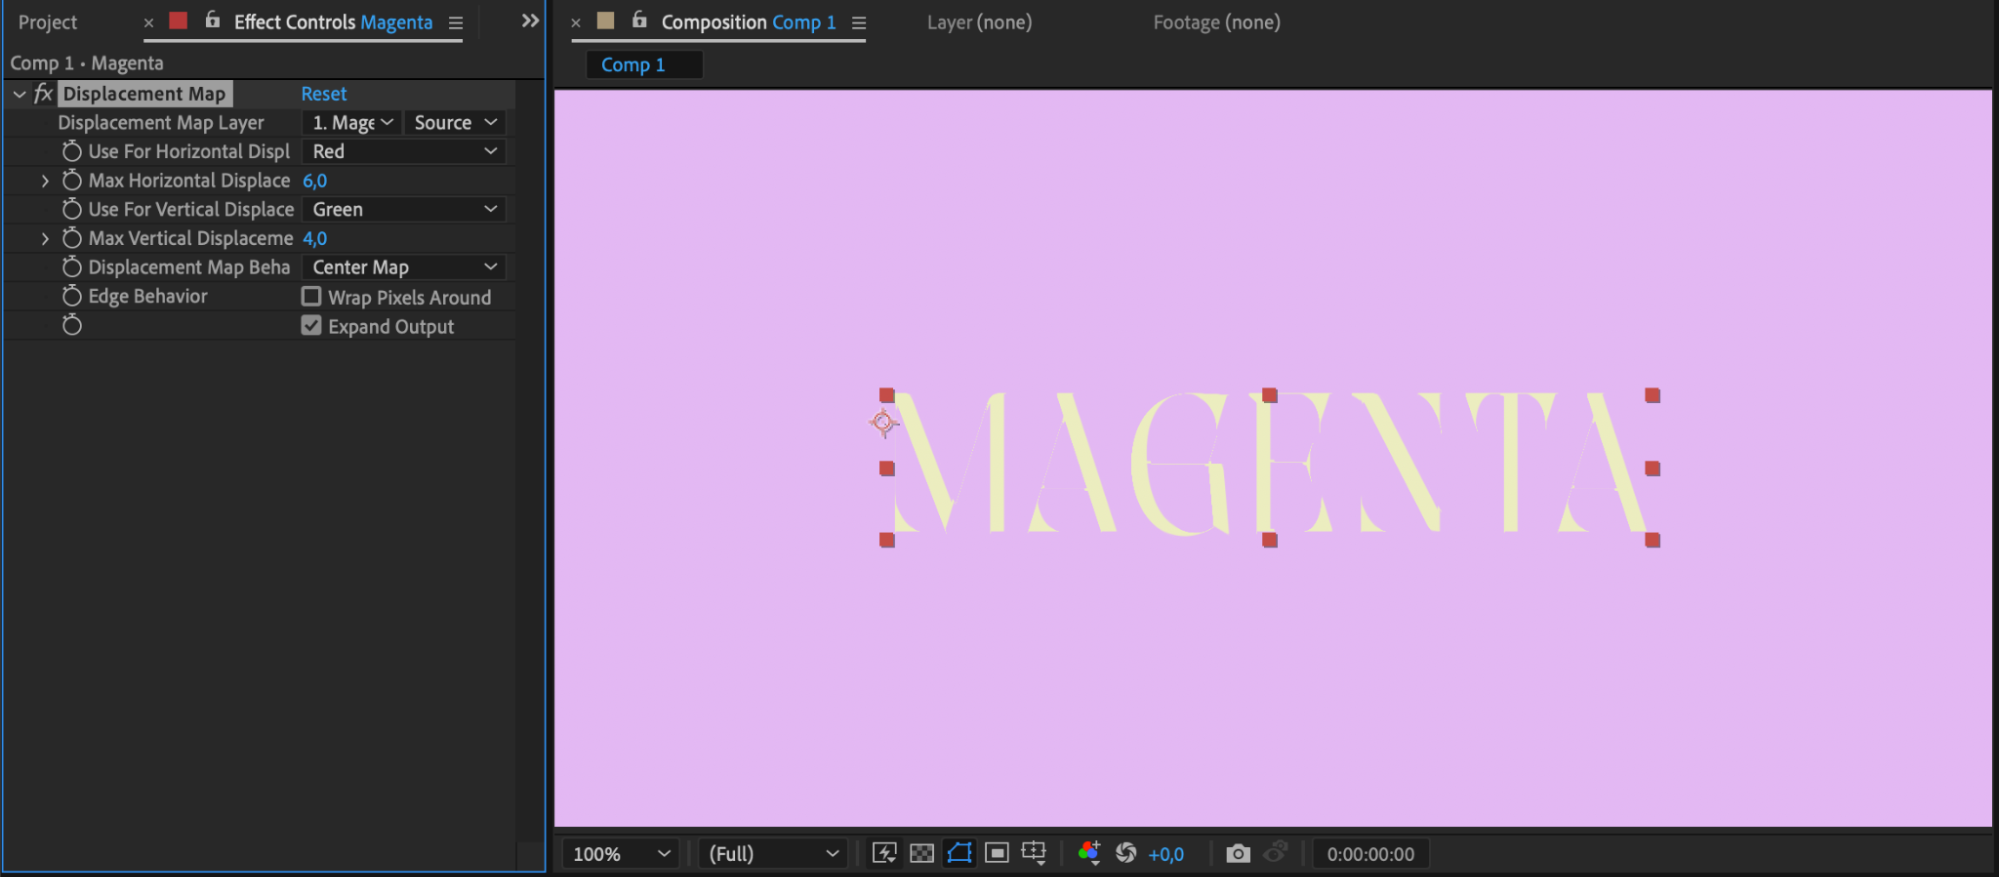 Step 5: Keyframe Displacement Map Settings
Get 10% off when you subscribe to our newsletter
To create the dissolve effect, you’ll need to animate the Displacement Map settings over time. Set keyframes for the Max Horizontal Displace and Max Vertical Displaceme properties at the beginning and end of the dissolve animation. Adjust the values between these keyframes to control the intensity and duration of the effect.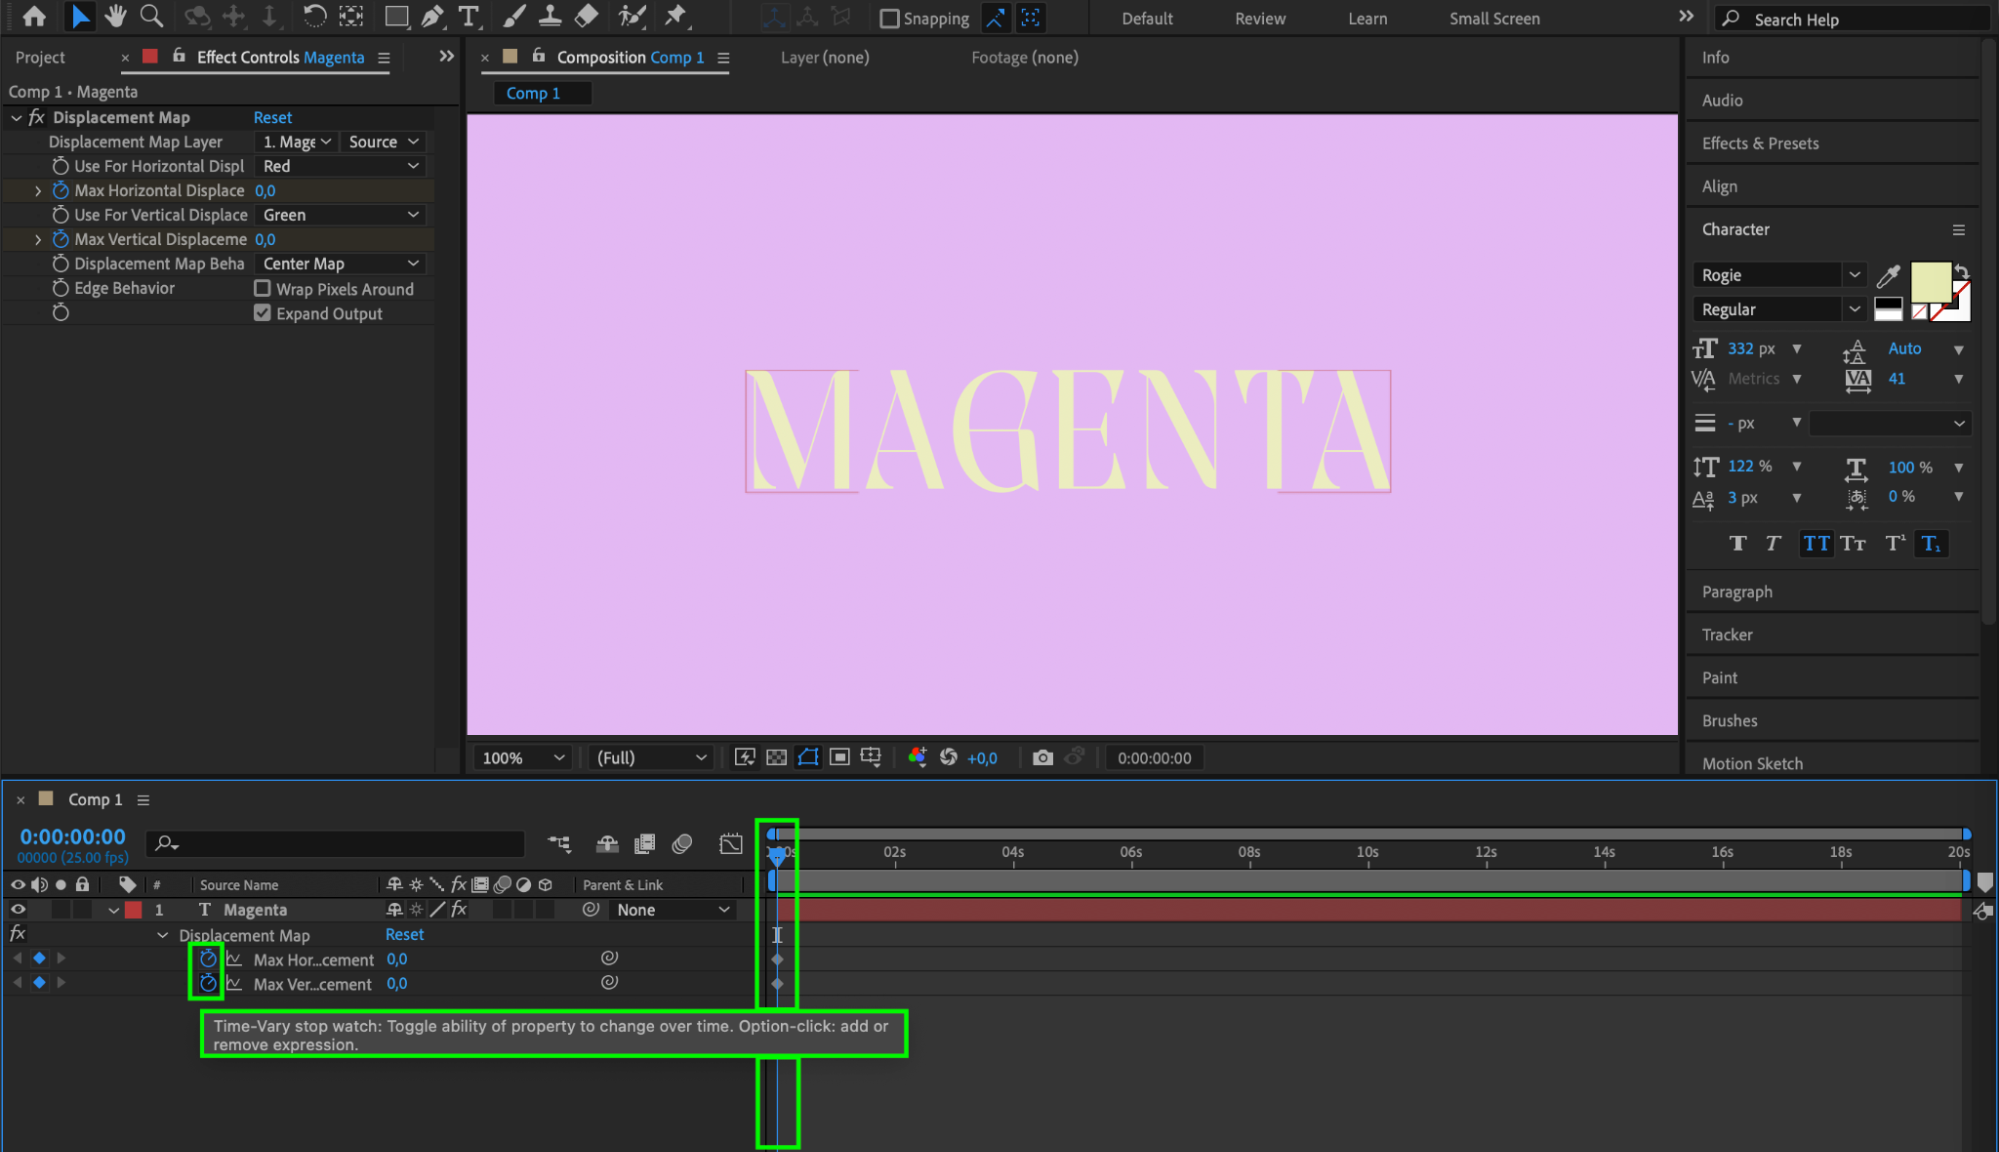
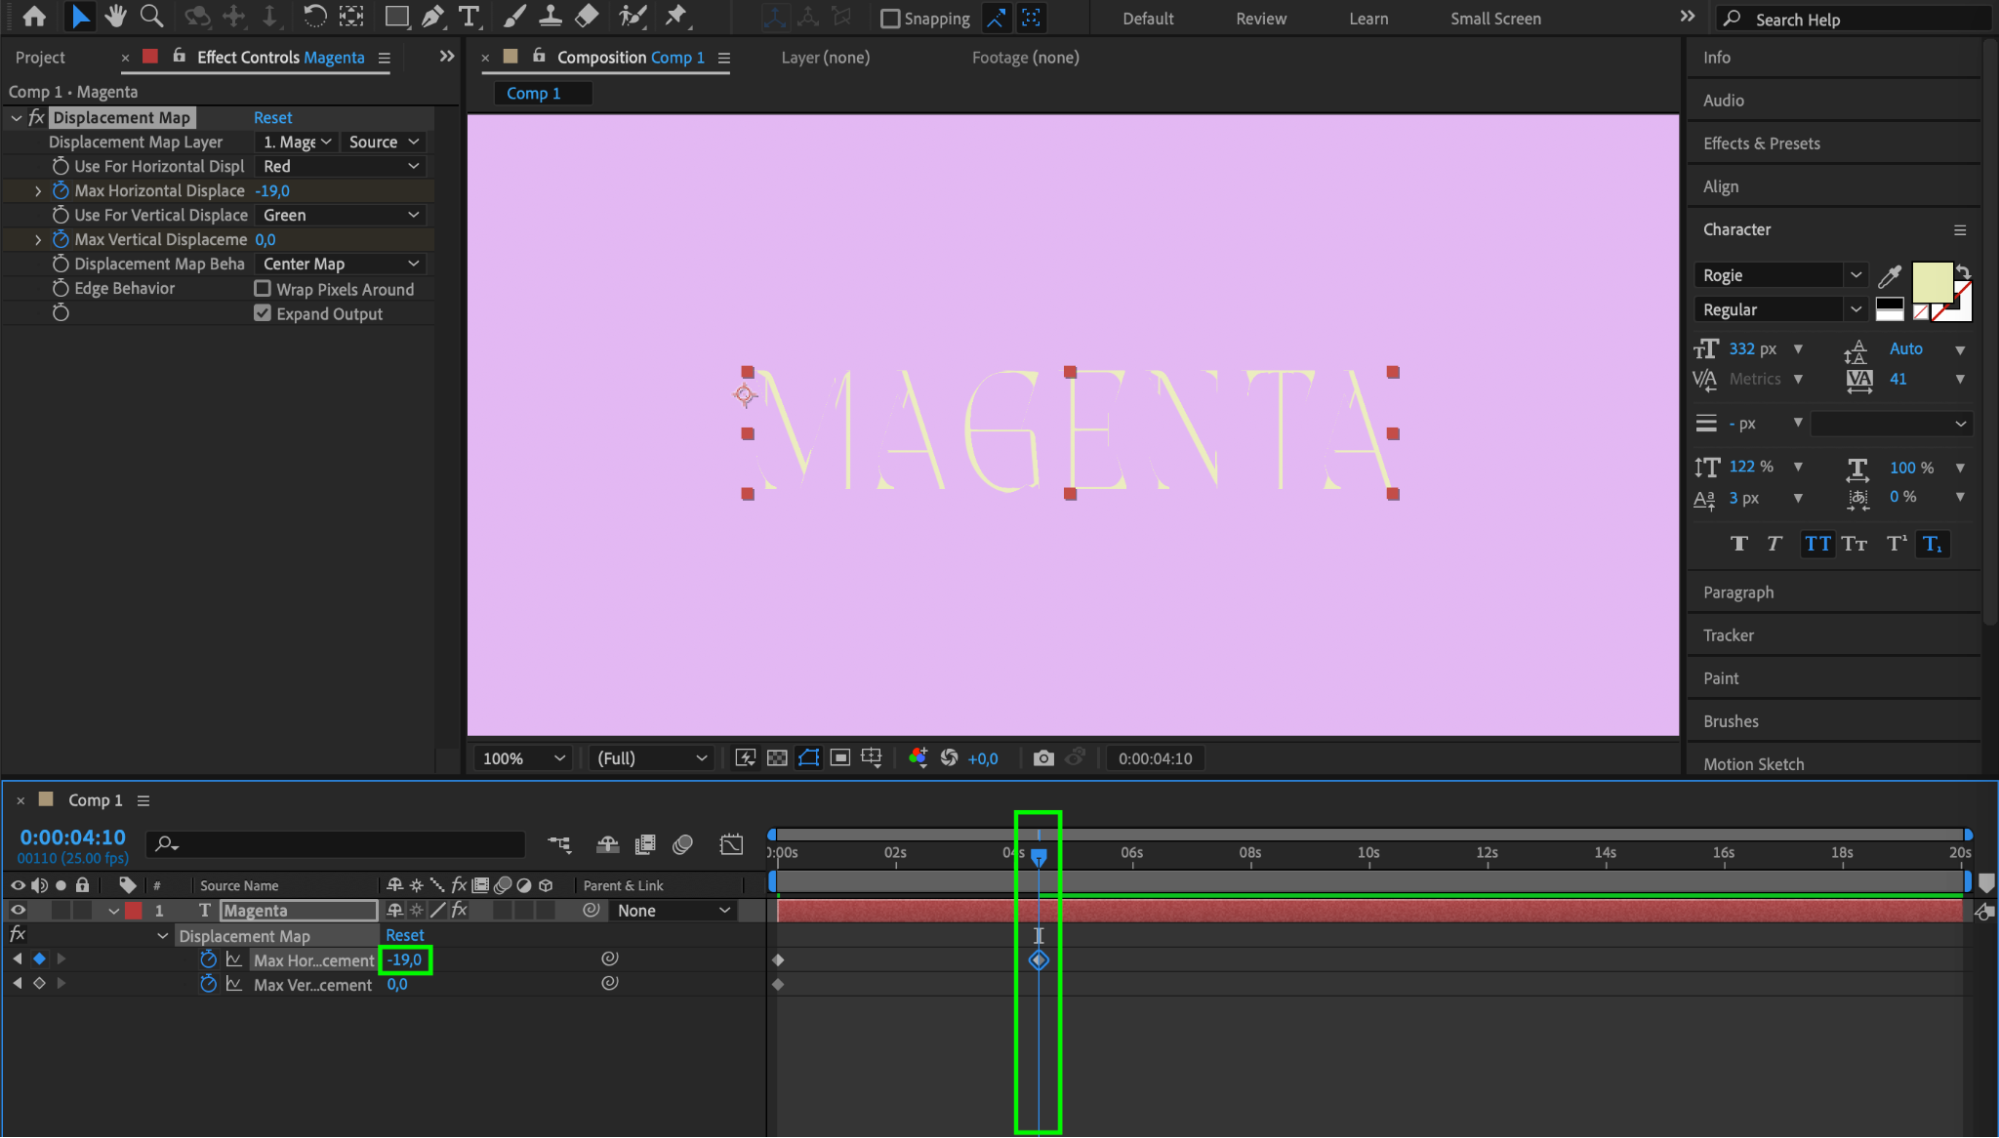
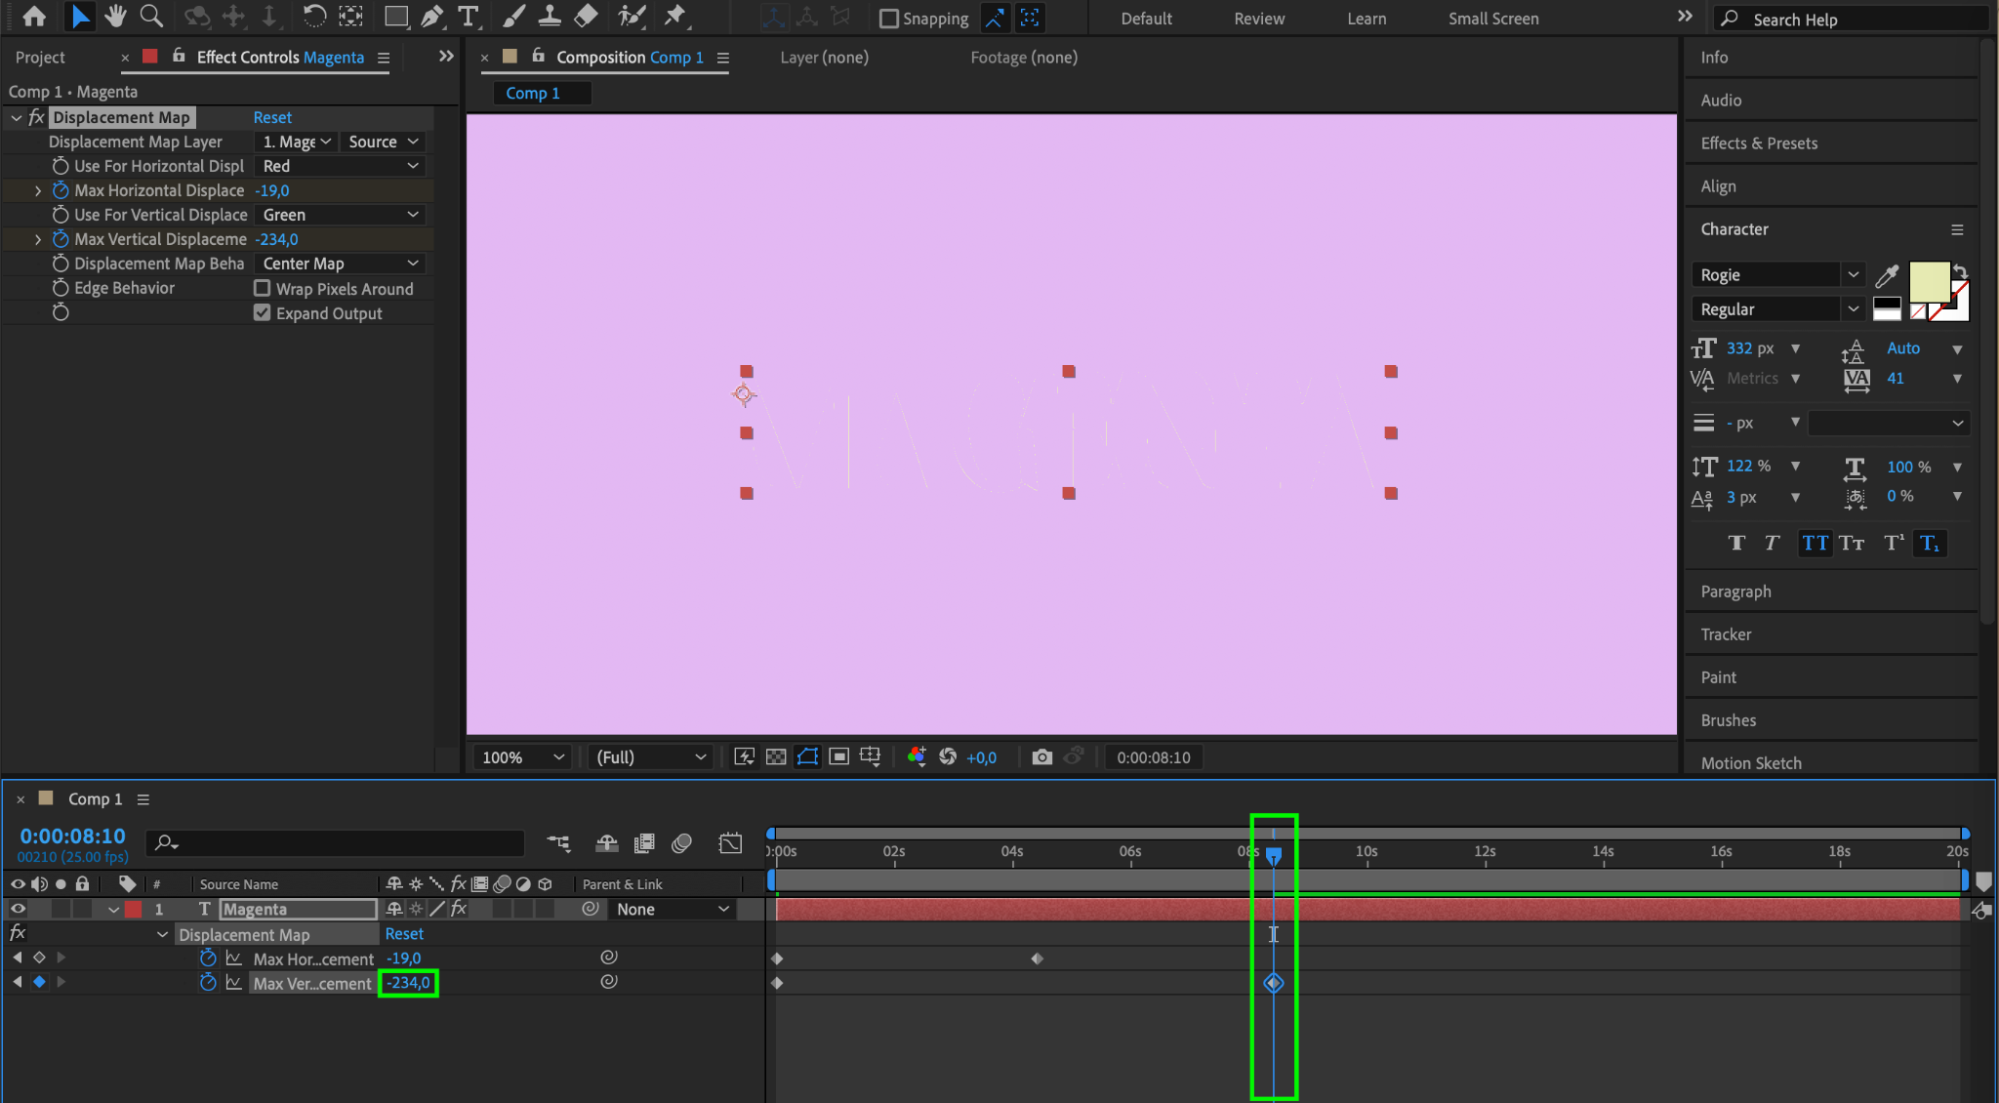
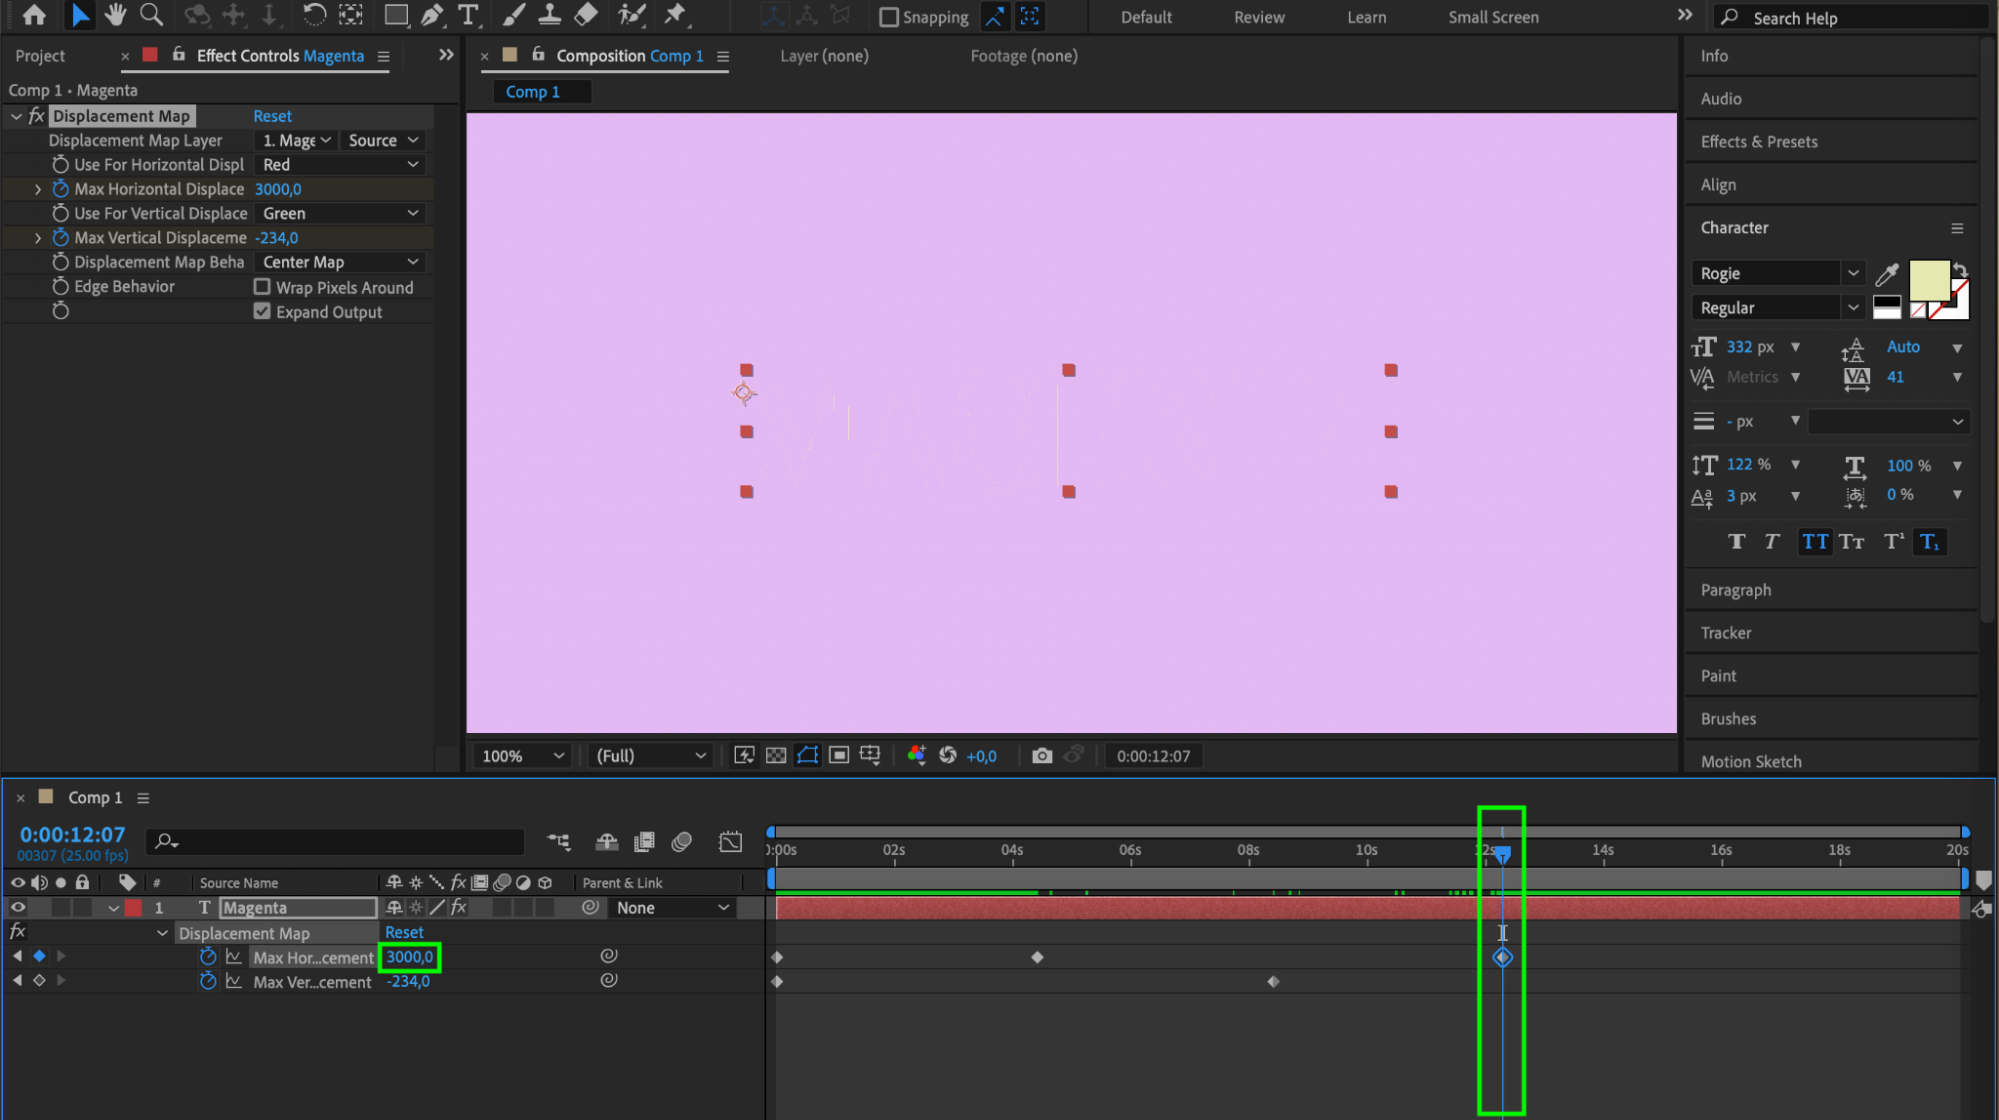 Step 6: Fine-Tune the Animation
Preview the animation and make any necessary adjustments to the Displacement Map settings to refine the dissolve effect further. Play with different keyframe timings and values to find the perfect balance for your text animation.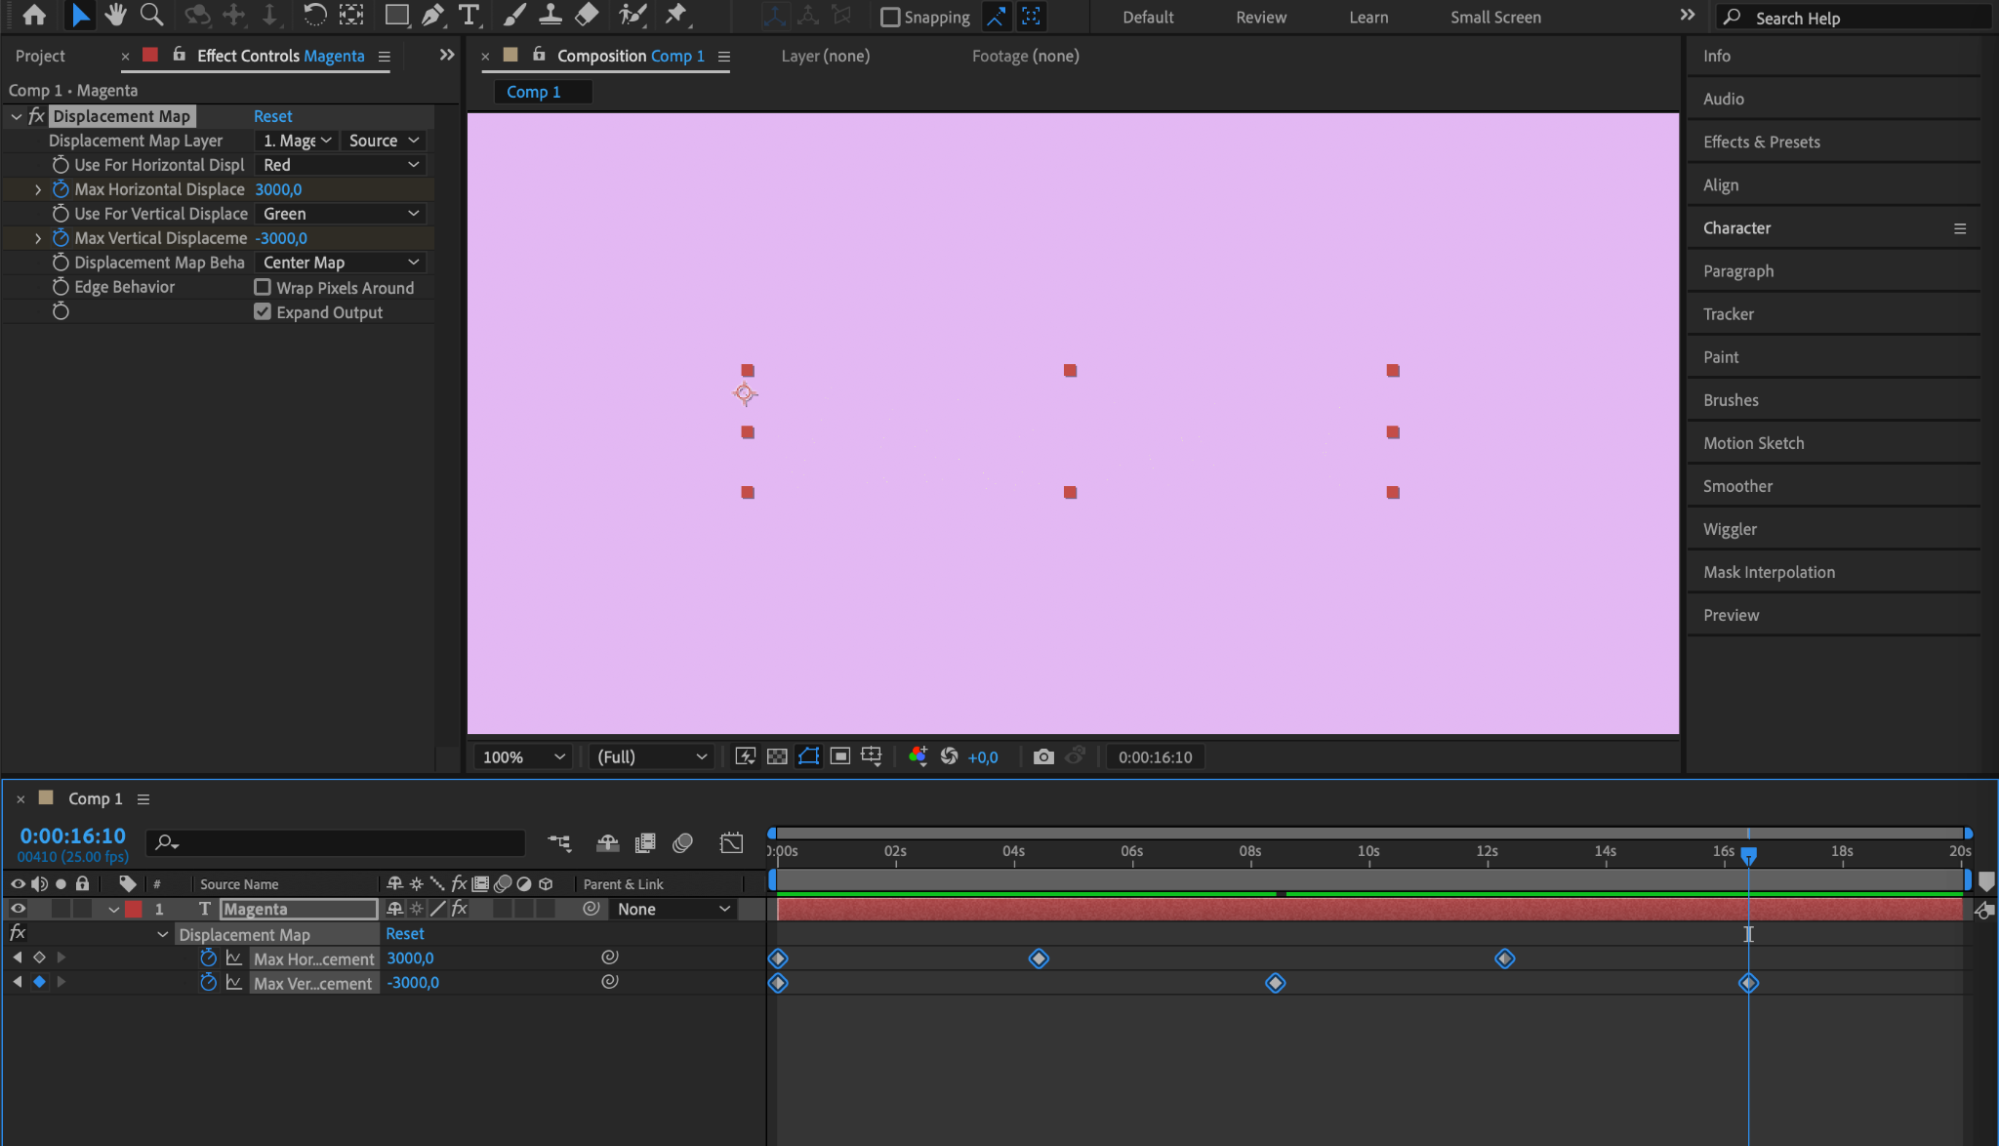
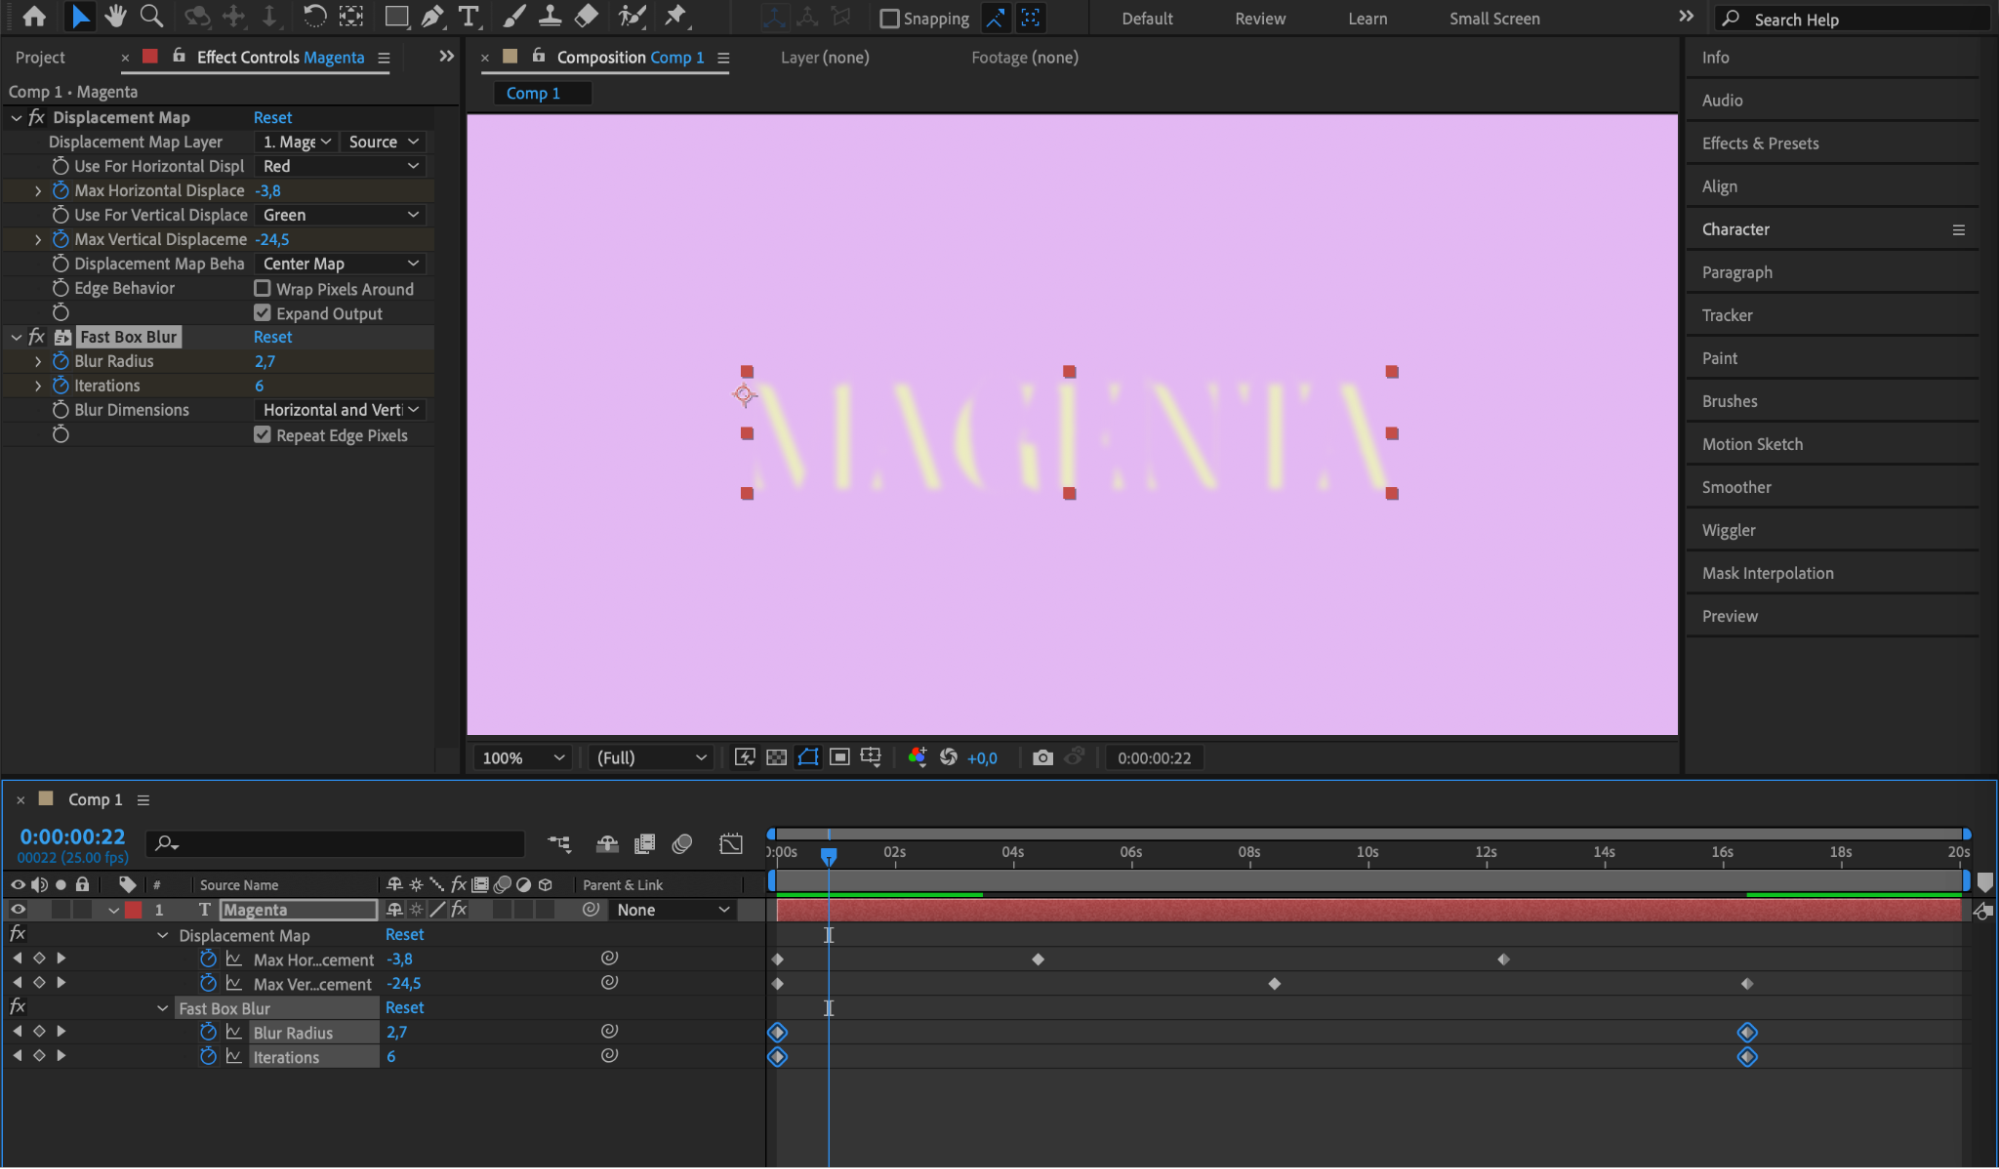
Step 7: Add Additional Effects
To enhance the dissolve effect, consider adding other effects such as blurs, gradients, or color overlays to your text layer. These additional effects can add depth and visual interest to the final result.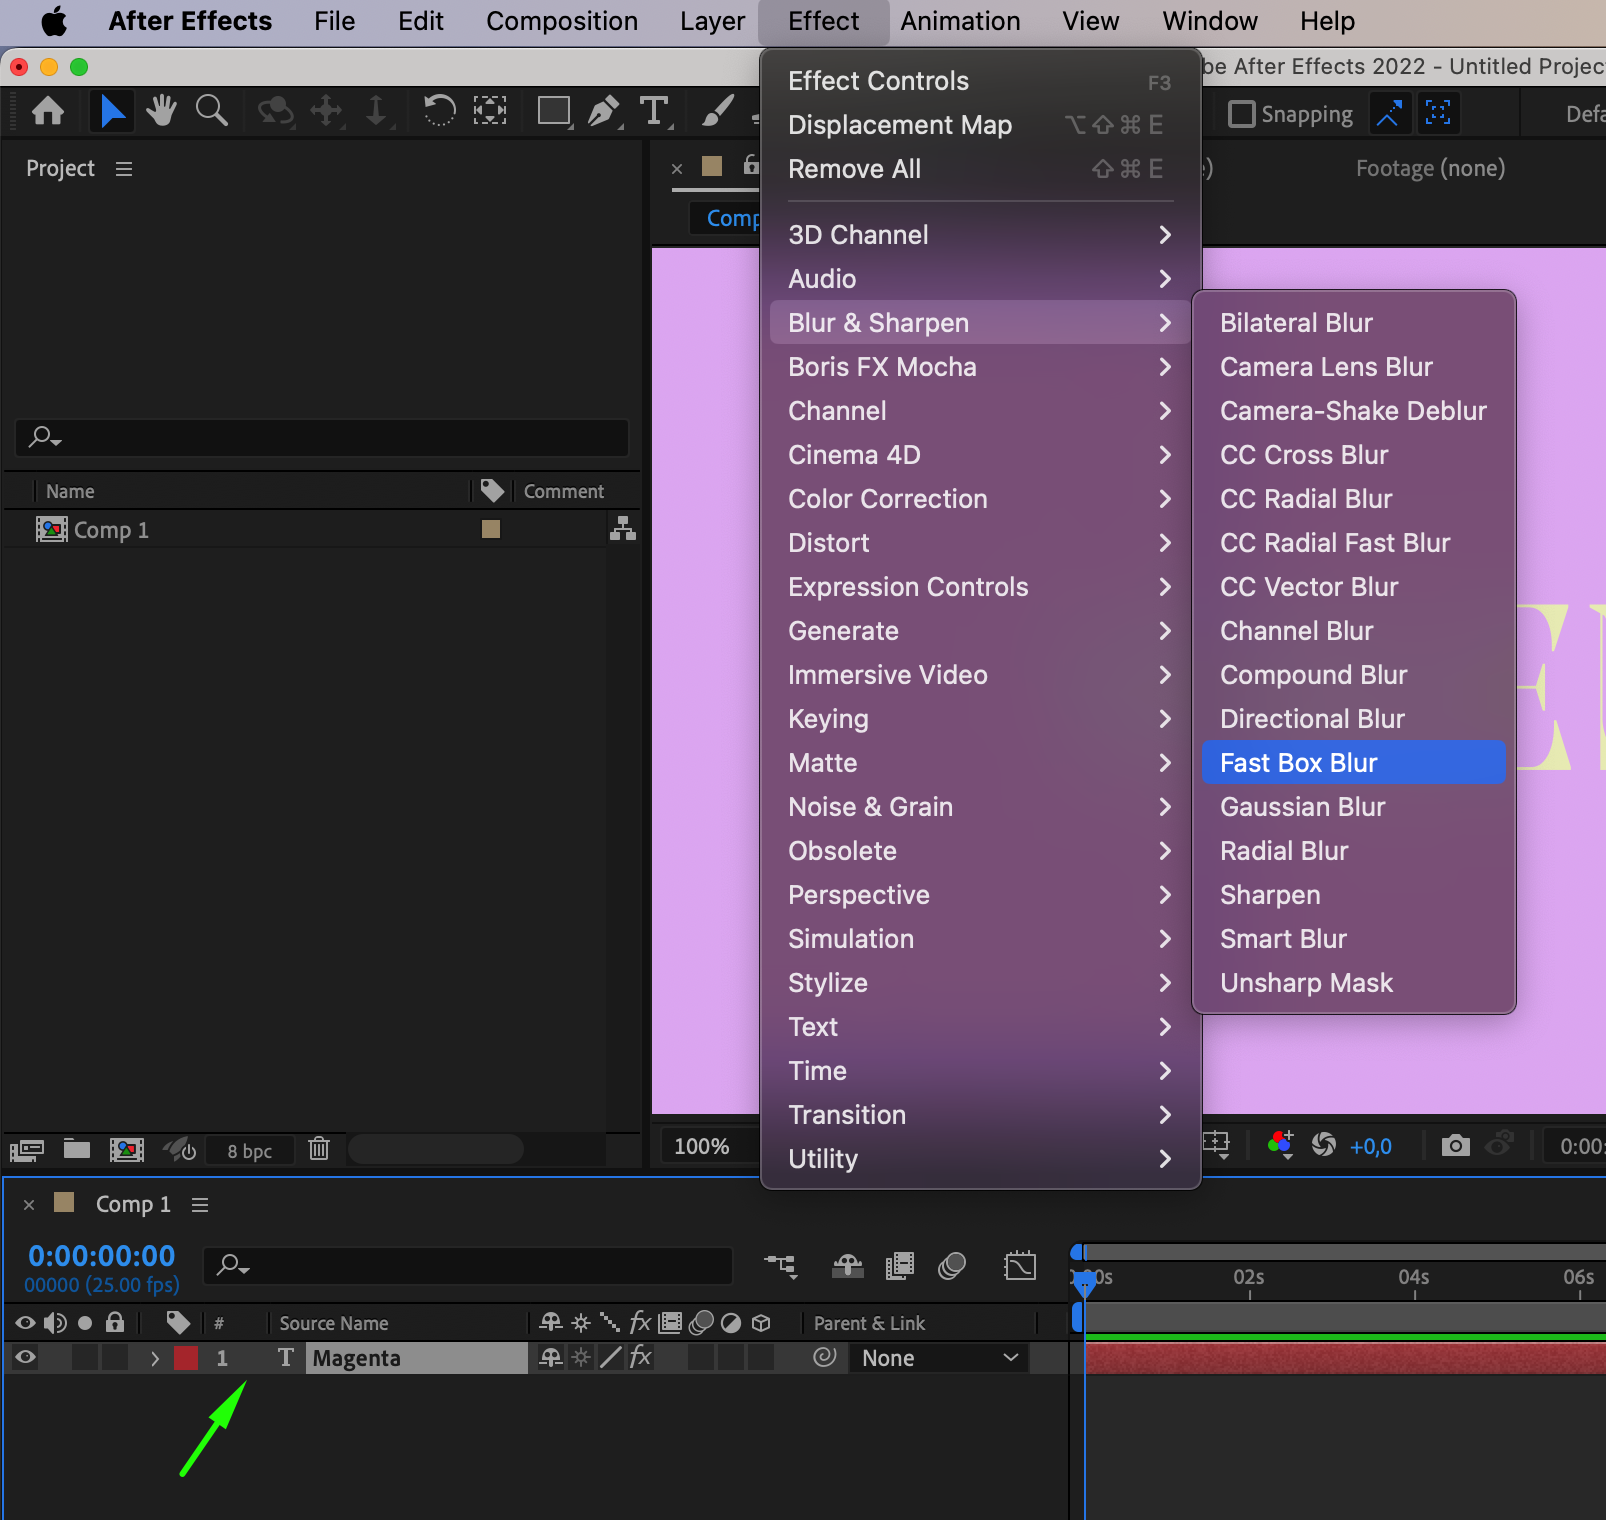
Get 10% off when you subscribe to our newsletter
 Step 8: Render and Export
Once you’re satisfied with your text dissolve animation, it’s time to render your composition and export it in the desired format for your project.
Conclusion
Creating a dissolve effect for your text in After Effects can instantly elevate the visual appeal of your video project. With the techniques covered in this tutorial, you now have the tools to bring your text to life with captivating and seamless transitions.
Get 10% off when you subscribe to our newsletter
Remember, practice makes perfect, so don’t hesitate to experiment and explore different variations of this effect to discover your unique style. Start implementing the dissolve effect in your projects and witness the transformation of your text animation. Unleash your creativity and wow your audience with stunning and seamless transitions!
For more video animation tutorials, tips, and resources, visit our website aejuice.com and stay tuned for more exciting content coming your way. Happy creating!
Our Bestsellers


