Mastering the Fade-In Effect in Adobe After Effects
Introduction
Are you interested in adding a professional touch to your videos? One way to do this is by incorporating smooth transitions, like a fade-in effect. In this tutorial, we will walk you through the process of creating a fade-in effect in Adobe After Effects.
Fade-in effects are commonly used in video production to smoothly introduce elements onscreen. Whether you are working on a short film, a promotional video, or a video presentation, incorporating a fade-in effect can give your project a professional and elegant look. The best part is, creating a fade-in effect in After Effects is easier than you might think!
Get 10% off when you subscribe to our newsletter

Step-by-Step Guide: How to Create a Fade-In Effect in After Effects
Step 1: Import Your Footage
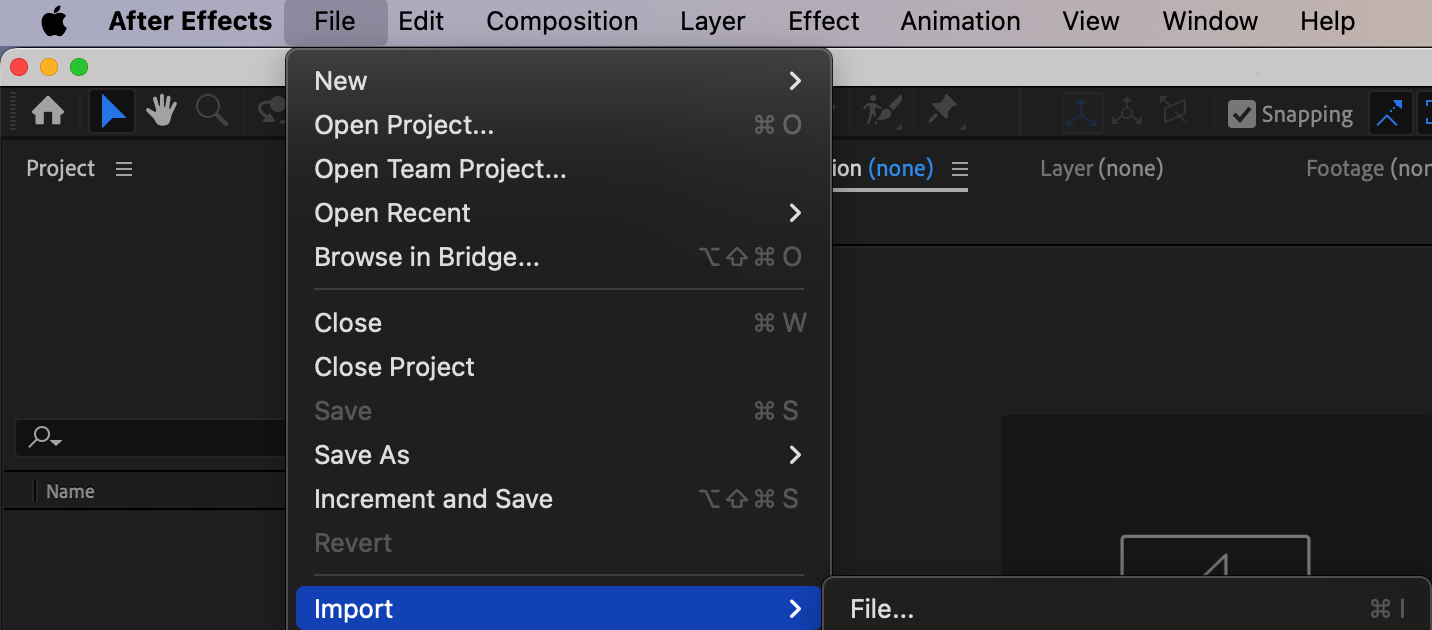
First, launch After Effects and import the footage you want to apply the fade-in effect to. You can import video files, image sequences, or even create your own animations within After Effects. To do this, go to File > Import > File and select the media you want to use.
 Step 2: Create a New Composition
Get 10% off when you subscribe to our newsletter

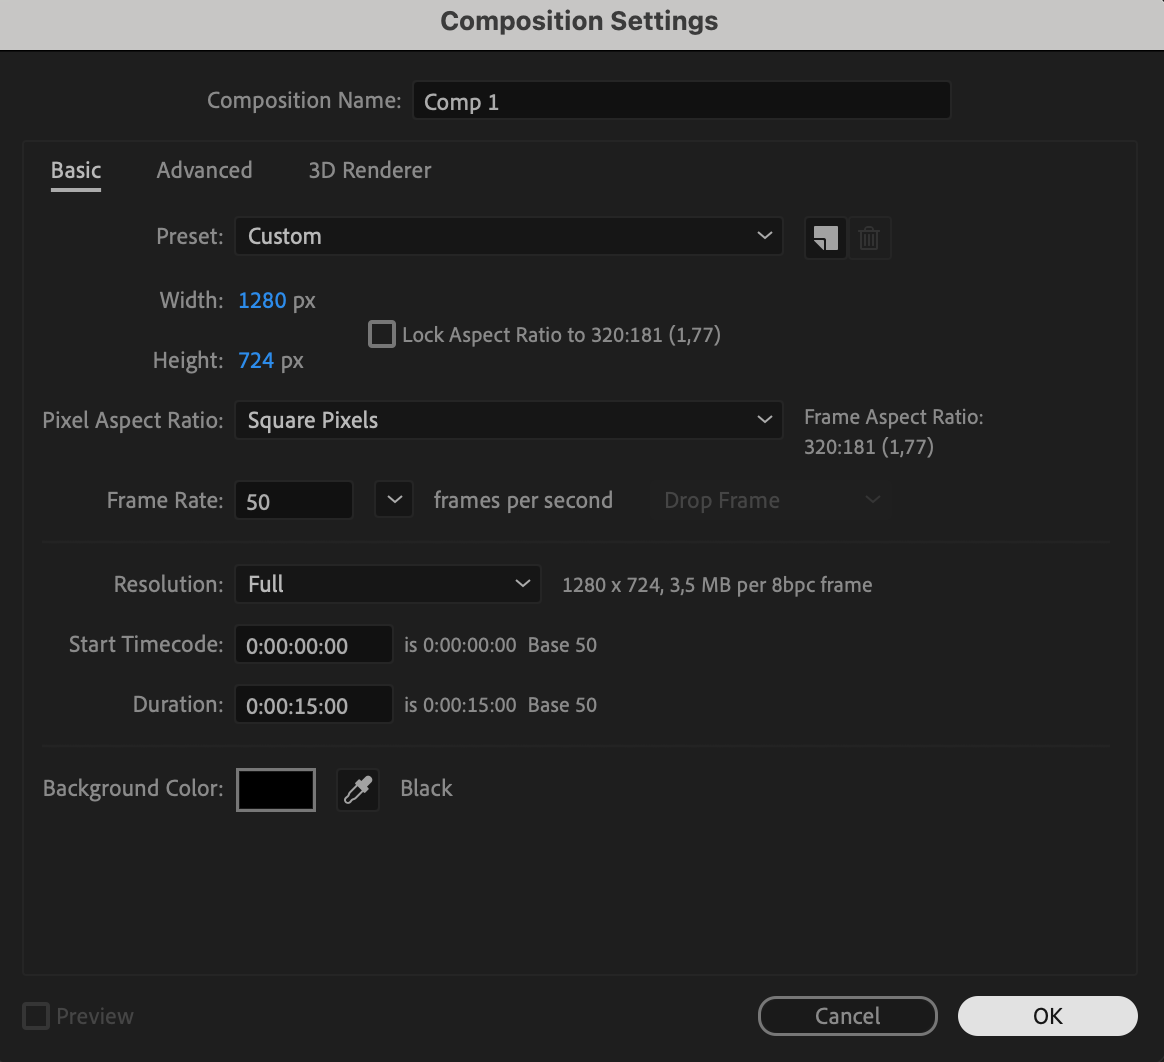
Once your footage is imported, create a new composition by going to the Composition menu, selecting New Composition, and setting the desired settings for your project. Make sure to set the duration of the composition according to your preferences. 
 Step 3: Add Your Footage to the Composition
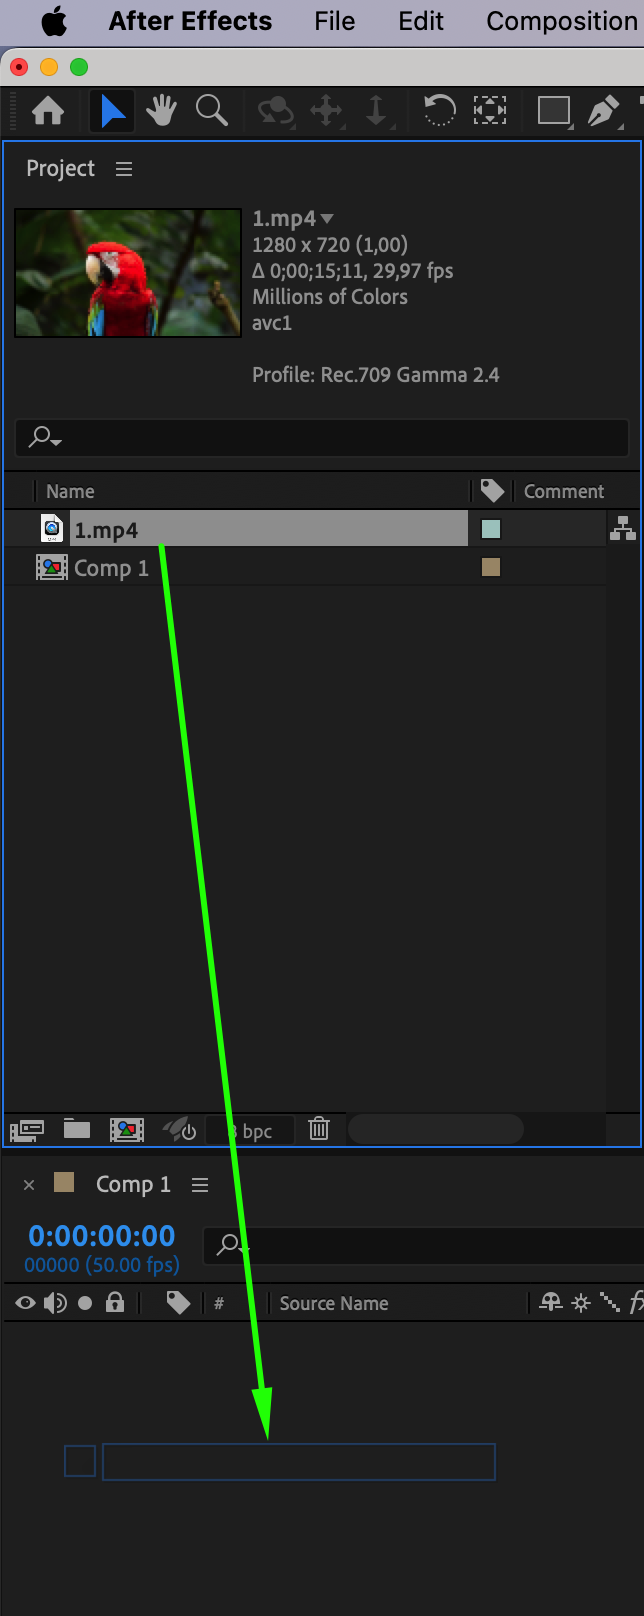
Next, drag and drop your imported footage into the composition timeline. You can also use the shortcut Ctrl + / (or Cmd + / on Mac) to add the selected footage to the timeline. This places your media into the composition where you can start applying the effects. Step 4: Access the Opacity Property
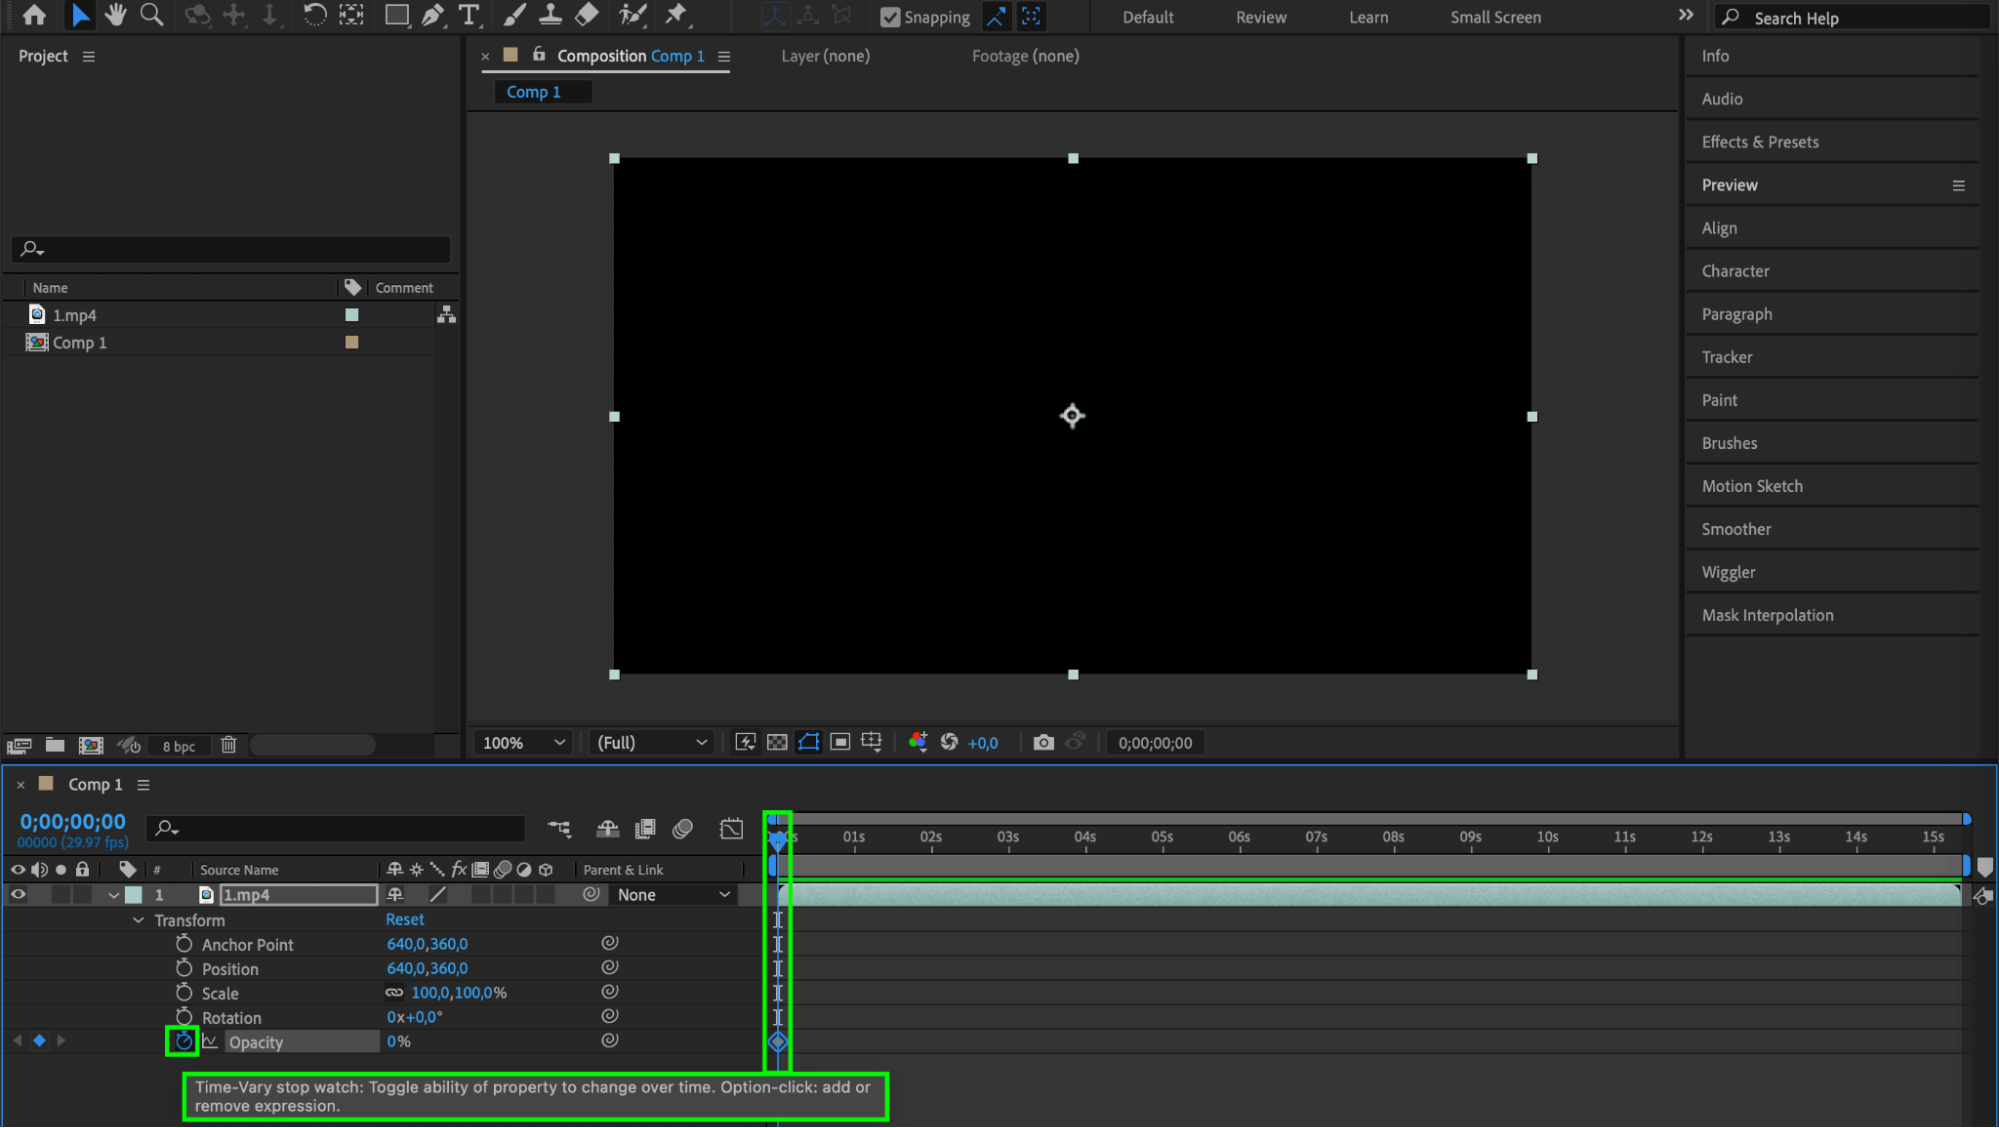
Expand the layer properties of your footage layer by clicking the arrow next to the layer name. Find the Opacity property under Transform. This property controls the transparency of your layer, which is essential for creating a fade-in effect. Step 5: Set the Keyframes
Now it’s time to set the keyframes for the opacity. Move the timeline indicator to the beginning of the composition and set the opacity value of your footage layer to 0%. This will make the footage fully transparent at the beginning. Click the stopwatch icon next to the Opacity property to create a keyframe. Step 6: Adjust the Timing
Get 10% off when you subscribe to our newsletter

To create a smooth fade-in effect, move the timeline indicator a few frames later and adjust the opacity value to 100%. A new keyframe will be automatically created. This will gradually increase the transparency of the layer, giving it a fade-in effect.  Step 7: Customize the Duration
Get 10% off when you subscribe to our newsletter

If you want to adjust the duration of the fade-in effect, drag the second keyframe closer or farther from the first keyframe. Play around with the timing to achieve the desired effect. To smooth out the transition, use Keyframe Assistant > Easy Ease.

 Step 8: Preview and Export
Finally, preview your composition by clicking on the Play button in the preview panel. If you’re satisfied with the results, you can export your composition as a video file or incorporate it into your larger project. Conclusion
By following these simple steps, you can create a beautiful fade-in effect in After Effects that will elevate the visual quality of your videos. Don’t be afraid to experiment with different durations and timings to find the perfect fade-in effect for your project. So, why wait? Start incorporating fade-in effects into your videos and make them truly stand out! Happy creating!


