Step-by-Step Guide to Creating a Flip Transition in After Effects
Introduction – How to Add a Flip Transition to Your Video Clips in After Effects
A flip transition in After Effects can bring a dramatic and visually appealing effect to your videos. This technique involves rotating a clip to reveal the next one, creating a flipping effect that transitions between scenes. Below are the steps to achieve a flip transition with ease.
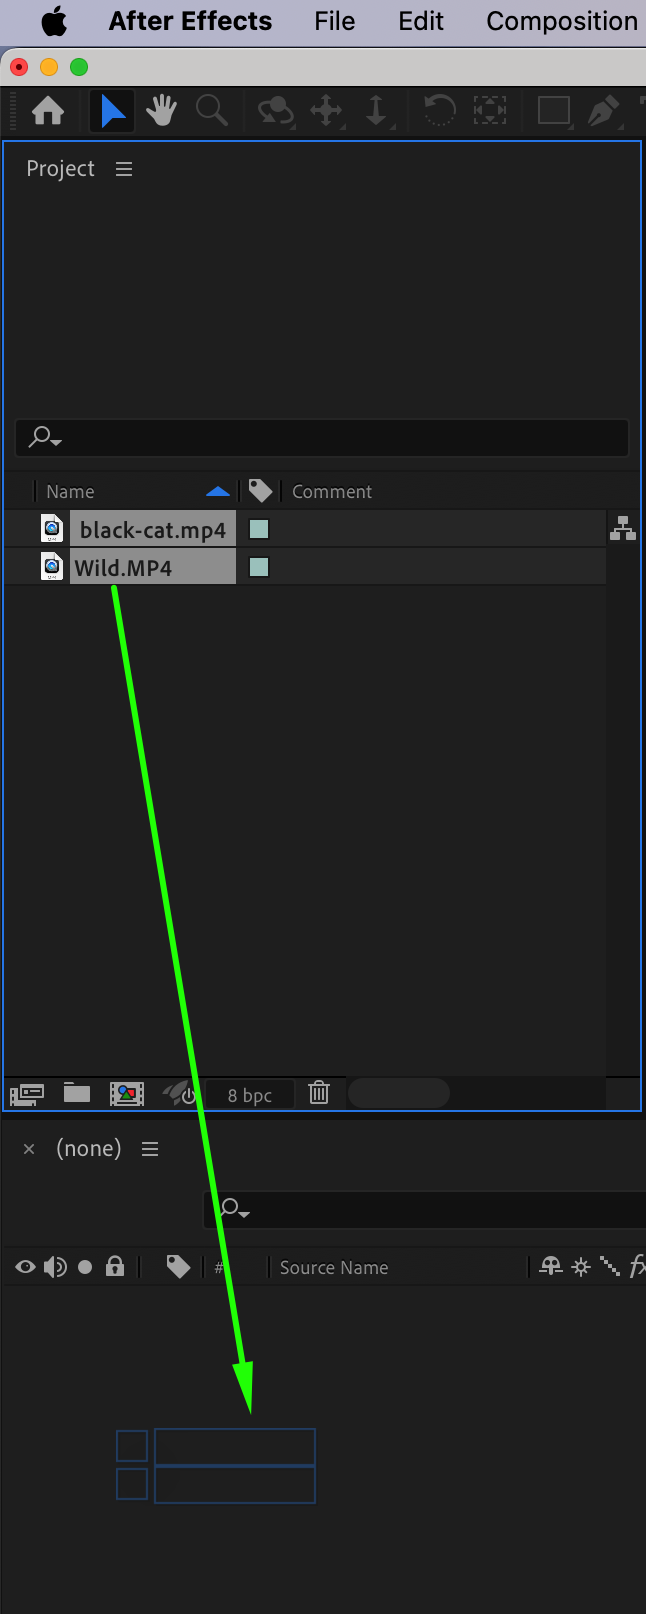
Step 1: Import Your Videos
Go to File > Import > File and select the video clips you want to use in your project. Once you’ve imported them, drag the clips onto your timeline to arrange them in sequence.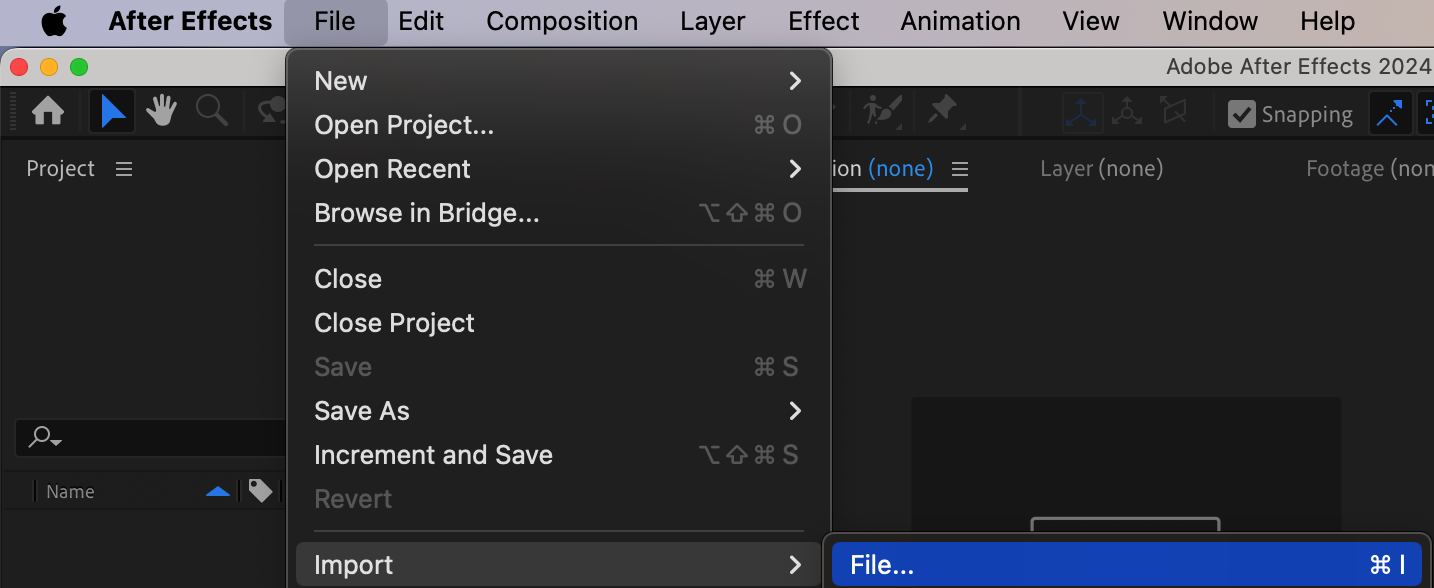
 Step 2: Scale Down the Video Layers
Get 10% off when you subscribe to our newsletter

To highlight the transition effect, you can reduce the scale of your video layers slightly. This allows the transition to take center stage and adds emphasis to the flipping movement.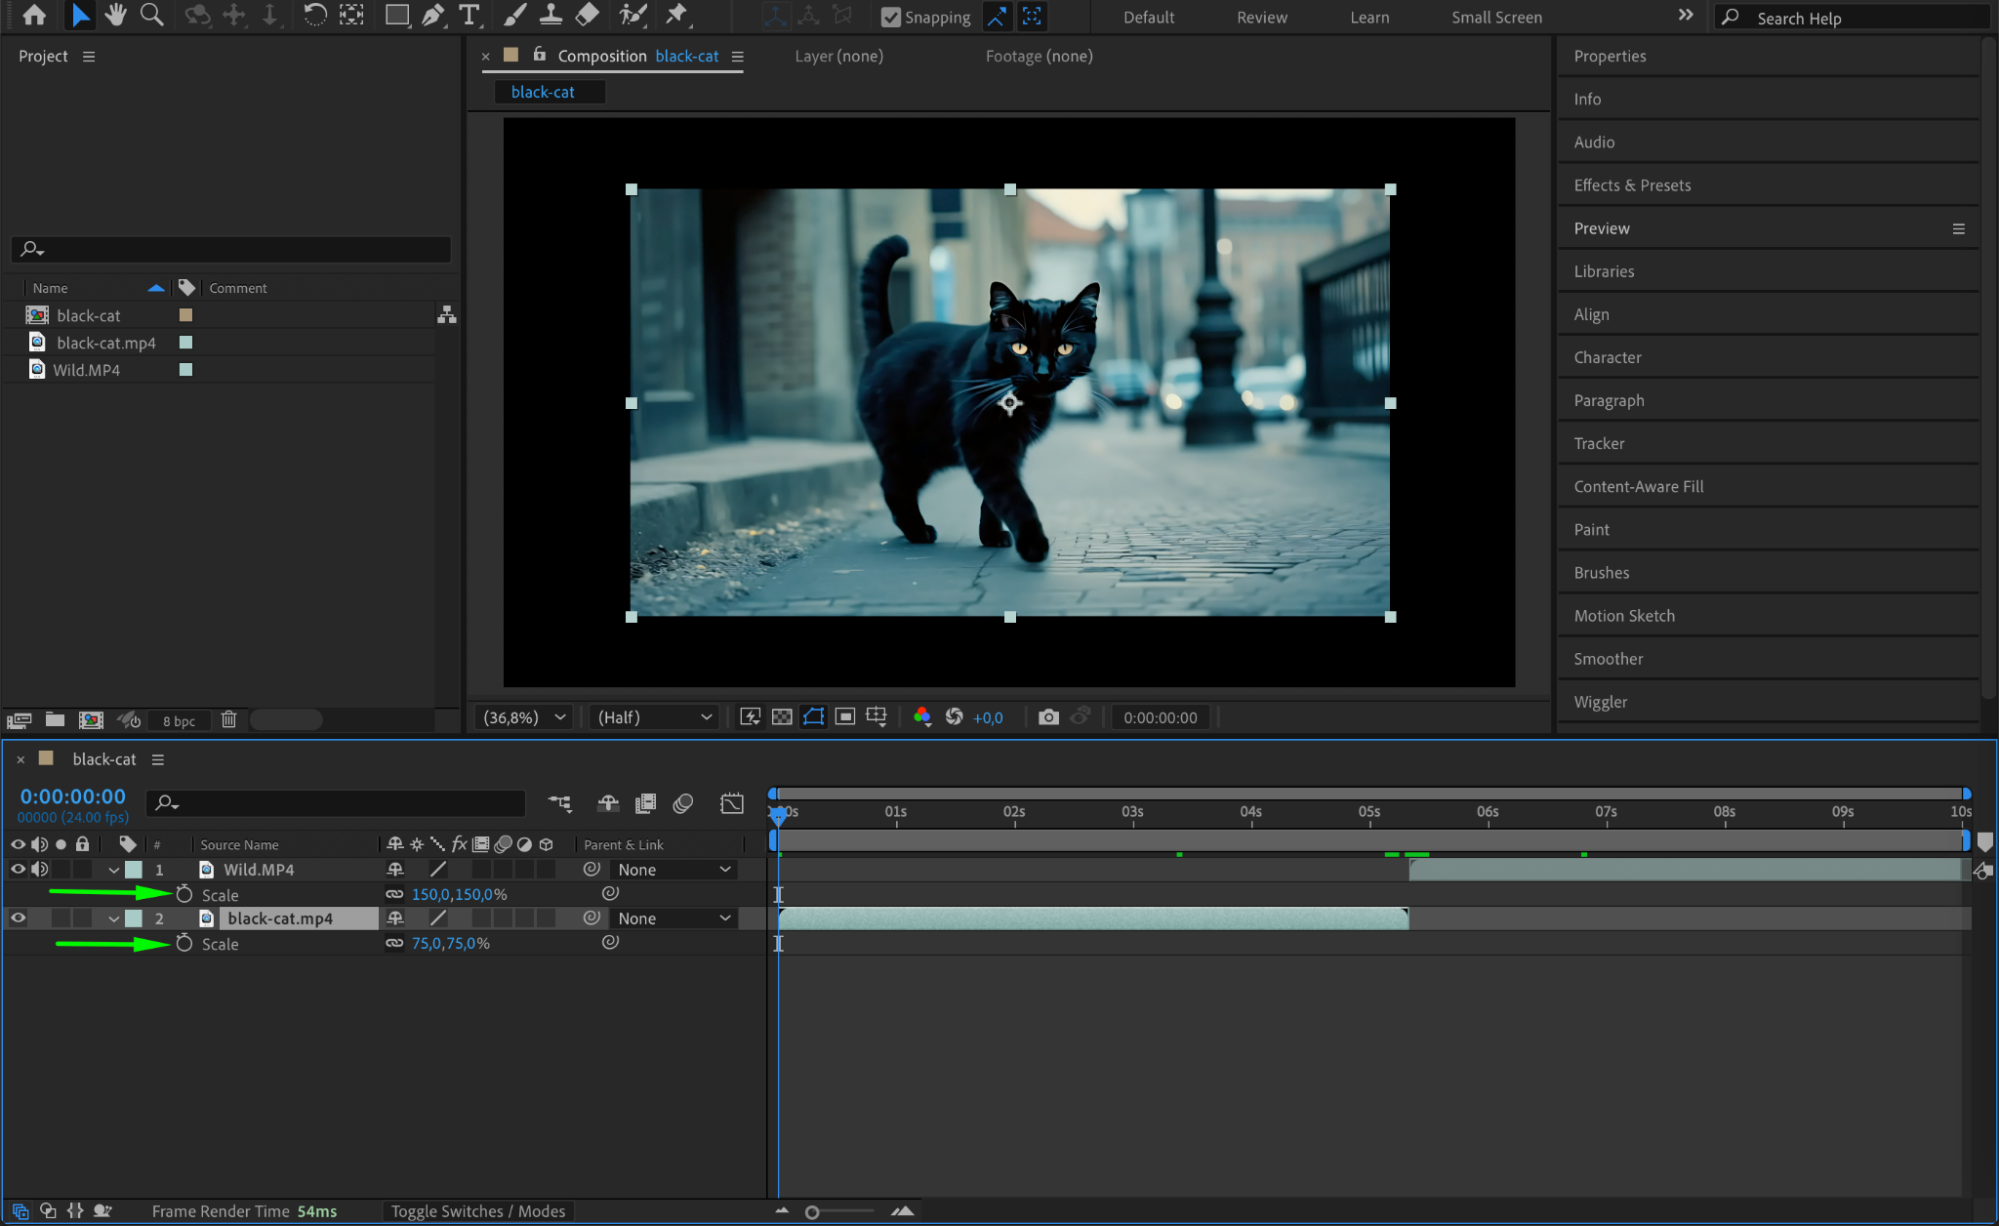 Step 3: Enable 3D Layers and Motion Blur
Enable the 3D Layer option for both of your video layers by clicking the cube icon in the timeline. This allows the video to rotate in 3D space. Additionally, click the Motion Blur icon to make the flip transition smoother and more dynamic.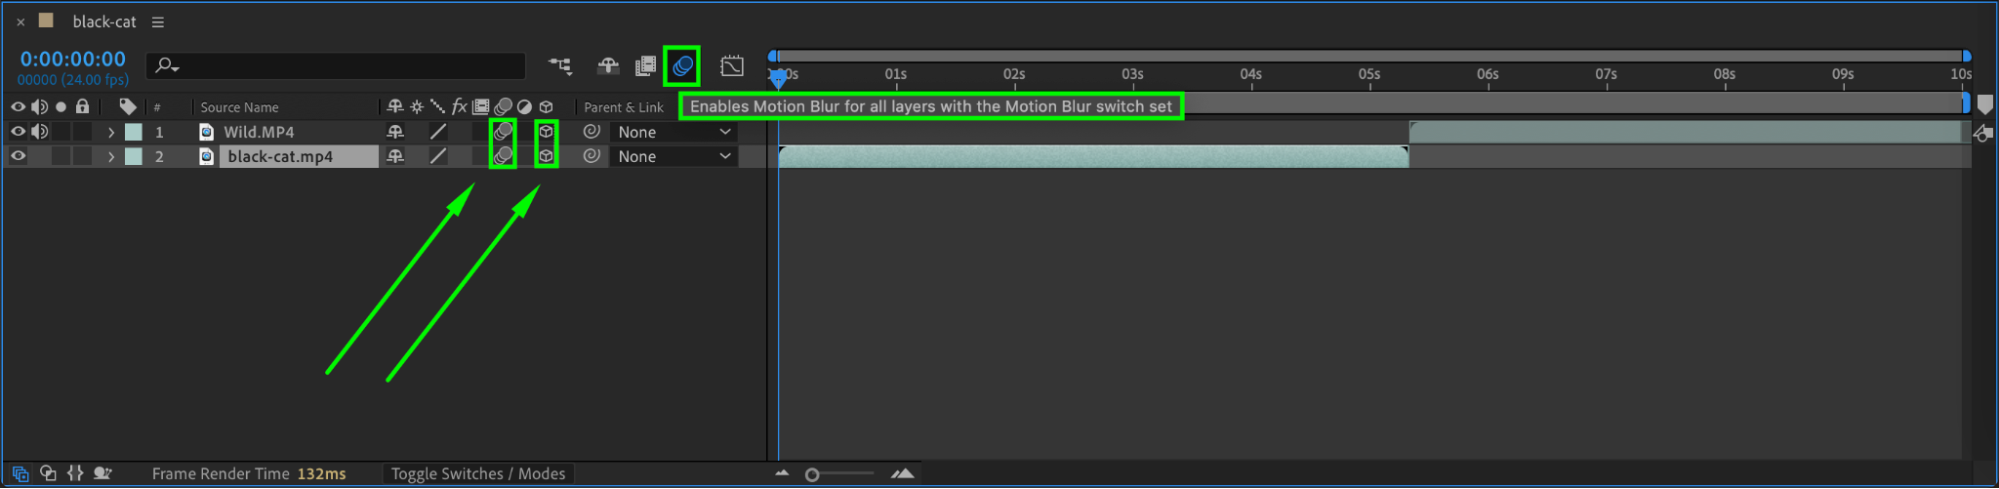 Step 4: Keyframe the First Video Layer’s Y Rotation
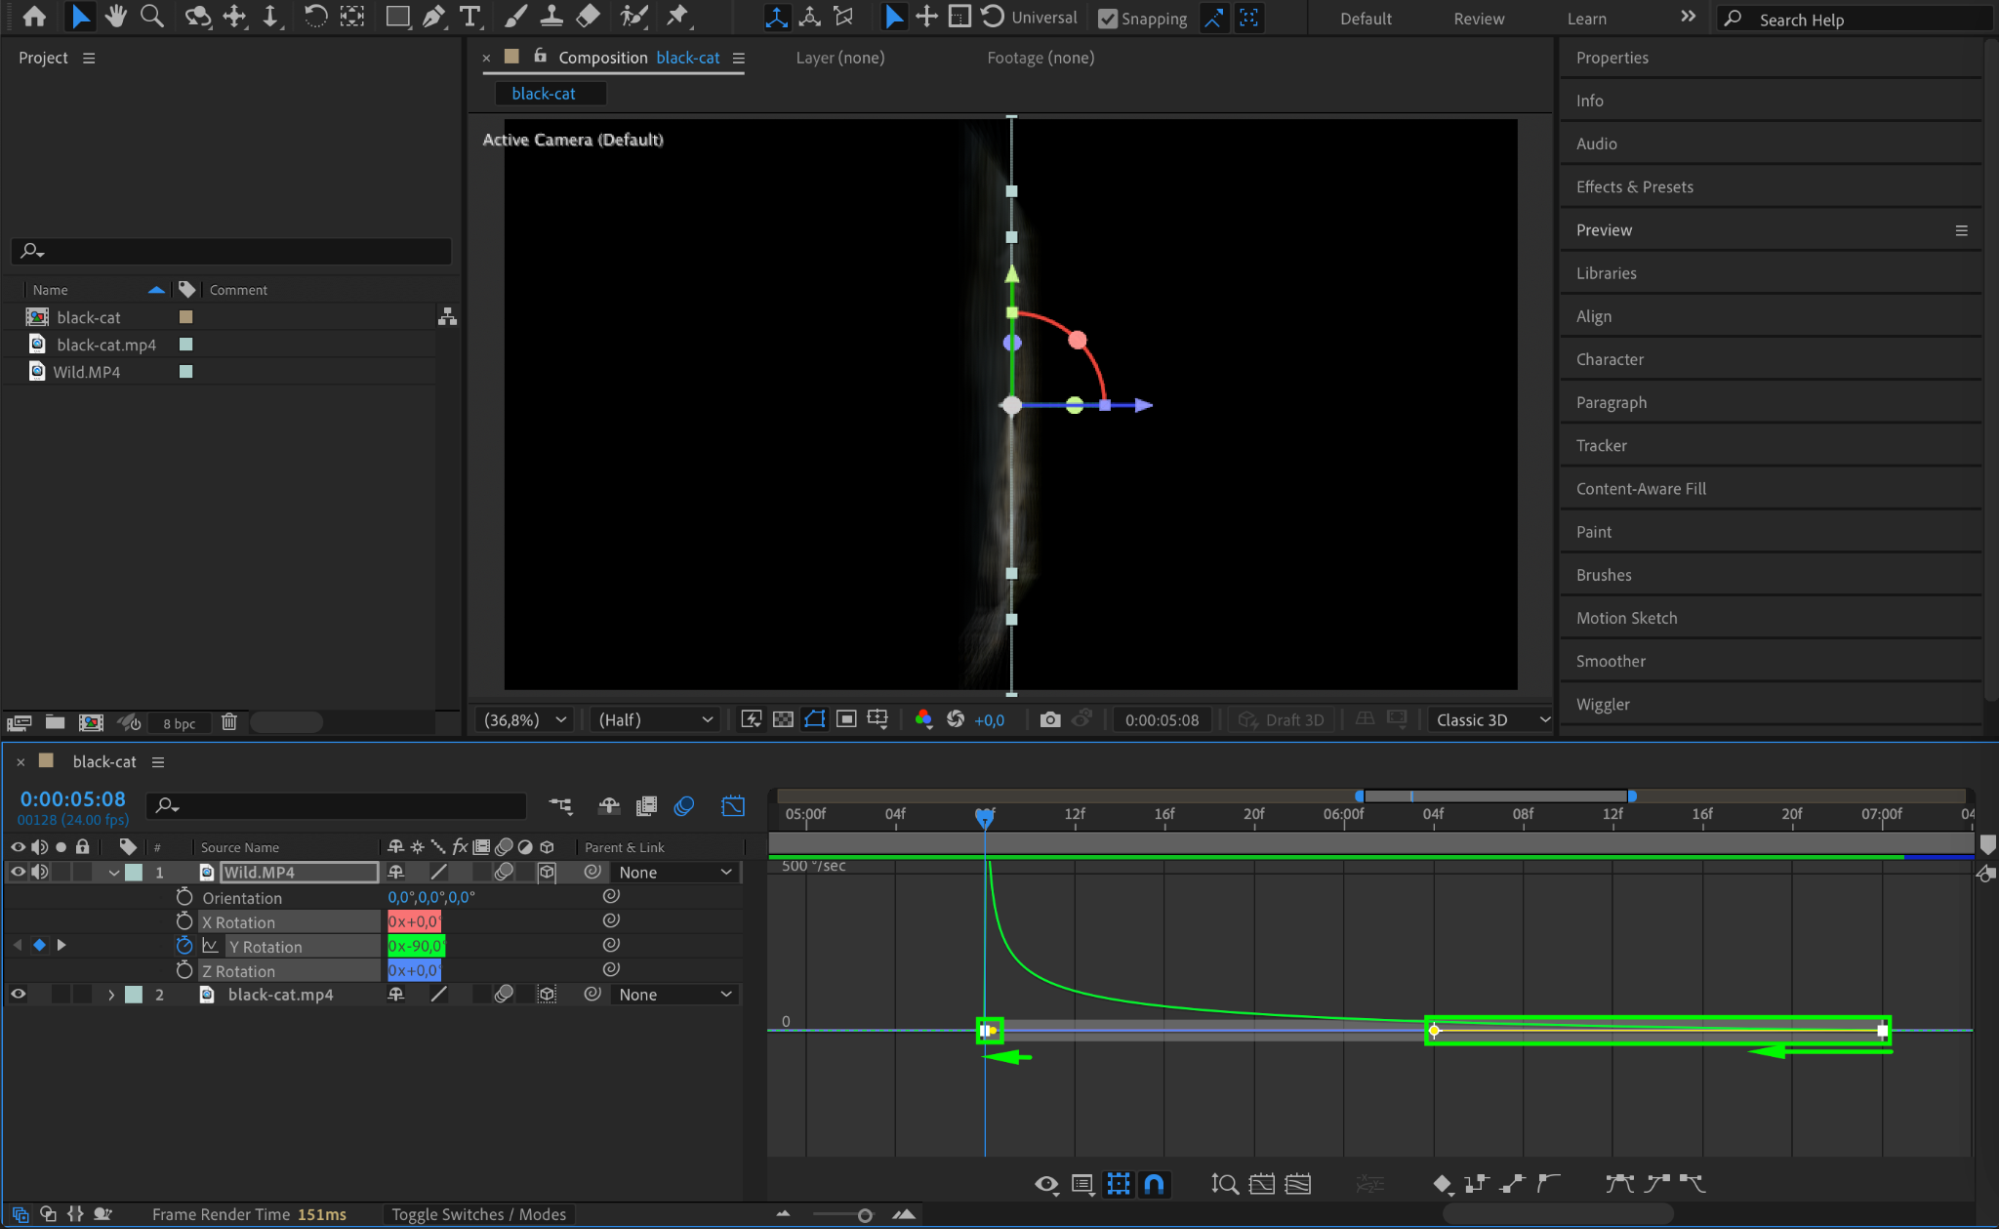
Expand the properties of the first video layer and find the Y Rotation property. Move the Current Time Indicator (CTI) to the point where you want the transition to start, and click on the stopwatch icon to set the first keyframe.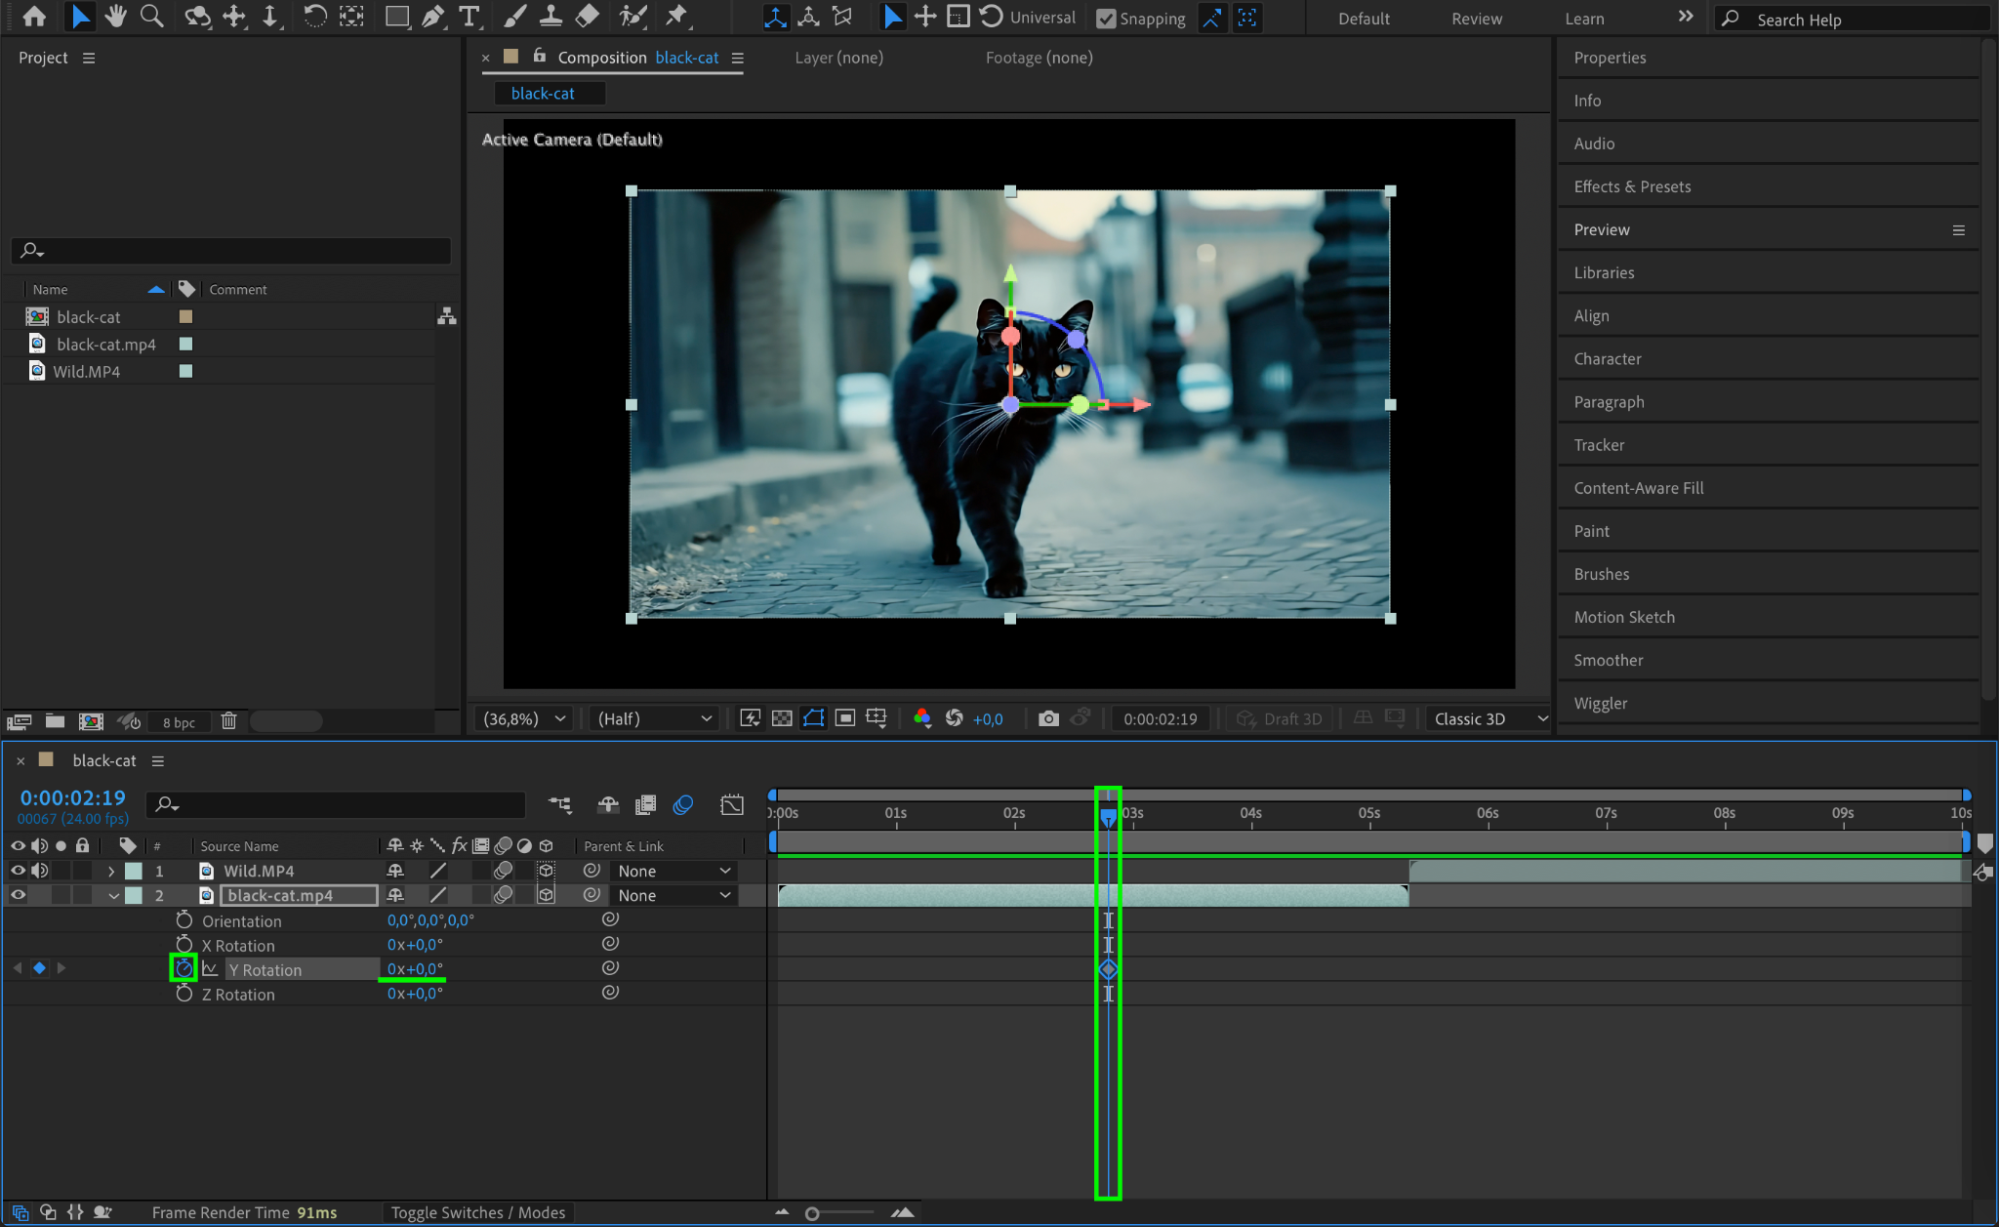 Step 5: Set the Rotation for the Transition
Move the CTI to where the two clips meet. Change the Y Rotation value of the first video layer to 90 degrees. This will create the flip effect.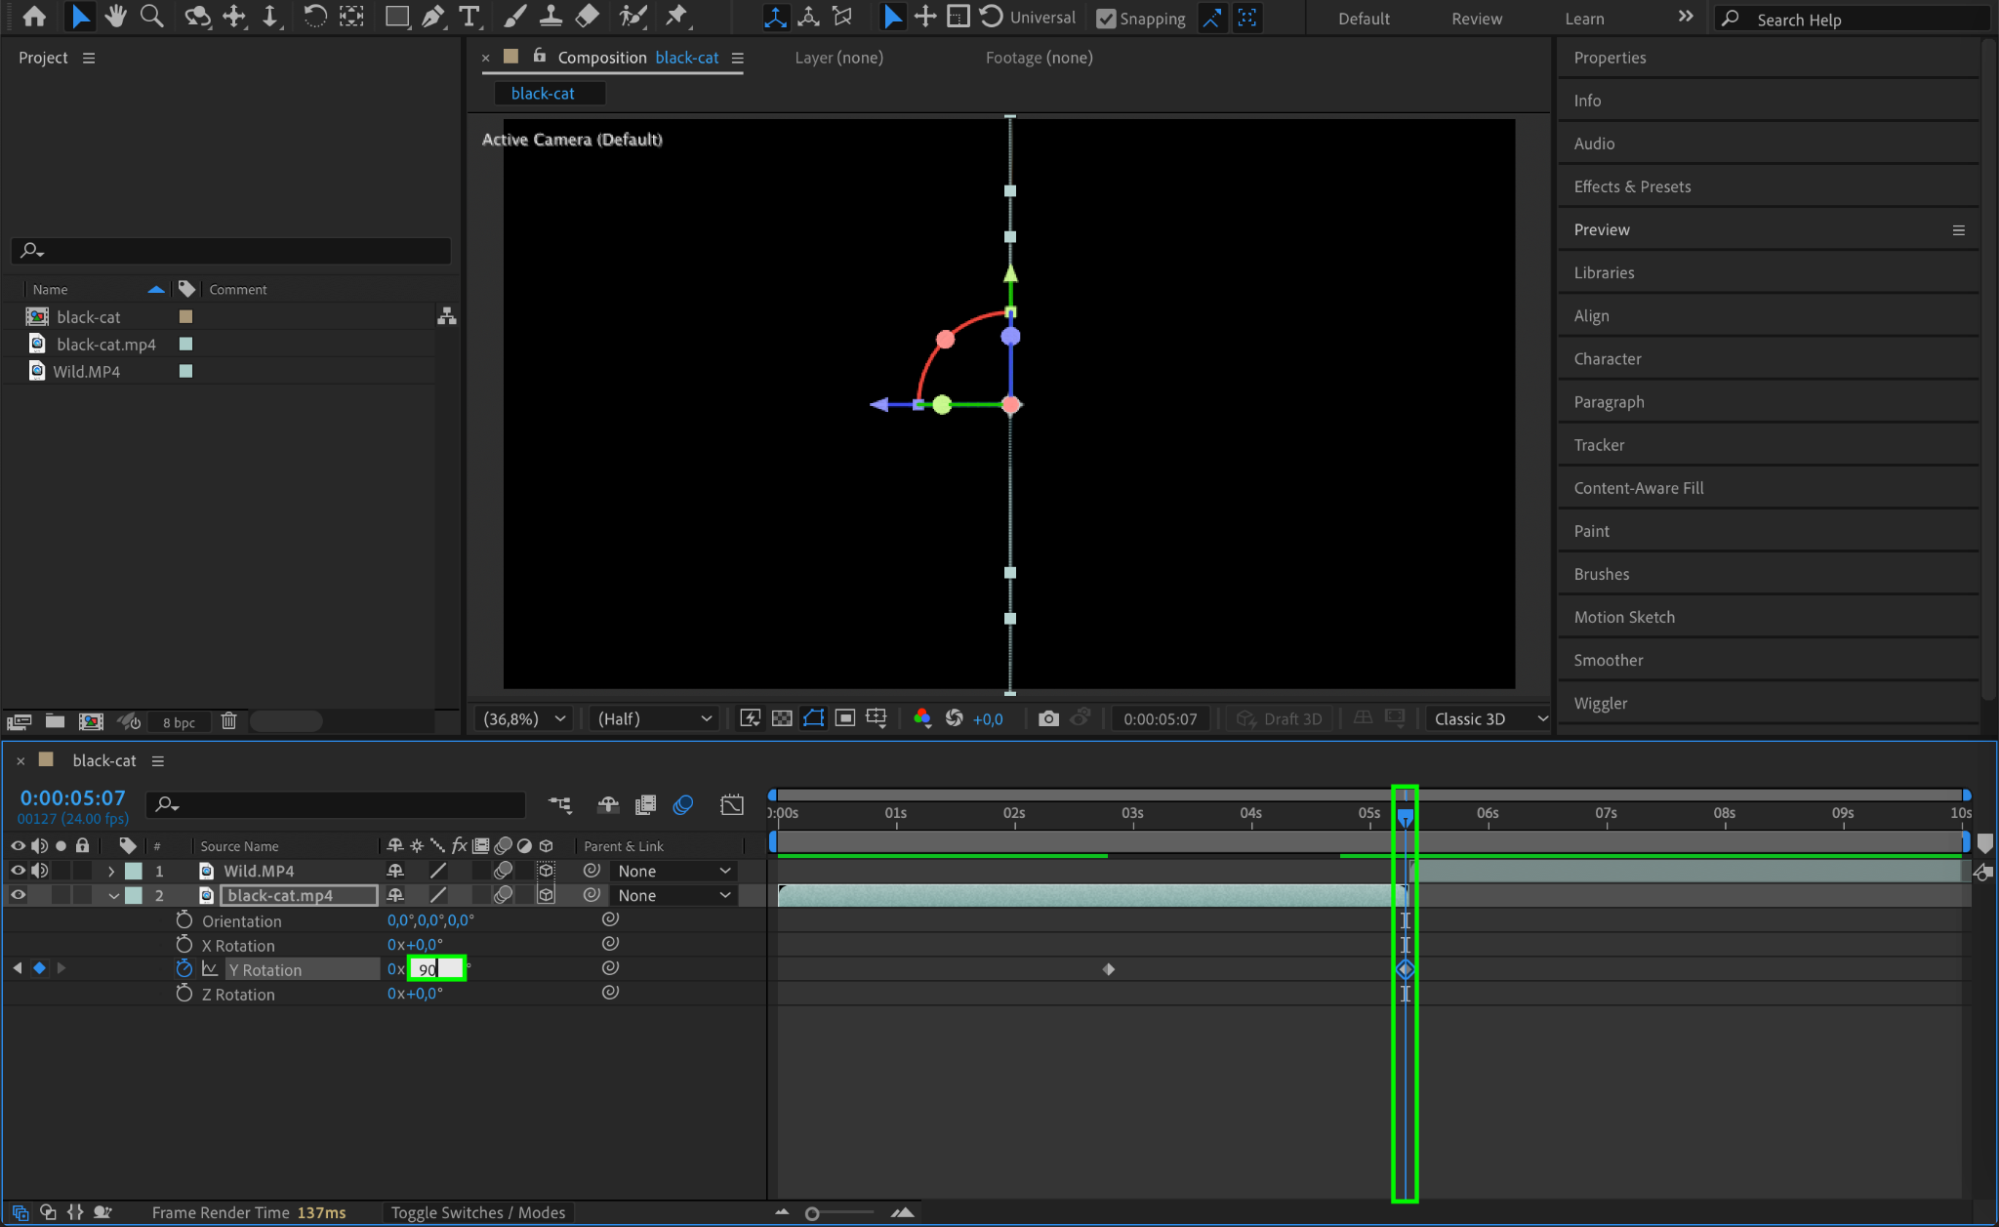 Step 6: Apply Easy Ease and Use the Graph Editor
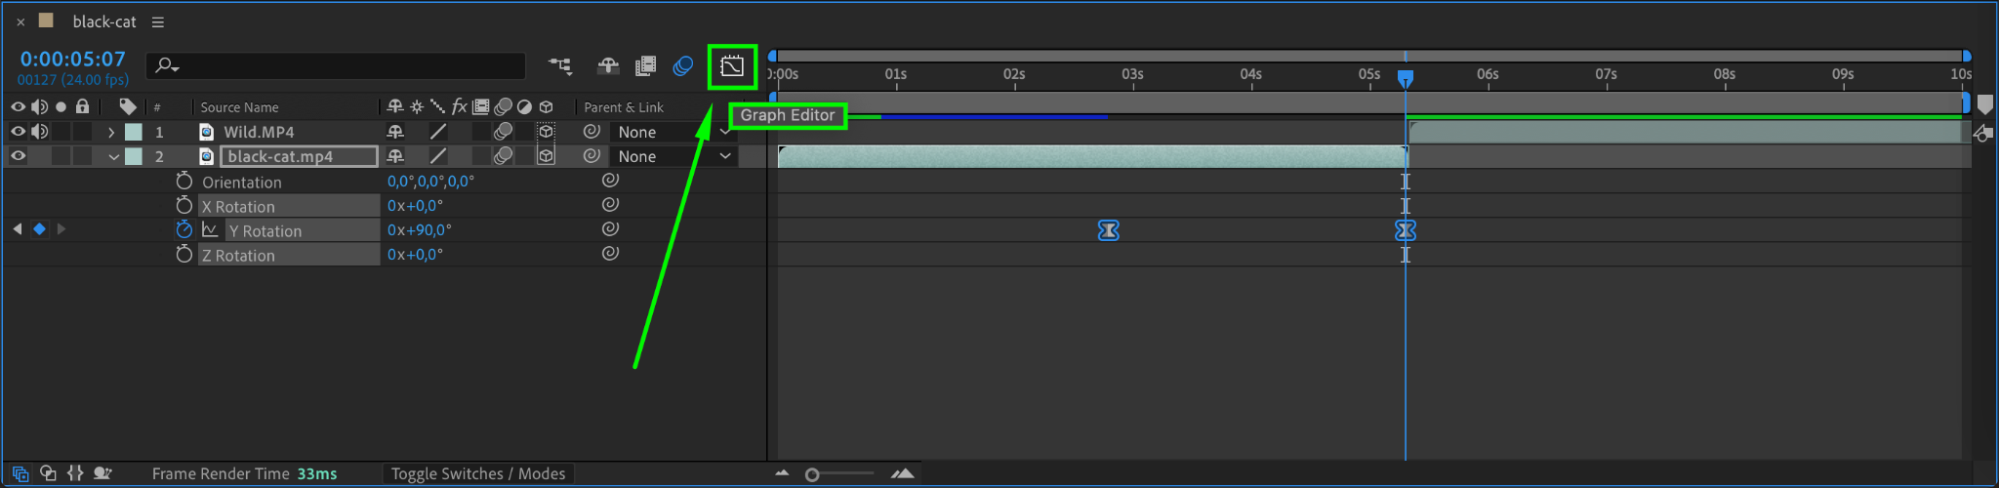
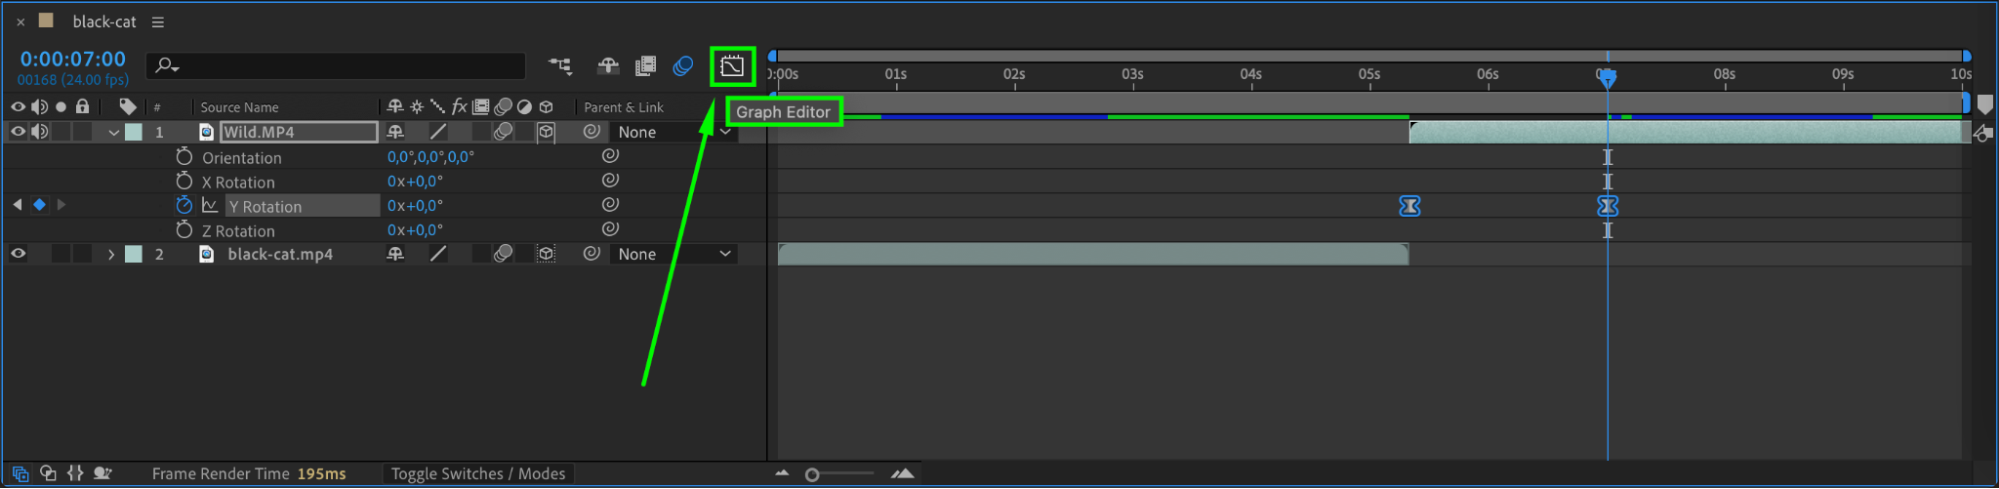
Right-click on the keyframes and select Easy Ease to create a smoother transition. Then, open the Graph Editor to adjust the speed and timing of the animation for a more polished effect.
 Step 7: Keyframe the Second Video Layer’s Y Rotation
Now, select the second video layer. With the CTI still at the meeting point of the two clips, click the stopwatch icon for the Y Rotation property of the second video layer and set its rotation to 90 degrees.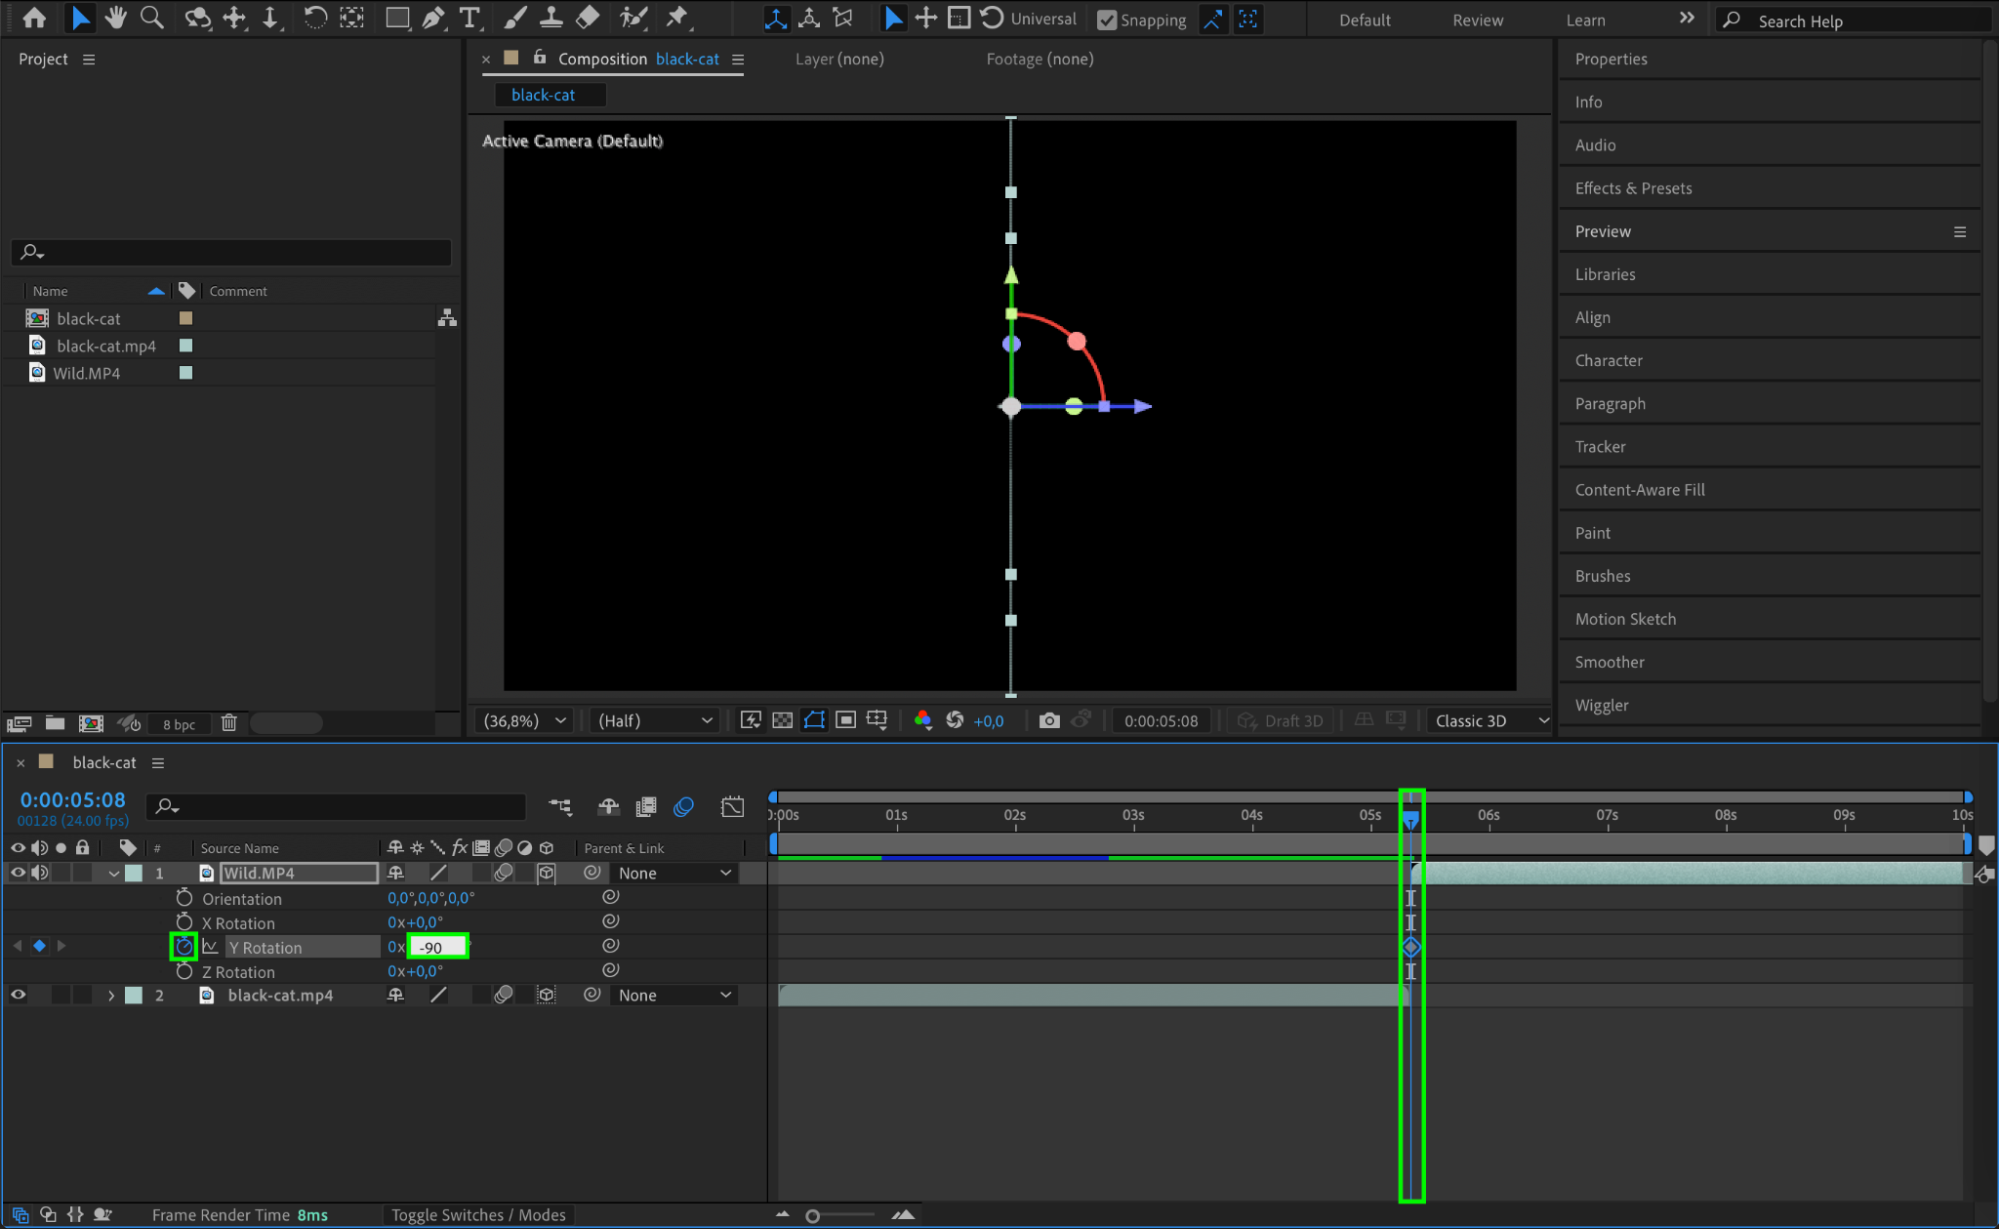 Step 8: Set the End of the Transition
Move the CTI to the point where you want the flip transition to end. Change the Y Rotation value for the second video layer back to 0 degrees. This will complete the flip and reveal the second clip.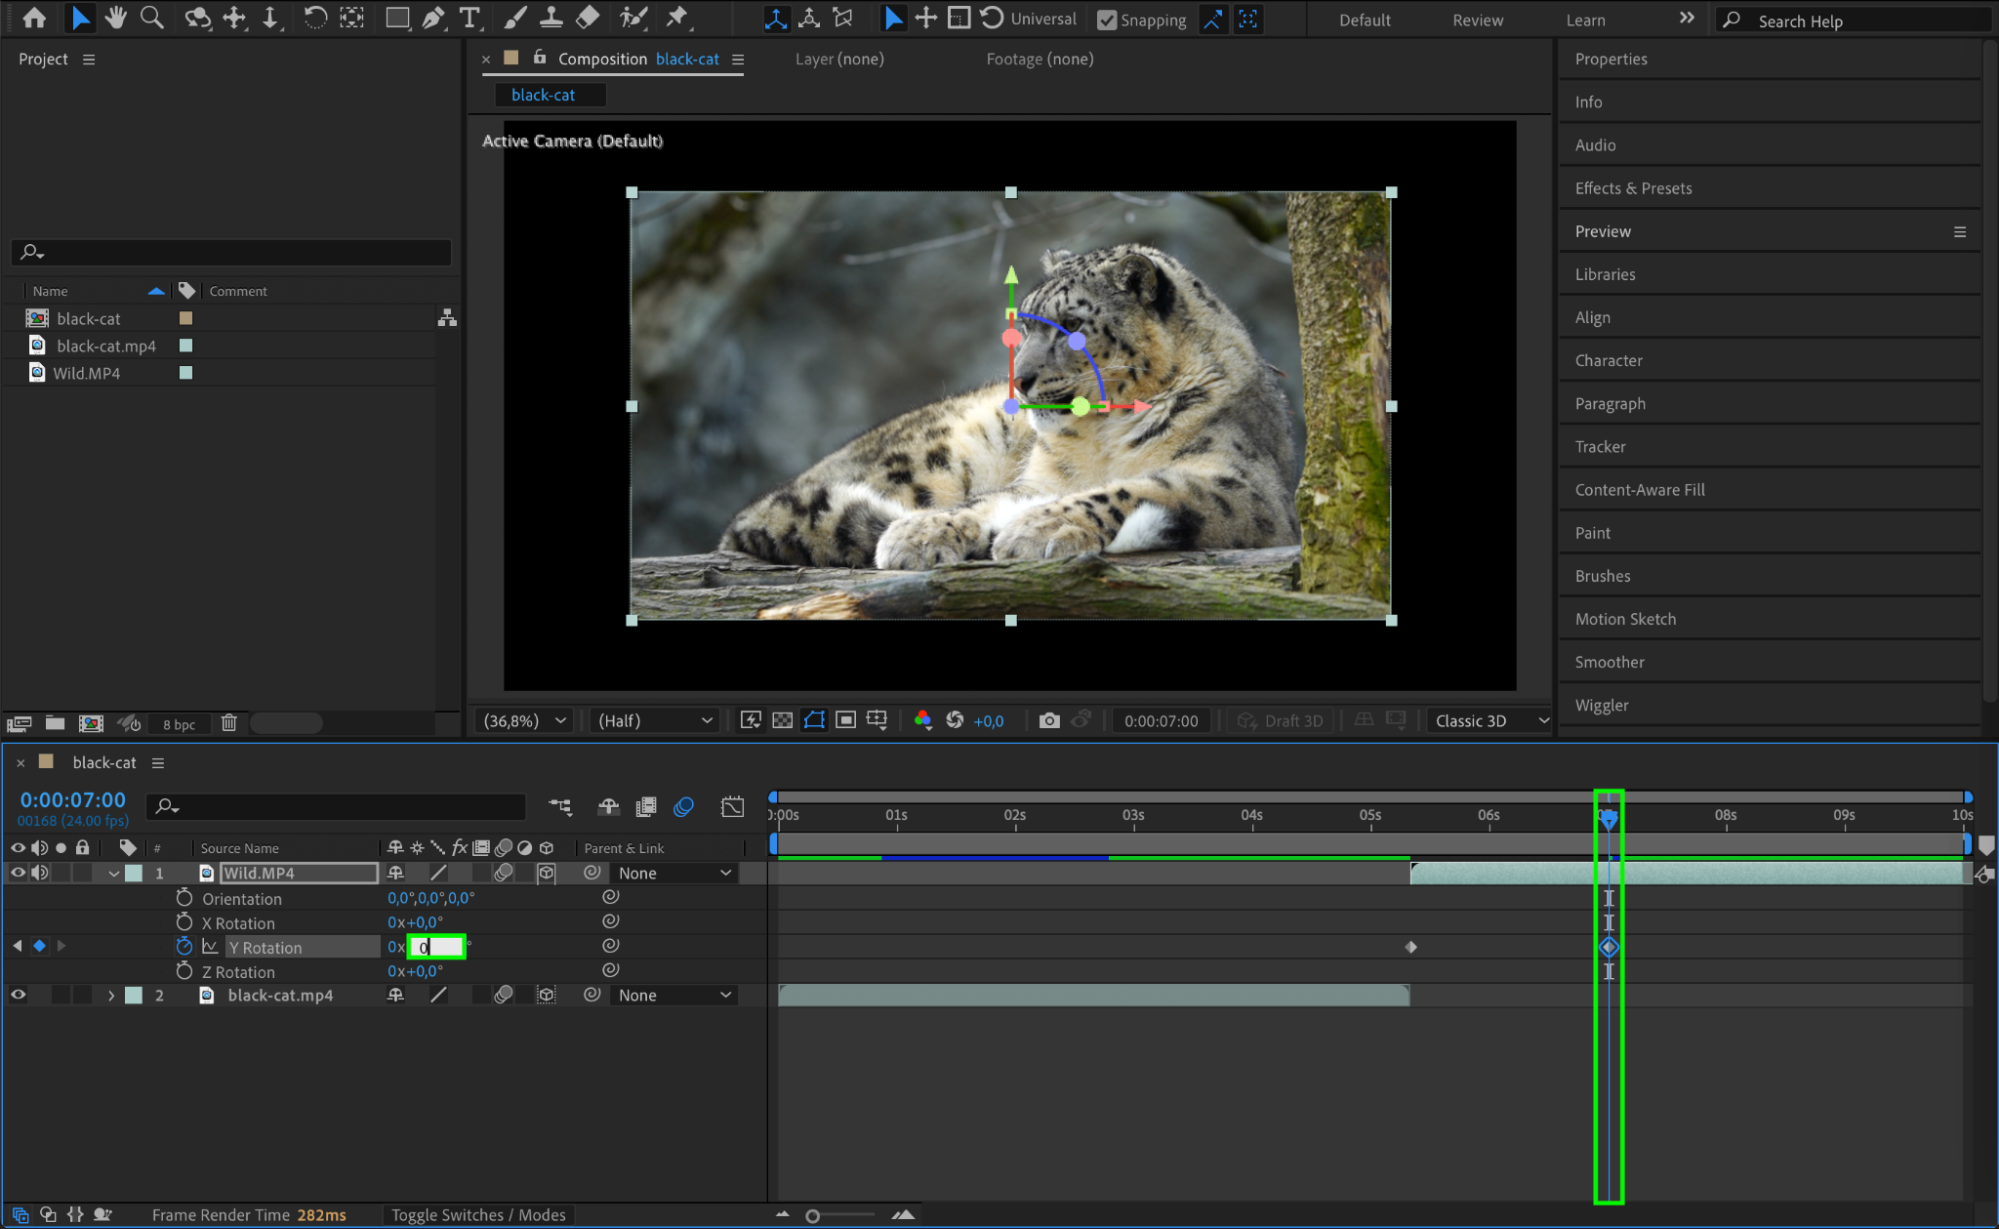 Step 9: Apply Easy Ease and Use the Graph Editor for the Second Layer
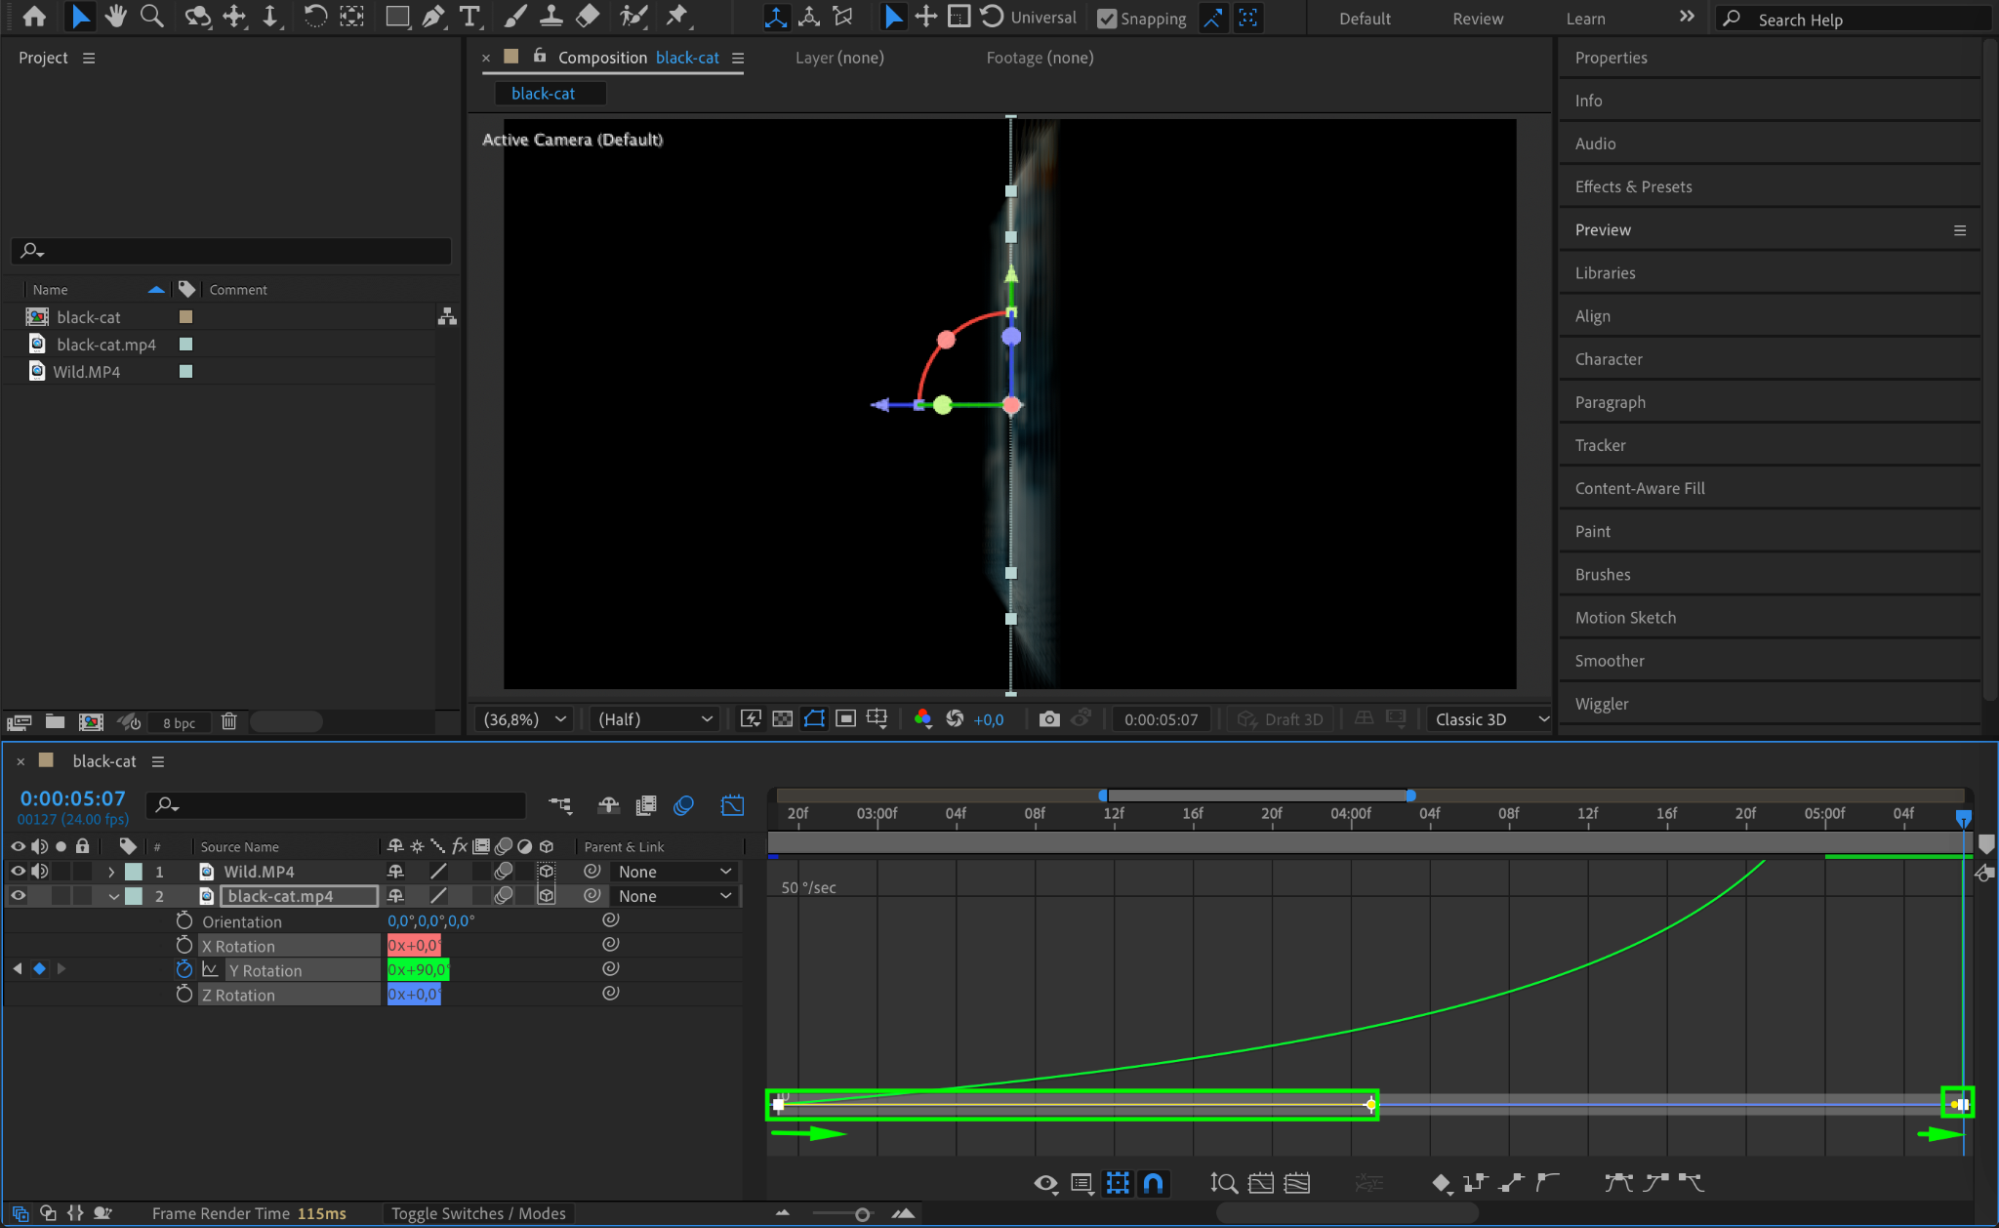
Just like with the first layer, right-click on the keyframes for the second video layer and select Easy Ease. Then, adjust the keyframes in the Graph Editor to fine-tune the animation for smoothness and speed.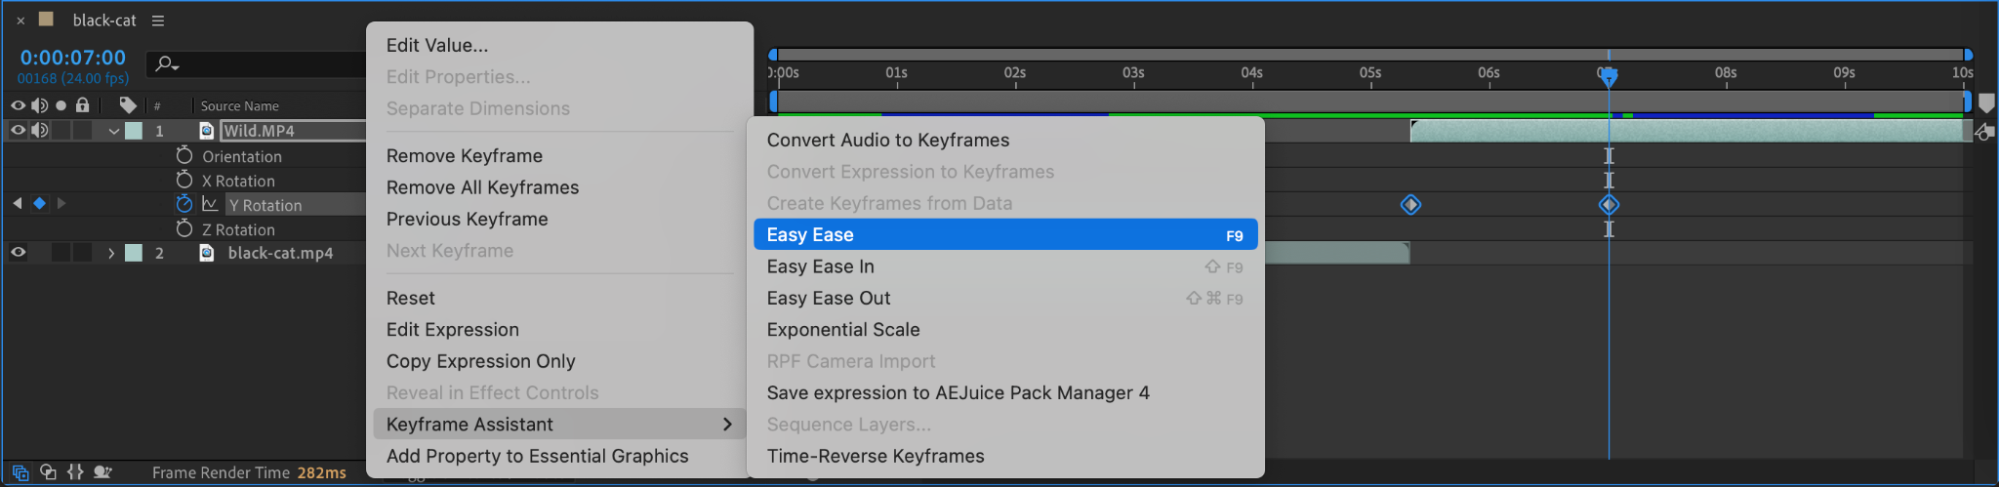
 Step 10: Preview the Animation
After completing all the keyframes and adjustments, hit Spacebar to preview the animation. Check the flip transition to ensure it’s smooth and properly timed.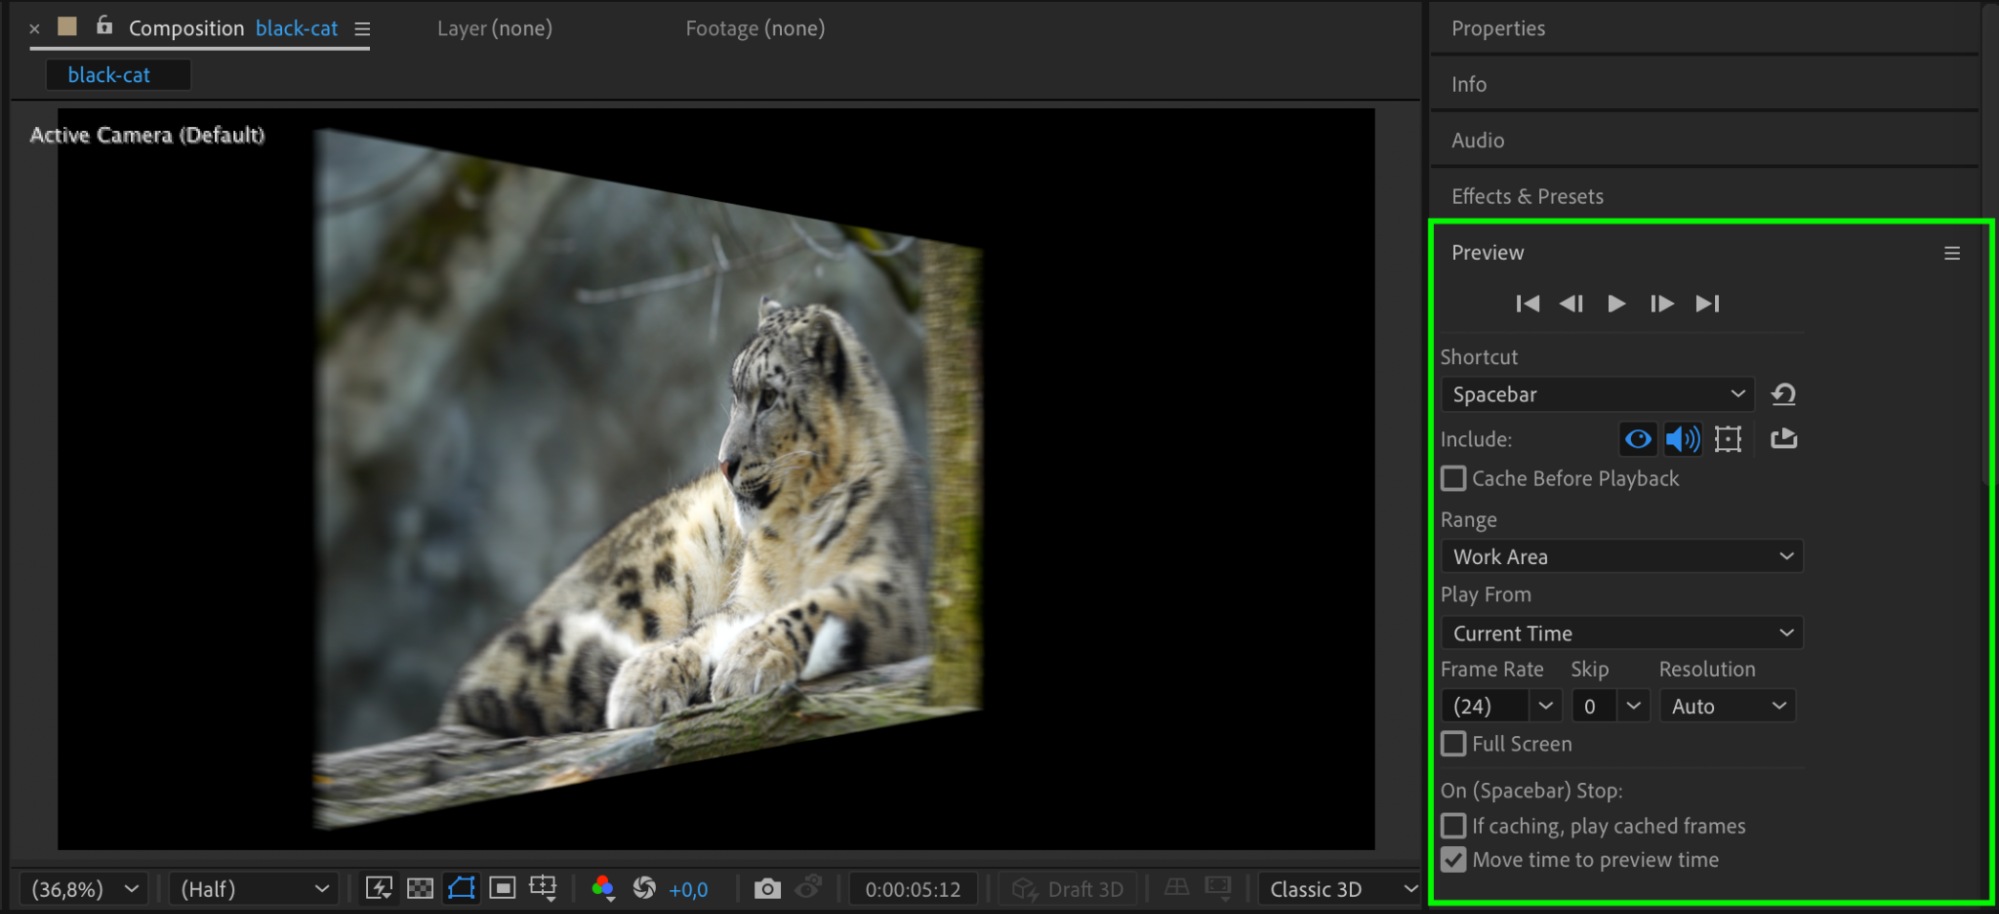 Step 11: Render the Final Animation
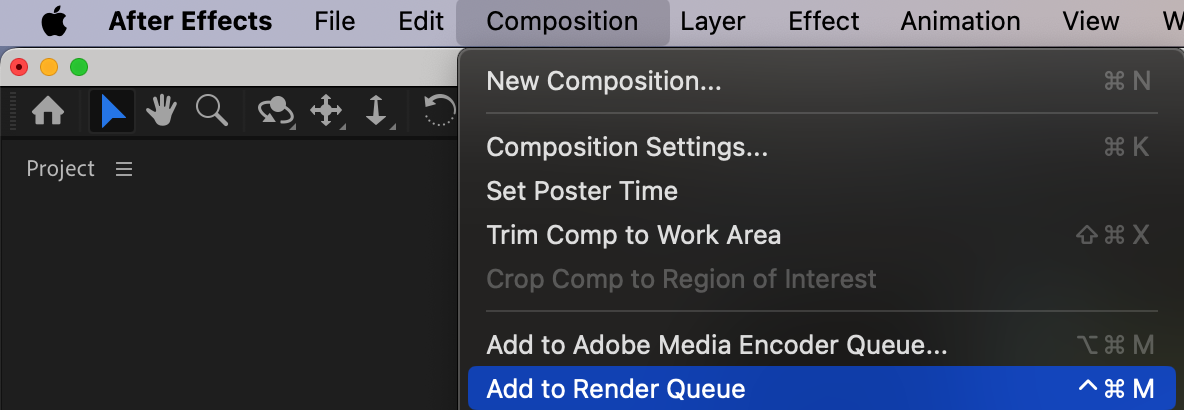
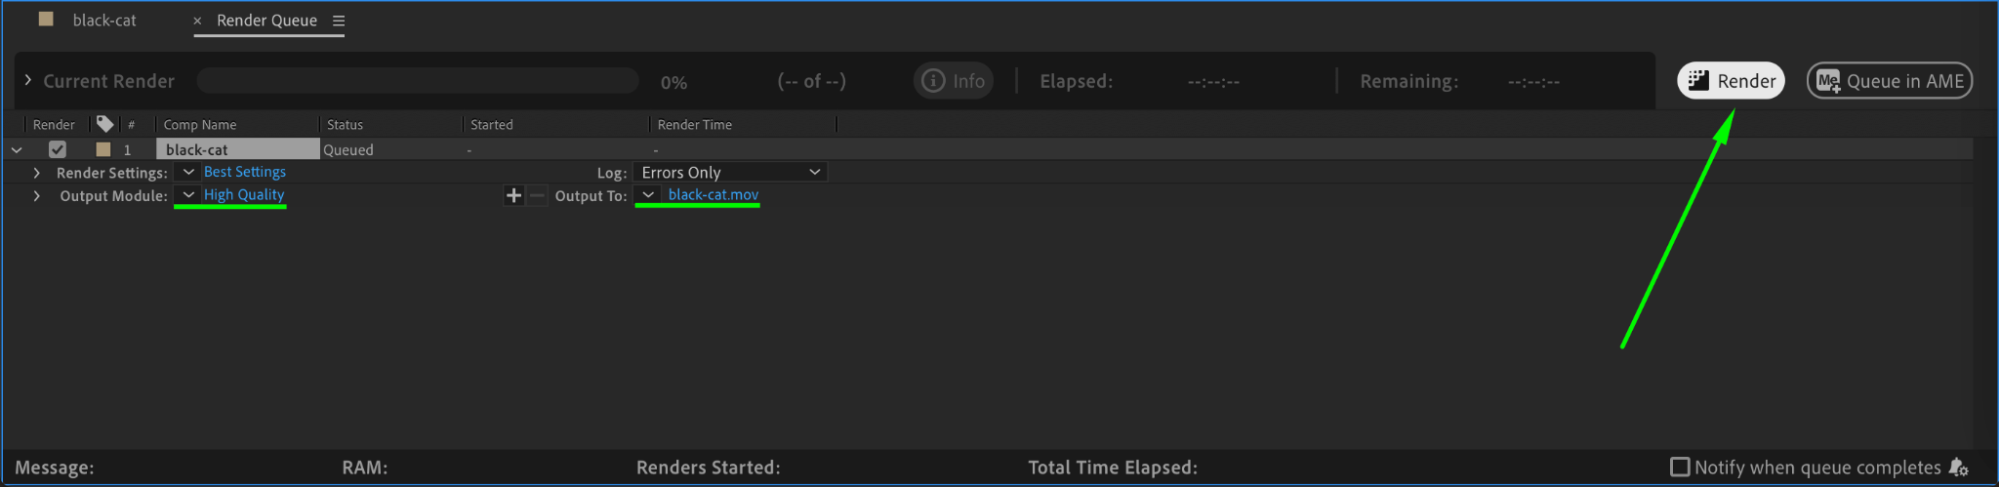
Once you’re satisfied with the flip transition, go to Composition > Add to Render Queue. Choose your export settings and click Render to save the video with the transition effect.
 Conclusion
Creating a flip transition in After Effects is a great way to add a dynamic, eye-catching effect to your video edits. By following these simple steps, you can seamlessly transition between clips with a realistic and smooth flip animation. Whether for creative effects or scene changes, the flip transition will elevate the quality of your videos and make them more engaging for your audience.
Our Bestsellers


