Creating a Dynamic Force Field Effect in After Effects
Introduction
Creating a force field effect can add a unique visual element to your videos. In this tutorial, you will learn how to build a force field in After Effects using solid layers, masks, opacity animation, and displacement maps. This technique will allow you to generate a glowing, interactive force field for your video projects.
Step 1: Create a New Composition
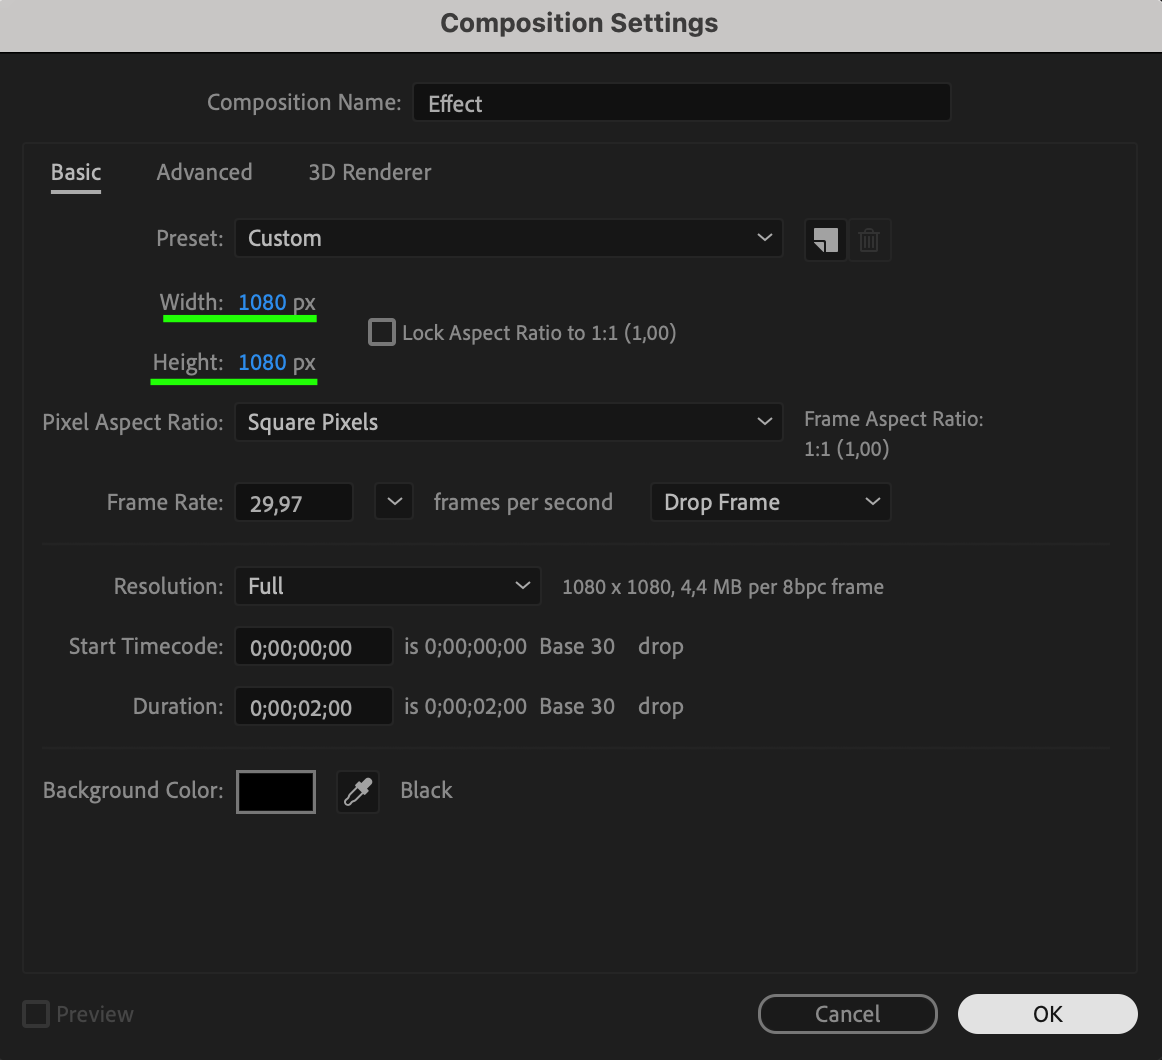
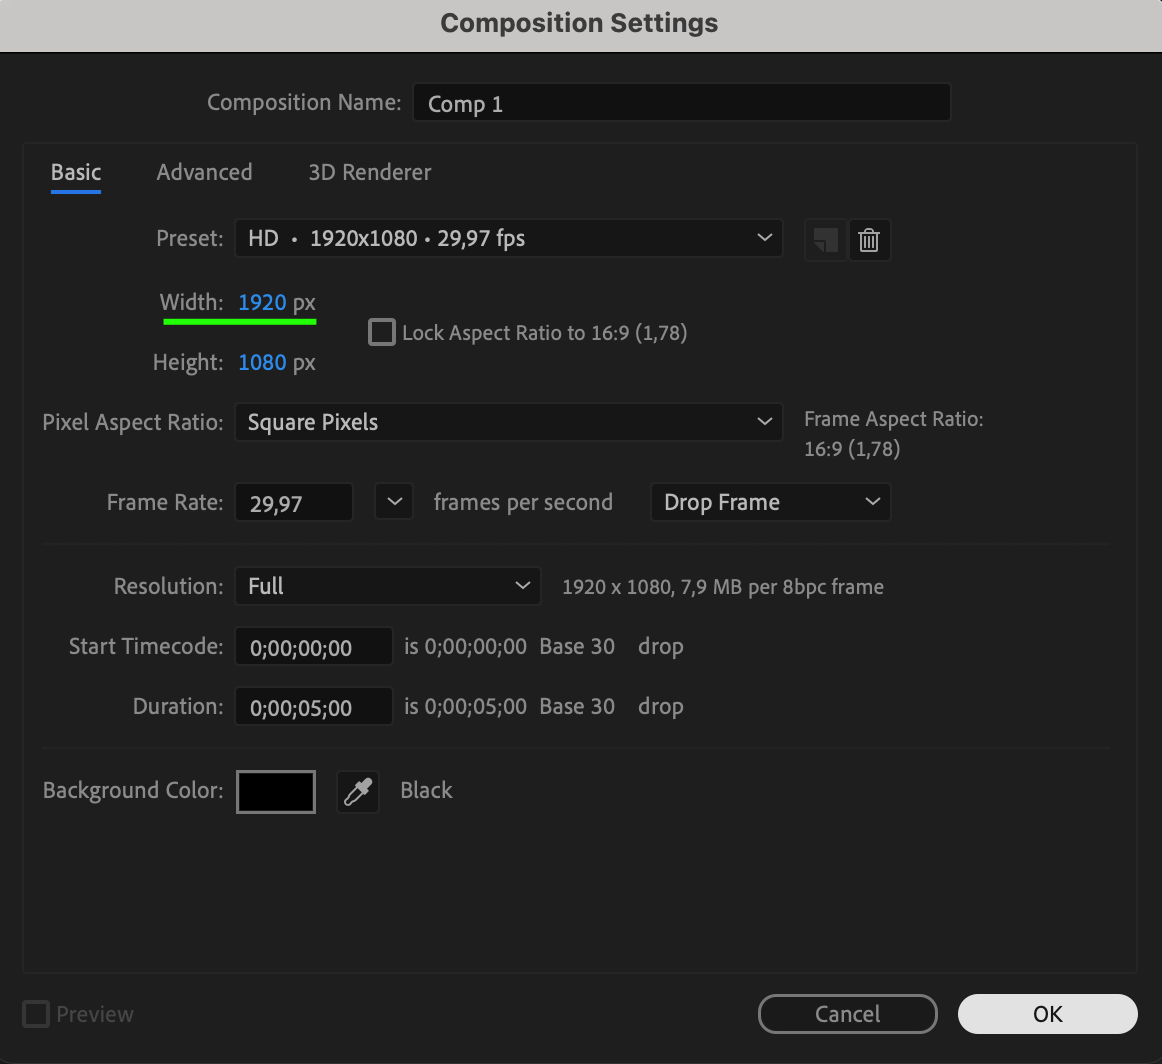
Start by creating a new composition in After Effects. Set the dimensions to 1080×1080 pixels and name it “Effect.” This composition will serve as the base for your force field effect.
 Step 2: Create a Solid Layer
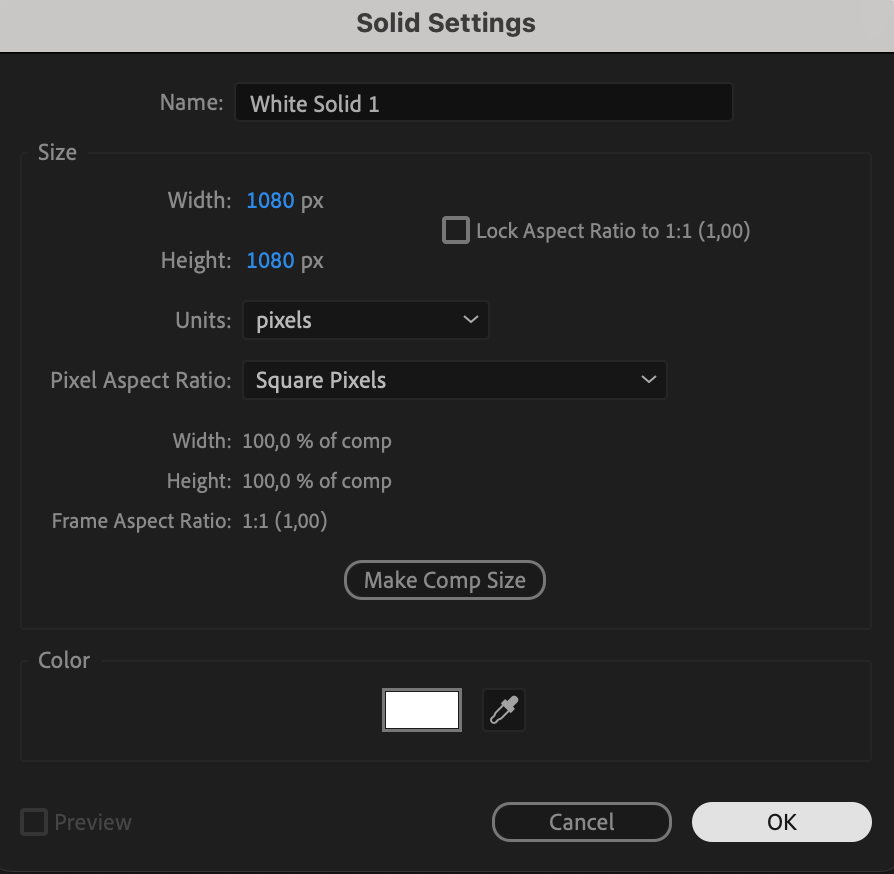
Go to Layer > New > Solid, and select a white color for the solid layer. This will act as the background layer for your force field.
 Step 3: Add an Elliptical Mask
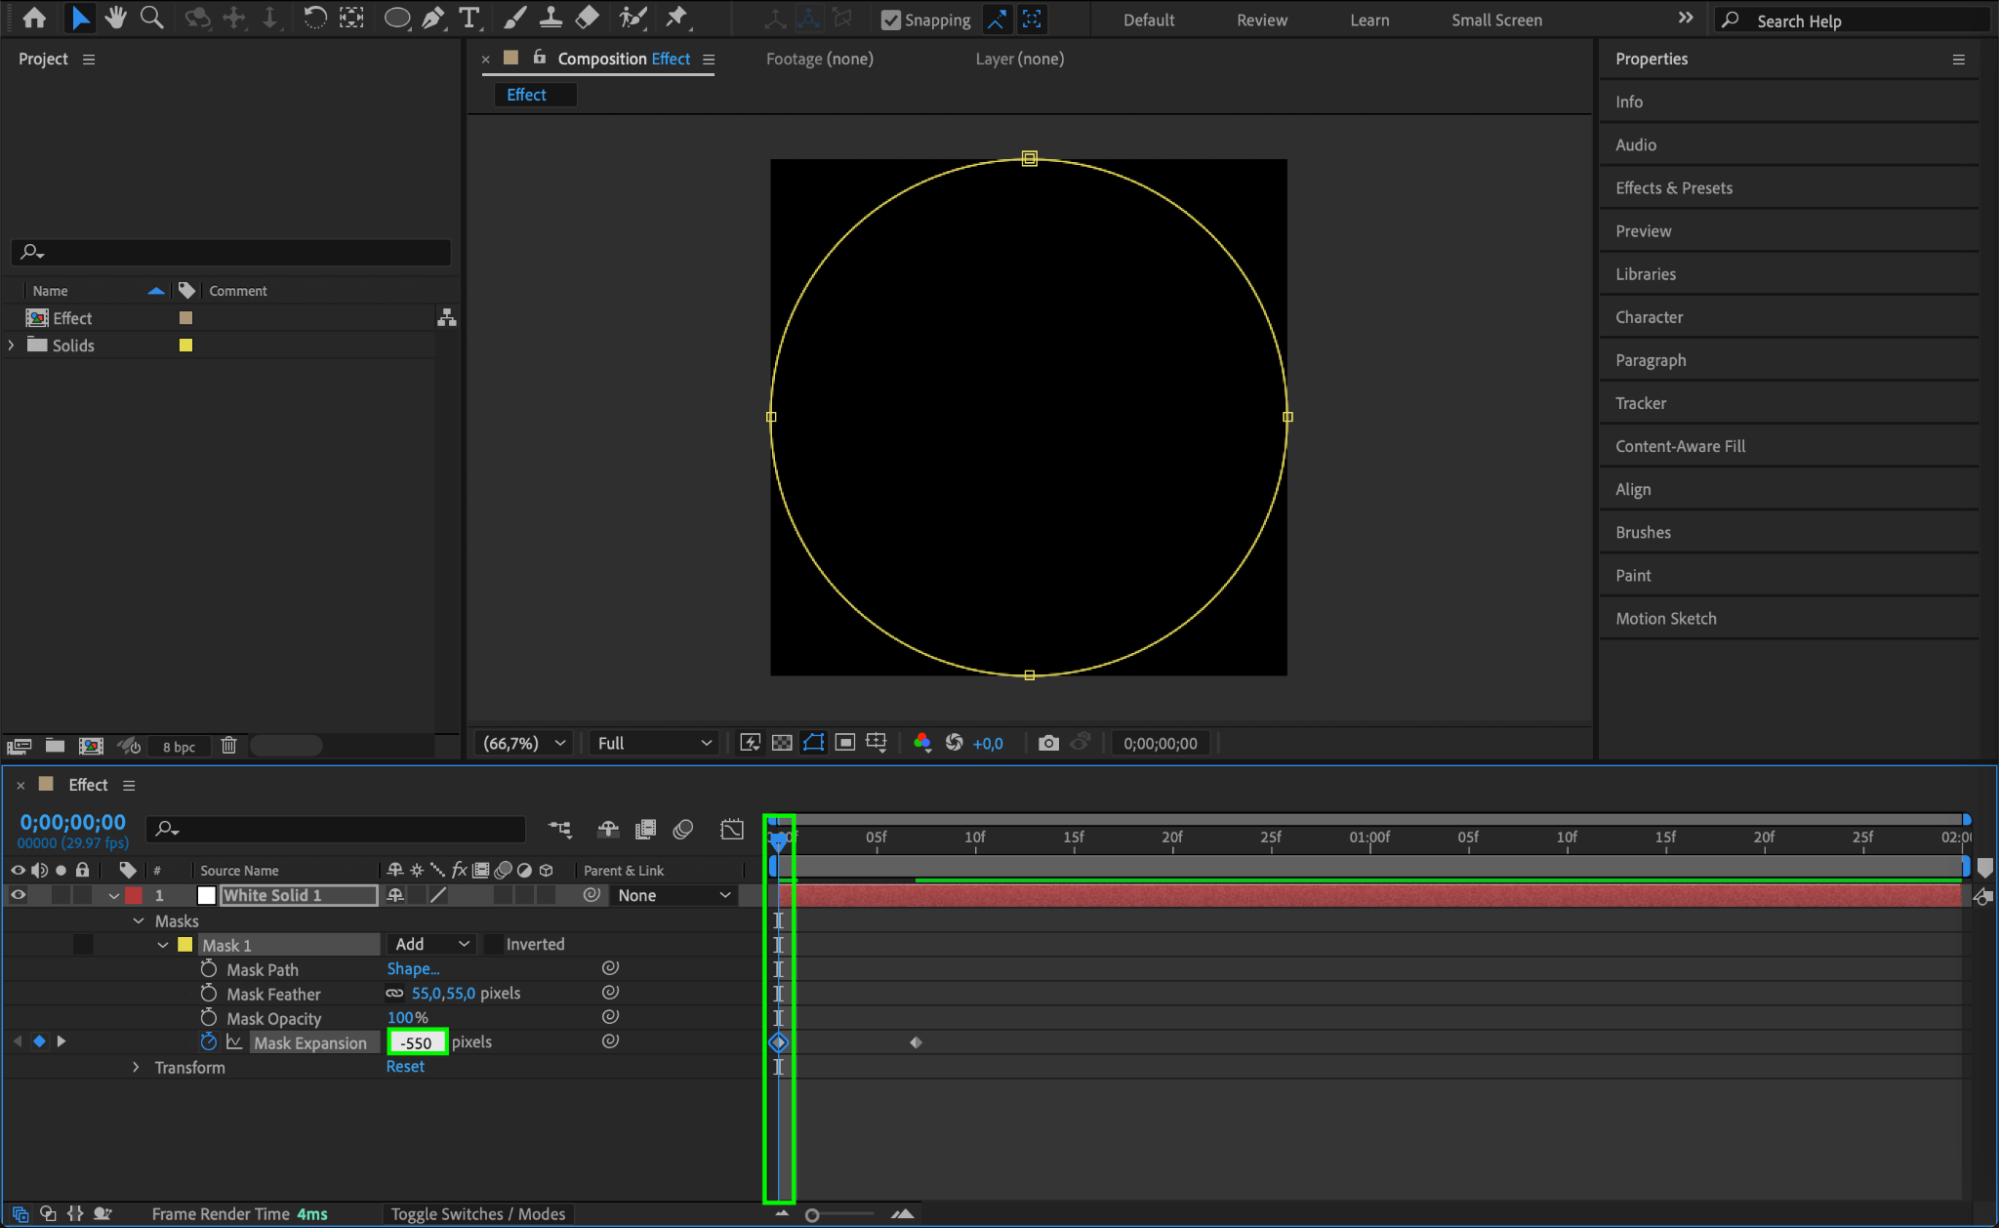
Select the solid layer and double-click on the Ellipse Tool (Q) to create a circular mask. Set the Mask Feather to 55 and the Mask Expansion to -35 after a few frames from the start of the composition. Adjust the Mask Expansion to -550 at the beginning of the composition to achieve the desired effect.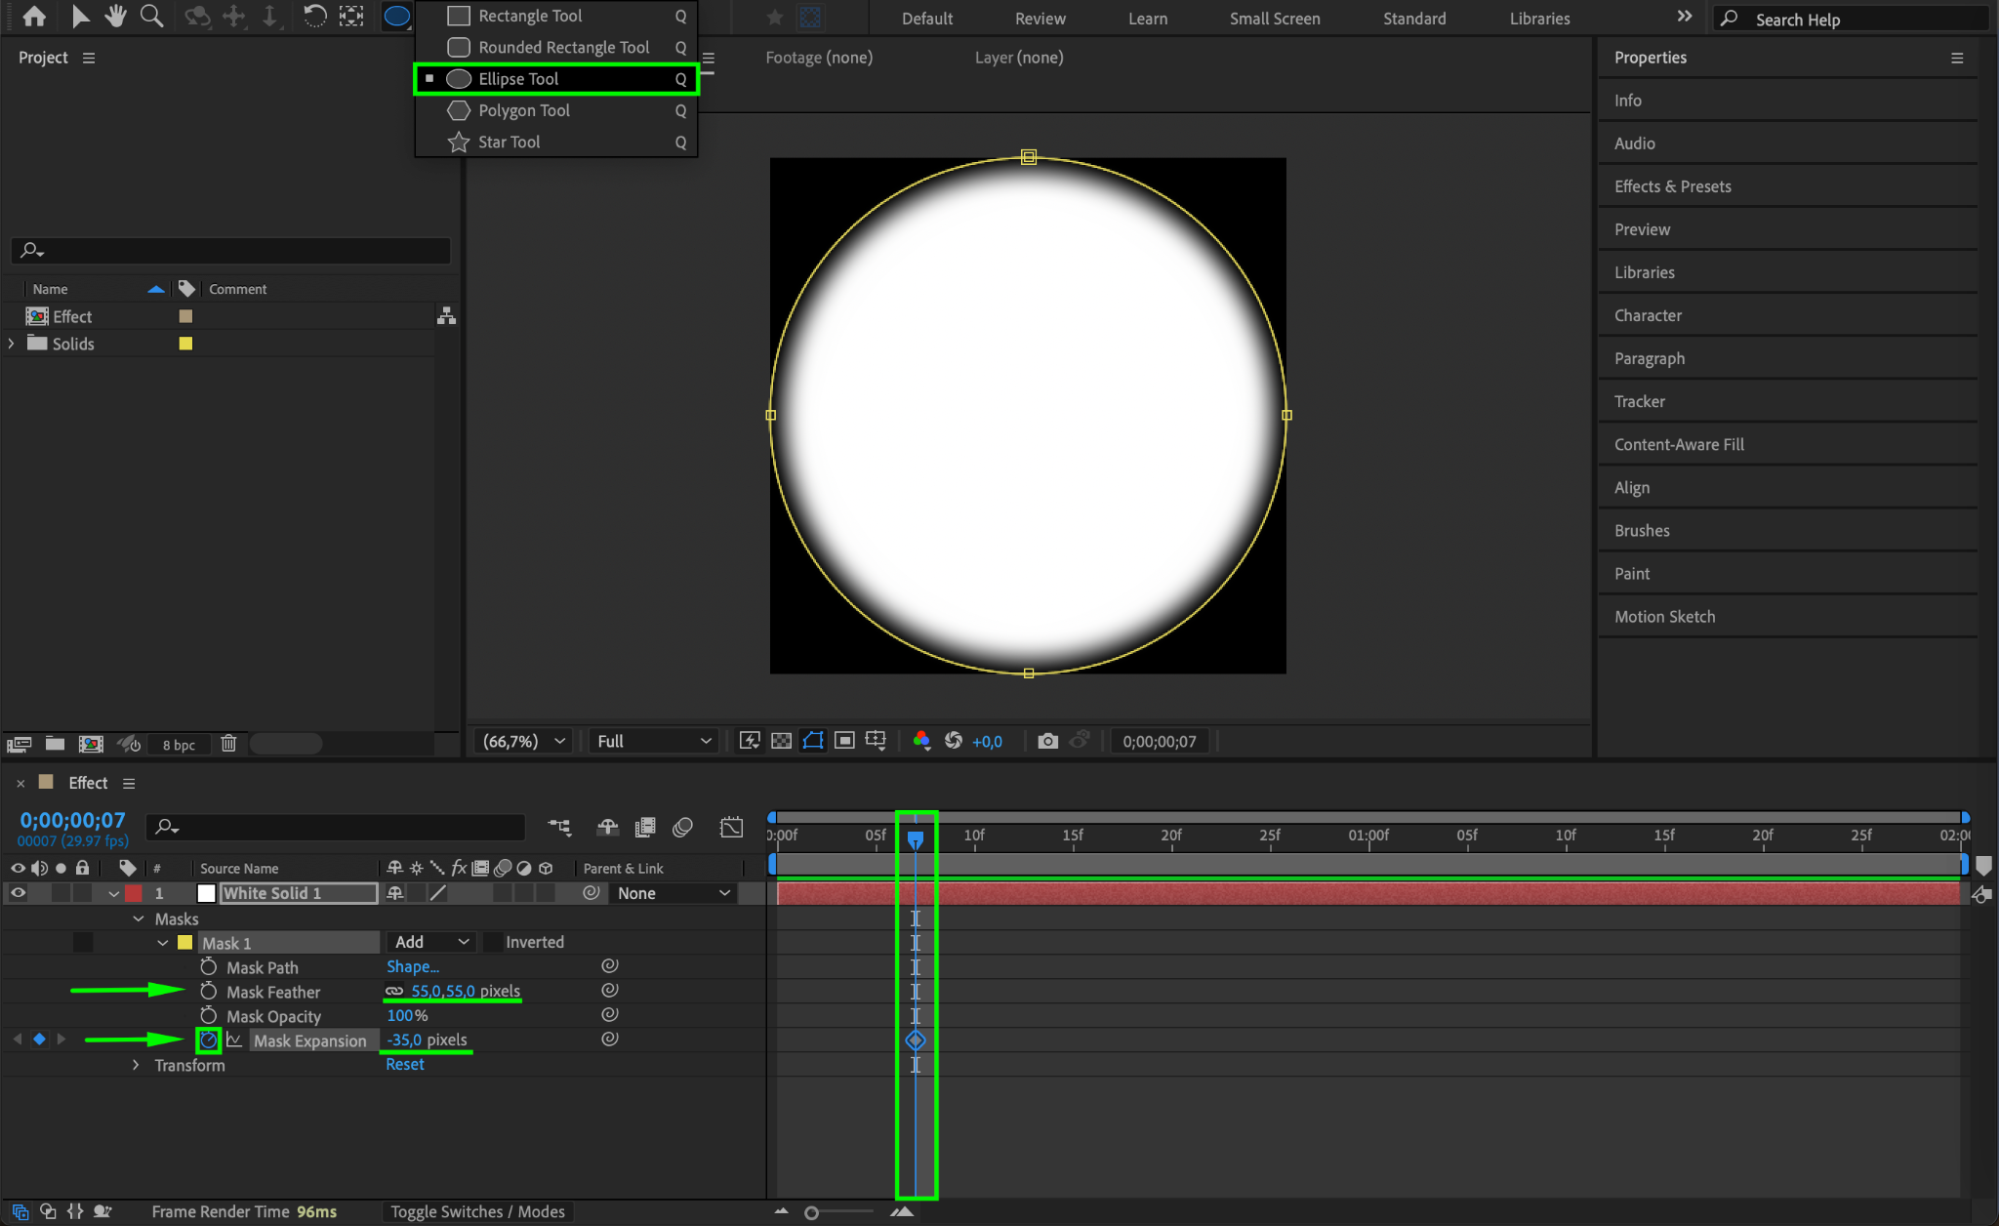
 Step 4: Duplicate the Mask
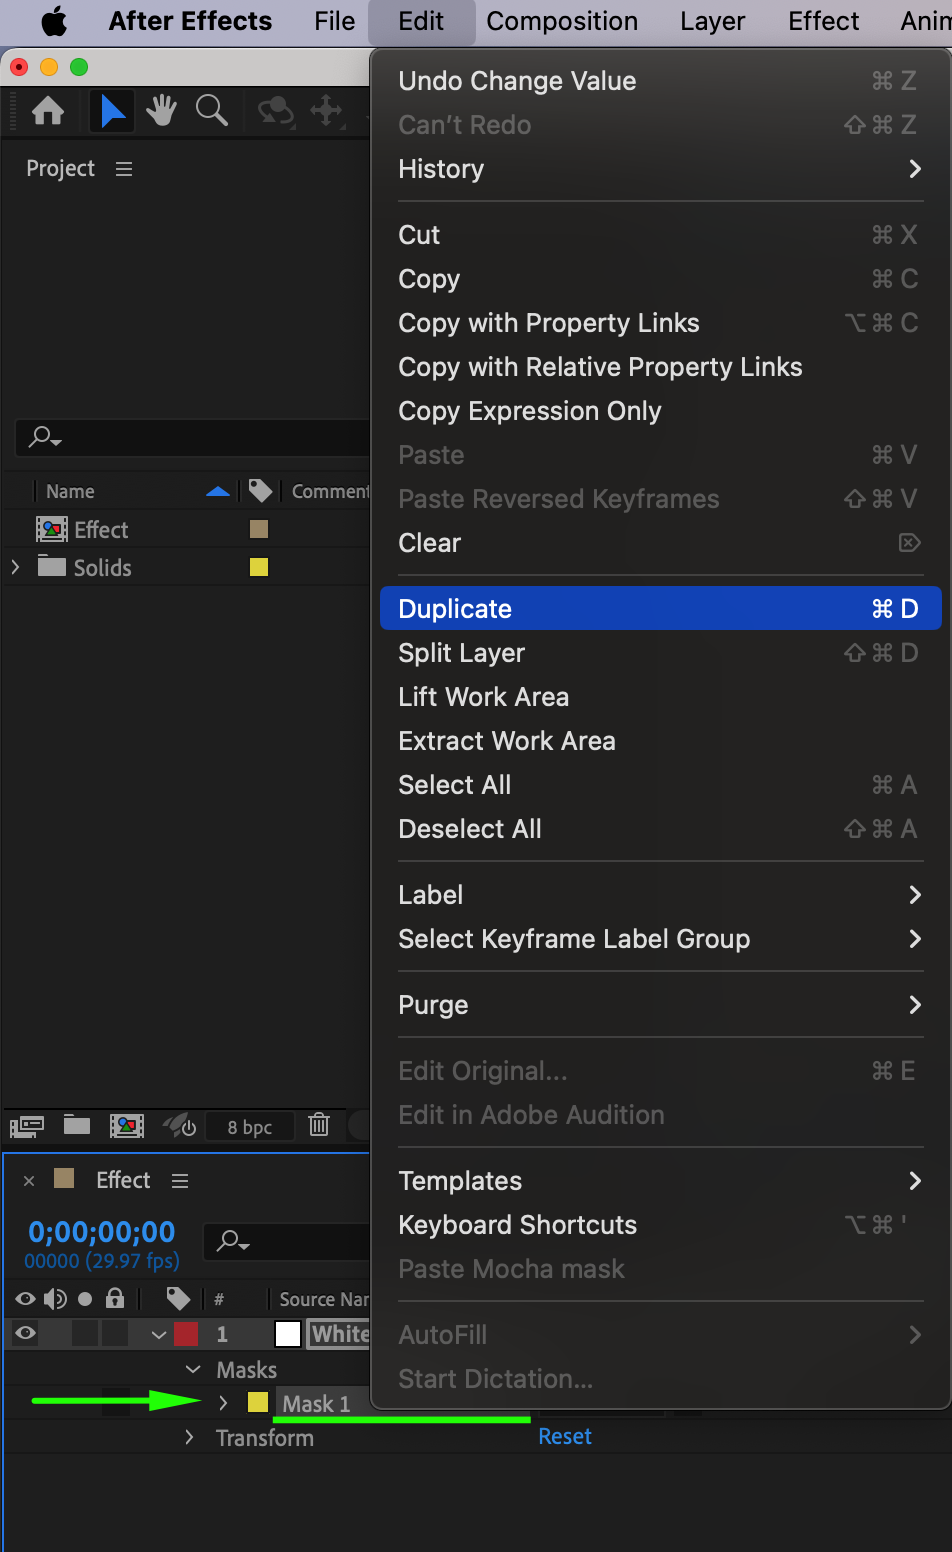
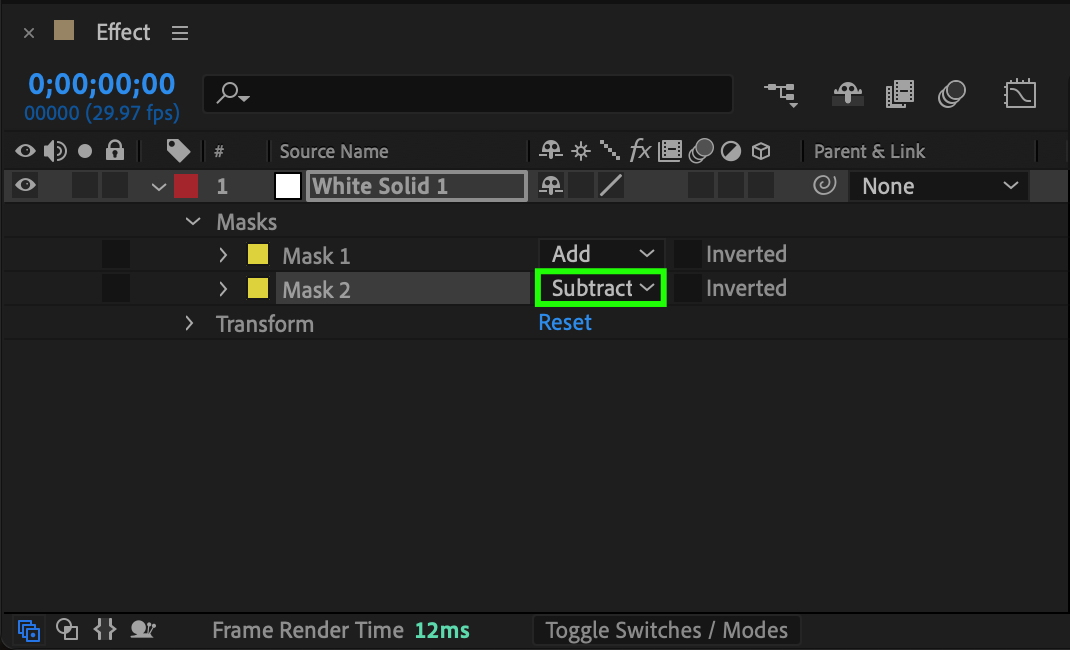
Duplicate the mask you just created by selecting the mask and pressing “Ctrl/Cmd + D”. Change the mask mode of the second mask to Subtract. This will create the outer ring effect for the force field.
 Step 5: Adjust Mask Keyframes
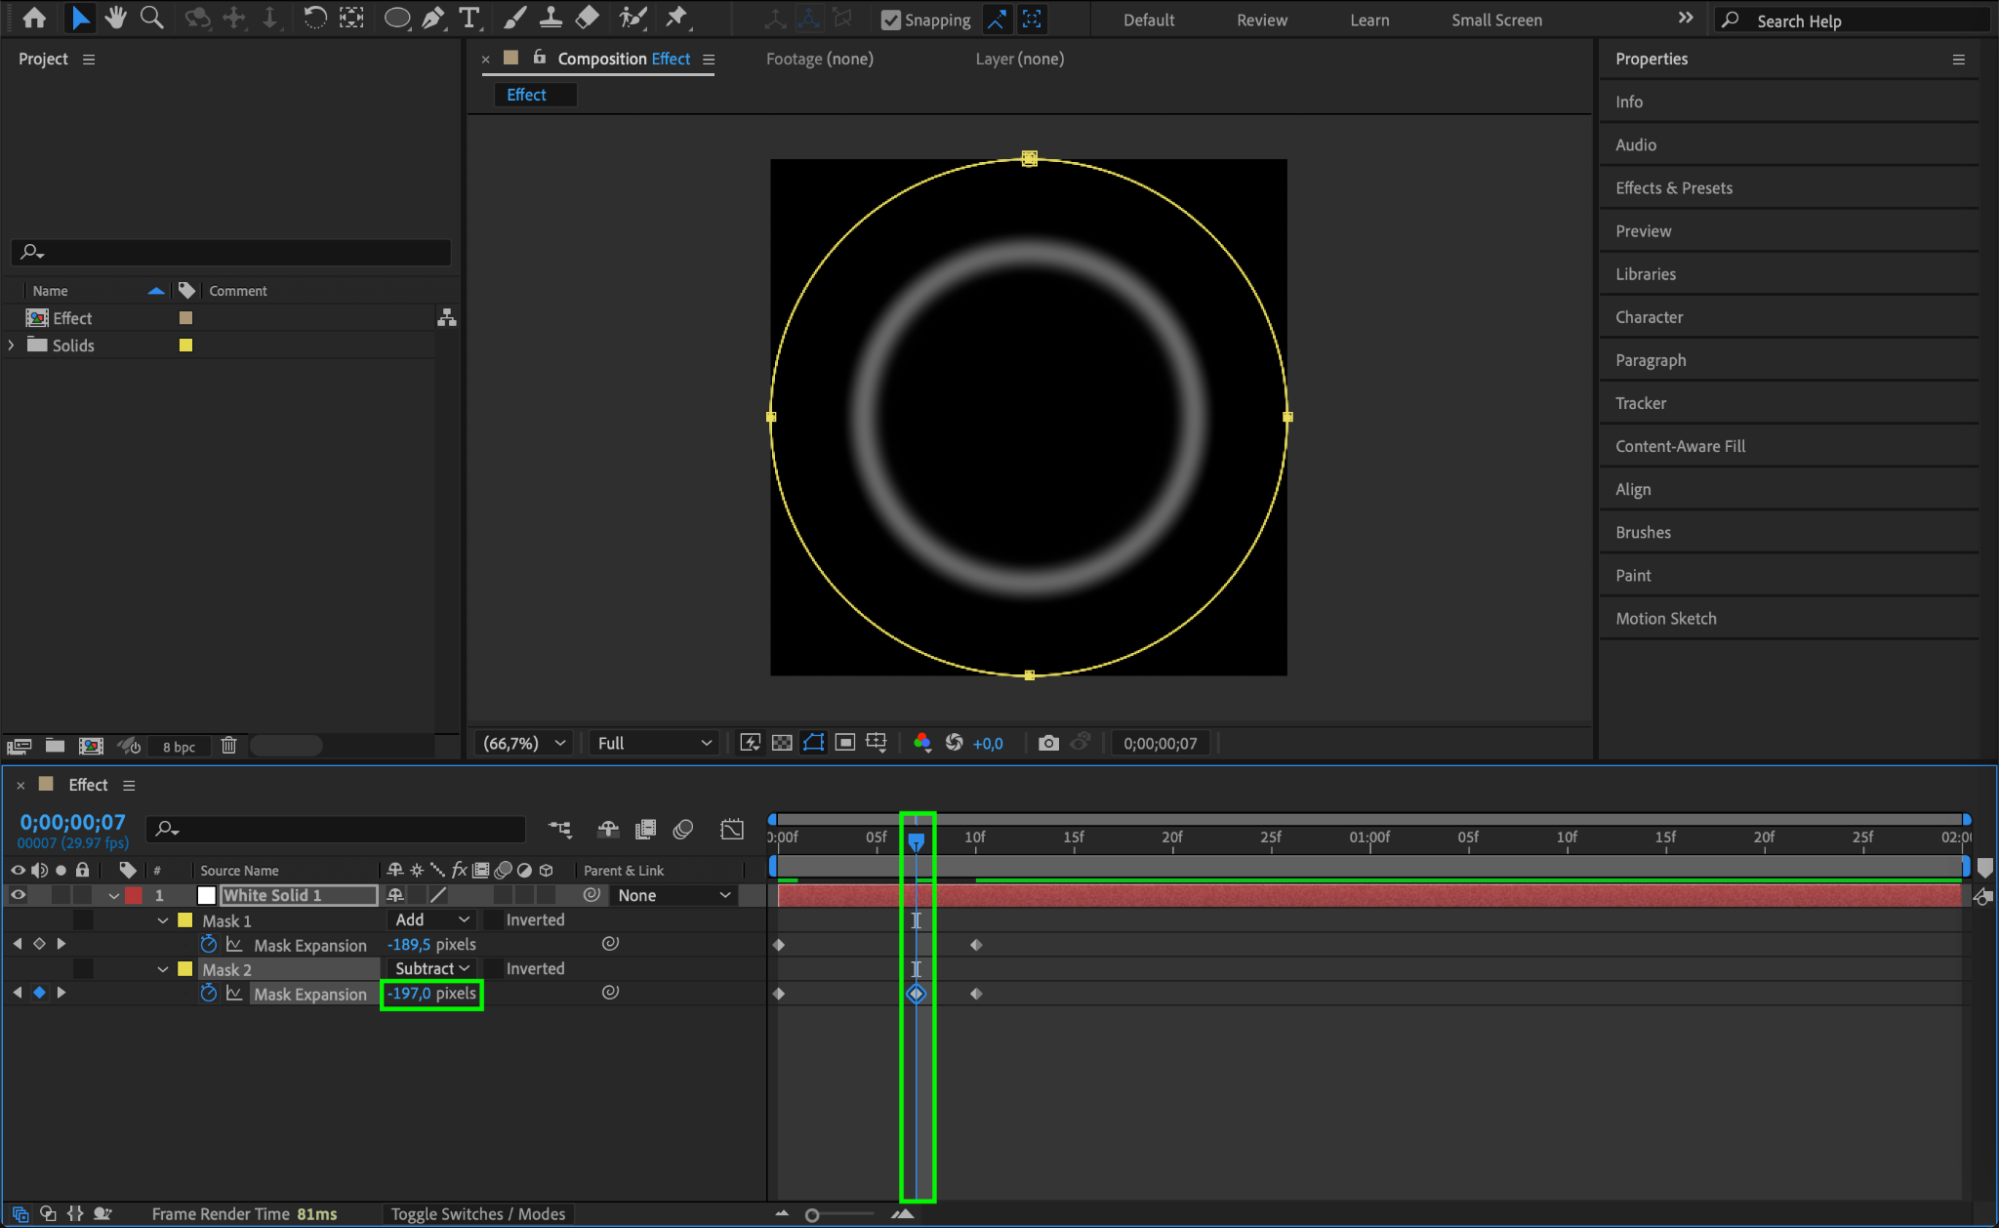
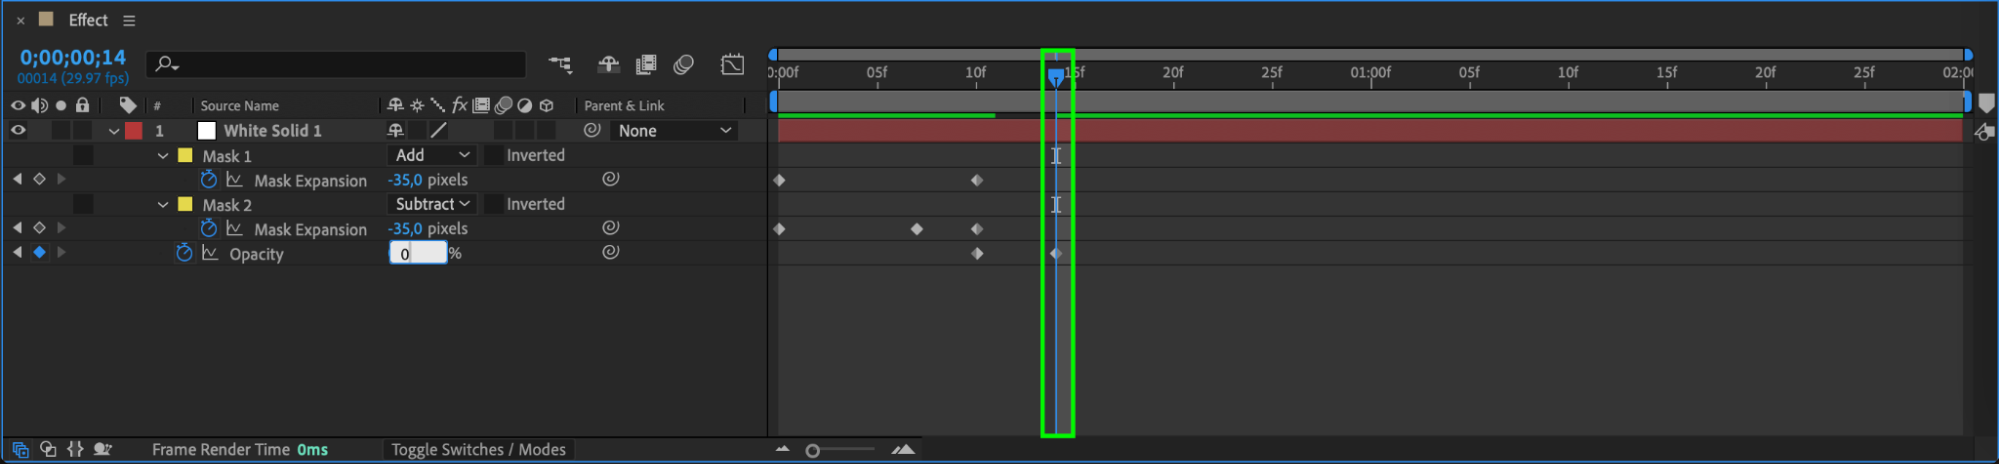
Move the second keyframes for the masks to the right. When the CTI is at their previous position, set the Mask 2 Expansion to -197 to enhance the visual depth of the force field.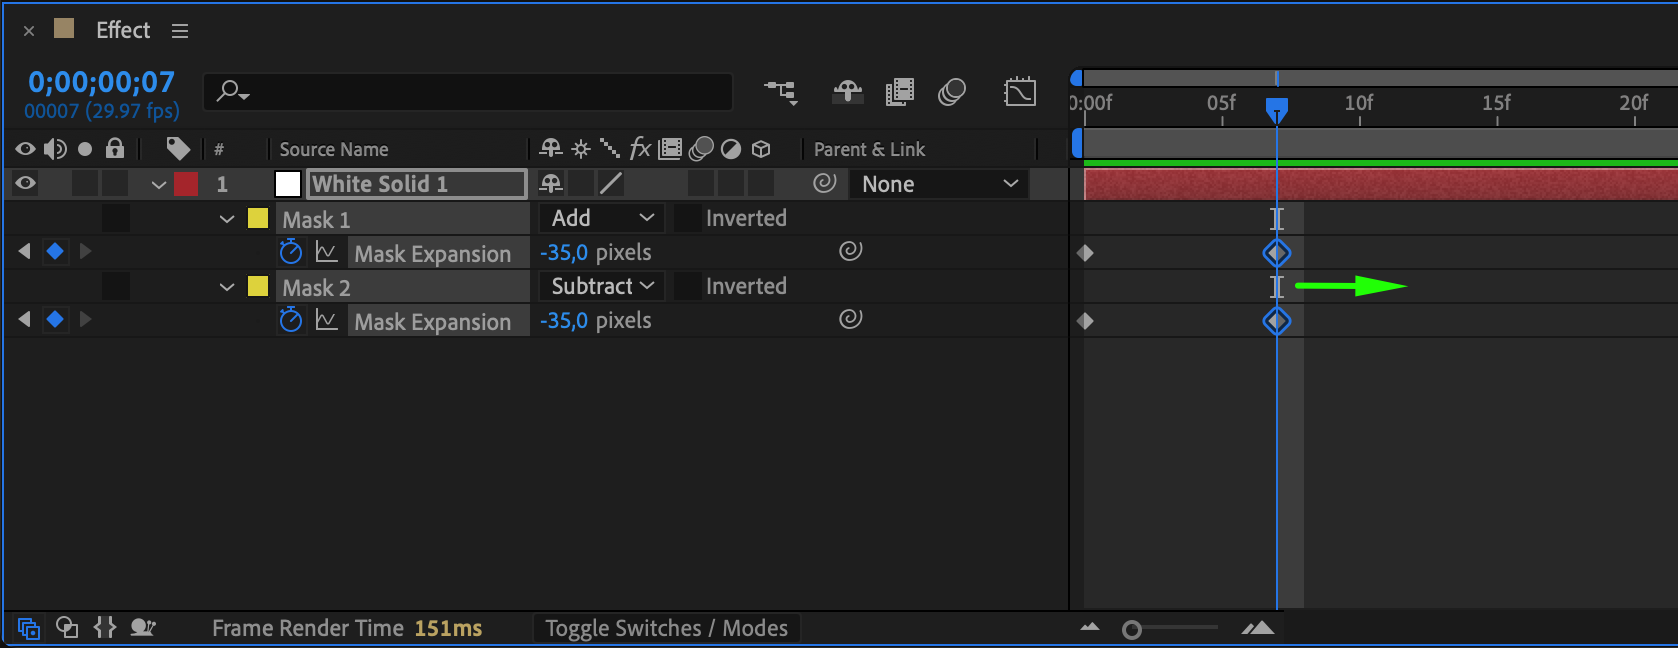
 Step 6: Animate Opacity
For the solid layer’s Opacity, create a keyframe at 100% opacity at the second keyframe position for both masks. Then, move the CTI (current time indicator) forward a few frames and change the opacity to 0%. This will make the force field fade in and out.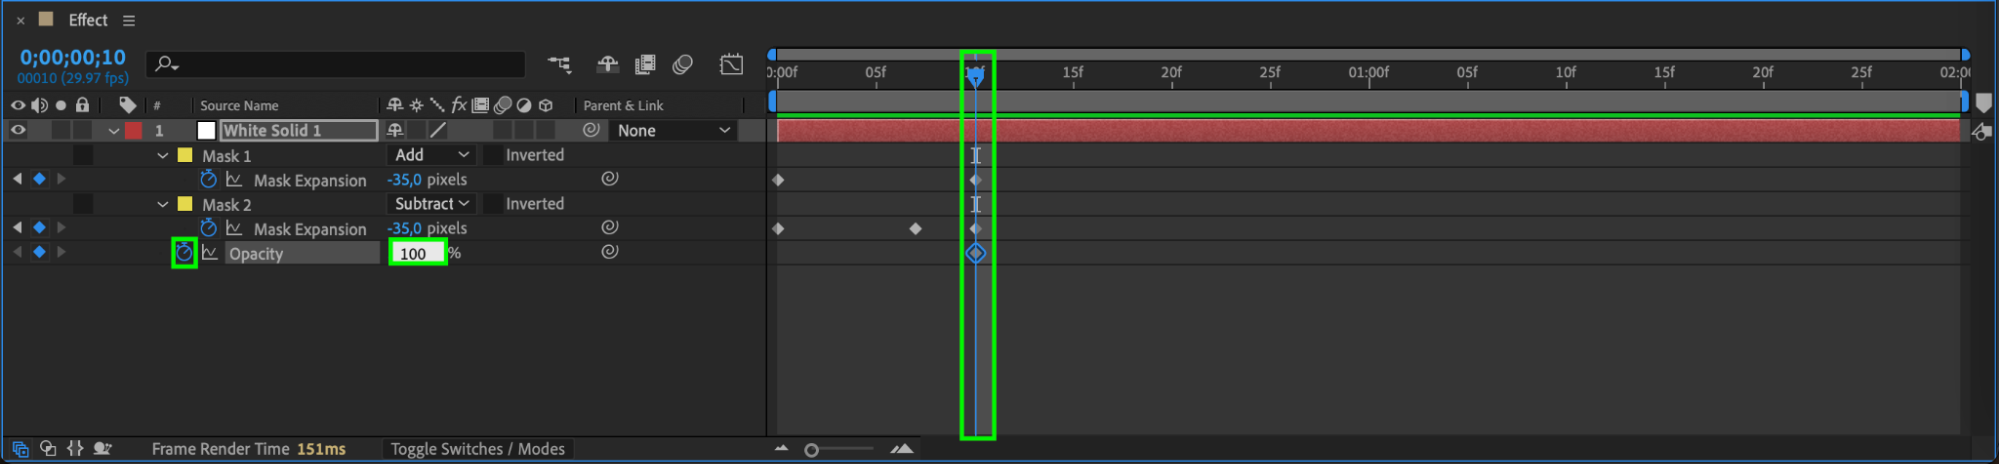
 Step 7: Apply Easy Ease
Select the keyframes for both masks and the opacity, then right-click and choose Keyframe Assistant > Easy Ease. This smoothes out the animation for a more natural look.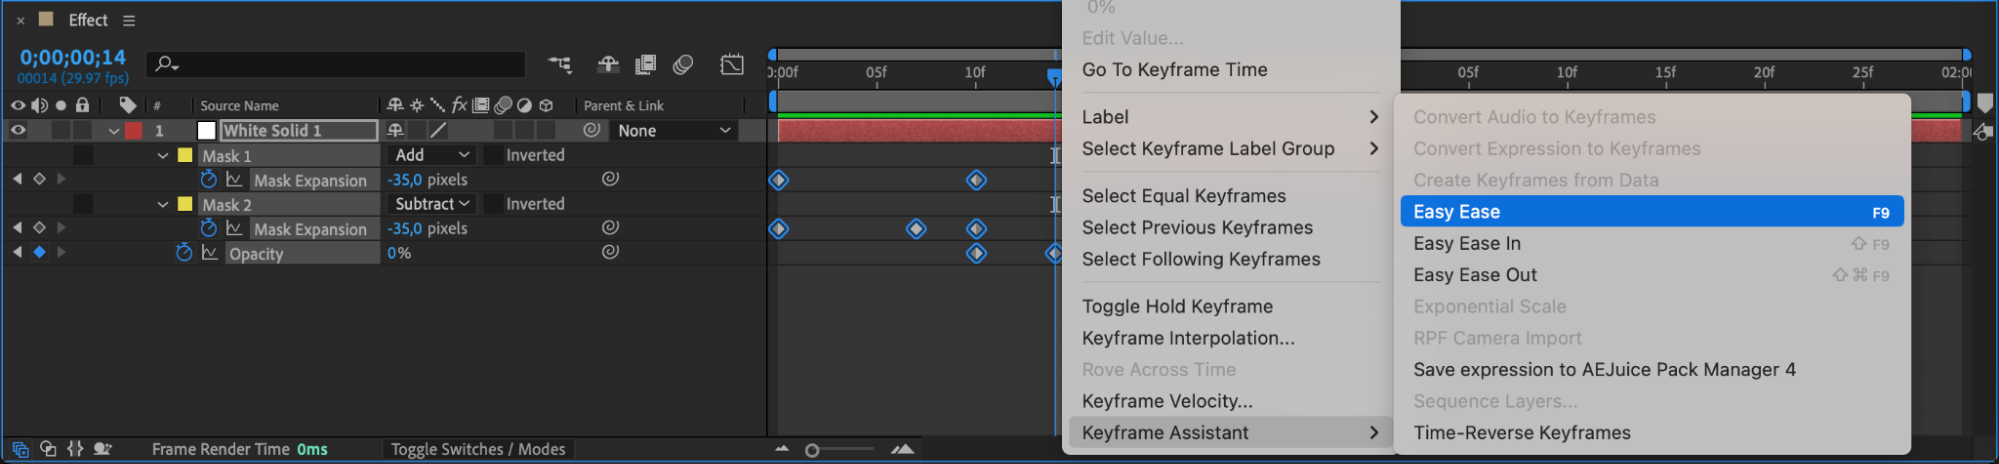 Step 8: Duplicate the Solid Layer
Duplicate the layer, then select the keyframes of the duplicate. Hold Alt (Windows) or Option (Mac) and drag the keyframes slightly to the left. This will duplicate the effect, making it appear more fluid and dynamic.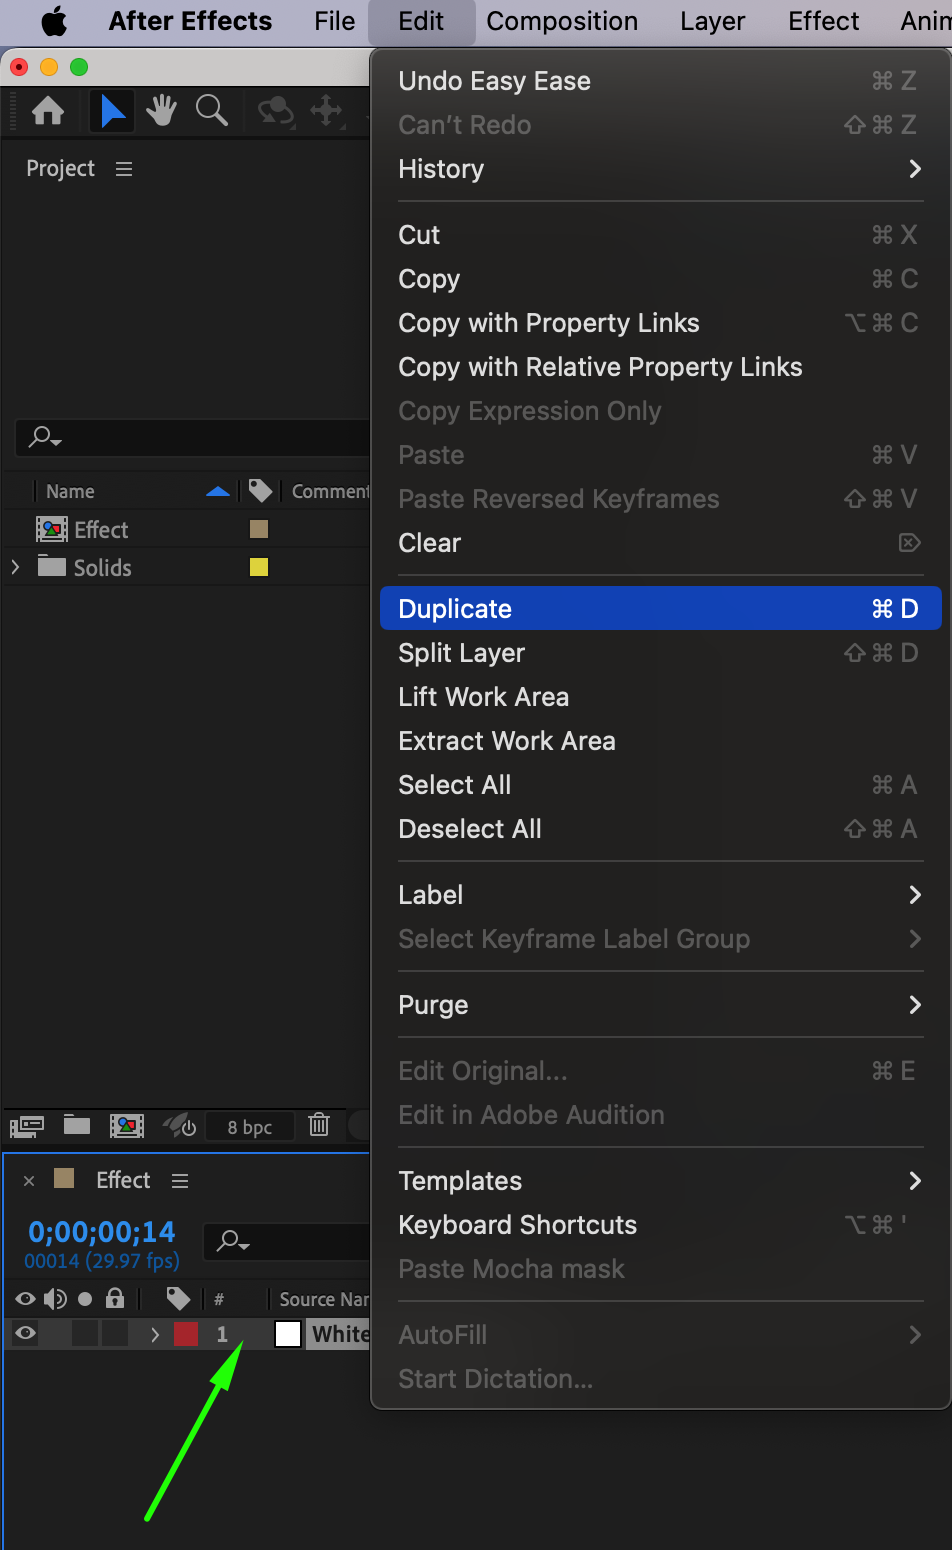
 Step 9: Create a New Composition for Video
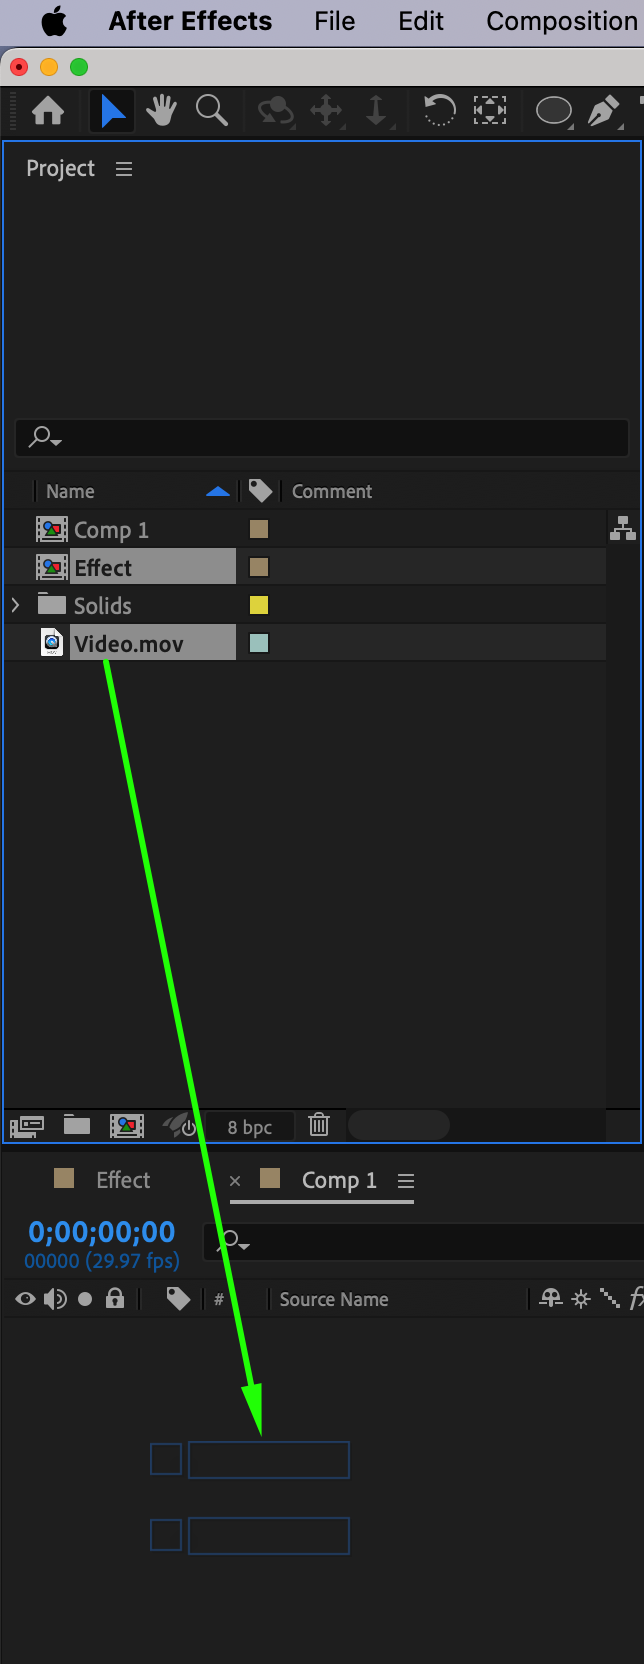
Create a new composition with dimensions 1920×1080 pixels. Import your video file and drag both the video and the force field effect composition onto the timeline. This will allow you to overlay the force field onto the video.
 Step 10: Enable 3D for the Force Field Layer
Make the force field layer 3D by clicking the 3D layer checkbox in the timeline. Position it accordingly to match the interaction with the object or person touching the force field.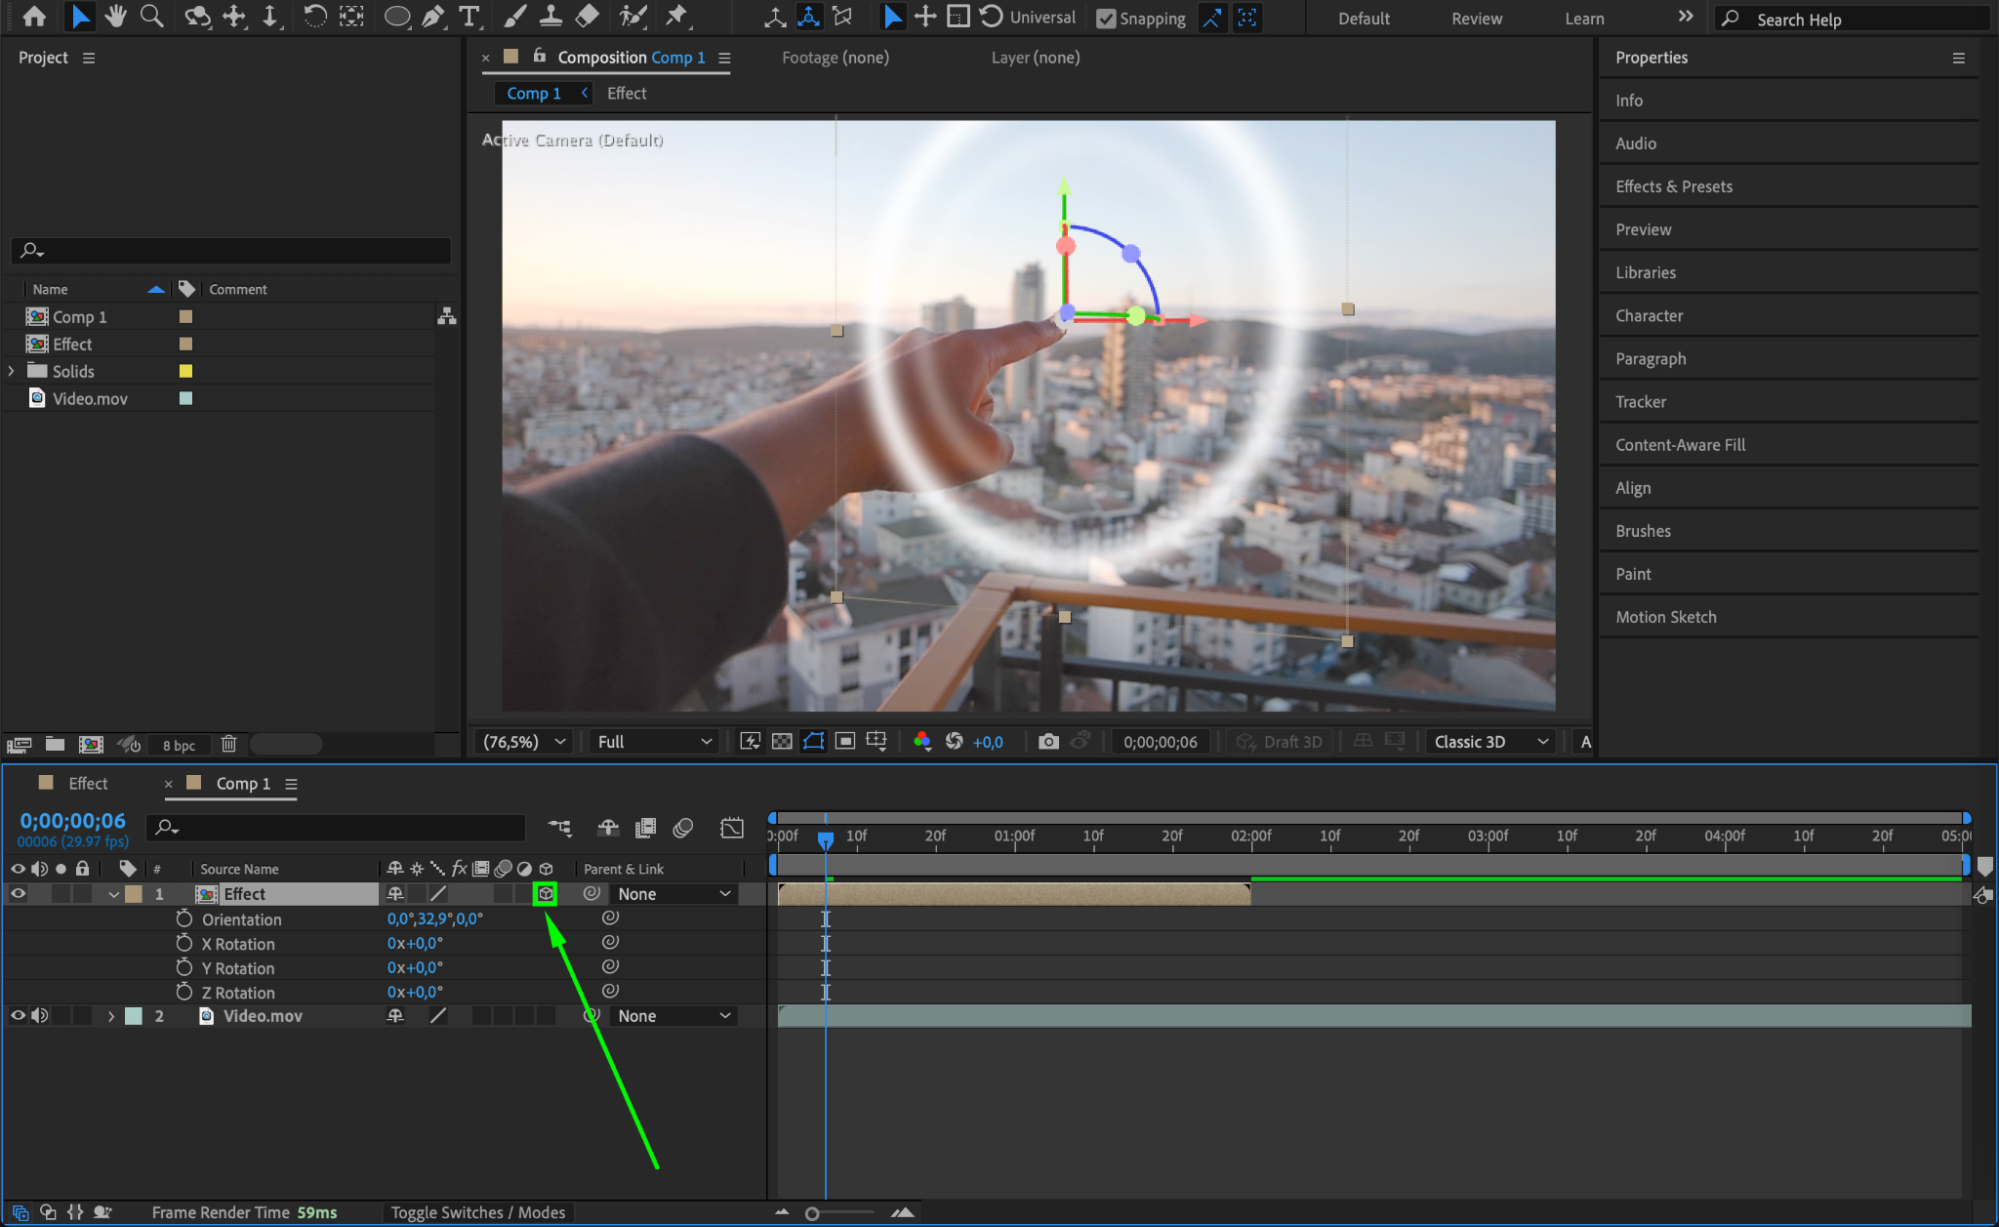 Step 11: Mask the Hand in the Video
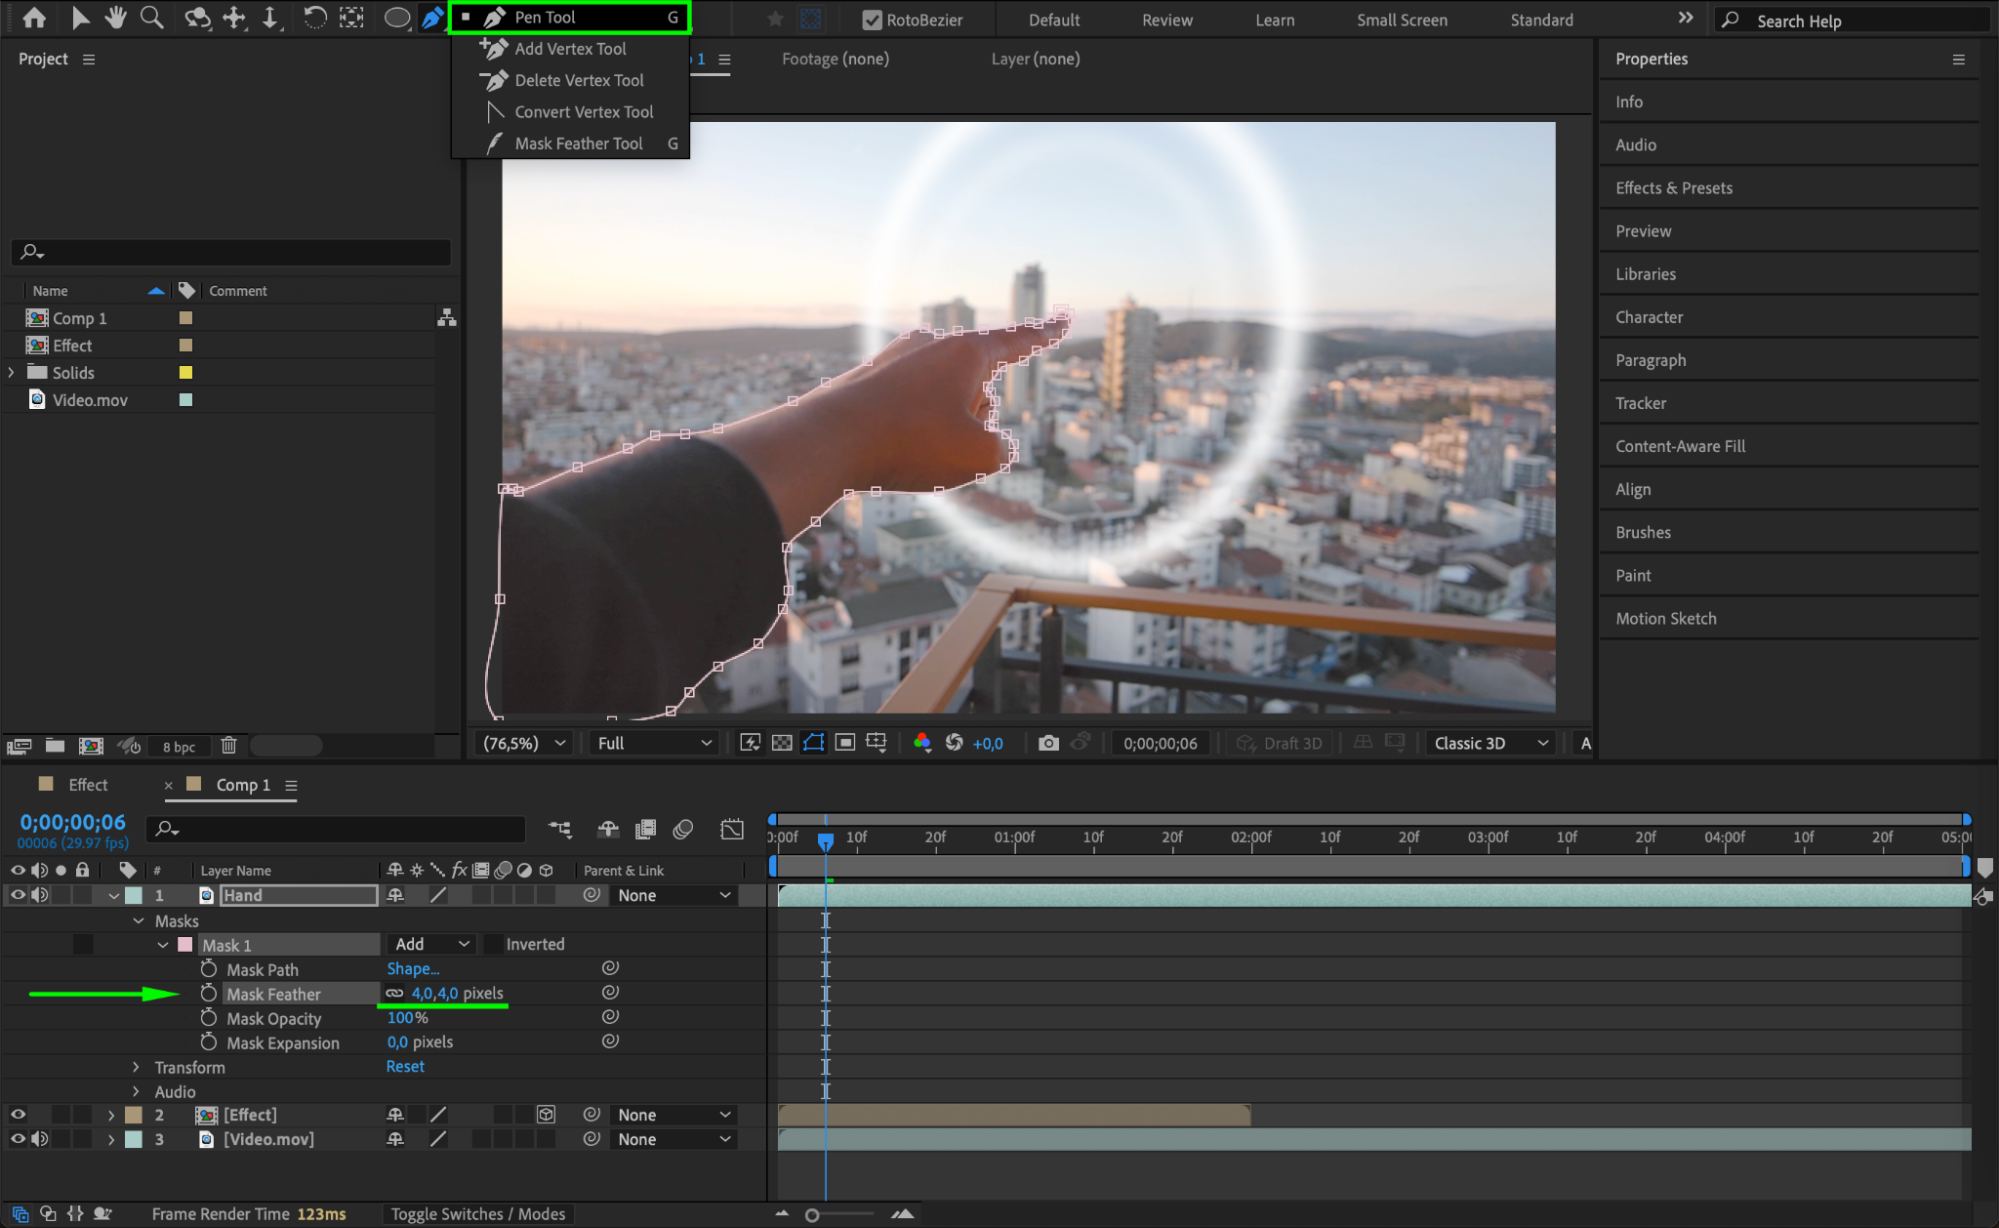
Duplicate the video layer and place it above the original. Use the Pen Tool (G) to create a mask around the hand interacting with the force field. Set the Mask Feather to 4 to blend the edges smoothly.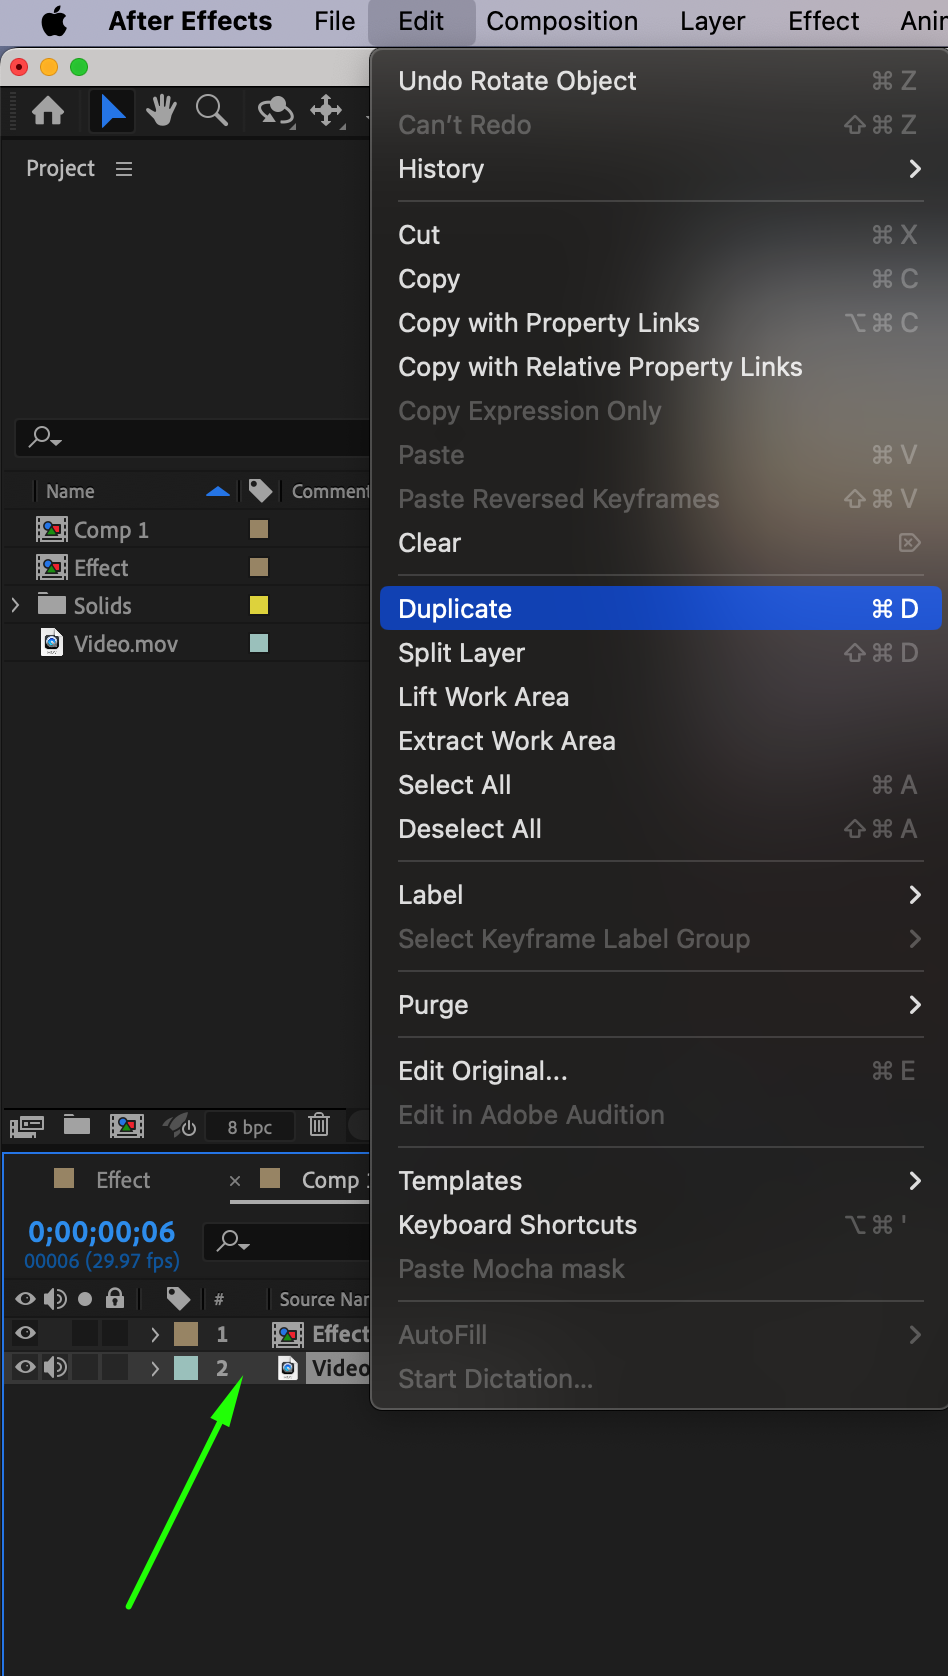
 Step 12: Add Adjustment Layer
Go to Layer > New > Adjustment Layer, and place it below the video layer with the hand. This adjustment layer will help refine the force field effect.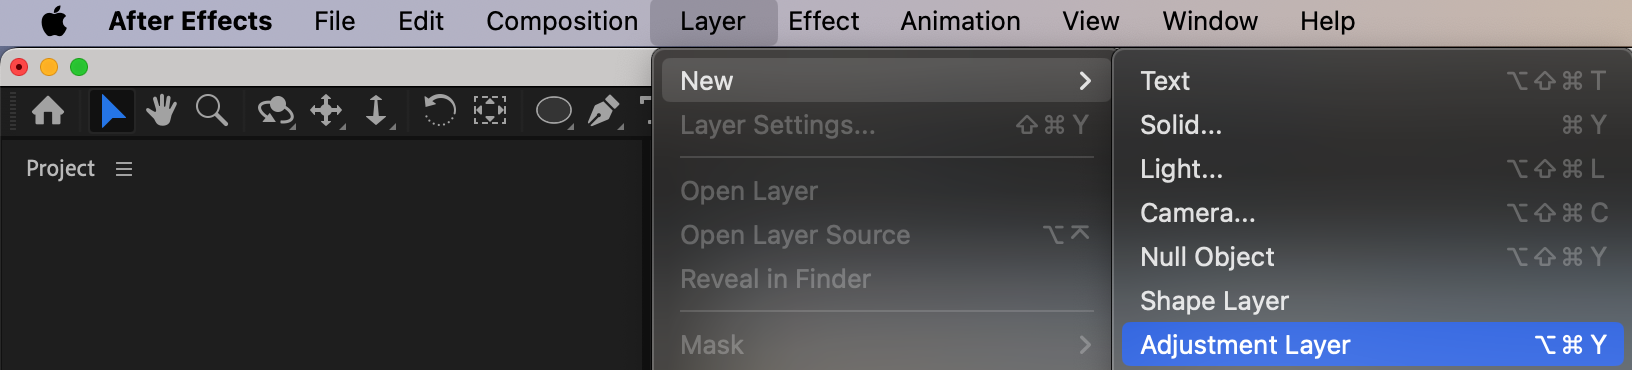
Step 13: Pre-compose the Effect Layer
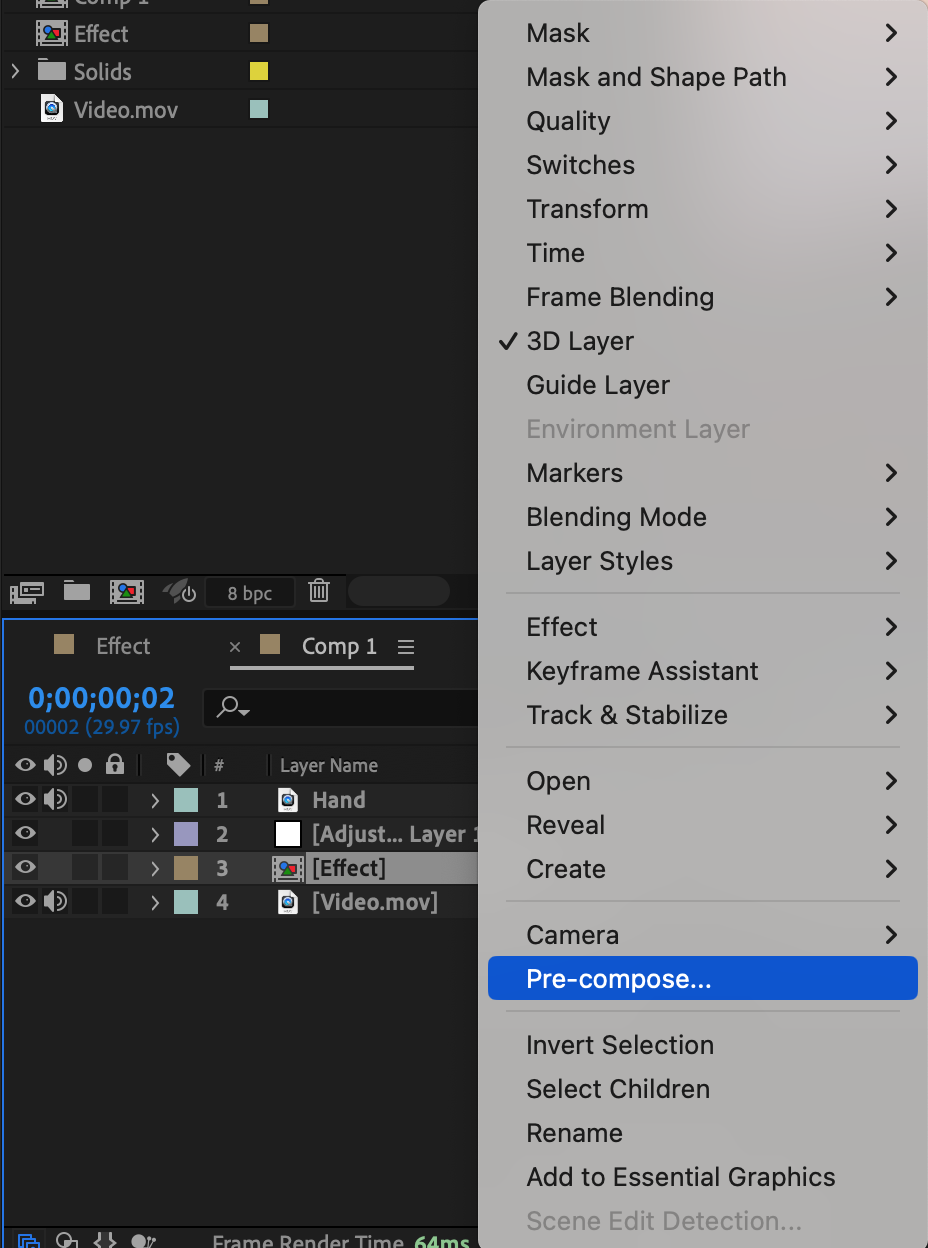
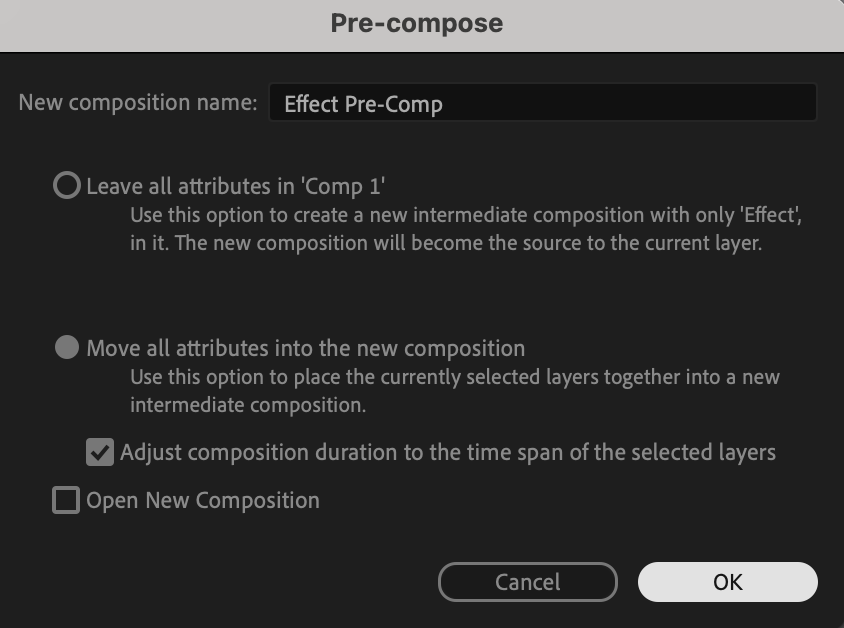
Right-click on the effect layer and choose Pre-compose to lock its position and make it easier to control in the timeline.
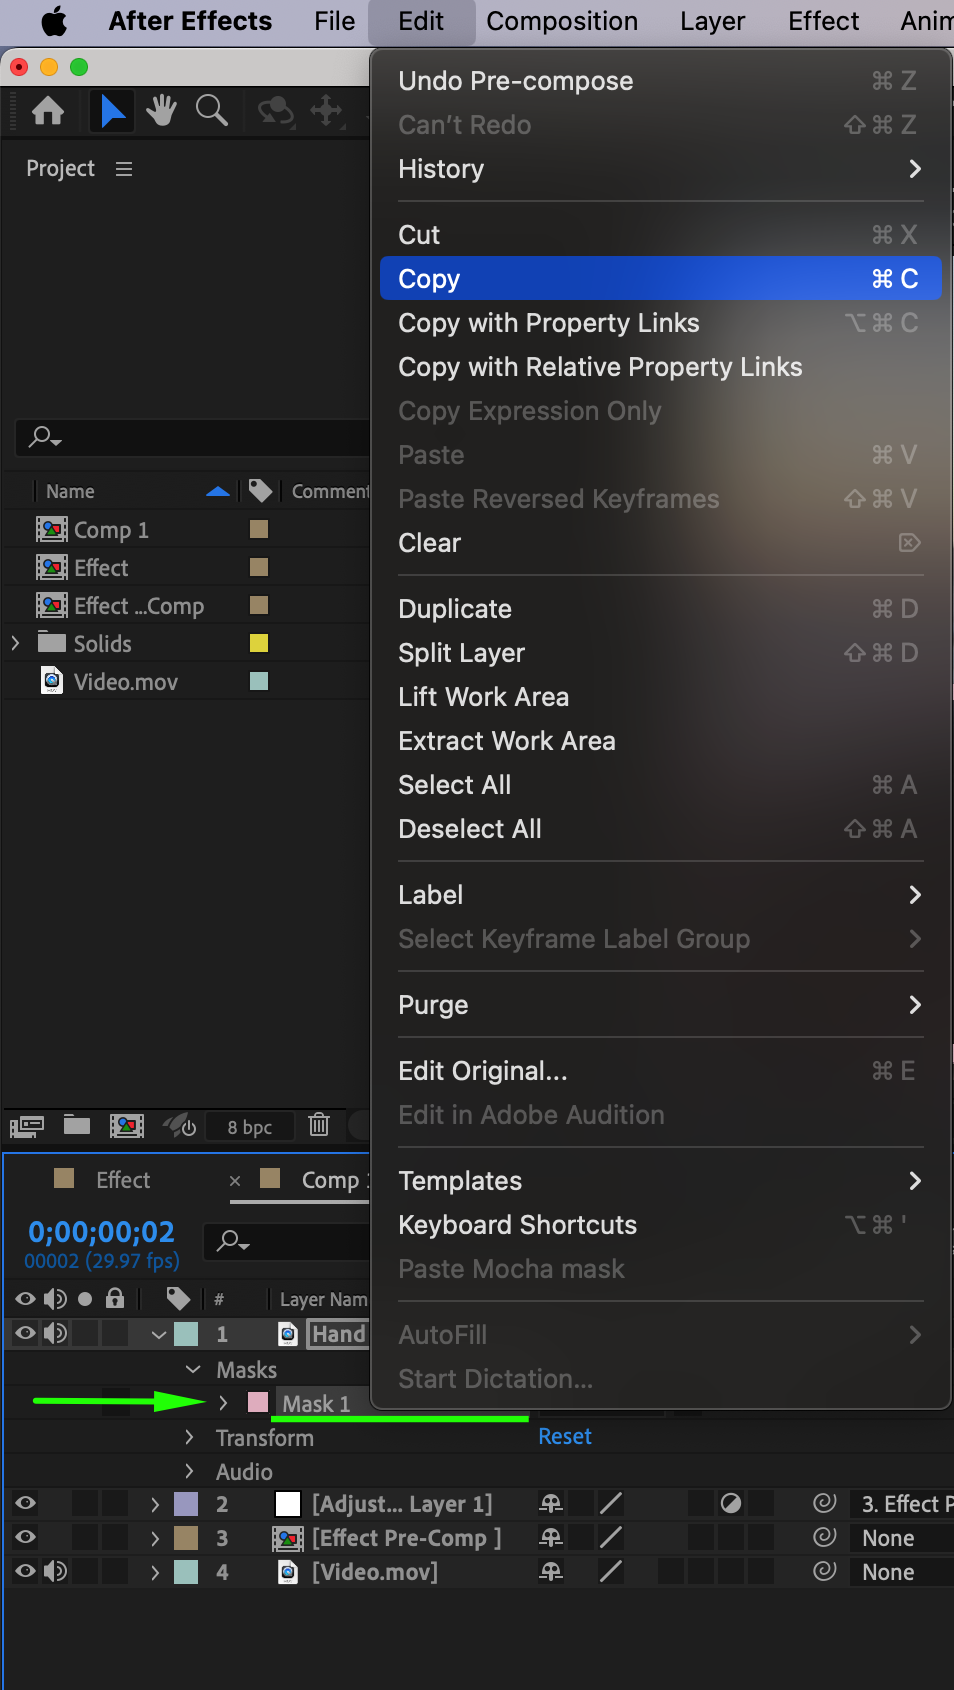
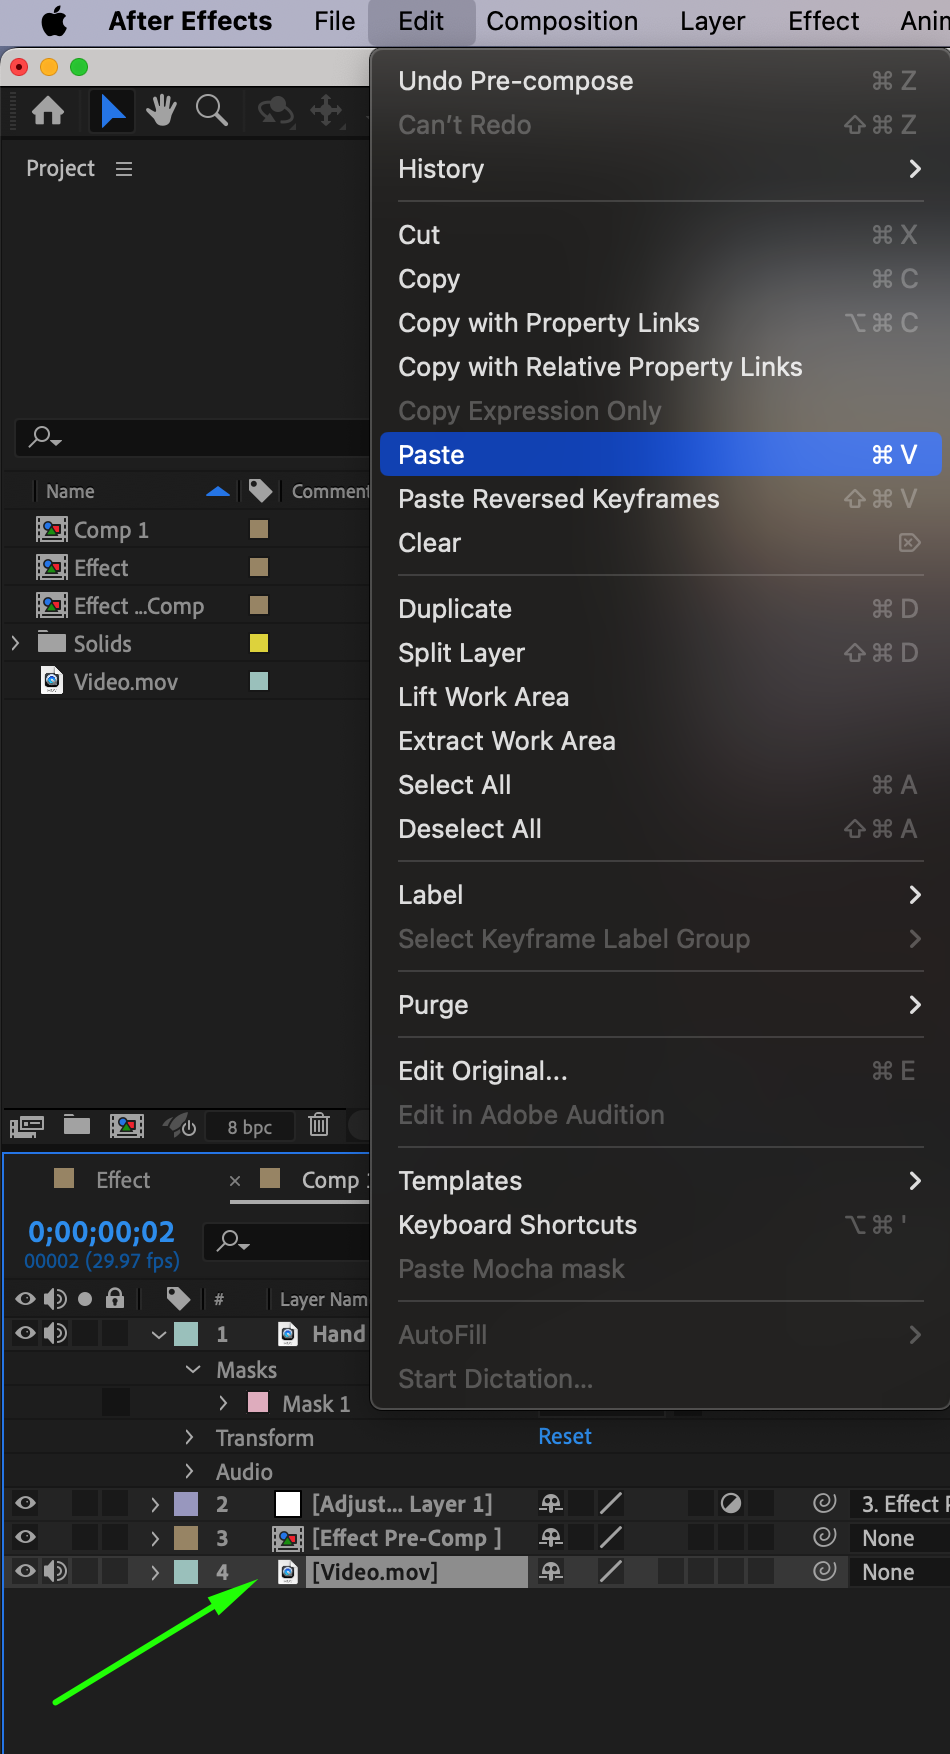
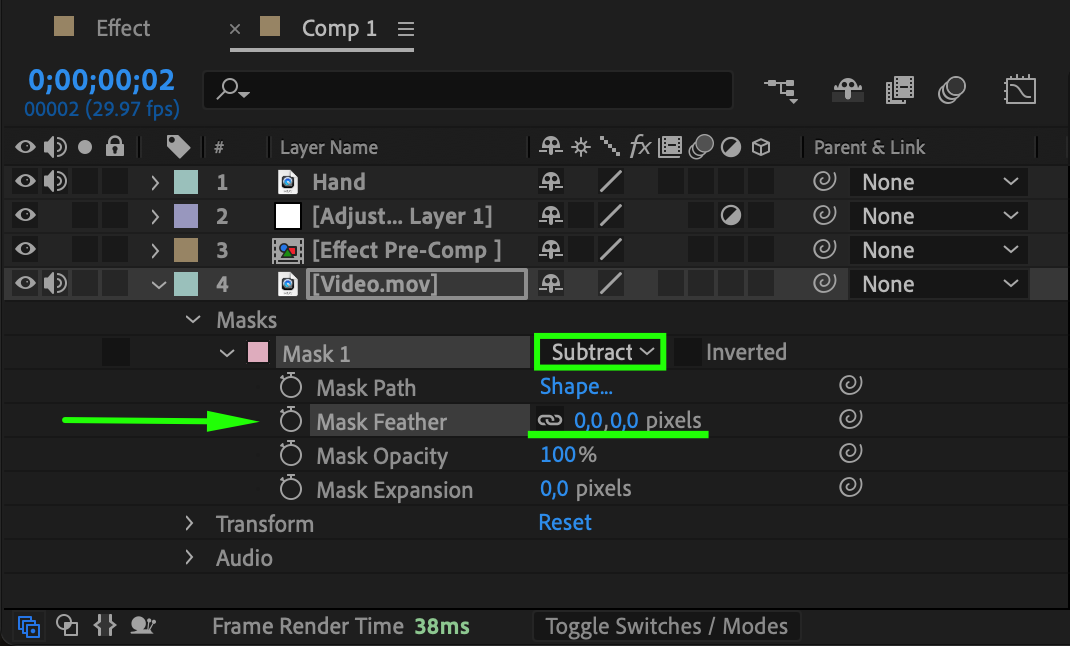
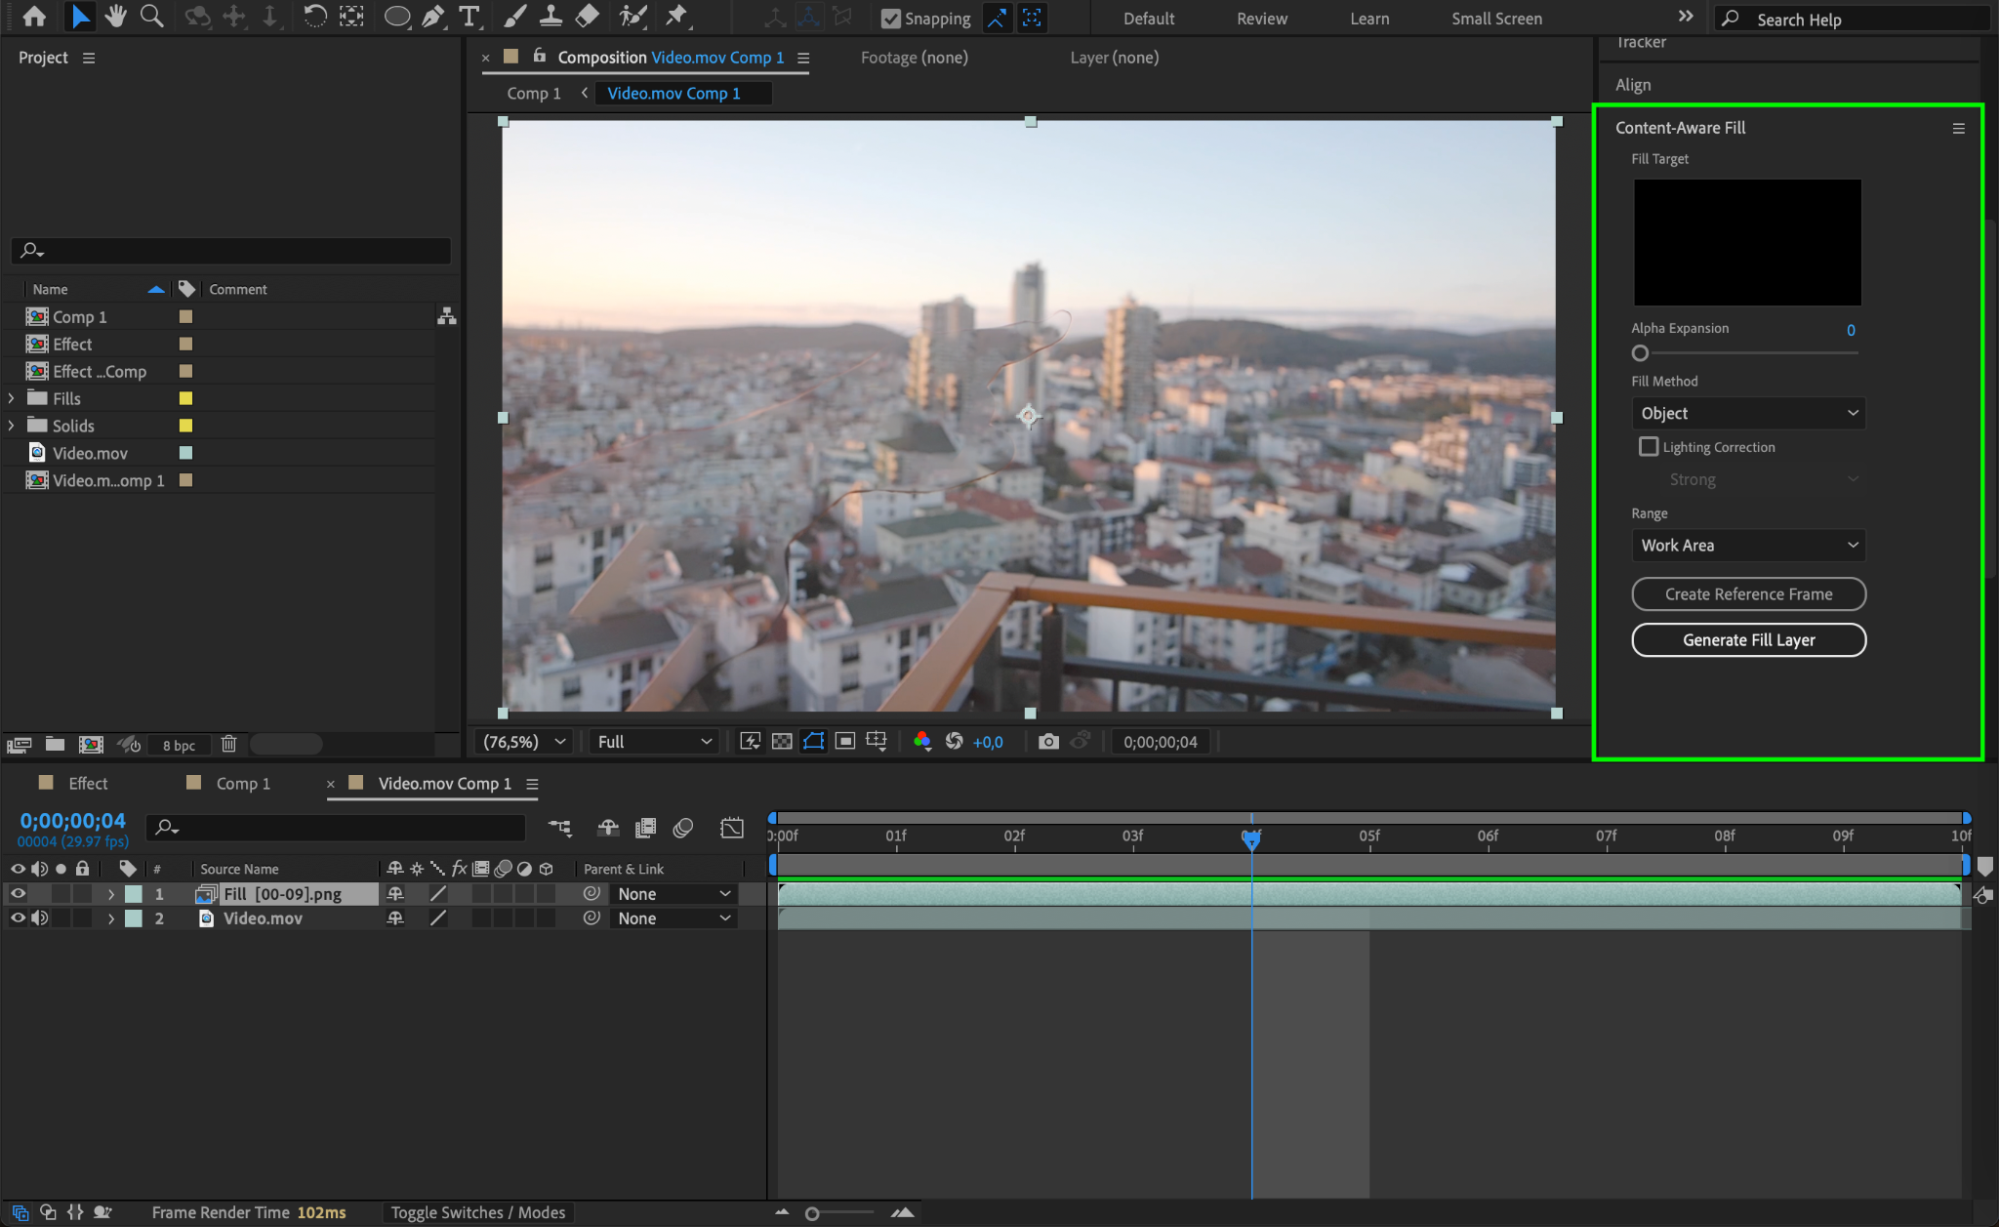
 Step 14: Apply Content-Aware Fill
Copy the mask from the hand layer and paste it into the original video layer on the timeline. Change the mask mode to Subtract, set the Mask Feather to 0, and pre-compose the layer. Use Content-Aware Fill to clean up the background, making the force field look seamless
 Step 15: Apply the Displacement Map Effect
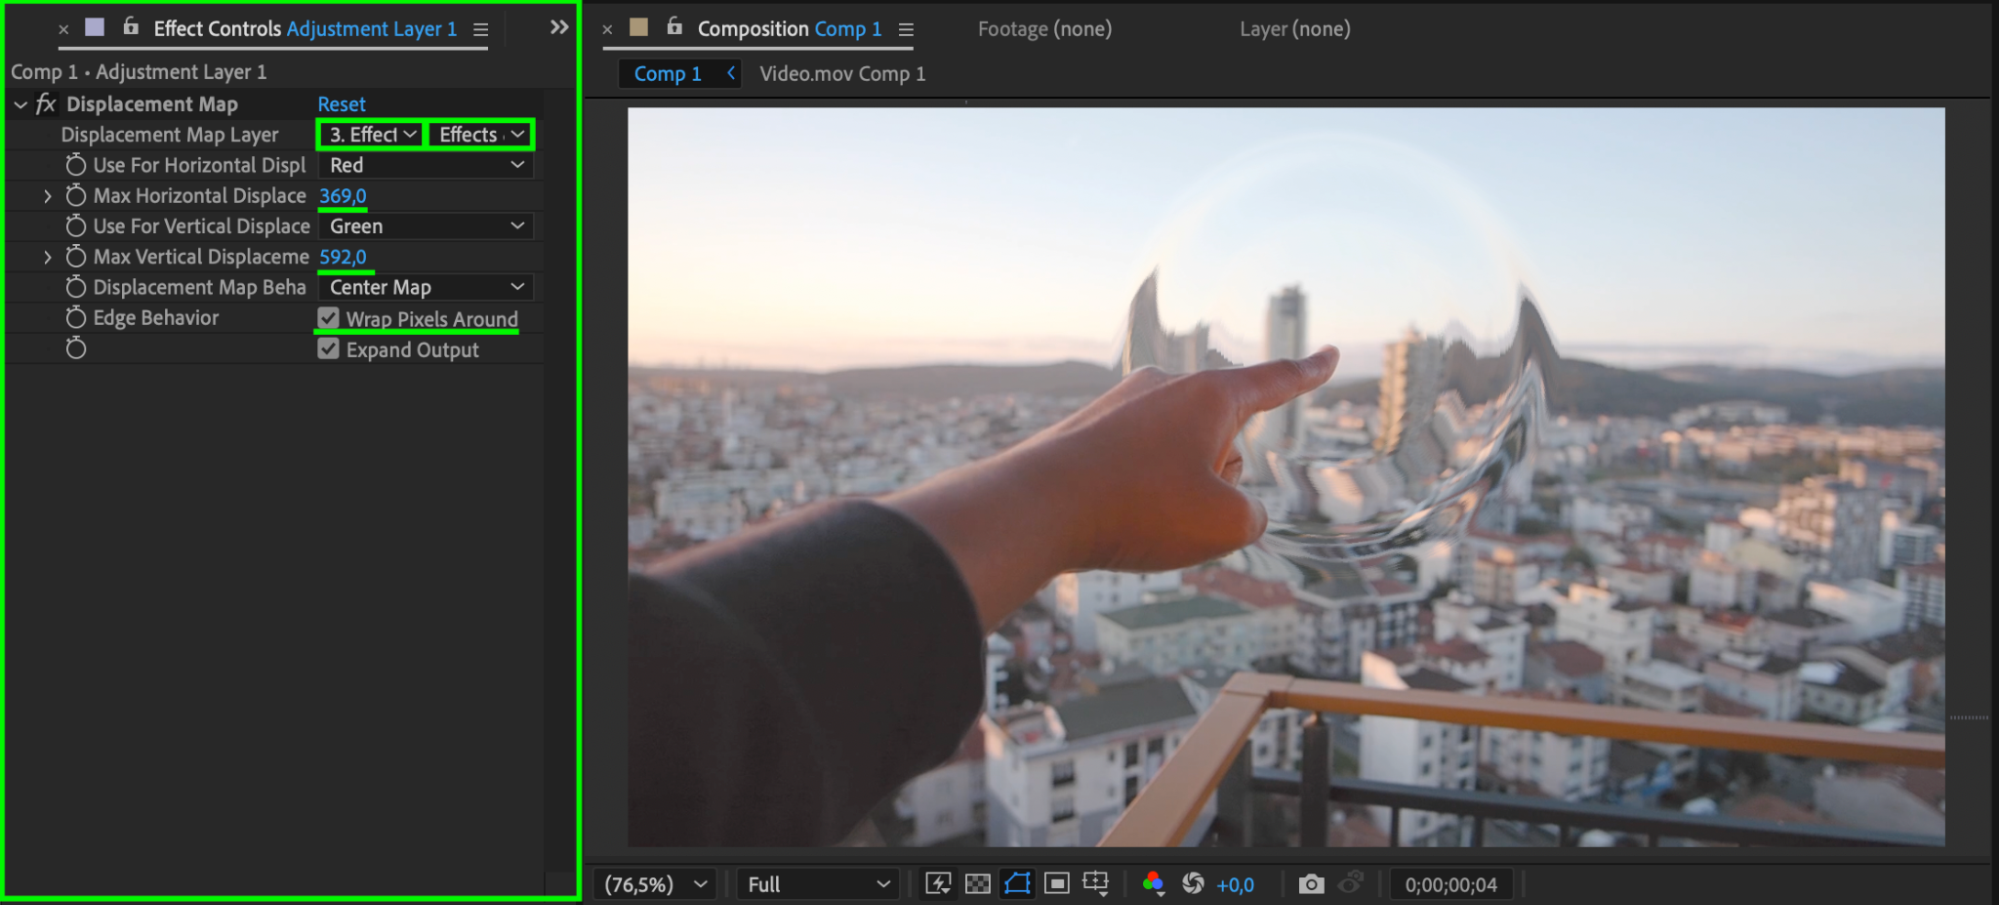
Select the adjustment layer and apply the Displacement Map effect from the Effects & Presets panel. Choose the force field effect layer as the displacement map source. Set the Max Horizontal Displacement and Max Vertical Displacement to create a more intense interaction. Enable Wrap Pixels Around to ensure the effect seamlessly covers the entire area.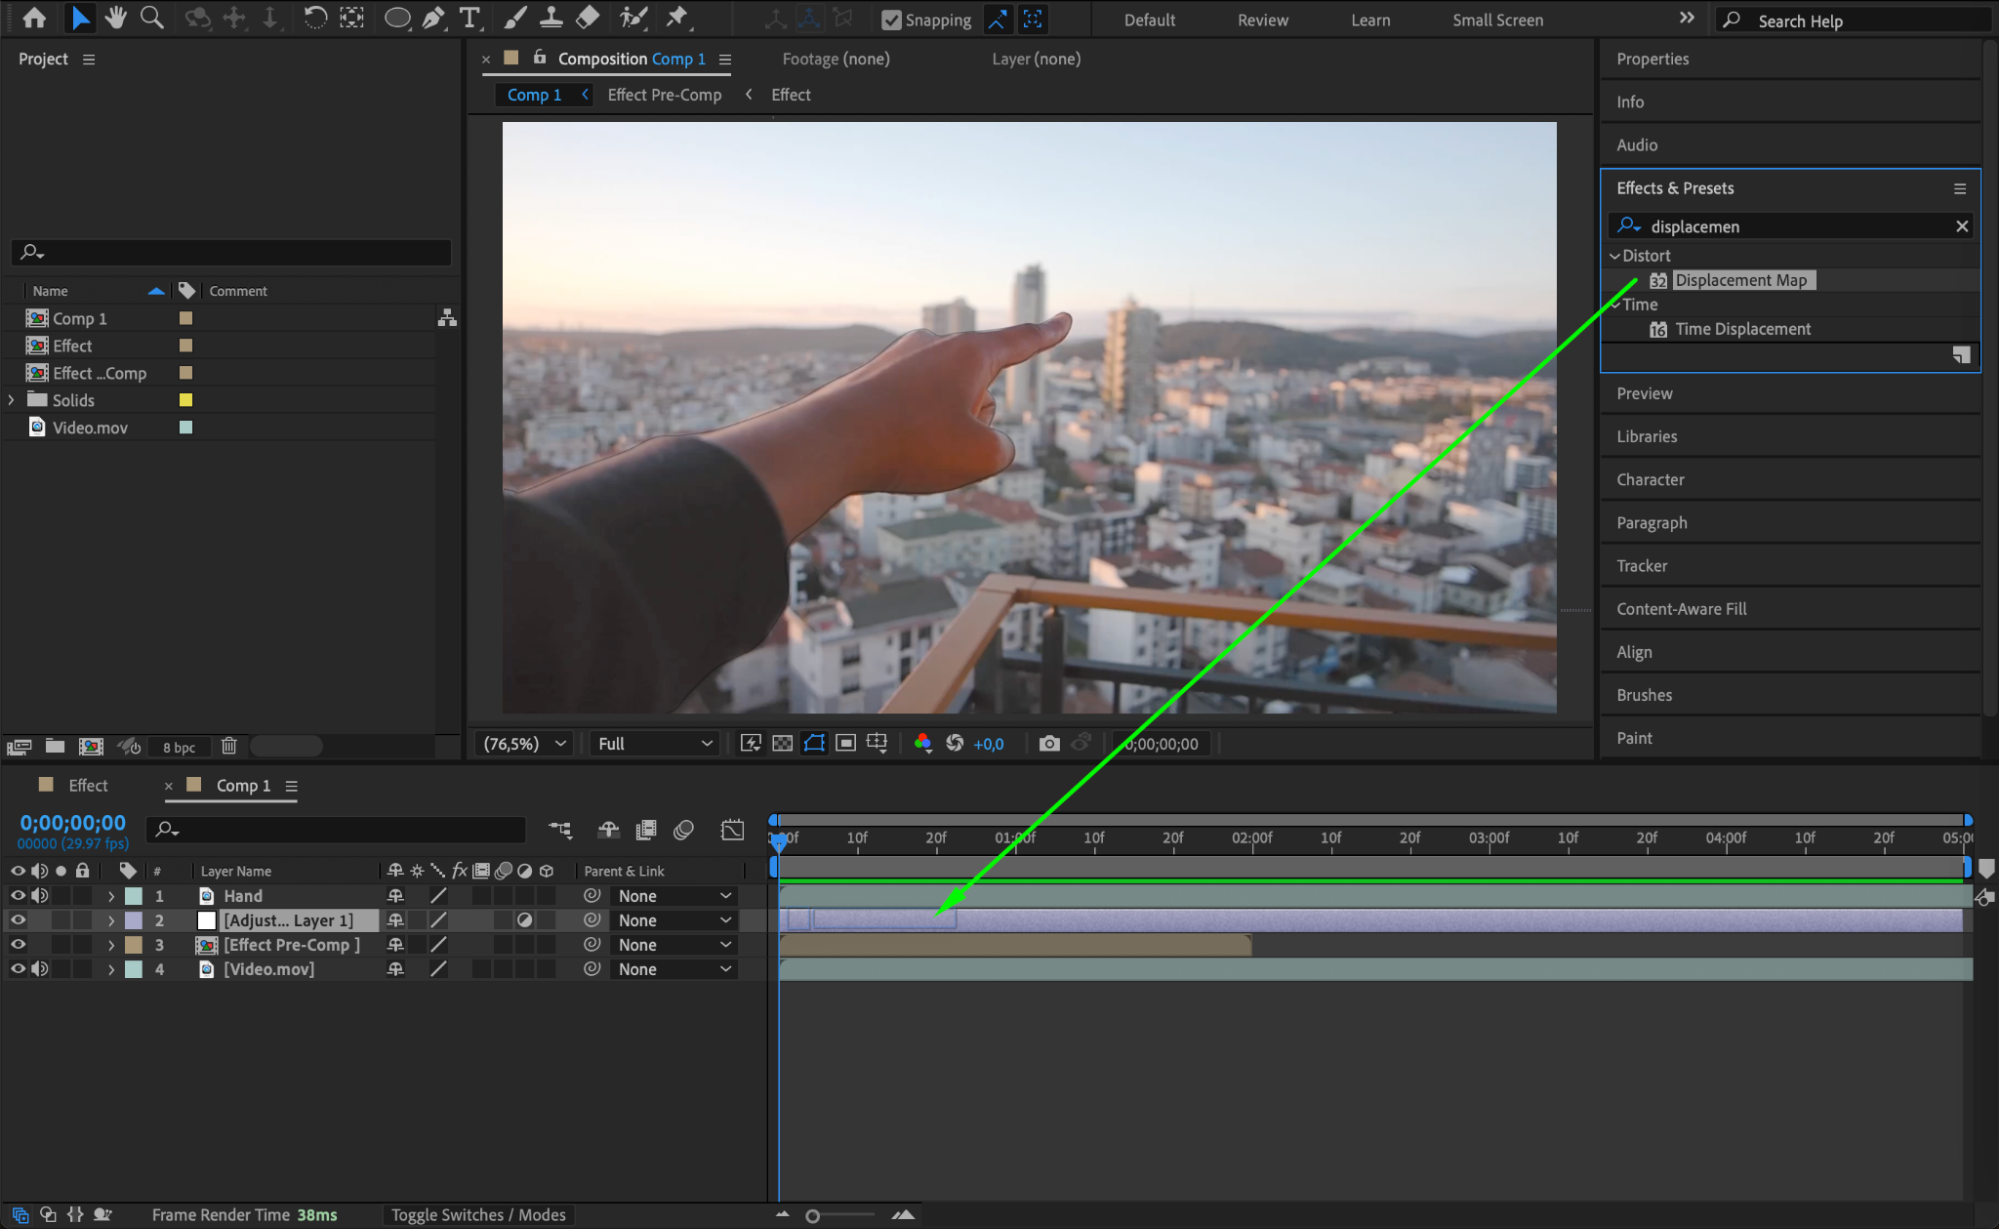
 Step 16: Preview the Effect
Press the spacebar to preview the animation. Make sure the force field interacts naturally with the hand and blends well with the video content. Adjust keyframes and effects as needed for a polished look.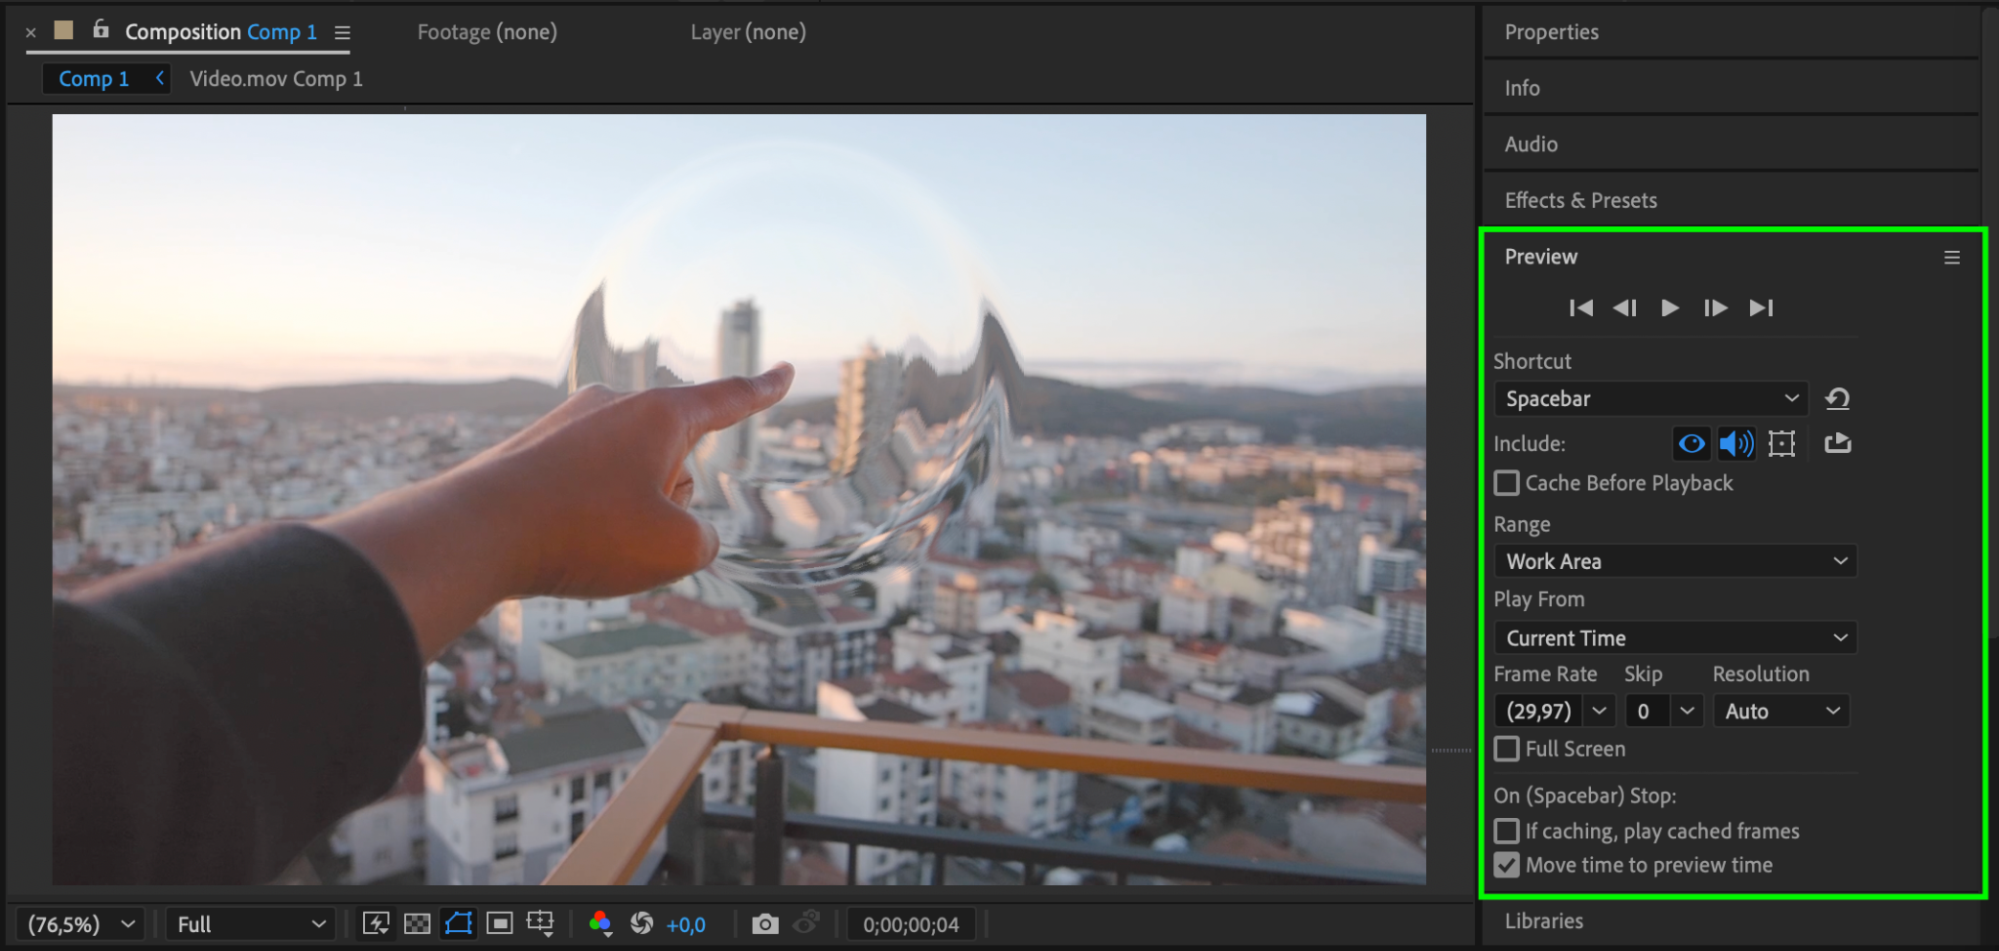 Conclusion
By following these steps, you can create a dynamic and realistic force field effect in After Effects. Using solid layers, masks, opacity animation, and displacement maps, you can create a stunning visual effect that adds depth and realism to your videos. Whether for sci-fi, fantasy, or any other creative project, this technique will enhance your storytelling.
Get 10% off when you subscribe to our newsletter

Our Bestsellers


